
last updated: mar 26, 2025
Overview
A connection links the D3 system to a third-party application, enabling data ingestion, integration commands, and remote commands.
The Connections module provides a centralized location to manage integration connections and webhook keys configured for the user account, enabling scalable and simplified deployment. Within this module, users can perform the following tasks:
-
Manage integration connections and webhook keys to see which have been configured for which clients (for MSSPs). Integration connections and webhook keys are organized in separate tabs.
-
Integration Connections: Add, edit, and remove integration connections.
-
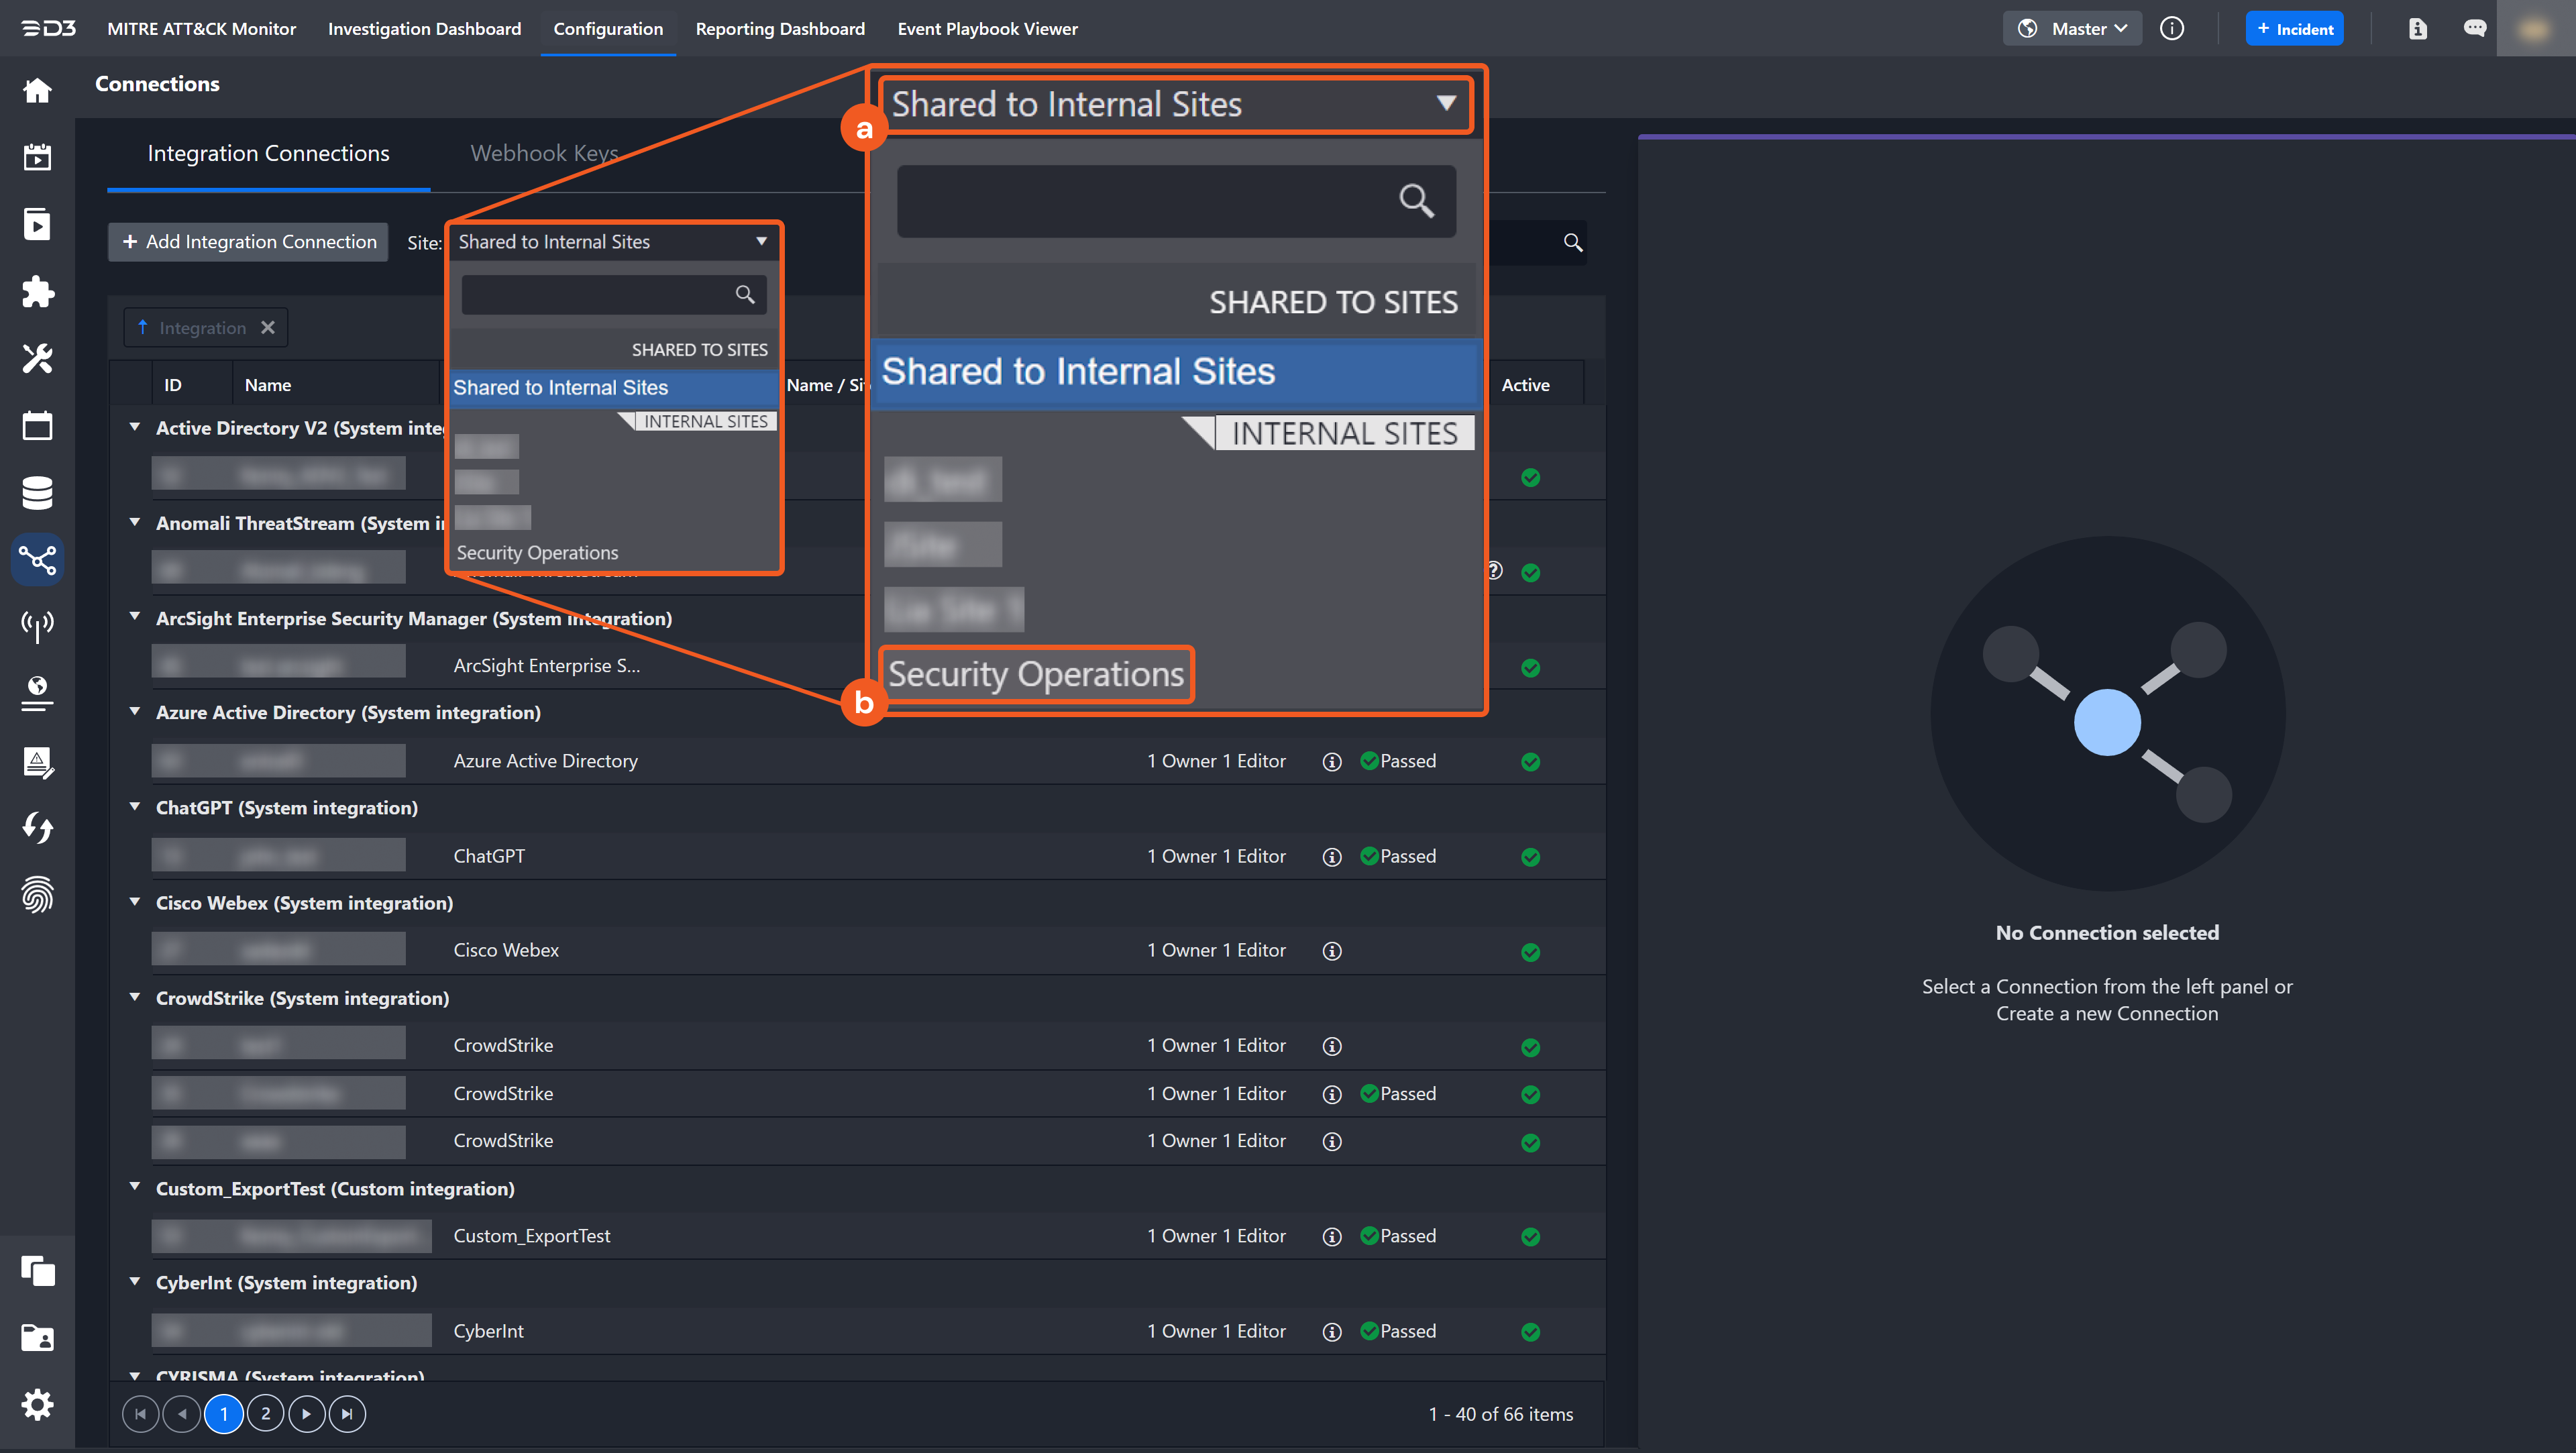
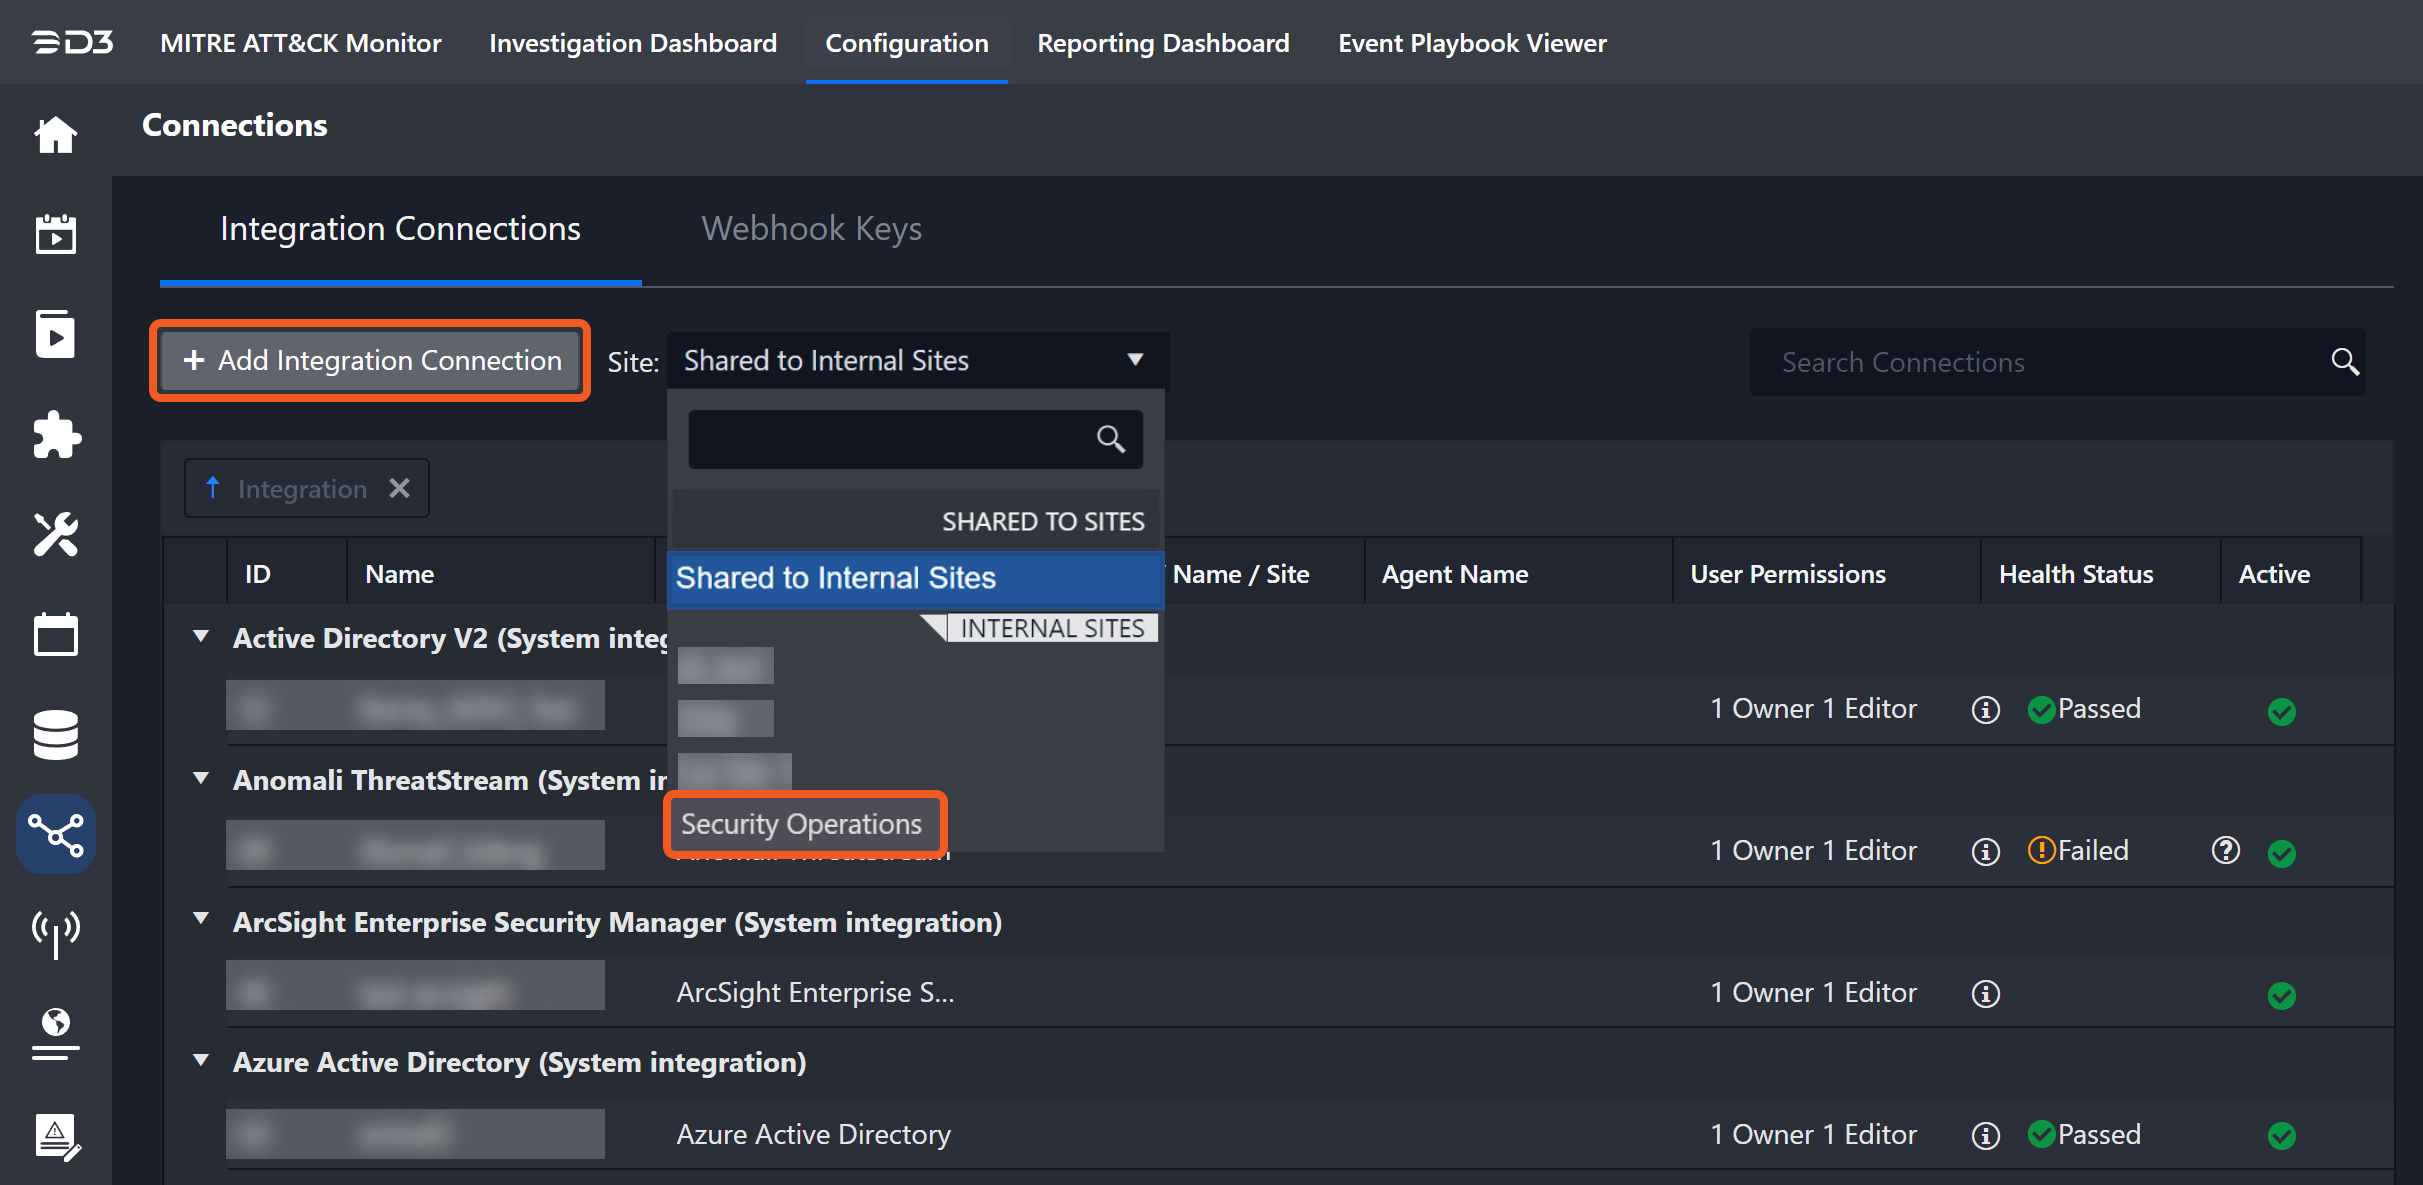
Filter integration connections by sites to see exactly which connections have been configured for which clients (for MSSPs). Use the drop-down menu on the right side of the + Add Integration Connection button to select the desired site.
-
Bulk add and edit the Connection used for each Integration (for SOC engineers).
-
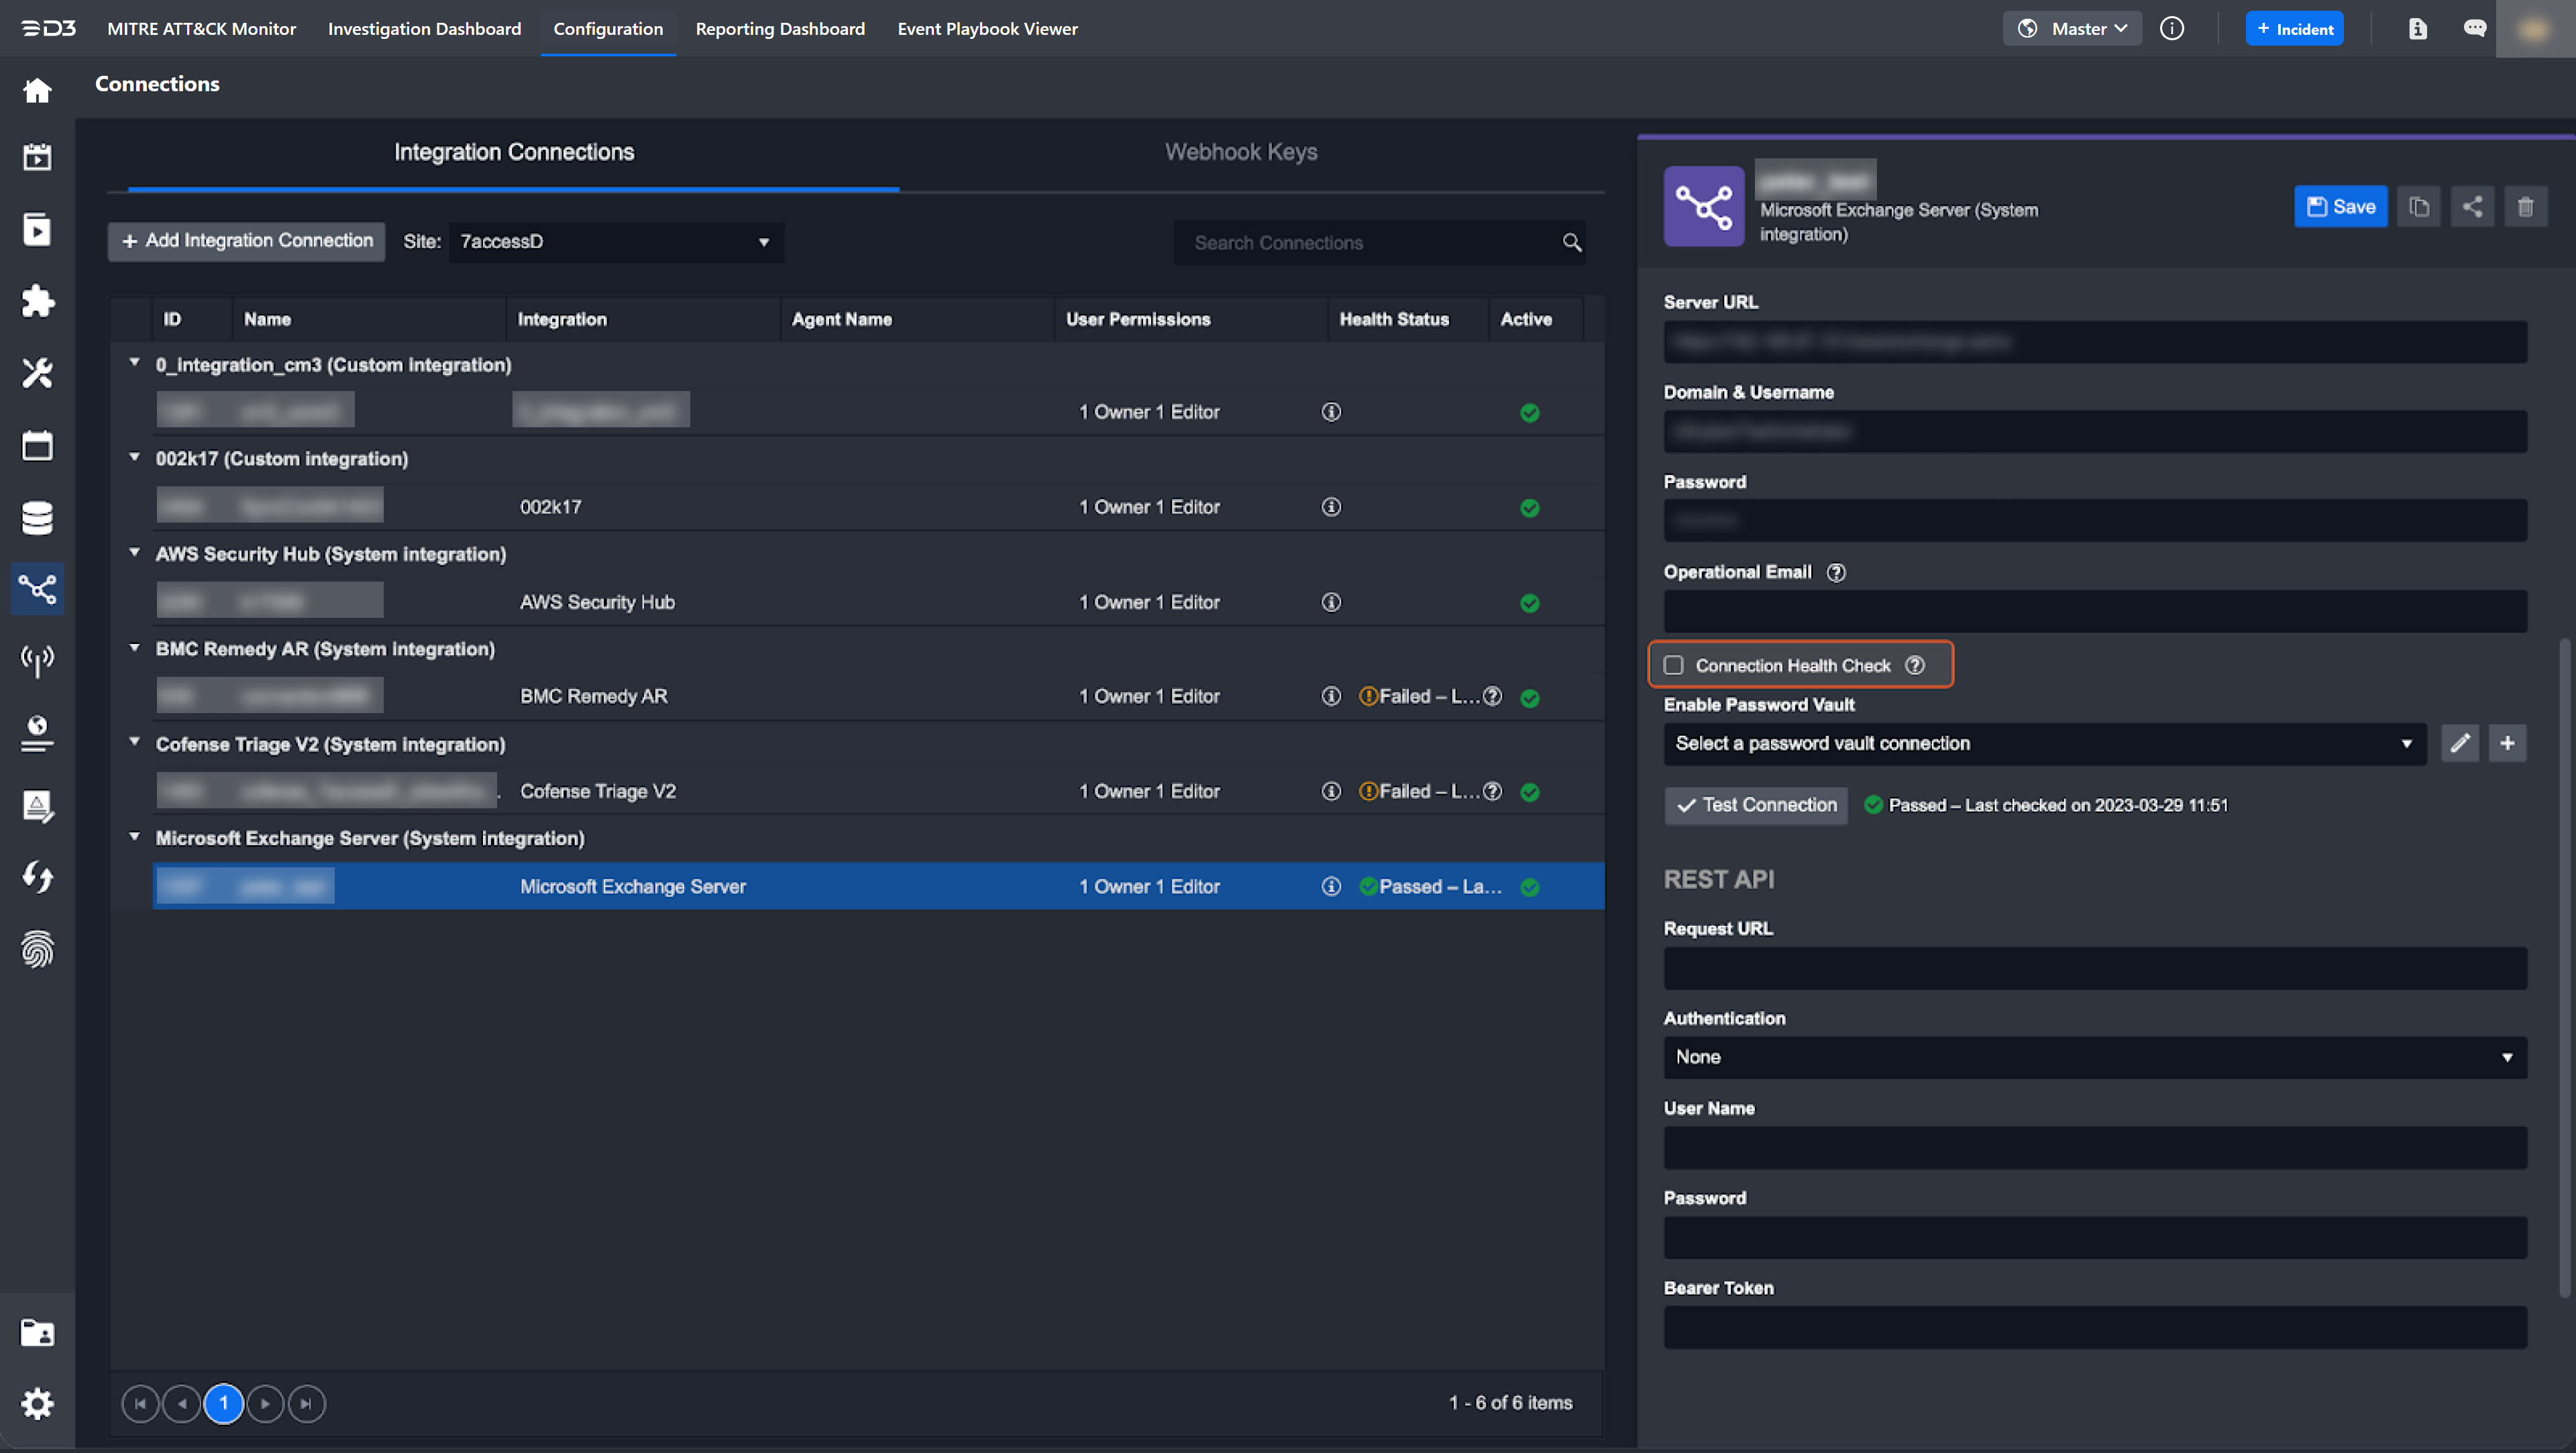
Monitor the Health Status of all Connections (for all users). The Health Status for Connections can be configured for some connections by activating the Connection Health Check option inside the connection details.
-
-
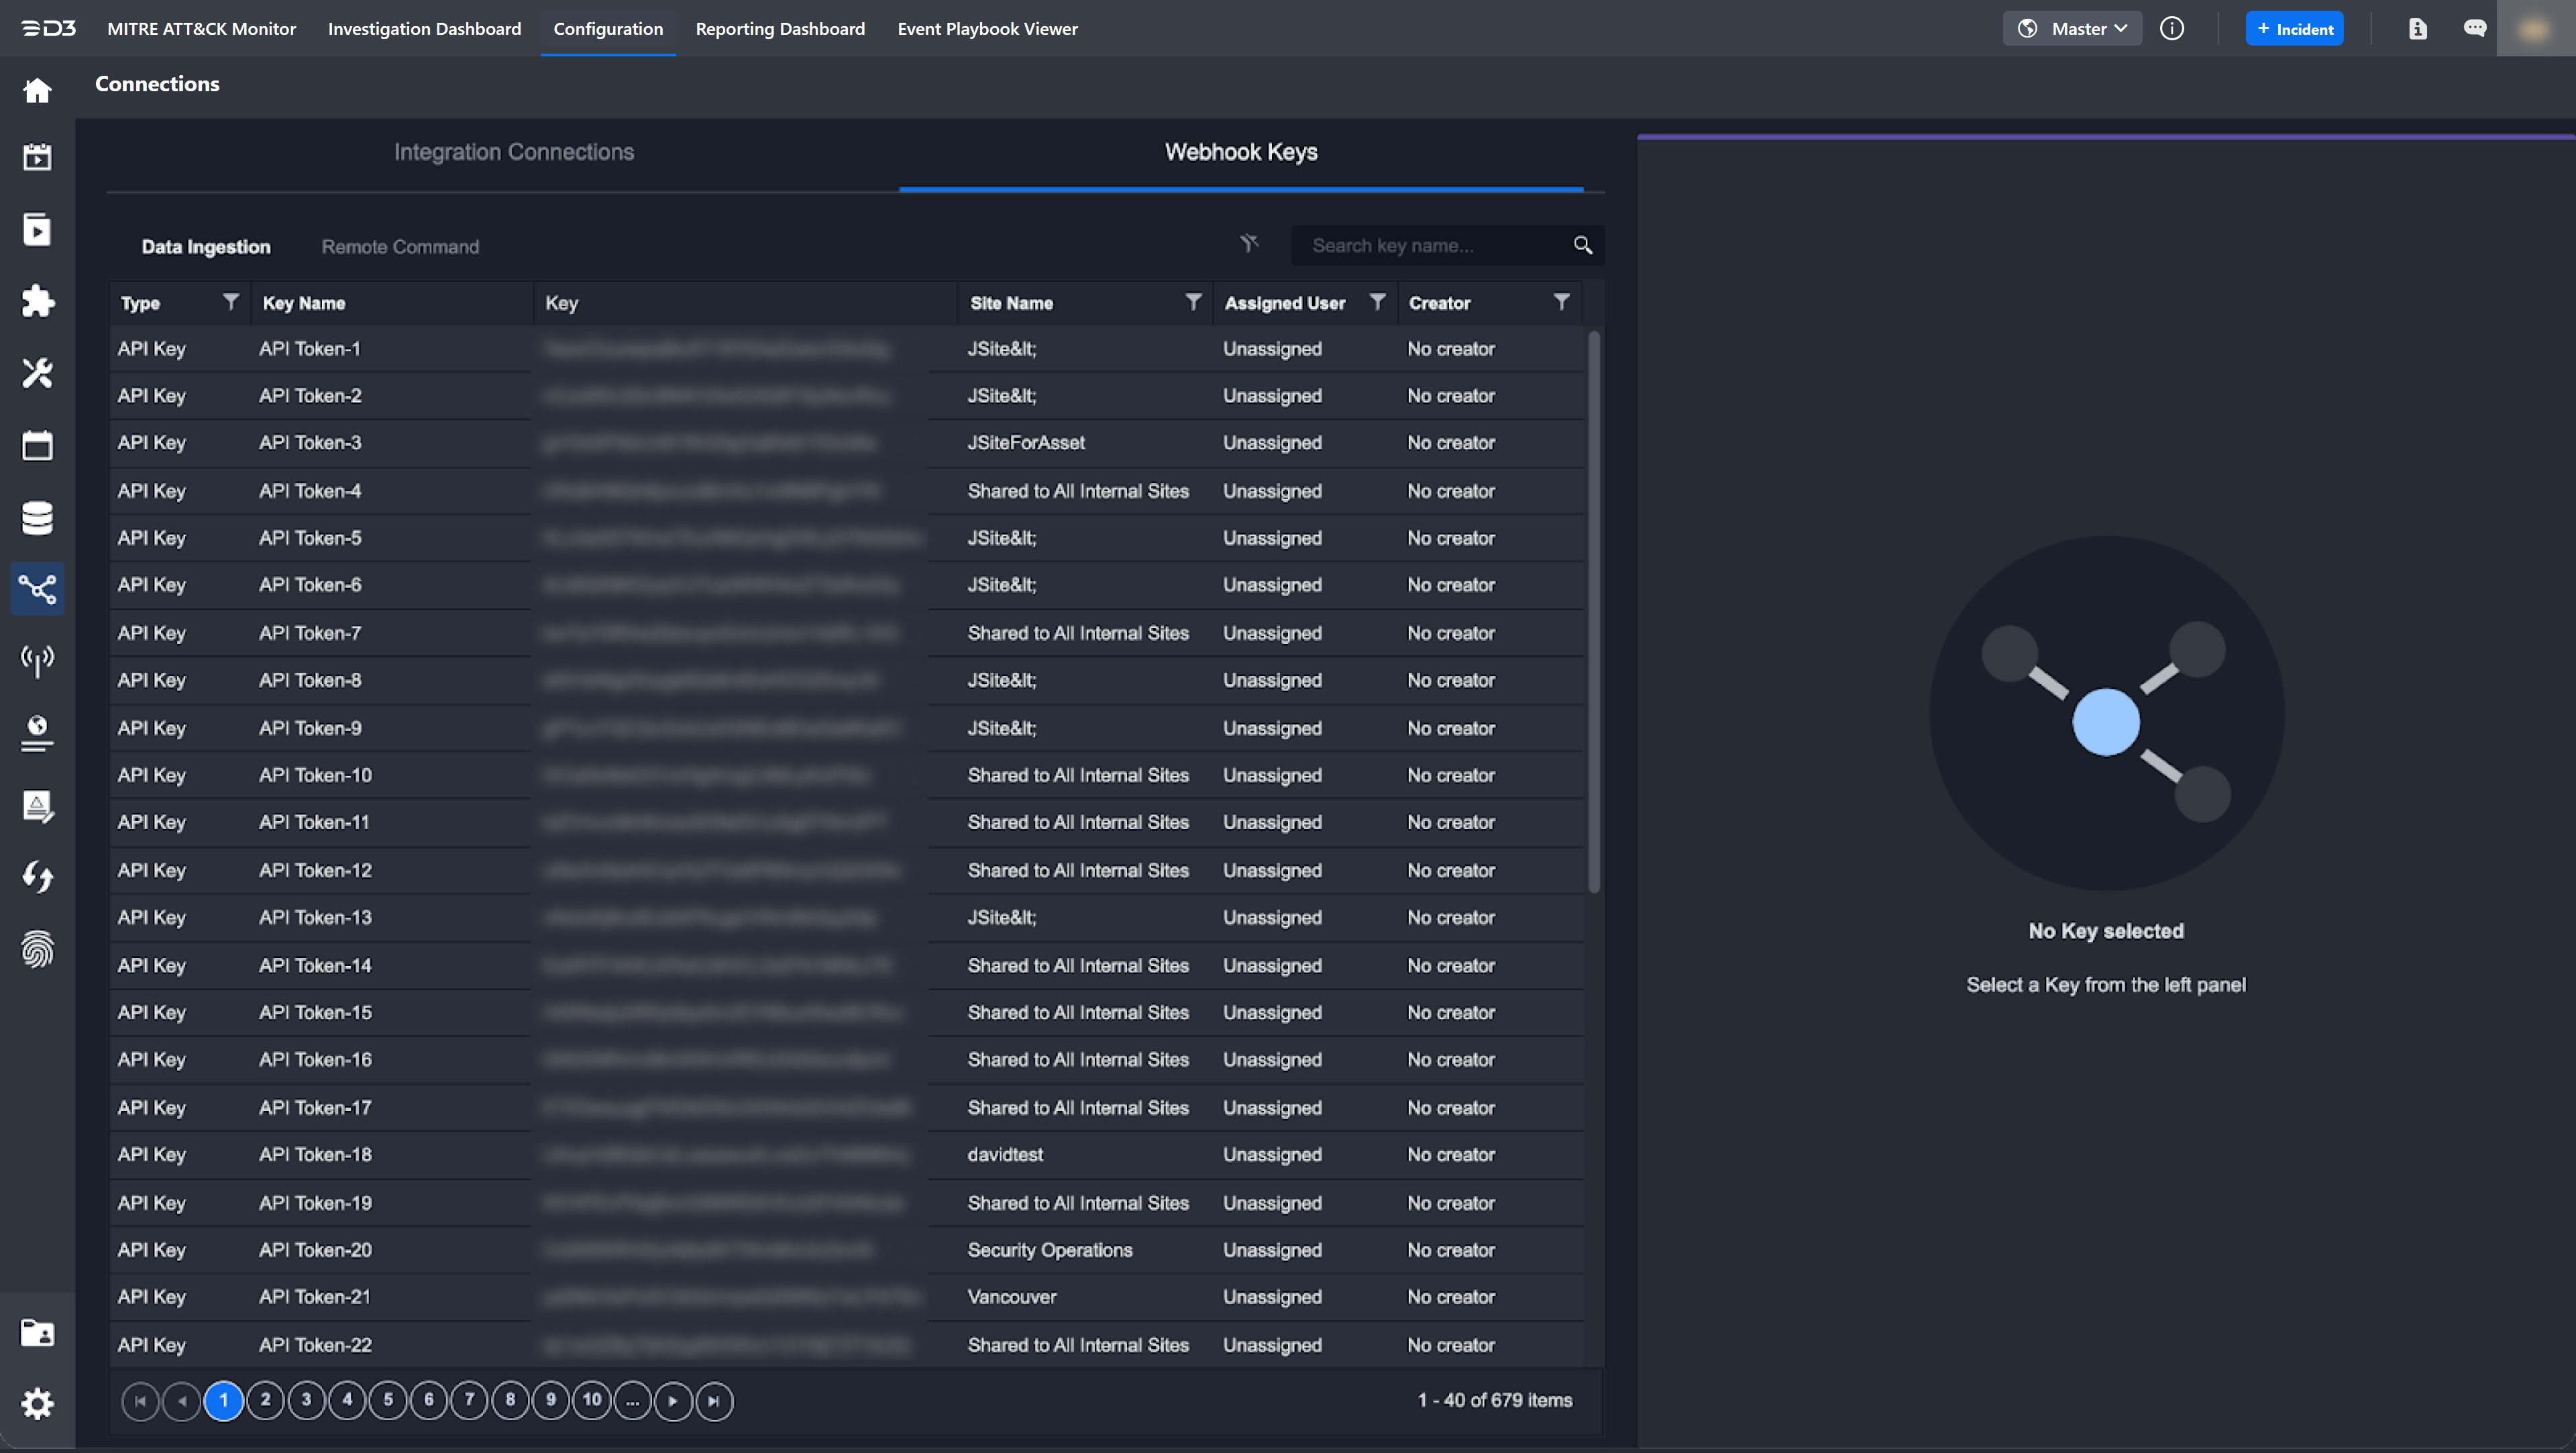
Webhook Keys: View and delete configured webhook keys for data ingestion and remote commands.
Integration Connections
The Connections tab provides a comprehensive list of integration connections available to the user account. These connections are authenticated using user credentials or API keys. Within this tab, users can manage integration connections by creating new connections, reviewing connected sites and associated users, modifying connection configurations, monitoring connection health status, and determining connection activity status.
Adding a Connection
To begin using a system integration, users must add an integration connection. Integration connection settings may vary based on the required parameters. The general steps are listed below.
-
Search for and select the integration to use from the integration list.
-
Click on the + Add Integration Connection button.
-
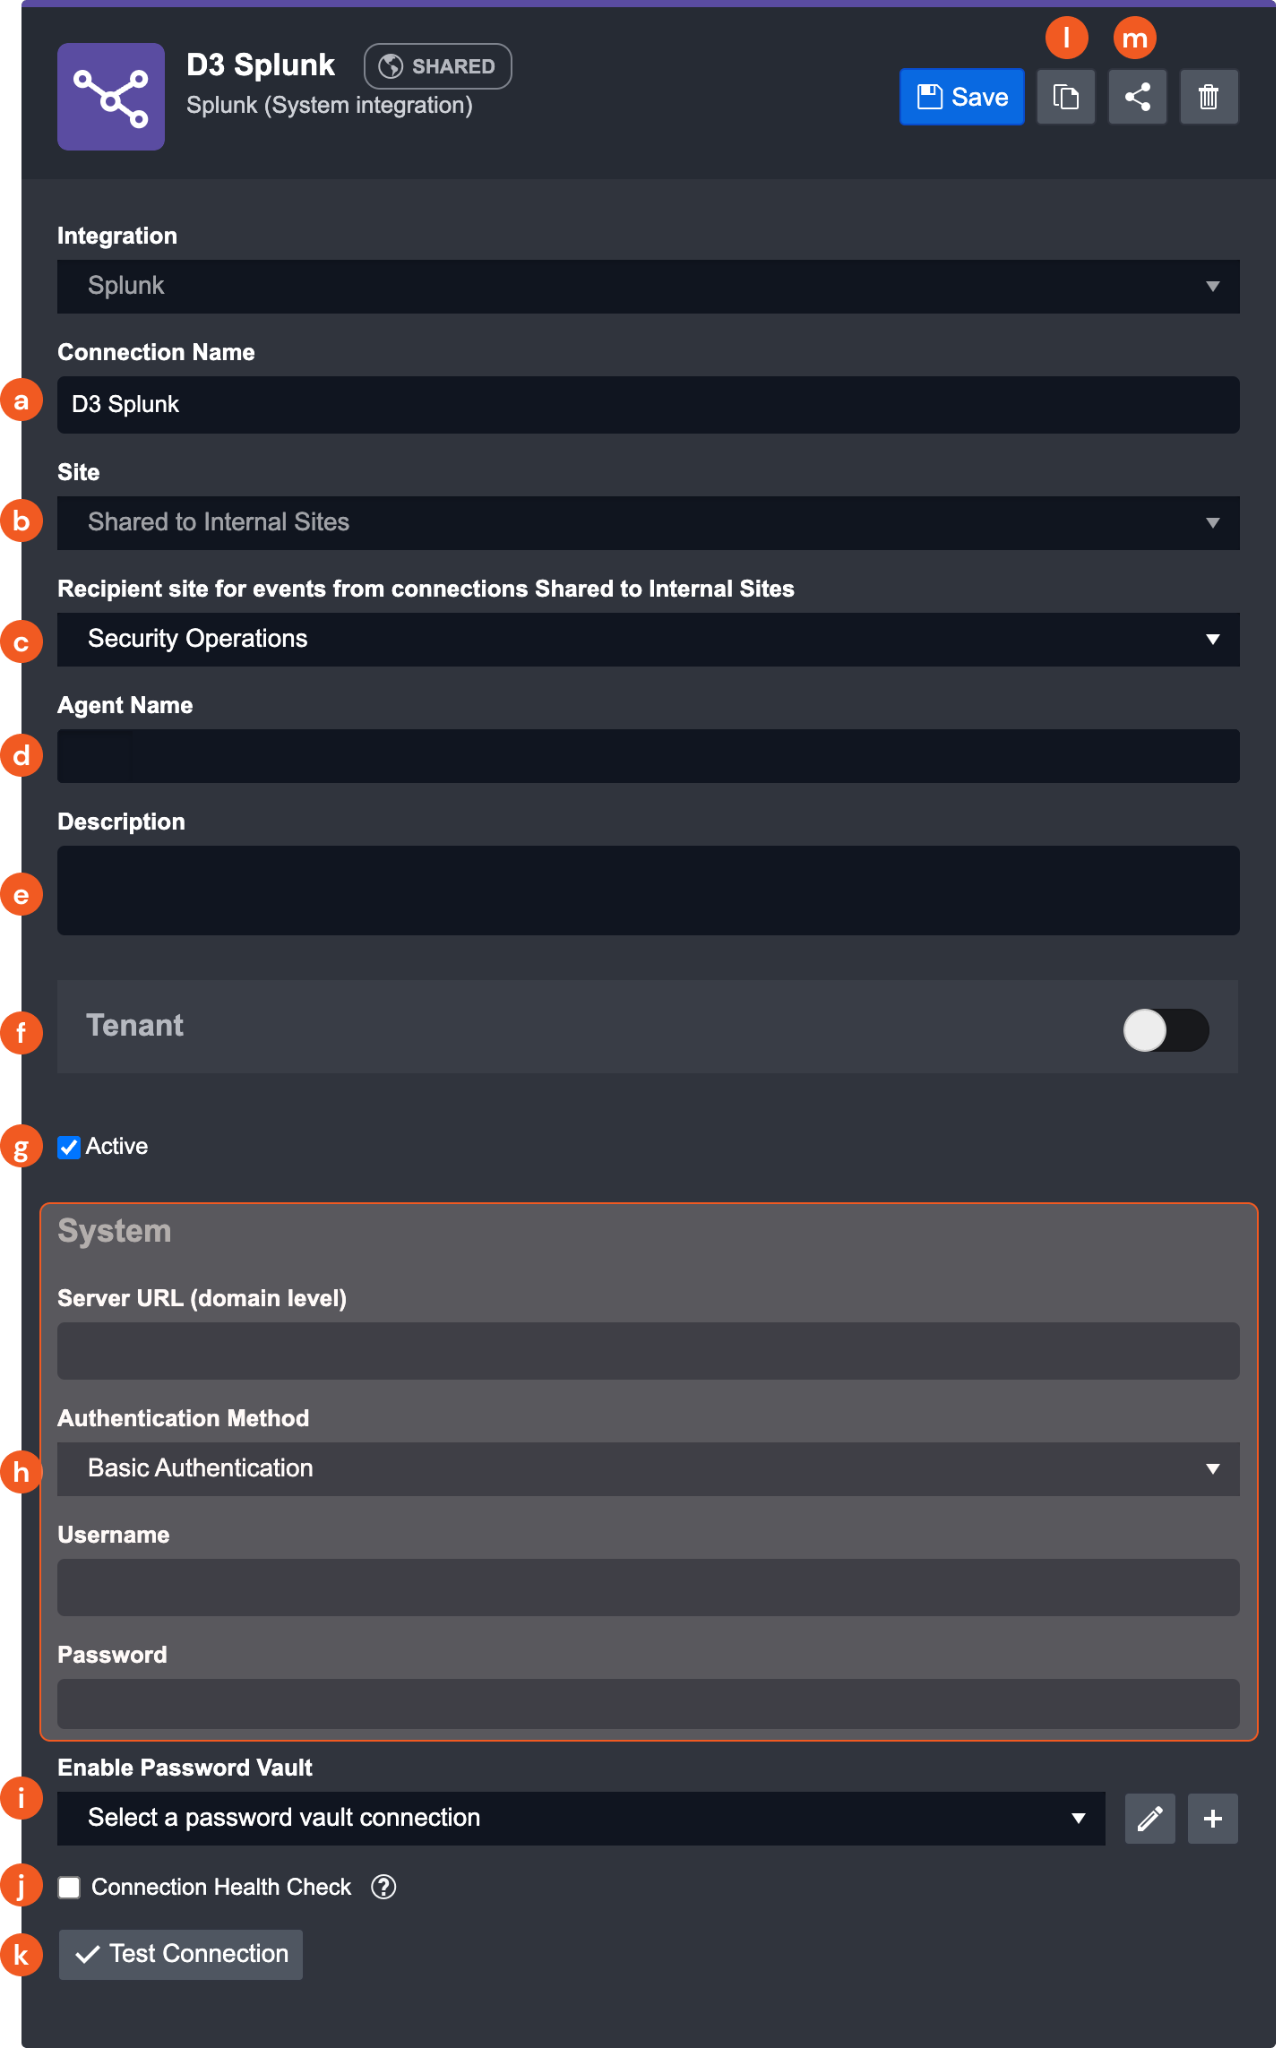
The New Connection panel will appear. After selecting an integration, users can configure the following connection details:
-
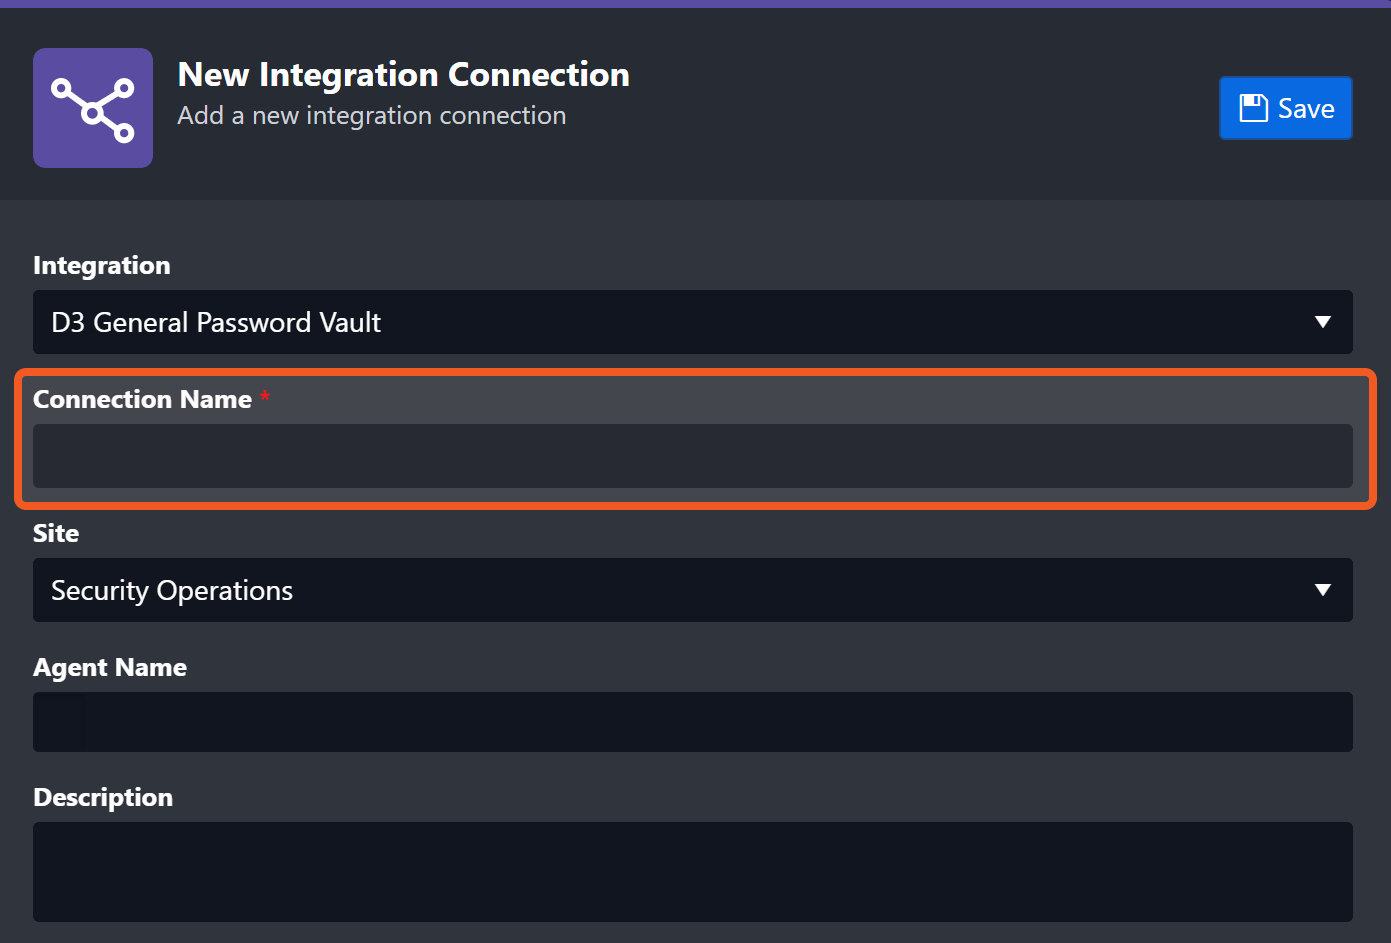
Connection Name
-
Sites: Set which Site can use this Connection.
-
A connection can be shared between all internal sites and client sites, and used for individual sites.
-
-
Select the Recipient site for events from connections Shared to Internal Sites
-
Agent Name (Optional): The proxy agent that has been set up previously.
-
Description (Optional): add a description of how this Connection should be used
-
Tenant: Enable this toggle to share the connection to a tenant site.
-
Active: ensure this checkbox is selected so that the Connection is available for use
-
System: This section contains the parameters predefined by D3 Security for this integration.
-
Enable Password Vault: The password vault connection that has been set up.
-
Connection Health Check: Select this checkbox to configure a recurring health check for the connection.
-
Test Connection: Click to verify the account credentials and network connection. A connection failure may indicate no network connection between the D3 platform and the third-party tool. The latest Test Connection results appear in this window for reference.
-
Clone Connection to Site: The sites to which the connection will be cloned.
-
User Permission: Configure users who have access to the connection.
Note: Sections l and m only show up when editing the Connection.
-
ALERT
If the connection is Shared to Internal Sites, users can configure the Recipient site for events from connections Shared to Internal Sites here as well. The selected site applies globally, meaning all events ingested through connections shared to internal sites will belong to the newly selected site. If no site is selected, a default Unknown site will be created.
Password Vault
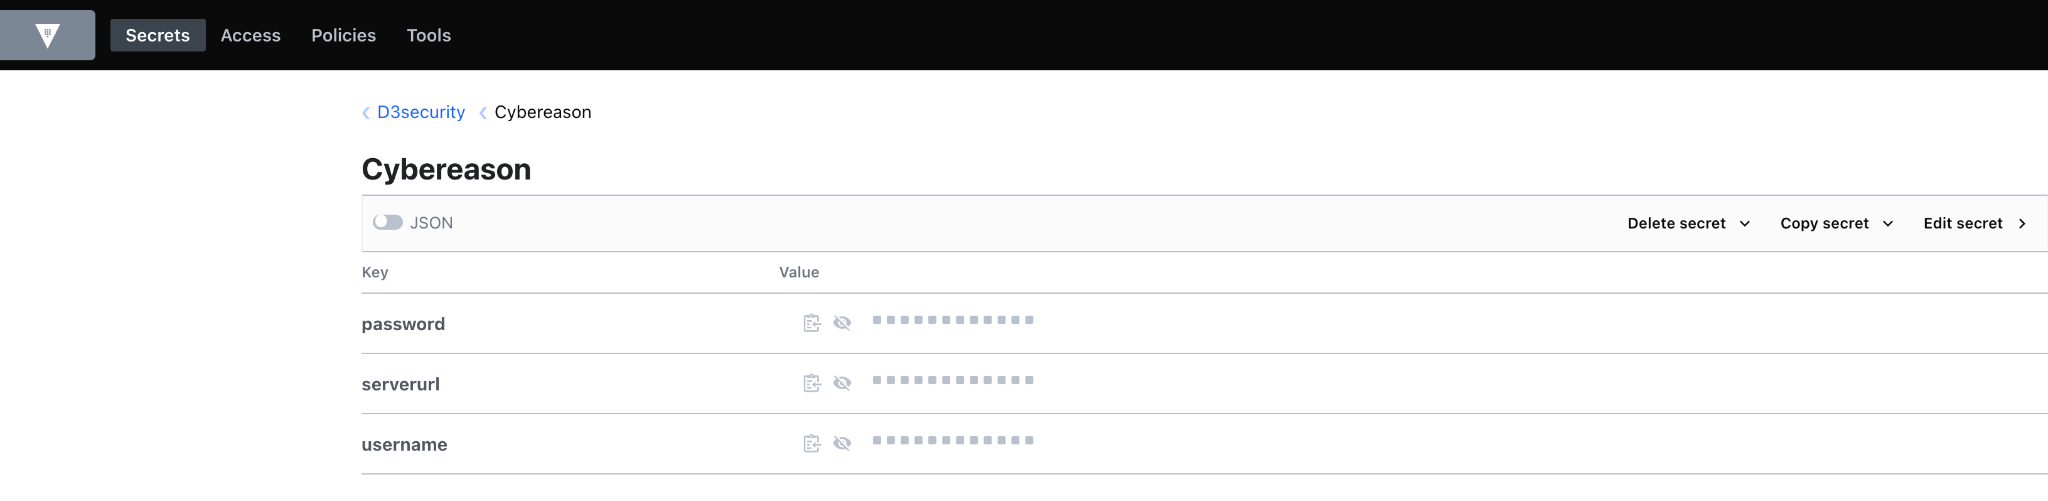
The processes of using password vault (e.g., Hashicorp, CyberArk) for an integration are listed below:
-
Set up a General Password Vault connection
-
Set up an Integration Connection (SIEM, Threat Intel or EDR) with Password Vault enabled
READER NOTE *
D3 integrates with external credential vaults, allowing users to use vaulted credentials in D3 without hard-coding or exposing credentials for third-party applications, such as SIEM, EDR, or threat intelligence tools. D3 does not store the credentials. Instead, the integration retrieves the credentials from the external vault when called.
Set up a General Password Vault connection
Connections to third-party environments are centrally managed in the Home > Configuration > Connections page
.png?cb=f41e4ca6cb709a97f41b89488eeae34d)
Creating a New Connection
-
To create a new Connection, click on the + Add Integration Connection button in a selected site.
READER NOTE *
If a Connection can be globally shared across multiple sites, the Connection can be added in Shared to all sites.
-
In the New Connection window, users can select General Password Vault from the drop-down list.
.png?cb=dd104541085eacf7fade8d6be145f6f5)
-
Next, specify a unique Connection Name.
-
Upon selecting the Integration, the corresponding System Connections Parameters will display.
-
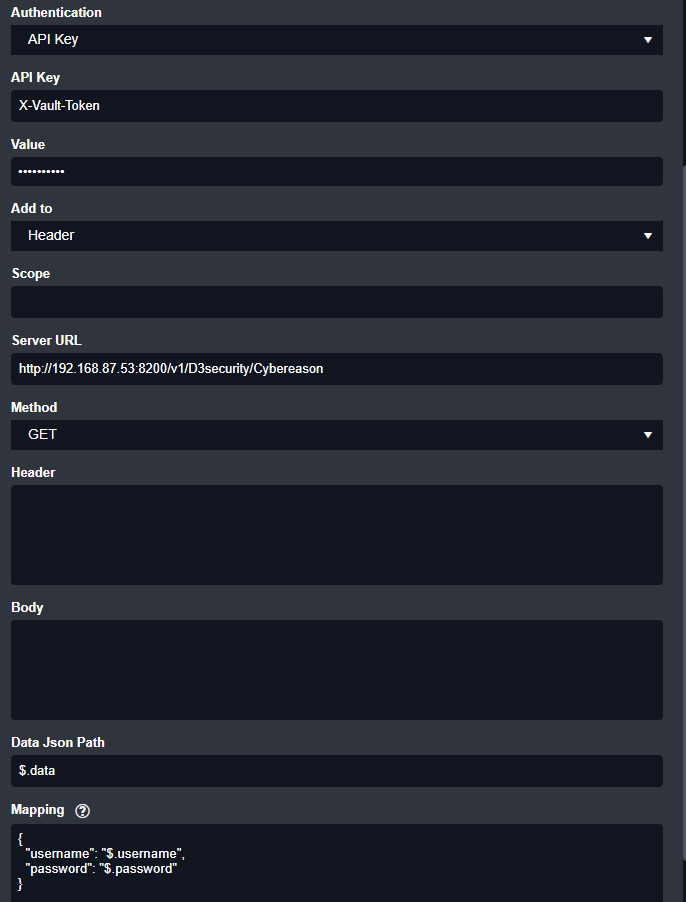
Connection credentials configuration:
-
Select Authentication Types
-
Enter Key for the Authentication, and its Value
-
If Add to Header is enabled, the key value pair will be automatically added to the header.
-
If Add to Query Params is enabled, the key value pair will be automatically added to the query URL
-
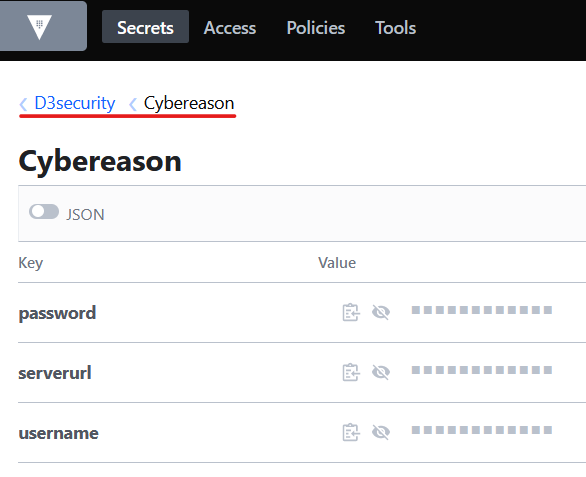
Add Server URL along with the directory of stored password
-
Select GET Method to query password
-
(optional) Header and Body
-
-
Test connection
-
Click Test Connection to ensure the authentication to the configured password vault is properly set up
-
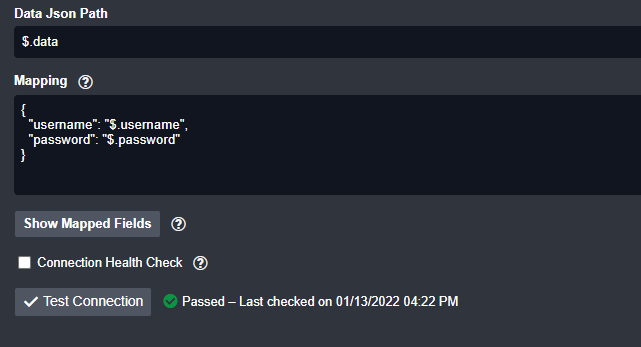
-
Configure mapping
-
Navigate to Home > Integration > General Password Vault
-
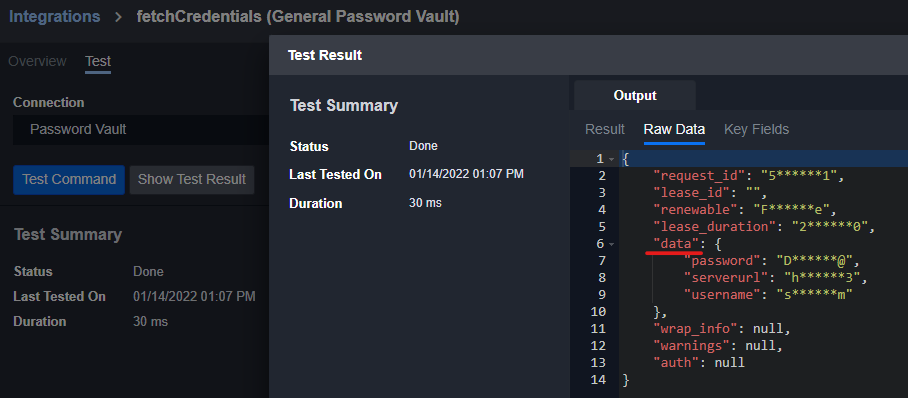
Test command "Fetch Credentials" using the configured connection
-
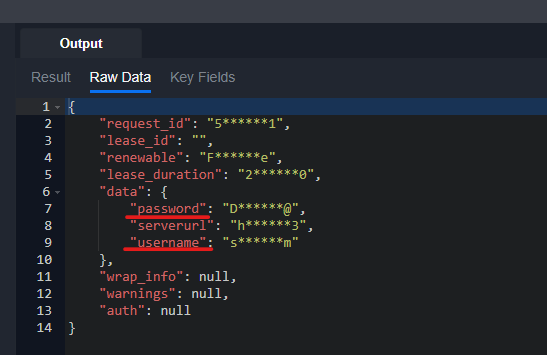
The password data is stored under
$.datain the example of Hashicorp -
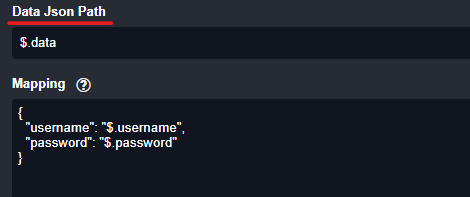
Configure Data JSON Path
-
Enter Root Path of in "Data Json Path"
$.data -
Note: Different password vault could have different root JSON paths. In order to identify the root JSON path of a given password vault, test the "Fetch Credentials" command to check on the response payload for the JSON path structure.
-
-
Construct Mapping
-
Go the corresponding Integration Home > Configuration > Integrations
-
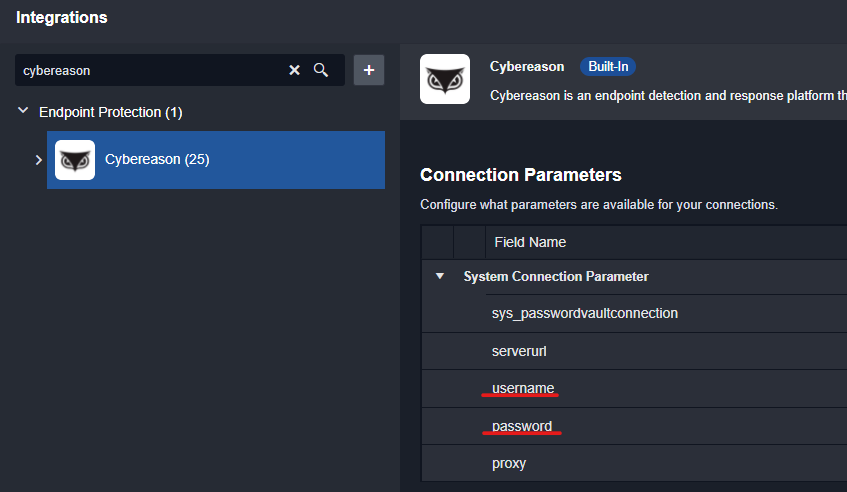
Click on Connection Parameters
-
Note down the connection parameters needed to be replaced from the password vault, example (username, password, serverurl)
JSON Keys for mapping match connection parameter (username, password)
-
JSON Value is keys under Data JSON Path (
$.username,$.password)
-
-
READER NOTE *
Mapping format: {"key":"value" }
Key is the Connection Parameter.
Value is the third-party JSON source path.
Set up an Integration Connection
The Integration refers to intended integration such as SIEM, Threat Intel or EDR, to be set up in D3.
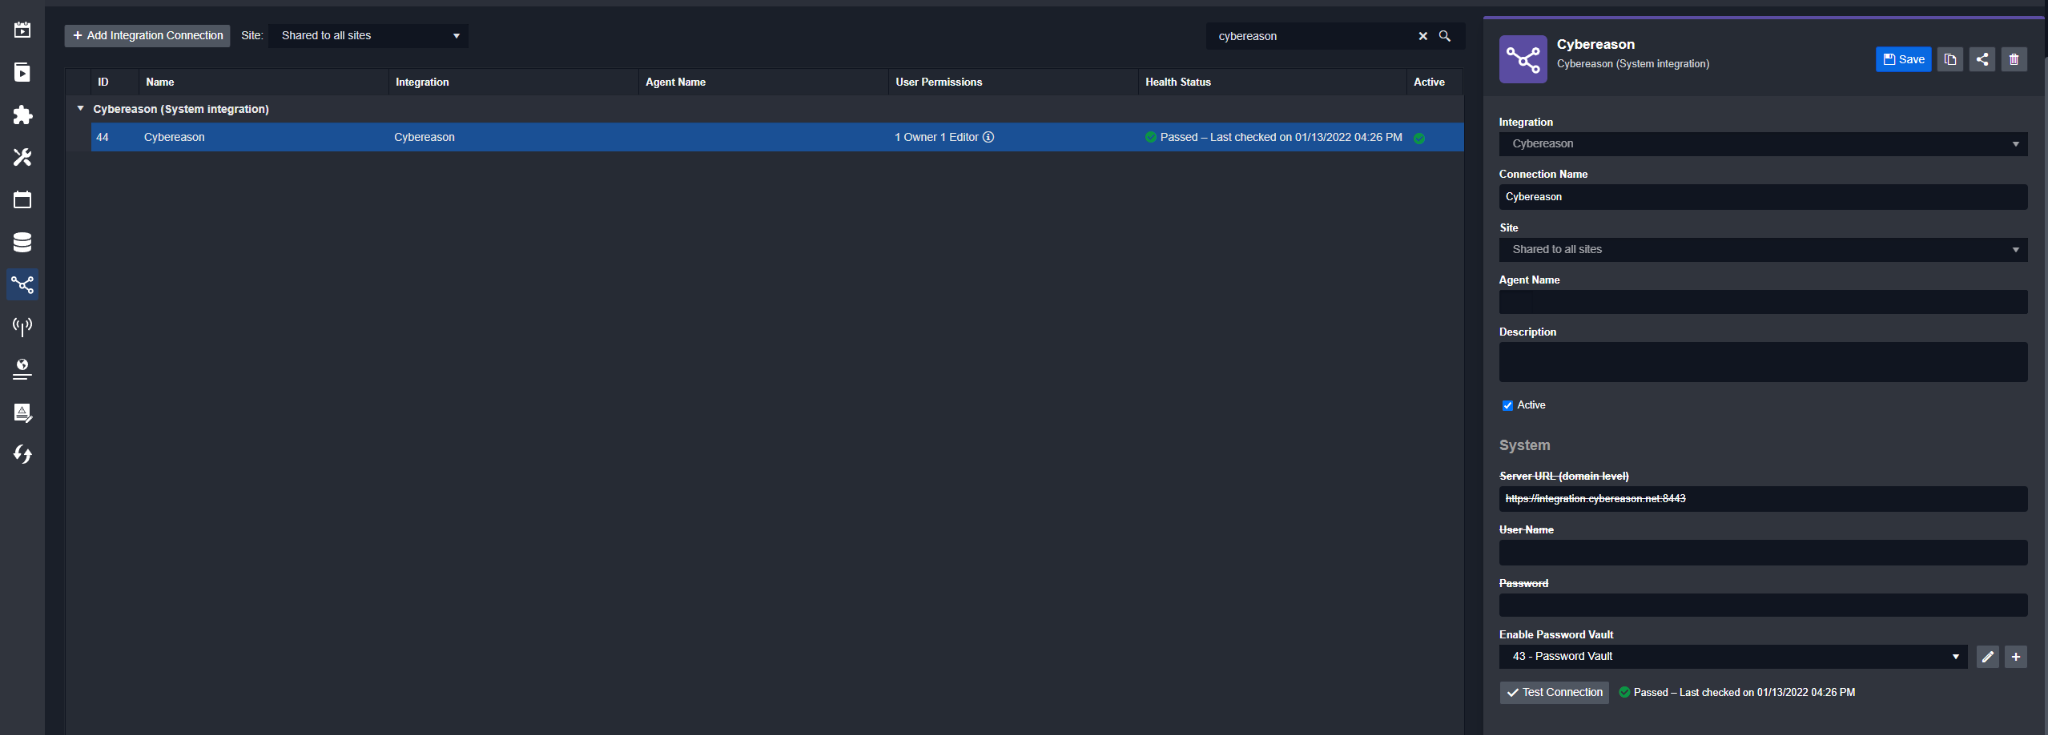
Follow the similar process of setting up a new integration connection (e.g., Cybereason)
Set up Connection:
-
Enter the Server URL
-
Select the Password Vault that has been configured
-
Test Connection to verify the connection is established to the third-party integration (e.g., Cybereason)
Configuring Access Control
Access the connections user permissions by clicking the share button on the top right of the configurations panel. By default, only the connection creator can have viewing and editing privileges and will assume the owner role.
-
Viewers: Viewers have no edit permission, and can only view the connection.
-
Editors: Editors can edit and save the connection.
-
Owners: The owner(s) of the connection can edit and delete, as well as change the permission of the connection.
If permission levels overlap, the highest permission level is granted. For example, if a user is an owner but their role is a viewer, the owner permission takes precedence.
READER NOTE
There must be at least one owner for each connection. The last owner cannot be deleted or reassigned to the viewer/editor.
Webhook Keys
.png?cb=37bcd8c63de93802d217818443d27b3d)
The Webhook Keys tab displays all configured webhook keys available to the user account, organized into Data Ingestion and Remote Command categories.
A webhook key, also referred to as a webhook token or webhook secret, serves as a unique identifier or authentication code used to secure and authenticate webhook communications between various applications or systems via webhooks. In D3, webhooks can be used to ingest data from external systems or remotely trigger commands within D3 from external systems.
In both the Data Ingestion and Remote Command subtabs, API keys are listed with the Type, Key Name, Key, Site Name, Assigned User, and Creator columns. Users can filter the columns or use the search bar to quickly locate a webhook key.
Clicking a key displays additional information in the right-side panel, including the key name, creator, and commands with access to the key. If a command is associated with an integration, the related integration is also displayed. Key creators can delete keys by clicking the trash icon.
READER NOTE
Webhook keys are managed in the Connections module. To create a new webhook key, navigate to the Data Ingestion or Integrations module under Configuration.
For details on webhook key configuration and authentication methods, refer to the Webhook Configuration Guide.