Widgets
LAST UPDATED: MARCH 14, 2025
The incident workspace now includes updated and new widgets, customizable via the Incident Workspace Builder. Each widget can be expanded or restored to their default size using their ![]() (expand) and
(expand) and ![]() (shrink) interactive icons.
(shrink) interactive icons.
Header Panel
-20241227-233530.png?inst-v=50beb7fd-144a-421c-a137-9f1549fb3a3f)
The general information header panel now features a modernized design, presenting key incident details.
Tasks Widget
-20241228-001930.png?inst-v=50beb7fd-144a-421c-a137-9f1549fb3a3f)
The new Tasks widget has replaced the old Your Pending Tasks section in the incident workspace overview. The Tasks widget provides a clear view of completed, upcoming and overdue playbook and ad hoc tasks. It also includes a graphical progress bar to visually track completion.
Users can click the ![]() button on this widget or use the Ad hoc Tasks quick action available in the header panel to add an ad hoc task.
button on this widget or use the Ad hoc Tasks quick action available in the header panel to add an ad hoc task.
Adversary Lifecycle Widget
%201-20241228-013359.png?inst-v=50beb7fd-144a-421c-a137-9f1549fb3a3f)
The Adversary Lifecycle (previously Tactics & Techniques) widget has been redesigned to intuitively showcase tactic and technique details specific to the current incident, providing clear and comprehensive insights for each item.
-20241228-010720.png?inst-v=50beb7fd-144a-421c-a137-9f1549fb3a3f)
Clicking on the ![]() button beside the Adversary Lifecycle widget header will render a popup. The dropdown menu within this popup contains built-in and custom tactics and techniques.
button beside the Adversary Lifecycle widget header will render a popup. The dropdown menu within this popup contains built-in and custom tactics and techniques.
Conclusion Widget
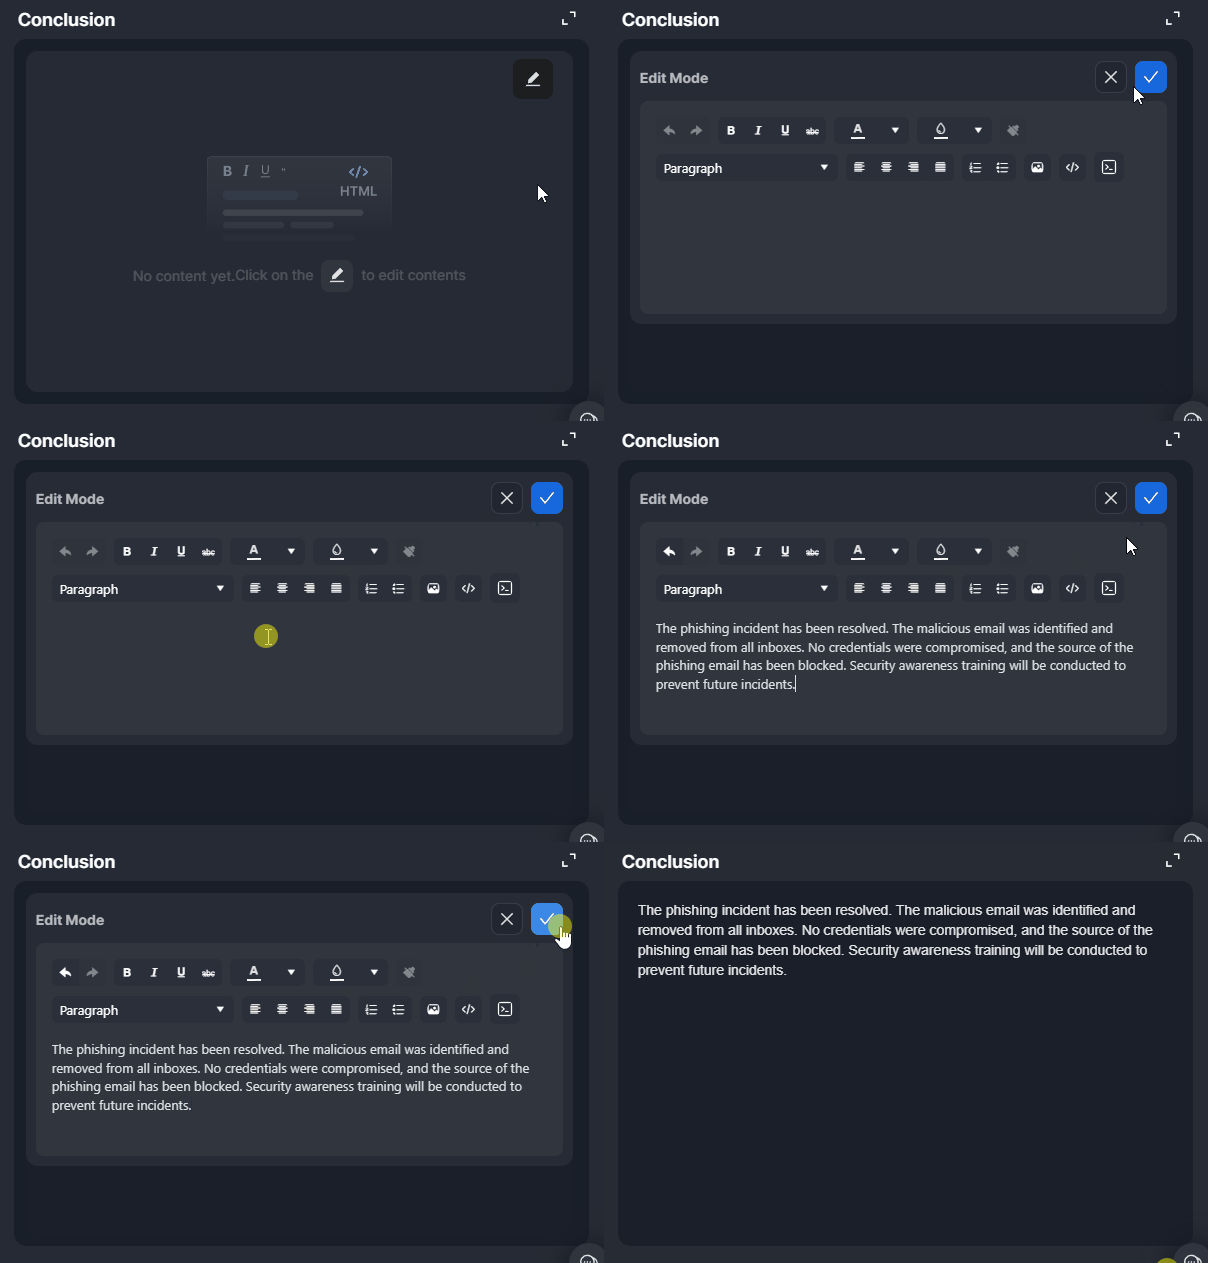
Users can use the Conclusion widget to record a summary for the incident’s resolution using an HTML editor.
To edit the content, hover over the widget and click on the  icon.
icon.
To clear the HTML widget, hover over the widget, click on the  icon, then click on the Clear button.
Custom Fields Widget
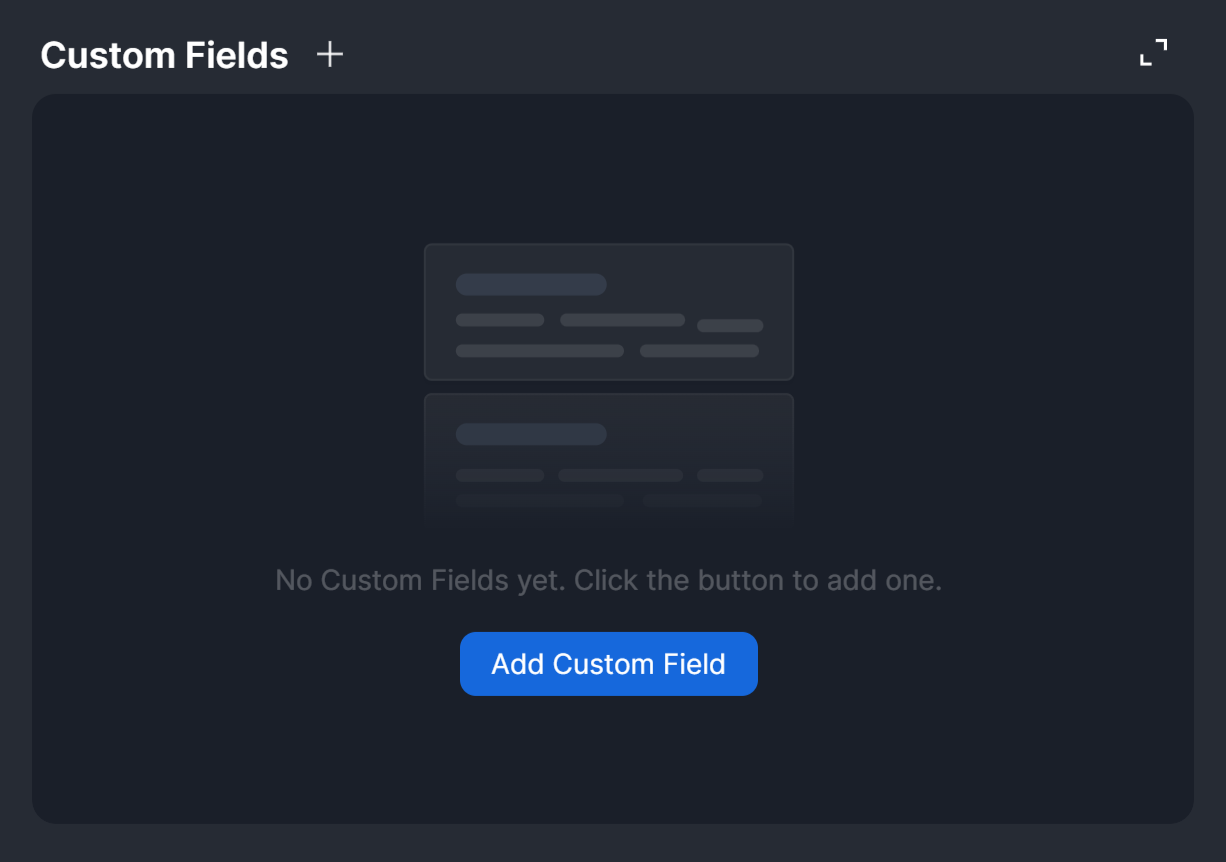
The Custom Fields widget allows users to add custom fields and values to incorporate information about the incident beyond what appears in the Header Panel.
Description Widget
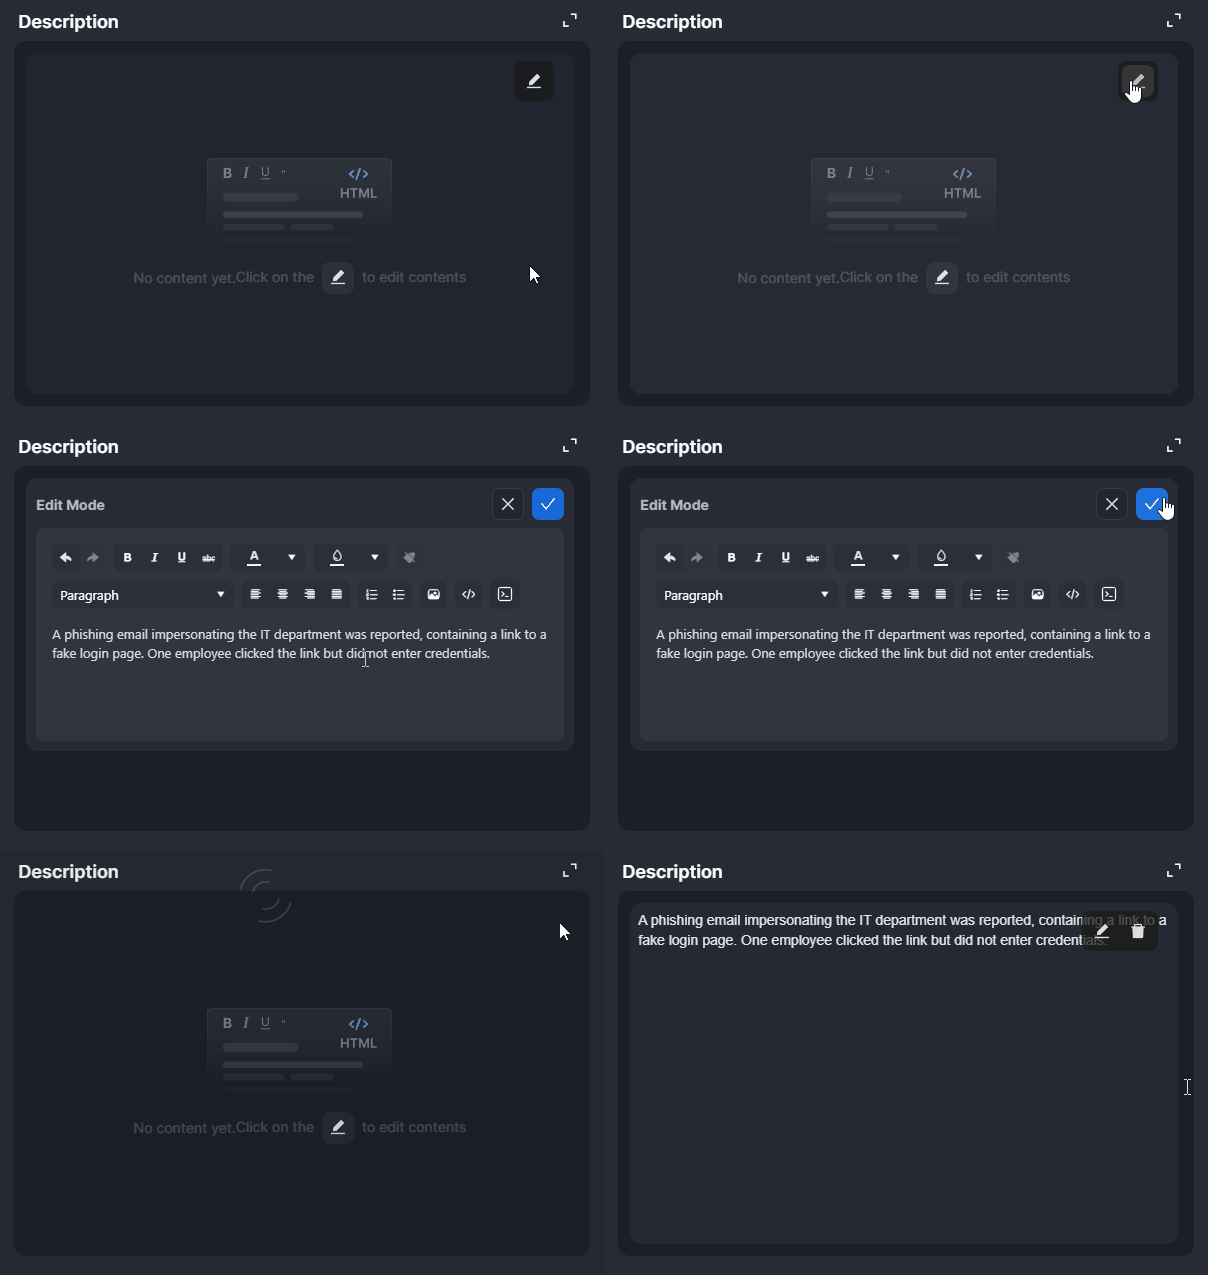
The Description widget enables users to add or update the incident description using an HTML editor.
To edit the content, hover over the widget and click on the  icon.
icon.
To clear the HTML widget, hover over the widget, click on the  icon, then click on the Clear button.
Events Summary Widget
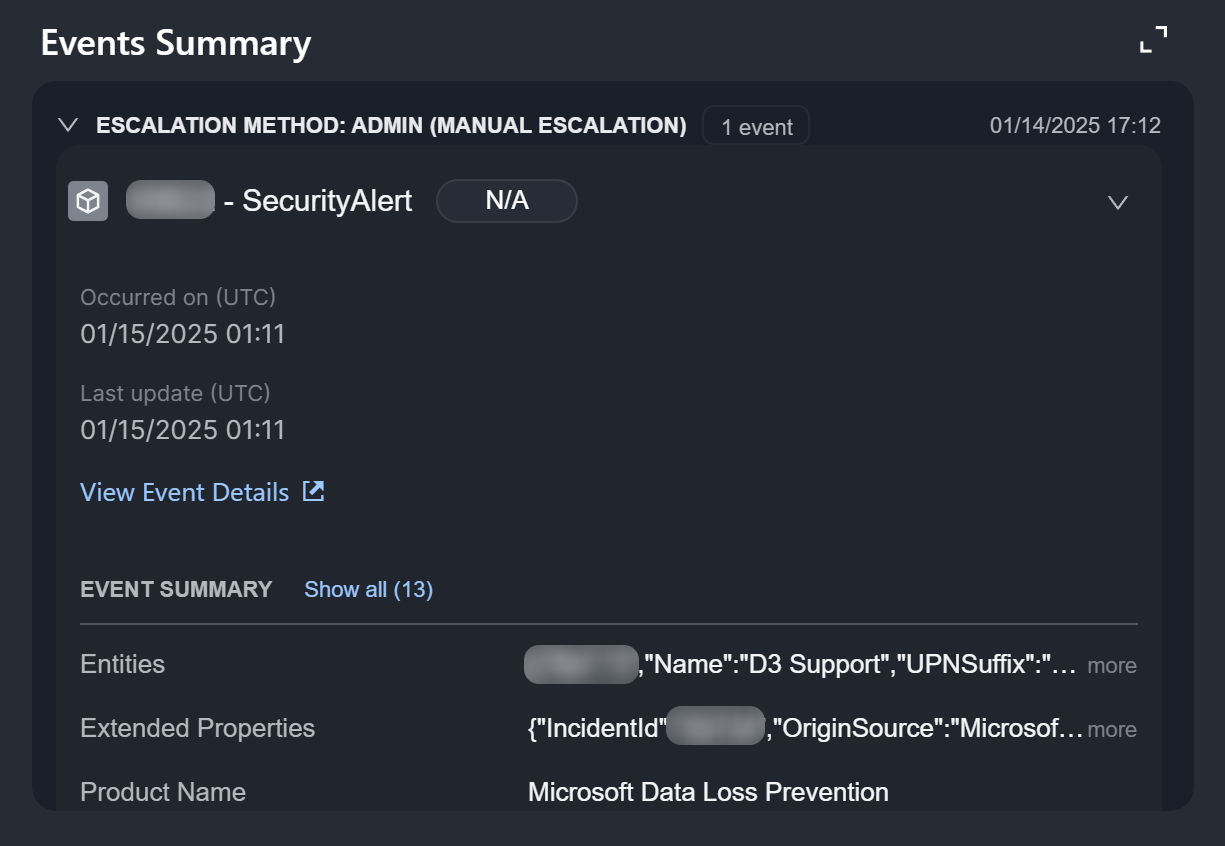
The Events Summary widget provides summaries of events linked to the incident, including their linkage method, event ID and name, risk level, occurrence and last updated dates, and a link to access the event details pop-up window for linked events.
Files Widget
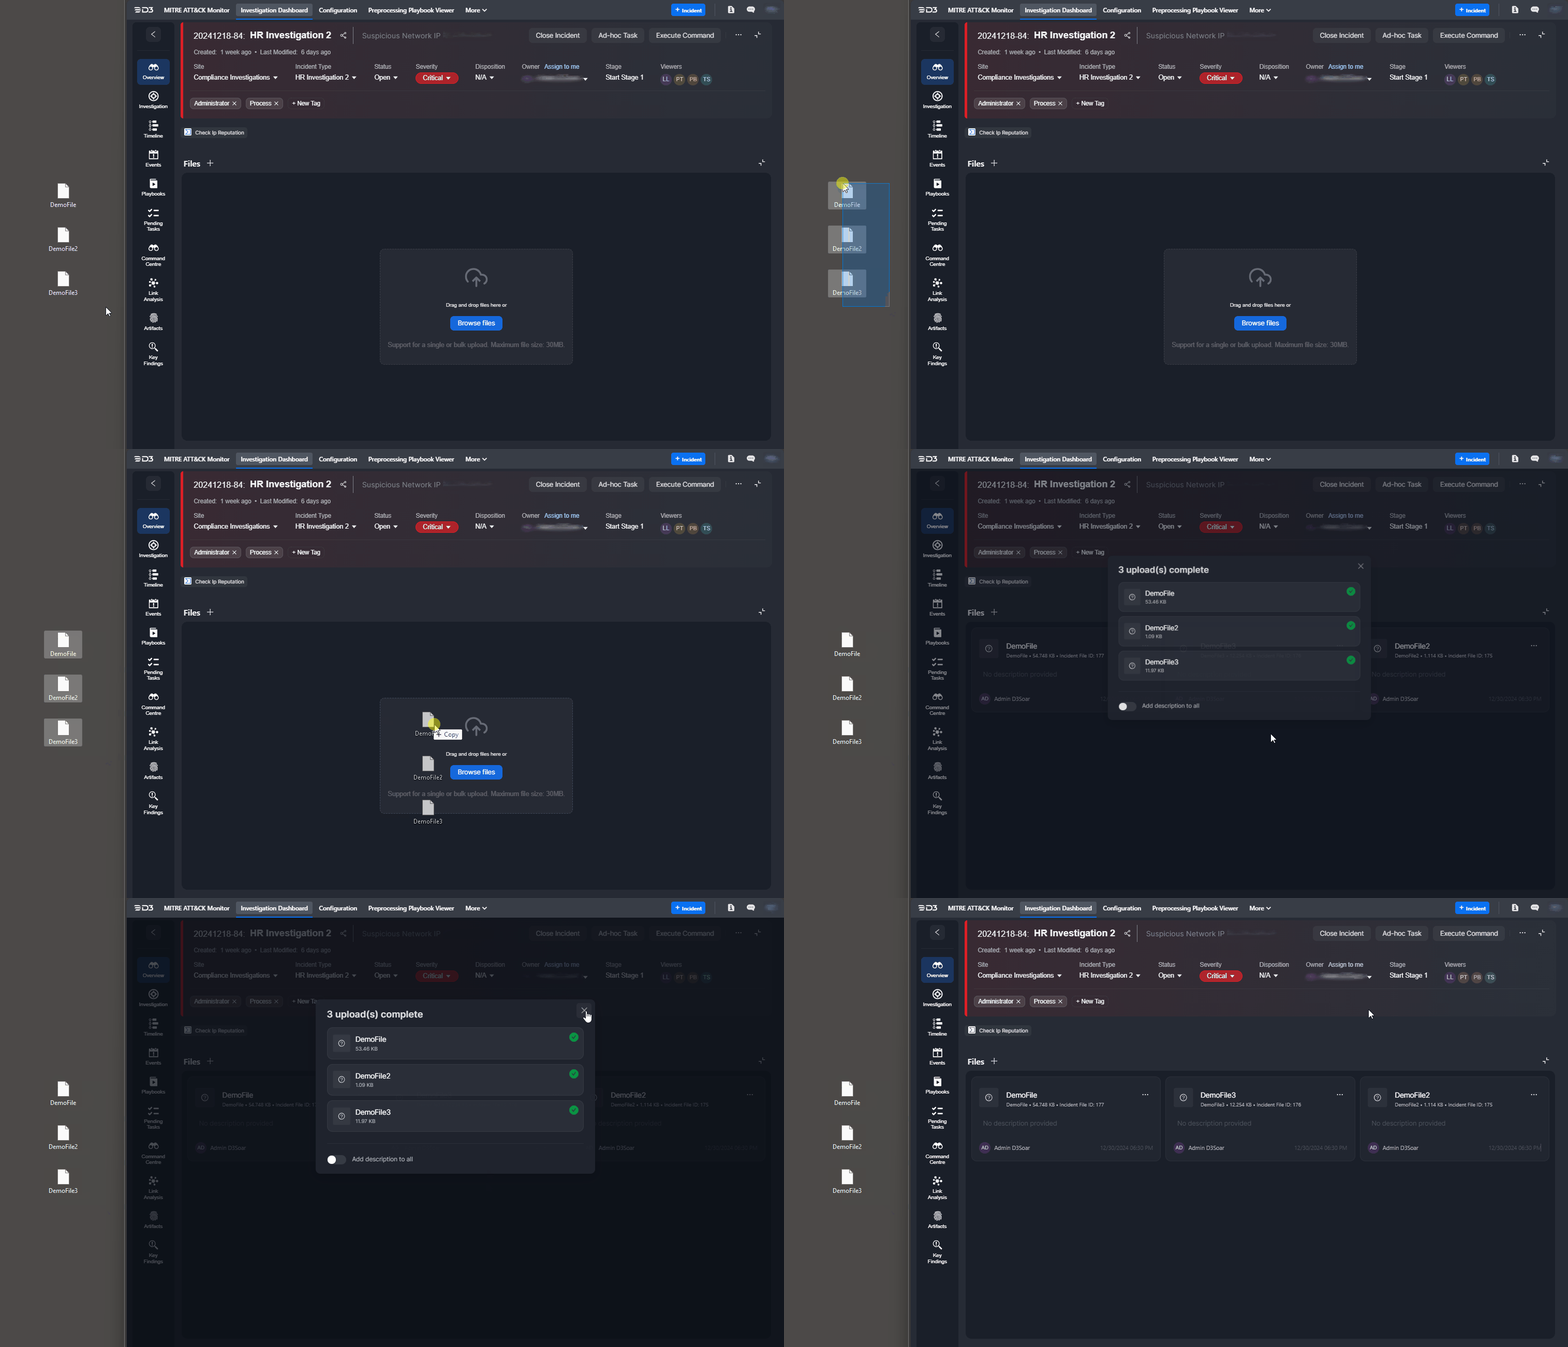
The Files widget has been redesigned to support file uploads via drag-and-drop or browsing.
Findings Widget
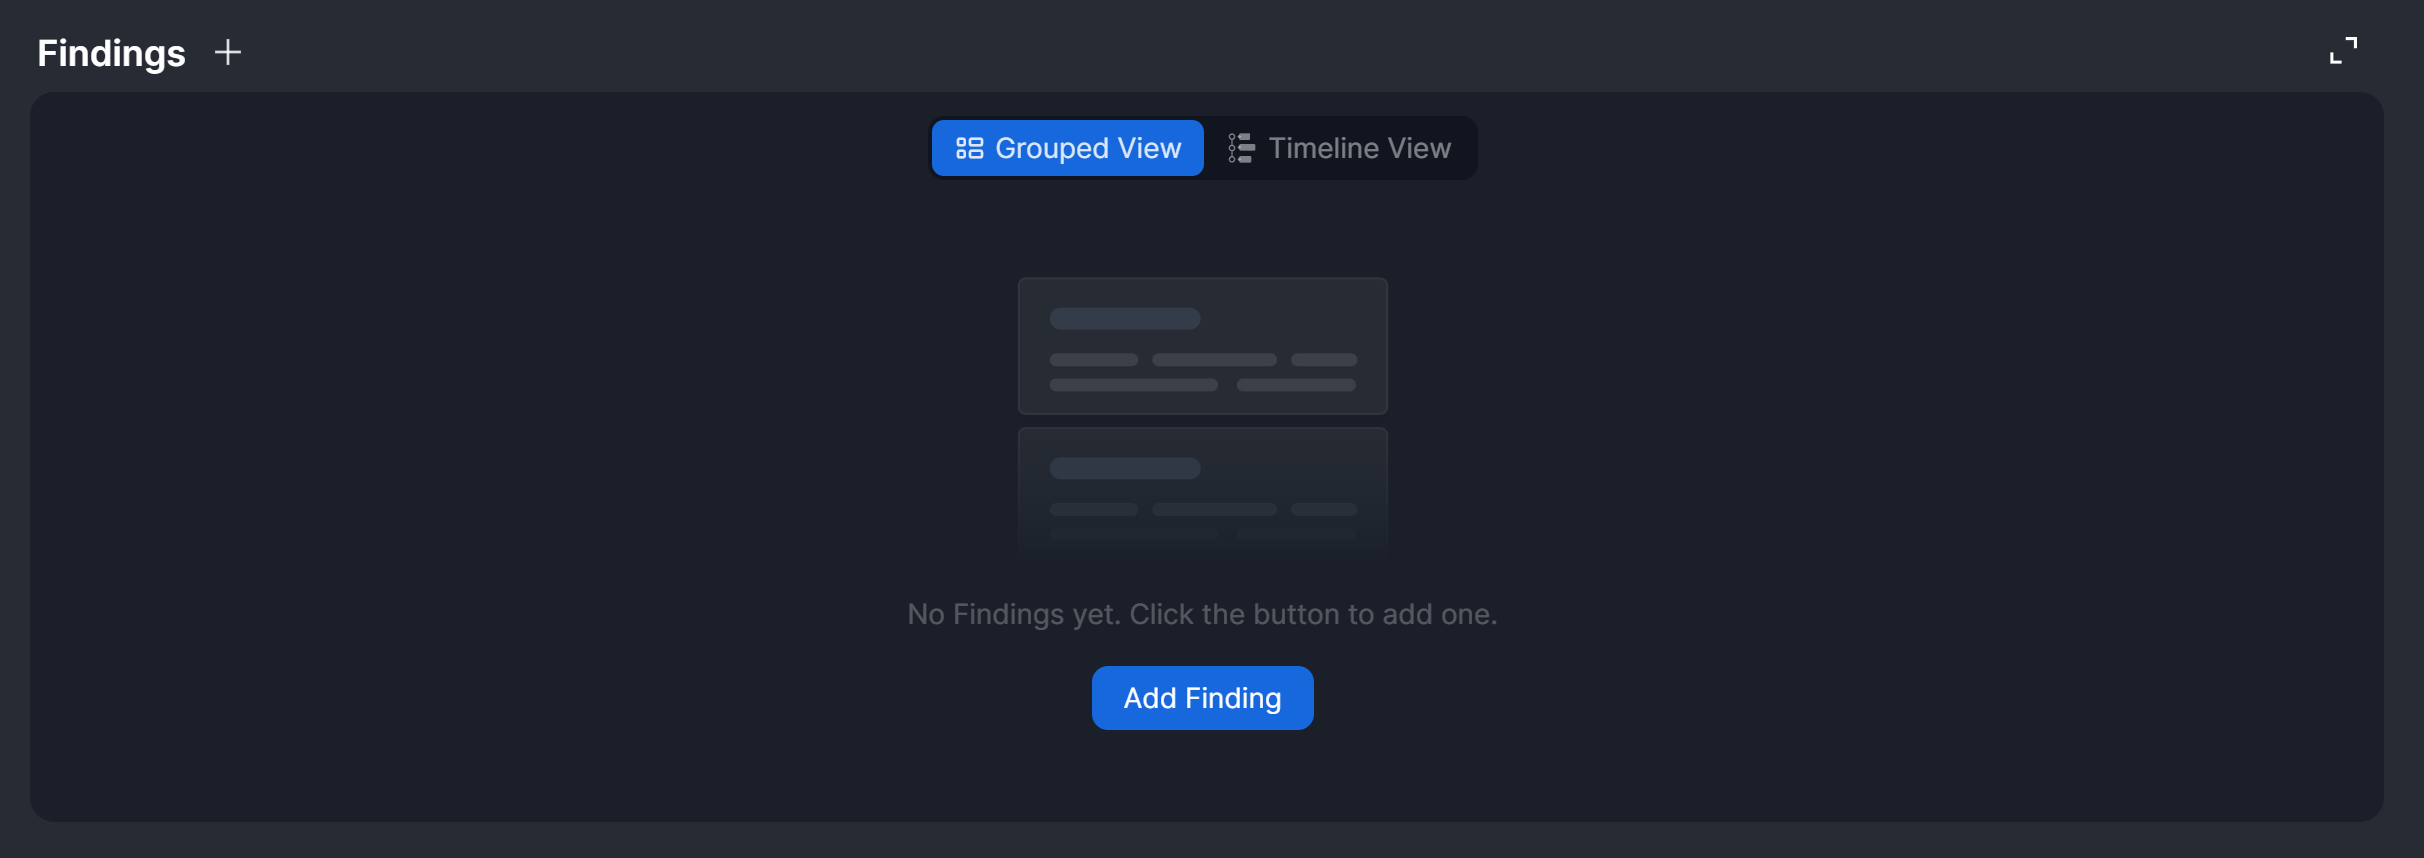
The Findings widget enables users to view, add, and edit investigation findings directly from the Overview tab. The data displayed in this widget mirrors the information in the Findings section of the Investigation tab.
HTML Widget
%201-20241231-185037.png?inst-v=50beb7fd-144a-421c-a137-9f1549fb3a3f)
The new HTML widget allows users to dynamically add custom HTML content, allowing the display of richly formatted information.
To edit the content, hover over the HTML widget and click on the  icon.
icon.
To clear the HTML widget, hover over the HTML widget, click on the  icon, then click on the Clear button.
Incident Form Widget
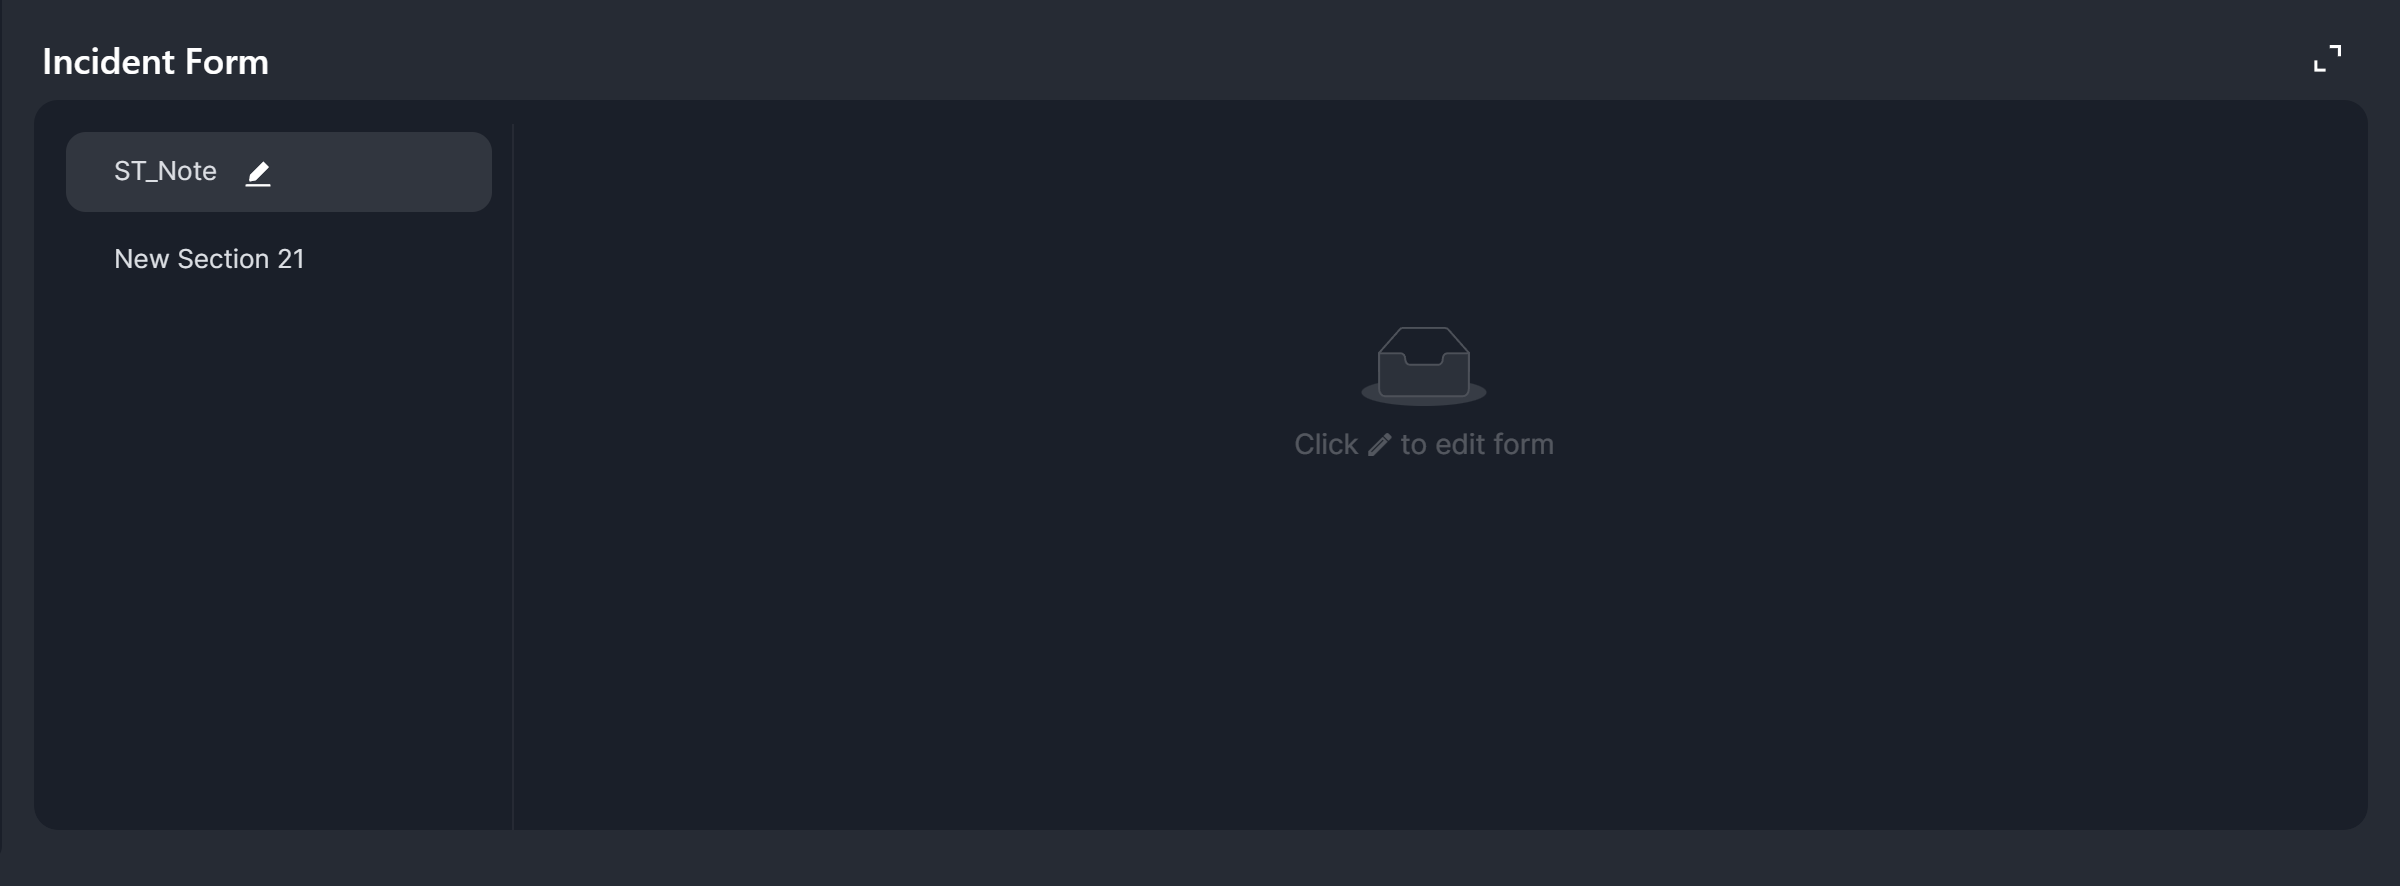
The Incident Form widget allows users to add or update information about the incident using the incident forms associated with the incident.
Investigation Team Widget
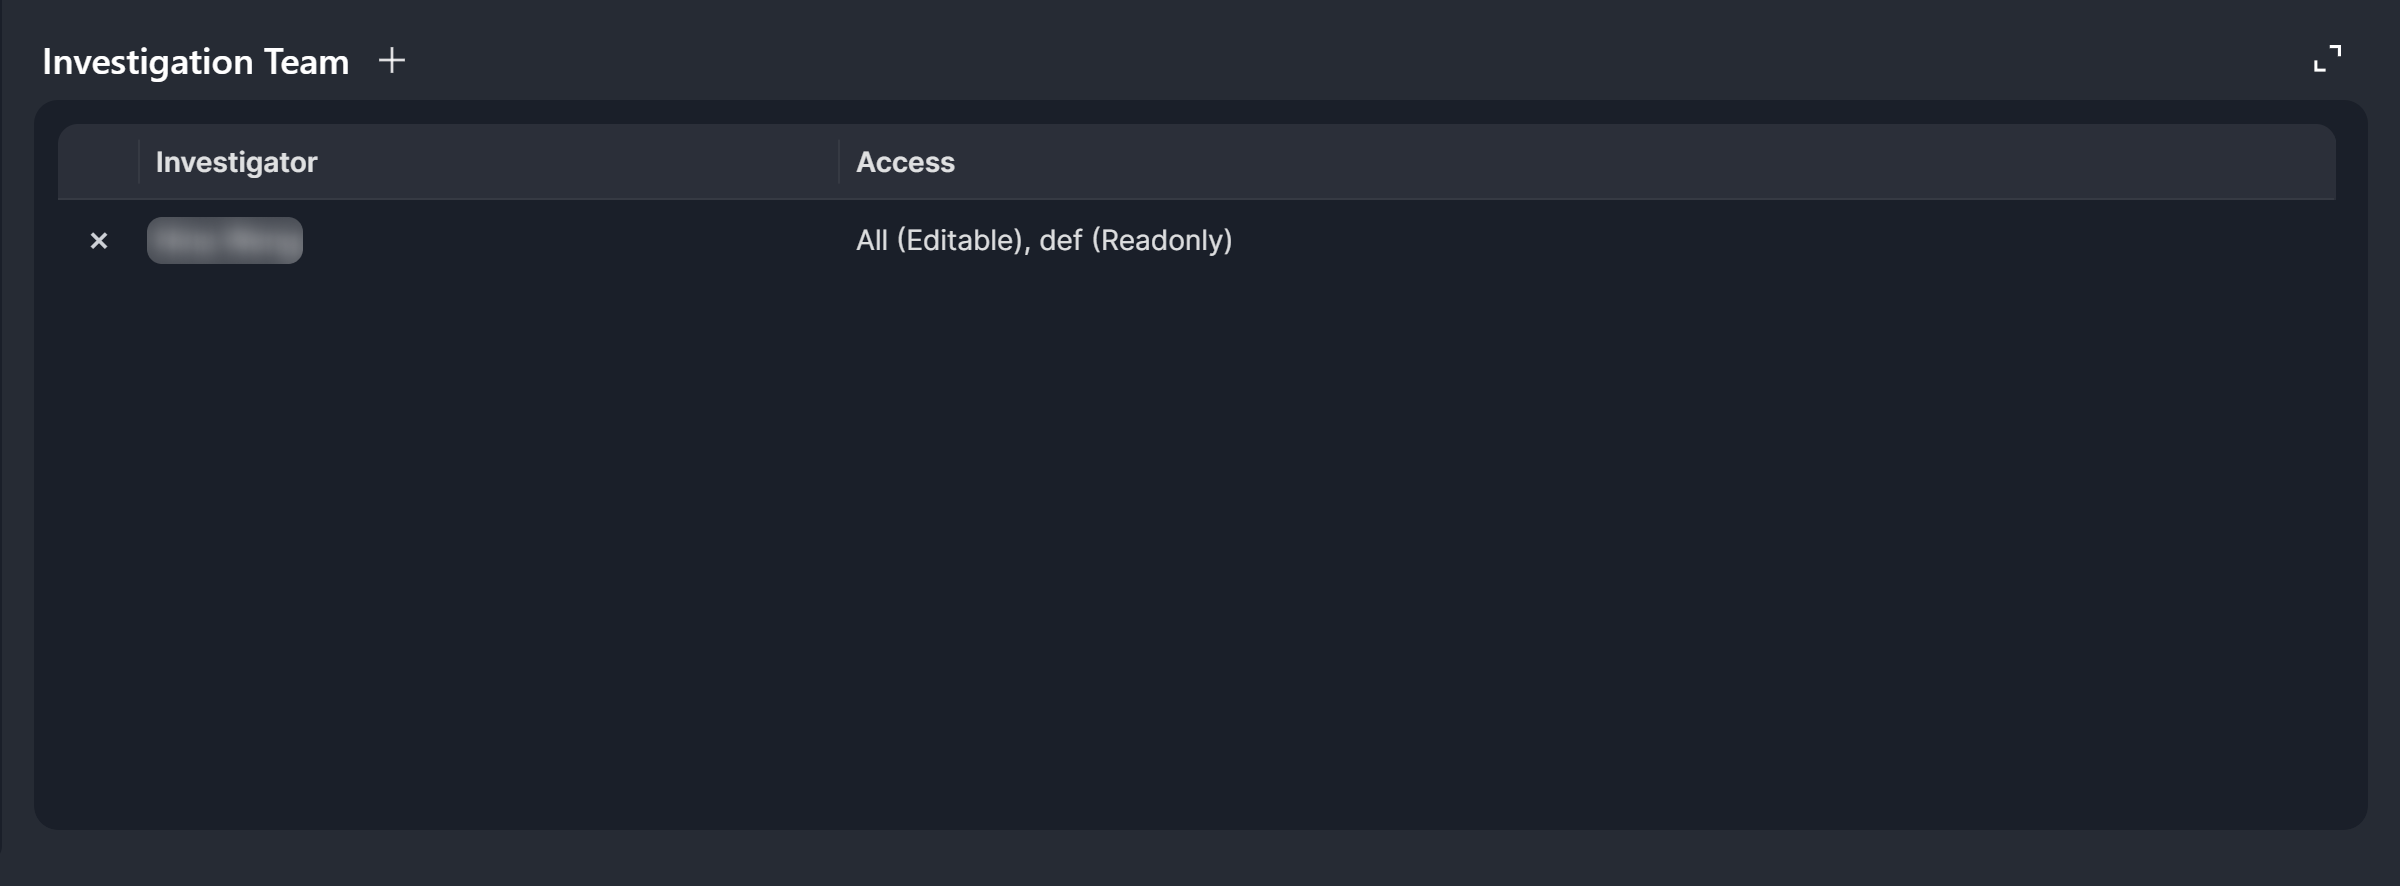
The Investigation Team widget displays users assigned to work on the incident and their access level. It also allows users to edit the team.
JSON Table Widget
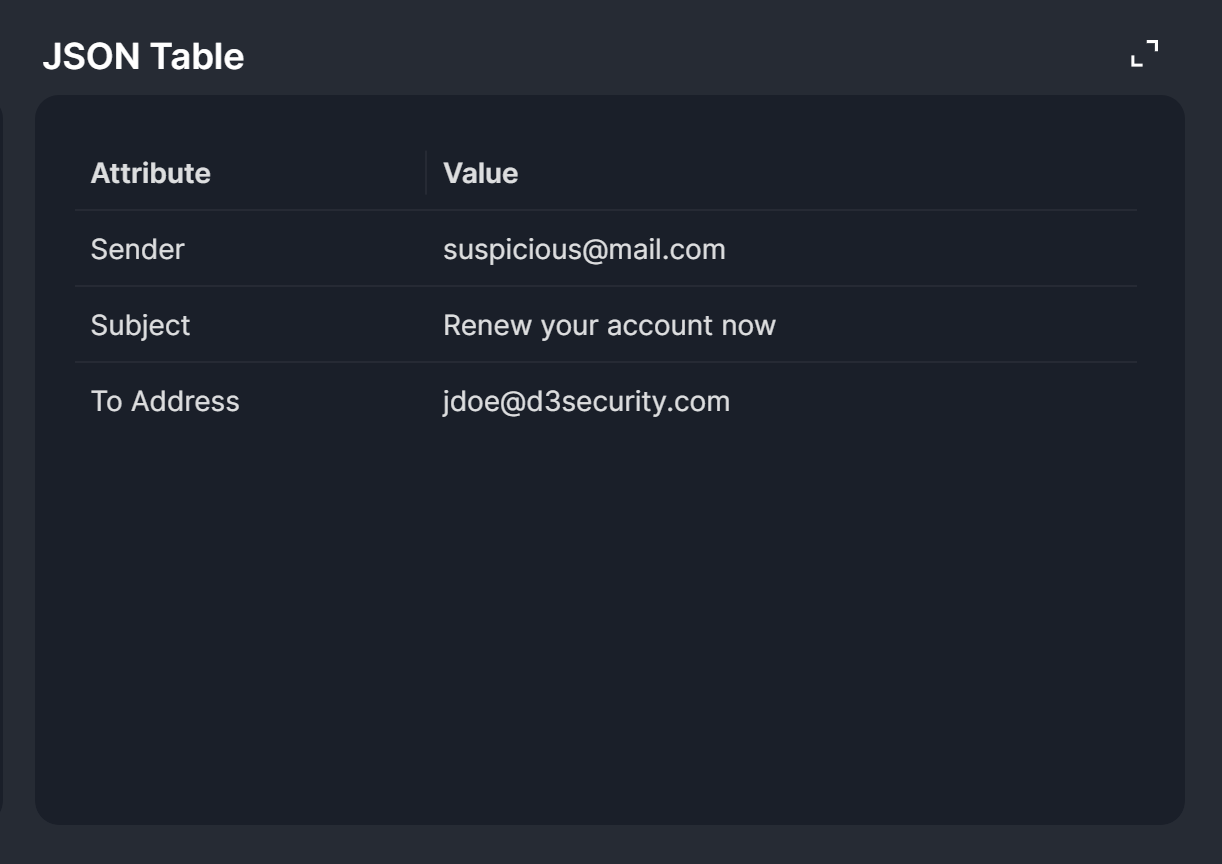
The JSON Table widget allows users to add a table containing custom JSON data into the incident. This data can be used as input for playbook tasks that support dynamic values.
Linked Artifacts Widget
.png?inst-v=50beb7fd-144a-421c-a137-9f1549fb3a3f)
The Linked Artifacts widget enables users to associate artifacts with the incident. Users can click on either the  button or the Add Linked Artifact button to link an existing artifact to the incident or create a new artifact to link to the incident.
After linking artifacts to the incident, users can access their details and execute commands on them. Linked artifacts are also displayed in the Link Analysis tab.

Linked Incident Widget
%201-20241231-002244.png?inst-v=50beb7fd-144a-421c-a137-9f1549fb3a3f)
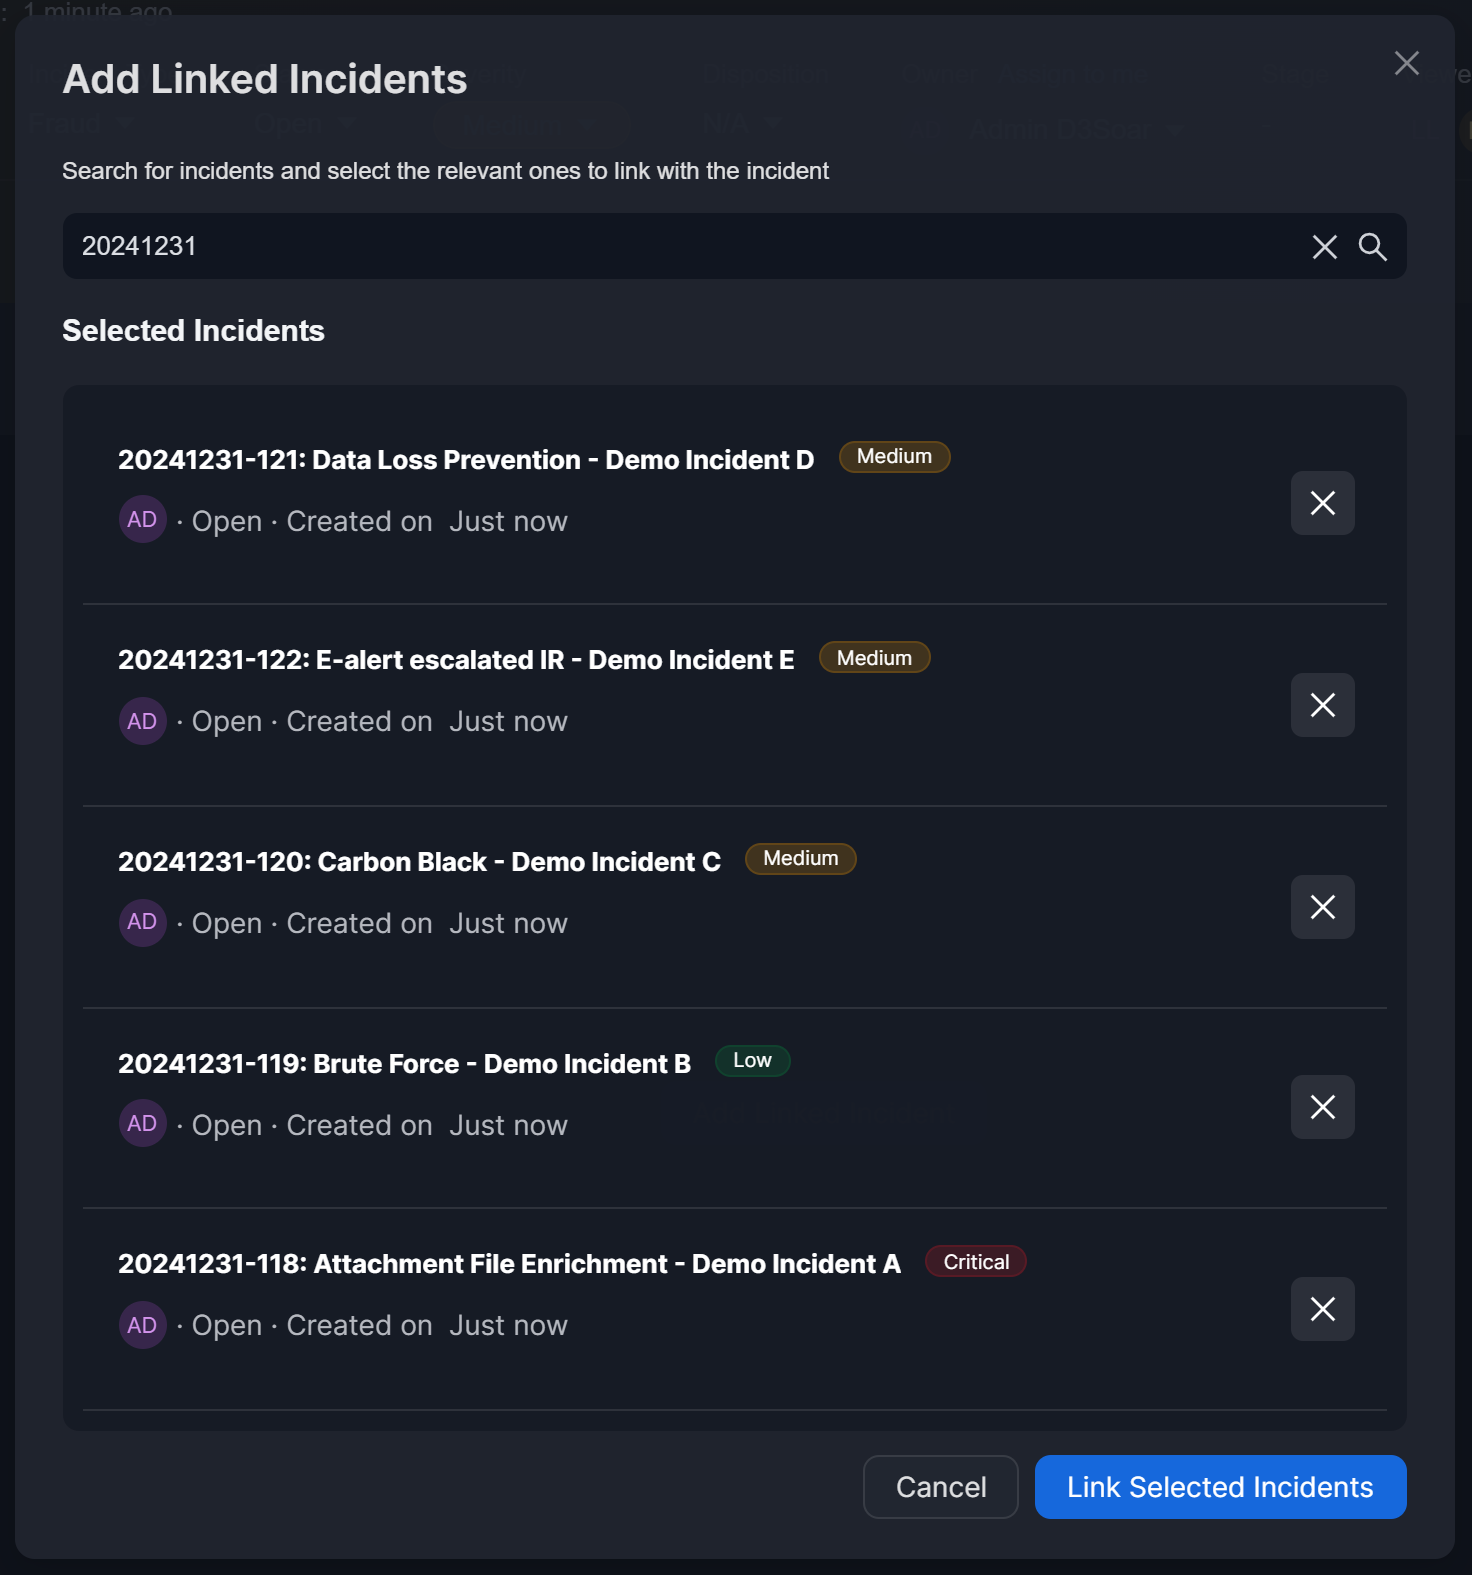
The Linked Incidents widget has been updated to support bulk selection and display a structured layout of incident details, including the number, title, type, status, creation date, owner, and associated artifacts.
Hovering over the owner icon, the text after "Created On", or any artifact reveals a tooltip with additional details.
-20241231-011920.png?inst-v=50beb7fd-144a-421c-a137-9f1549fb3a3f)
To copy a linked incident’s URL, hover over that incident and click on the  icon.
icon.
To unlink an incident, hover over that incident and click on the -20241231-011540.png?inst-v=50beb7fd-144a-421c-a137-9f1549fb3a3f) icon.
icon.
Notes Widget
%201-20241231-024409.png?inst-v=50beb7fd-144a-421c-a137-9f1549fb3a3f)
The Notes widget has been improved for greater clarity and differentiation between notes, with a keyword search feature added for easier retrieval.
Playbook Automation Widget
-20241231-015352.png?inst-v=50beb7fd-144a-421c-a137-9f1549fb3a3f)
The Playbook Automation widget (formerly Playbook) now supports bulk selection, same-page unlinking and viewing, filtering of custom or built-in playbooks, and filtering by integration commands used within playbooks.
Clicking a playbook card renders a modal containing the executing playbook, identical to accessing it via the Playbooks sidebar menu.
-20241231-022415.png?inst-v=50beb7fd-144a-421c-a137-9f1549fb3a3f)
Recommendations Widget
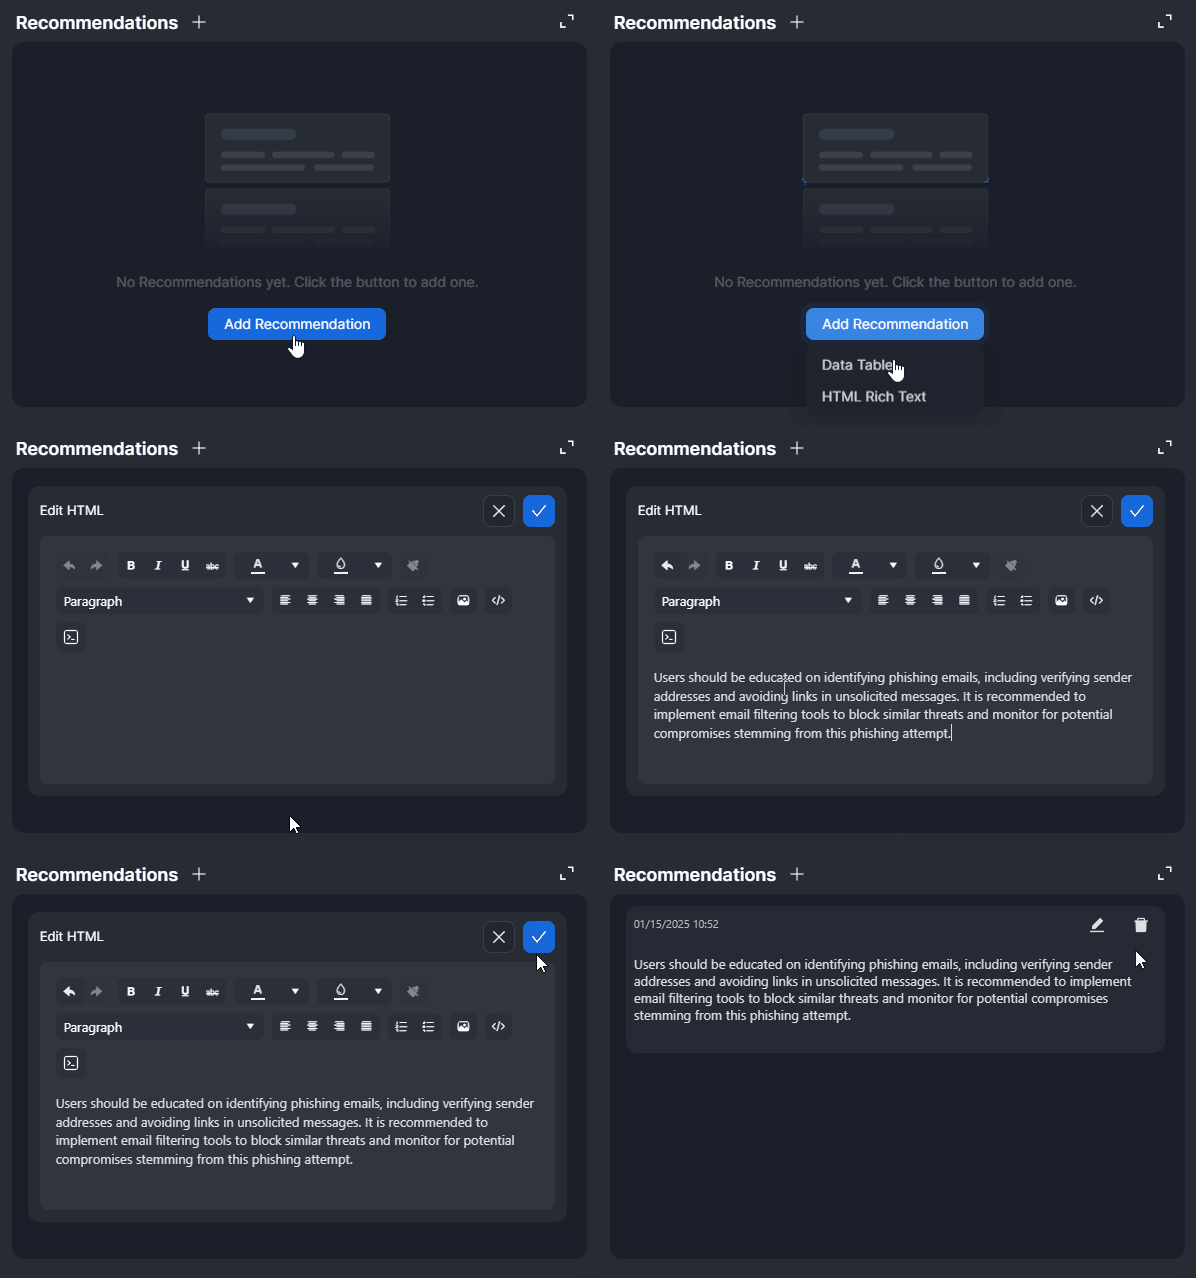
The Recommendations widget enables users to view, add, and edit analyst recommendations directly from the Overview tab. The data displayed in this widget mirrors the information in the Recommendations section of the Investigation tab.
The process of adding a recommendation, whether with a data table or HTML Rich Text, is identical to adding a finding, with the exception that the category dropdown is available only for findings.
Remediations & Mitigations Widget
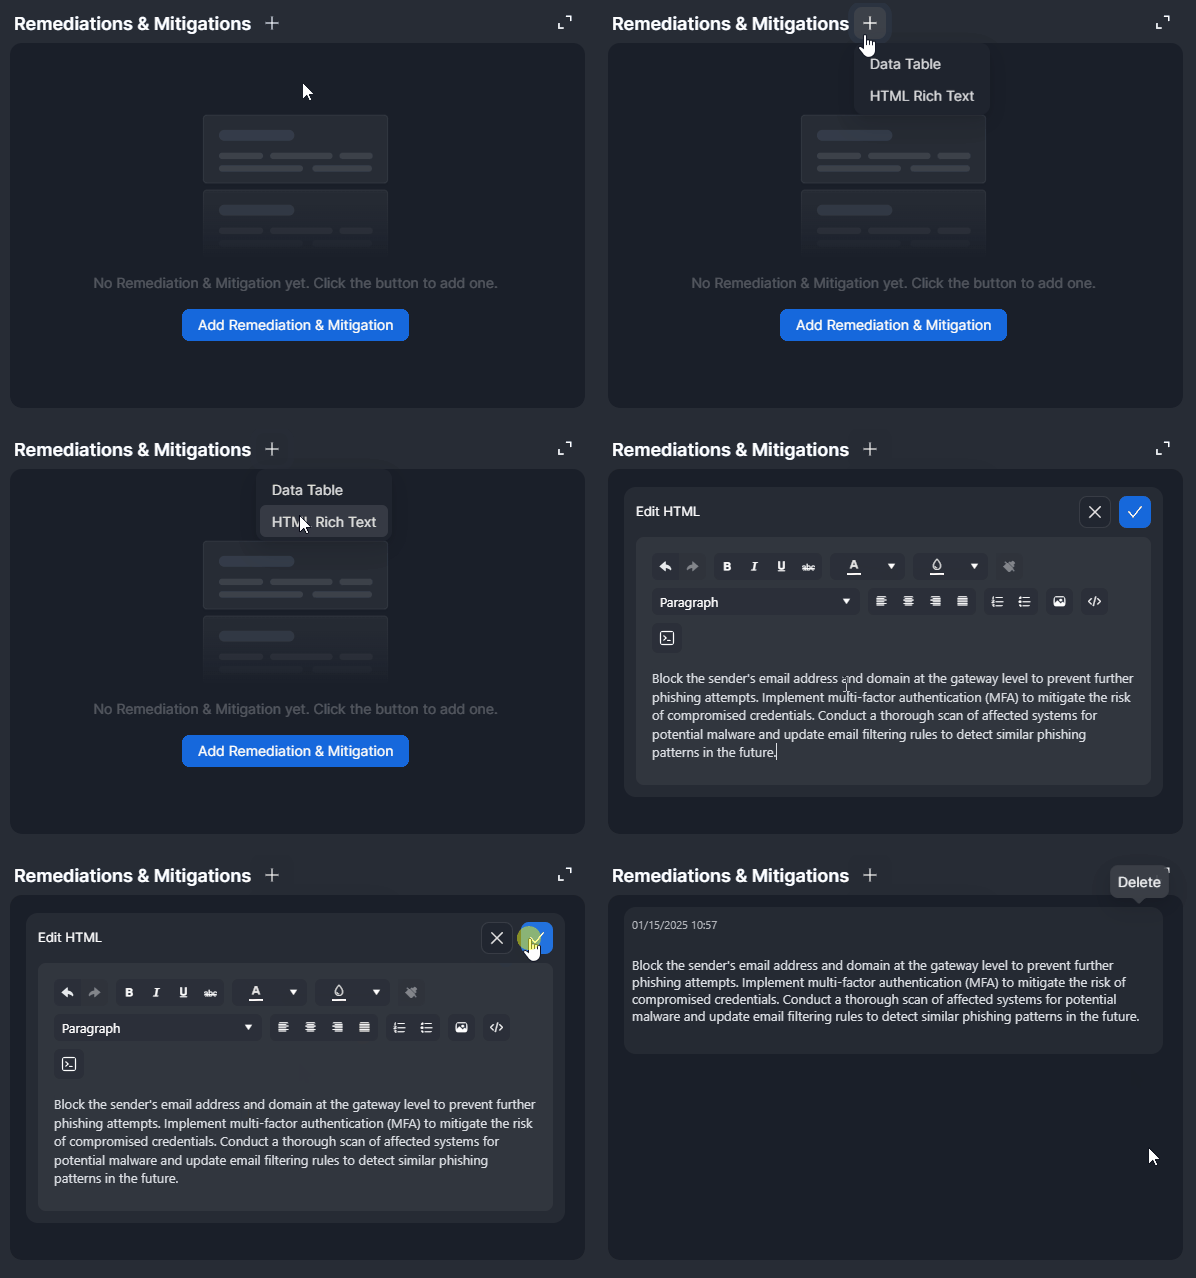
The Remediations & Mitigations widget enables users to view, add, and edit analyst remediation and mitigation strategies directly from the Overview tab. The data displayed in this widget mirrors the information in the Remediations & Mitigations section of the Investigation tab.
The process of adding a remediation and mitigation strategy, whether with a data table or HTML Rich Text, is identical to adding a finding, with the exception that the category dropdown is available only for findings.
AI Summary Widget
The Summary widget mirrors the content of the Summary section in the Investigation sidebar menu.
Beside the Summary widget header is a light blue refresh icon  . Clicking this icon securely generates a new summary using AI, improving incident reporting and team communication. This icon is accessible only to users with incident editing role, configured in the Organization Management module.
%201%20(1)-20241231-195203.png?inst-v=50beb7fd-144a-421c-a137-9f1549fb3a3f)
Before AI-Generated Summary
%201-20241231-201611.png?inst-v=50beb7fd-144a-421c-a137-9f1549fb3a3f)
Summary After AI Regeneration
After an AI summary is generated, an %202-20241231-201813.png?inst-v=50beb7fd-144a-421c-a137-9f1549fb3a3f) label will render next to the Summary widget header. If the summary content is modified by a user, the label will be removed.
label will render next to the Summary widget header. If the summary content is modified by a user, the label will be removed.

-20241228-003410.png?inst-v=50beb7fd-144a-421c-a137-9f1549fb3a3f)
-20241228-003712.png?inst-v=50beb7fd-144a-421c-a137-9f1549fb3a3f)

-20241228-012434.png?inst-v=50beb7fd-144a-421c-a137-9f1549fb3a3f)
%201-20241228-012834.png?inst-v=50beb7fd-144a-421c-a137-9f1549fb3a3f)
-20241228-013713.png?inst-v=50beb7fd-144a-421c-a137-9f1549fb3a3f)
-20241228-013935.png?inst-v=50beb7fd-144a-421c-a137-9f1549fb3a3f)
.png?inst-v=50beb7fd-144a-421c-a137-9f1549fb3a3f)
.png?inst-v=50beb7fd-144a-421c-a137-9f1549fb3a3f)
.png?inst-v=50beb7fd-144a-421c-a137-9f1549fb3a3f)


%201-20241230-183917.png?inst-v=50beb7fd-144a-421c-a137-9f1549fb3a3f)
-20241230-184908.png?inst-v=50beb7fd-144a-421c-a137-9f1549fb3a3f)
-20241230-185253.png?inst-v=50beb7fd-144a-421c-a137-9f1549fb3a3f)
%203-20241230-185847.png?inst-v=50beb7fd-144a-421c-a137-9f1549fb3a3f)
%202-20241230-185807.png?inst-v=50beb7fd-144a-421c-a137-9f1549fb3a3f)


.png?inst-v=50beb7fd-144a-421c-a137-9f1549fb3a3f)


.png?inst-v=50beb7fd-144a-421c-a137-9f1549fb3a3f)


-20241231-005430.png?inst-v=50beb7fd-144a-421c-a137-9f1549fb3a3f)
-20241231-010617.png?inst-v=50beb7fd-144a-421c-a137-9f1549fb3a3f)
-20241231-005439.png?inst-v=50beb7fd-144a-421c-a137-9f1549fb3a3f)
-20241231-005447.png?inst-v=50beb7fd-144a-421c-a137-9f1549fb3a3f)
-20241231-011026.png?inst-v=50beb7fd-144a-421c-a137-9f1549fb3a3f)
%201-20241231-173254.png?inst-v=50beb7fd-144a-421c-a137-9f1549fb3a3f)
-20241231-024922.png?inst-v=50beb7fd-144a-421c-a137-9f1549fb3a3f)
-20250106-183012.png?inst-v=50beb7fd-144a-421c-a137-9f1549fb3a3f)
-20241231-021212.png?inst-v=50beb7fd-144a-421c-a137-9f1549fb3a3f)
%201%20(1)-20241231-021952.png?inst-v=50beb7fd-144a-421c-a137-9f1549fb3a3f)
%201-20241231-191925.png?inst-v=50beb7fd-144a-421c-a137-9f1549fb3a3f)
