Linked Artifacts
LAST UPDATED: NOV 22, 2024
Overview
Artifacts can be linked to an incident directly within the Incident Workspace, ensuring proper context and accessibility for analysis.
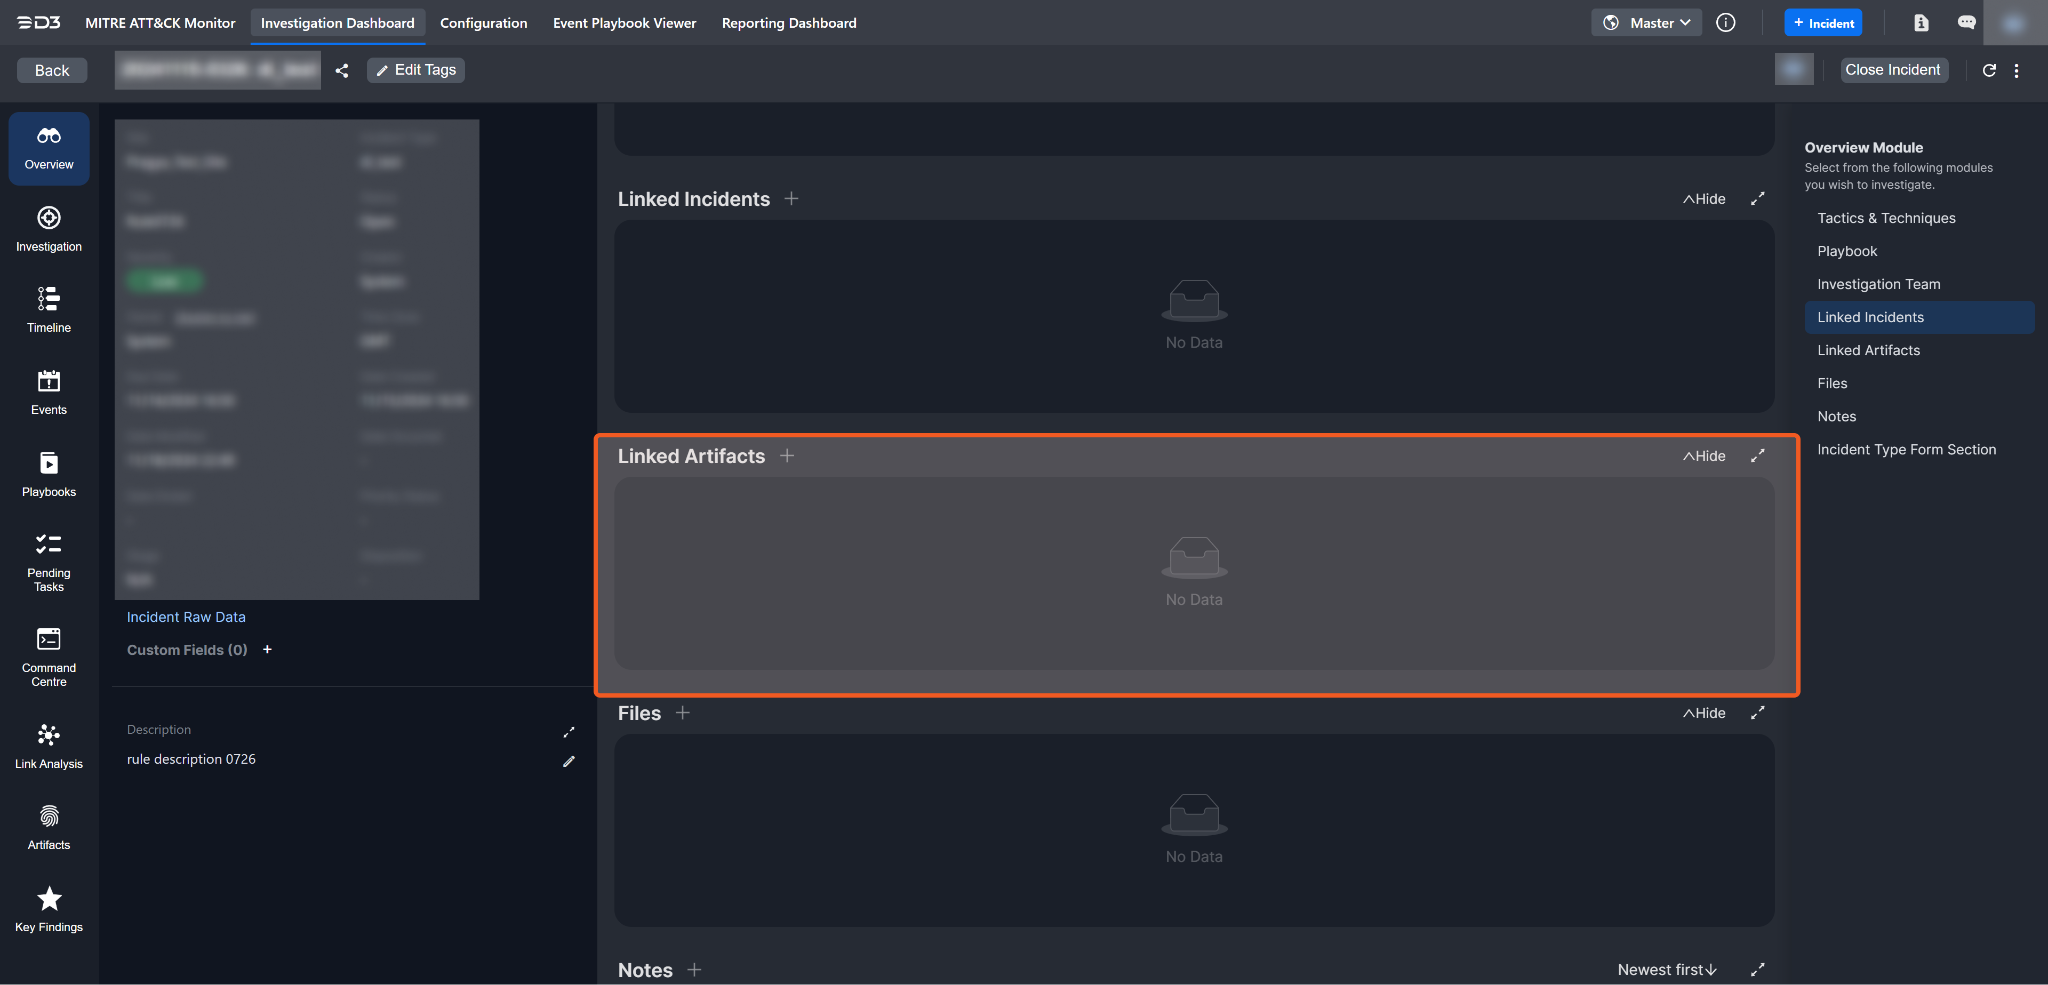
Artifacts can be linked in two ways:
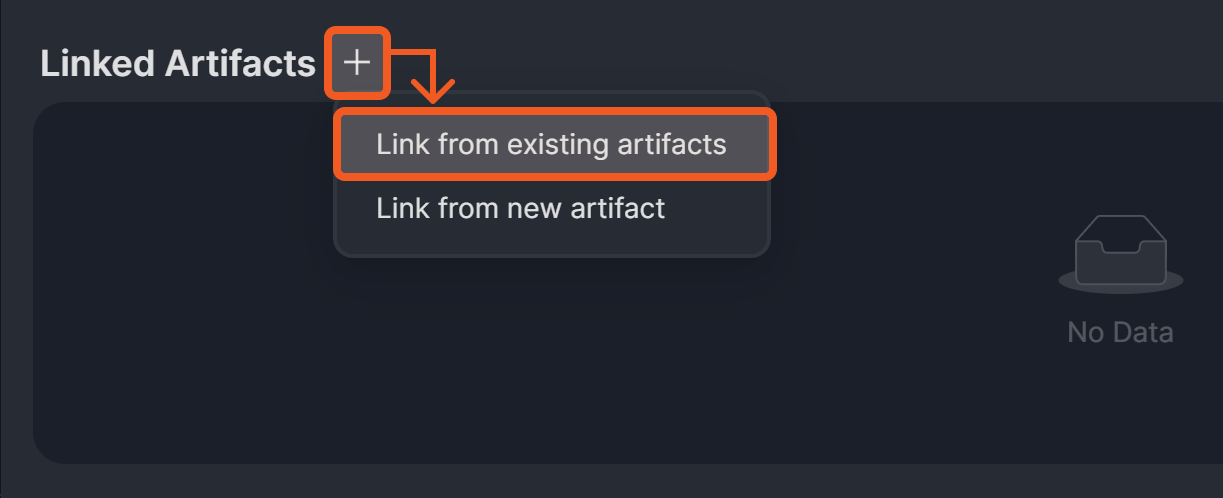
By selecting from existing artifacts.
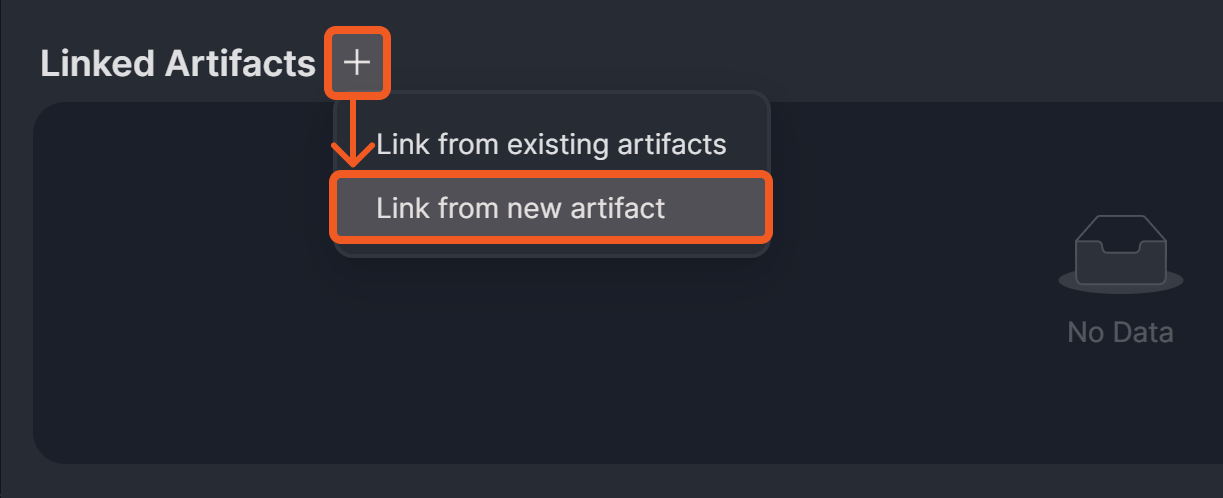
By adding new artifacts directly from Linked Artifacts.
Link from existing artifacts
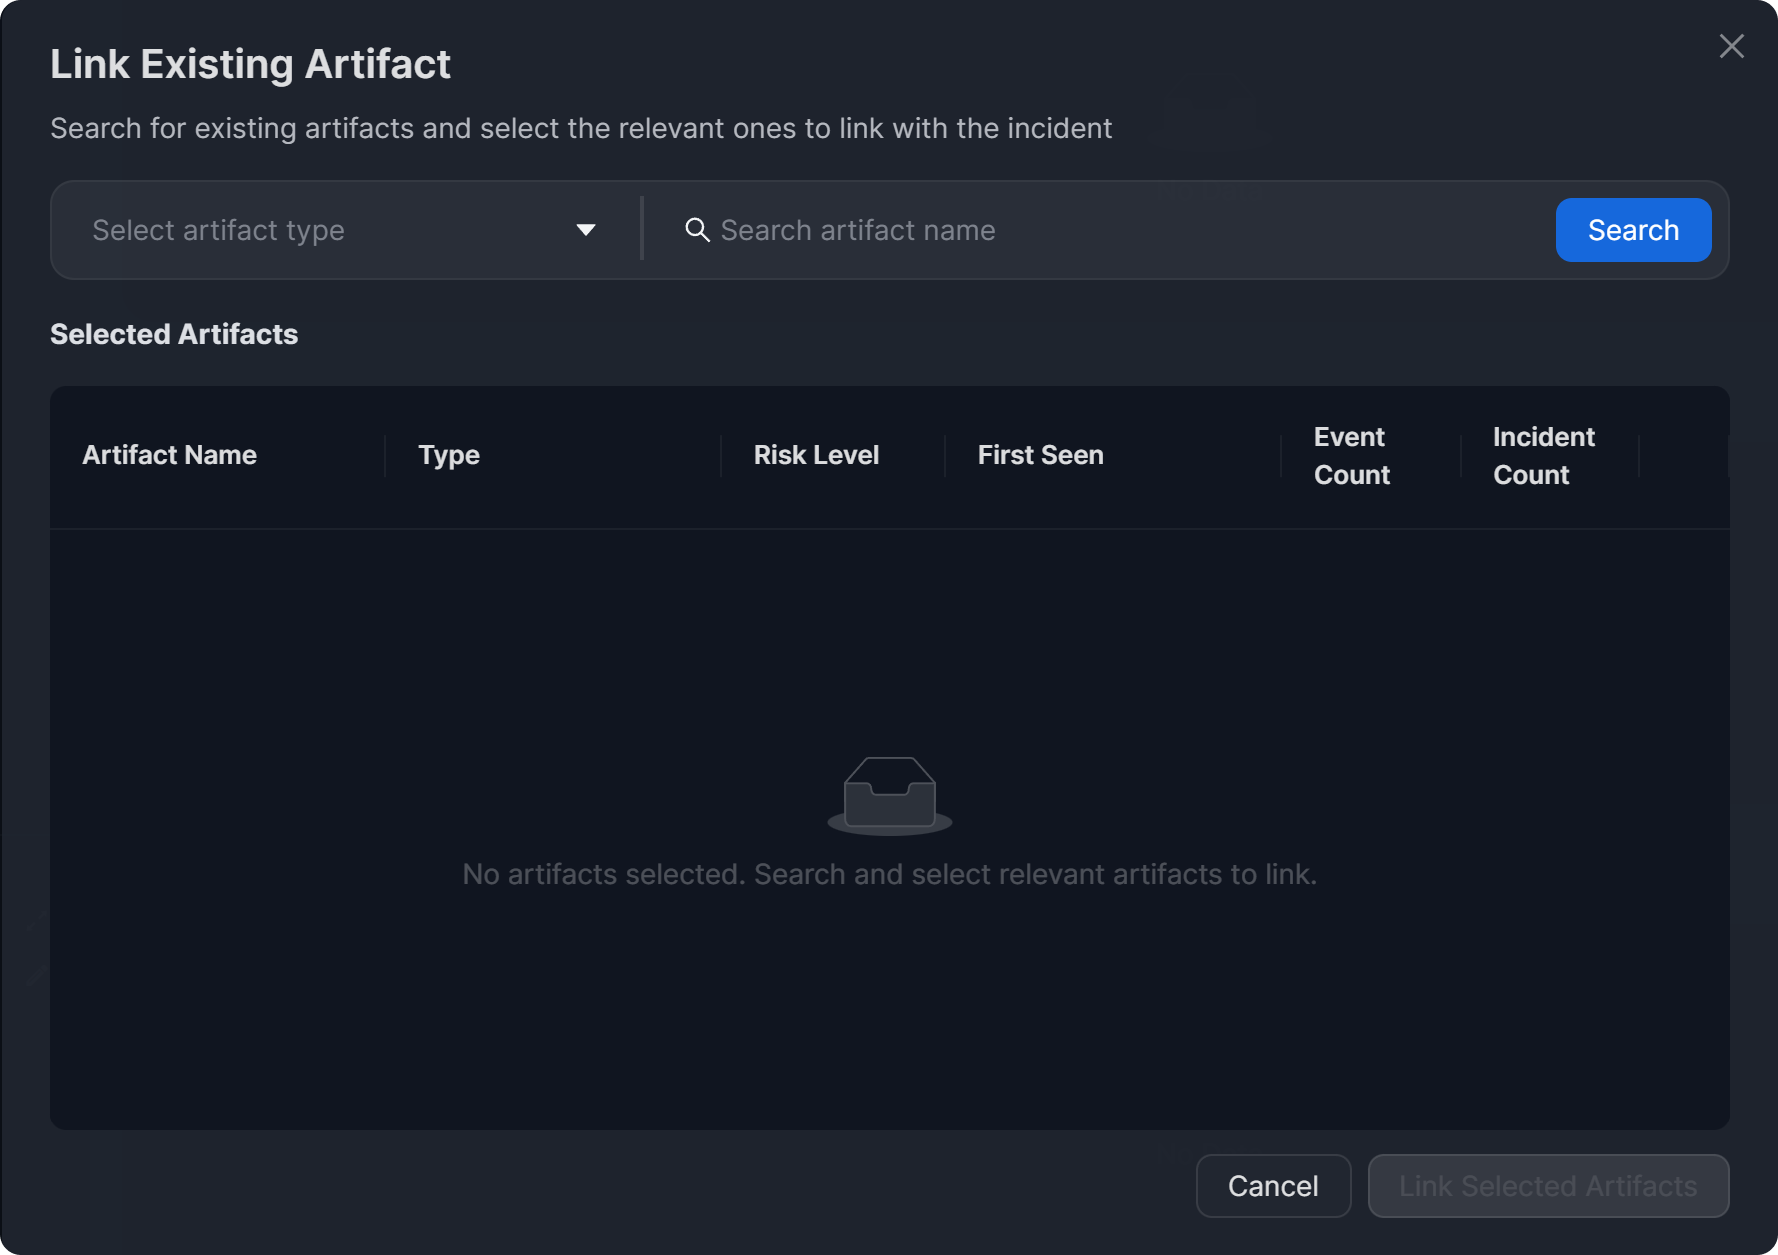
To use this pop-up to search for artifacts to associate with the incident, follow the steps below:
Select an artifact type and search for the artifact by its name.
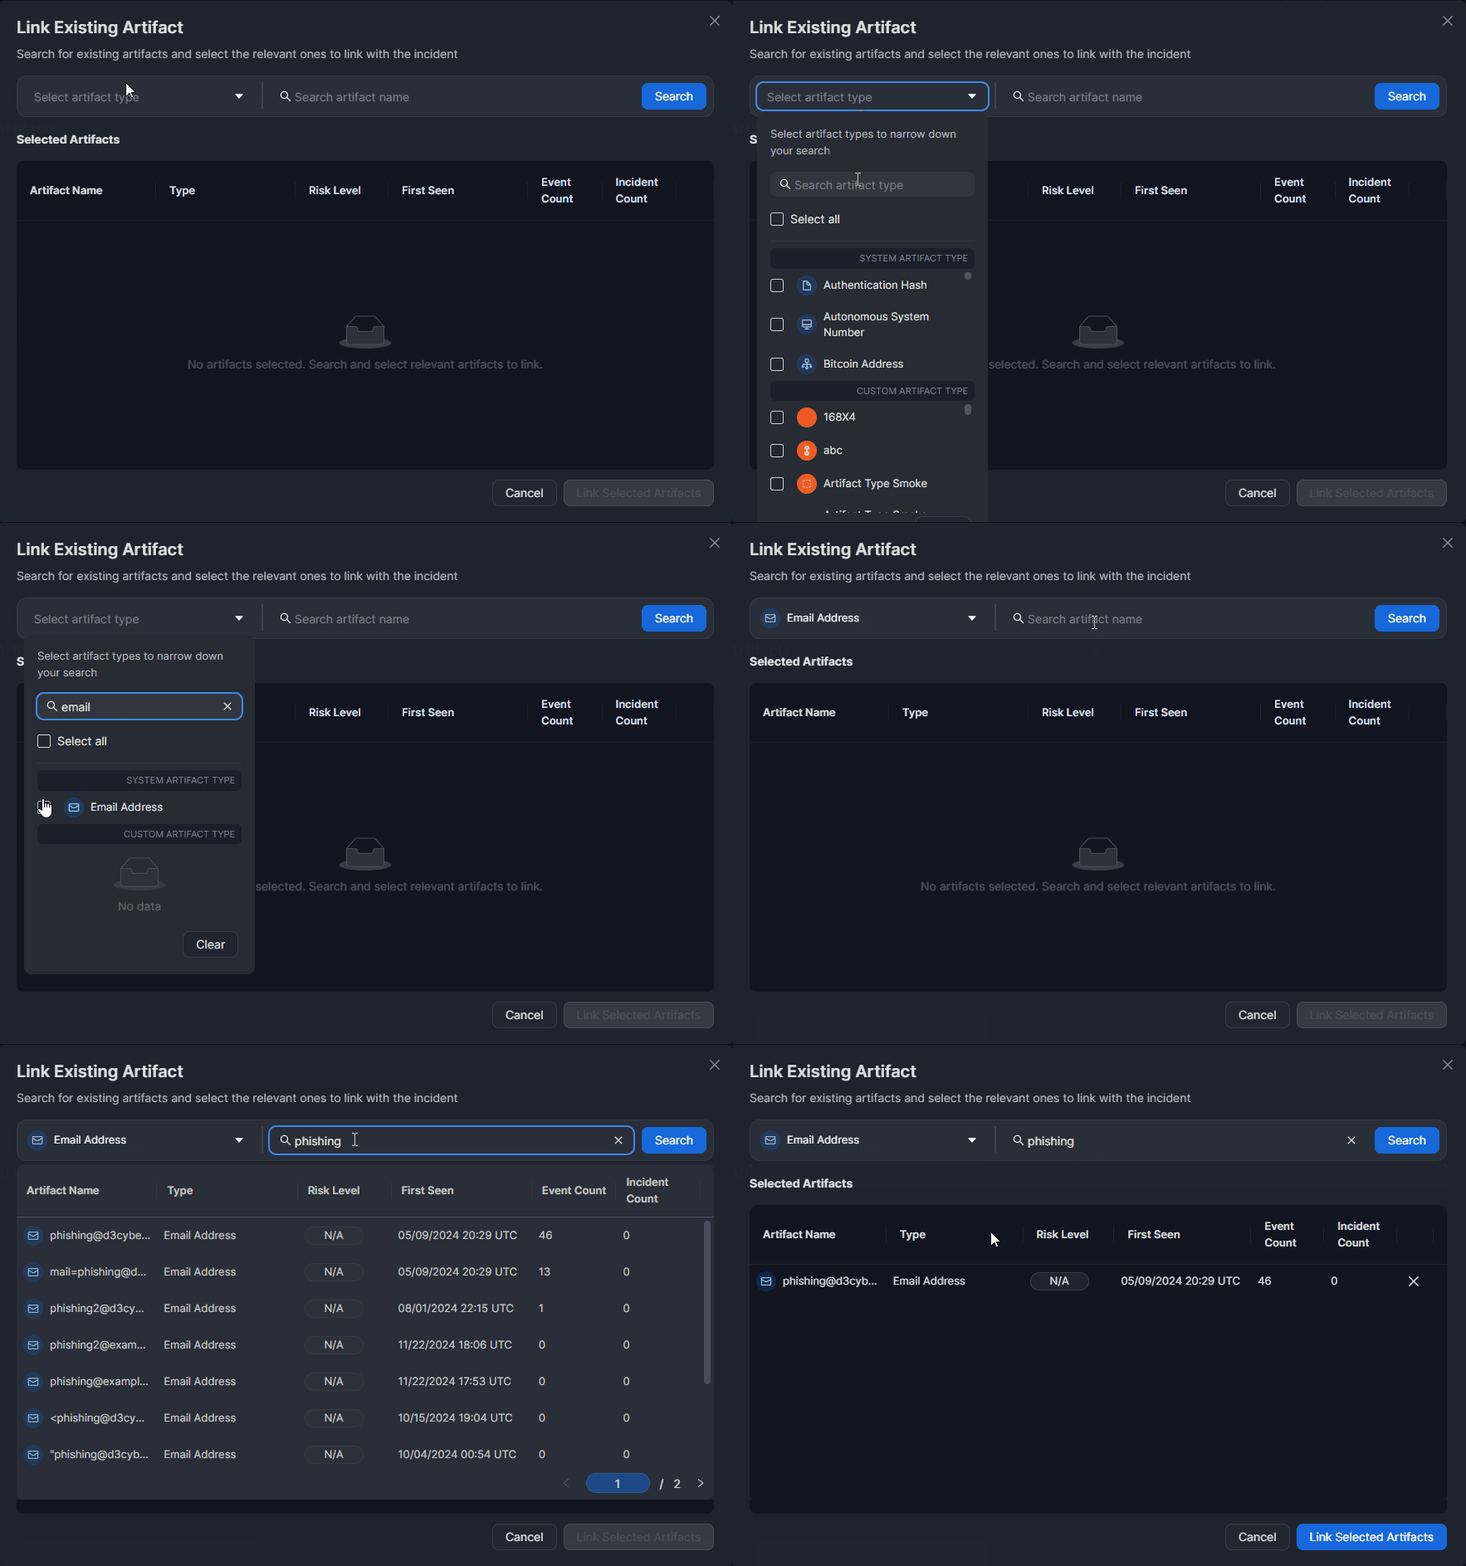
Click on the Link Selected Artifacts button to associate the artifact with the incident.

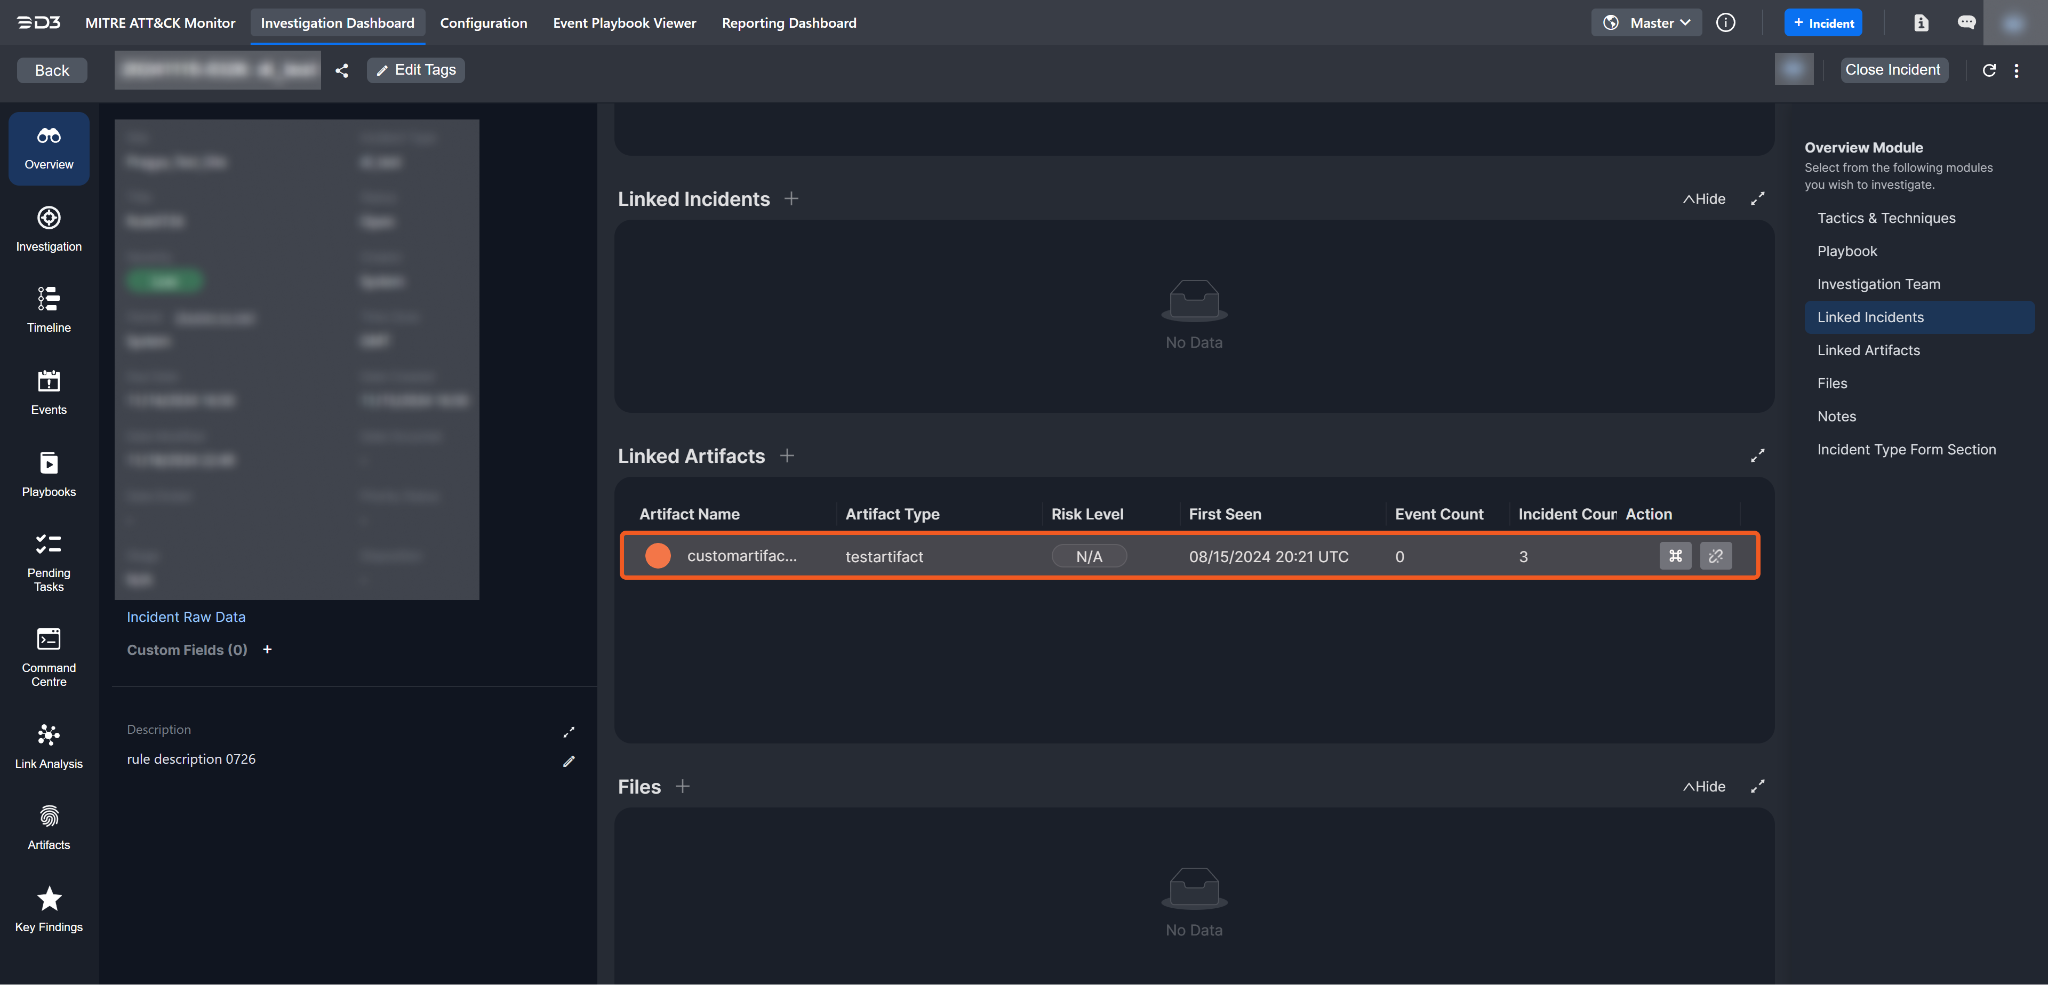
Confirm that the artifact has been linked.
Link from new artifacts
Clicking on the Link from new artifact option will open the New Artifact pop-up. Artifacts can be created in either the Editor View, Raw View, or by batch upload.
Editor View
The editor view provides a more visual interface for adding new artifacts. It allows users to input values manually, select options from dropdown menus, and perform other interactive actions.
%202.png?inst-v=4ee0dc0e-1f9e-456d-b7f9-e8e93f0a3cde)
To create artifacts to associate with the incident in the editor view, follow these steps:
Search for and select an artifact type from the dropdown menu and fill in the field(s).
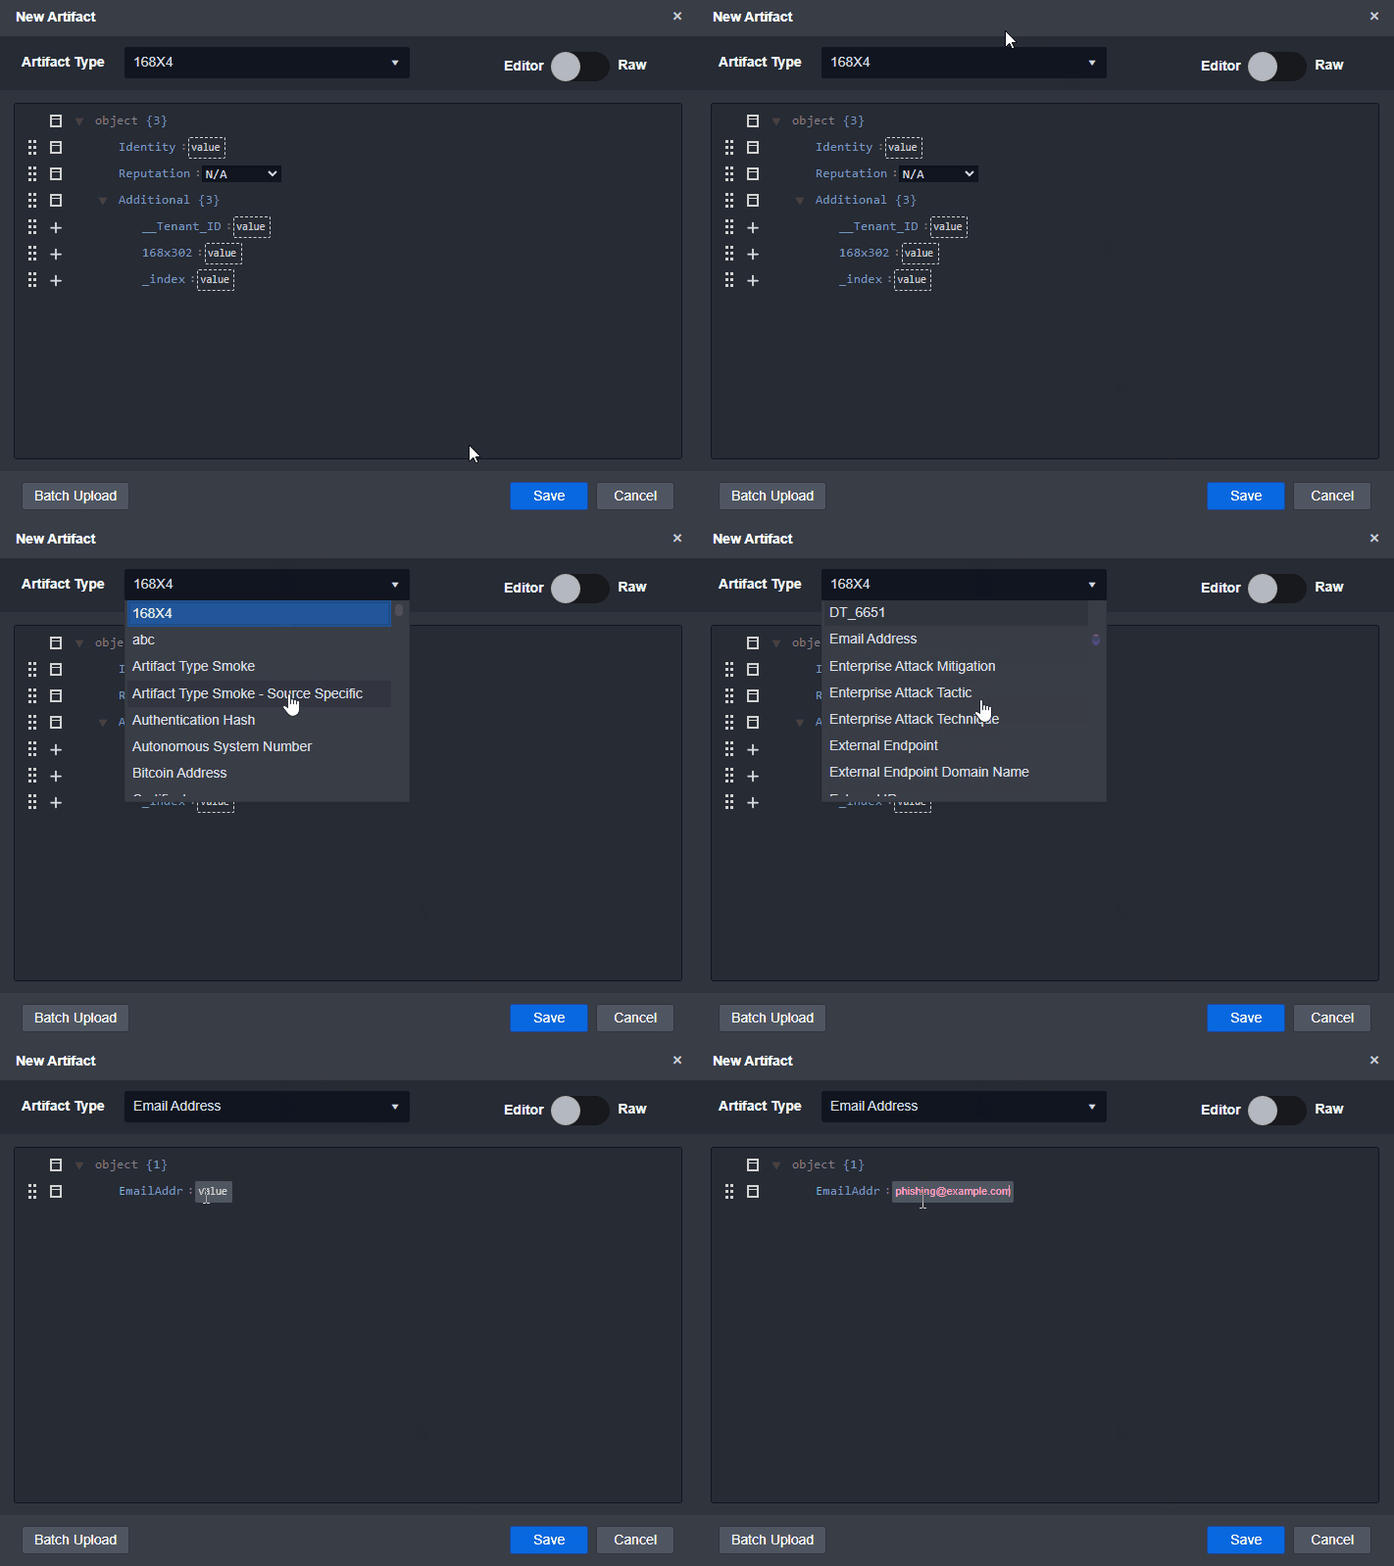
Save the artifact.

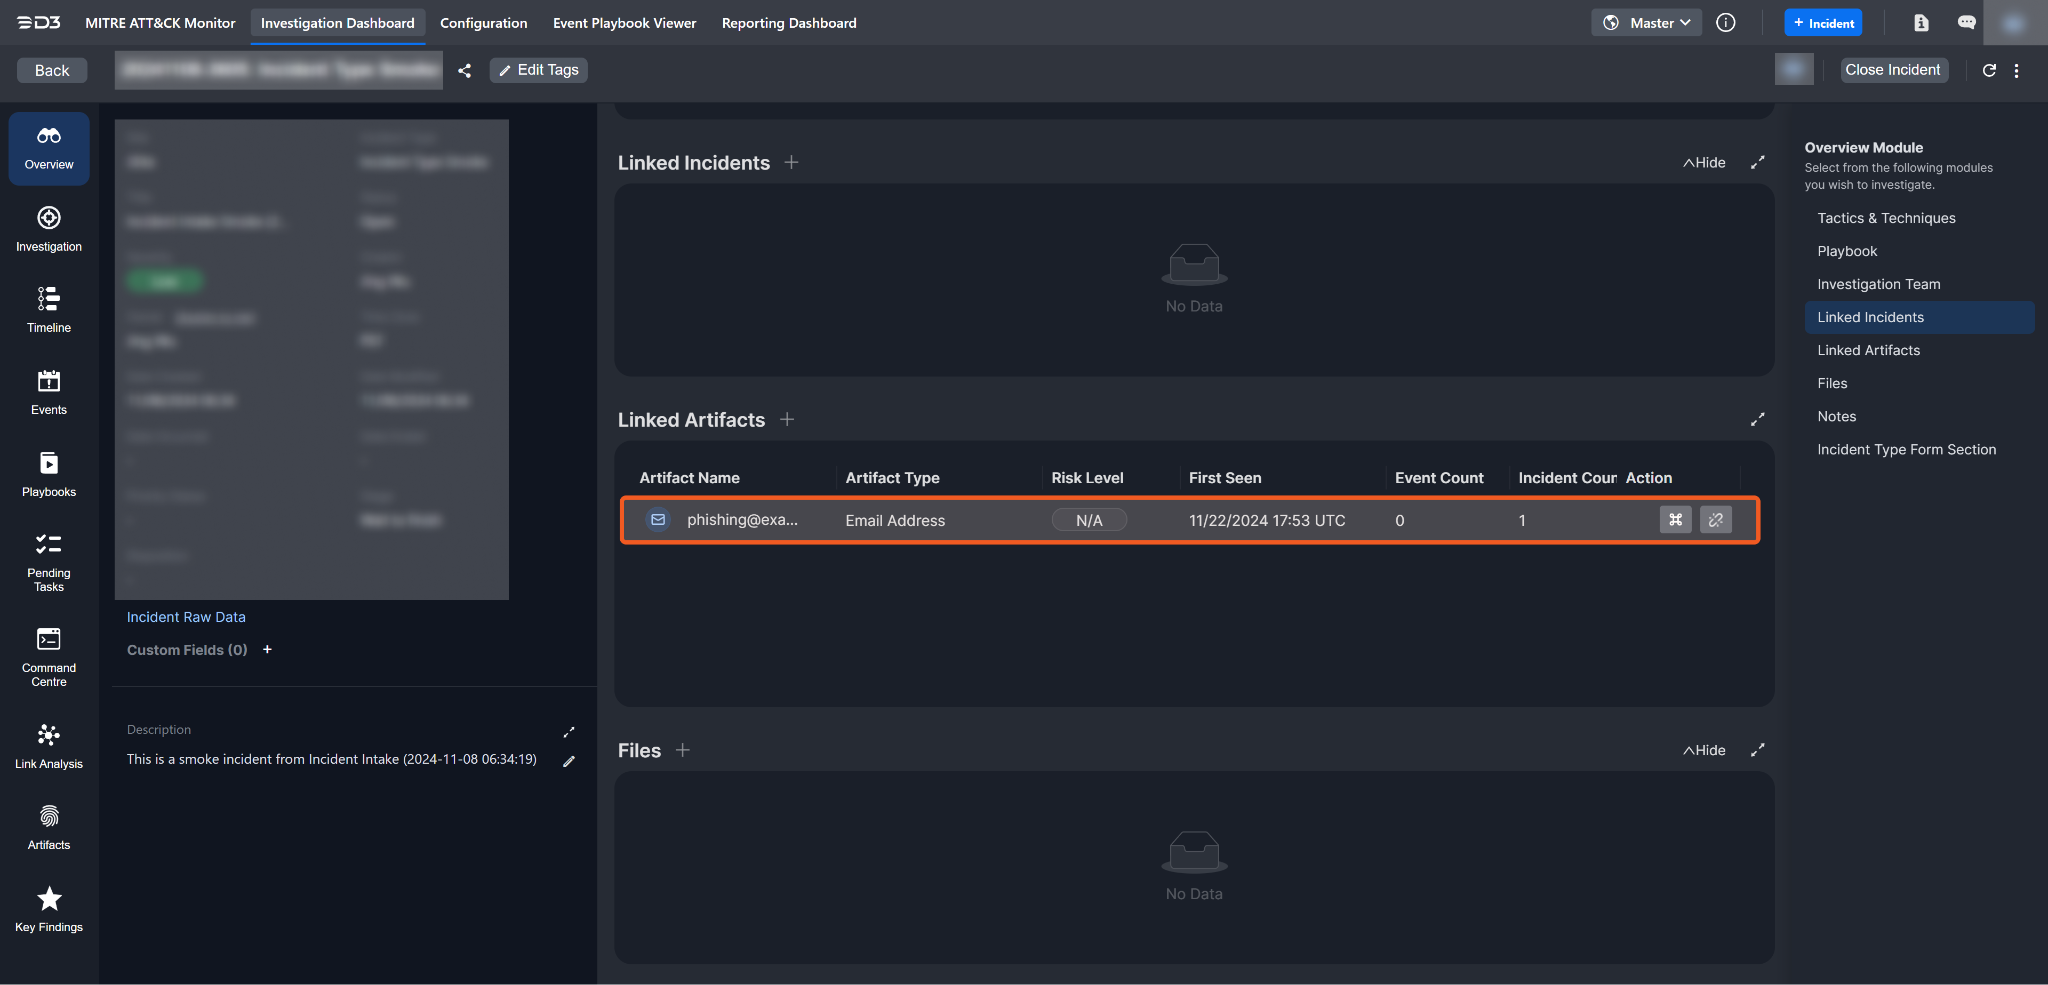
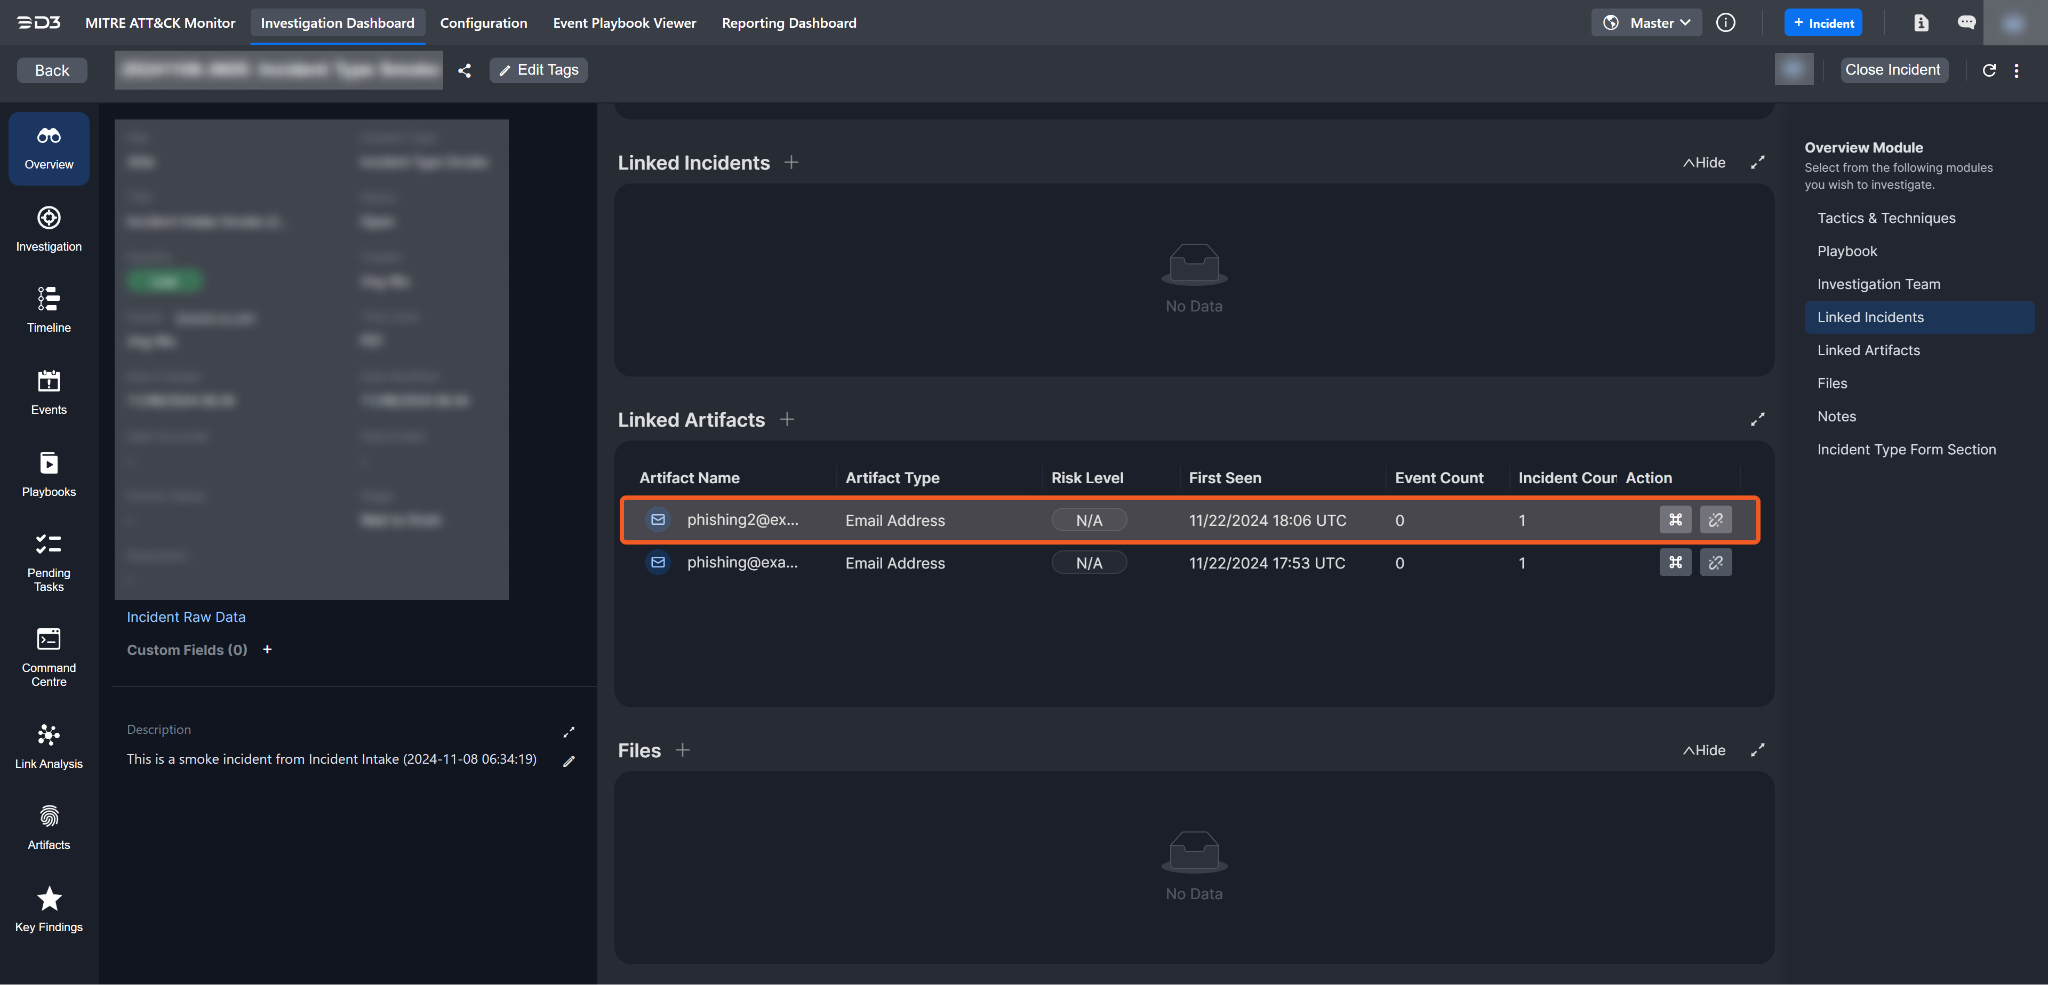
Confirm that the newly created artifact has been linked.
Raw View
The raw view enables users to input data directly in JSON format.
%203.png?inst-v=4ee0dc0e-1f9e-456d-b7f9-e8e93f0a3cde)
To create artifacts to associate with the incident in the editor view, follow these steps:
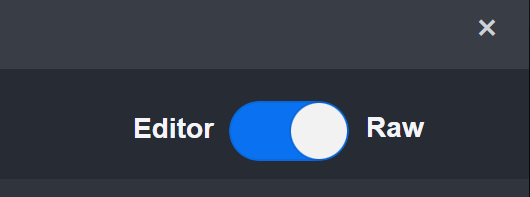
Toggle the raw view, select or search for an artifact type from the dropdown menu, and fill in the field(s).
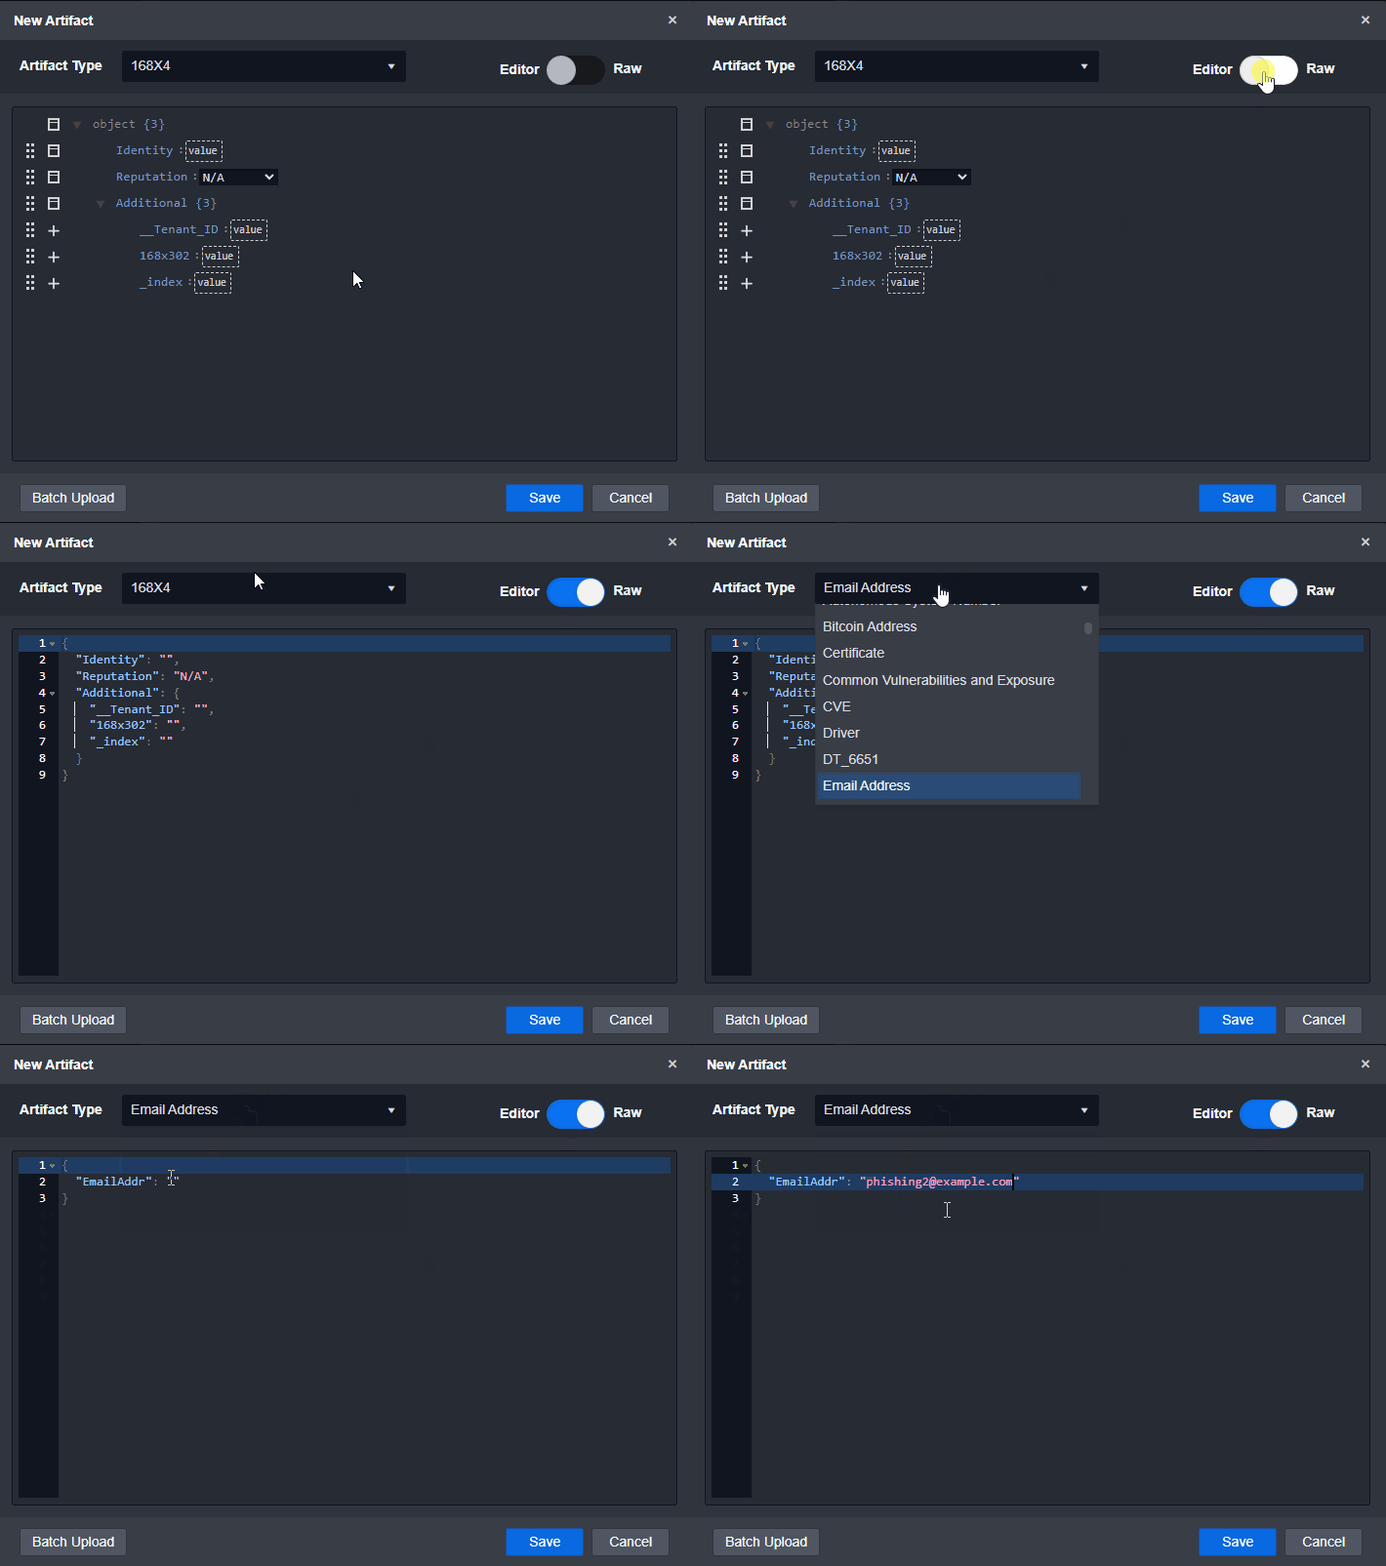
Save the artifact.

Confirm that the newly created artifact has been linked.
Batch Upload
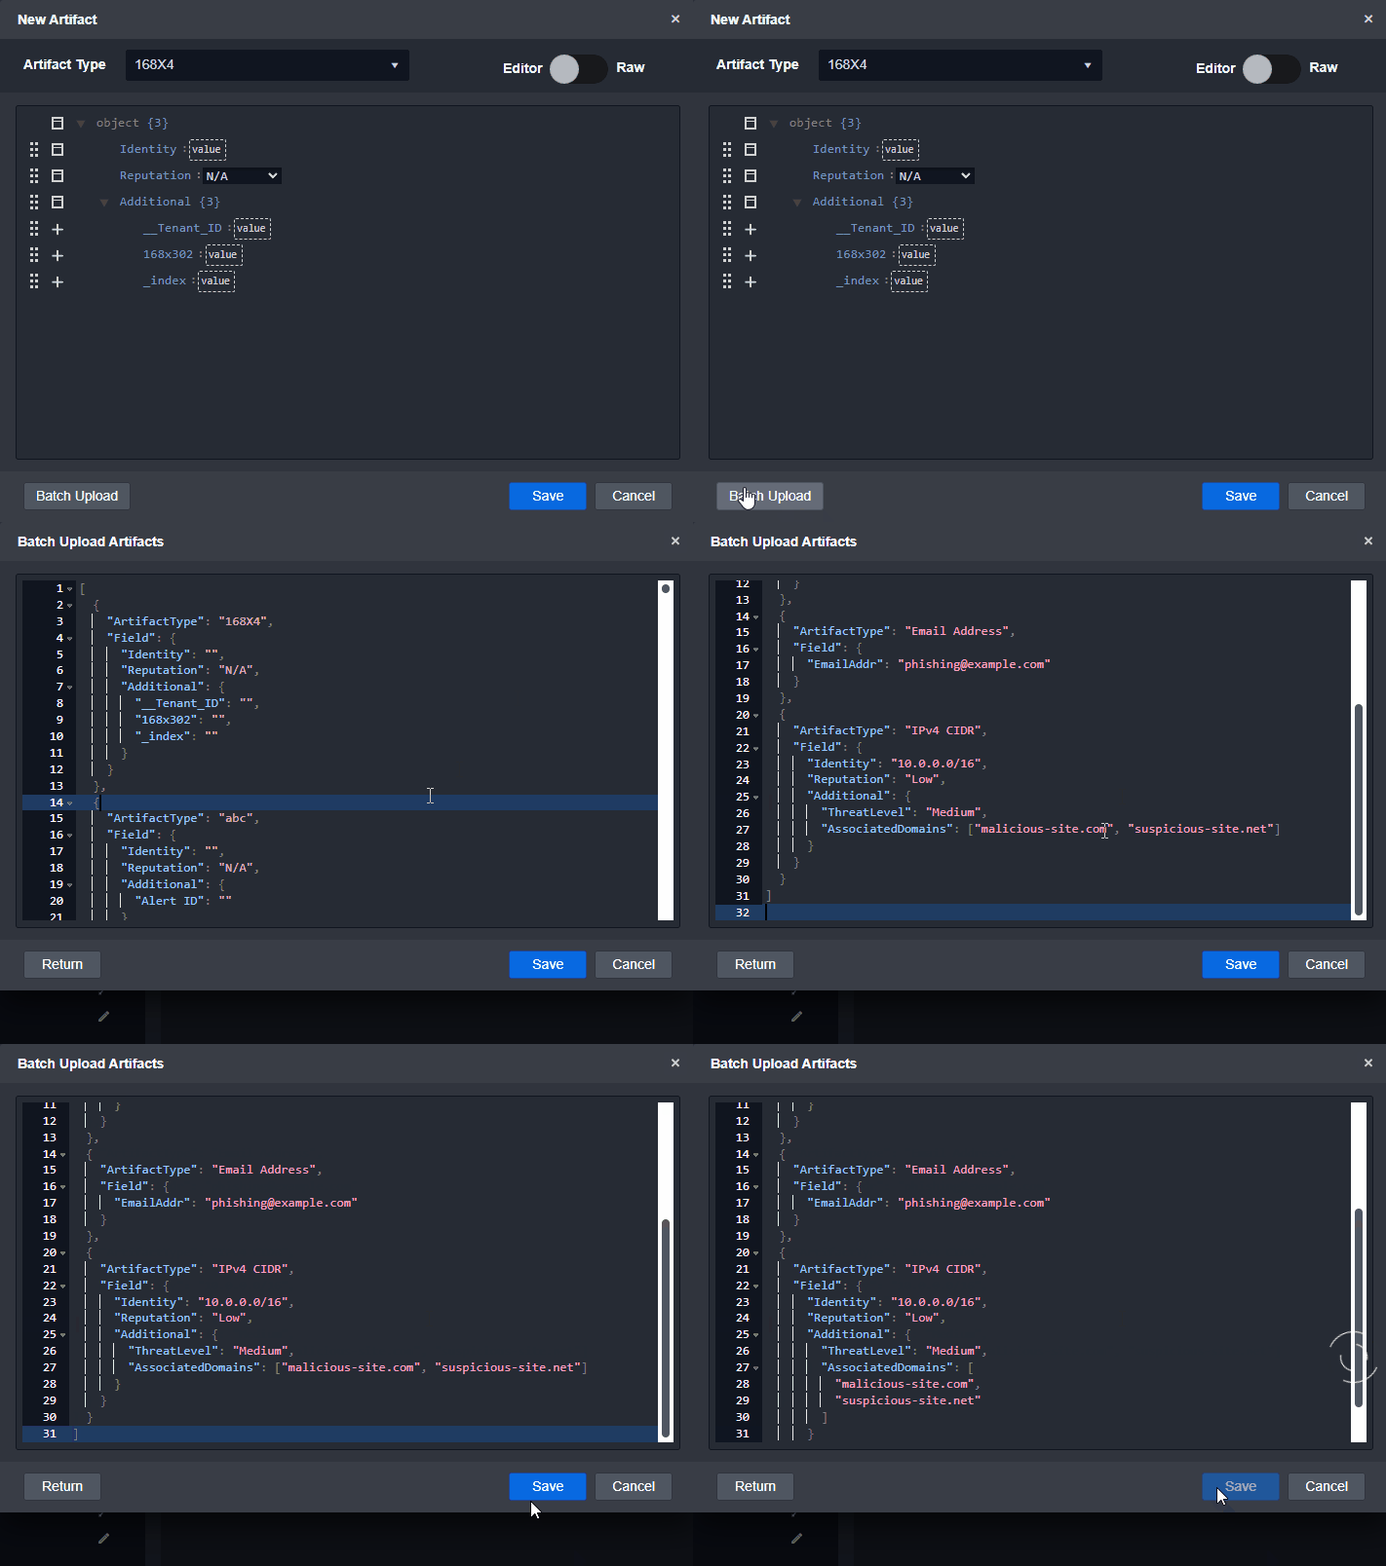
The batch upload feature enables users to add multiple artifacts simultaneously through the JSON editor.
It is recommended that users search for the required fields, copy the default JSON format, and paste it into a separate document (e.g., Word or a text file). Populate the fields with the required values using the specified format, then paste the updated JSON back into the editor for submission.
This approach ensures artifacts are correctly created and linked, minimizing errors and reducing time spent troubleshooting.
To batch upload artifacts, follow these steps:
Toggle the raw view.
Click on the Batch Upload button, replace the default data with the artifact data to be uploaded, and save the batch upload to complete the process.
Confirm that all artifacts have been uploaded.
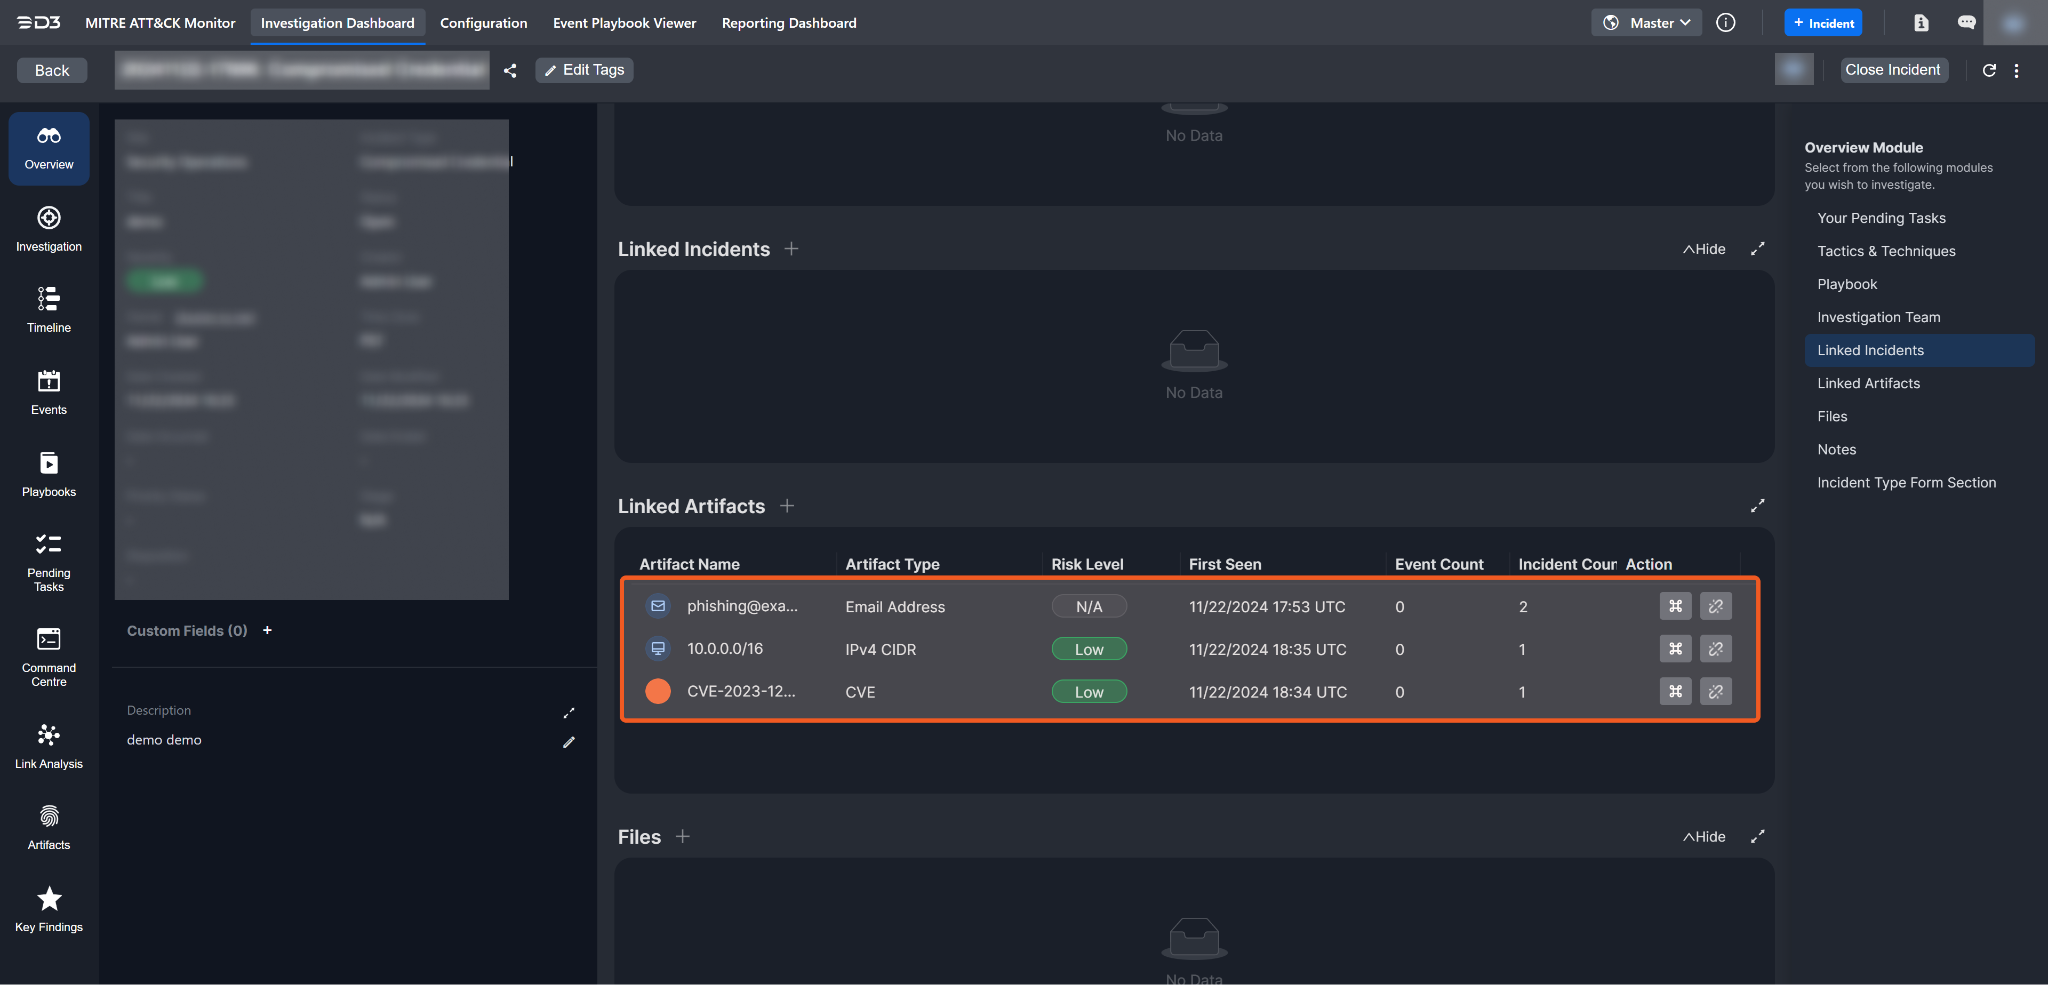
Execute a Command
Users can directly execute commands on linked artifacts using the Execute Command button by following the steps below:
Click on the Execute Command button.

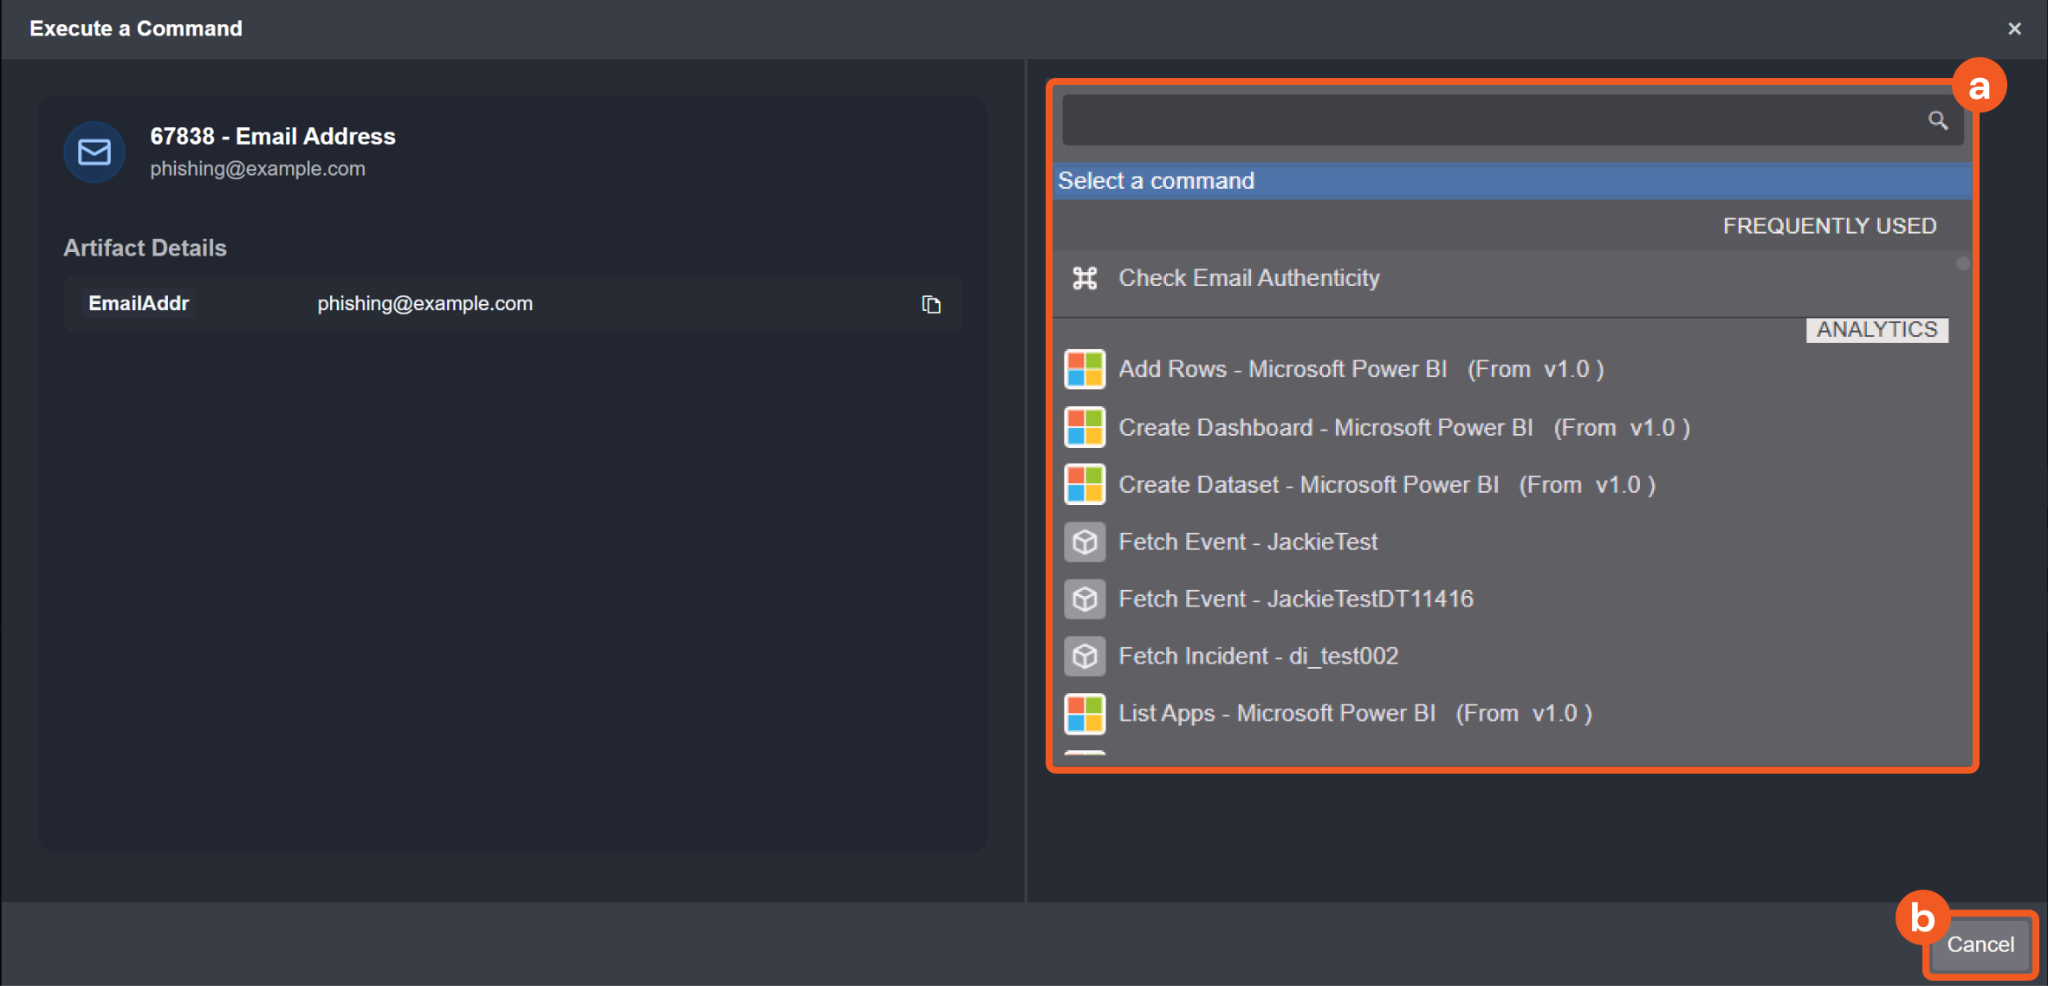
Select a command from the dropdown menu.
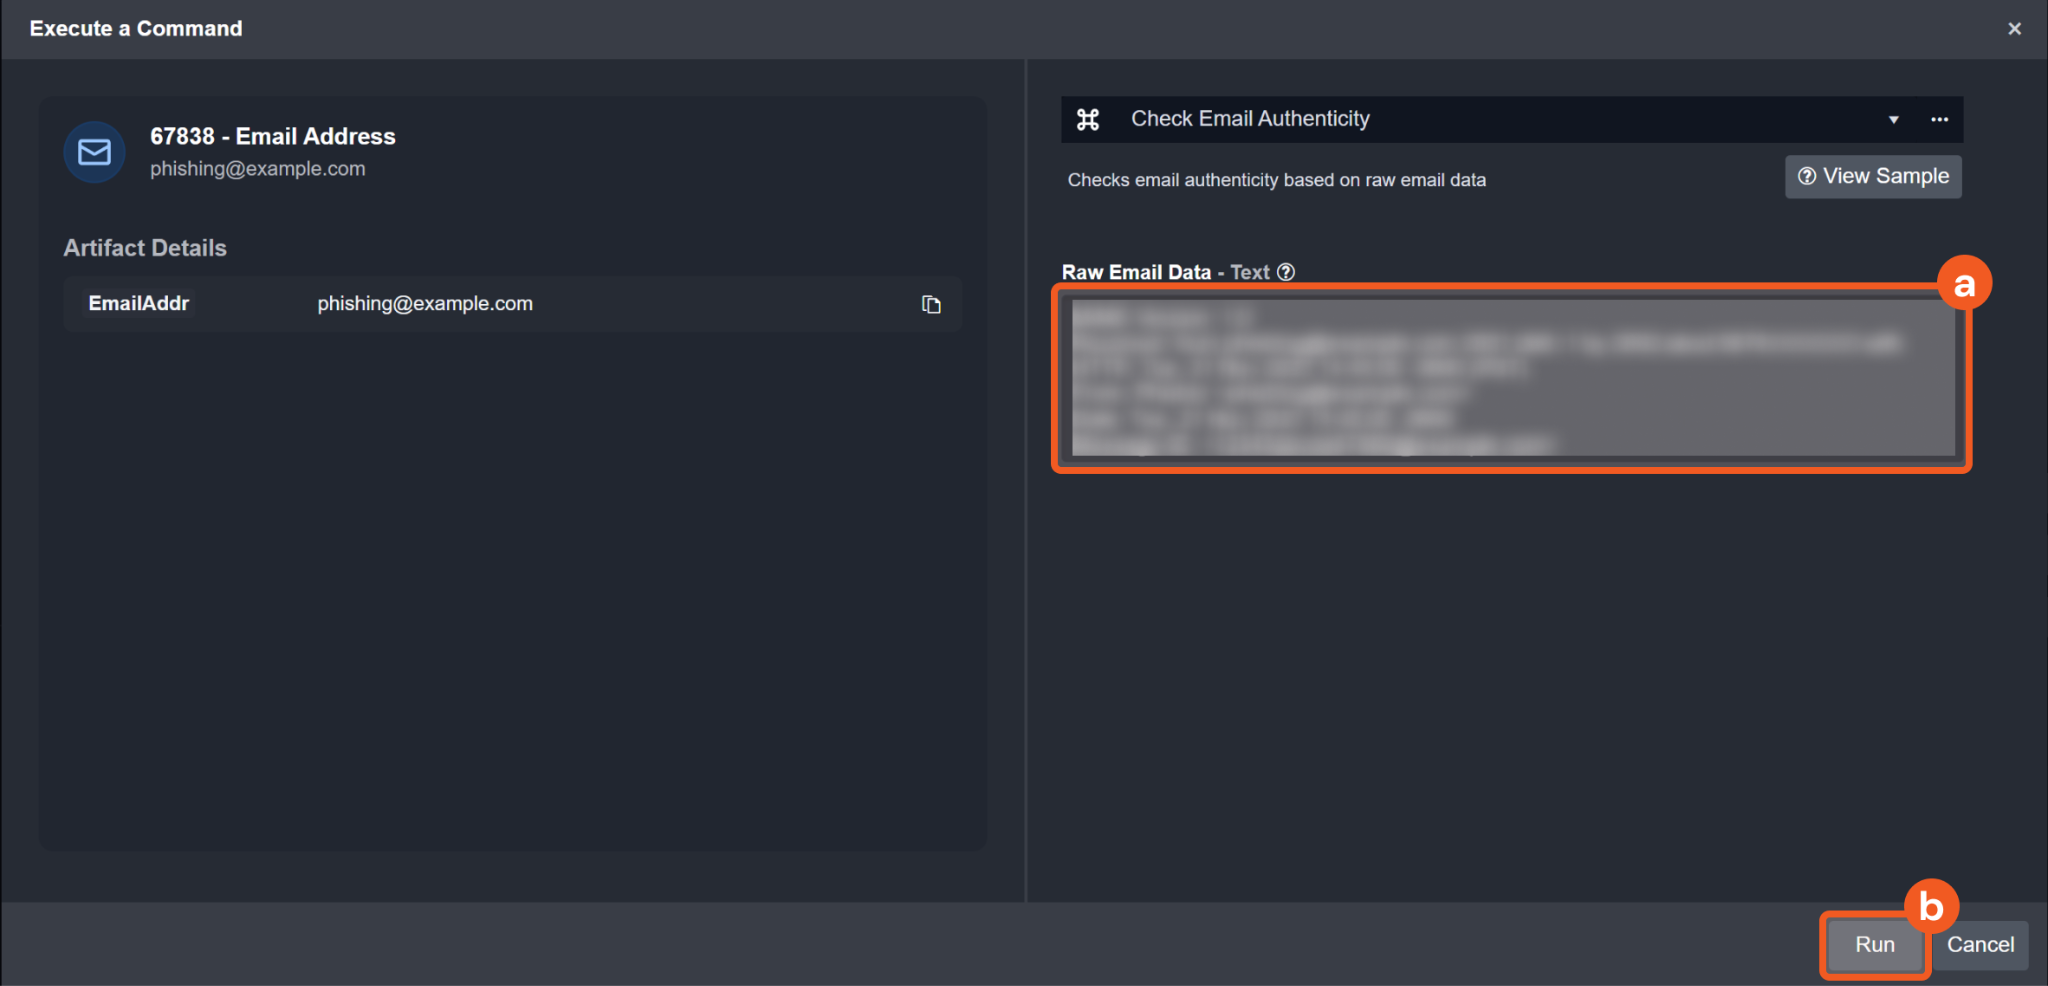
Paste in the raw data and run the command.
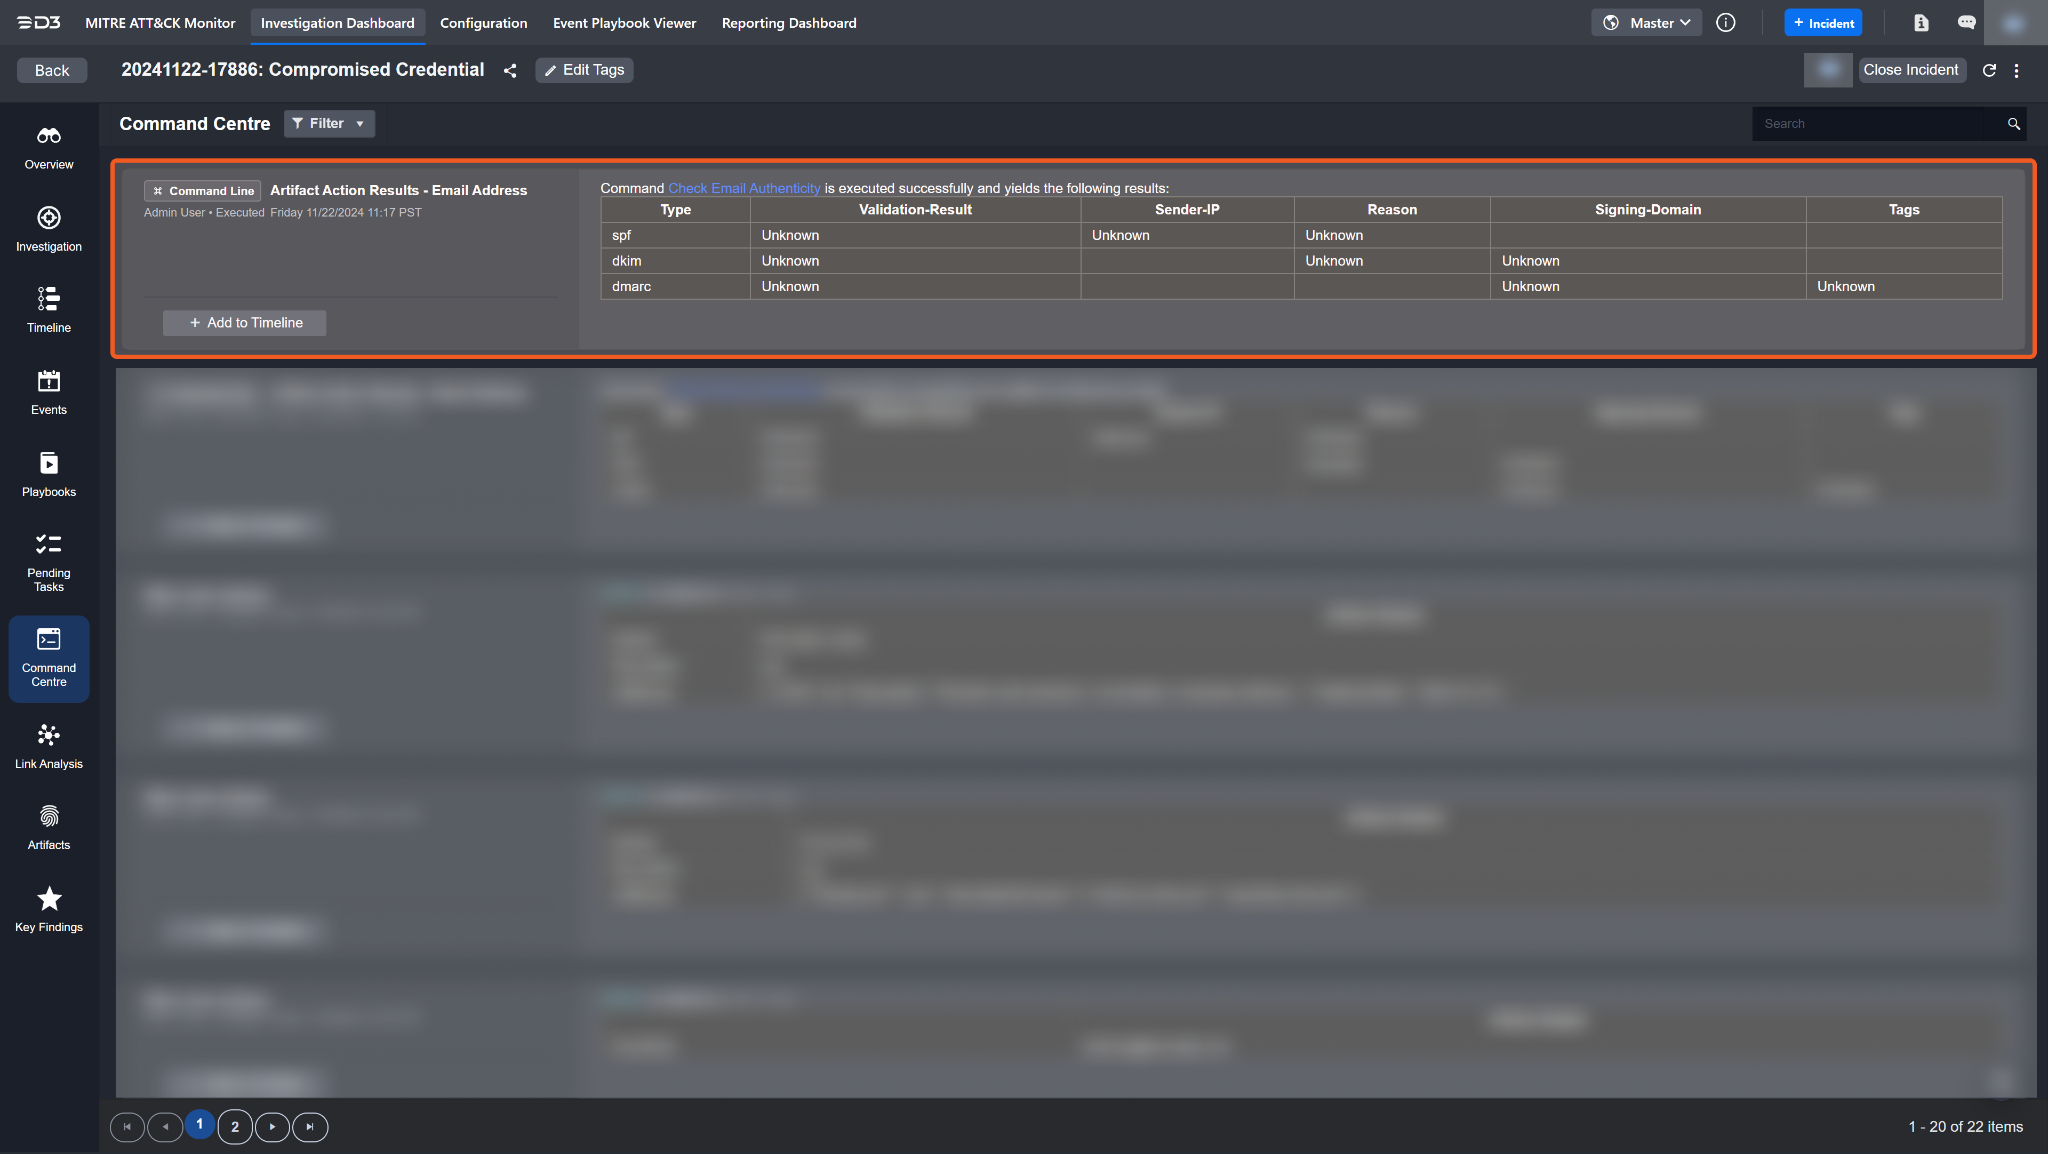
If the command ran successfully, users will be taken to the Command Centre tab. The execution results are displayed at the top.
Unlink an Artifact
Unlinking an artifact removes its association with the incident but does not delete the artifact itself.

