In-Playbook Data Source Configuration
LAST UPDATED: MAR 21, 2025
At the beginning of every preprocessing playbook is a Data Source node.
-20241220-010842.png?inst-v=bfb1ec42-c45a-425e-9e97-43428b3365fd)
The Data Source node defines the source of incoming data for the preprocessing playbook, which can originate from an integration or through a manual upload. Click on the  button to open the data source creation pop-up window.

%201-20241223-204138.png?inst-v=bfb1ec42-c45a-425e-9e97-43428b3365fd)
Fetch
Select the Fetch data intake option, then click on the Next button.
-20241223-204728.png?inst-v=bfb1ec42-c45a-425e-9e97-43428b3365fd)
Locate an integration by using the search bar or scrolling through the list, then click on the Next button.
-20250103-192423.png?inst-v=bfb1ec42-c45a-425e-9e97-43428b3365fd)
Select the site that will be allowed to use the integration connection, then click on the Next button.
-20250103-192634.png?inst-v=bfb1ec42-c45a-425e-9e97-43428b3365fd)
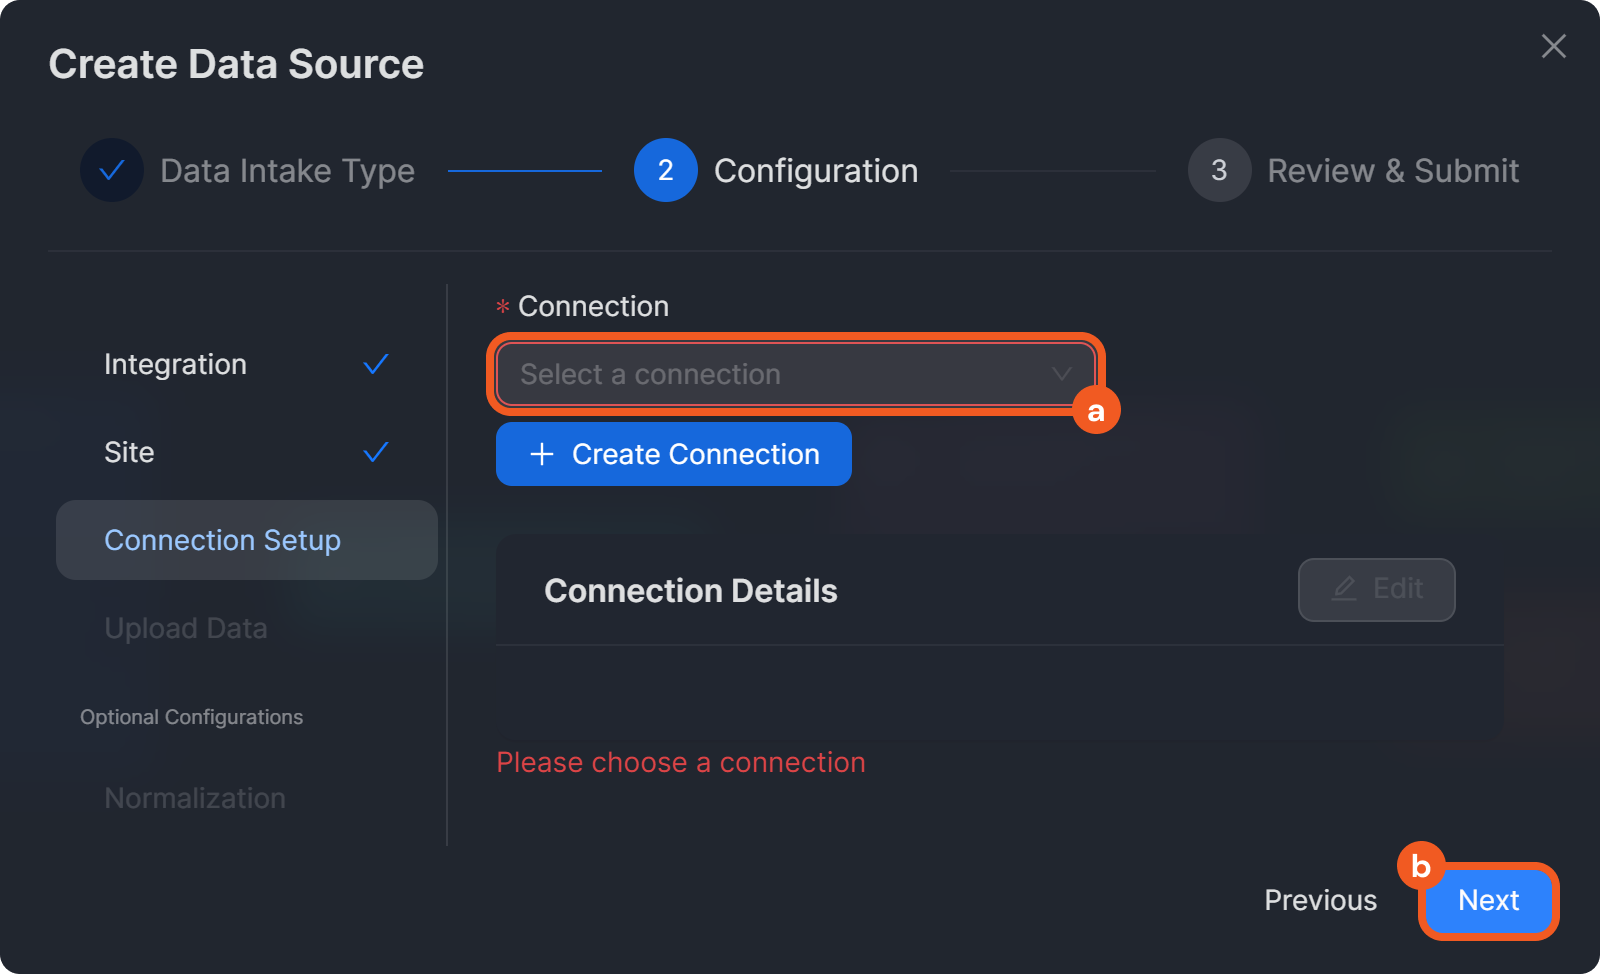
Click on the connection field, then select a connection.
-20250103-202724.png?inst-v=bfb1ec42-c45a-425e-9e97-43428b3365fd)
Click on the Next button.
Input the integration-specific required Fetch Event command parameters, then click on the Next button.
-20250103-194033.png?inst-v=bfb1ec42-c45a-425e-9e97-43428b3365fd)
Review the event source to ensure that all required fields for business needs are mapped, then click on the Review button.
-20250103-202947.png?inst-v=bfb1ec42-c45a-425e-9e97-43428b3365fd)
Review all entered information, then click on the Submit button.
%201-20241223-194828.png?inst-v=bfb1ec42-c45a-425e-9e97-43428b3365fd)
Click on View All to see all submitted data sources.
-20241223-203933.png?inst-v=bfb1ec42-c45a-425e-9e97-43428b3365fd)
Click on Edit to configure changes.
-20250103-195200.png?inst-v=bfb1ec42-c45a-425e-9e97-43428b3365fd)
Manual Upload
Select the Manual Upload data intake option, then click on the Next button.
-20241223-204933.png?inst-v=bfb1ec42-c45a-425e-9e97-43428b3365fd)
Select an integration, then click on the Next button.
-20250103-201221.png?inst-v=bfb1ec42-c45a-425e-9e97-43428b3365fd)
Select a site, then click on the Next button.
-20250103-201336.png?inst-v=bfb1ec42-c45a-425e-9e97-43428b3365fd)
Select a connection, then click on the Next button.

Enter JSON data, then click on the Next button.
-20250103-202013.png?inst-v=bfb1ec42-c45a-425e-9e97-43428b3365fd)
Review the event source to ensure that all required fields for business needs are mapped, then click on the Review button.
-20250103-211630.png?inst-v=bfb1ec42-c45a-425e-9e97-43428b3365fd)
Review all entered information, then click on the Submit button.
-20250103-191108.png?inst-v=bfb1ec42-c45a-425e-9e97-43428b3365fd)
Click on the View All hyperlink on the Data Source node.
-20250103-202519.png?inst-v=bfb1ec42-c45a-425e-9e97-43428b3365fd)
Click on Edit hyperlink to configure changes.
-20250103-202437.png?inst-v=bfb1ec42-c45a-425e-9e97-43428b3365fd)

-20241220-174154.png?inst-v=bfb1ec42-c45a-425e-9e97-43428b3365fd)
-20241220-034953.png?inst-v=bfb1ec42-c45a-425e-9e97-43428b3365fd)
-20250103-203229.png?inst-v=bfb1ec42-c45a-425e-9e97-43428b3365fd)
-20241223-191739.png?inst-v=bfb1ec42-c45a-425e-9e97-43428b3365fd)