Unwind tasks split a JSON array into individual objects, each containing one element from the array along with any root-level fields preserved. This results in a new object per deconstructed array item.
Understanding the Unwind Task
The Unwind task type can support various data processing scenarios. Common use cases include the following:
Allowing each item in an JSON array to be processed independently by downstream tasks.
Enabling conditional logic to evaluate each array element individually, allowing multiple branches to match rather than stopping at the first true condition.
Creating structured reports in which each array element produces a distinct row or entry (e.g., an Excel report)
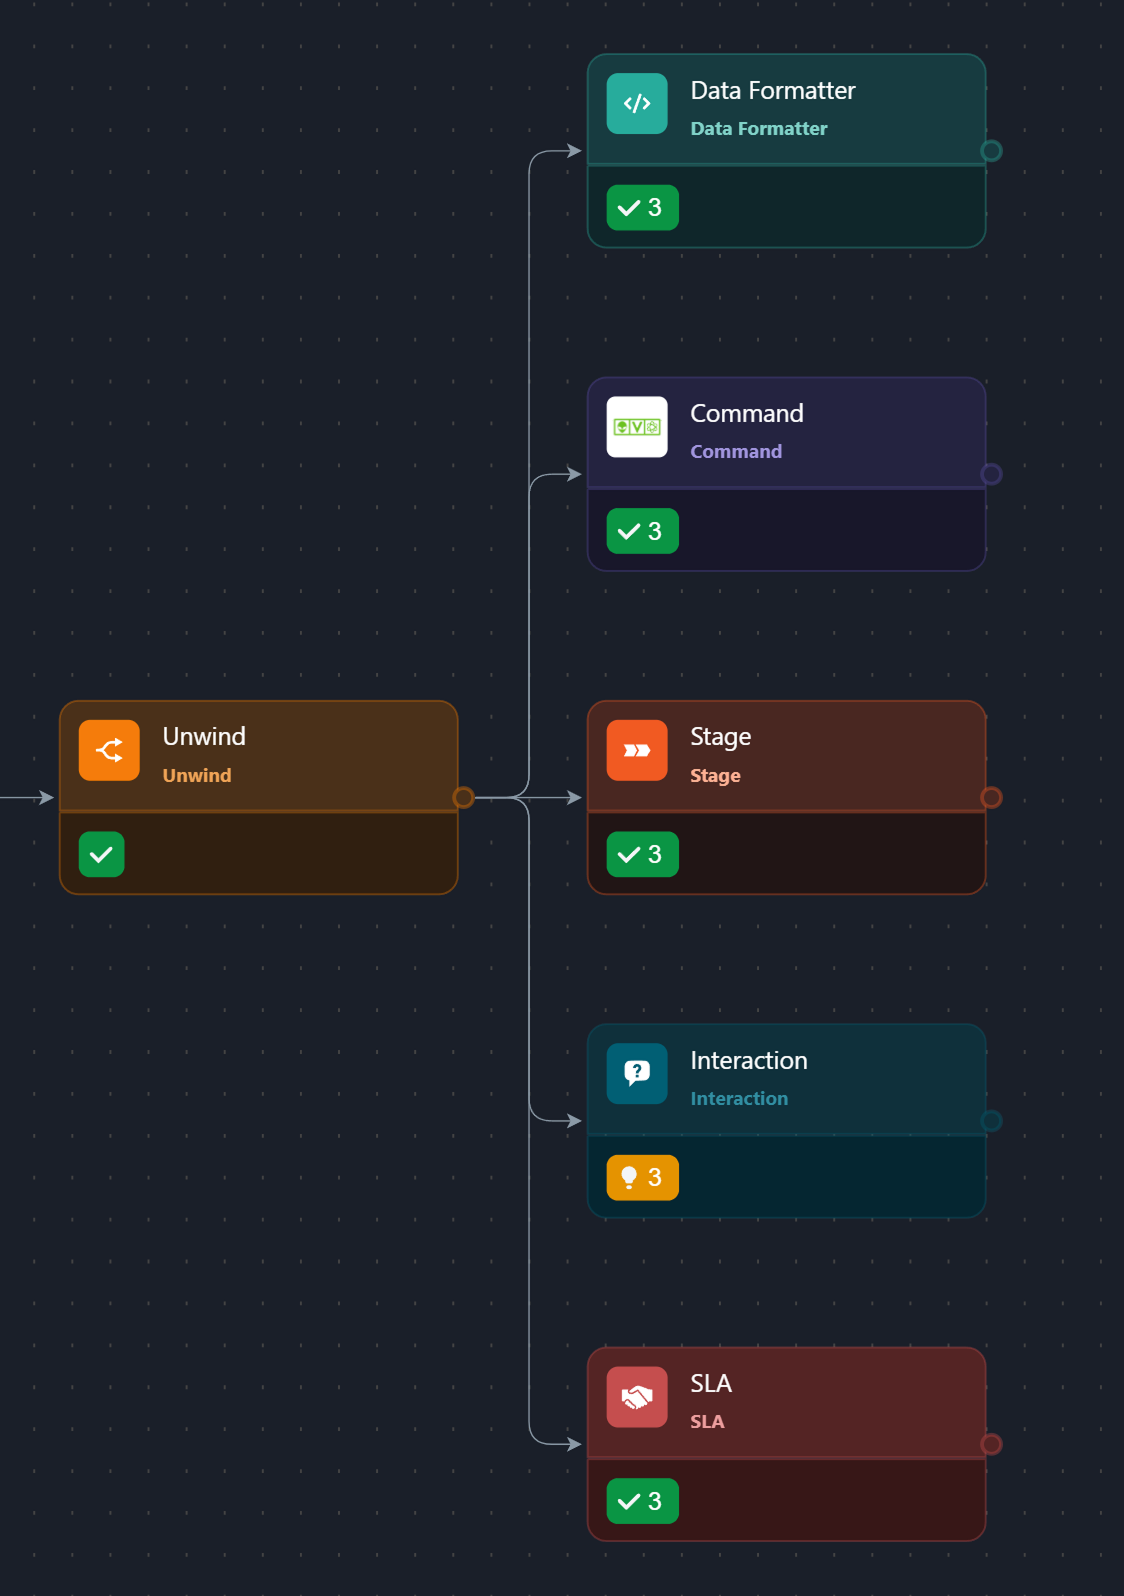
If the Unwind task executes successfully, all downstream tasks will run n times, where n is the number of items deconstructed by the Unwind task.
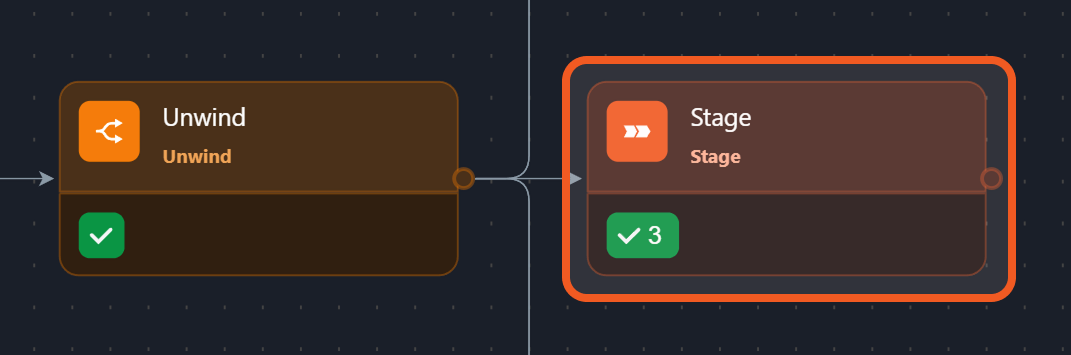
The Stage and Stage 2 tasks executed 3 times as they are downstream of the Unwind task, which unwound three objects from an array.
Using the Unwind Task
There are two input parameters available for the Unwind task.
JSON Data: The JSON object to be processed. This can be a root-level array or an object that contains at least one array.
JSON Path of Array Field (Optional): The path to the specific array within the JSON object (provided in JSON Data) to be deconstructed.
Specifying the JSON Data
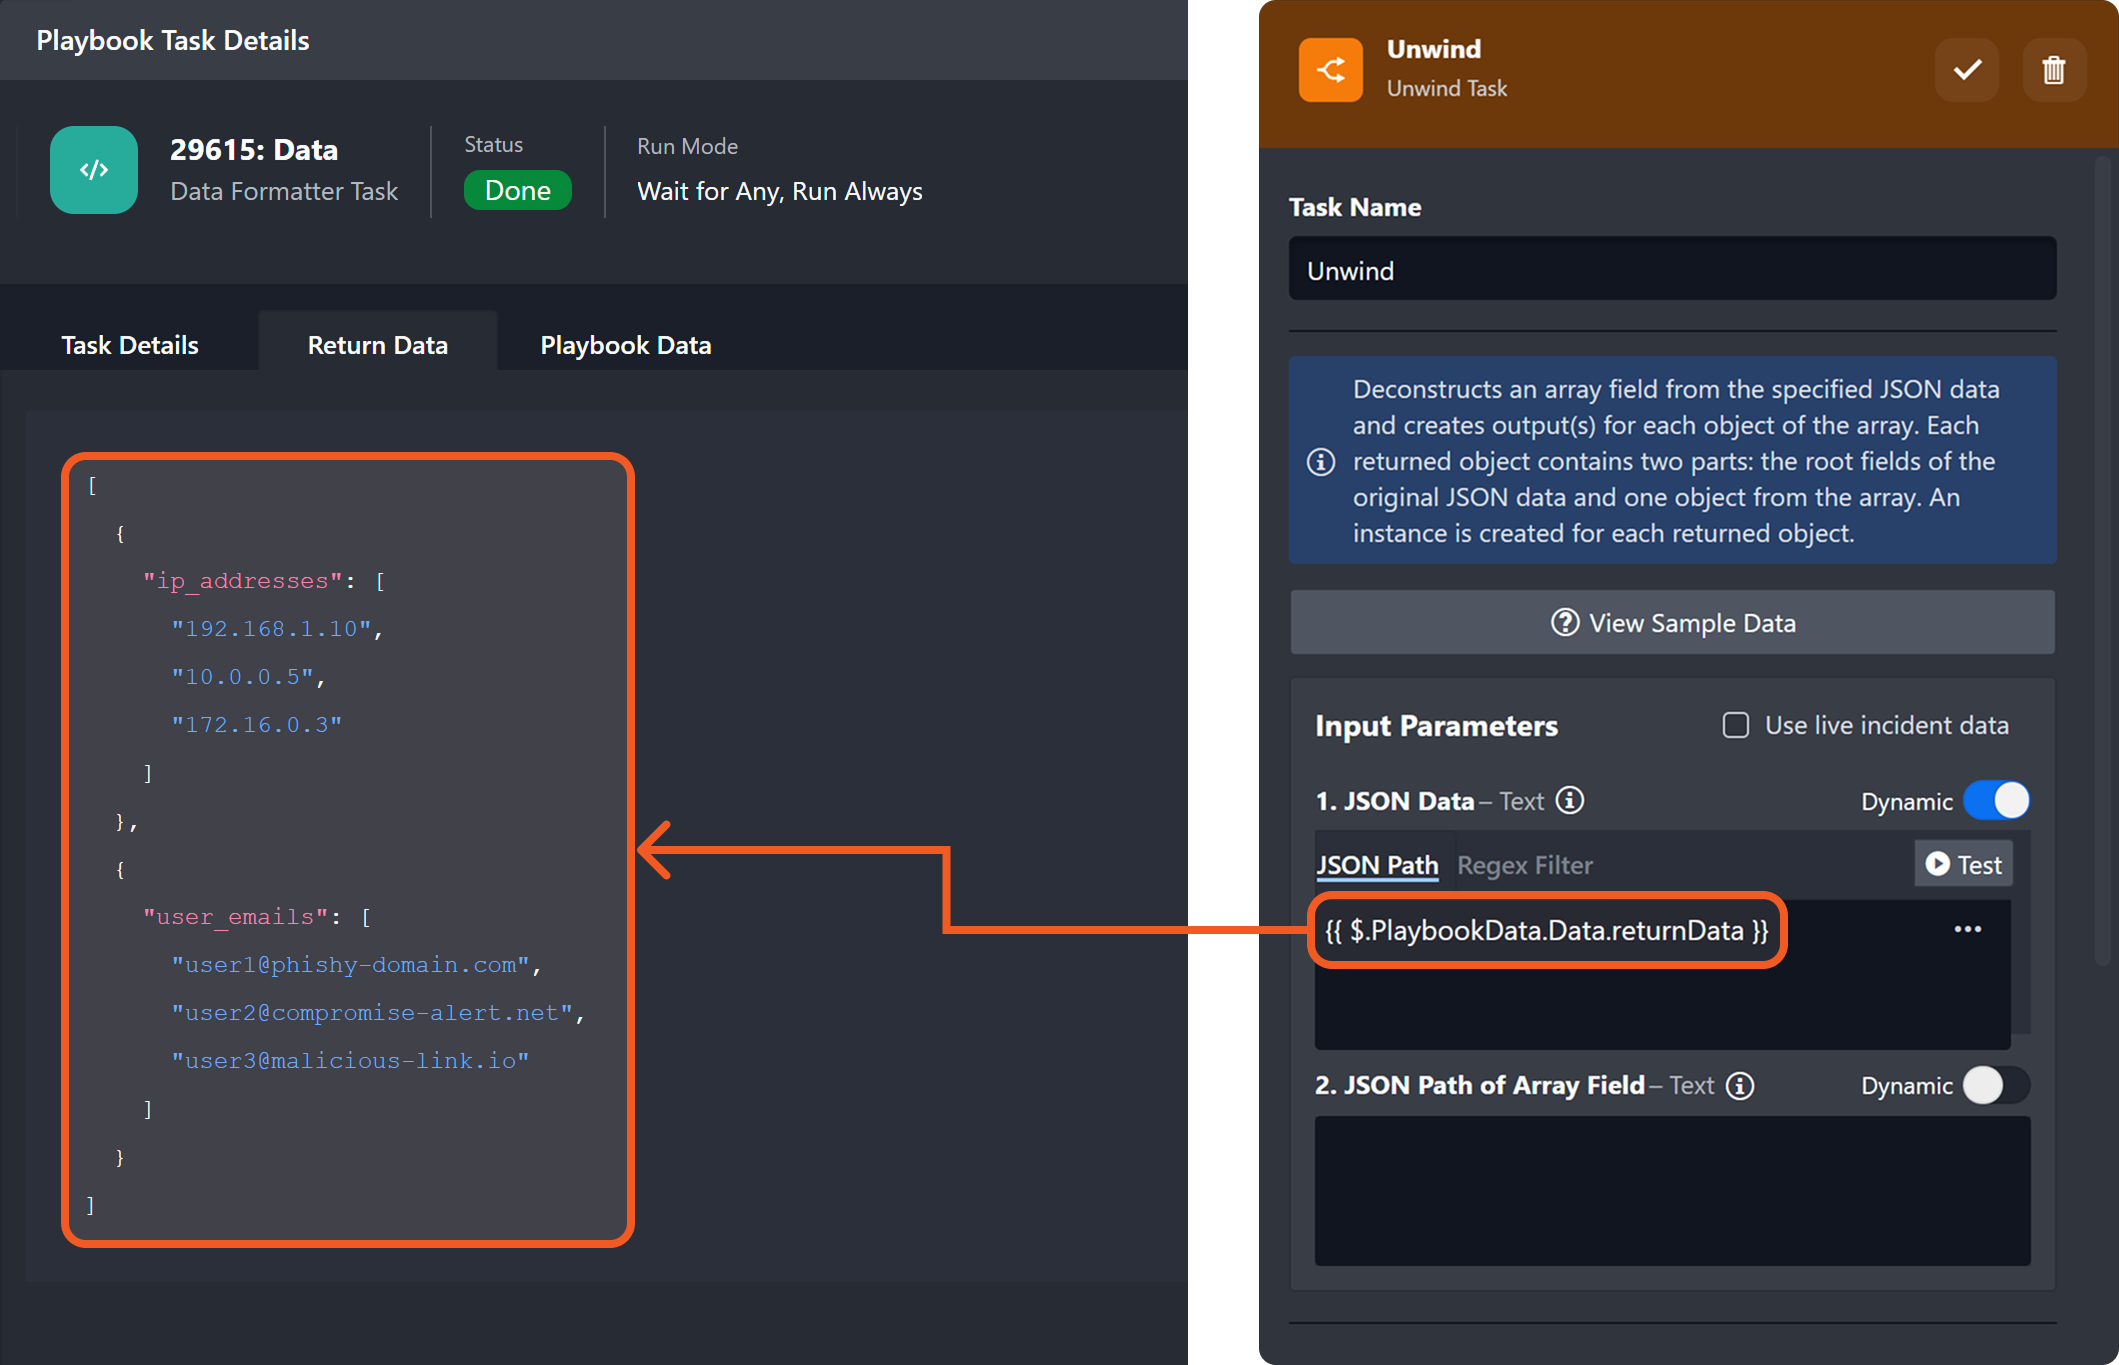
The first step in using the Unwind task is to identify the JSON Data to deconstruct. The input value must contain at least one array. In the example below, the JSON Data parameter references the output from a task named Data, which returns an array at the root level.
This directs the Unwind task to deconstruct the root-level array, which contains two objects.
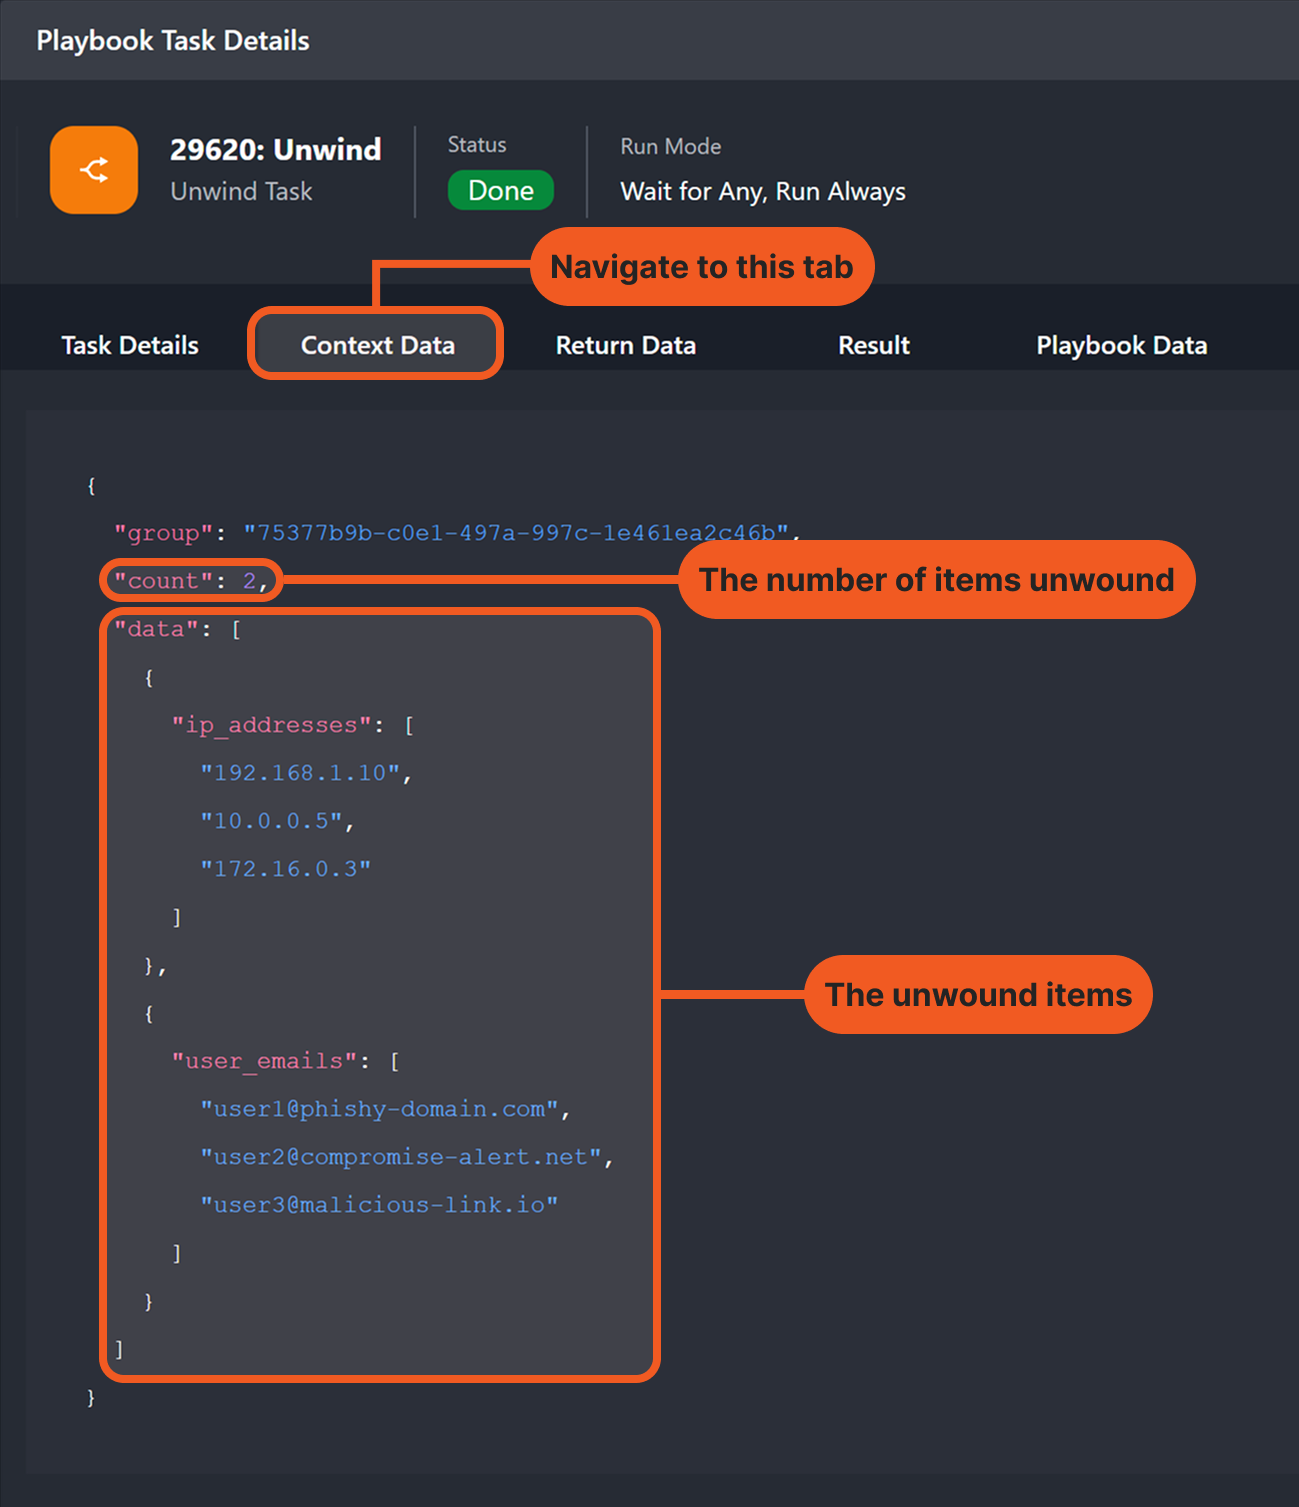
Users can view the unwound objects on the Context Data tab, along with additional details such as the count field (indicating the number of items unwound from the array) and the unwound items themselves, now contained within the data array.
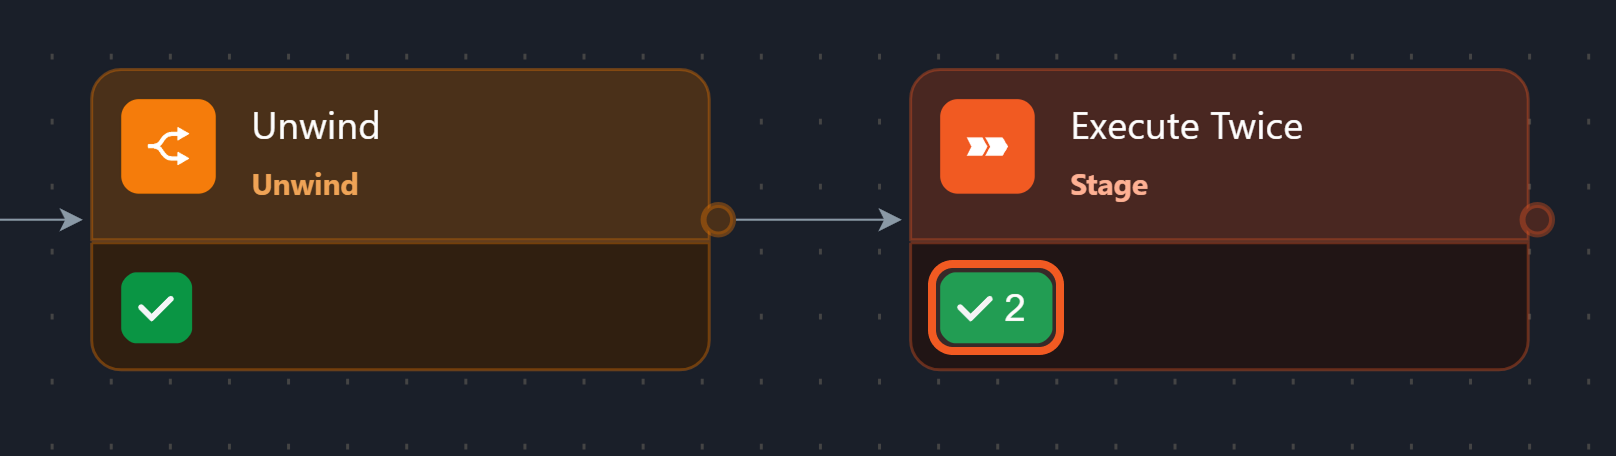
In this example, since two objects were unwound, any downstream task—such as the Execute Twice Stage task—will execute or be suggested for execution twice, once per unwound item.
Specifying the Array Field to Deconstruct
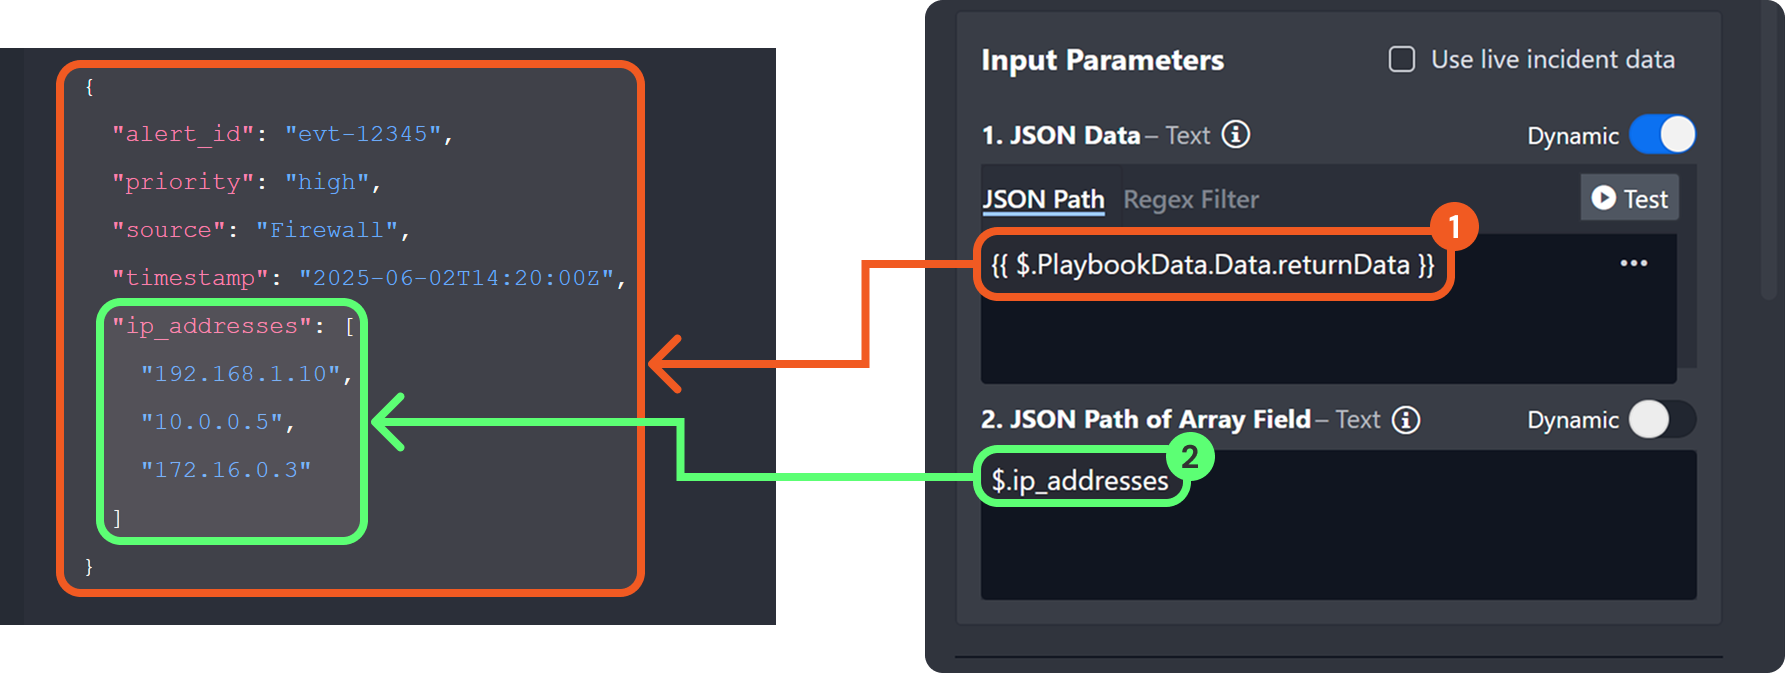
In some scenarios, users may need to unwind an array nested within an object while retaining fields from the parent level. For example, an analyst might unwind an array of IP addresses while preserving contextual information—such as the triggering alert, its ID, priority, and timestamp—present at the root level.
ORIGINAL DATA STRUCTURE
The data structure in the example below illustrates a case where elements requiring individual processing (i.e., IP addresses) are stored in a nested array, while parent-level information must be retained across each iteration.
This structure can be generated by using the Unwind task and setting the JSON Path of Array Field to $.ip_addresses, which deconstructs the array while preserving the surrounding context from the parent object.
To unwind the ip_addresses array while preserving root-level contextual information, configure the Unwind task as follows:
Specify the path to the JSON data that contains the array field to be deconstructed. This ensures that the fields at this level are preserved in the resulting data structure.
Provide the relative path to the array field to be deconstructed. In this case, use $.ip_addresses, which refers to the ip_addresses array located at the root of the object at the $.PlaybookData.Data.returnData path.
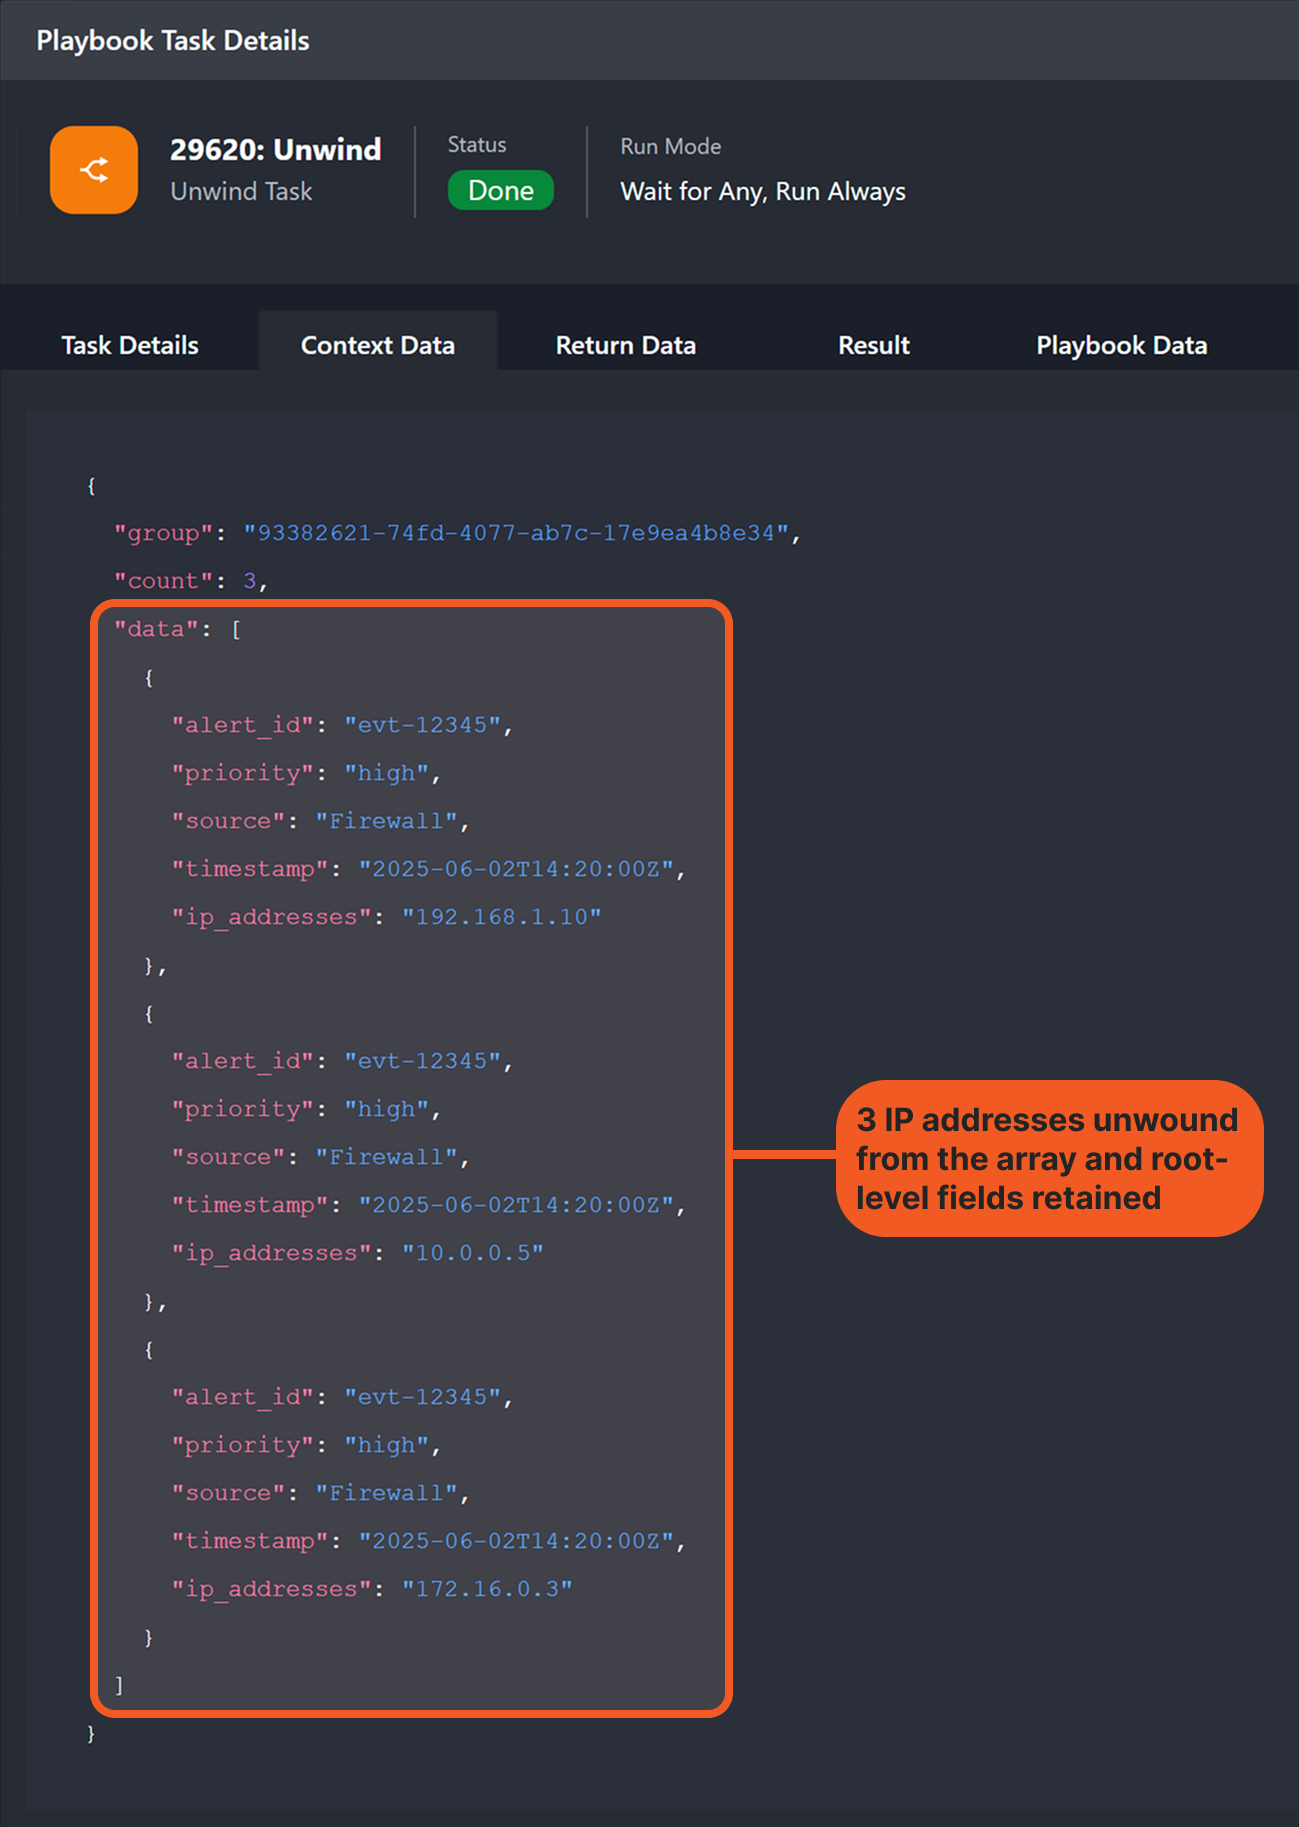
RESULT
The Unwind task will not only create a separate object for each value unwound from the ip_addresses array but also retain all root-level fields returned by the path $.PlaybookData.Data.returnData.
All root-level fields and their values are in the final data structure:
"alert_id": "evt-12345"
"priority": "high"
"source": "Firewall"
"timestamp": "2025-06-02T14:20:00Z"
Inspecting Downstream Task Executions
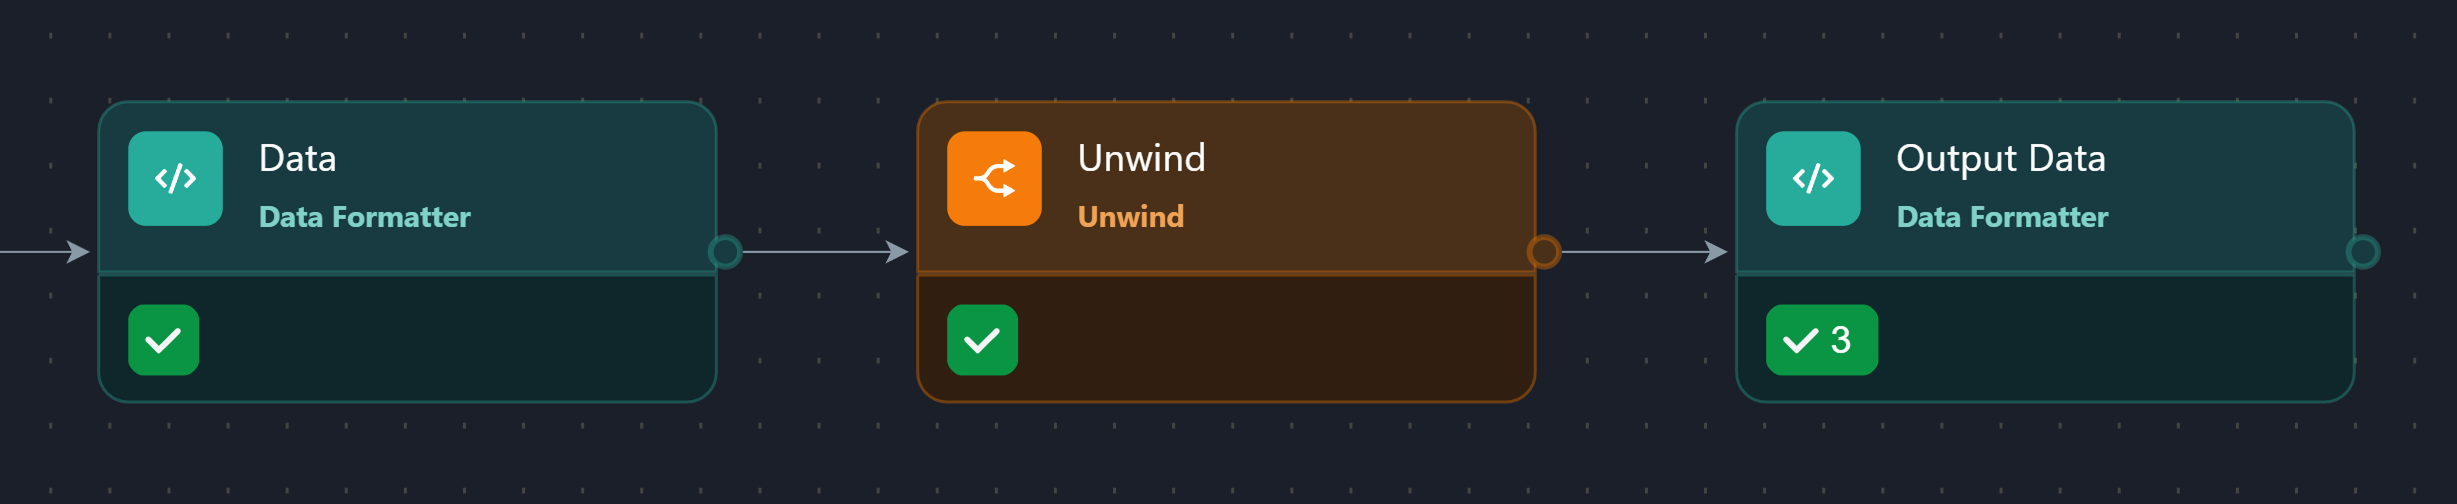
All tasks downstream of an Unwind task execute once for each item deconstructed from the array. This is because the Unwind task converts an array into multiple individual objects—one per unwound element.
In the example above, downstream tasks executed or were suggested three times because the Unwind task deconstructed the ip_addresses array, which contained three items.
Tasks downstream of an Unwind task execute once per unwound item, whether or not they take any input. For example, Stage tasks take no input but are still executed or suggested for execution n times when following an Unwind task, as each run follows a separate parallel path.
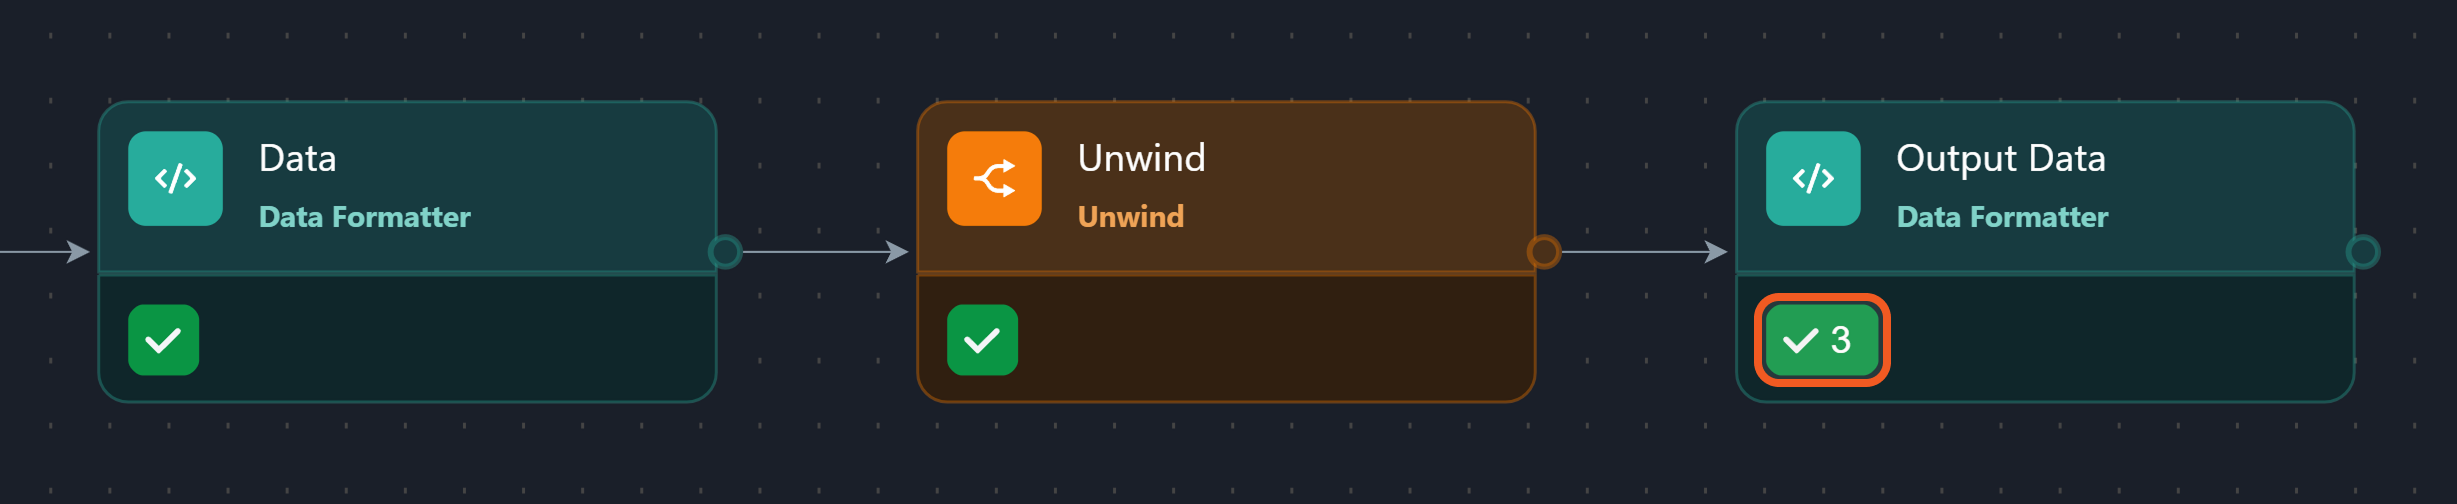
Users can view individual executions of downstream tasks as follows. In this example, the Output Data task displays each IP address that was unwound from the ip_addresses array (extracted from the Data task).
Click the task status icon of a downstream task.
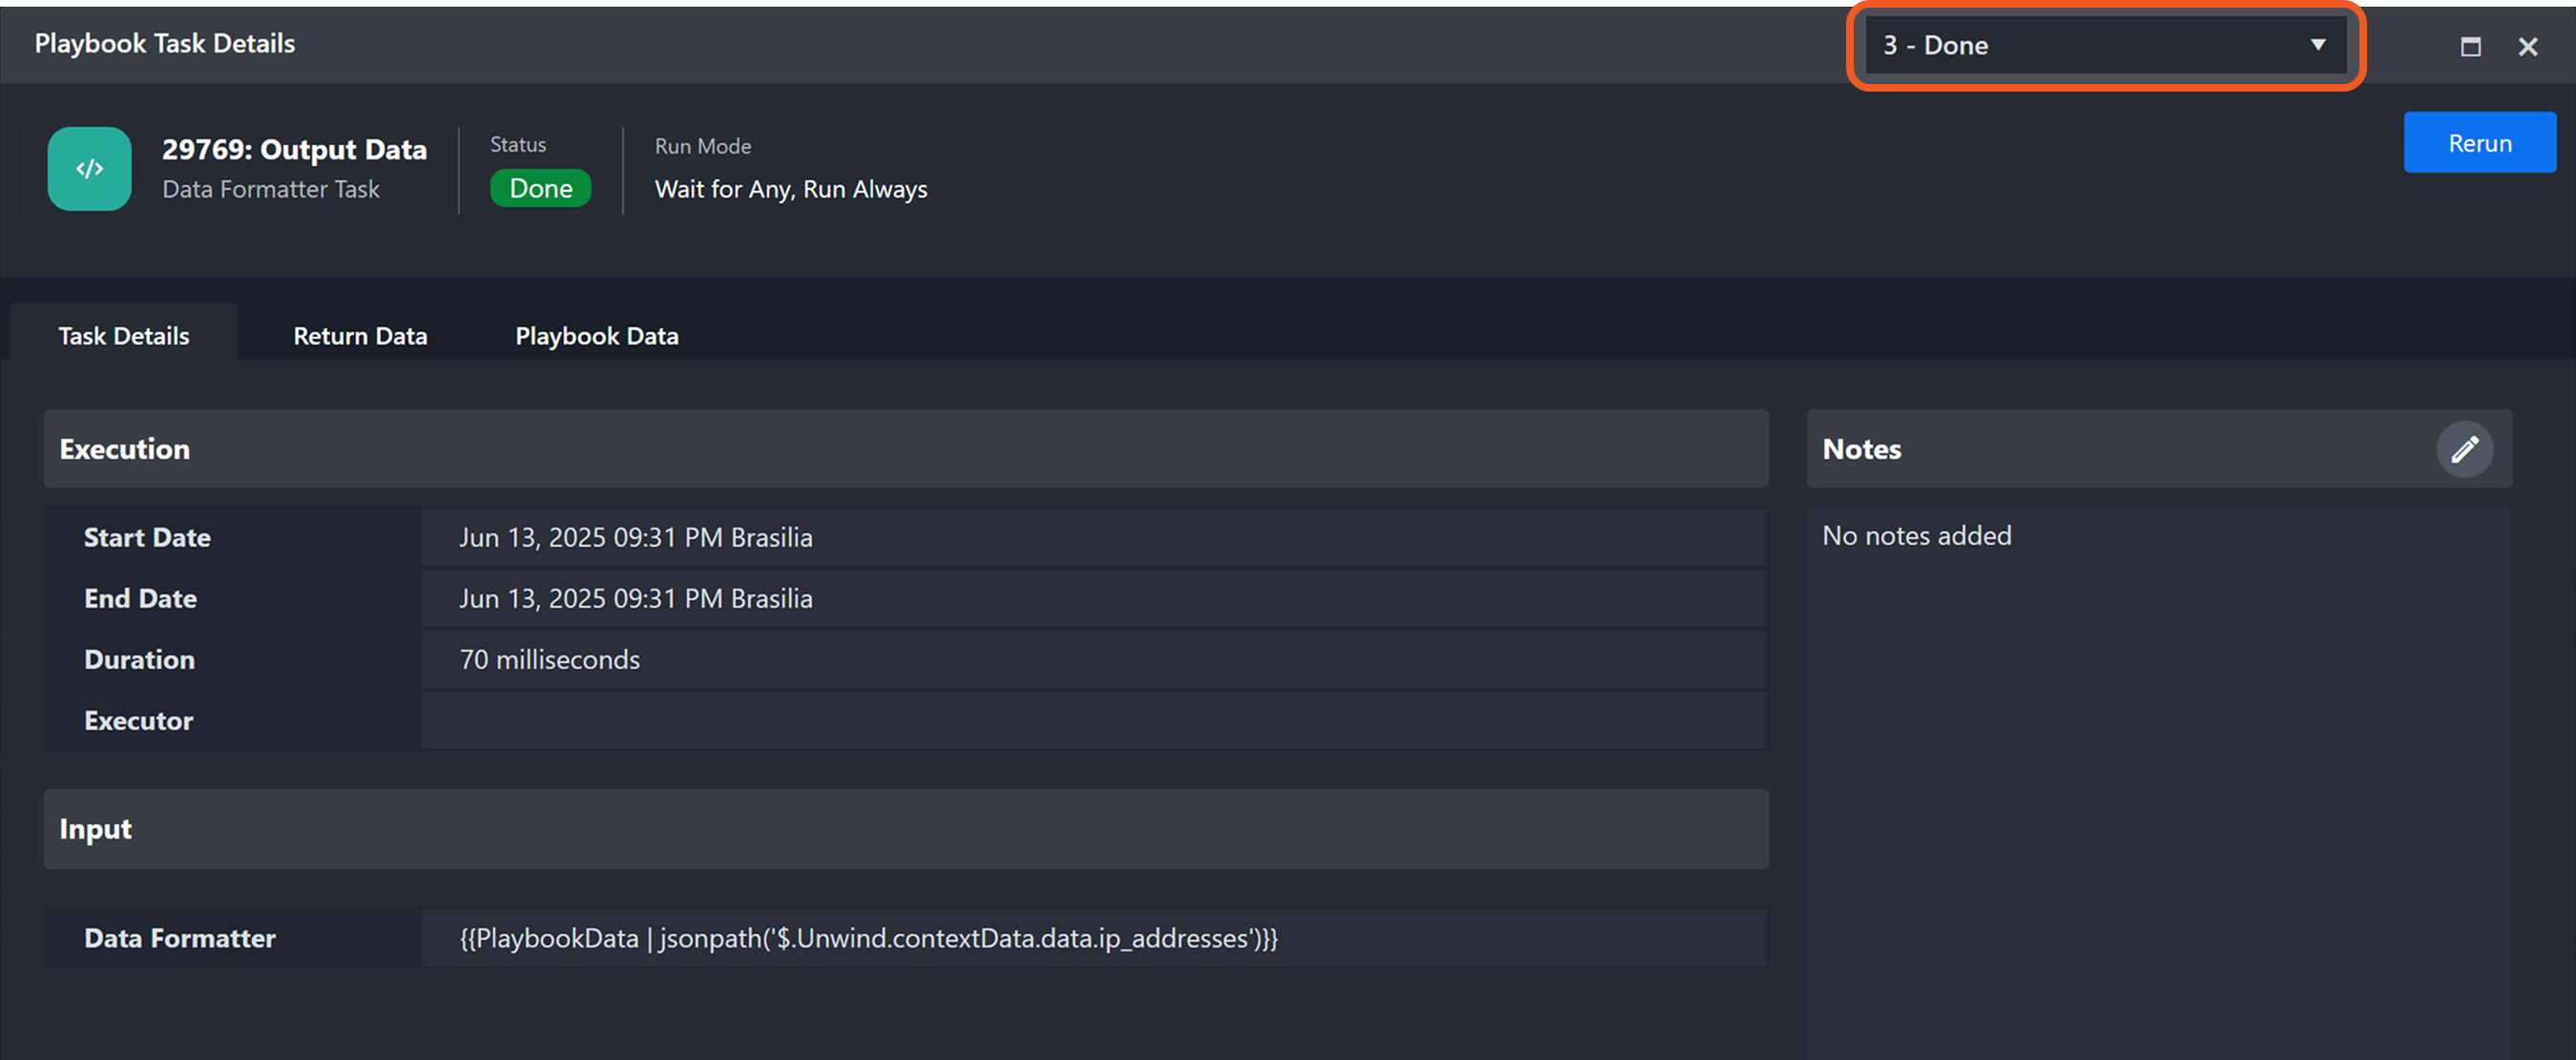
In the top-right corner, click the {number} – {task status} dropdown.
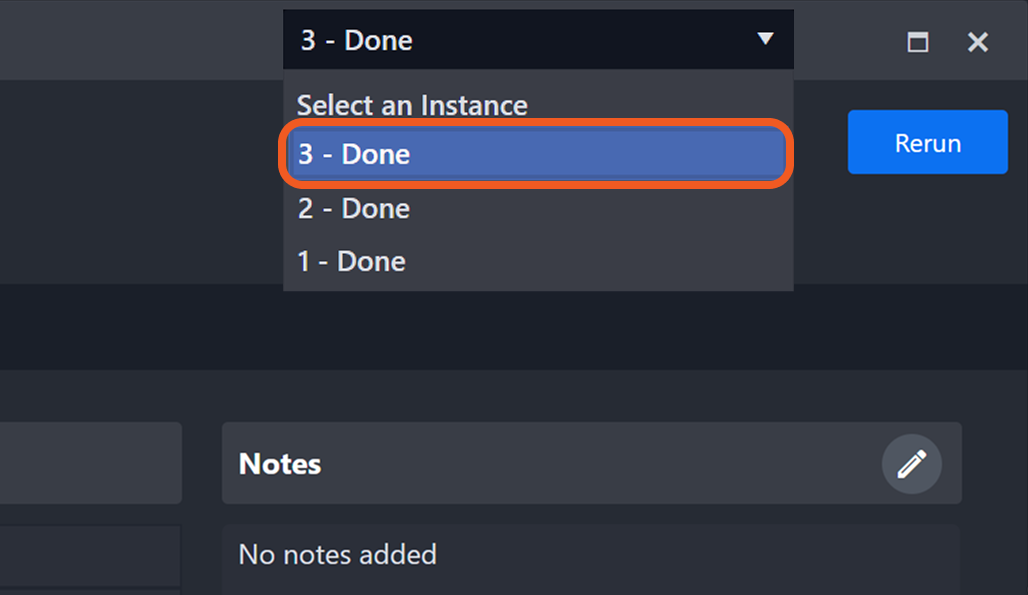
Select a specific execution instance.
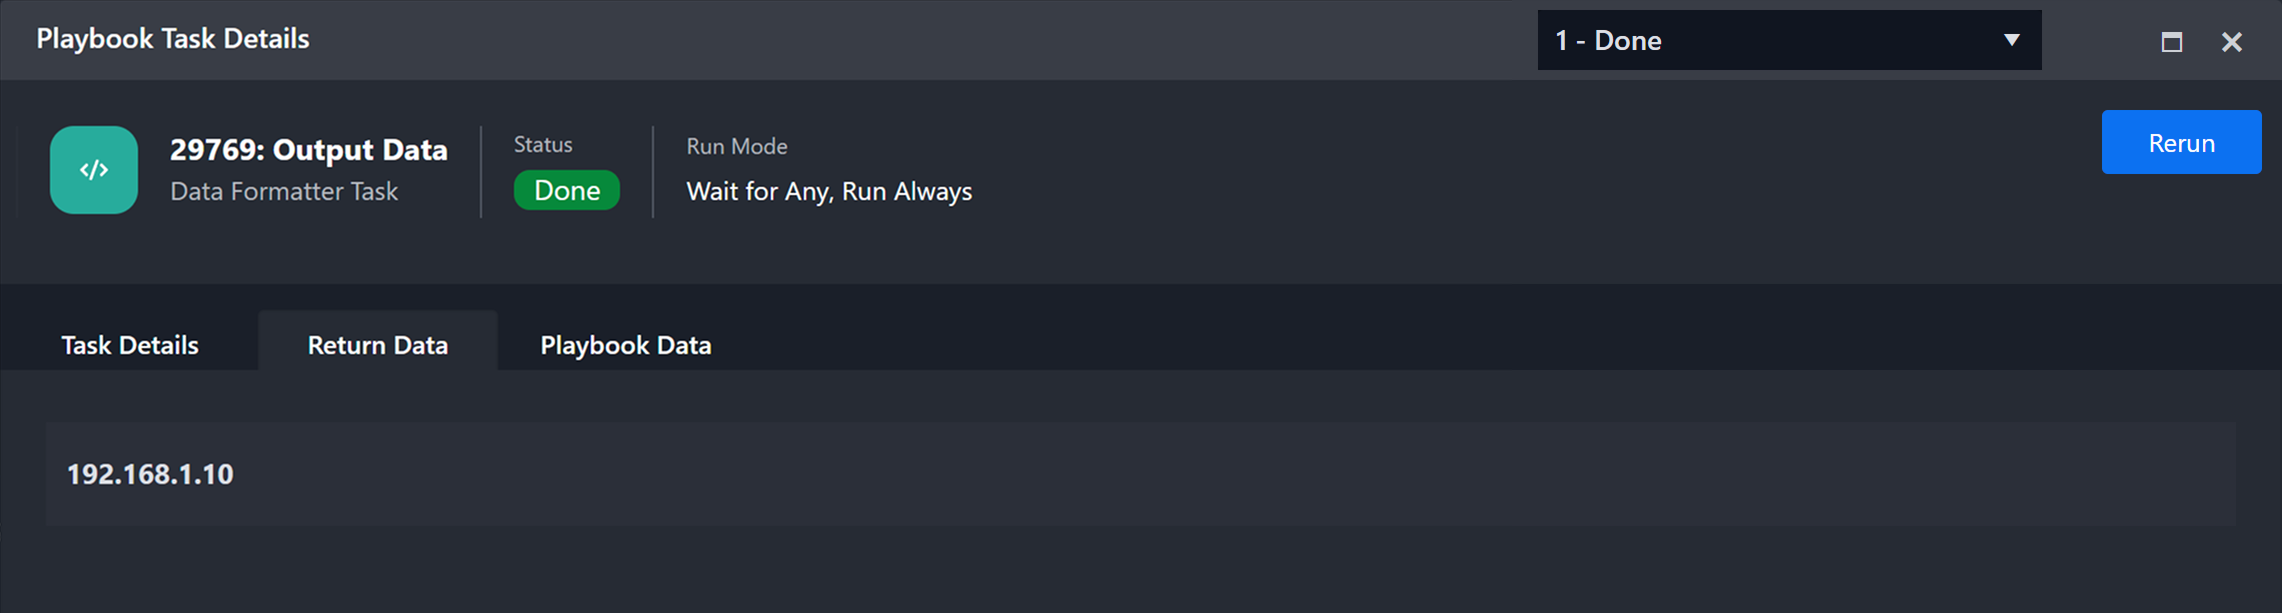
Task Execution Instance - 1: Return Data
The Output Data task returns the IP address 192.168.1.10, unwound from the ip_addresses array.
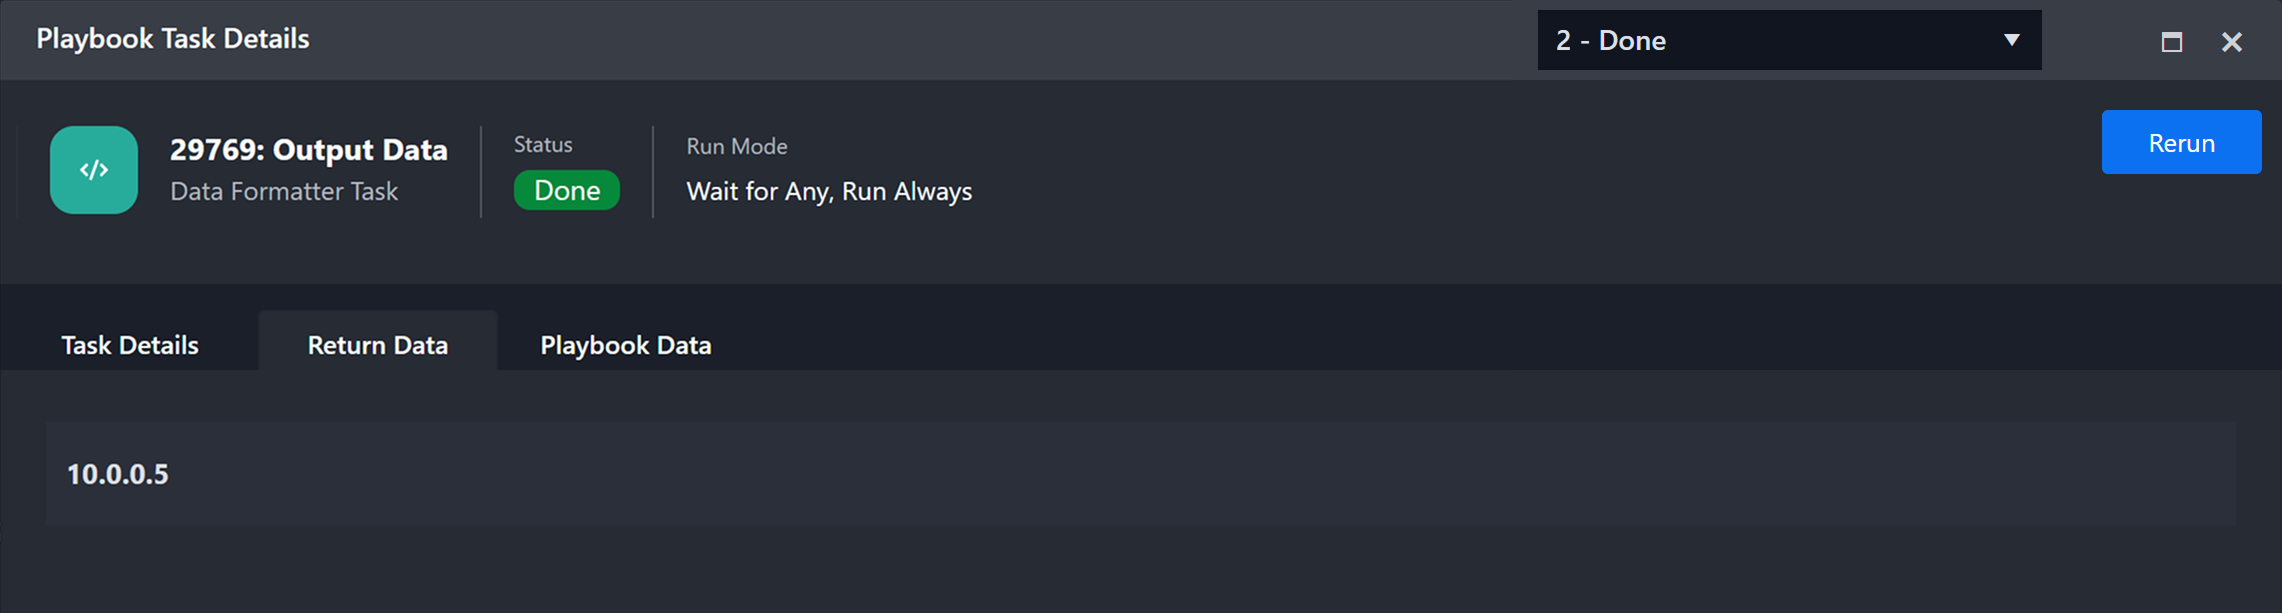
Task Execution Instance - 2: Return Data
The Output Data task returns the IP address 10.0.0.5, unwound from the ip_addresses array.
Task Execution Instance - 3: Return Data
The Output Data task returns the IP address 172.16.0.3, unwound from the ip_addresses array.
Recombining Execution Paths
Using an Unwind task causes downstream tasks to execute multiple times, creating multiple parallel execution paths. These paths often need to be recombined to consolidate results or pass aggregated data to subsequent tasks.
The Merge task node can consolidate multiple execution paths created downstream of an Unwind task back into a single path.
WITHOUT MERGE TASK
Without a Merge task node, the Stage task runs once for each execution path, leading to multiple parallel execution paths.
WITH MERGE TASK
Including a Merge task node in the execution path consolidates the parallel branches created by the Unwind task before proceeding to the Stage task.
READER NOTE
For more information about the Merge task node, refer to this article.
Use Case Examples
Example 1: Executing IP Reputation Checks Separately for Each Array Element
SCENARIO An event containing three IP addresses is ingested, and their reputations must be assessed individually while preserving root-level contextual information. The Unwind task deconstructs the addresses, enabling separate reputation checks for each.
READER NOTE
This example assumes the incoming event data contains an array of IP addresses. The steps should be adjusted as necessary to match the structure of the data being used.
Click the Test Playbook button to create a data source, ensuring the trigger output fields for the event containing three IP addresses are available for dynamic input selection.
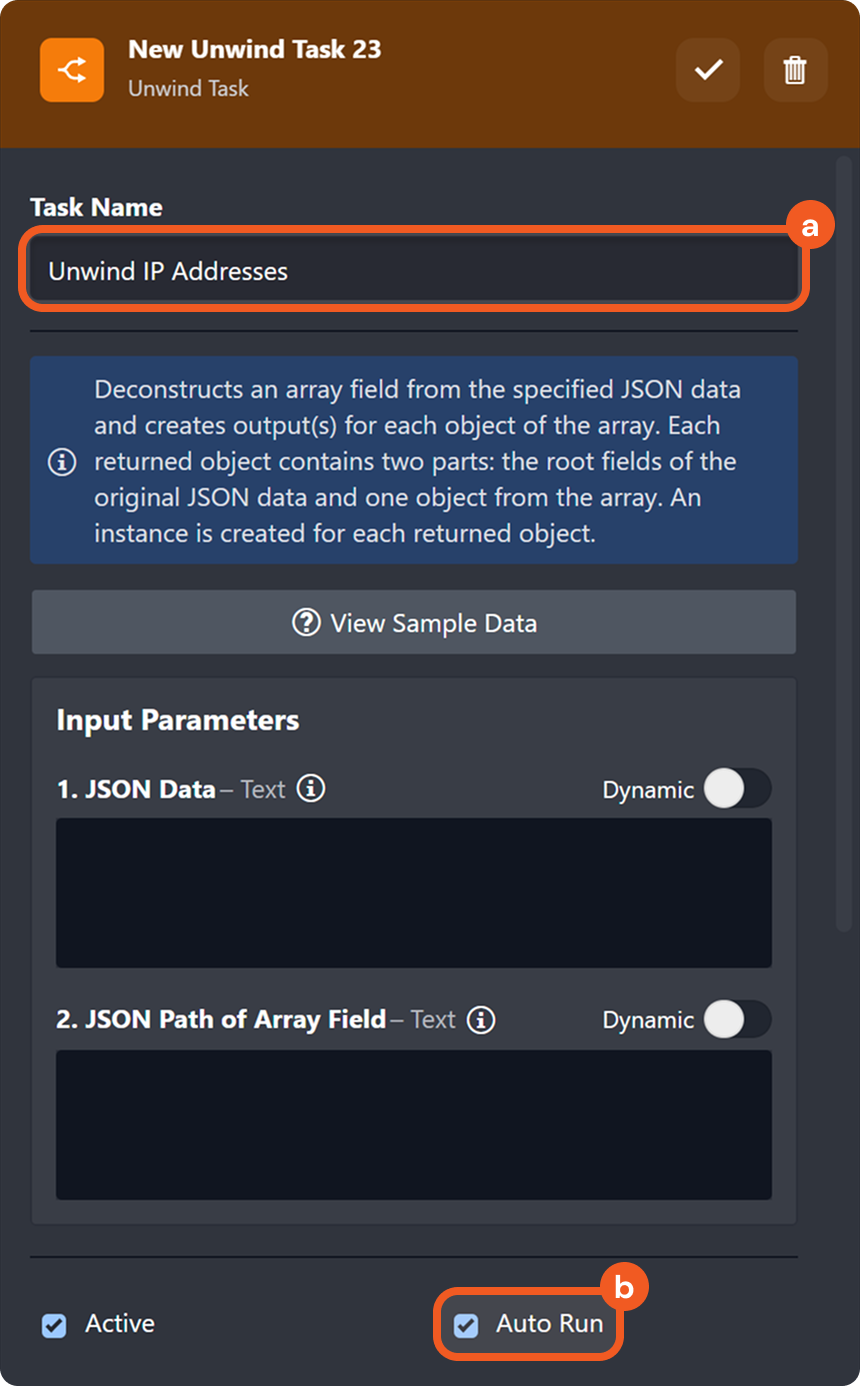
Name the task Unwind IP Addresses, then select the Auto Runcheckbox.
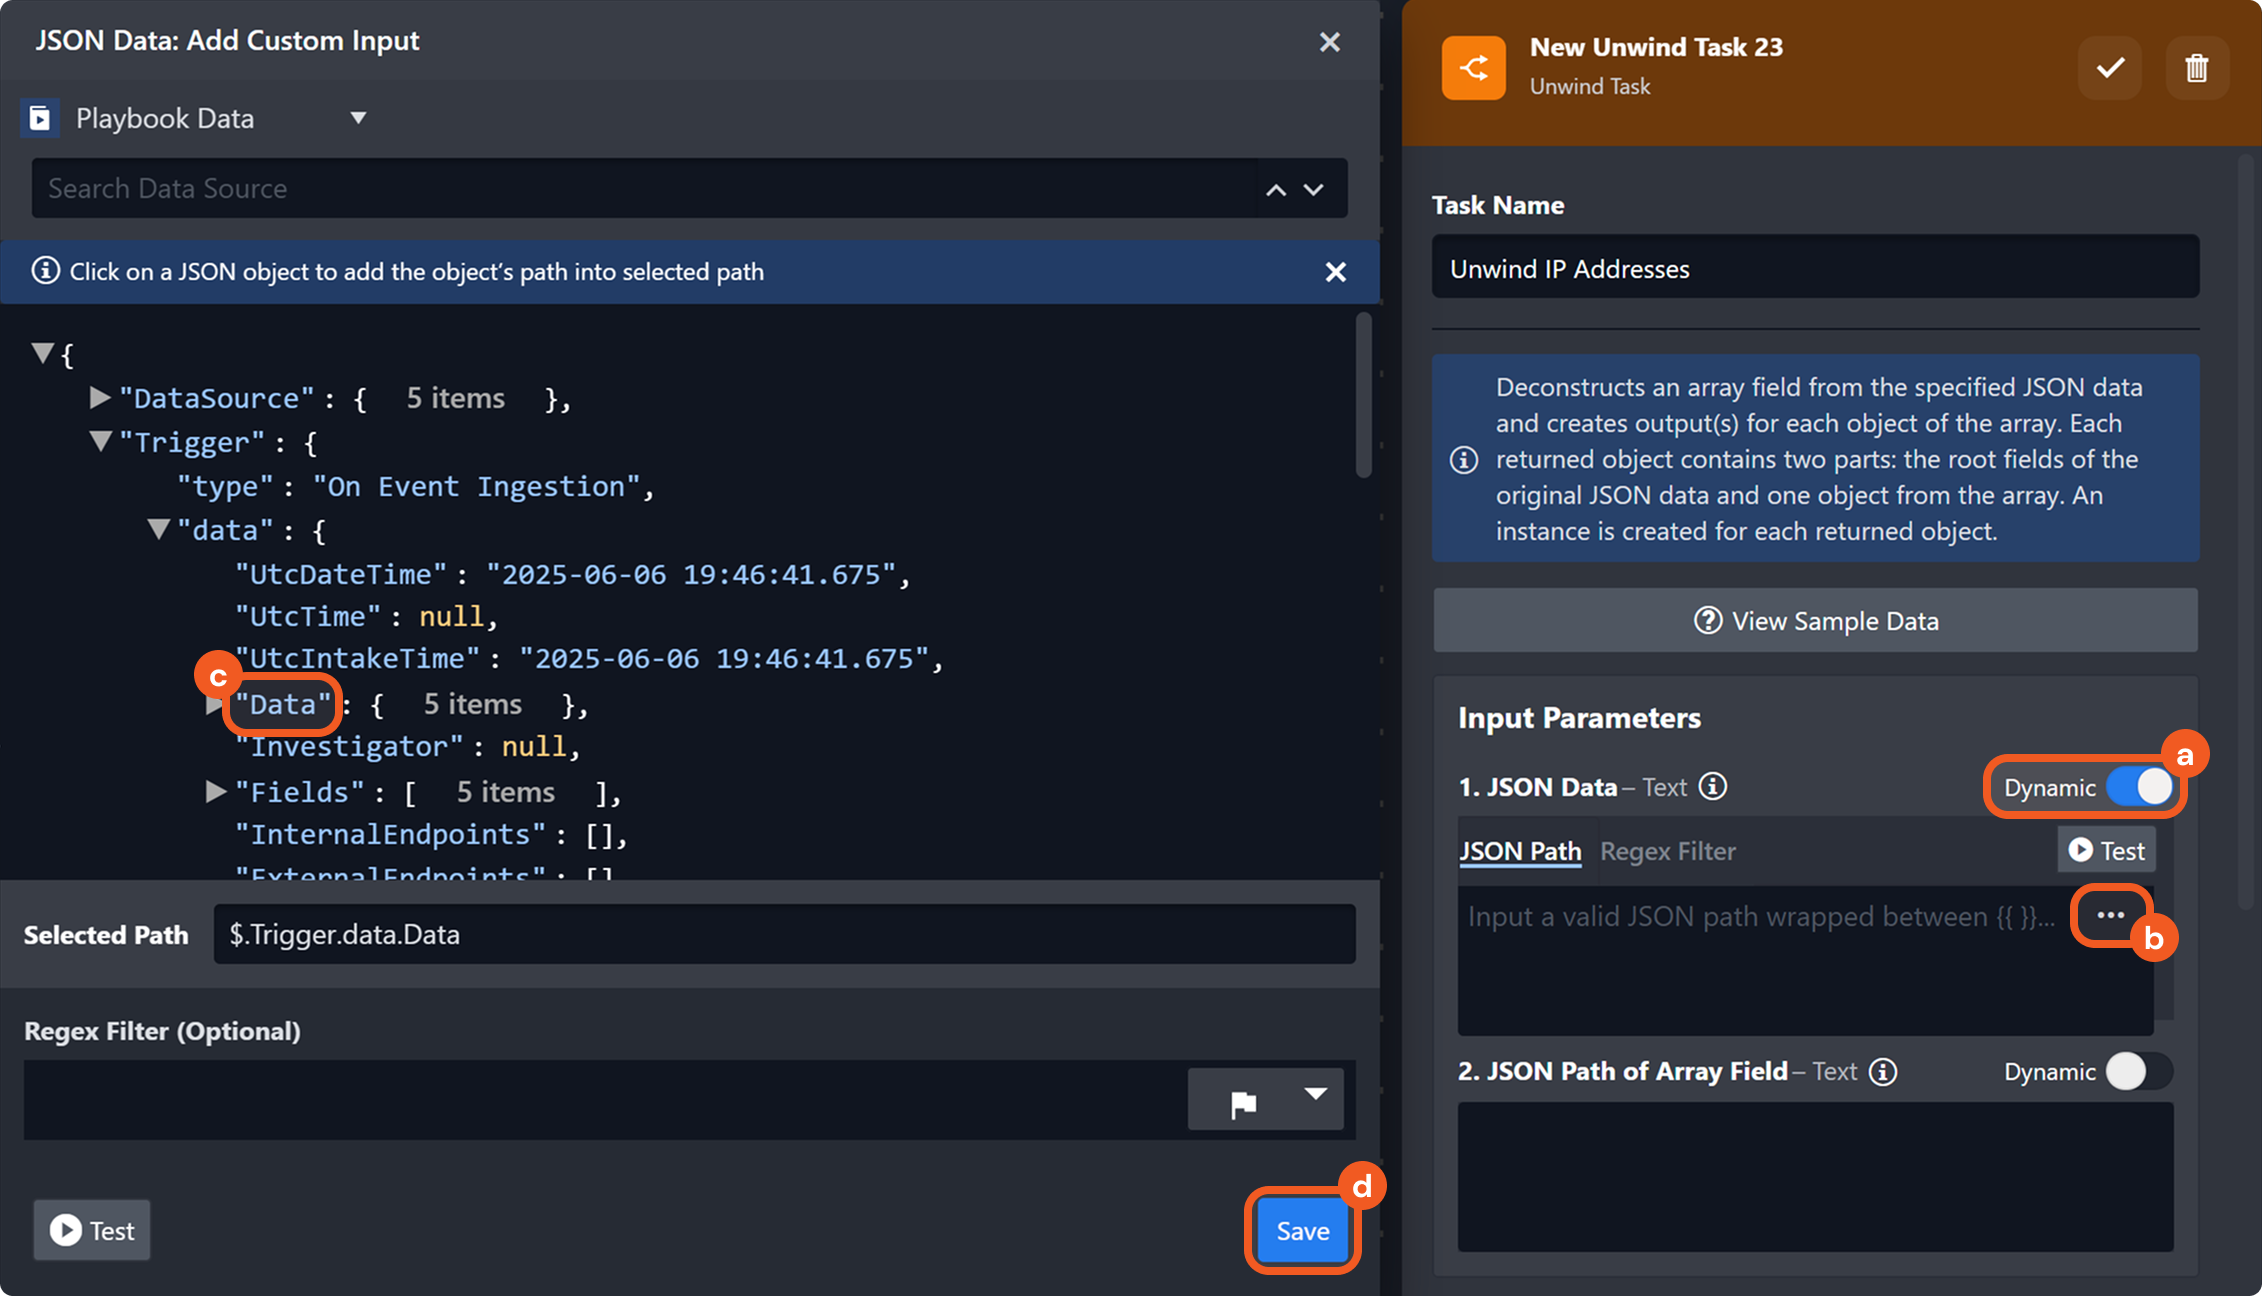
Provide the input for the JSON Data parameter.
Enable the Dynamic toggle.
Click the icon.
Select the JSON path located at Trigger > data > Data.
Click the Save button.
Provide the input for the JSON Path of Array Field parameter.
Click the Test button to inspect the JSON data structure.
Identify the array field to be deconstruction.
Enter the corresponding JSON path (e.g., $.ip_addresses).
Click the button to save.
Click the button to test the Unwind IP Addresses task.
This generates task outputs that can be referenced by downstream tasks.
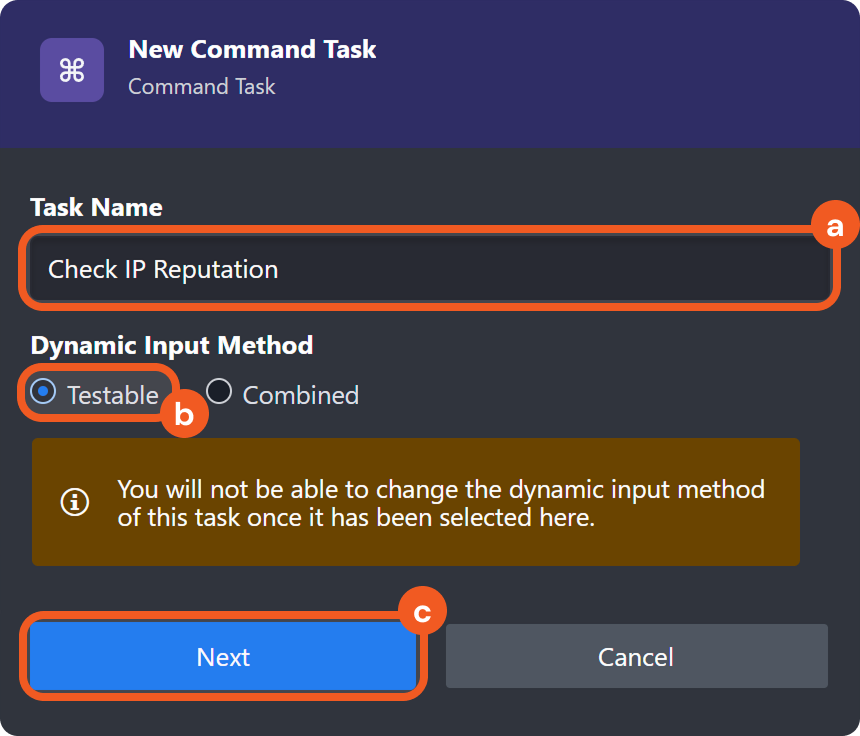
Add a Check IP Reputation Command task (for example, one from AlienVault OTX) to the preceding task node.
Name the task, ensure that the Testable option is selected, then click the Next button.
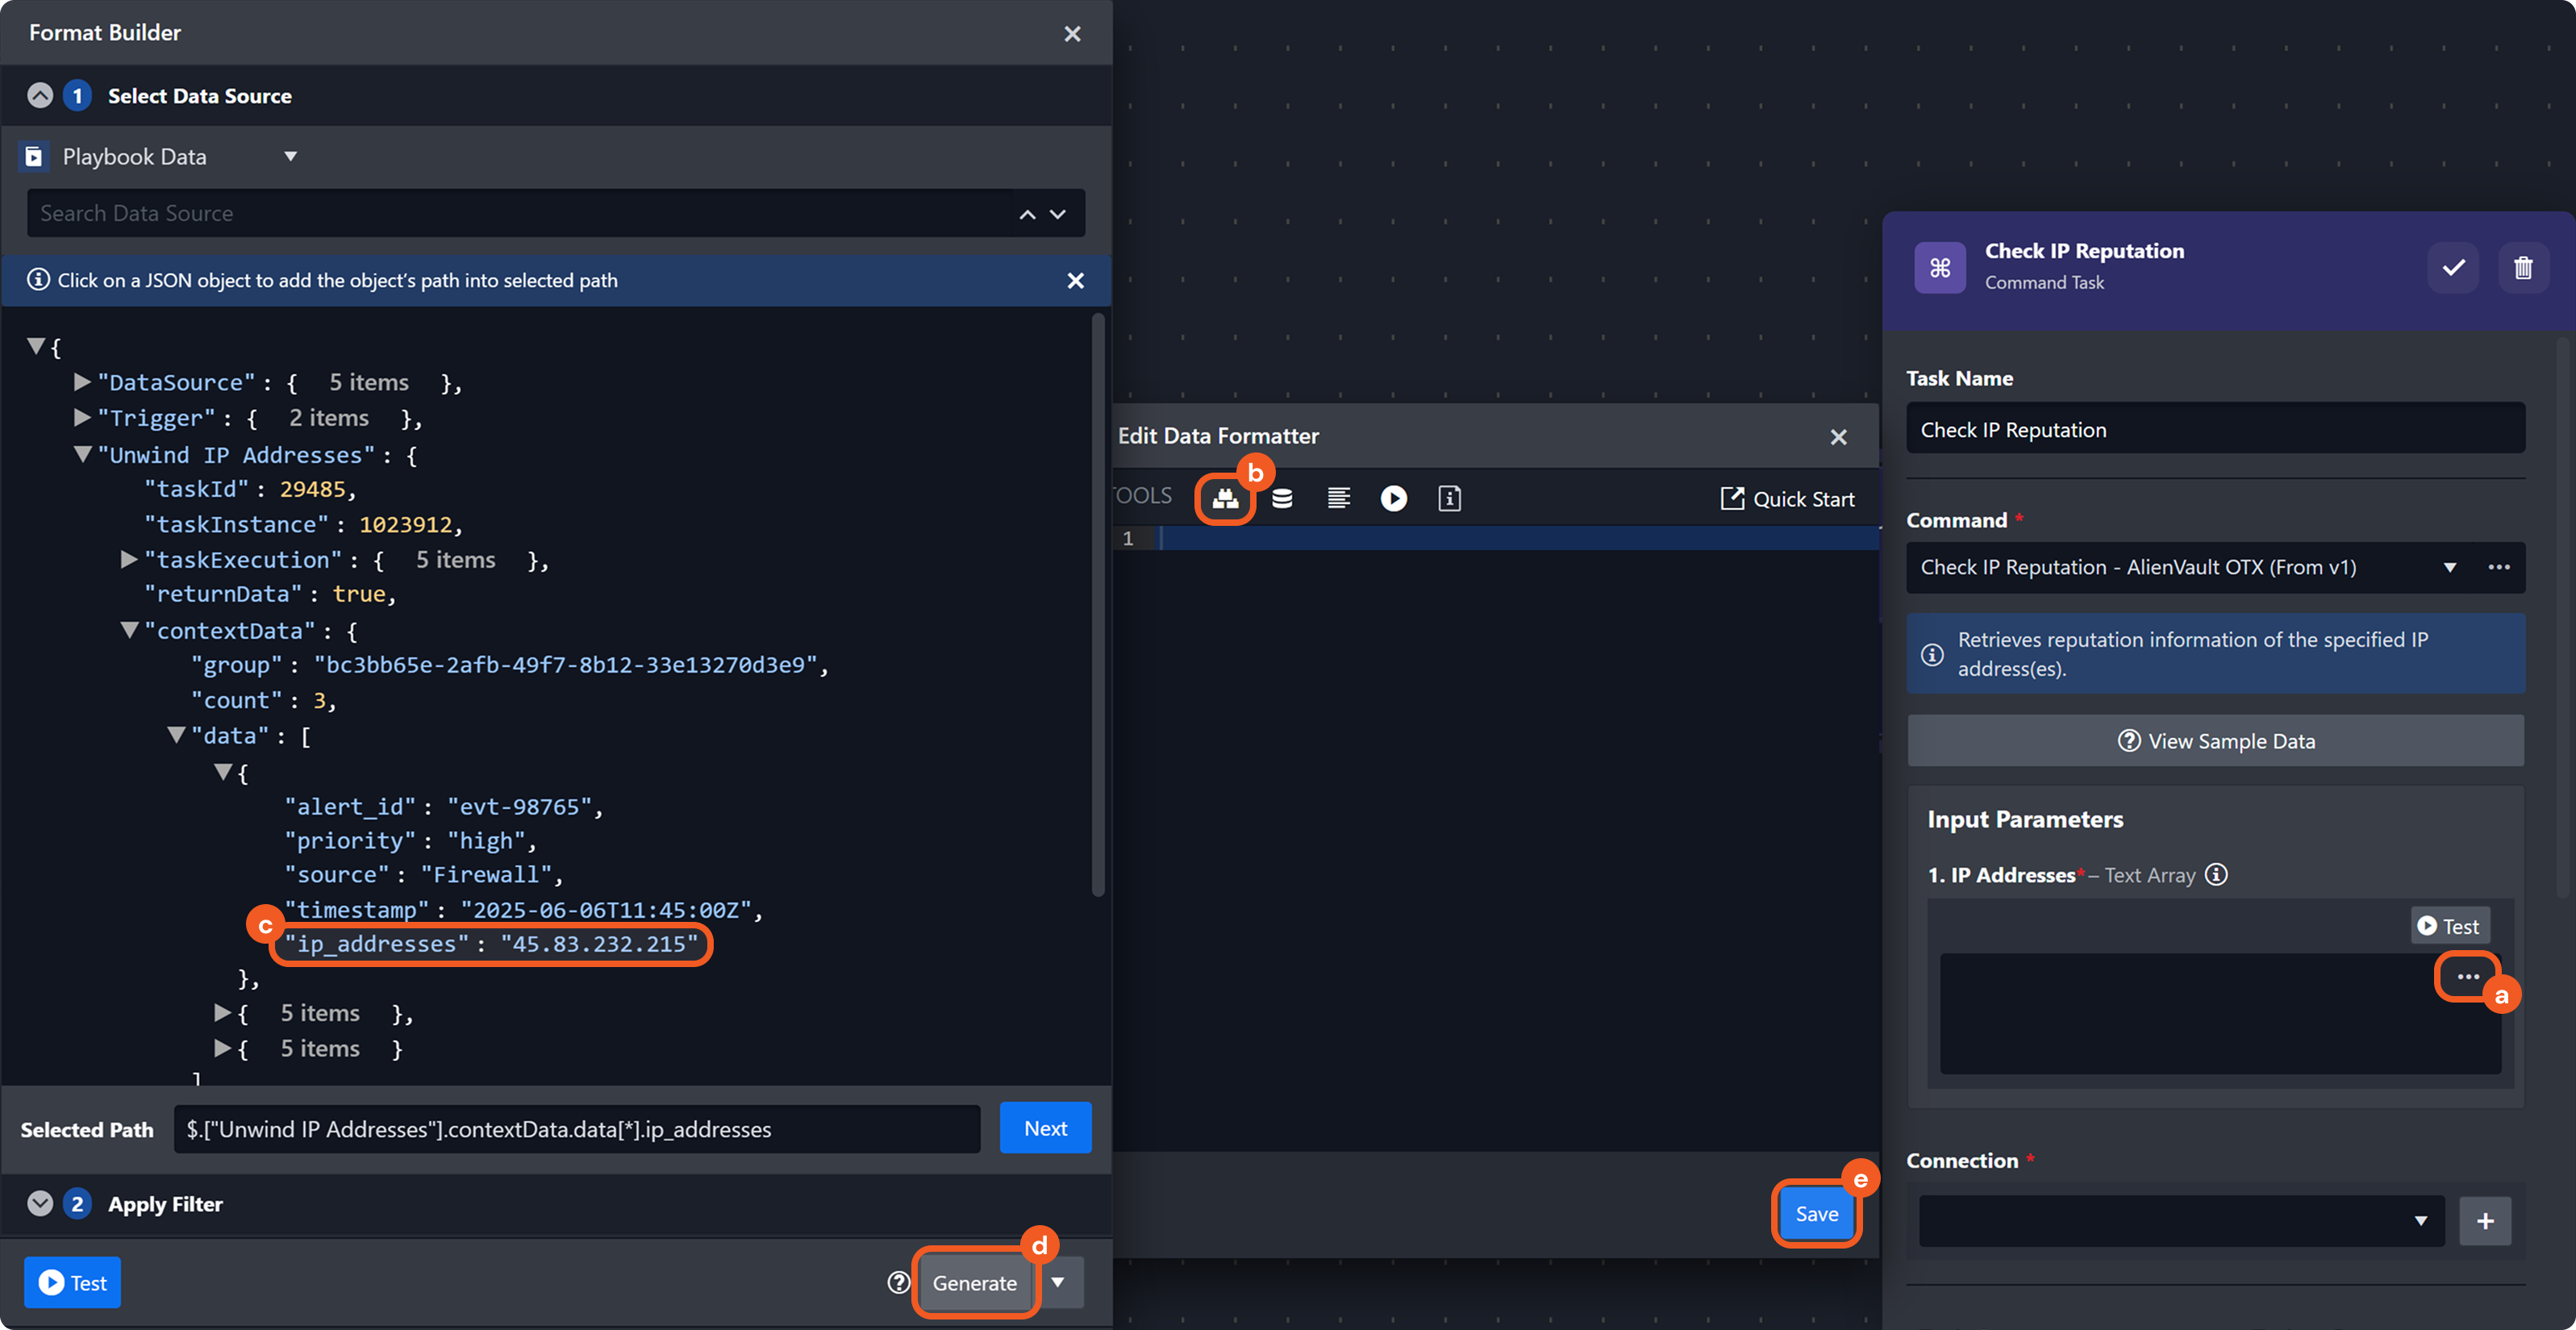
Provide the input for the IP Addresses parameter.
Click the icon.
Click the icon.
Select the JSON path located at Unwind IP Addresses > contextData > data > ip_addresses.
Click the Generate button.
Click the Save button.
Choose a valid connection, select the Auto Run checkbox, then click the button to save.
Click the button to test the Command task.
RESULT
If the Command task executed successfully, users can observe that the reputation command executed once per unwound IP address.
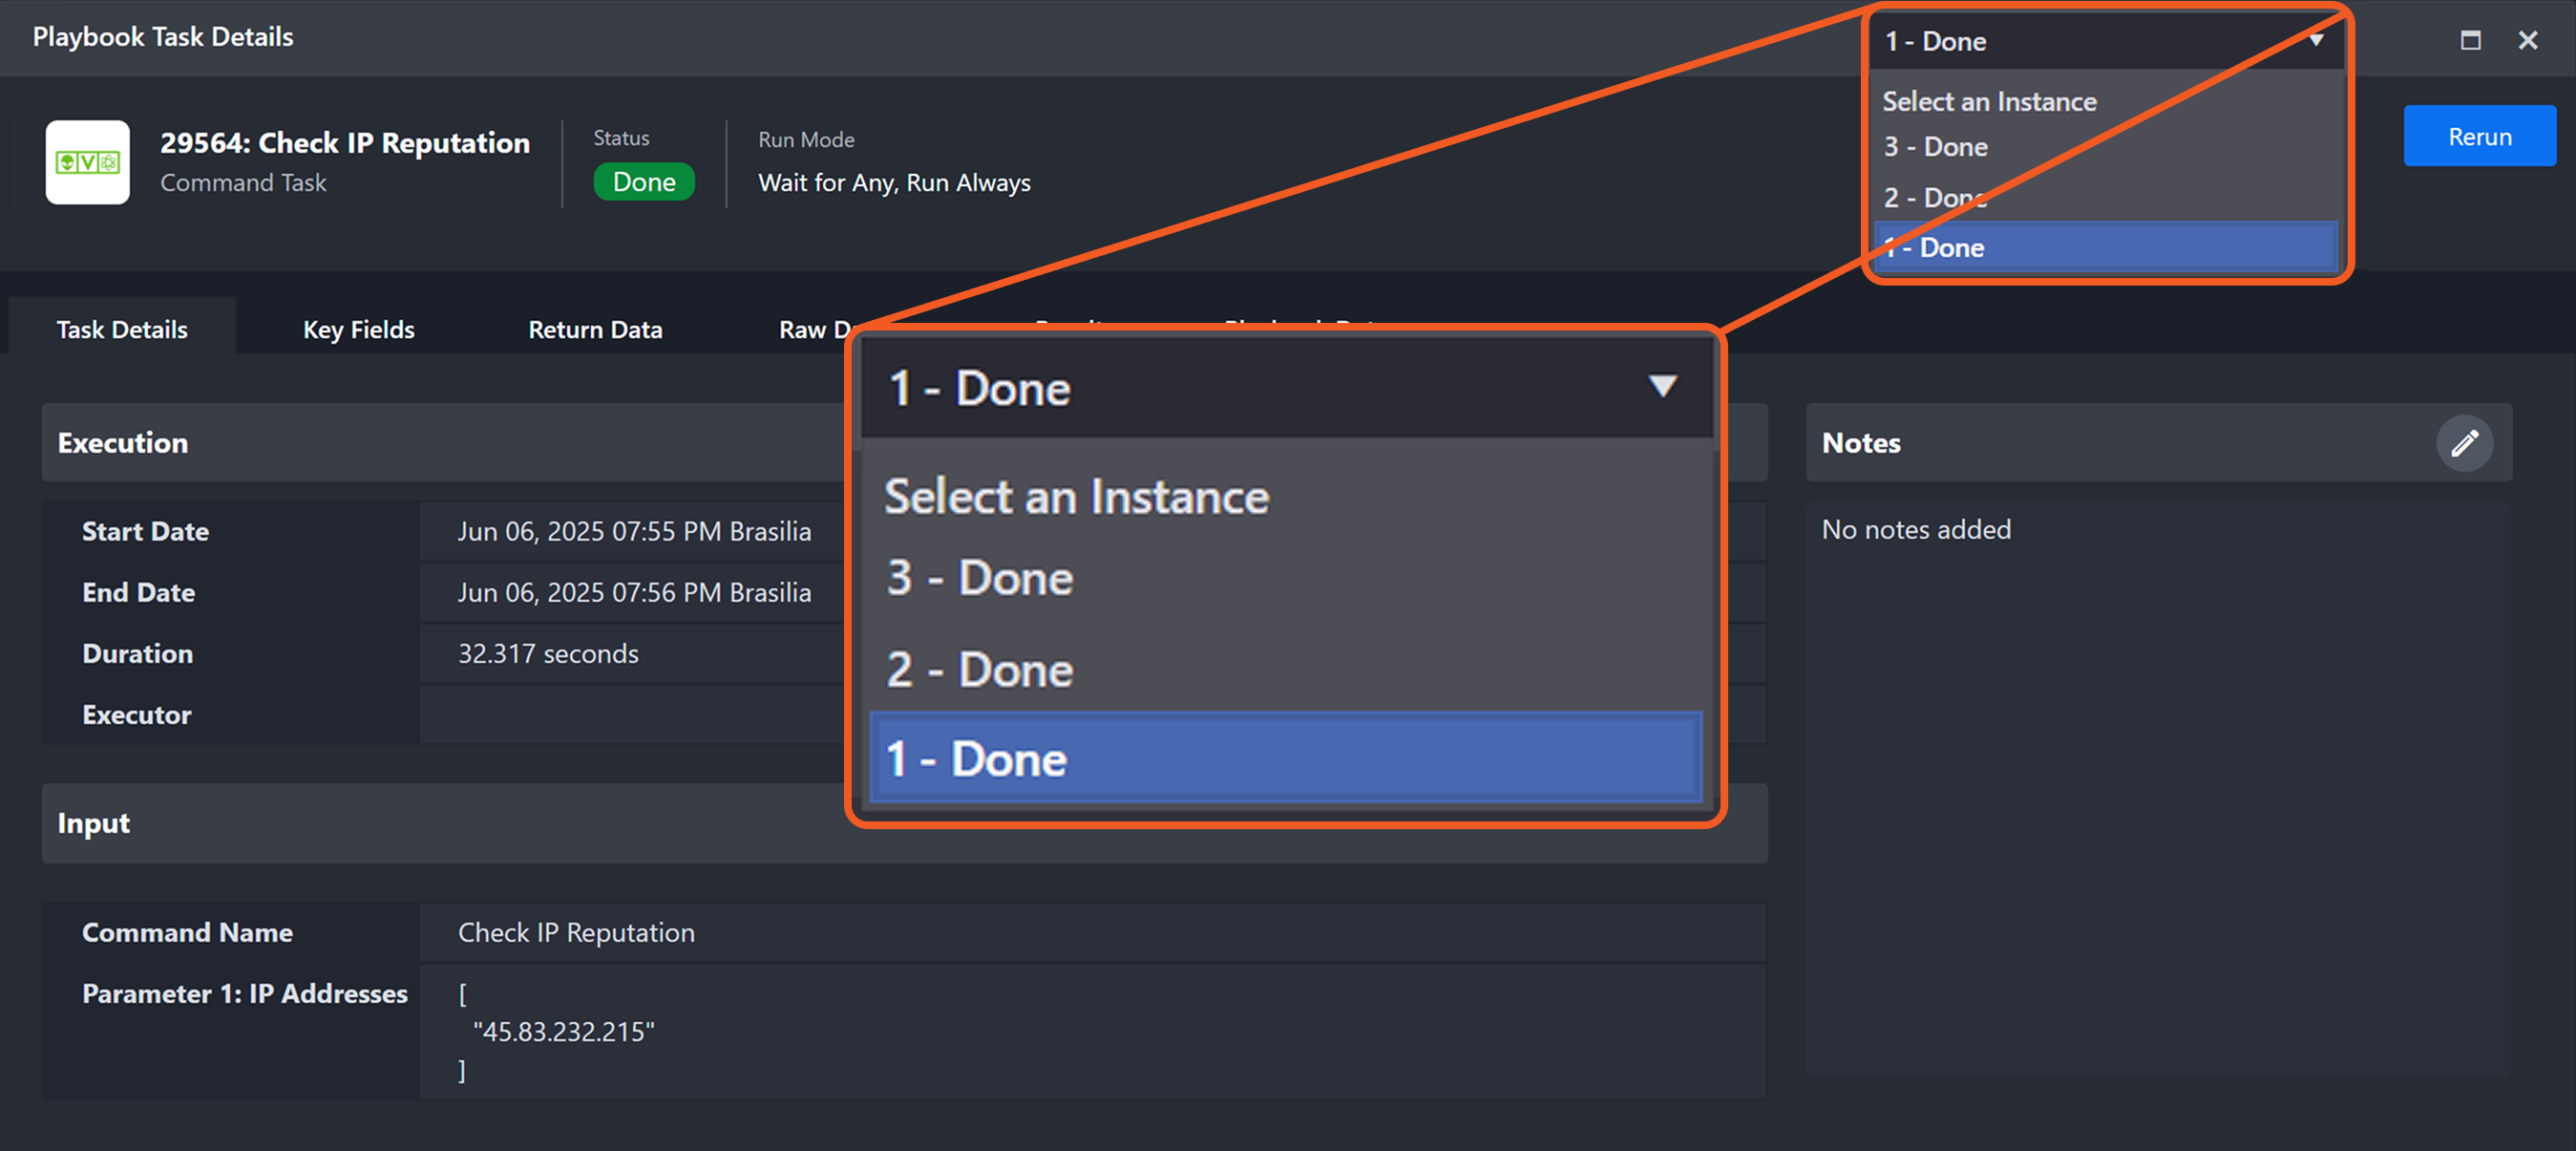
Clicking the task status icon will display the following:
A dropdown in the top-right corner indicating the specific instance of the task execution and its status (e.g., 1 - Done, 2 - Done, etc.)
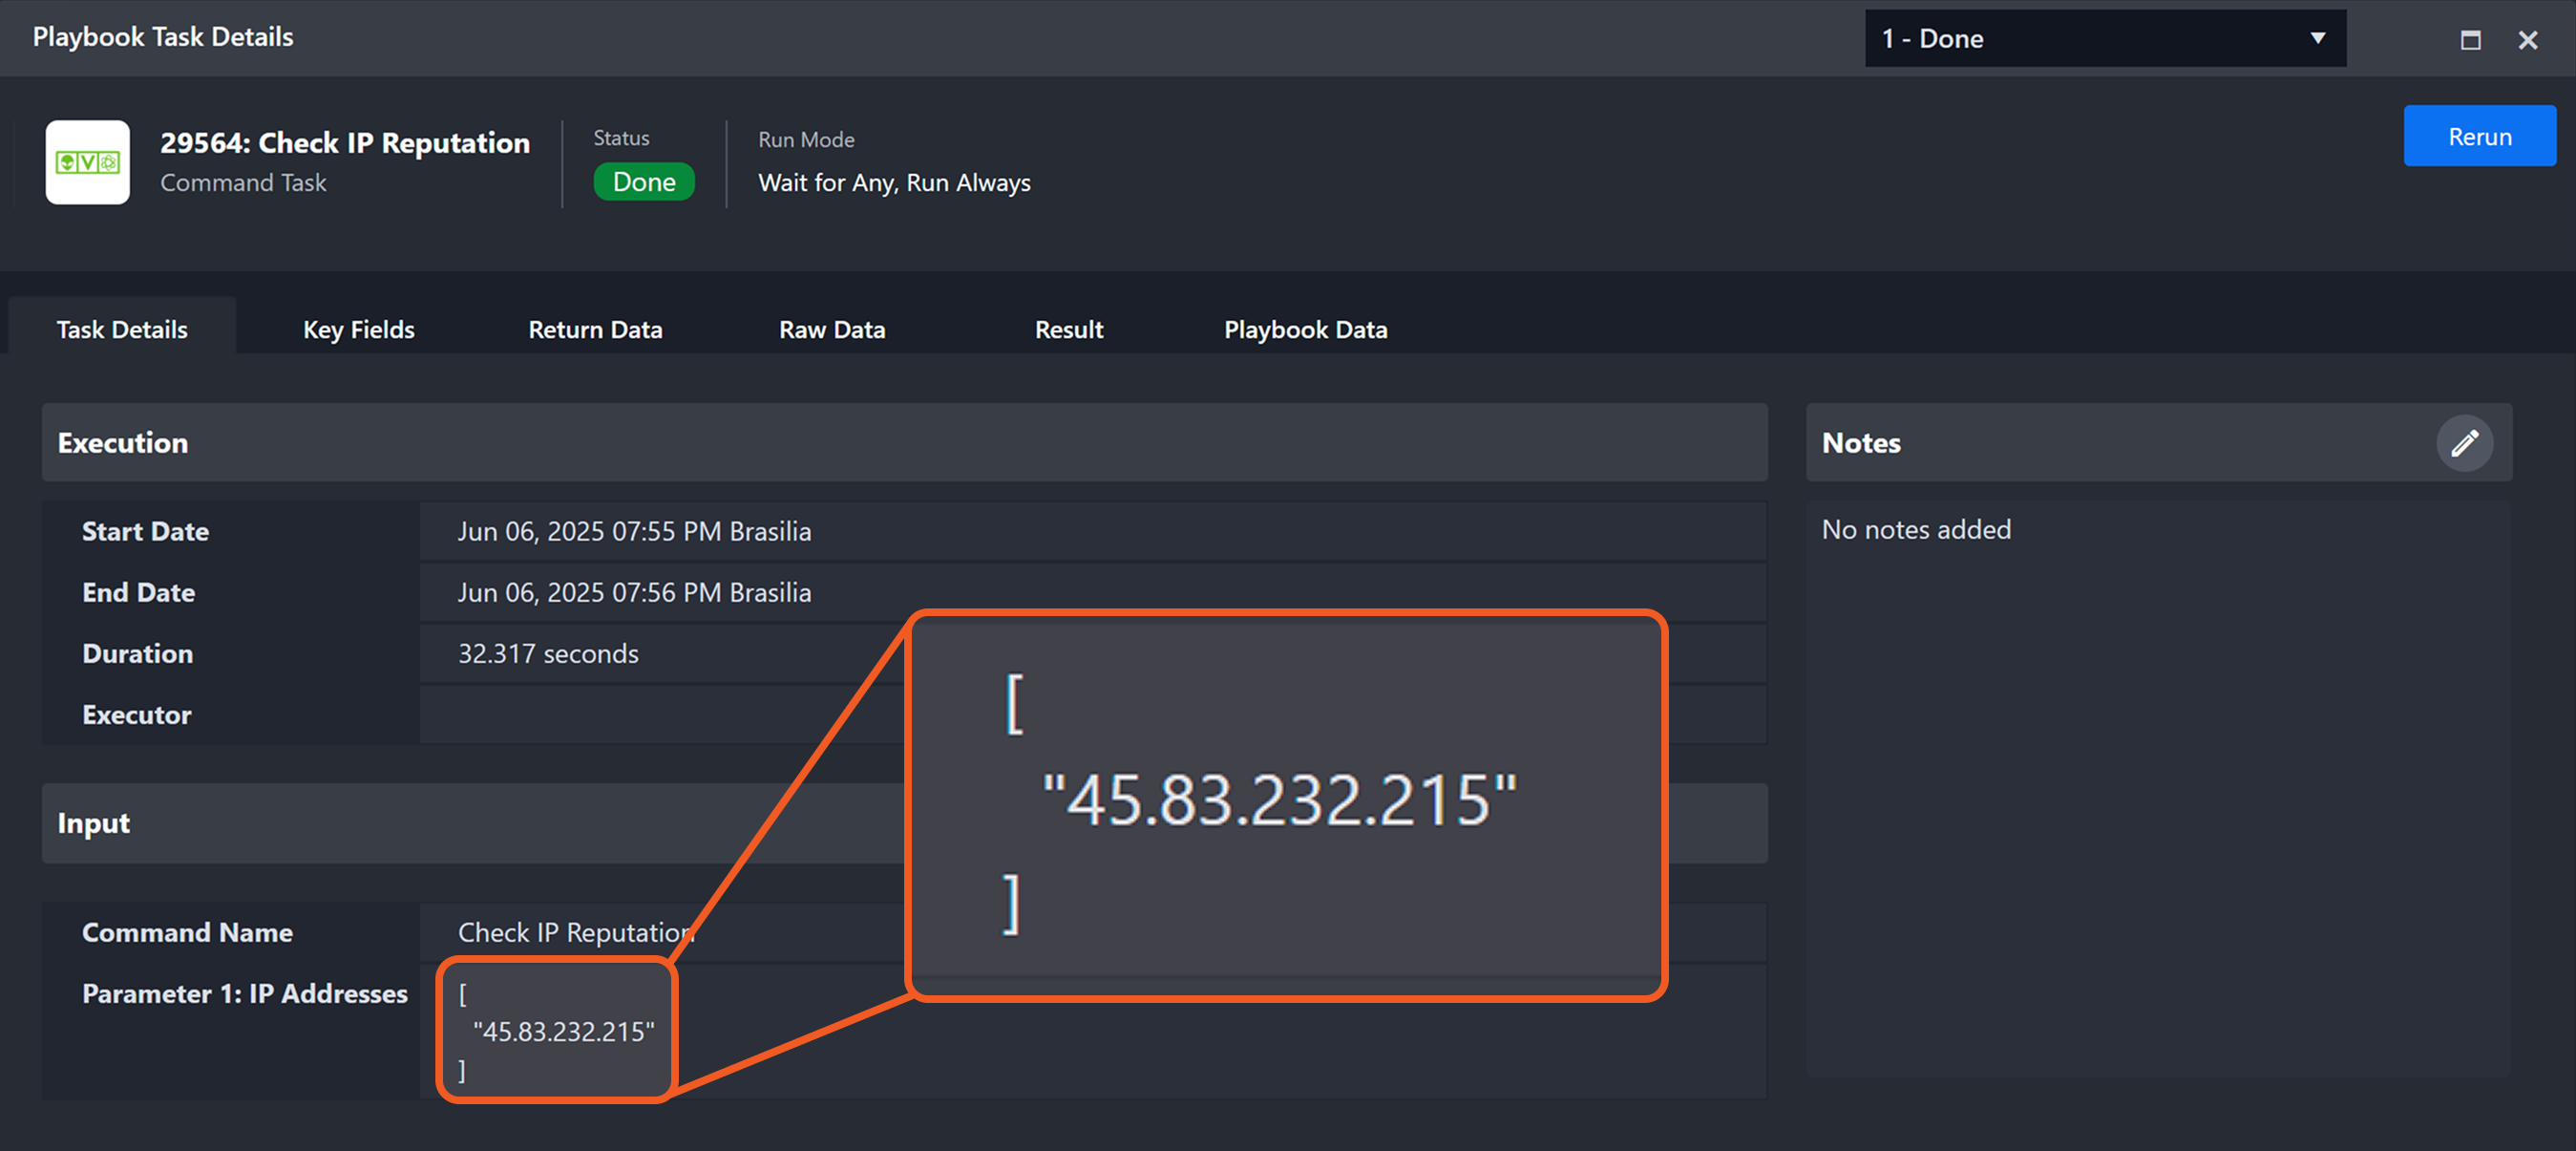
The IP Addresses field in the Input section containing only one value
These indicators confirm that the task executed once for each object returned by the Unwind task.
Example 2: Handling Unwound Artifact Data by Observable Type
SCENARIO An analyst needs to route artifact data through different execution paths based on the type of each artifact. The following example demonstrates how to accomplish this using an Unwind task and Conditional task.
READER NOTE
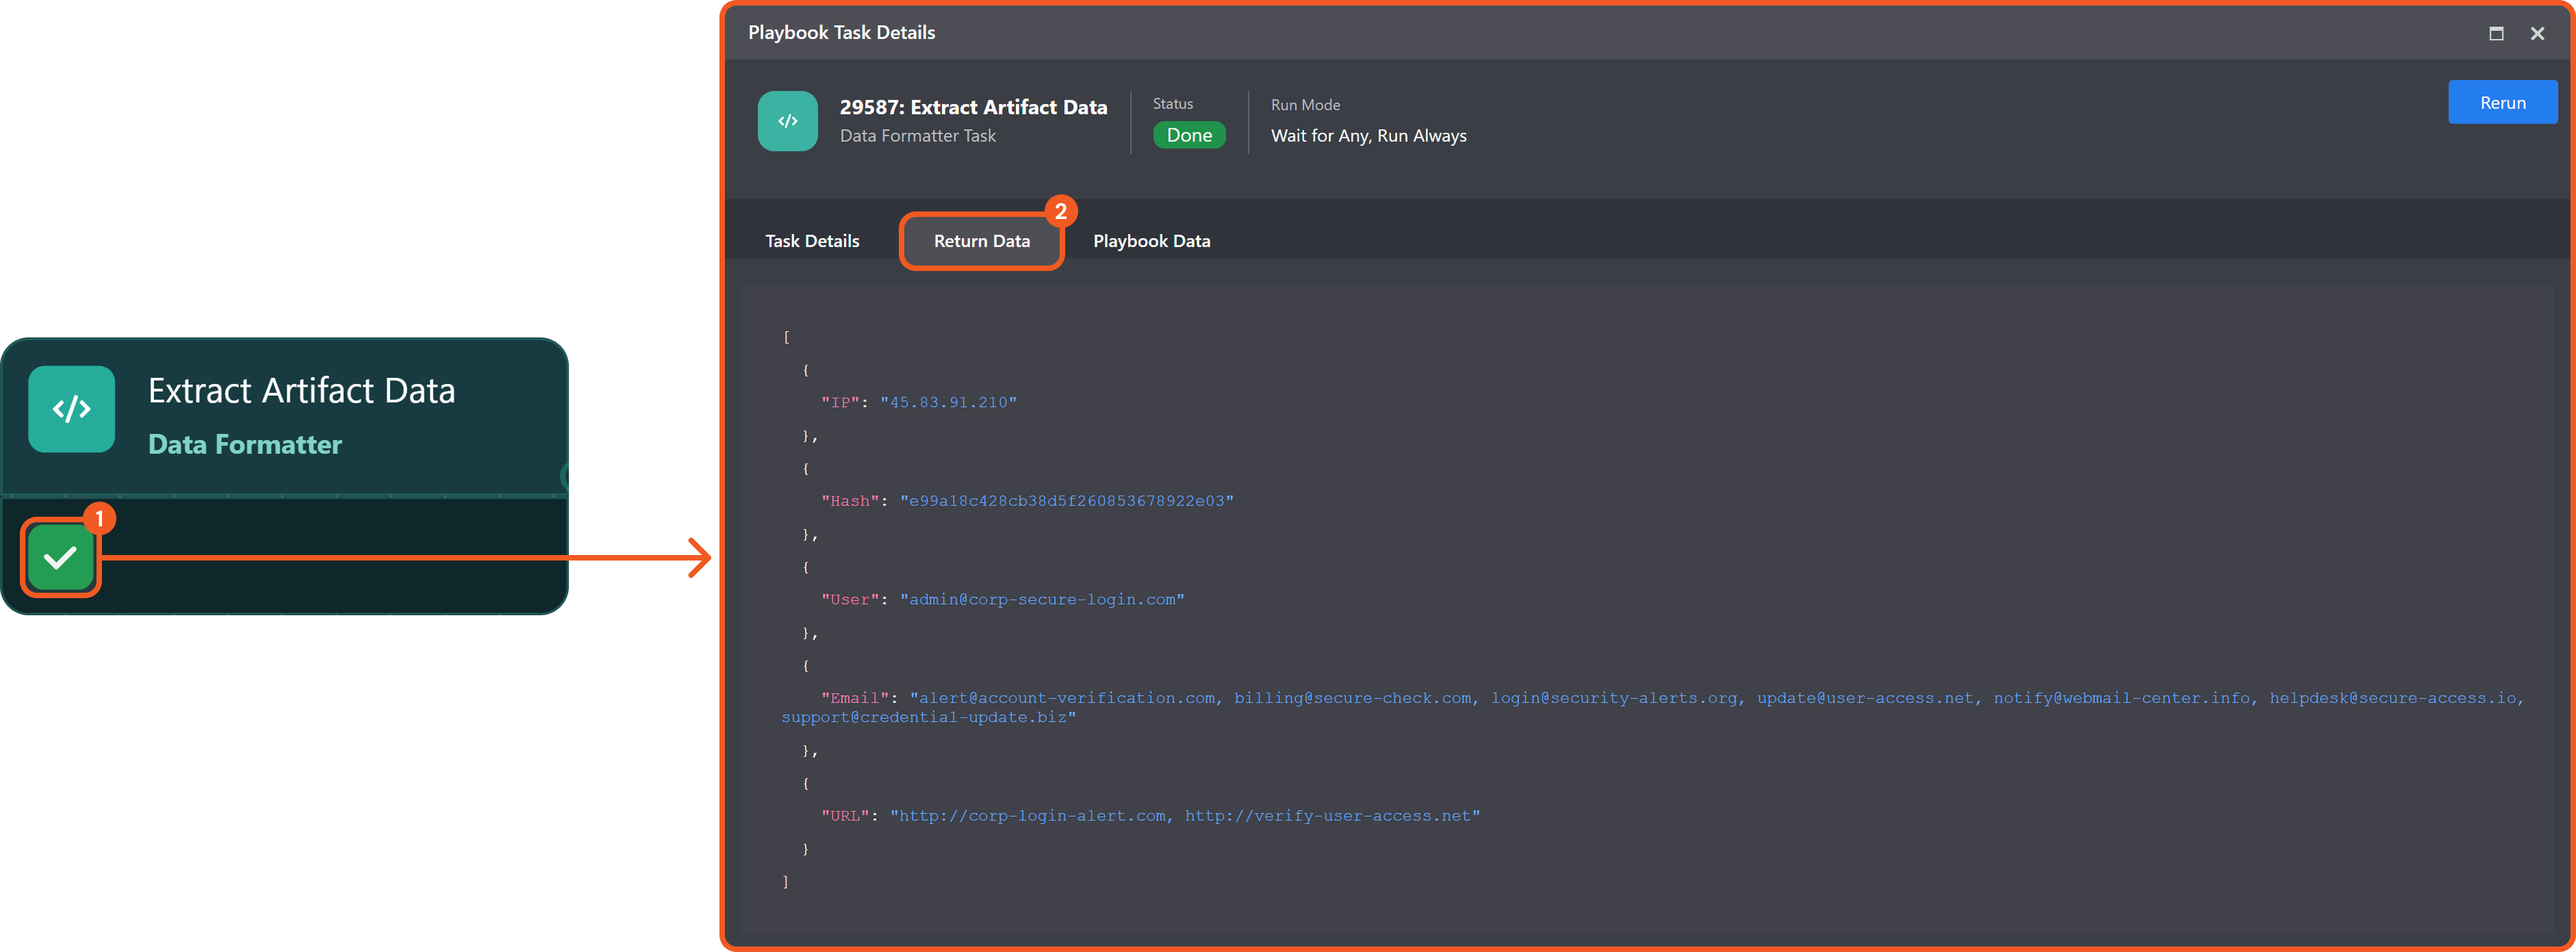
The Unwind task receives its input from a Data Formatter task that returns a JSON array containing five objects—each representing a different type of artifact.
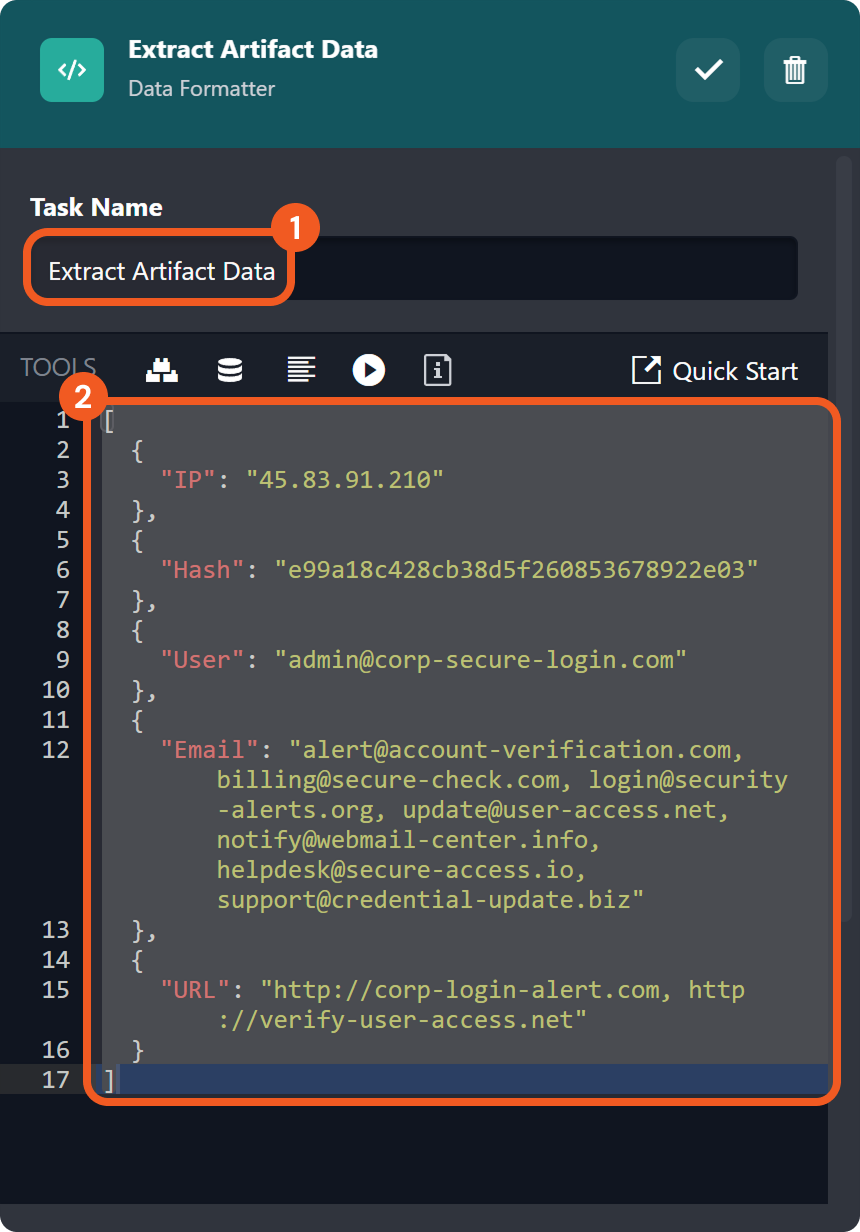
To follow along with the example, users should add a Data Formatter task and:
Name it Extract Artifact Data.
Copy the JSON data below and paste it into the code editor:
Click the Test Playbook button to ensure that the outputs of the Extract Artifact Datatask are available for dynamic input selection.
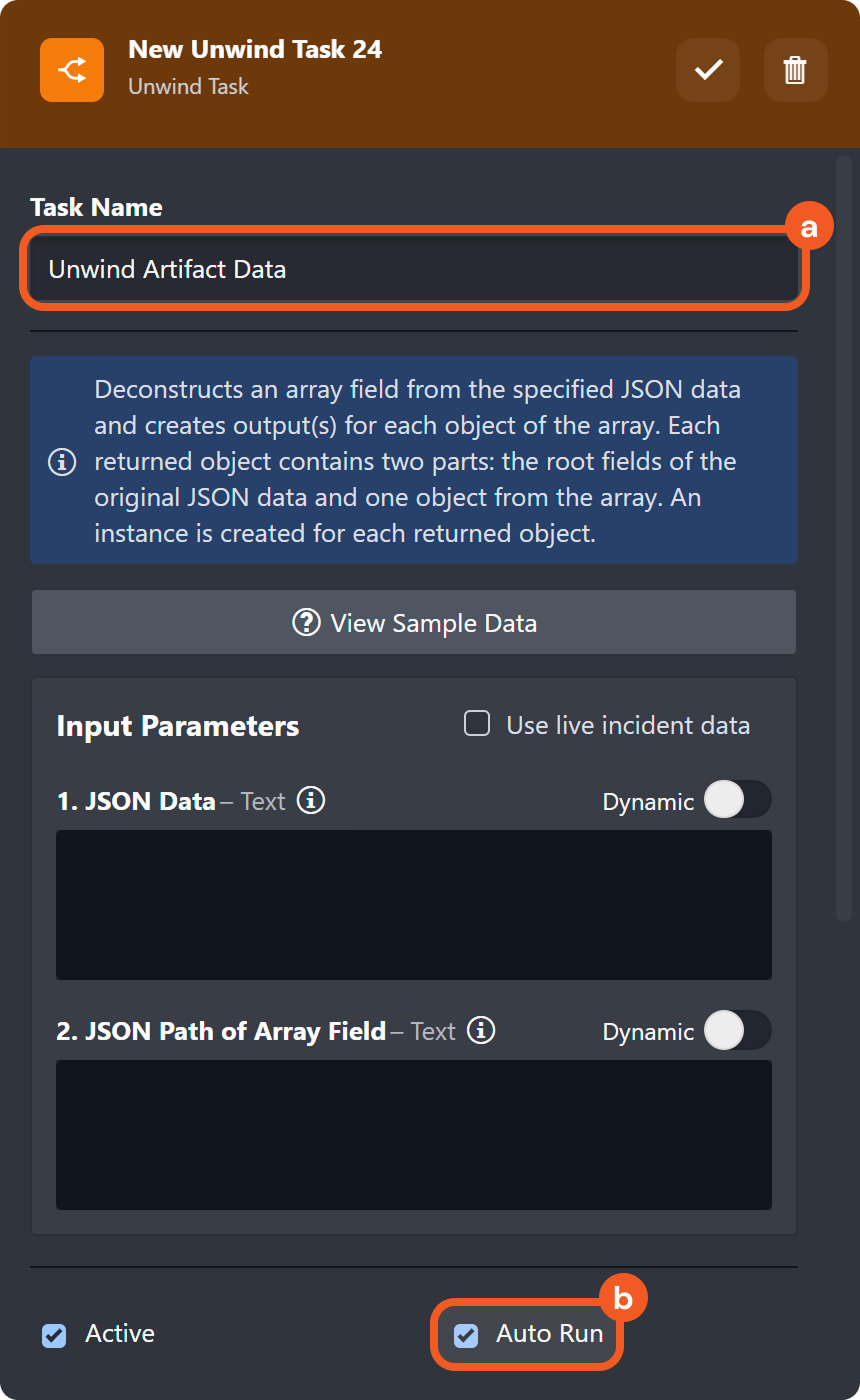
Add an Unwind task node to the Extract Artifact Data task.
Name the task Unwind Artifact Data, then select the Auto Run checkbox.
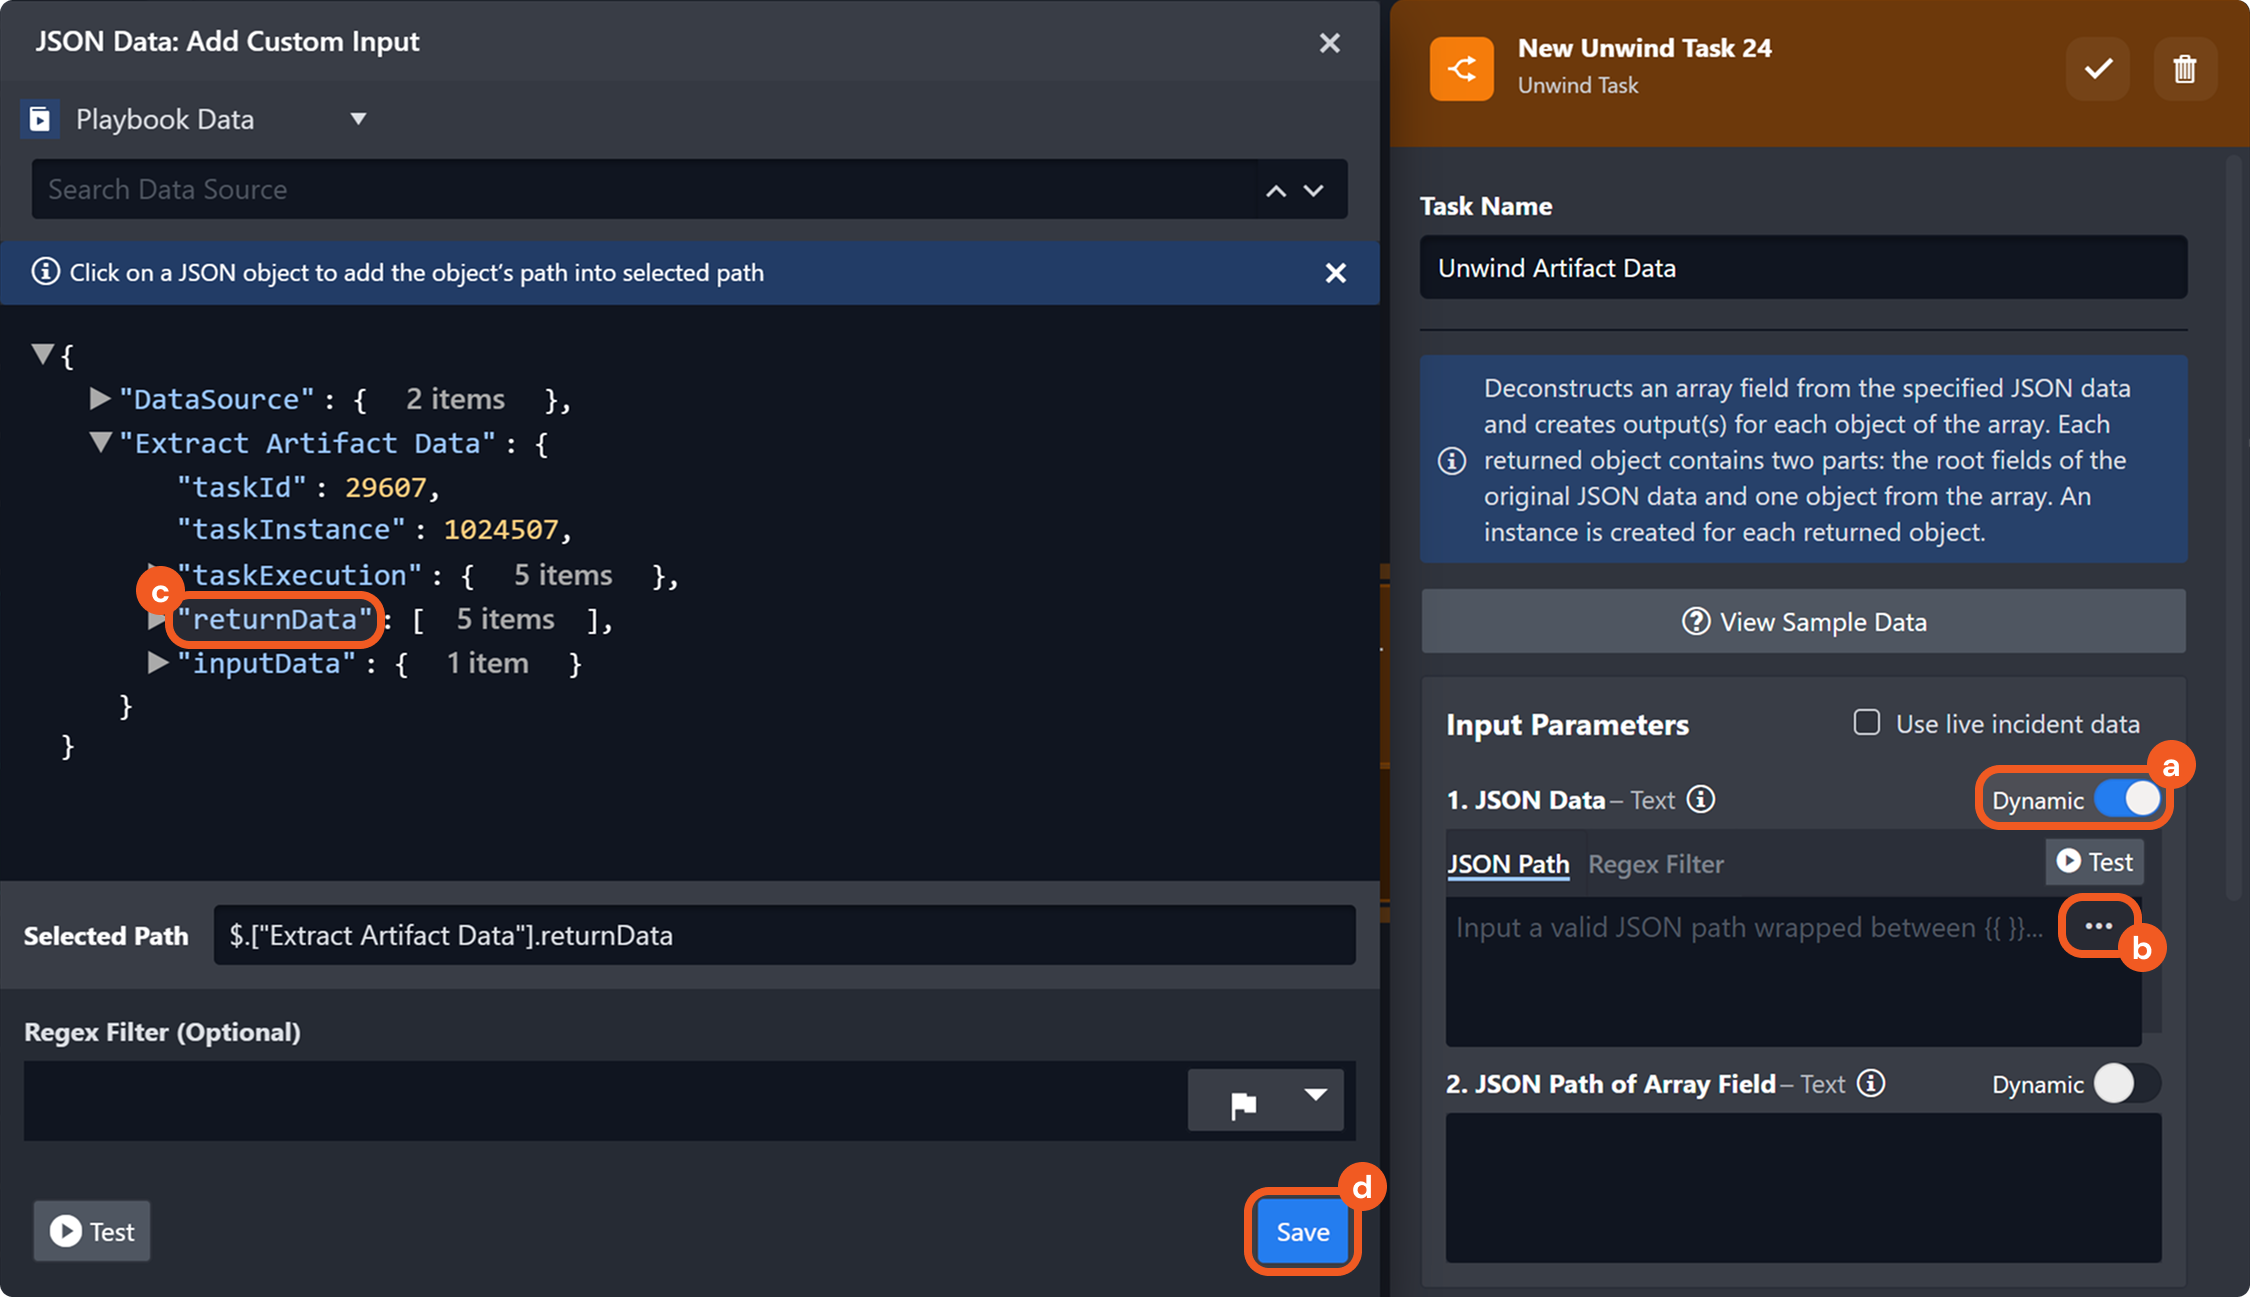
Provide the input for the JSON Data parameter.
Enable the Dynamic toggle.
Click the icon.
Select the JSON path located at Extract Artifact Data > returnData.
Click the Save button.
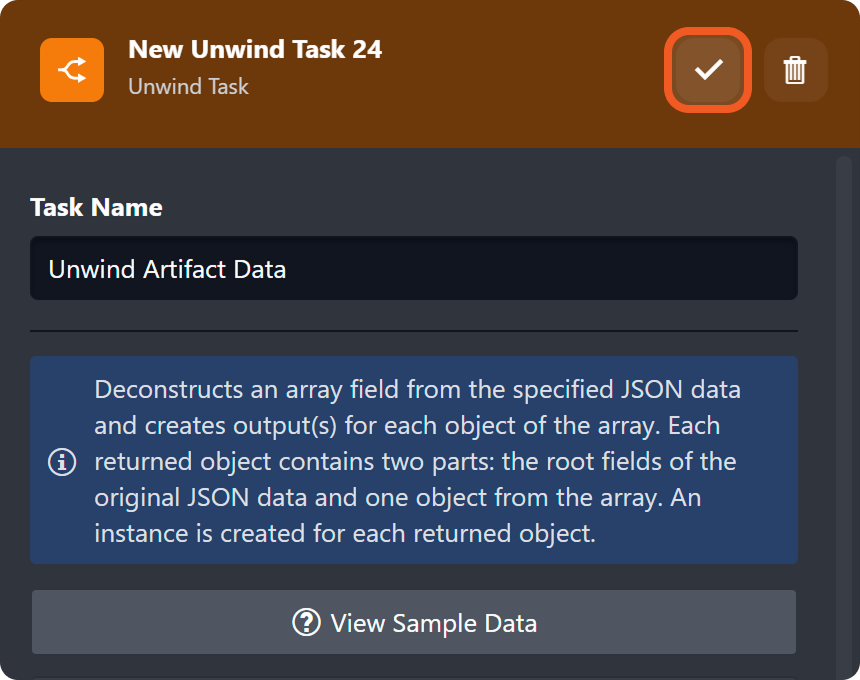
Click the button to save.
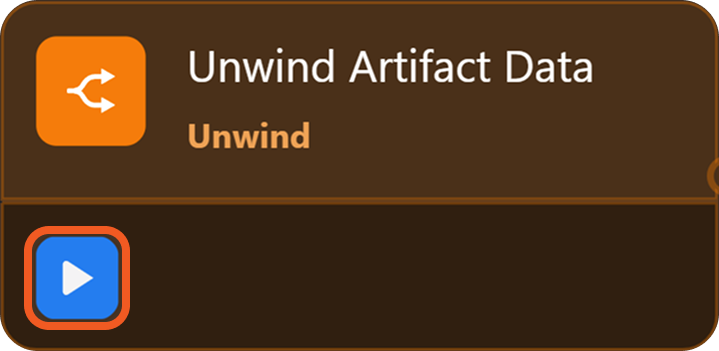
Click the button to execute the Unwind task.
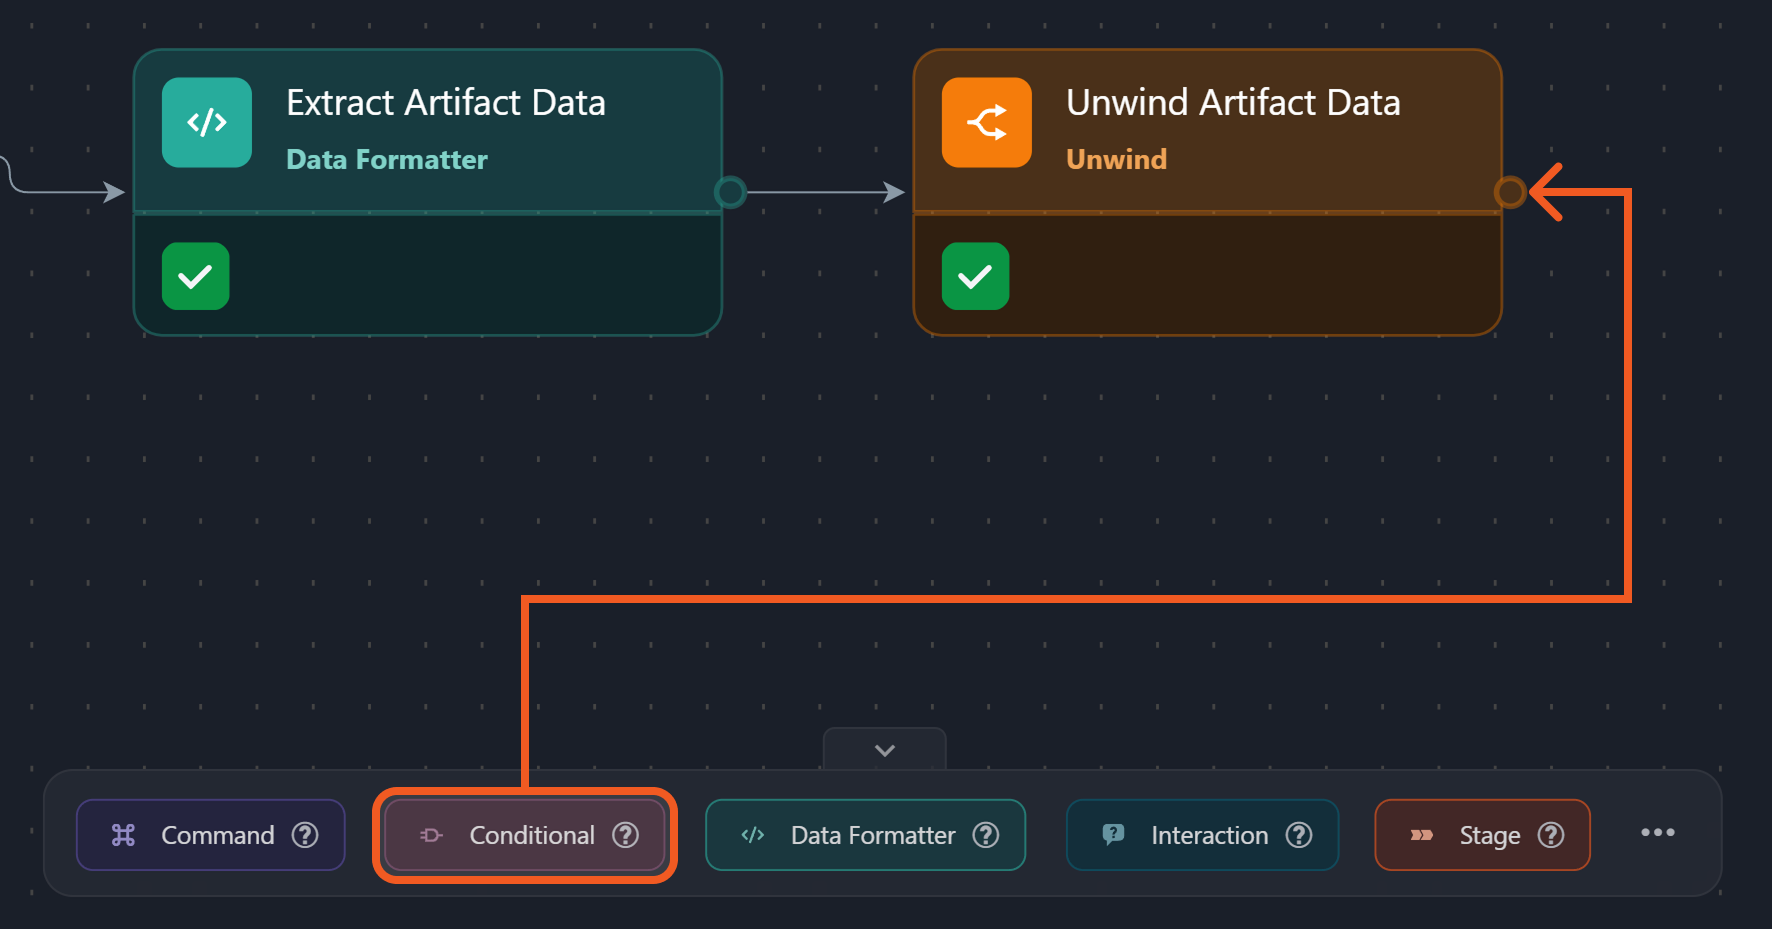
Add a Conditional task node to the Unwind Artifact Data task.
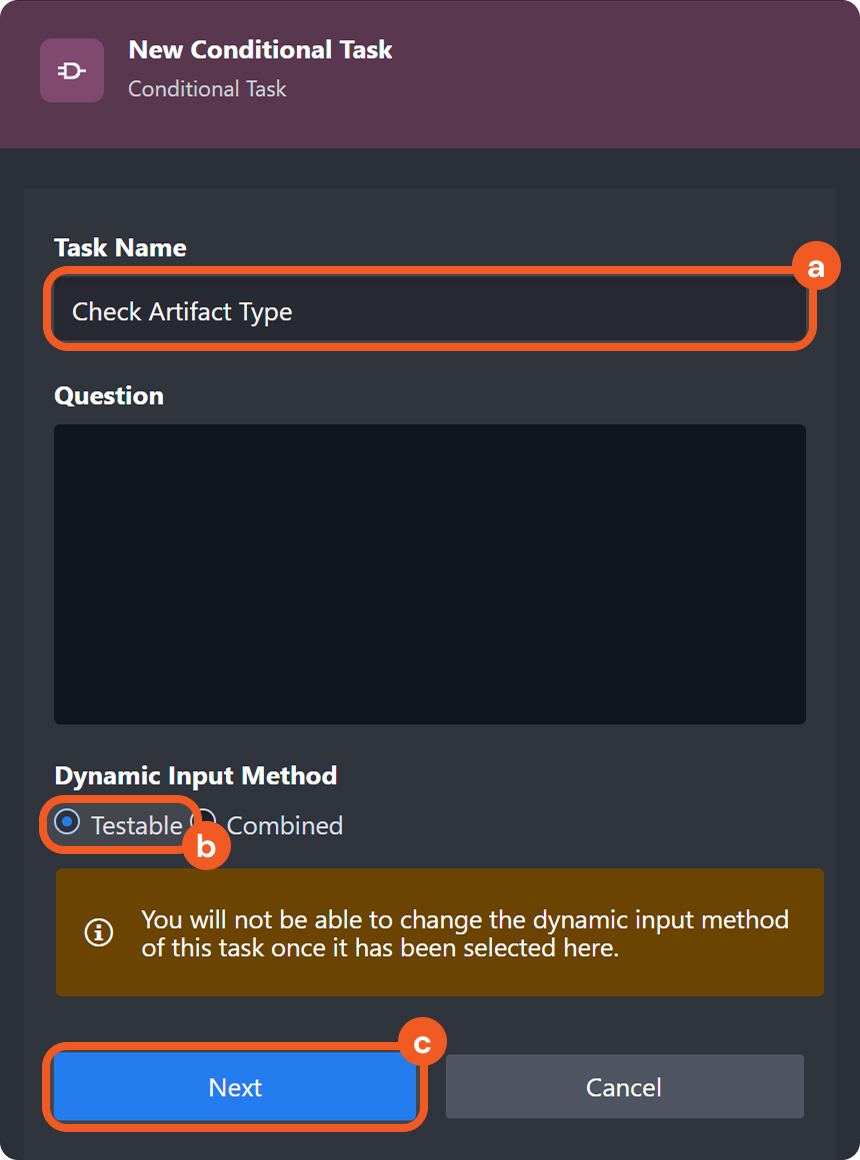
Name the task Check Artifact Type, ensure that the Testable option is selected, then click the Next button.
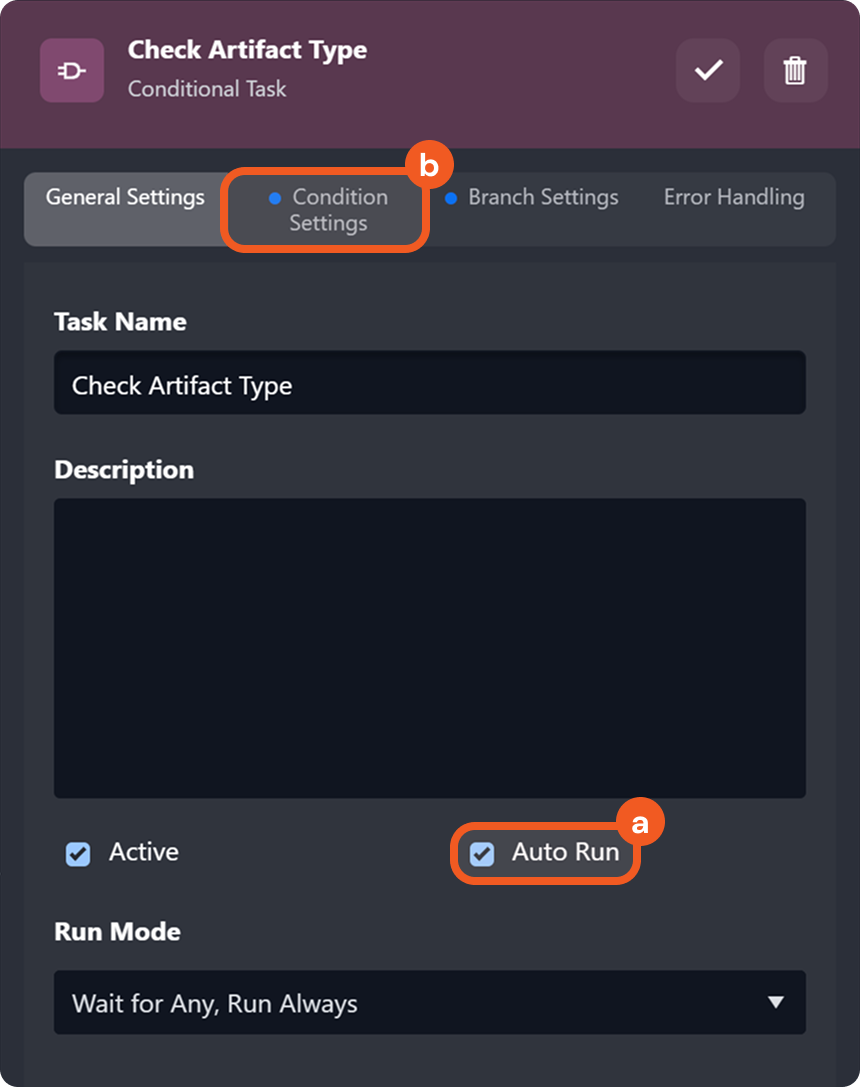
Select the Auto Run checkbox, then navigate to the Condition Settings tab.
Select the Dynamic Inputoption, then copy and paste the code below into the code editor.
CODE
{#
  Runs once per artifact object from the Unwind task.
  Each condition checks if the current object contains a value for a specific field.
  If a value is found, the corresponding label is returned.
#}

{% if PlaybookData | jsonpath('$.["Unwind Artifact Data"].contextData.data[*].IP') %}
IP
{% elif PlaybookData | jsonpath('$.["Unwind Artifact Data"].contextData.data[*].Hash') %}
Hash
{% elif PlaybookData | jsonpath('$.["Unwind Artifact Data"].contextData.data[*].User') %}
User
{% elif PlaybookData | jsonpath('$.["Unwind Artifact Data"].contextData.data[*].Email') %}
Email
{% elif PlaybookData | jsonpath('$.["Unwind Artifact Data"].contextData.data[*].URL') %}
URL
{% endif %}
This block runs once for each object produced by the Unwind task. It checks whether the current object contains a value for one of the known artifact types: IP, Hash, User, Email, or URL. If a value is found, the corresponding conditional branch is activated.
Navigate to the Branch Settings tab, click the + Add Branch button, and add branches for IP, Hash, User, Email, and URL.
Ensure that the branch names are entered exactly as shown.
Click the button to save.
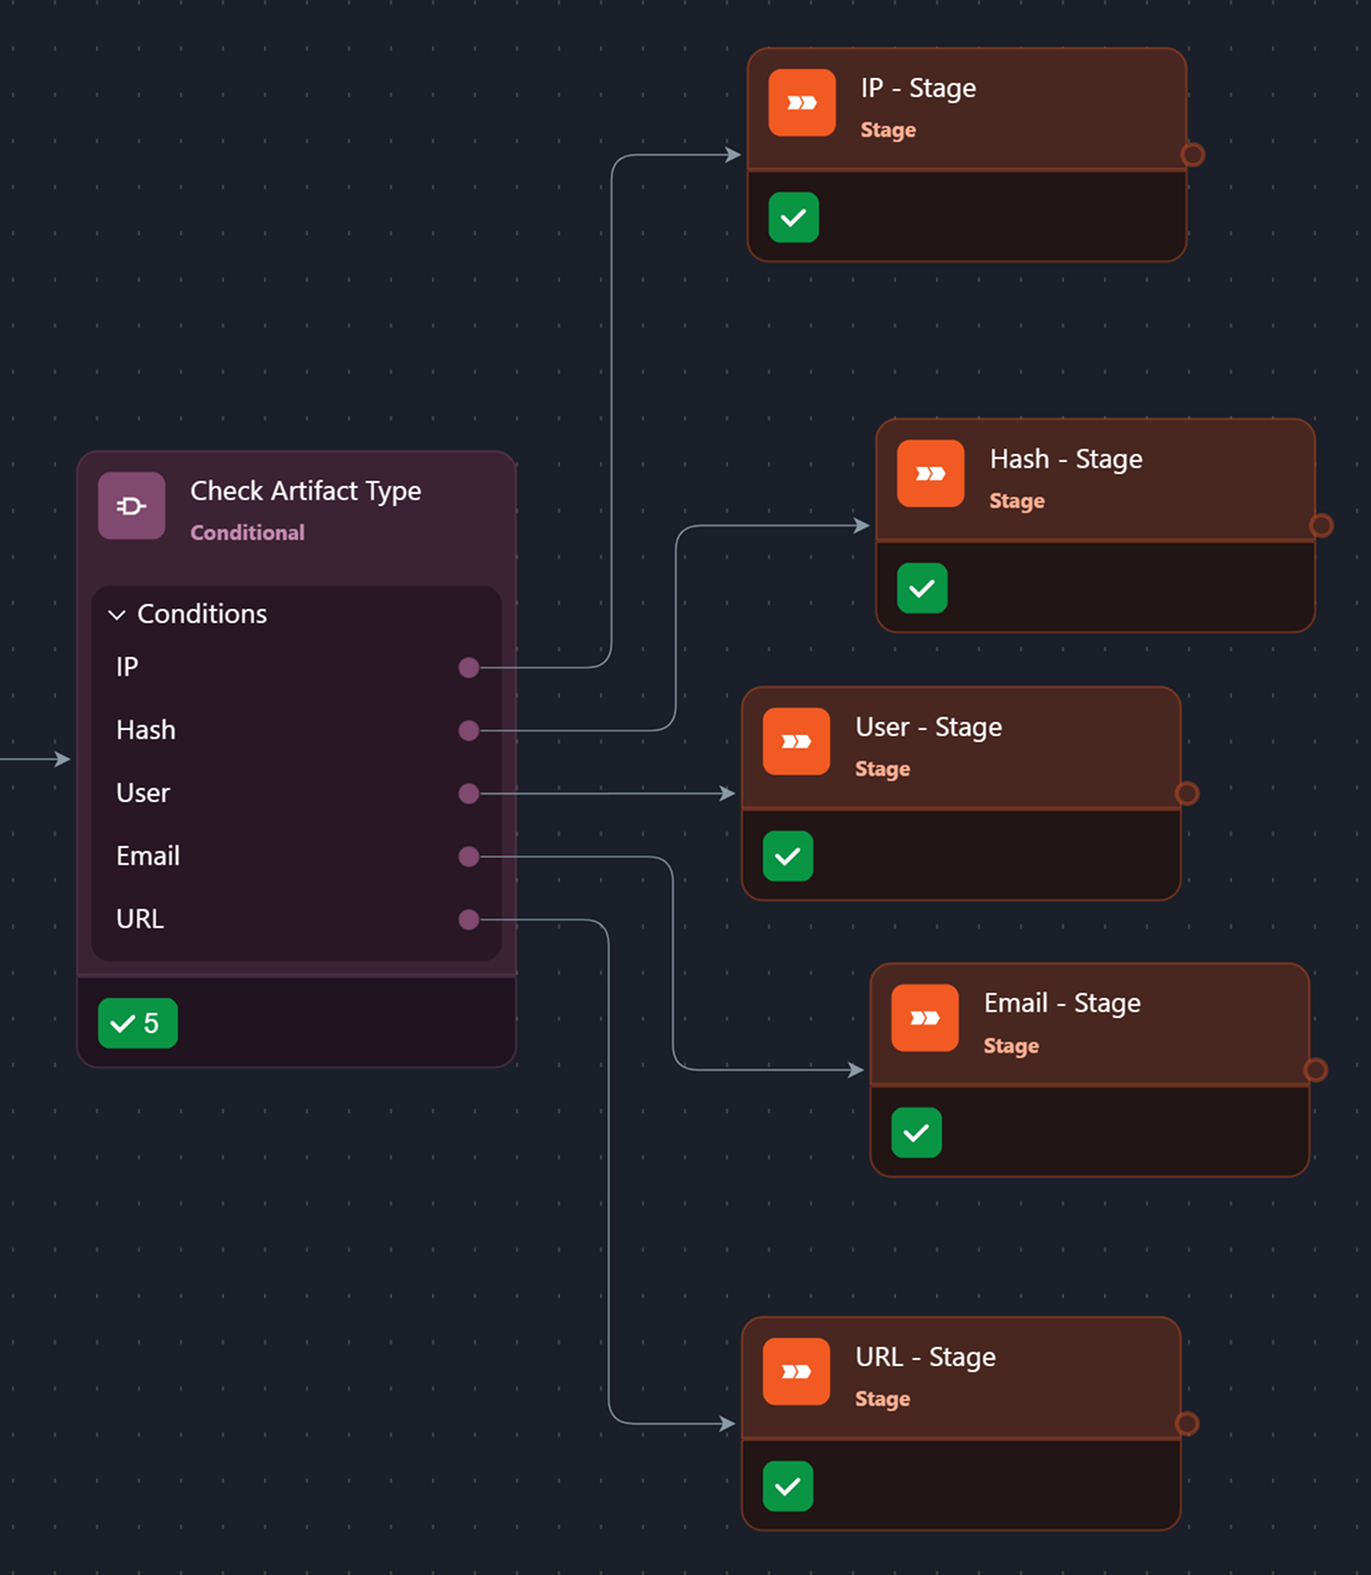
Add a Stage task to each branch.
This verifies that all branches follow the correct execution path and that execution does not stop at the first matching condition.
Click the Test Playbook button to view the execution flow.
RESULT
The Conditional task evaluates each artifact individually and activates the matching execution path based on its type, rather than stopping at the first match. Using a Conditional task alongside an Unwind task is particularly effective when different reputation check commands must be applied to different artifact types.
Also note that configuring tasks in this manner does not result in multiple parallel executions of the same downstream task.
Example 3: Separating Email Recipients to Generate Reports
SCENARIO Three employees receive a suspicious email in Outlook. An analyst can use the Unwind task to deconstruct the toRecipients field, to create an Excel sheet listing all affected individuals along with relevant event details.
READER NOTE
This example assumes that a D3 event was created in response to a suspicious Office 365 email sent to multiple recipients.
Click the Test Playbook button to create a data source, ensuring the trigger output fields for the Office 365 event are available for dynamic input selection.
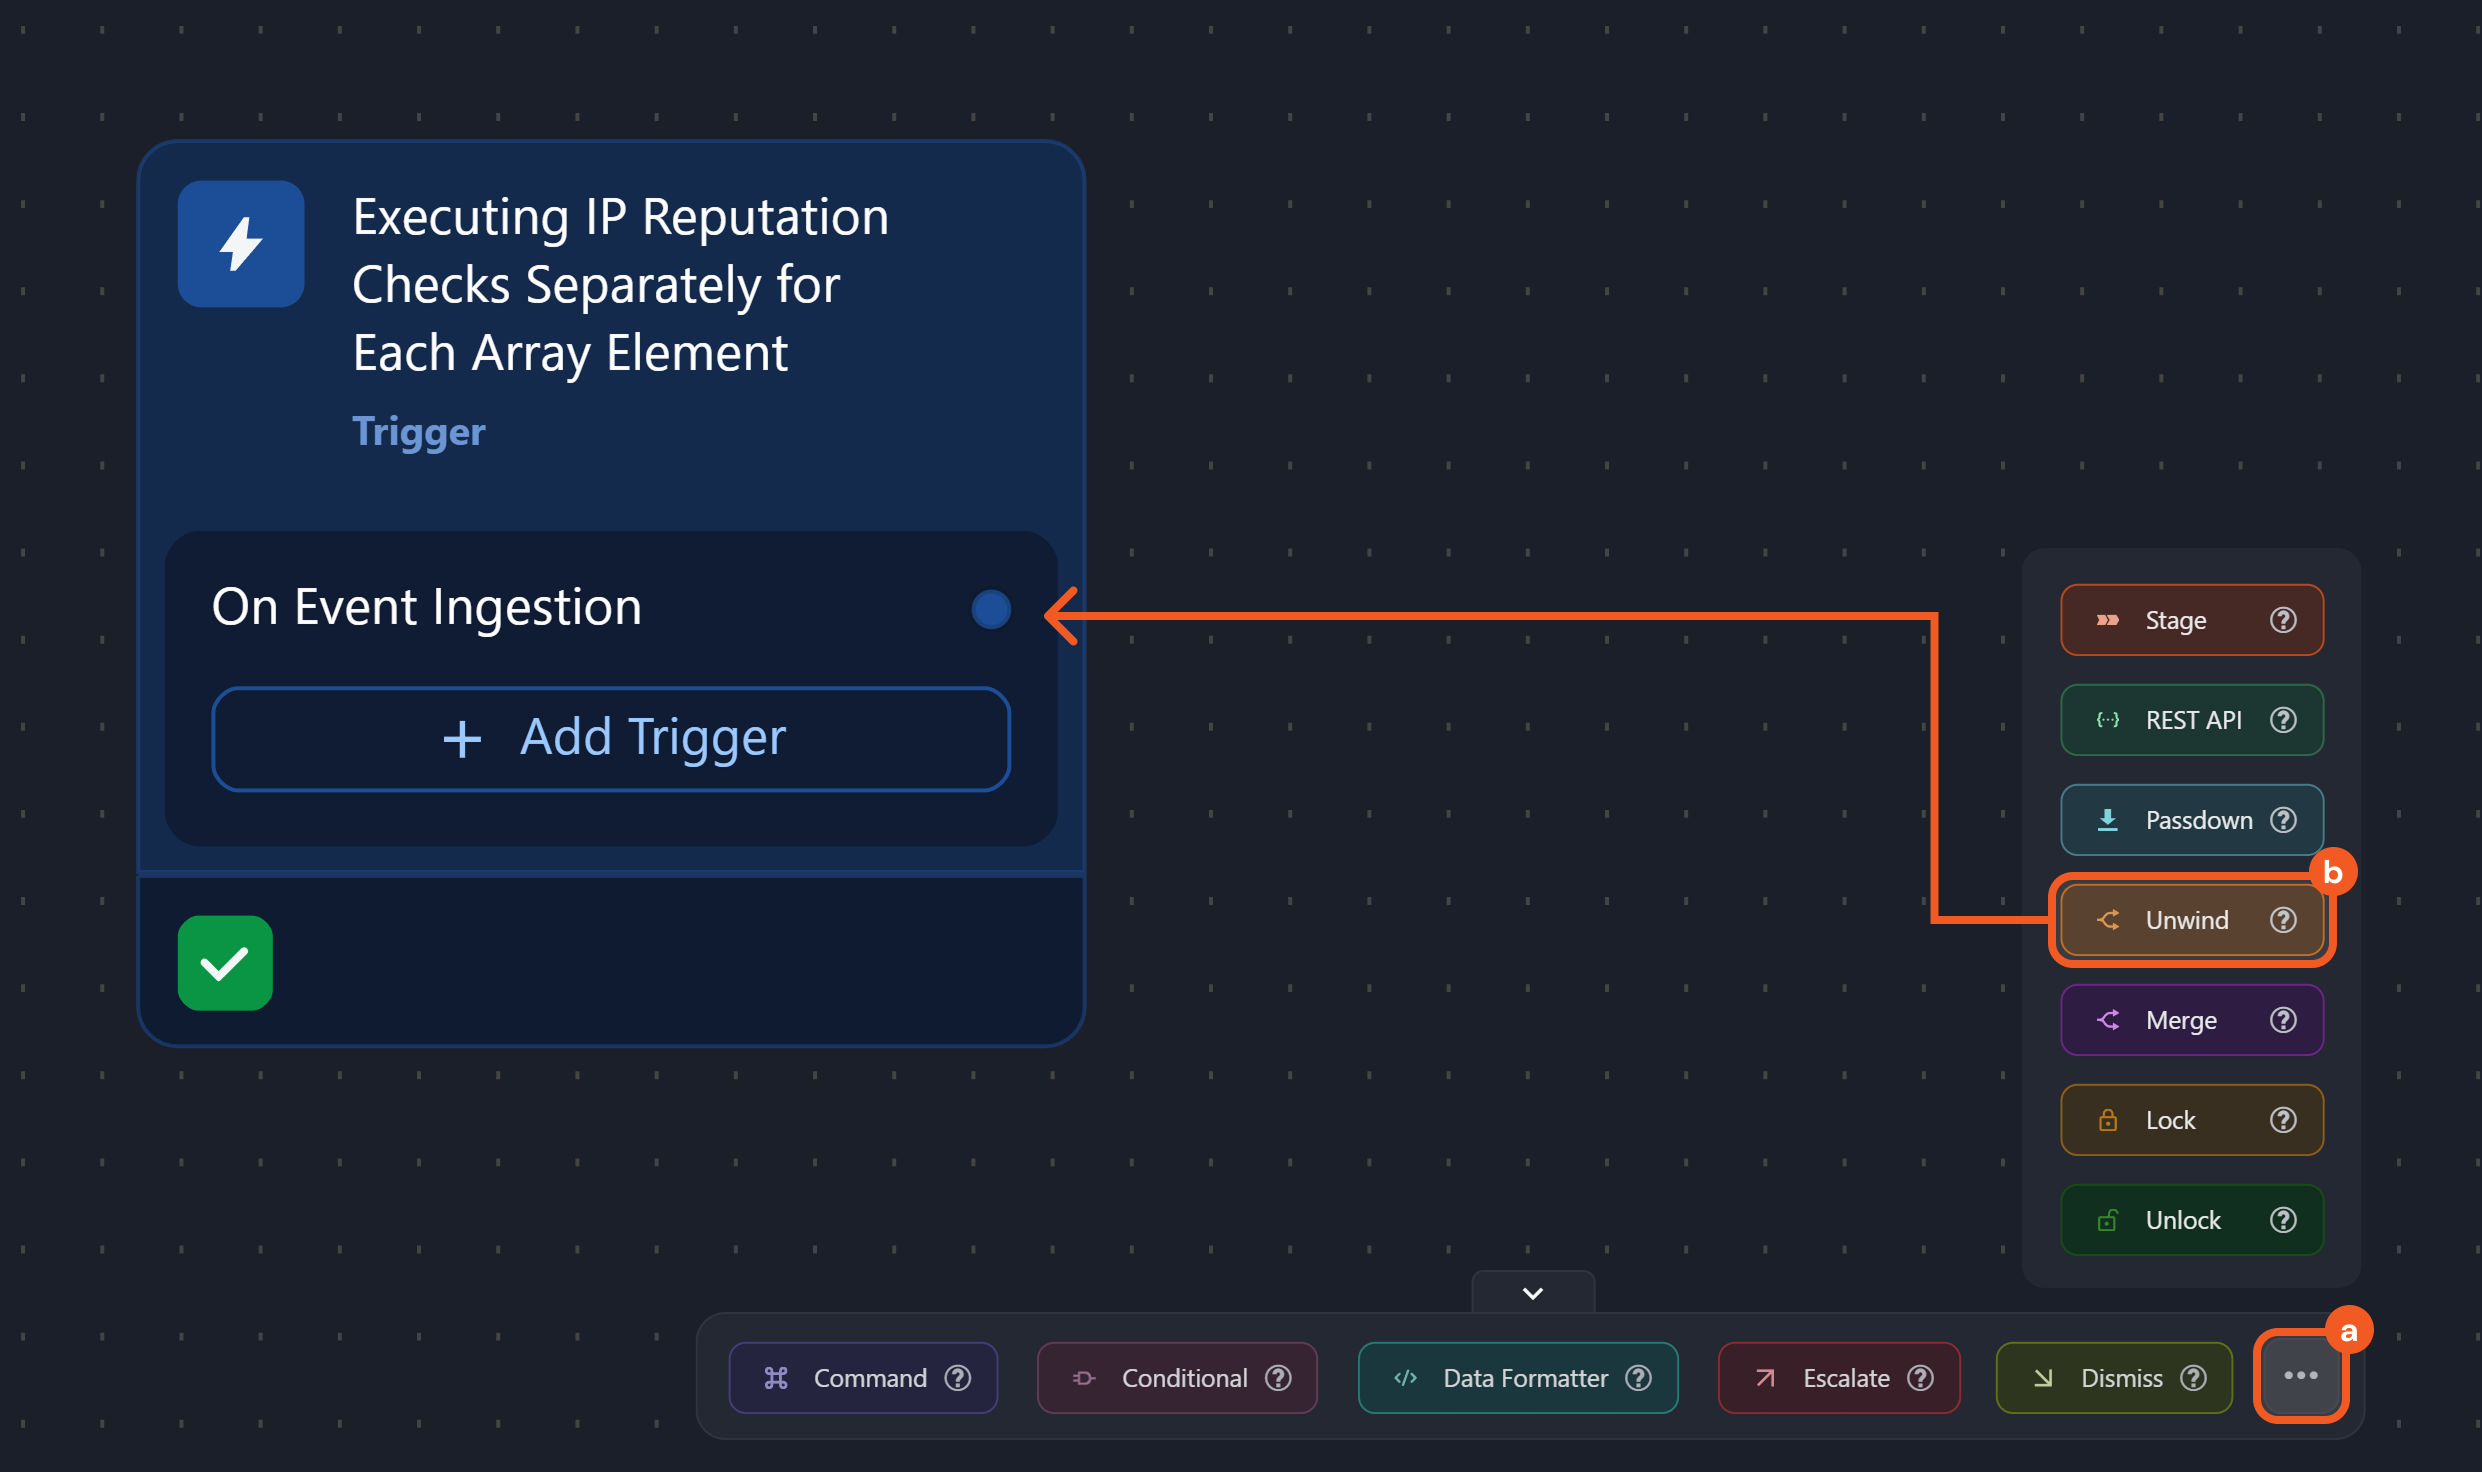
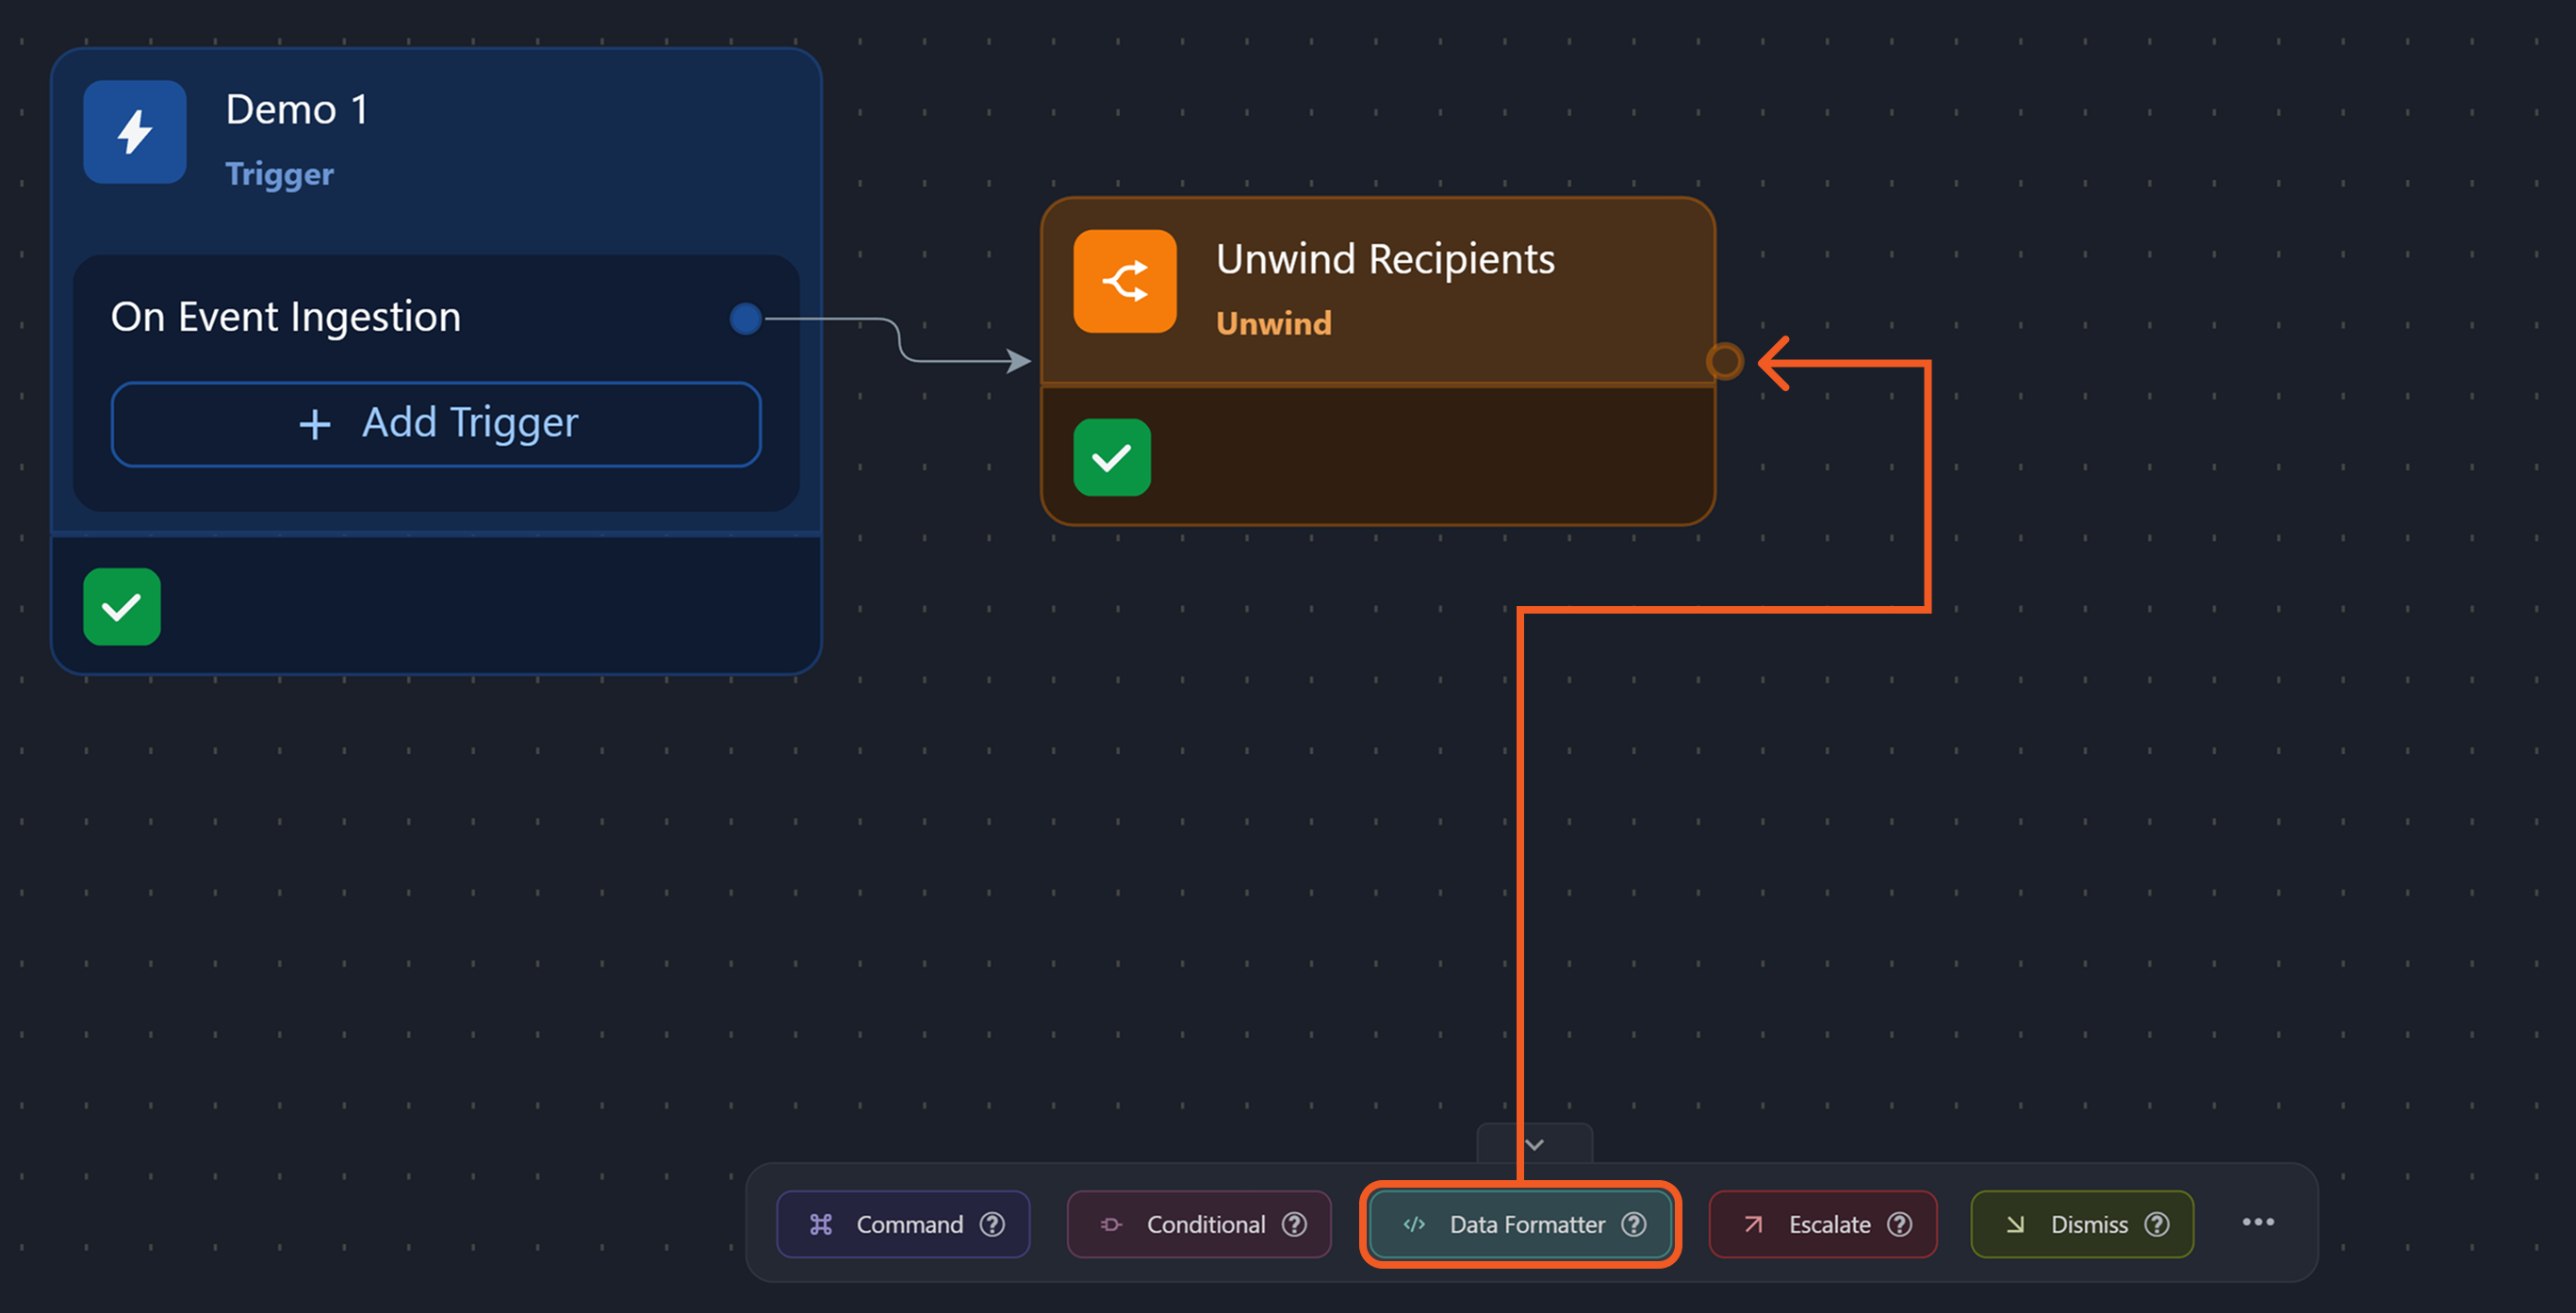
Add an Unwind task node to the On Event Ingestion trigger.
Name the task Unwind Recipients, then select the Auto Run checkbox.
Provide the input for the JSON Data parameter.
Enable the Dynamic toggle.
Click the icon.
Select the JSON path located at Trigger > data > Data.
Click the Save button.
Provide the input for the JSON Path of Array Field parameter.
Click the Test button to inspect the JSON data structure.
Identify the array field to be deconstruction.
Enter the corresponding JSON path (e.g., $.toRecipients).
Click the button to save.
Click the button to test the Unwind Recipients task.
This generates task outputs that can be referenced by downstream tasks.
Add a Data Formatter task to the previous task node.
This task will be used to convert unwound recipient data into a flat JSON array for reporting.
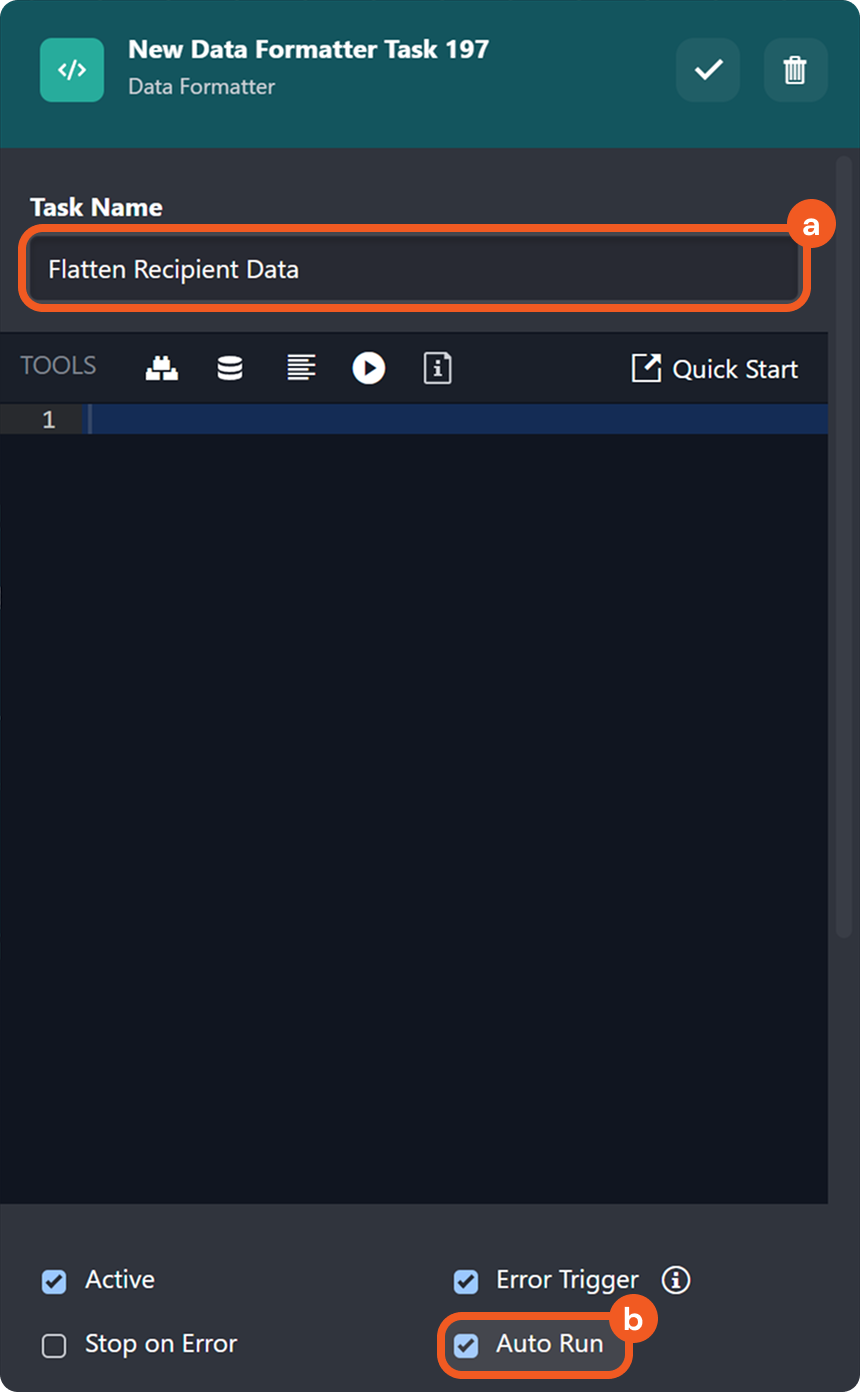
Name the task Flatten Recipient Data, then select the Auto Run checkbox.
Enter the code below (supplemented with comments) in the code editor.
CODE
{# Extracts the unwound recipient data array from the playbook output #}
{% set data = PlaybookData | jsonpath('$.["Unwind Recipients"].contextData.data') %}
[

{# Iterates through each recipient object in the unwound data array #}
{% for item in data %}
  {
    {# Extracts the recipient's email address #}
    "recipient_email": "{{ item.toRecipients.emailAddress.address }}",

    {# Extracts the email subject from the original message #}
    "subject": "{{ item.originalEmail[0].detail.item.subject | default('') }}",

    {# Extracts the sender's display name #}
    "sender_name": "{{ item.originalEmail[0].detail.item.sender.emailAddress.name | default('') }}",

    {# Extracts the sender's email address #}
    "sender_email": "{{ item.originalEmail[0].detail.item.sender.emailAddress.address | default('') }}",

    {# Extracts the email's sent timestamp #}
    "sent_time": "{{ item.originalEmail[0].detail.item.sentDateTime | default('') }}"
  }

  {# Adds a comma between JSON objects, except after the last item #}
  {% if not loop.last %},{% endif %}
{% endfor %}

]
This generates a flat JSON array by extracting key email fields for each unwound recipient.
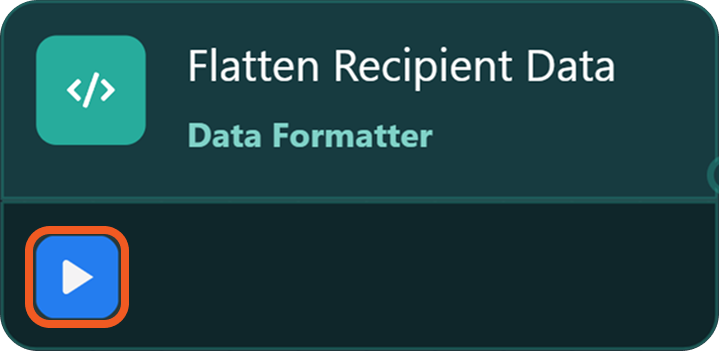
Click the button to save.
Click the button to test the Flatten Recipient Data task.
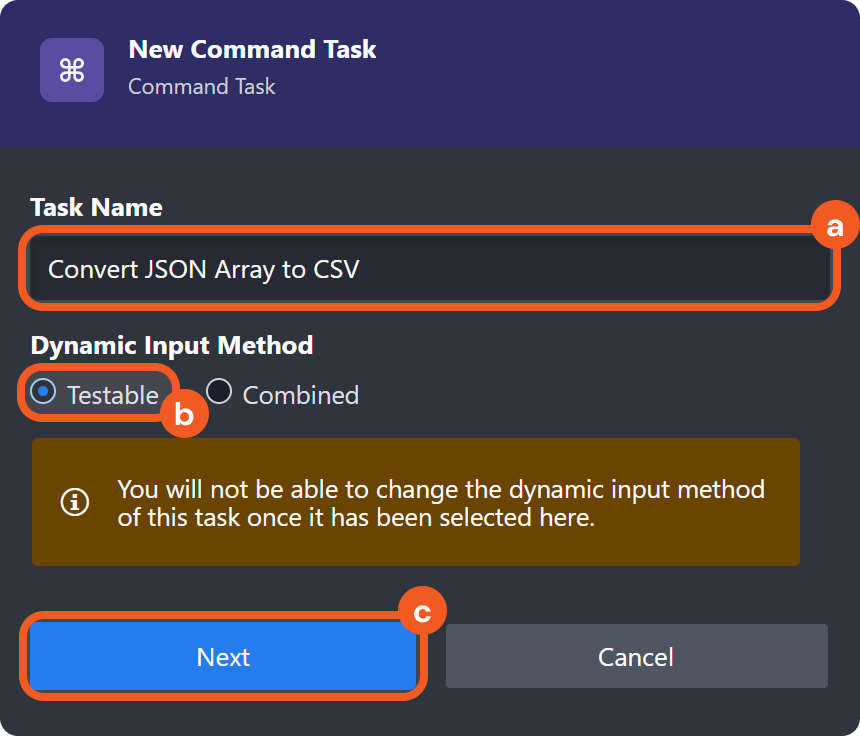
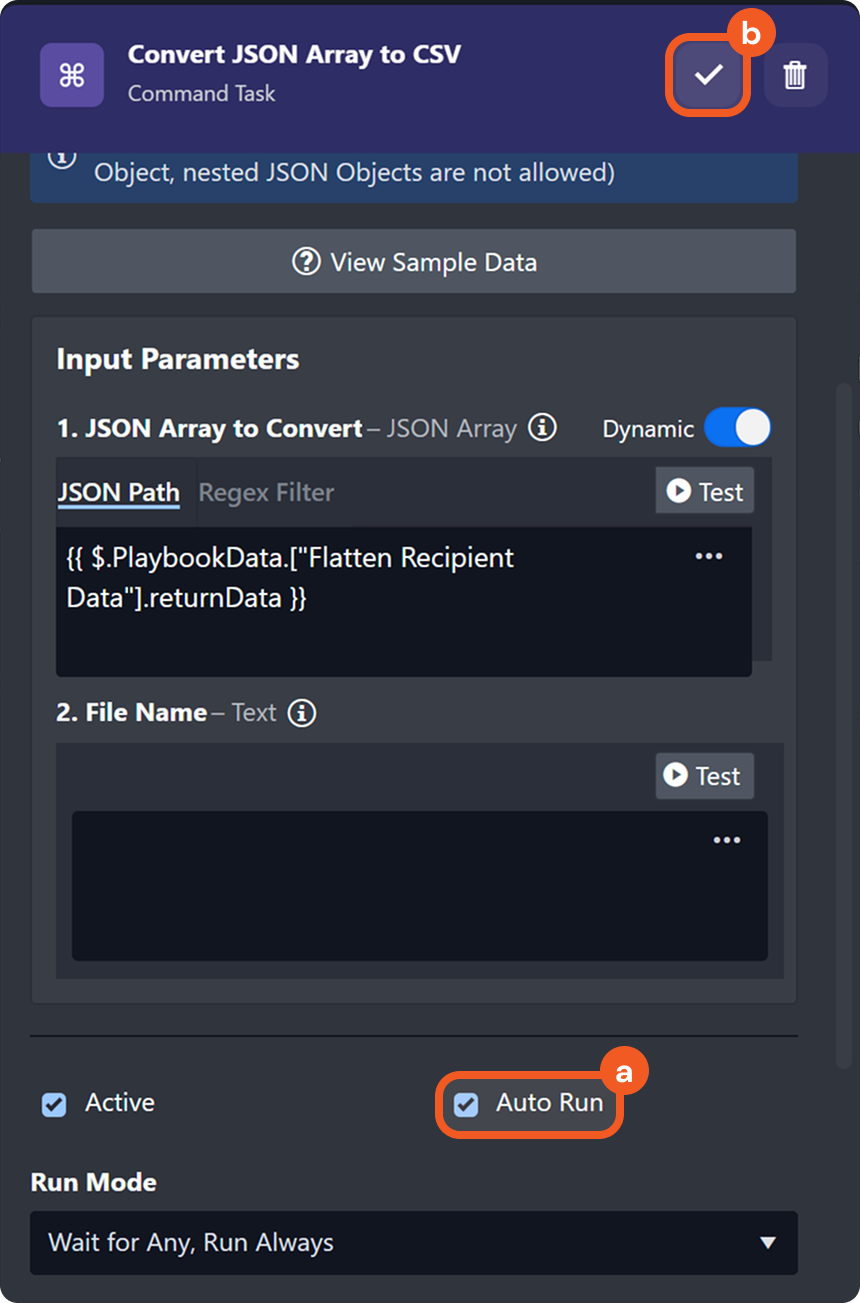
Add a Convert JSON Array to CSV Command task to previous task node.
Name the task, ensure that the Testable option is selected, then click the Next button.
Provide the input for the JSON Array to Convert parameter.
Enable the Dynamic toggle.
Click the icon.
Select the JSON path located at Flatten Recipient Data > returnData.
Click the Save button.
Select the Auto Run checkbox, then click the button to save.
Click the button to test the Convert JSON Array to CSV task.
RESULT
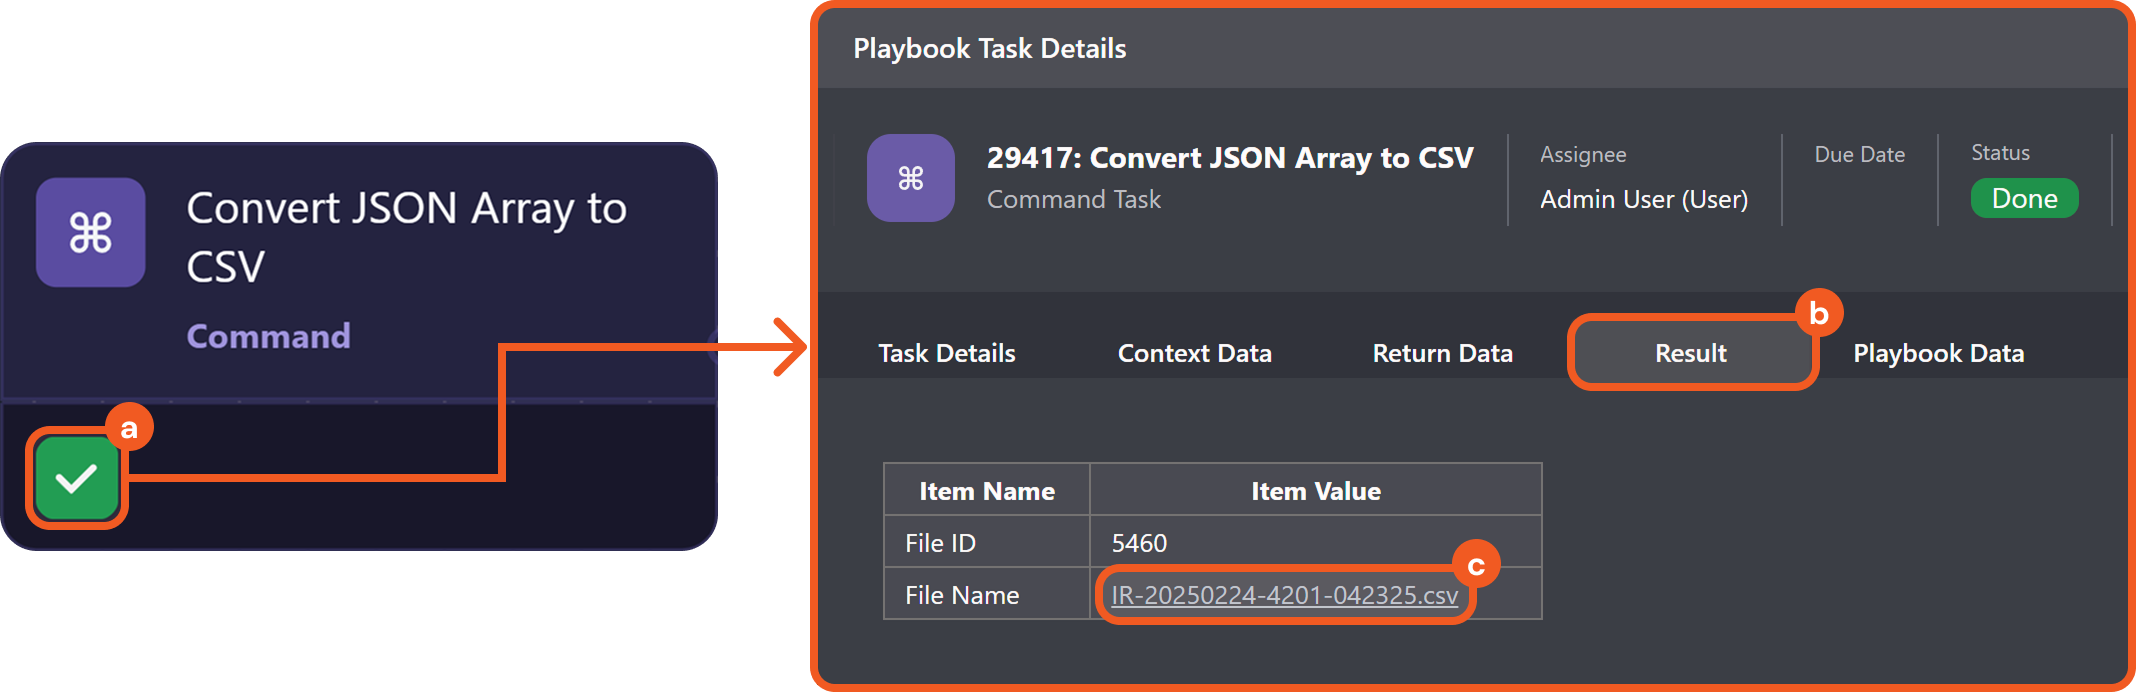
If the Convert JSON Array to CSV task executed successfully, users can click the icon and navigate to the Results tab to access the CSV download link. Clicking the link downloads the CSV file for viewing.
JavaScript errors detected
Please note, these errors can depend on your browser setup.
If this problem persists, please contact our support.


.png?inst-v=e416ef0a-975f-4240-8b76-b2350608028d)
.png?inst-v=e416ef0a-975f-4240-8b76-b2350608028d)
.png?inst-v=e416ef0a-975f-4240-8b76-b2350608028d)

.png?inst-v=e416ef0a-975f-4240-8b76-b2350608028d)


.png?inst-v=e416ef0a-975f-4240-8b76-b2350608028d)
 icon.
icon.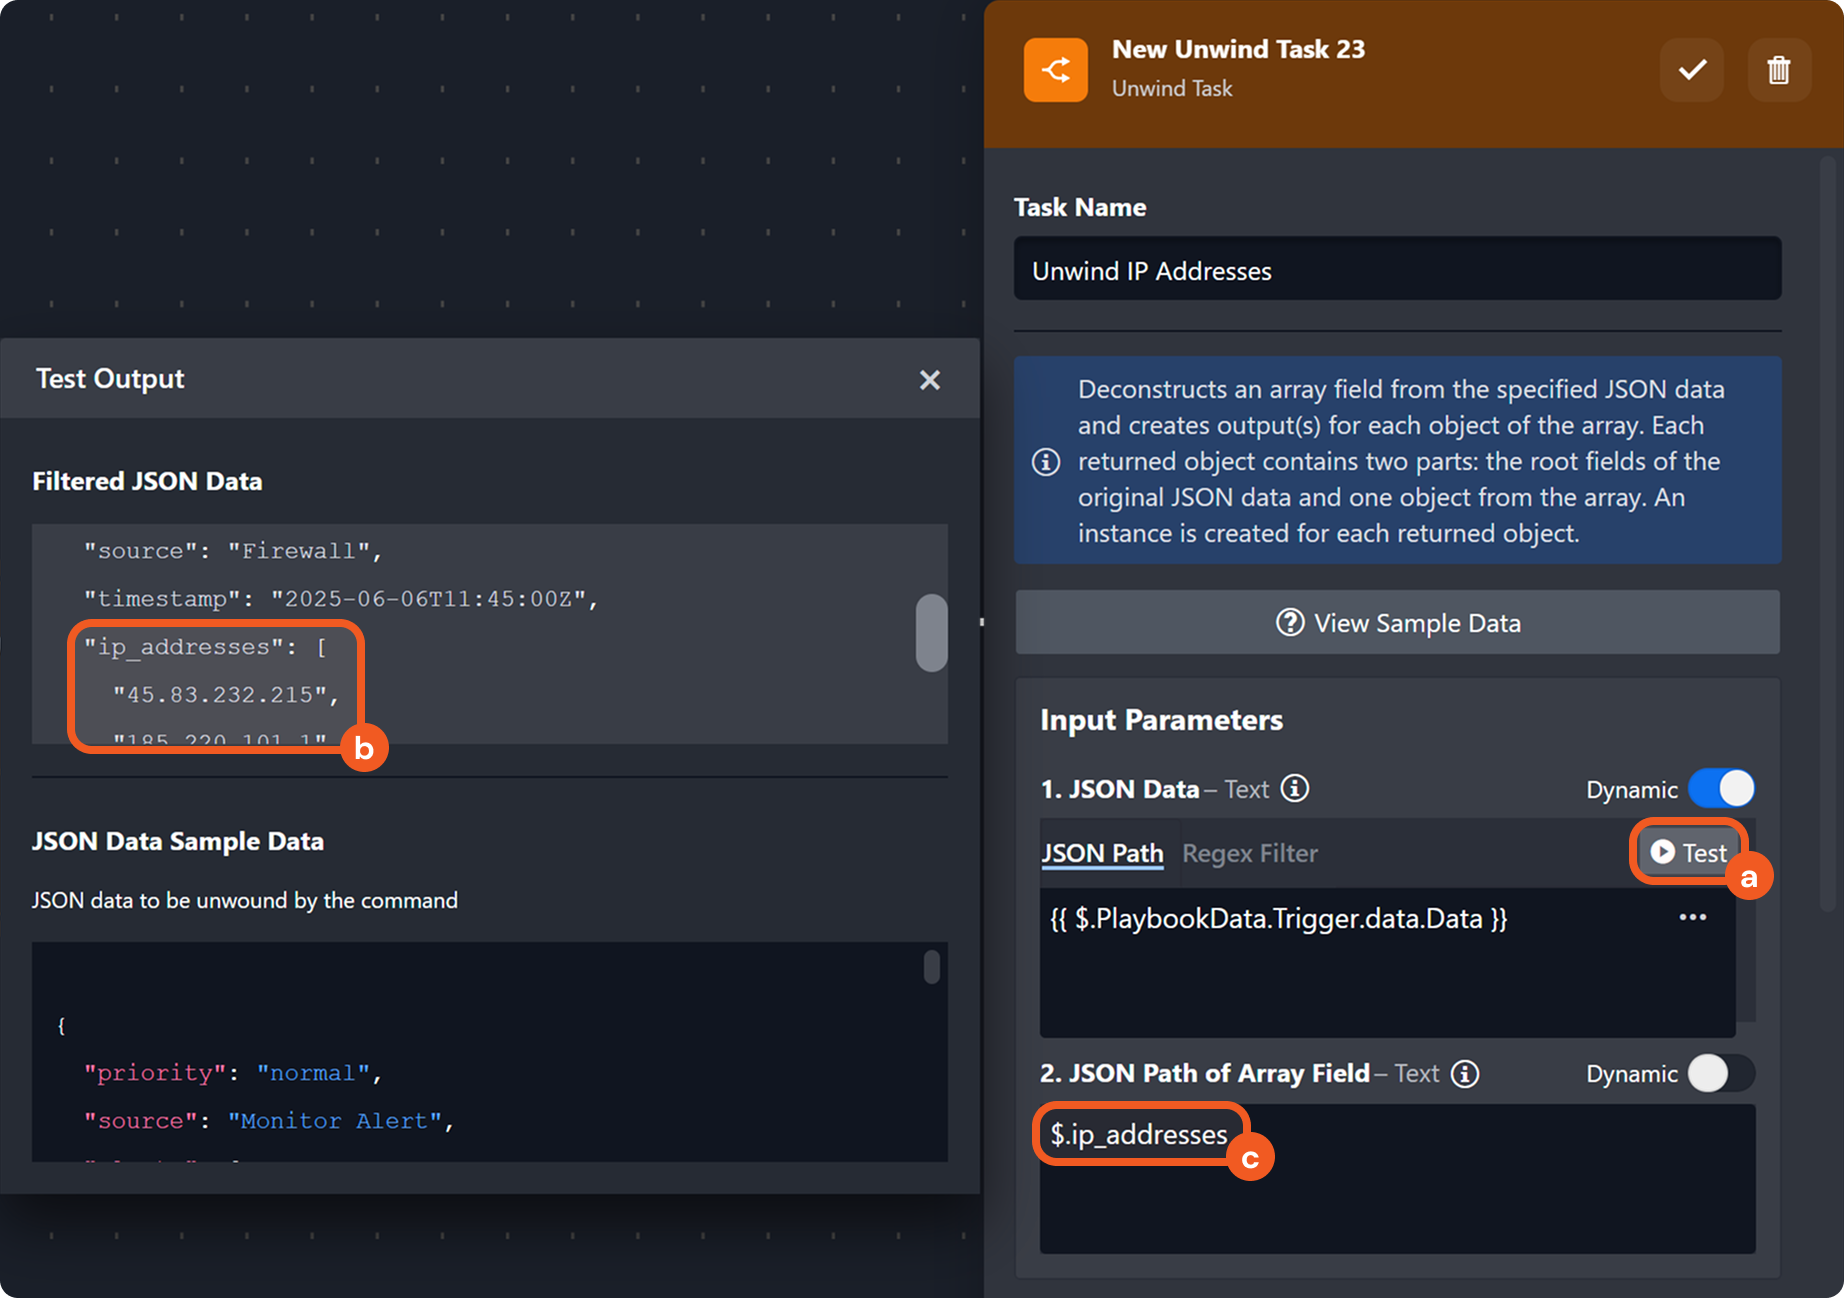
 button to save.
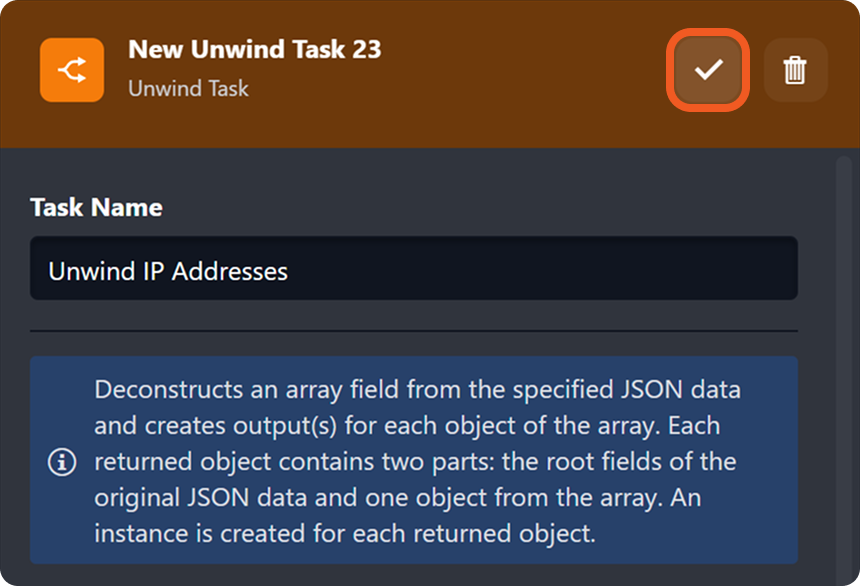
 button to test the Unwind IP Addresses task.
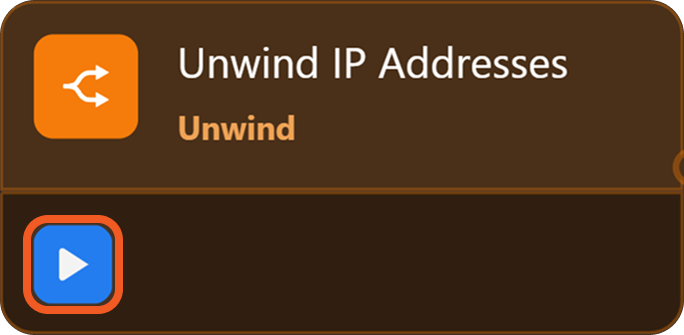
 icon.
icon. button to save.
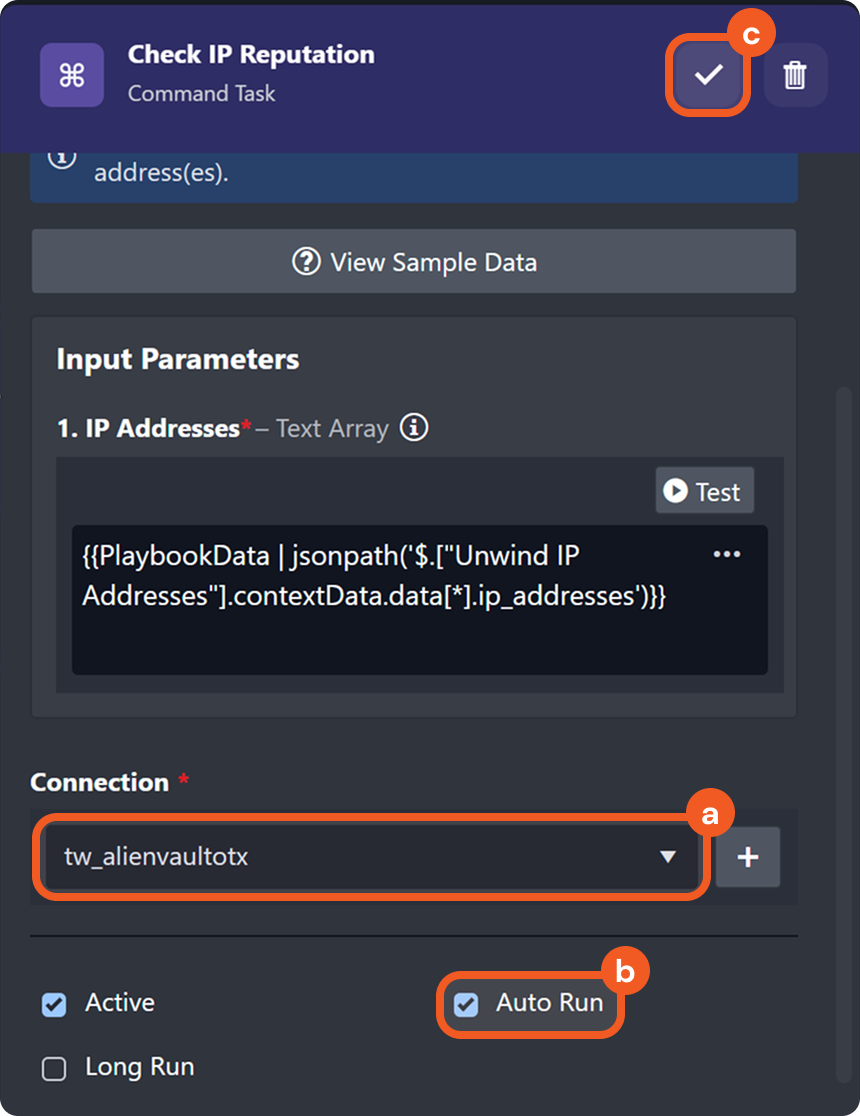


.png?inst-v=e416ef0a-975f-4240-8b76-b2350608028d)

.png?inst-v=e416ef0a-975f-4240-8b76-b2350608028d) CODE
CODE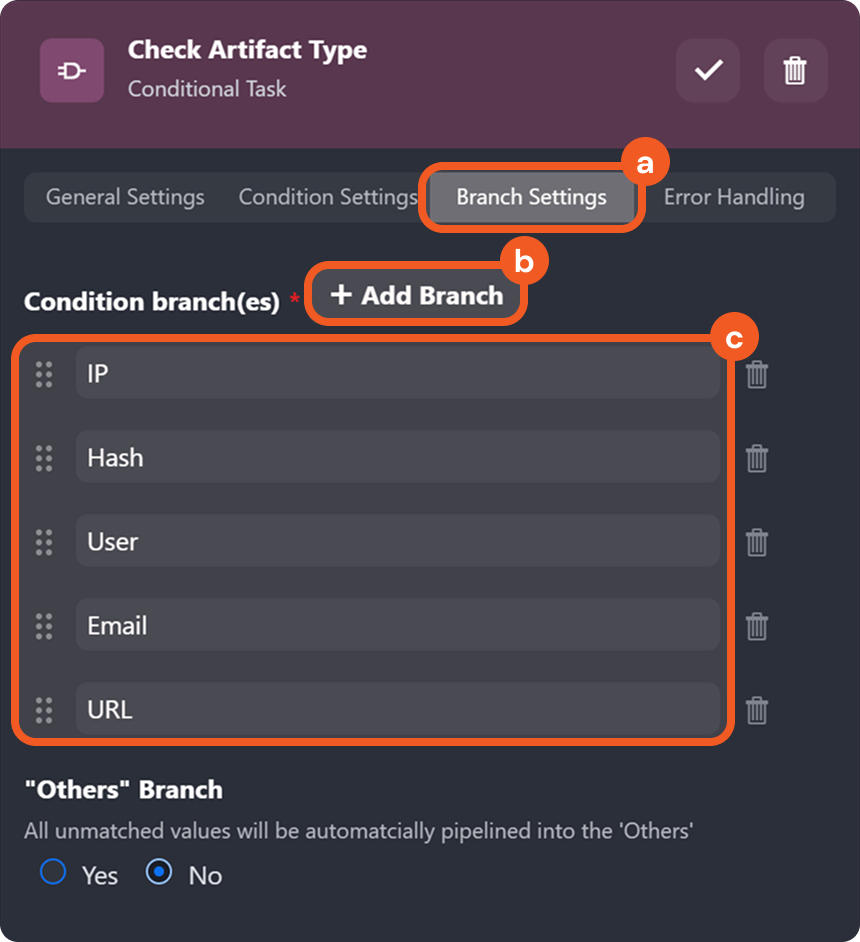
 button to save.
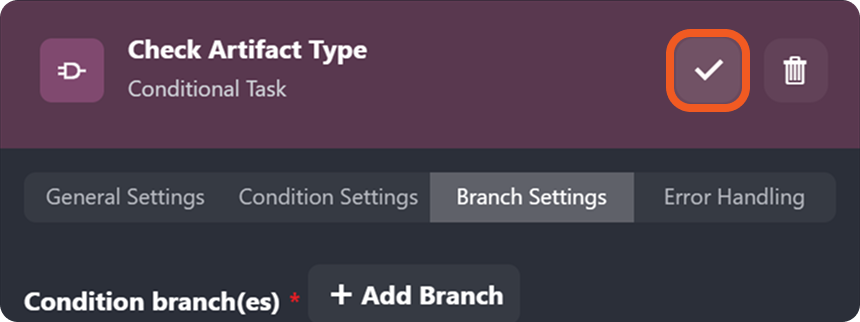
.png?inst-v=e416ef0a-975f-4240-8b76-b2350608028d)
.png?inst-v=e416ef0a-975f-4240-8b76-b2350608028d)
.png?inst-v=e416ef0a-975f-4240-8b76-b2350608028d)
.png?inst-v=e416ef0a-975f-4240-8b76-b2350608028d)
.png?inst-v=e416ef0a-975f-4240-8b76-b2350608028d)
.png?inst-v=e416ef0a-975f-4240-8b76-b2350608028d)
 button to save.
.png?inst-v=e416ef0a-975f-4240-8b76-b2350608028d)

 icon and navigate to the Results tab to access the CSV download link. Clicking the link downloads the CSV file for viewing.