
Agent Installation on Windows
LAST UPDATED: OCT 18, 2024
Proxy Agent Installation on Windows
Environment Requirement
Server Hardware Requirements
Component | Minimum |
|---|---|
Virtual Machine | 1* virtual machine is required |
Platform | VMware vSphere v6.7 + is recommended |
CPU | 4-core, Intel Xeon 3.0 GHz or higher is required |
RAM | 16GB or higher |
Disk space | 200GB or higher, solid-state drive-based storage is required |
Operating System
Version | License |
|---|---|
Windows 2019 | Windows Server 2019 Standard |
Firewall Ports
Service | Protocol | Port | Direction | Firewall / Proxy |
|---|---|---|---|---|
D3 SOAR Proxy Agent | TCP | 443 | Outbound to Internet | Allow |
Please Note:
The server for D3 Proxy Agent must be able to communicate with D3 vSOC servers via TCP ports 443.
D3 Proxy Agent must be installed on servers that have direct access to all your internal resources, such as firewalls, SIEM, Exchange, etc.
If Web Proxy is enabled in your network environment, Web Proxy IP needs to be configured in the D3PlaybookAgent.exe.config during the installation.(See How to Configure Internet Proxy Settings)
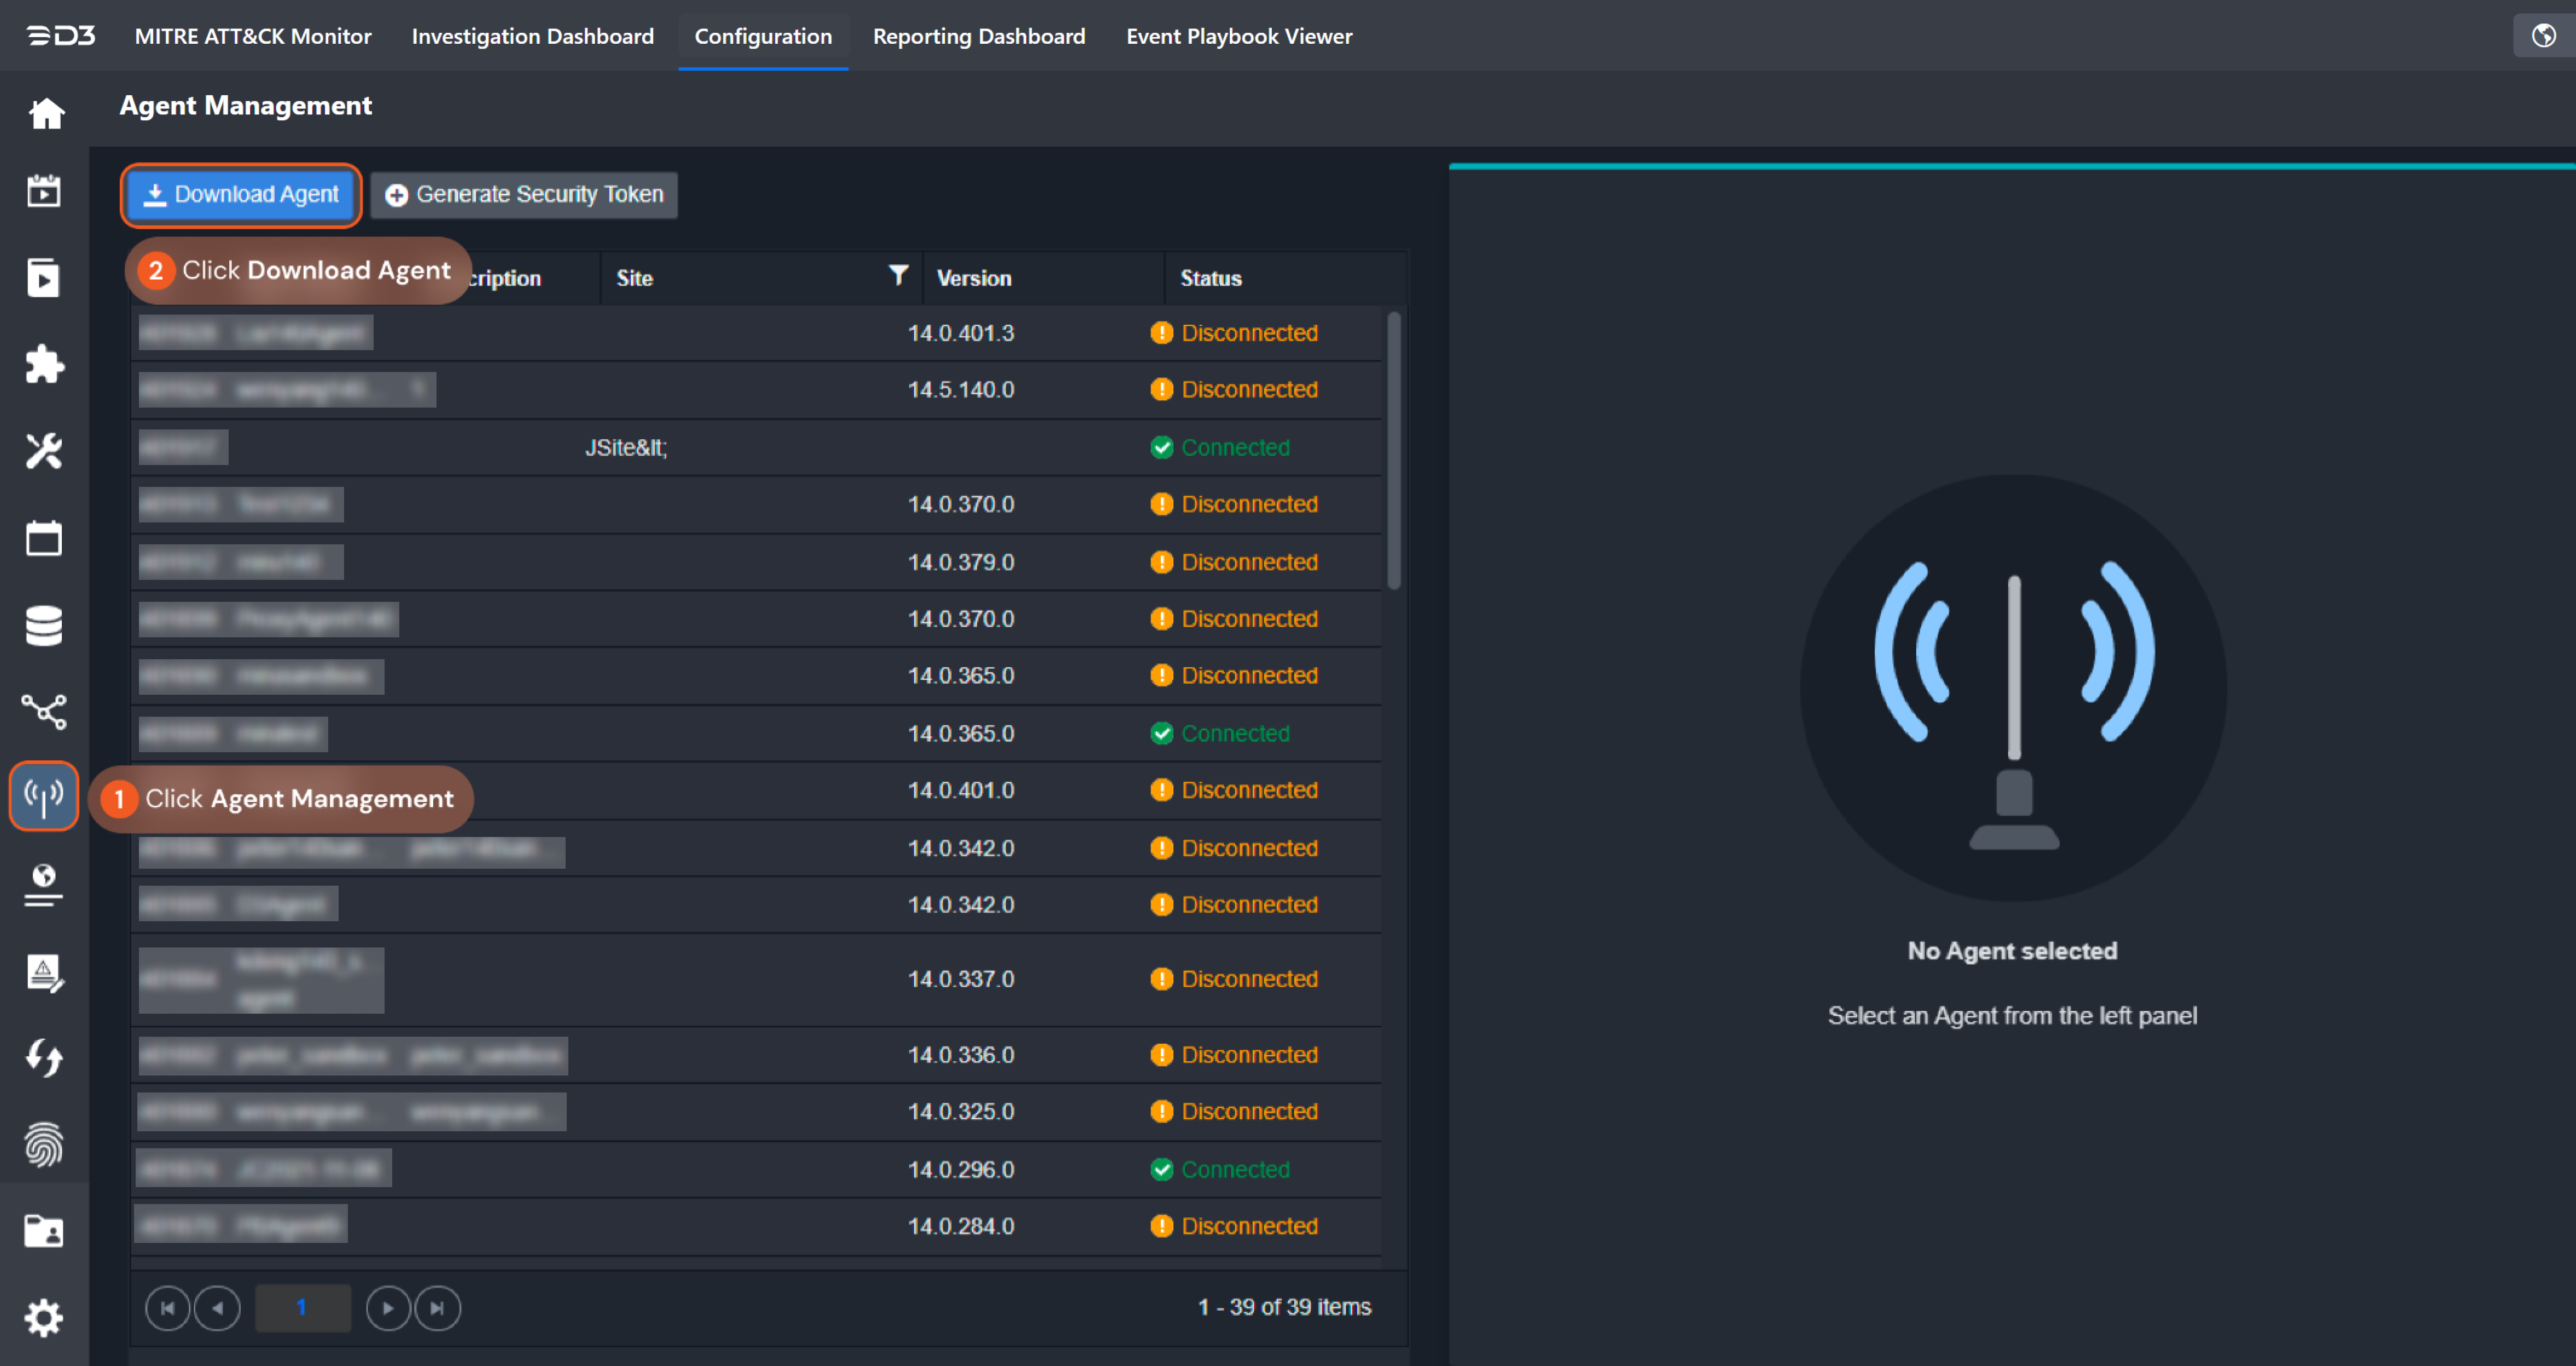
Installing New Agents
The Agent installation process is done via an Installation Wizard. The installation package can be downloaded directly from D3 SOAR. The steps below will outline the process of installing new Agents.
To install a new Agent:
Download Proxy Agent Package from within vSOC GUI
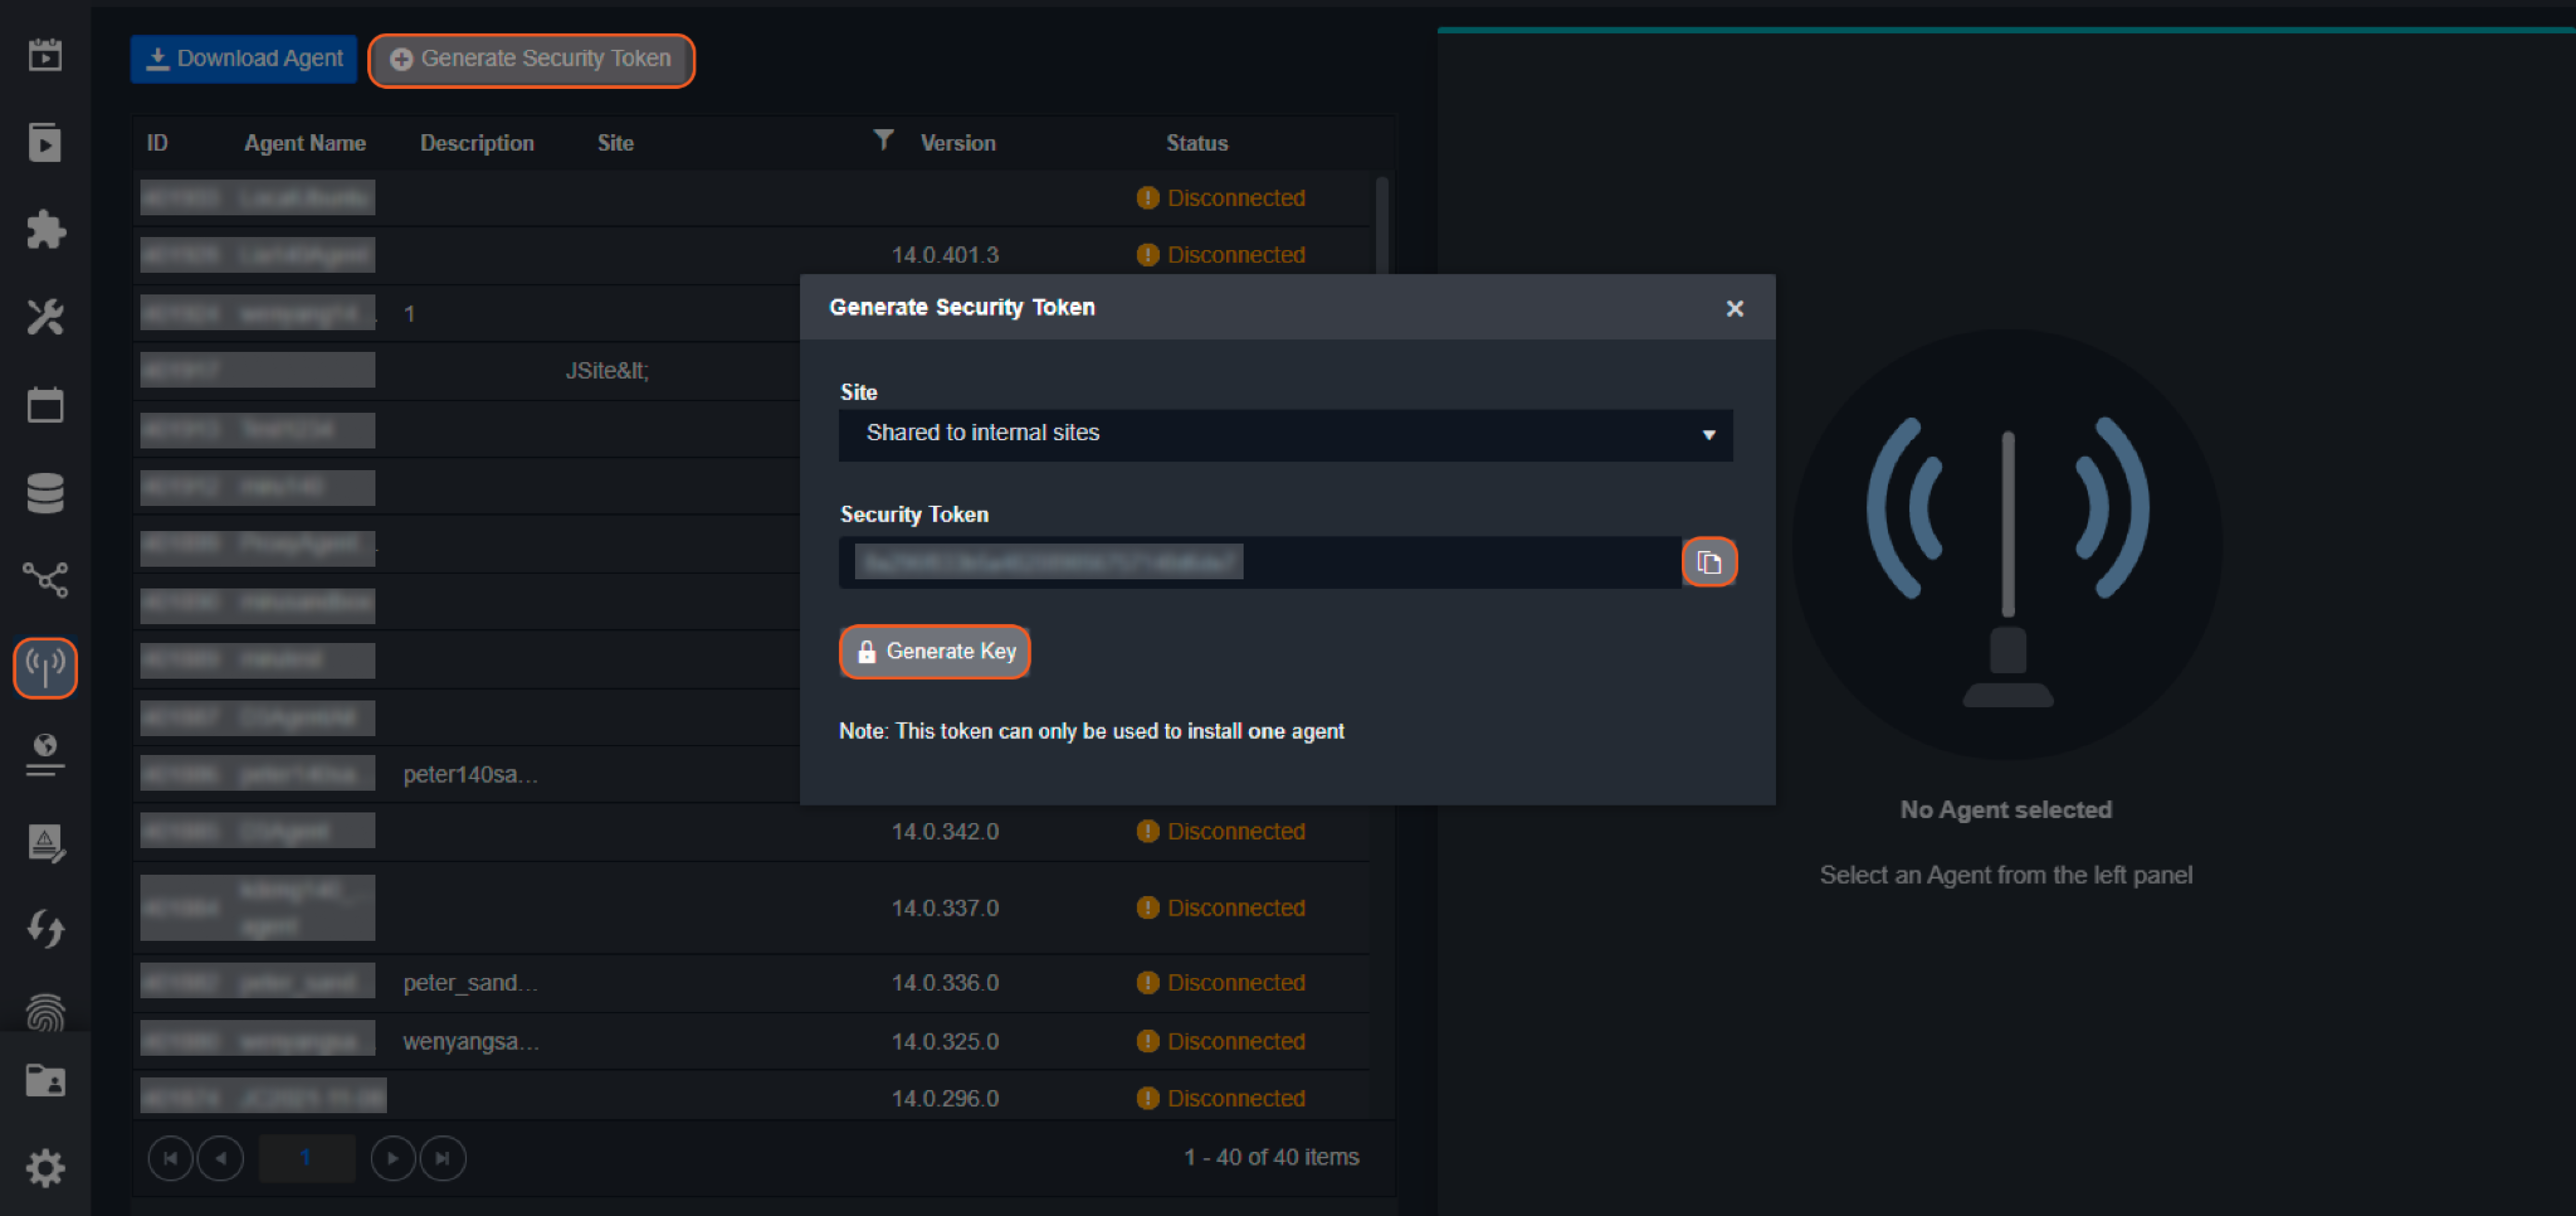
Save the Security Token Key
Generate Security Token, copy and paste it in a txt file. This token will be used during the installation process.
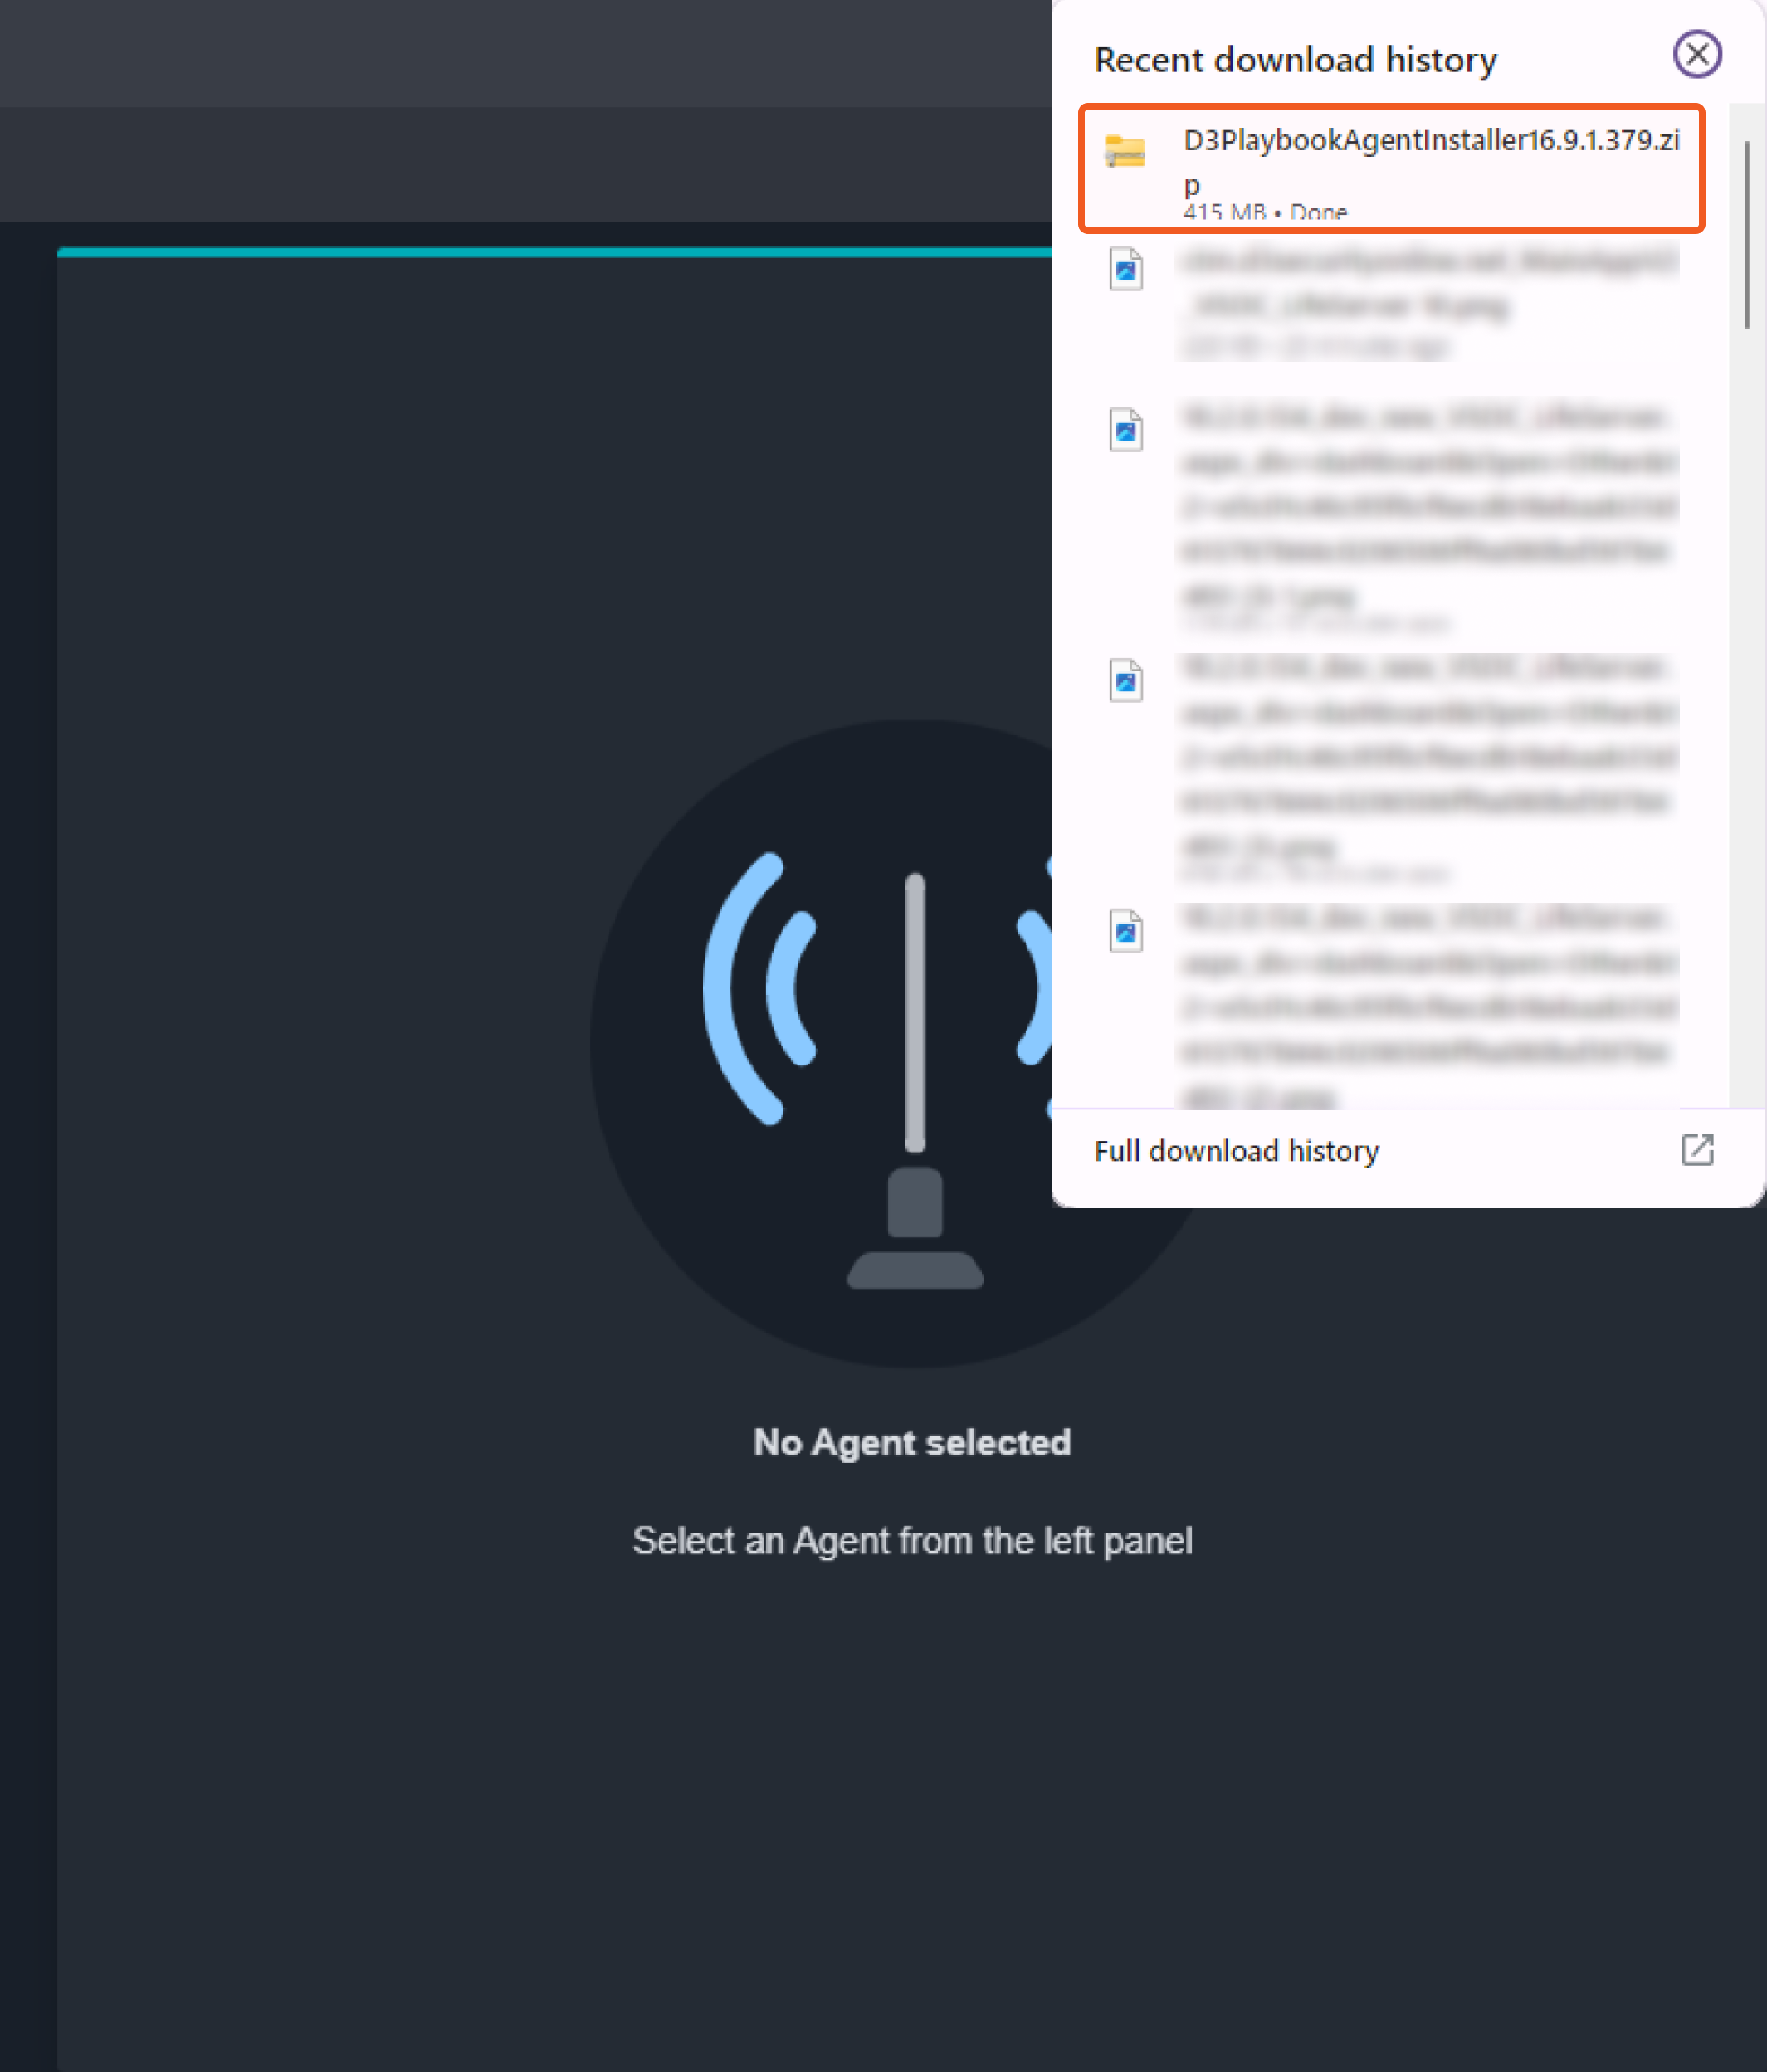
Unzip the Installation Package
READER NOTE
The Zip file size should be 170MB or larger. If it is around 3MB, please see the Troubleshooting section.
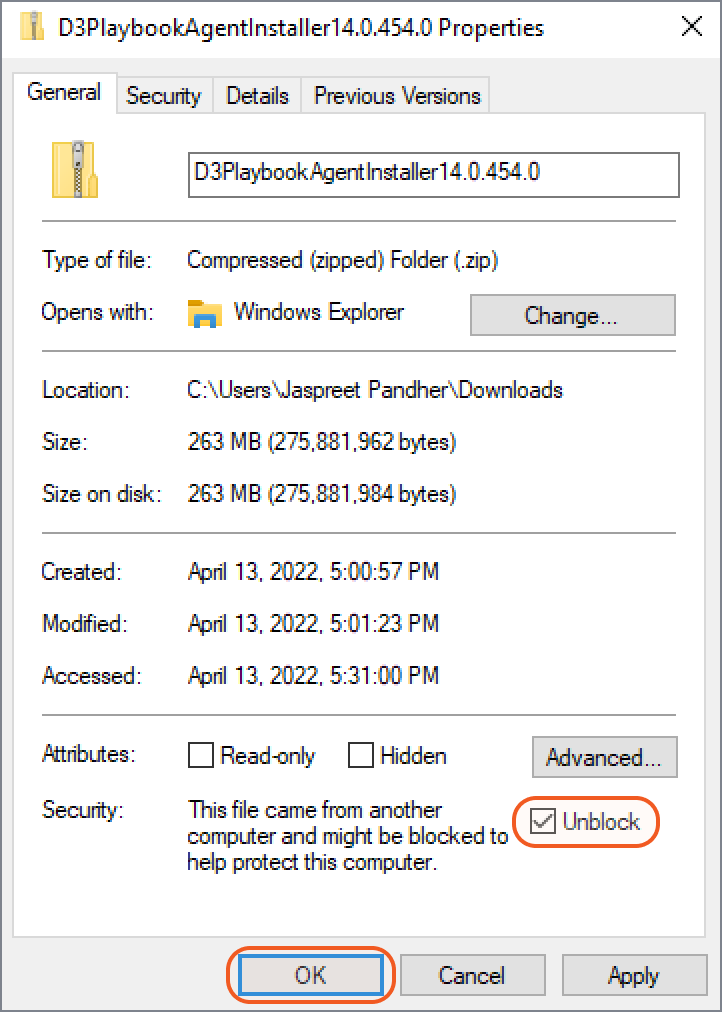
Make sure this zip file was NOT blocked by Windows. Right click on the file and check the block state. If it is blocked, Unblock it first before you unzip. Otherwise, even if you can unzip it, but some unzipped files are still locked, you may NOT be able to install it successfully. The installation will not be able to proceed and hang there.

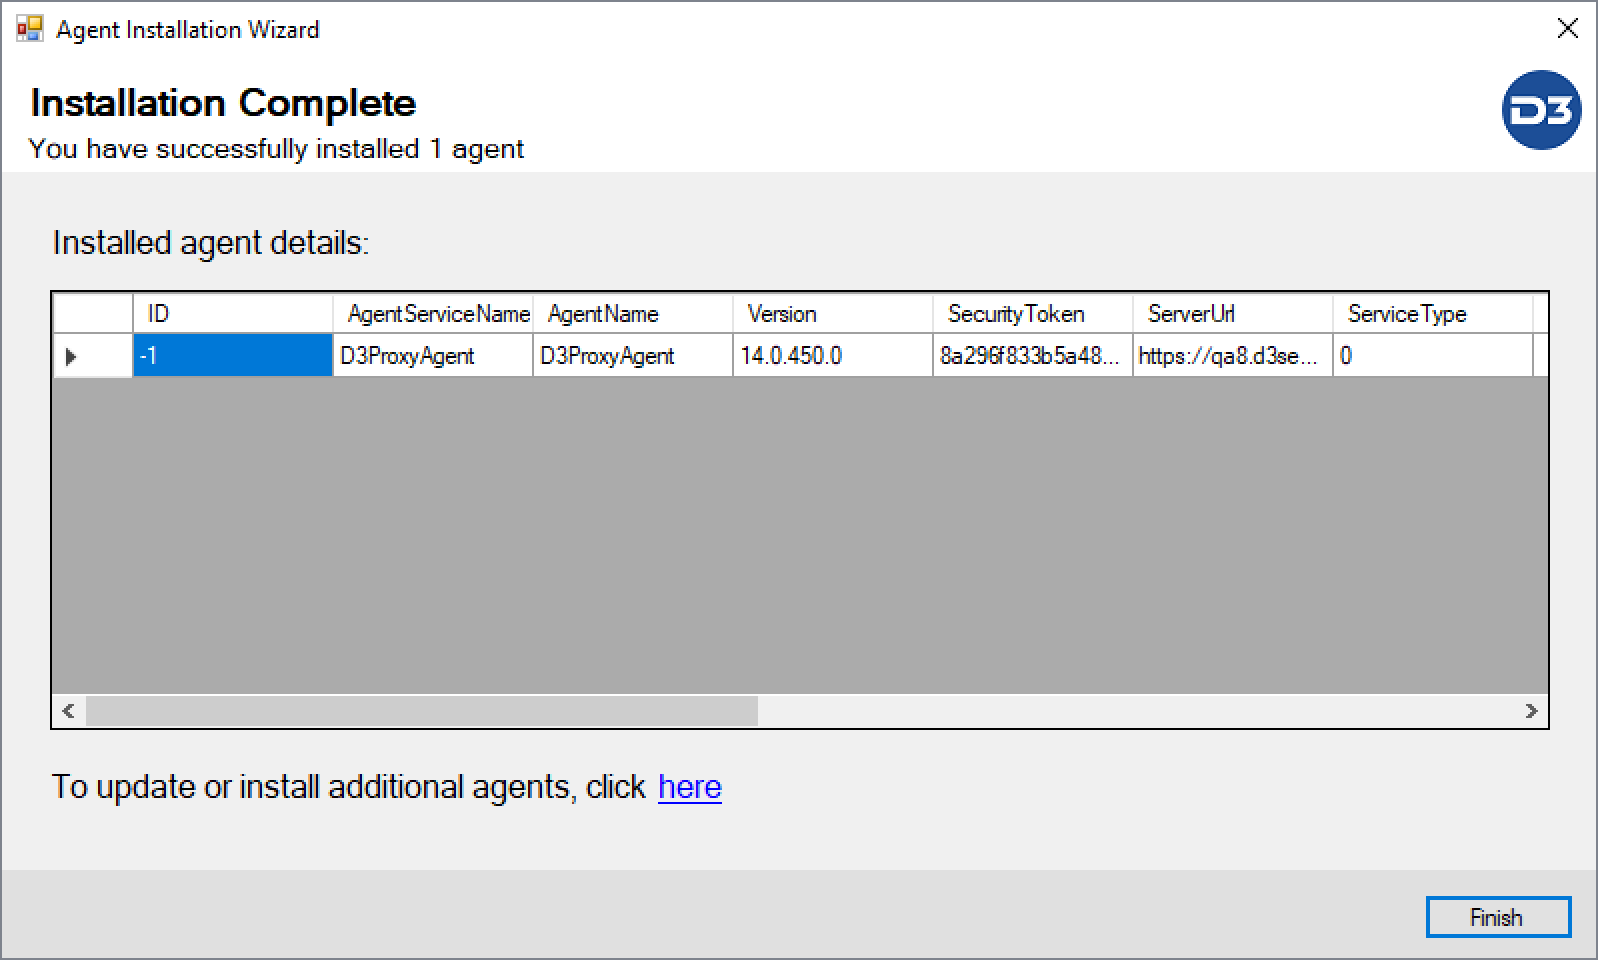
Right click and run D3PlaybookAgentInstaller.exe as administrator


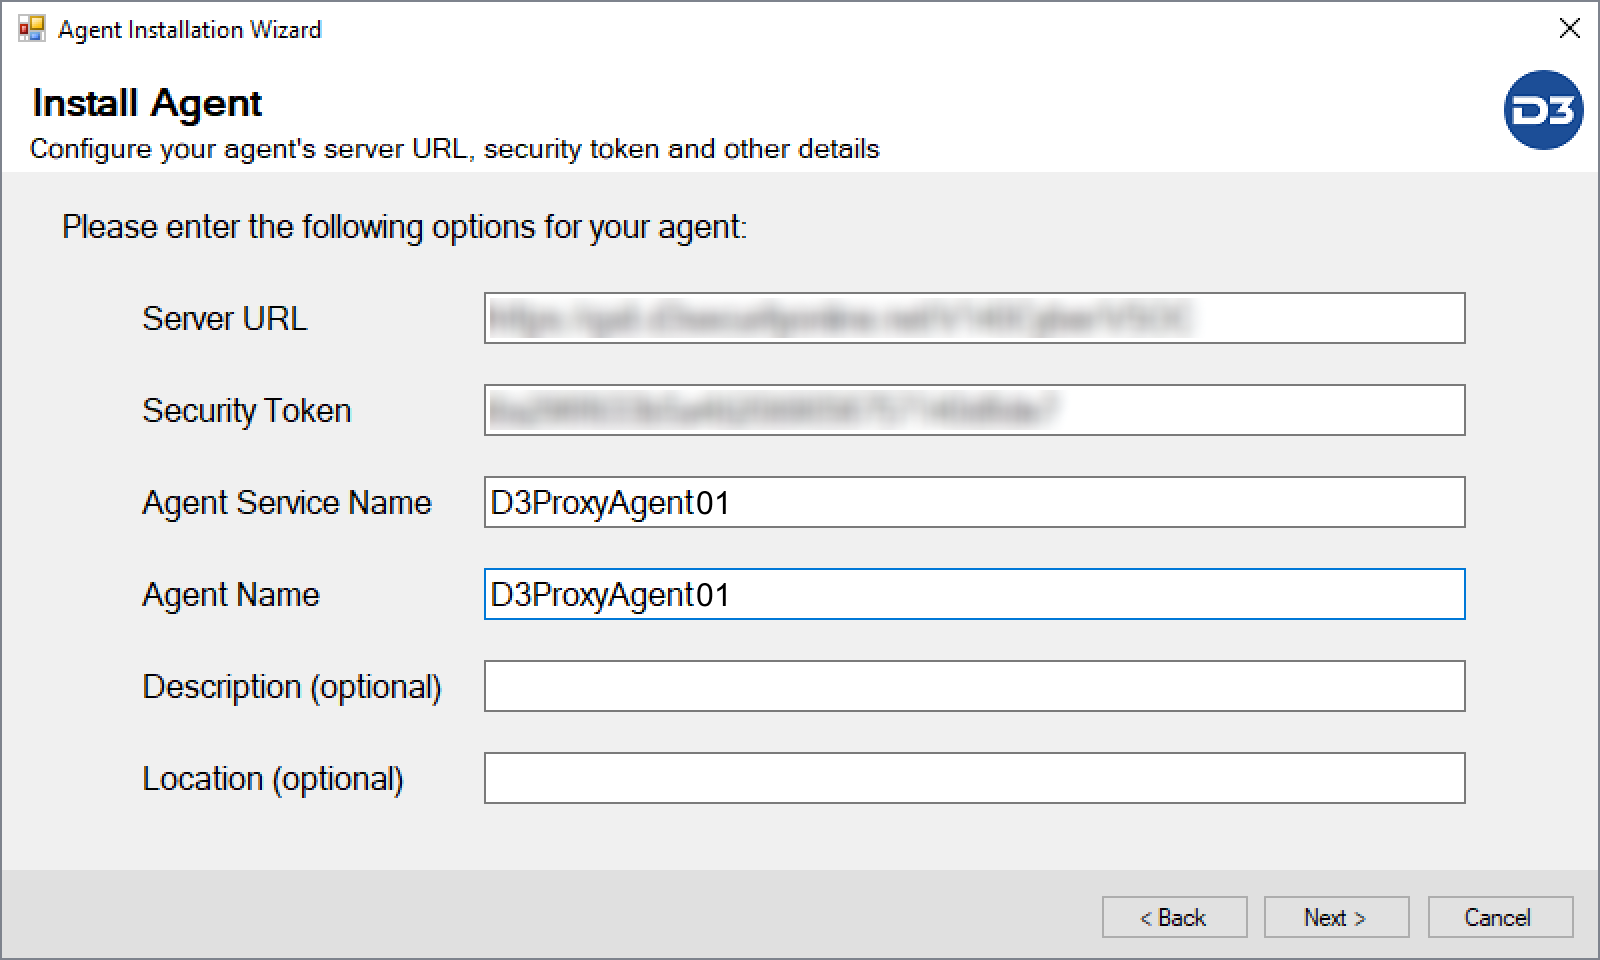
Input vSOC Server URL, Security Token, Agent Service Name, Agent Name. Description and Location details are optional.

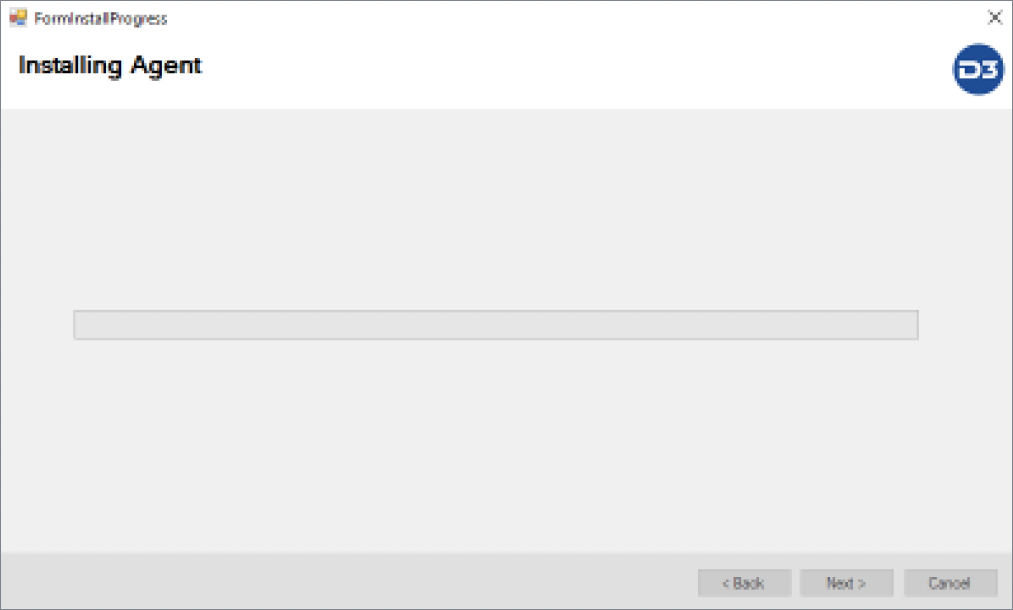
Click Next and wait for Installation to complete. See the Troubleshooting section if the install does not complete.
Check the Proxy Agent Service Status in Windows Services. Make sure the proxy agent is running properly.

Check the logs to see connection status:
C:\Program Files (x86)\D3security\D3PlaybookAgent\log\D3PlaybookAgent.log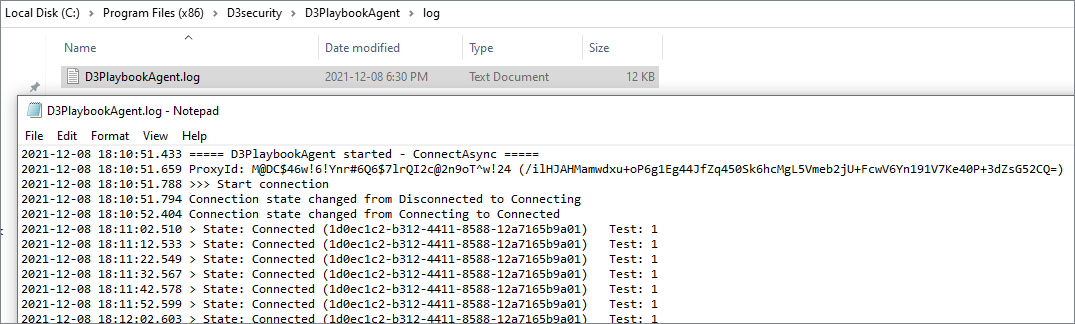
How to Configure Internet Proxy Settings
In some environments, the D3 Proxy Agent can NOT access the Internet directly, it has to access the Internet via a Proxy server.
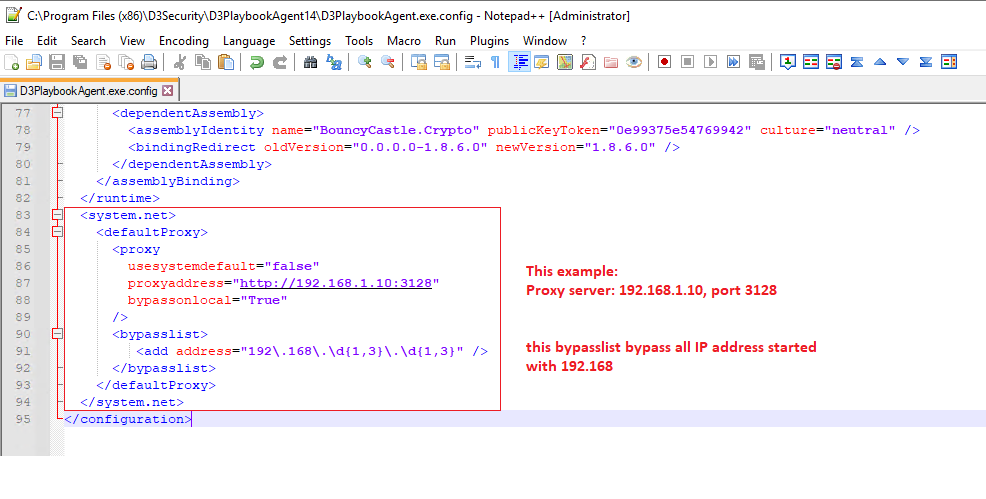
Edit the D3PlaybookAgent.exe.config file, add Proxy setting as follows:
C:\Program Files (x86)\D3Security\D3PlaybookAgent14\D3PlaybookAgent.exe.config
Add proxy configuration between <system.net>..... </system.net> shown below.
READER NOTE
This example set the proxy server IP 192.168.1.10, port 3128
All local IP addresses 192.168.xxx.xxx are bypassed.
Proxy Agent High Availability
Proxy Agent supports High Availability by installing multiple Proxy Agents in different servers. Each agent must use a unique Secure Token.
Example
Install the first Agent in
\D3PlaybookAgent01folder.
Each Agent needs a unique Security Token. Please generate the token in vSOC page.
Enter a unique Security Token, Agent Service Name and Agent Name for this Agent
Install the 2nd Agent by right clicking
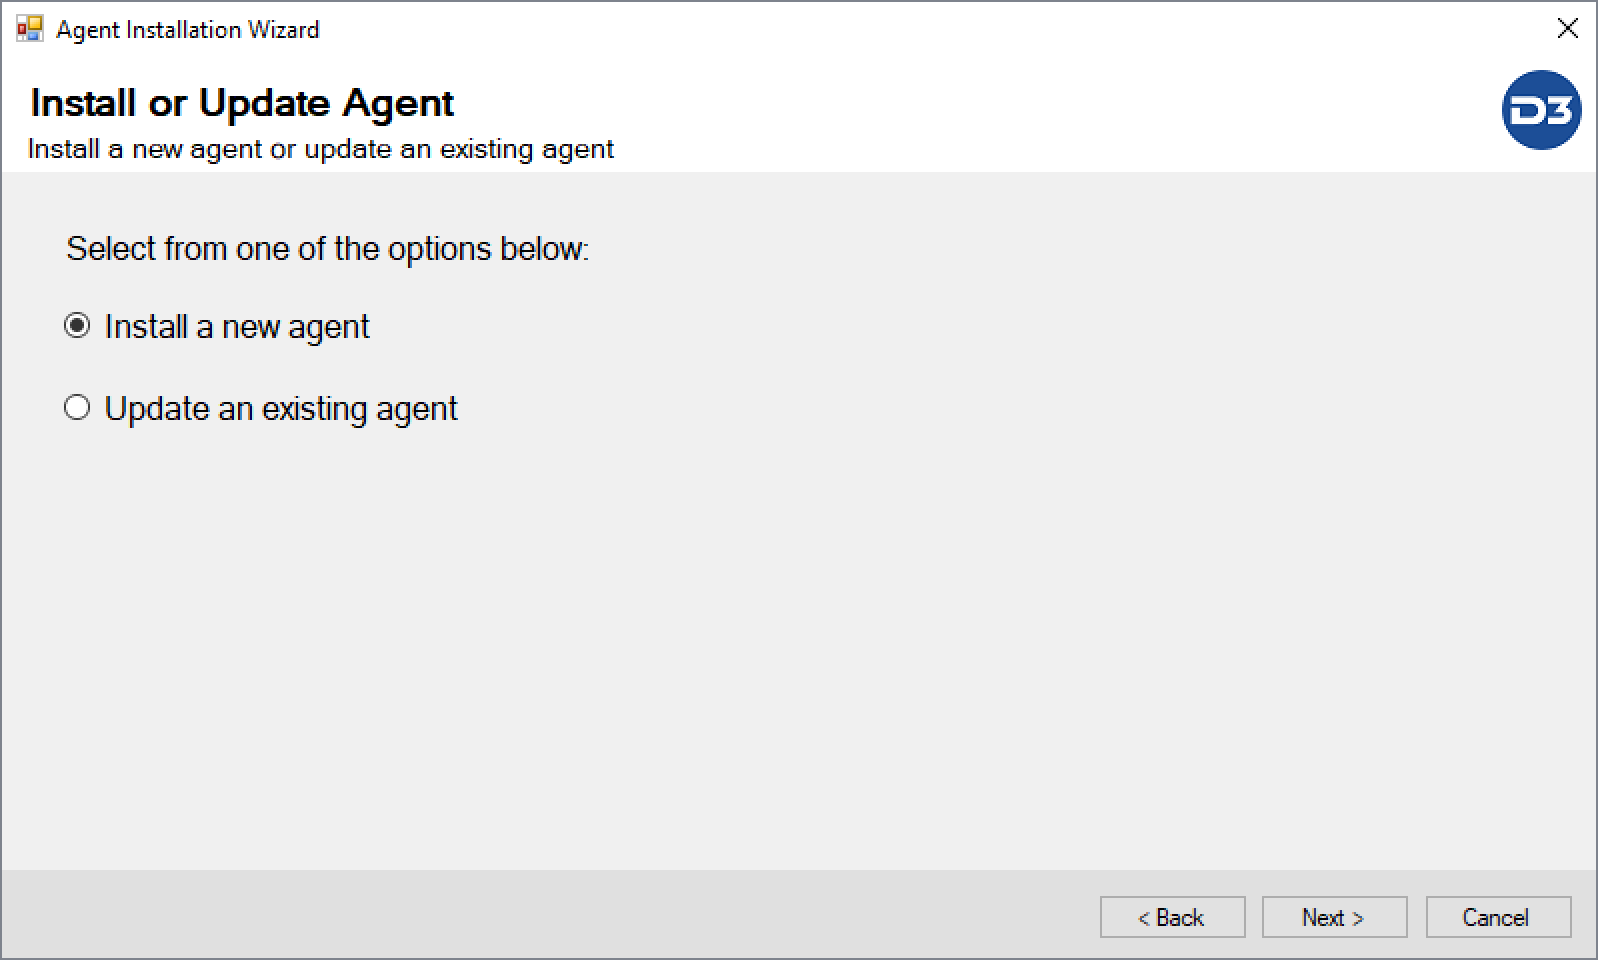
D3playbookAgentInstaller.exeand run as administrator. Choose Install a new agent.
Use a unique folder name, for example
\D3PlaybookAgent02, Keep "Install Python" checked and leave the folder as it is. (That will configure the Python path for the 2nd Proxy Agent)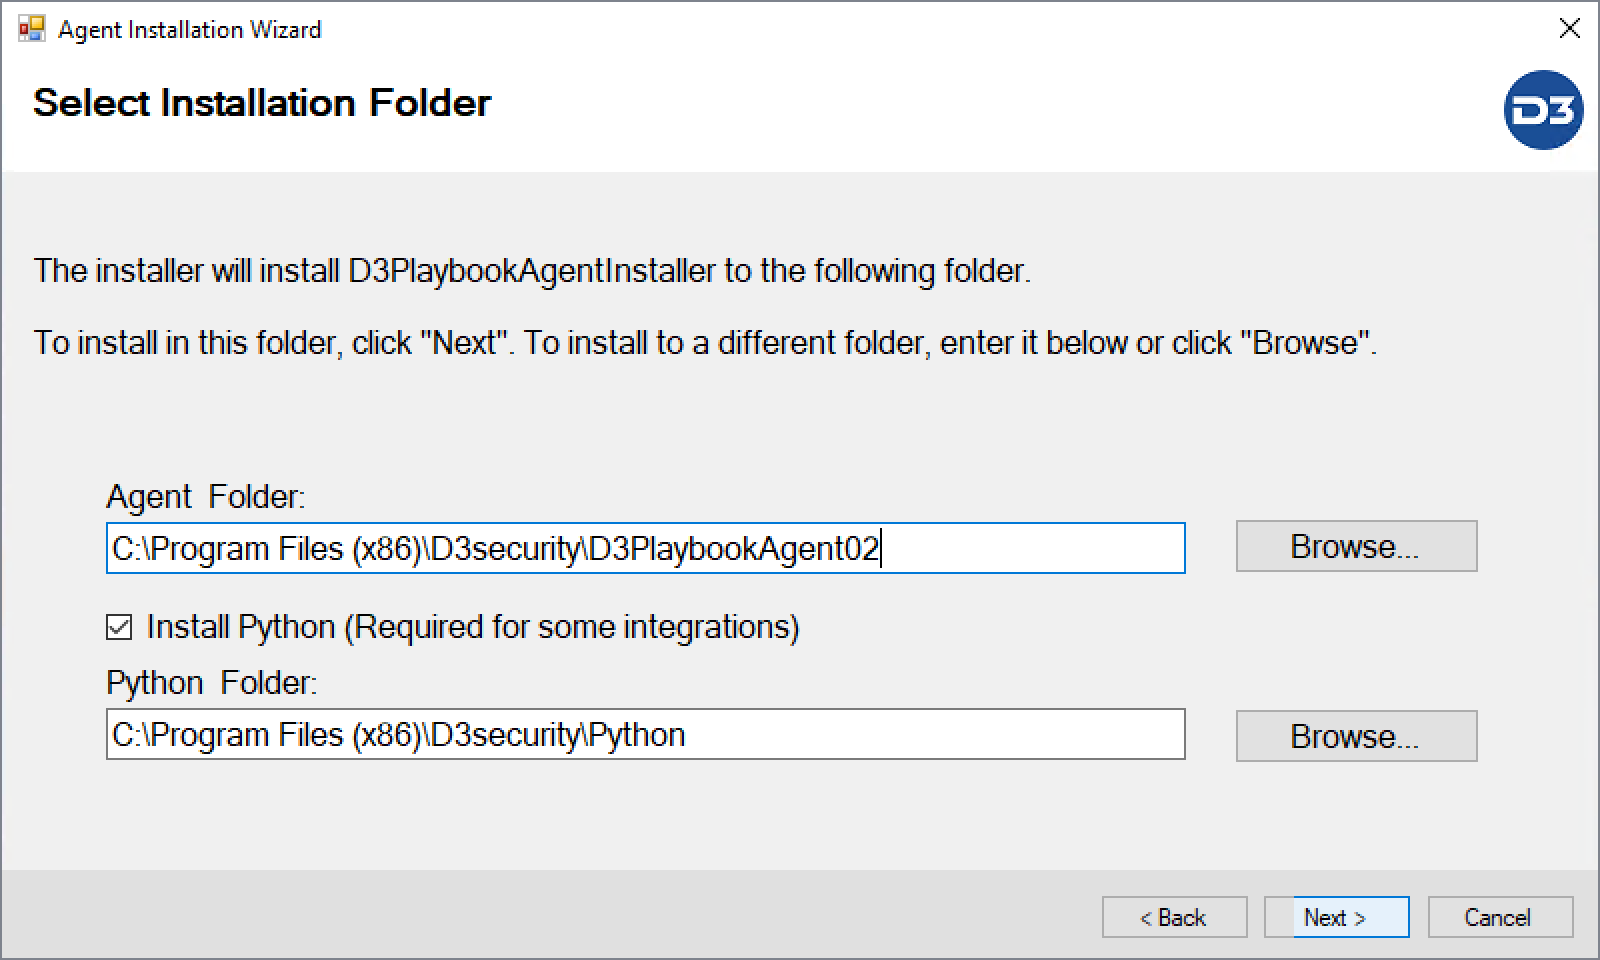
Use a Unique Security Token, Agent Service Name and Agent Name

Complete the installation.
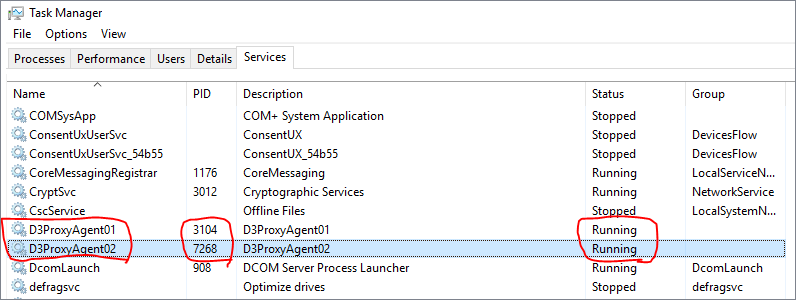
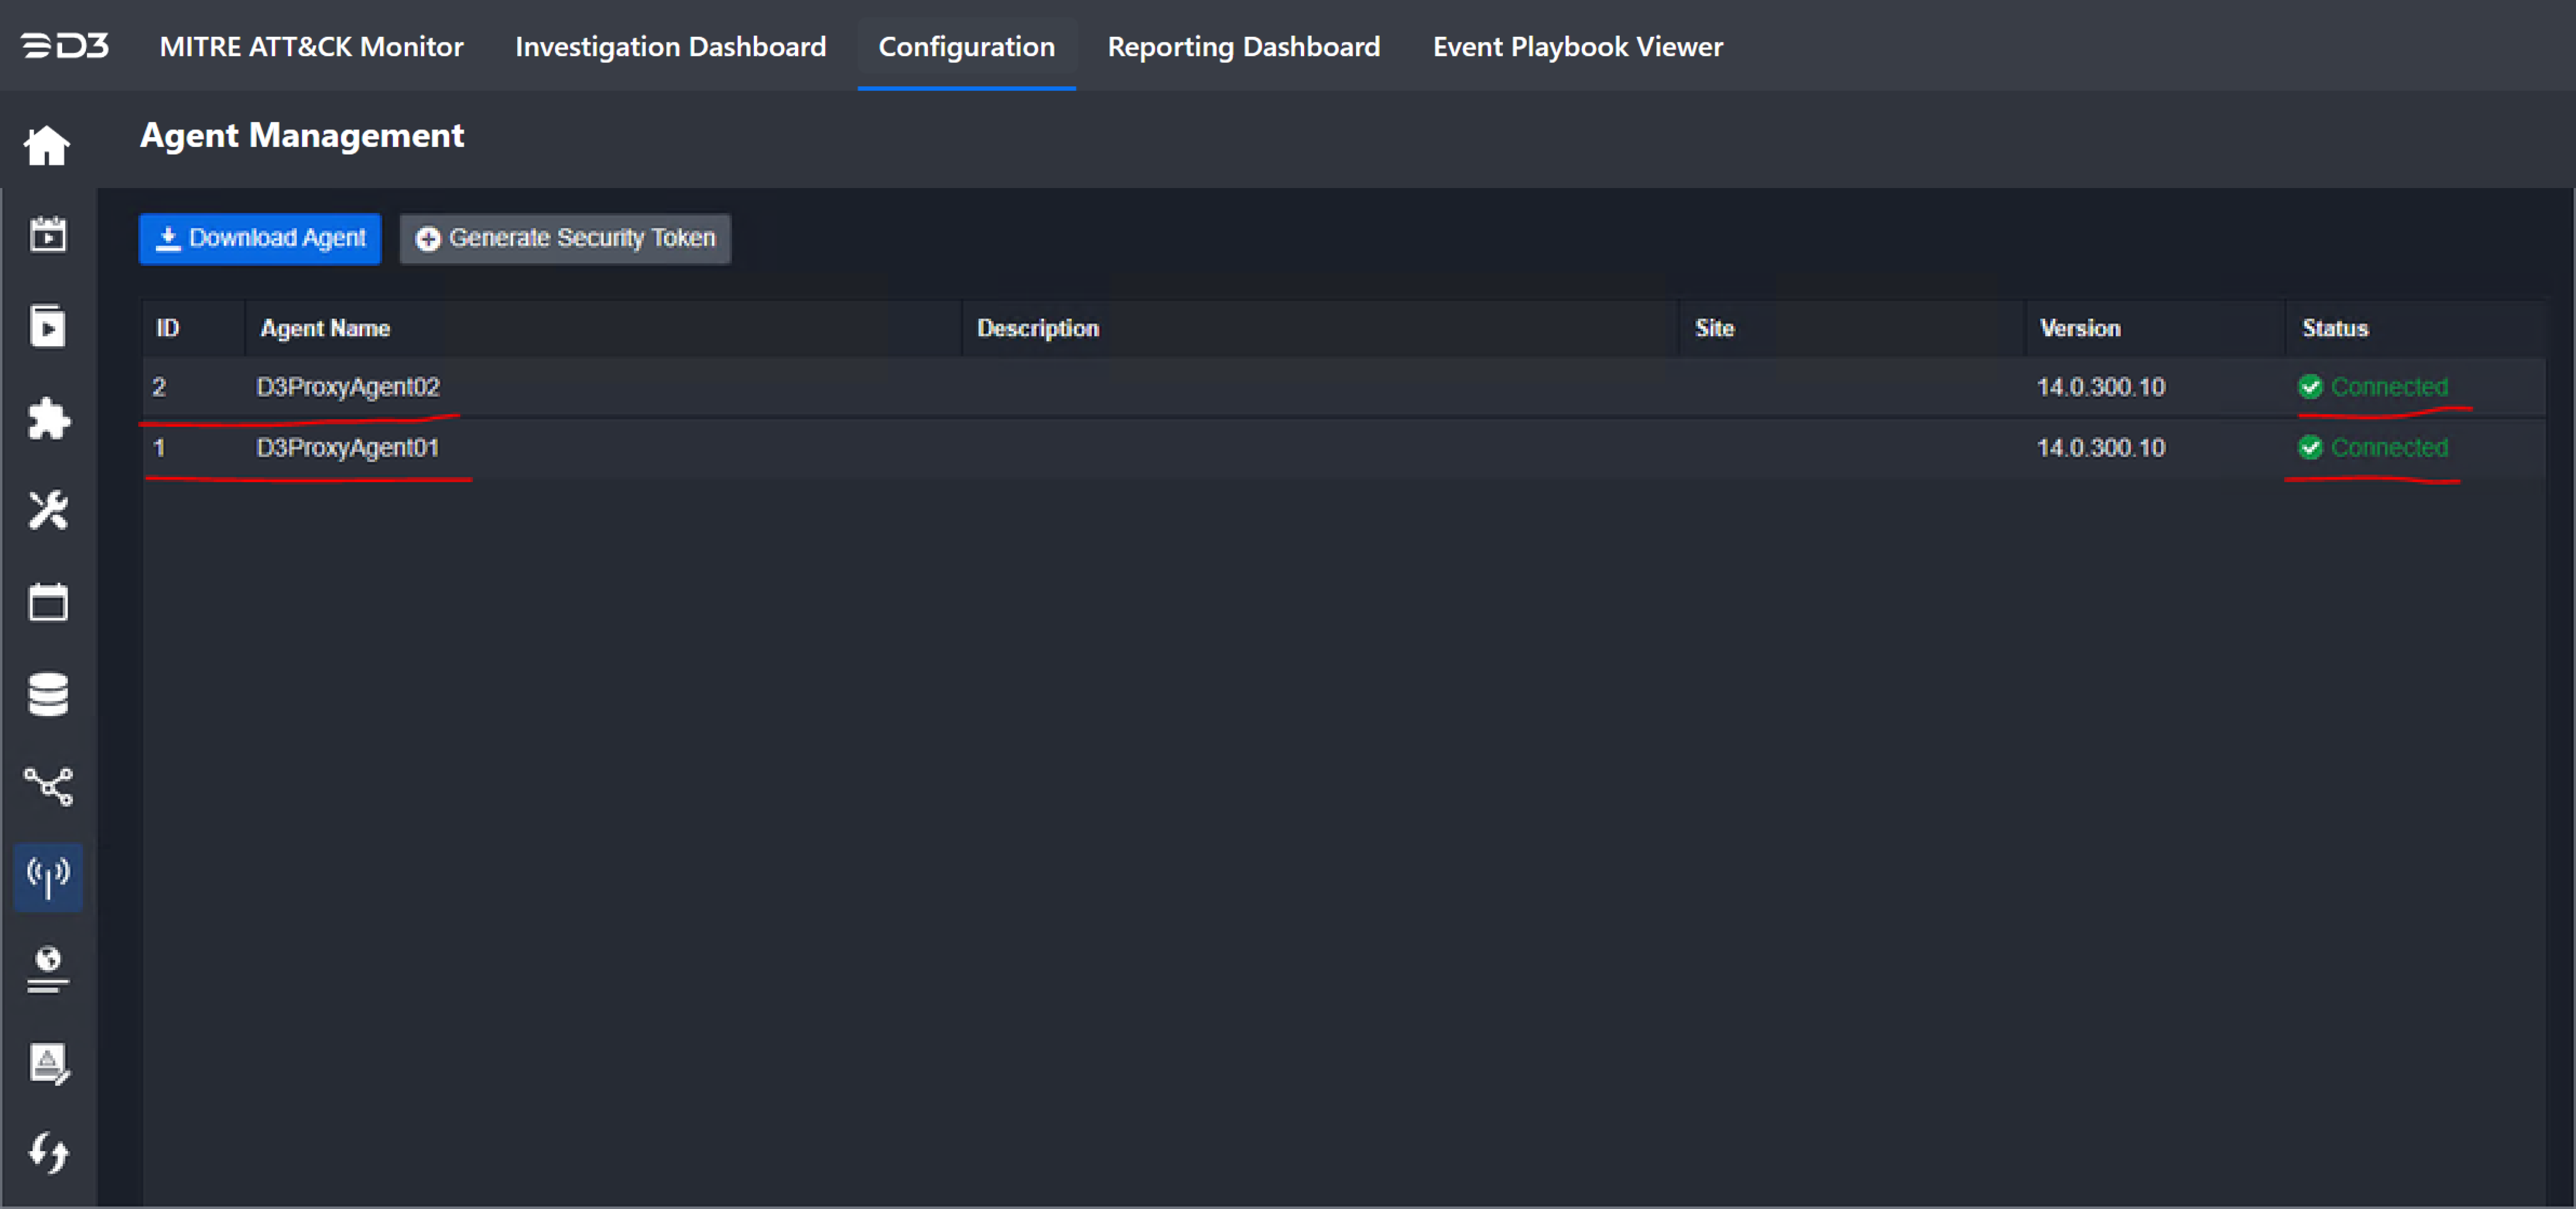
After 2nd agent installation finished, you will see two folders

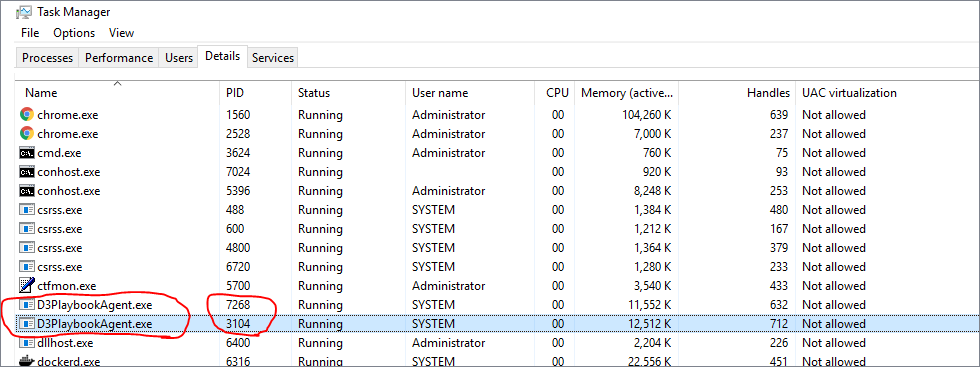
Check the service status in Windows Task Manager. Make sure the services are running.
Check the logs at
C:\Program Files (x86)\D3security\D3PlaybookAgent01\log, State:Connected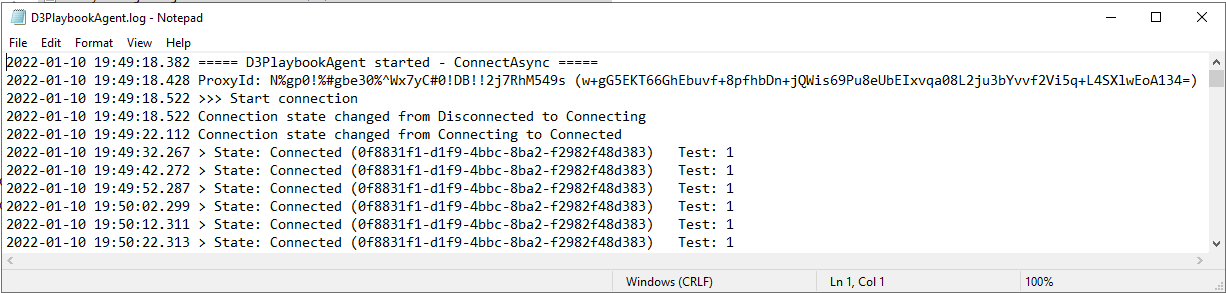
Check the logs at
C:\Program Files (x86)\D3security\D3PlaybookAgent02\log, State:Connected
From the vSOC Agent Management interface, both of the Proxy Agents Status should be Connected. Installation has finished and is successful.
Proxy Agent Windows Server Hardening
How Proxy Agent Works

In short, the Proxy Agent does NOT need incoming TCP connections. It always initiates TCP connections to vSOC server and RestfulAPI targets. So we can block all incoming connections to the Windows server where D3 Proxy Agent is running on. Just run the powershell scripts to disable all the default enabled incoming firewall rules on Windows Server.


Troubleshooting
Package download is NOT successful
Agent Key
Download PlaybookAgent from vSOC GUI. The file size of D3PlaybookAgentInstaller14.0.xxx.x.zip should be at least 170MB or larger which includes the Python package. If the download does NOT include the Python package, its size may be around 3MB and requires troubleshooting.
On DB Server, in SSMS (SQL Server Management Studio), right click the database, run new query
Run the following command to check if the Proxy Agent key exists or not.
select * from vSOC_Settings_Default where keyname like 'Cyber.PythonInstallationFolderForPlaybookAgent'
If the PlaybookAgent key does not exist, run the insert command to add it to the database.
insert into vSOC_Settings_Default (keyName, keyValue) values ('Cyber.PythonInstallationFolderForPlaybookAgent', 'C:\Python\Python38')
Run the update command to update the key value.
update vSOC_Settings_Default set keyValue = 'C:\Python\Python38' where keyname like 'Cyber.PythonInstallationFolderForPlaybookAgent'
READER NOTE
C:\Python\Python38 is an example here.
It is the Python path on your vSOC server. Change it to your Python path where Python.exe resides.
After updating the key into the Database, stop D3TaskManager services, stop App Pool, then restart the services and App Pool again.
Delete Agent folder under
C:\D3App\D3Temp\AgentorC:\D3App\Virtual_Dir\D3Temp\Agent
See examples below. Your D3App folder may be on other disks like D:\ or E:\ as well.


No File Downloaded
When attempting to download the Agent, sometimes no file is downloaded. In this case, check your D3Temp directory properties. Make sure users have full control so the Agent software can be written into this folder.
Set users with full control.

Go to vSOC to download the agent again. The correct zipped installation package size should be at least 170MB or larger.
READER NOTE
If user vSOC was updated to a new version, you need to download and update your Proxy agent accordingly.
The Proxy Agent version should match the vSOC version.
Download new Proxy Agent and install
READER NOTE
You can install multiple Proxy Agents, each with a different Security Token.
Installing Agent Not Completing
If the installation stalls and does not complete, the root cause is that the Playbook Installation package was blocked by Windows when downloading from vSOC servers.
Go to the .zip file and view Properties.
Check the Unblock box before unzipping the file. Even if the file is able to unzip successfully without this permission, some files will still be blocked by Windows. Ensure that this is checked before proceeding.
Run the installation again.