
In-Playbook Data Source Configuration
LAST UPDATED: JAN 7, 2025
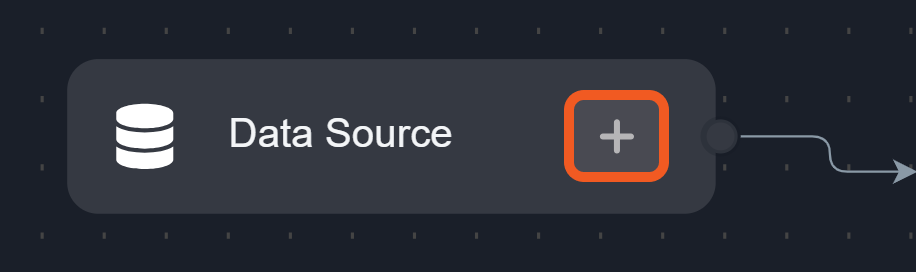
At the beginning of every preprocessing playbook is a Data Source node.
-20241220-010842.png?inst-v=05328674-b079-4c01-ba41-8dd92707b455)
The Data Source node defines the source of incoming data for the preprocessing playbook, which can originate from an integration or through a manual upload. Click on the  button to open the data source creation pop-up window.
%201-20241223-204138.png?inst-v=05328674-b079-4c01-ba41-8dd92707b455)
Fetch
Select the Fetch data intake option, then click on the Next button.
-20241223-204728.png?inst-v=05328674-b079-4c01-ba41-8dd92707b455)
Locate an integration by using the search bar or scrolling through the list, then click on the Next button.
-20250103-192423.png?inst-v=05328674-b079-4c01-ba41-8dd92707b455)
Select the site that will be allowed to use the integration connection, then click on the Next button.
-20250103-192634.png?inst-v=05328674-b079-4c01-ba41-8dd92707b455)
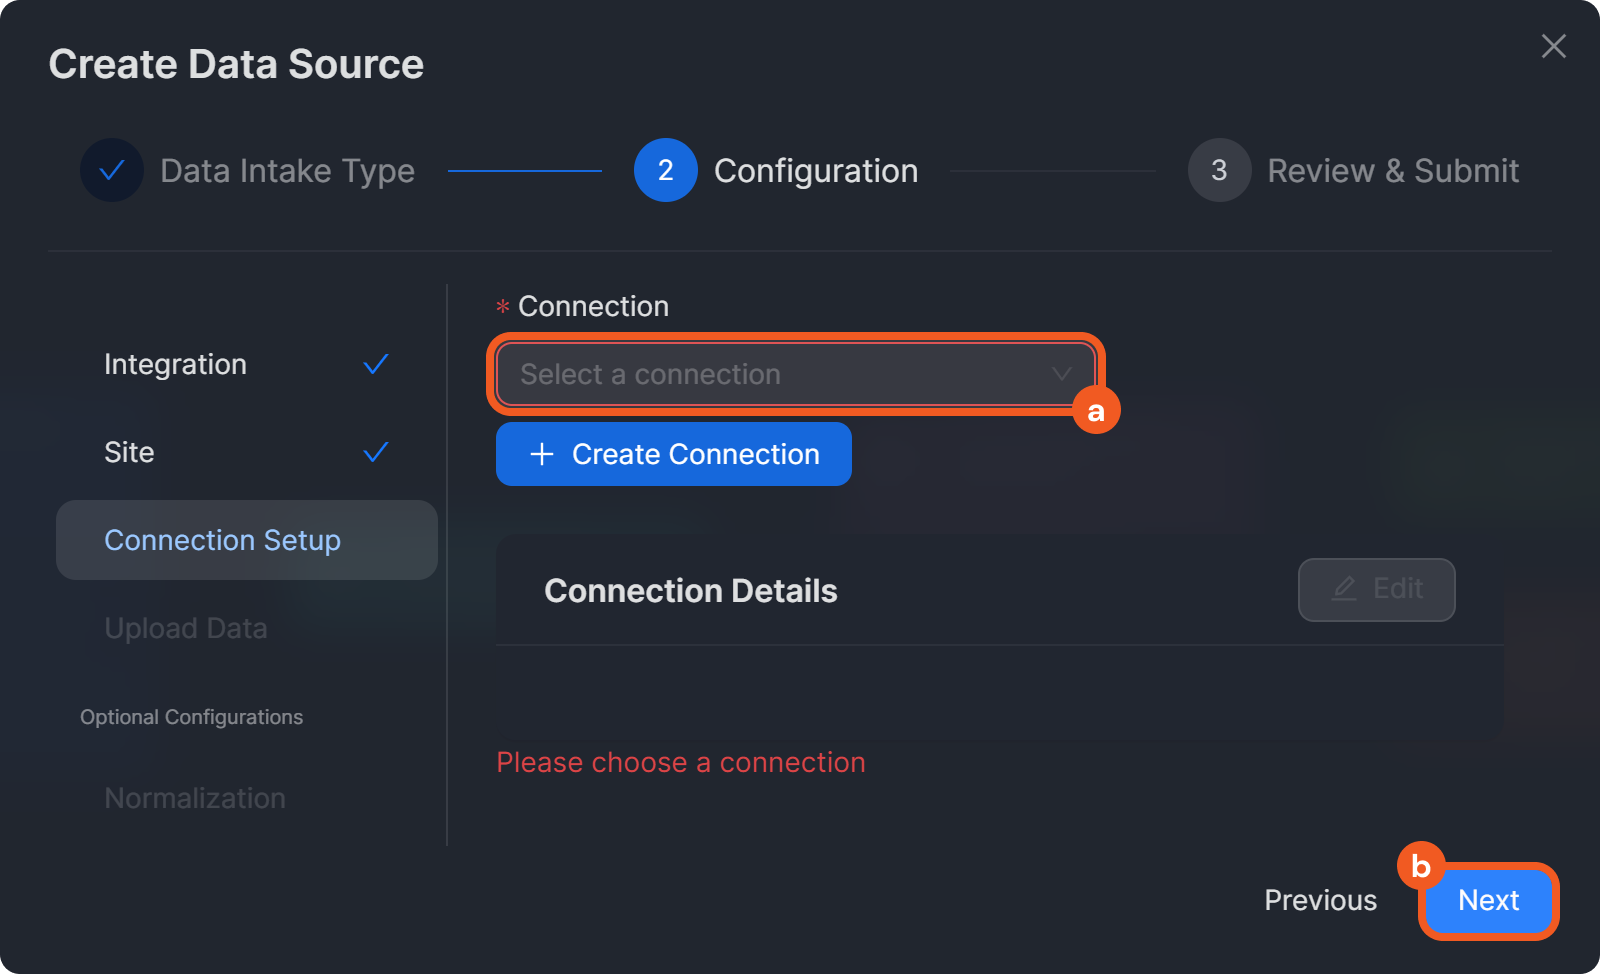
Click on the connection field, then select a connection.
-20250103-202724.png?inst-v=05328674-b079-4c01-ba41-8dd92707b455)
Click on the + Create Connection button.
-20241220-174154.png?inst-v=05328674-b079-4c01-ba41-8dd92707b455)
Follow configuration instructions on D3’s integration documentation.
READER NOTE
Contact D3 to request an integration documentation for one that is not currently included.
Test the connection, then click on the + Add button.
-20241220-034953.png?inst-v=05328674-b079-4c01-ba41-8dd92707b455)
Click on the Next button.
Input the integration-specific required Fetch Event command parameters, then click on the Next button.
-20250103-194033.png?inst-v=05328674-b079-4c01-ba41-8dd92707b455)
Review the event source to ensure that all required fields for business needs are mapped, then click on the Review button.
-20250103-202947.png?inst-v=05328674-b079-4c01-ba41-8dd92707b455)
Click on the Edit button.
-20250103-203229.png?inst-v=05328674-b079-4c01-ba41-8dd92707b455)
Modify the event field mapping as needed, within the popup.
-20241223-191739.png?inst-v=05328674-b079-4c01-ba41-8dd92707b455)
Click on the Edit Event Source button to view and modify the main event JSON path.
Click on the + Add Event Source button to view and modify the event source name, search string and order priority.
Click on the + Add Field button to insert a new field, specifying its name, source field, source type, whether it should be displayed in an incident, and its artifact settings.
Review all entered information, then click on the Submit button.
%201-20241223-194828.png?inst-v=05328674-b079-4c01-ba41-8dd92707b455)
Click on View All to see all submitted data sources.
-20241223-203933.png?inst-v=05328674-b079-4c01-ba41-8dd92707b455)
Click on Edit to configure changes.
-20250103-195200.png?inst-v=05328674-b079-4c01-ba41-8dd92707b455)
Manual Upload
Select the Manual Upload data intake option, then click on the Next button.
-20241223-204933.png?inst-v=05328674-b079-4c01-ba41-8dd92707b455)
Select an integration, then click on the Next button.
-20250103-201221.png?inst-v=05328674-b079-4c01-ba41-8dd92707b455)
Select a site, then click on the Next button.
-20250103-201336.png?inst-v=05328674-b079-4c01-ba41-8dd92707b455)
Select a connection, then click on the Next button.
Enter JSON data, then click on the Next button.
-20250103-202013.png?inst-v=05328674-b079-4c01-ba41-8dd92707b455)
Review the event source to ensure that all required fields for business needs are mapped, then click on the Review button.
-20250103-211630.png?inst-v=05328674-b079-4c01-ba41-8dd92707b455)
Review all entered information, then click on the Submit button.
-20250103-191108.png?inst-v=05328674-b079-4c01-ba41-8dd92707b455)
Click on the View All hyperlink on the Data Source node.
-20250103-202519.png?inst-v=05328674-b079-4c01-ba41-8dd92707b455)
Click on Edit hyperlink to configure changes.
-20250103-202437.png?inst-v=05328674-b079-4c01-ba41-8dd92707b455)