
Configuring Data Ingestion
LAST UPDATED: JAN 13, 2025
Configuring data ingestion is a prerequisite for automating workflows that use external data. This guide outlines the steps for configuring data ingestion using the Schedule method (pulling data into D3) and the Webhook method (pushing data into D3).
Accessing Data Ingestion Settings
-20241129-185744.png?inst-v=f0ae511a-7398-4e63-b935-74c903306443)
Click on the Configuration navigational link.
Click on the Data Ingestion module.
Click on the + button.
-20241129-190515.png?inst-v=f0ae511a-7398-4e63-b935-74c903306443)
After clicking the + button, you will see two options:
Schedule: Data will be ingested from third-party integrations automatically.
Webhook: Enables users to transmit data into D3 vSOC through API testing tools (e.g. Postman).
Configuring Data Ingestion
Scheduled Ingestion
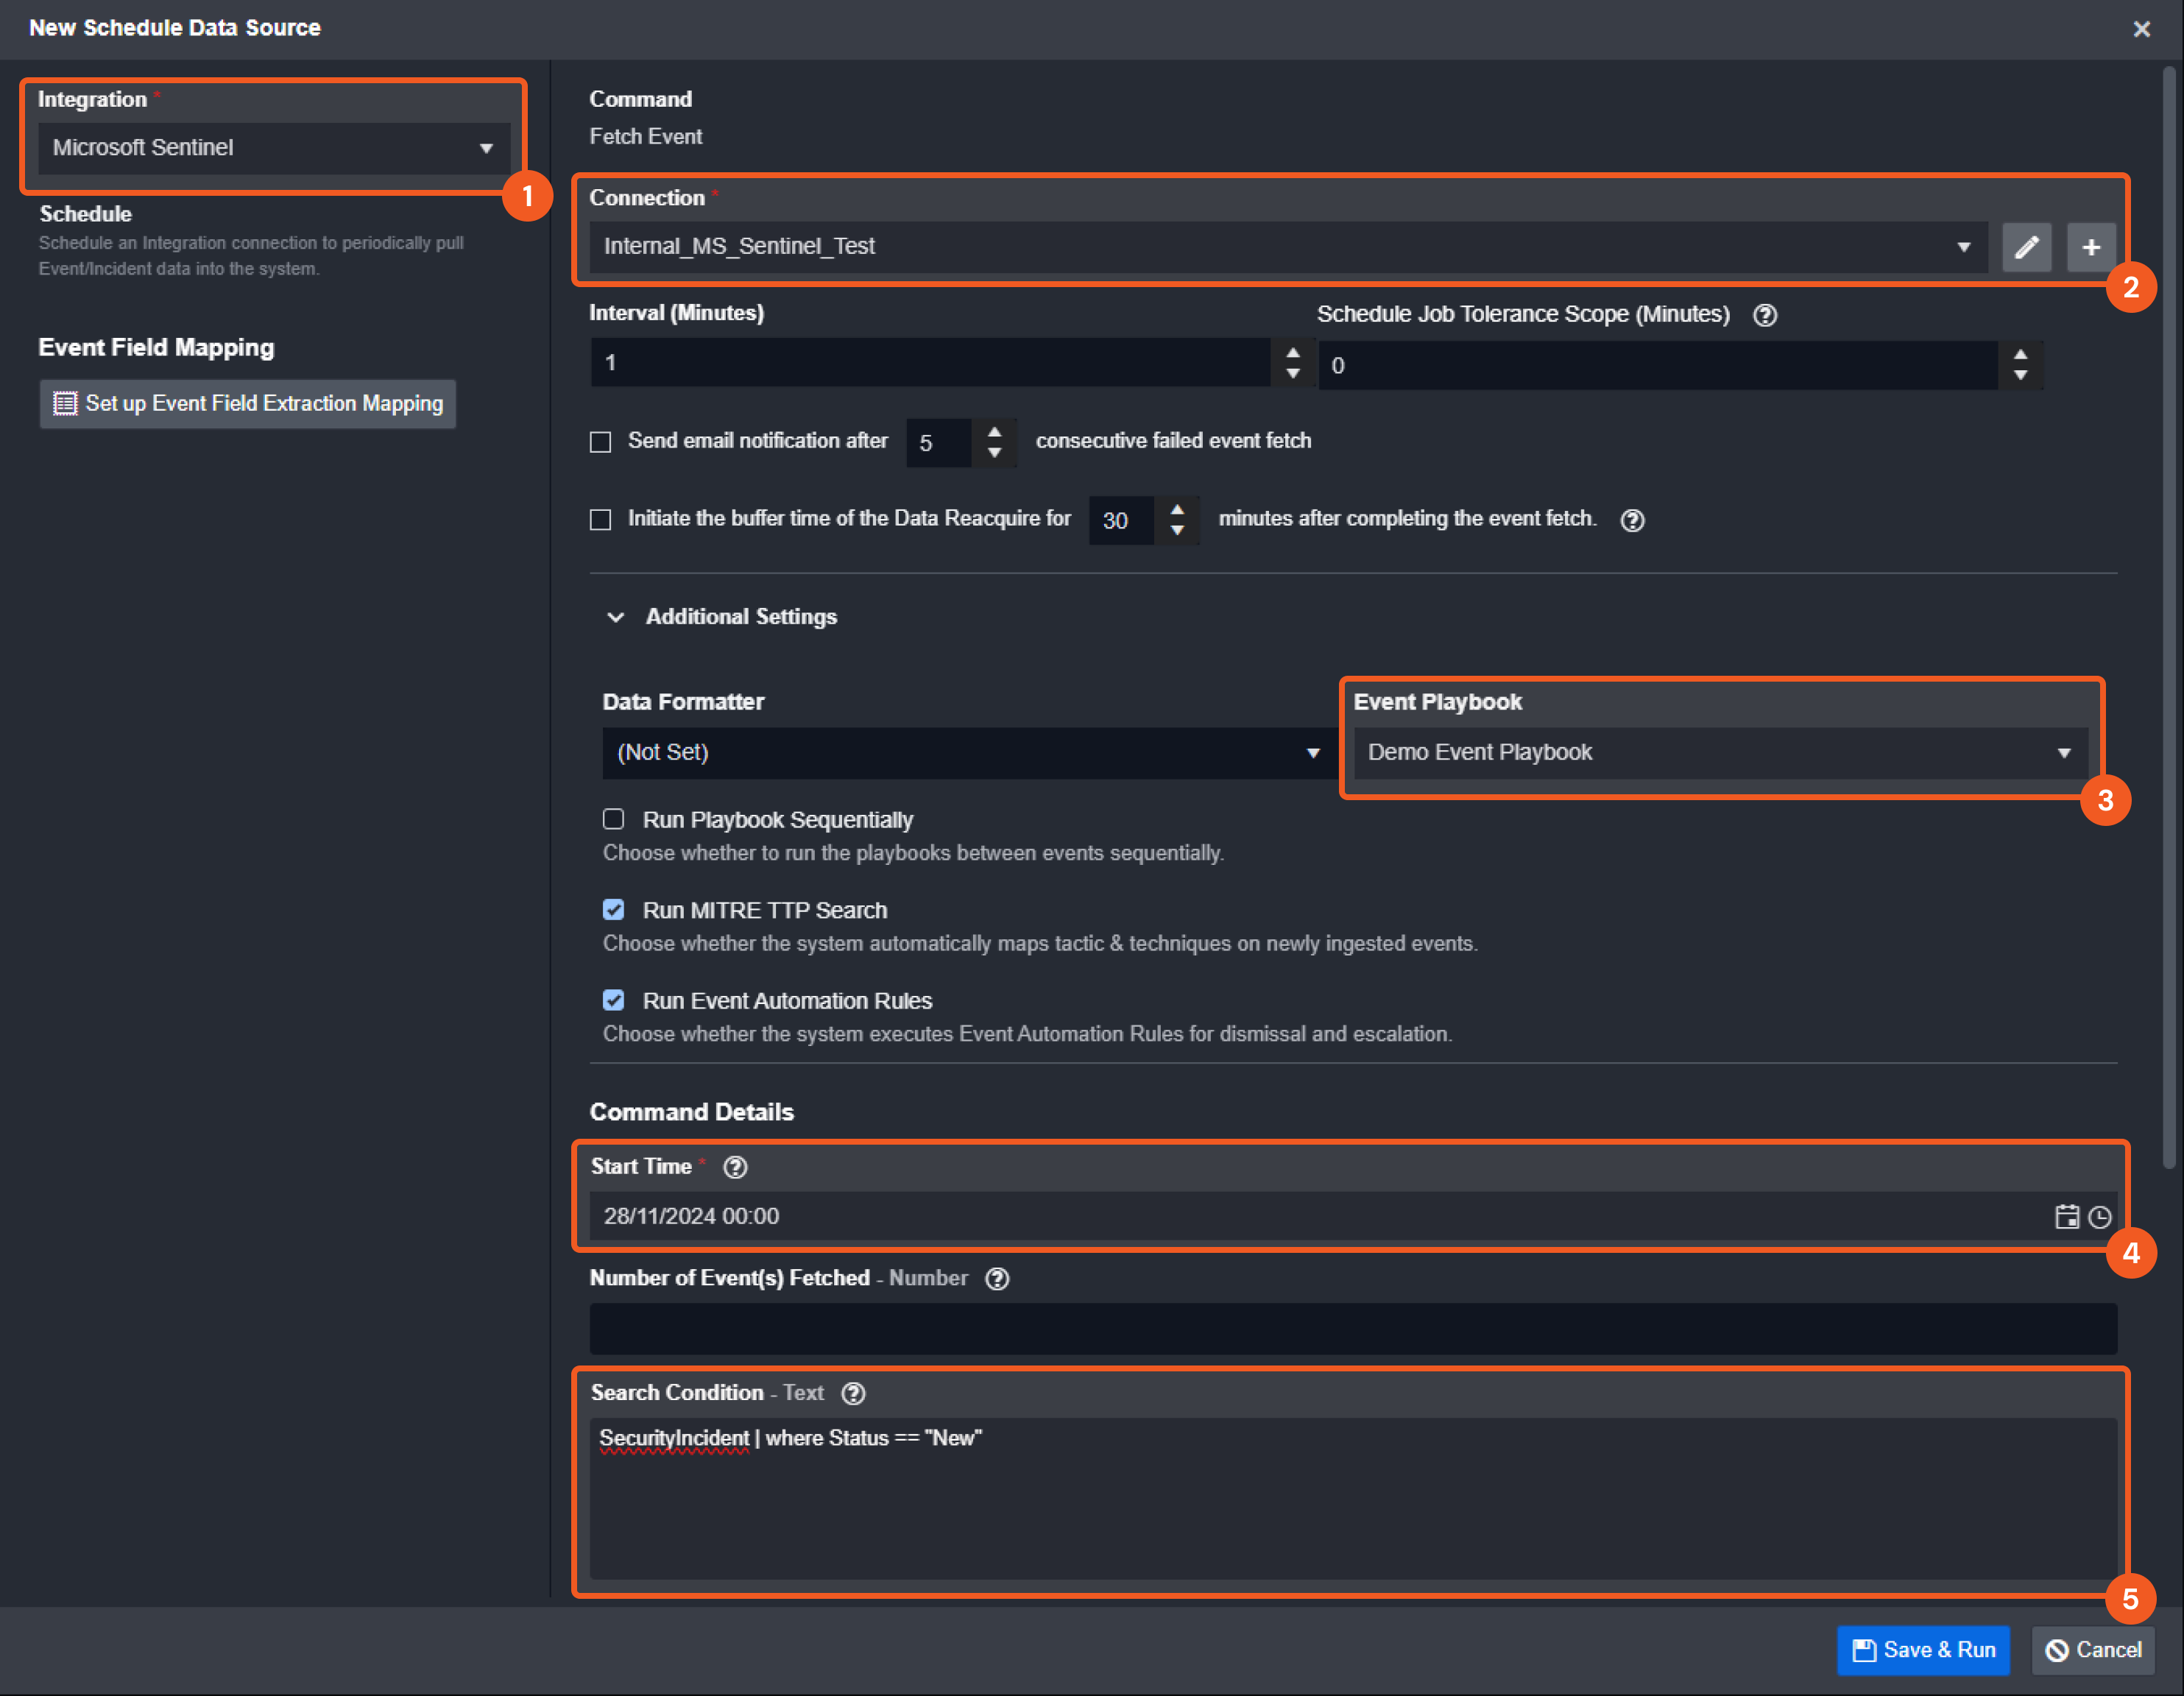
Select an Integration (e.g. Microsoft Sentinel).
Select the integration Connection configured beforehand.
READER NOTE
This connection facilitates data retrieval from the selected integration. For Microsoft Sentinel configuration instructions, refer to Configuring Microsoft Sentinel to Work with D3 SOAR and Configuring D3 SOAR to Work with Microsoft Sentinel.
Select the Event Playbook to run after the data is ingested, within the Additional Settings accordion.
Set the Start Time (in UTC) for initiating data ingestion.
Configure integration-specific input parameters. For the case of Microsoft Sentinel, this includes entering a search query to retrieve specific data. Let us use the following Search Condition (Kusto Query Language):
CODESecurityIncident | where Status == "New"Click on the Save & Run button.
Reviewing Ingestions
-20241129-194523.png?inst-v=f0ae511a-7398-4e63-b935-74c903306443)
Navigate to the Data Ingestion module.
Select the data ingestion schedule task created. A list of ingestion actions will appear on the right.
Observe the ingestions.
-20241129-194707.png?inst-v=f0ae511a-7398-4e63-b935-74c903306443) (with no number beside it) indicates the absence of available data at that time.
(with no number beside it) indicates the absence of available data at that time.-20241129-194854.png?inst-v=f0ae511a-7398-4e63-b935-74c903306443) (with a number to its left) signifies successful data ingestion with the count of D3 events created.
(with a number to its left) signifies successful data ingestion with the count of D3 events created.
Click on the category tabs to access the desired data ingestion details.
READER NOTE
The D3 events created and their corresponding IDs are available in the Event List tab.
View specific ingestion details in the code preview section.
Webhook Ingestion
If Webhook was selected instead of Schedule, perform the following steps:
-20241129-195837.png?inst-v=f0ae511a-7398-4e63-b935-74c903306443)
Select the Integration name.
Select the Site to share or make data available.
Enable the API key Authentication Method.
Use the API Request URL, Request Header Key, and Request Header Value to configure API clients for pushing data into D3.
Select the Event Playbook, within the Additional Settings accordion, to process the ingested data.