
SharePoint
LAST UPDATED: APR 11, 2025
Overview
SharePoint empowers teamwork with dynamic and productive team sites for every project team, department, and division. Share files, data, news, and resources. Customize your site to streamline your team's work. Collaborate effortlessly and securely with team members inside and outside your organization, across PCs, Macs, and mobile devices.
D3 SOAR is providing REST operations to function with SharePoint.
SharePoint is available for use in:
Known Limitations
See Avoid getting throttled or blocked in SharePoint Online | Microsoft Learn for more information about the rate limits of the SharePoint API.
Connection
To connect to SharePoint from D3 SOAR, please follow this part to collect the required information below:
Parameter | Description | Example |
Authentication Method | The grant type used to authenticate the API connection. By default, the value is ACS. If Authorization Code is selected, ensure an application is registered in Microsoft Entra ID with the required API permissions and the correct redirect URL configured. If ACS is selected, use the SharePoint ACS application to obtain the required credentials. Starting April 2, 2026, Azure Access Control Service (ACS) usage will be retired for SharePoint in Microsoft 365, and users will no longer be able to create or use Azure ACS principals to access SharePoint. Authorization Code should be used instead. | Authorization Code |
Server URL | The URL of the SharePoint server. | https://d3devcyber.sharepoint.com |
Tenant ID | The tenant ID used for authentication. | f621*****feed |
Client ID | The client ID used for authentication. | b8e2*****d550 |
Client Secret | The client secret used for authentication. | cXR6*****Wpjb |
Authorization Code | The authorization code used for OAuth 2.0 authentication with the OAuth 2.0 grant type. Click the Get Authorization button on the Connection page to generate the authorization code automatically. | AXgA*****5oeA |
Callback URL | The callback URL used for the Authorization Code grant type. Add this callback URL to the application registration in Microsoft Entra ID. | https://*****/VSOC/Auth2Callback.aspx |
Refresh Token | The refresh token used for authentication with the Authorization Code grant type. Click the Get Refresh Token button on the Connection page to generate the refresh token automatically. This parameter is read-only and auto-generated. | AXgA****caNs |
Permission Requirements
Each endpoint in the SharePoint API requires a certain permission scope. Run the following commands in PowerShell to enable the required permissions. Values surrounded by ankle brackets (<>) are to be replaced with your values.
Install the SharePoint module for PowerShell.
CODEInstall-Module -Name Microsoft.Online.SharePoint.PowerShellDefine the admin user to grant the permissions.
CODE$adminUPN="<AdminUser>@<YourMicrosoftAccount>"Define the organization user grant the permissions.
CODE$orgName="<OrganizationForSharePoint>"Connect to SharePoint online.
CODE$userCredential = Get-Credential -UserName $adminUPN -Message "<PASSWORD>"Connect-SPOService -Url https://$orgName-admin.sharepoint.com $userCredentialAllow apps to use Azure Access Control.
CODE$userCredential set-spotenant -DisableCustomAppAuthentication $falseGet auth from site upload file permission.
CODEset-SPOsite -identity https://$orgName.sharepoint.com/sites/{sitename} -DenyAddAndCustomizePages $false
Note: All permissions above are required.
Configuring SharePoint to Work with D3 SOAR
Authentication Code
Navigate to the Azure portal.
Navigate to the App registrations page, then click on the + New registration button.
Register an application.
Name the application.
Select the Accounts in this organizational directory only radio option.
Enter the web redirect URI (i.e., the Callback URL field in D3 vSOC).
Click on the Register button.
Store the client ID and tenant ID.
Add a new client secret.
Store the value.
Navigate to the API permissions section, then click on the + Add a permission button.
Confirm the required permissions appear in the Configured permissions table.
-20250325-003124.png?inst-v=a9107af0-b04c-4e31-bb5a-938372783868)
ACS Client Credential
ANNOUNCEMENT
As per Microsoft’s announcement, starting April 2, 2026, Azure Access Control Service (ACS) usage for SharePoint in Microsoft 365 will be retired, and Azure ACS principals can no longer be created or used to access SharePoint.
Access and log in to your SharePoint environment (https://<Your_Sharepoint_Address>/_layouts/15/sharepoint.aspx) with admin credentials.
Once you are logged in, access the following link to generate a Client ID and Client Secret: https://<Your_Sharepoint_Address>/_layouts/15/appregnew.aspx.
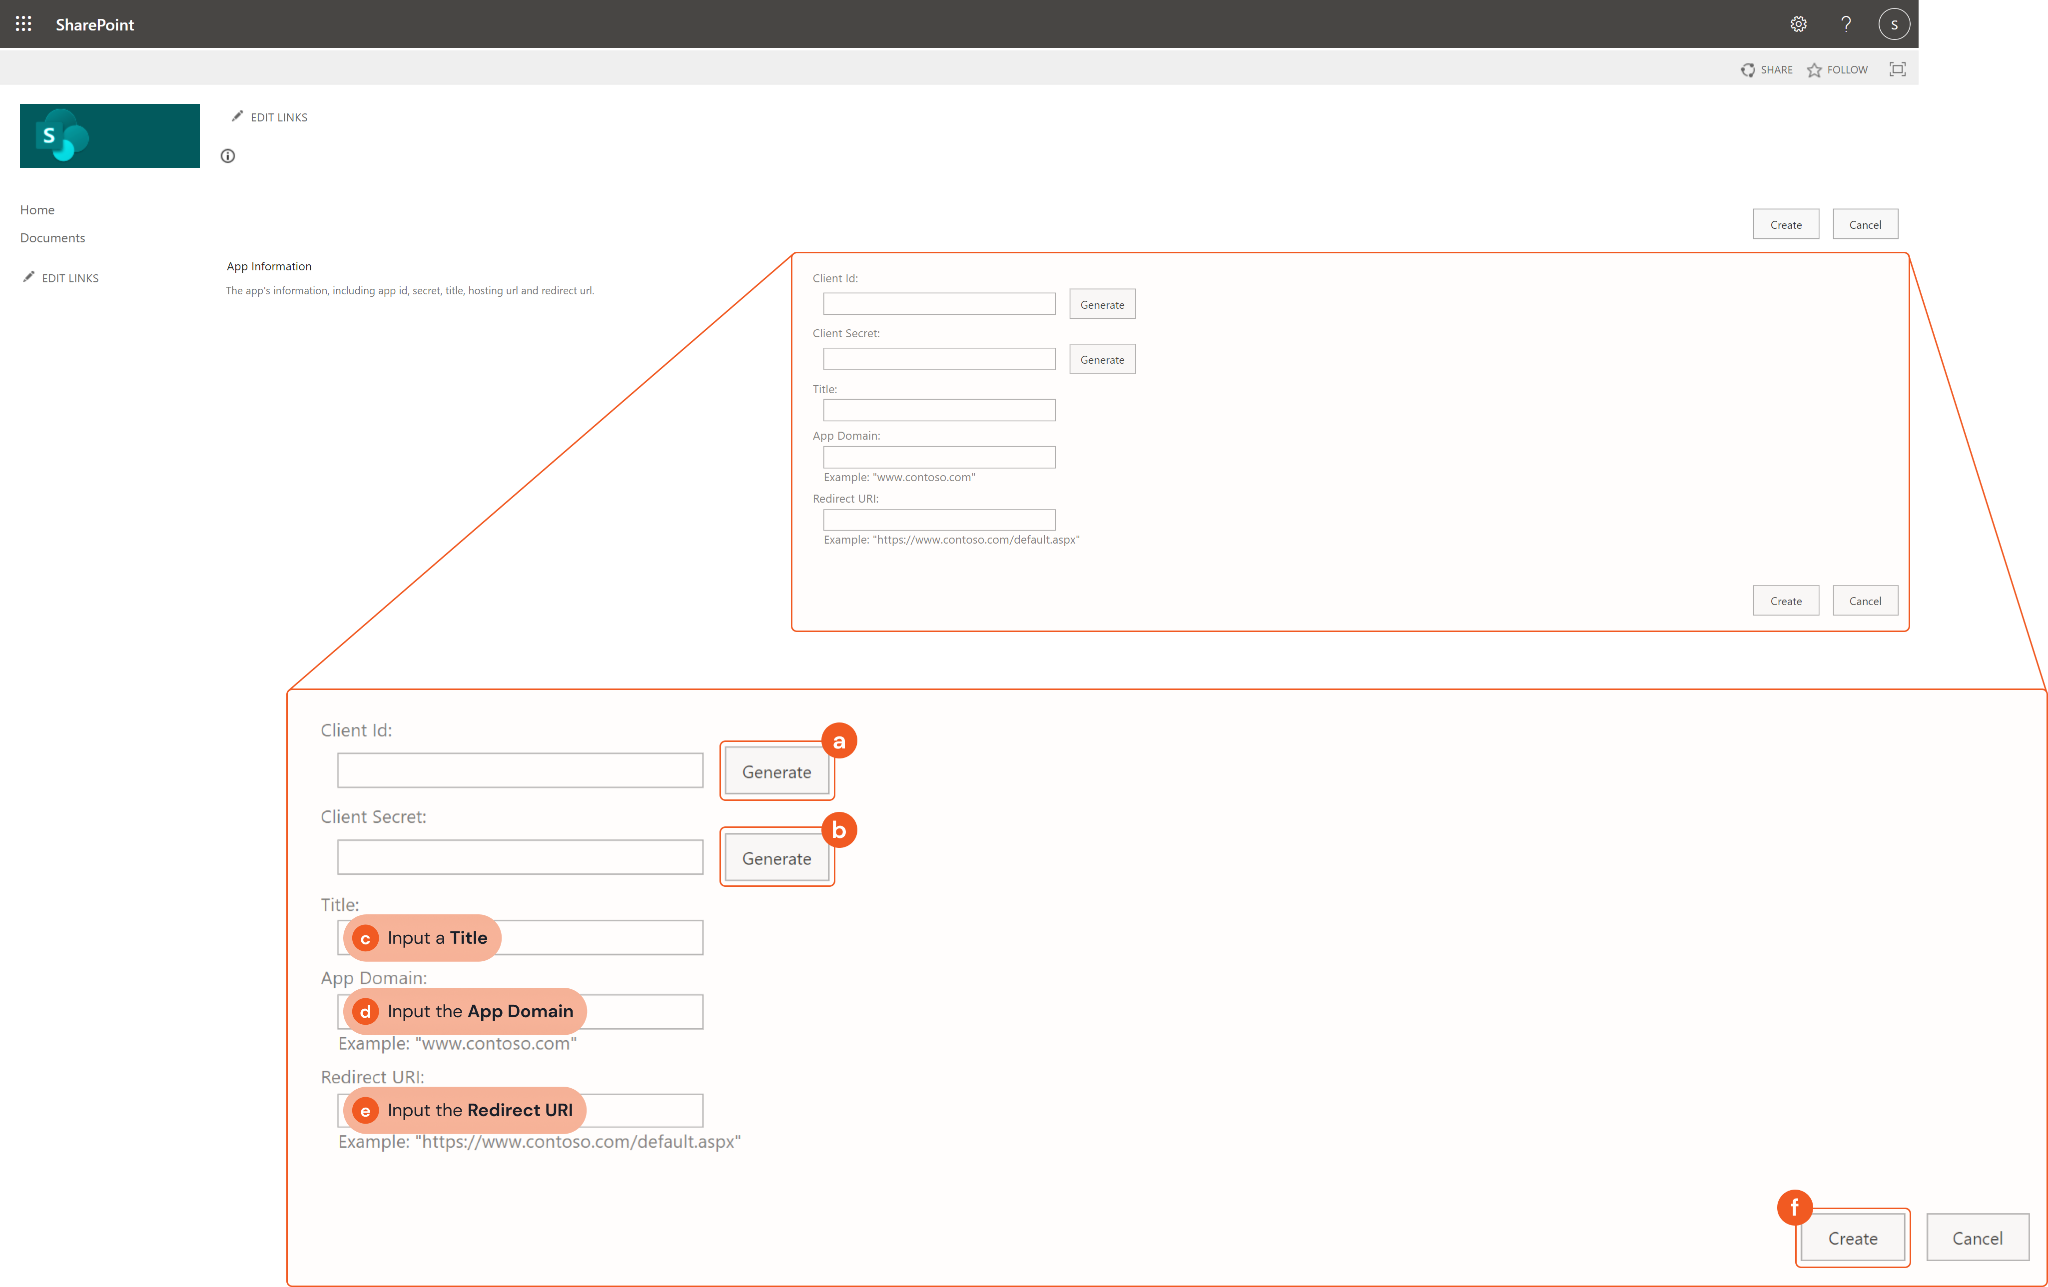
Click Generate next to the Client Id field to generate the client ID. Store the client ID in a secure location. It will be required to build the integration connection in D3 SOAR.
Click Generate next to the Client Secret field to generate the client Secret. Store the client secret in a secure location. It will be required to build the integration connection in D3 SOAR.
Input a Title for the app (e.g. API Connection).
Input the App Domain (e.g. www.contoso.com). If you are unsure about this field, you may use the provided example. It will not affect the connection app.
Input the Redirect URI (e.g. https://www.contoso.com/default.aspx). If you are unsure about this field, you may use the provided example. It will not affect the connection app.
Click Create.
Access the following link to add permissions to the app: https://<Your_SharePoint_Tenant_Name>-admin.sharepoint.com/_layouts/15/appinv.aspx
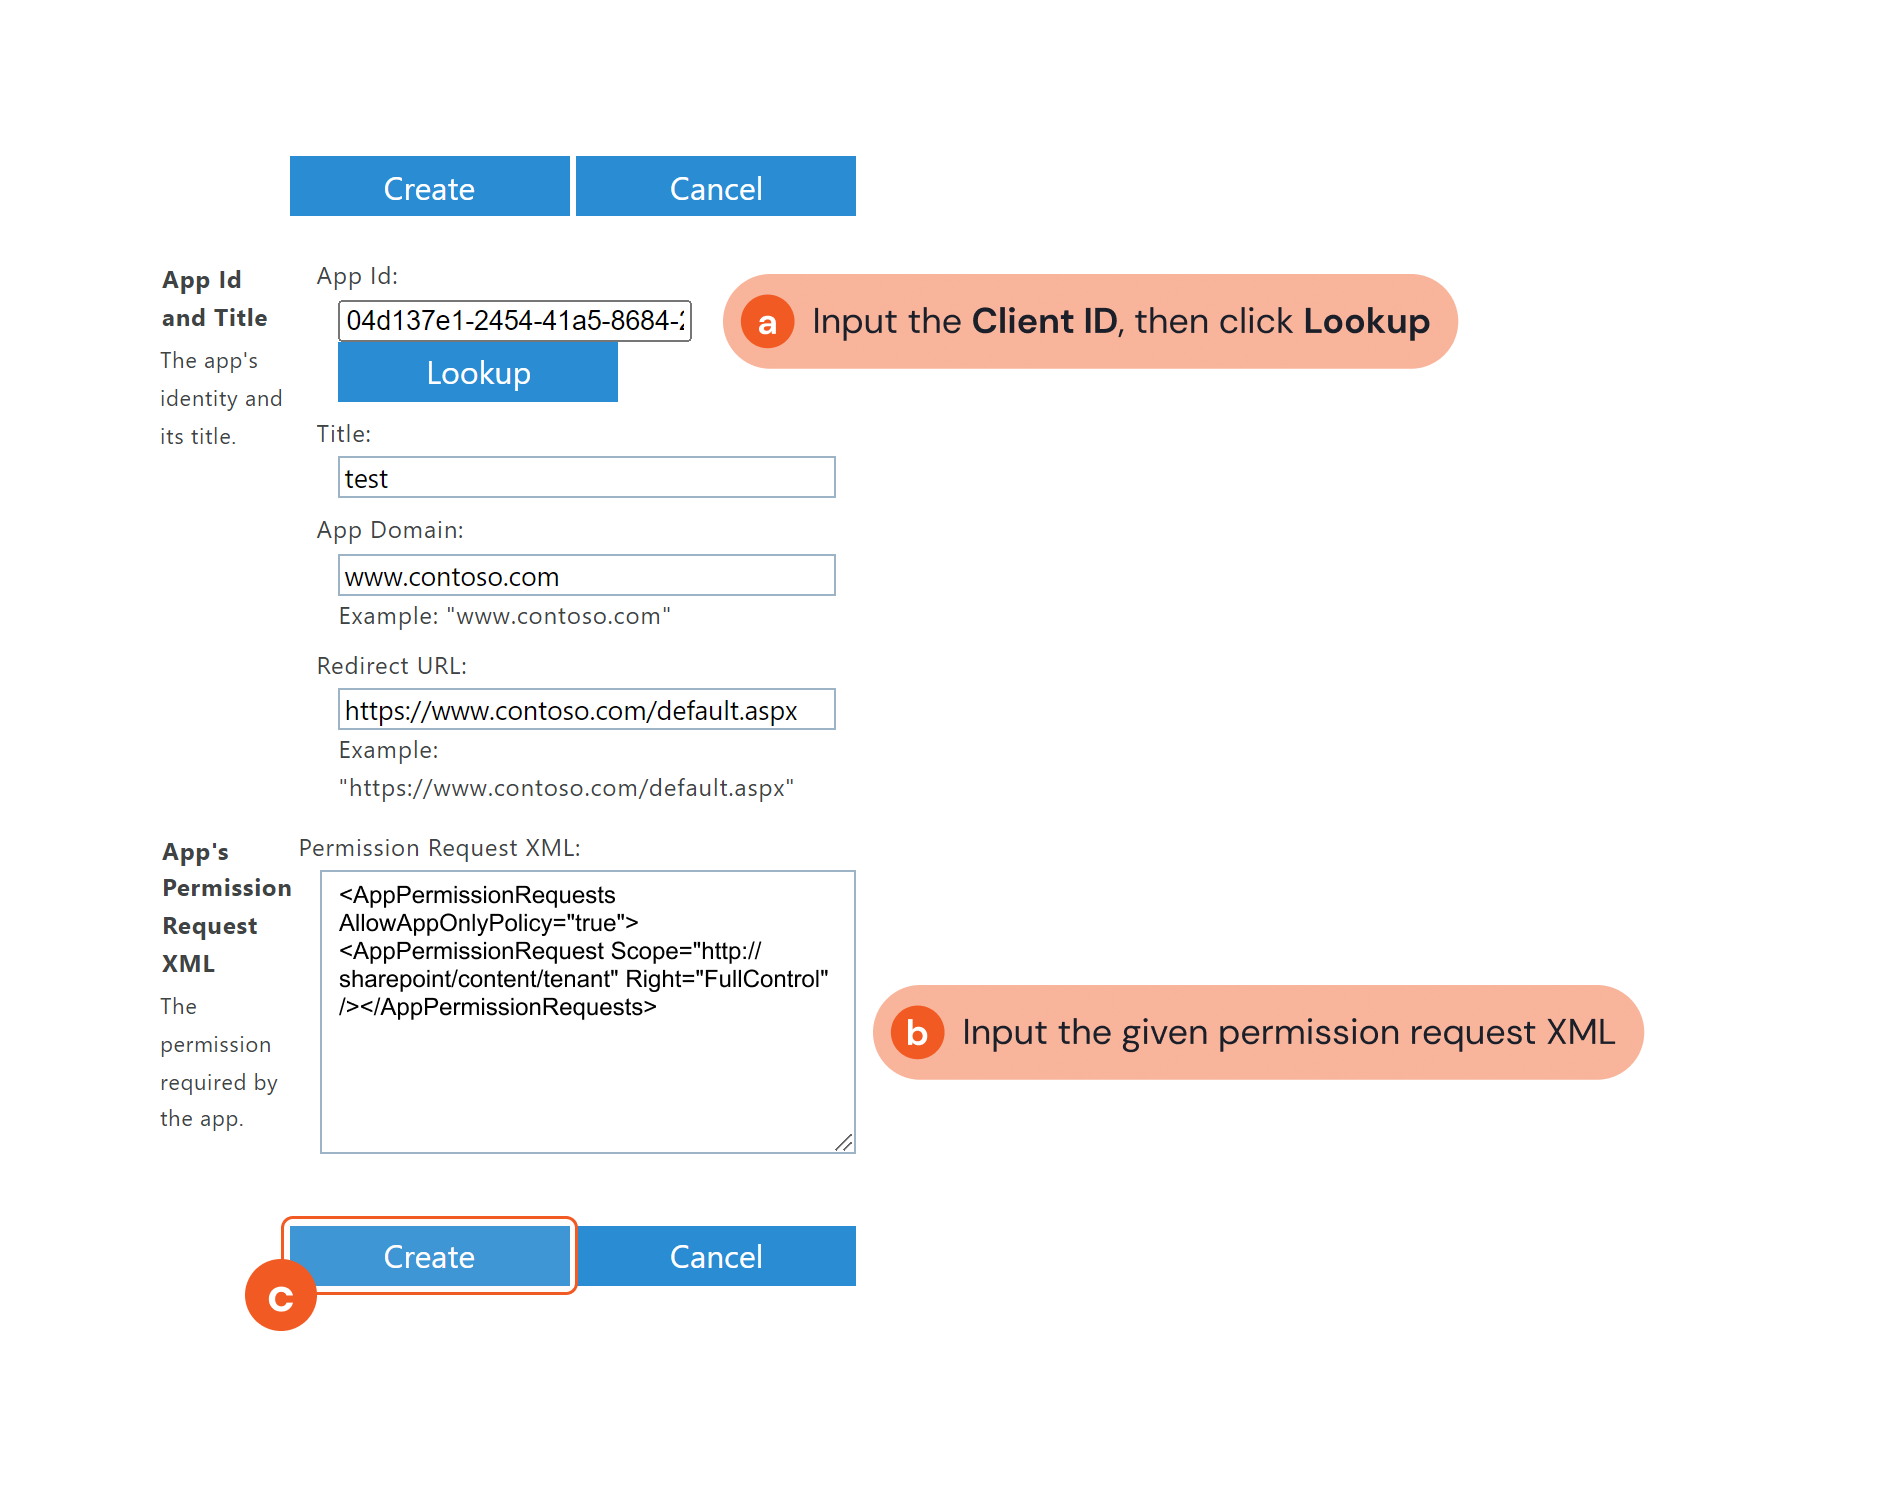
Input the Client Id of your created app into the App Id field, then click Lookup. The other fields will automatically be populated.
Under Permission Request XML, input the following XML.
<AppPermissionRequests AllowAppOnlyPolicy="true"> <AppPermissionRequest Scope="http://sharepoint/content/tenant" Right="FullControl" /></AppPermissionRequests>Click Create.
You will be prompted to trust the created API connection. Click Trust It.

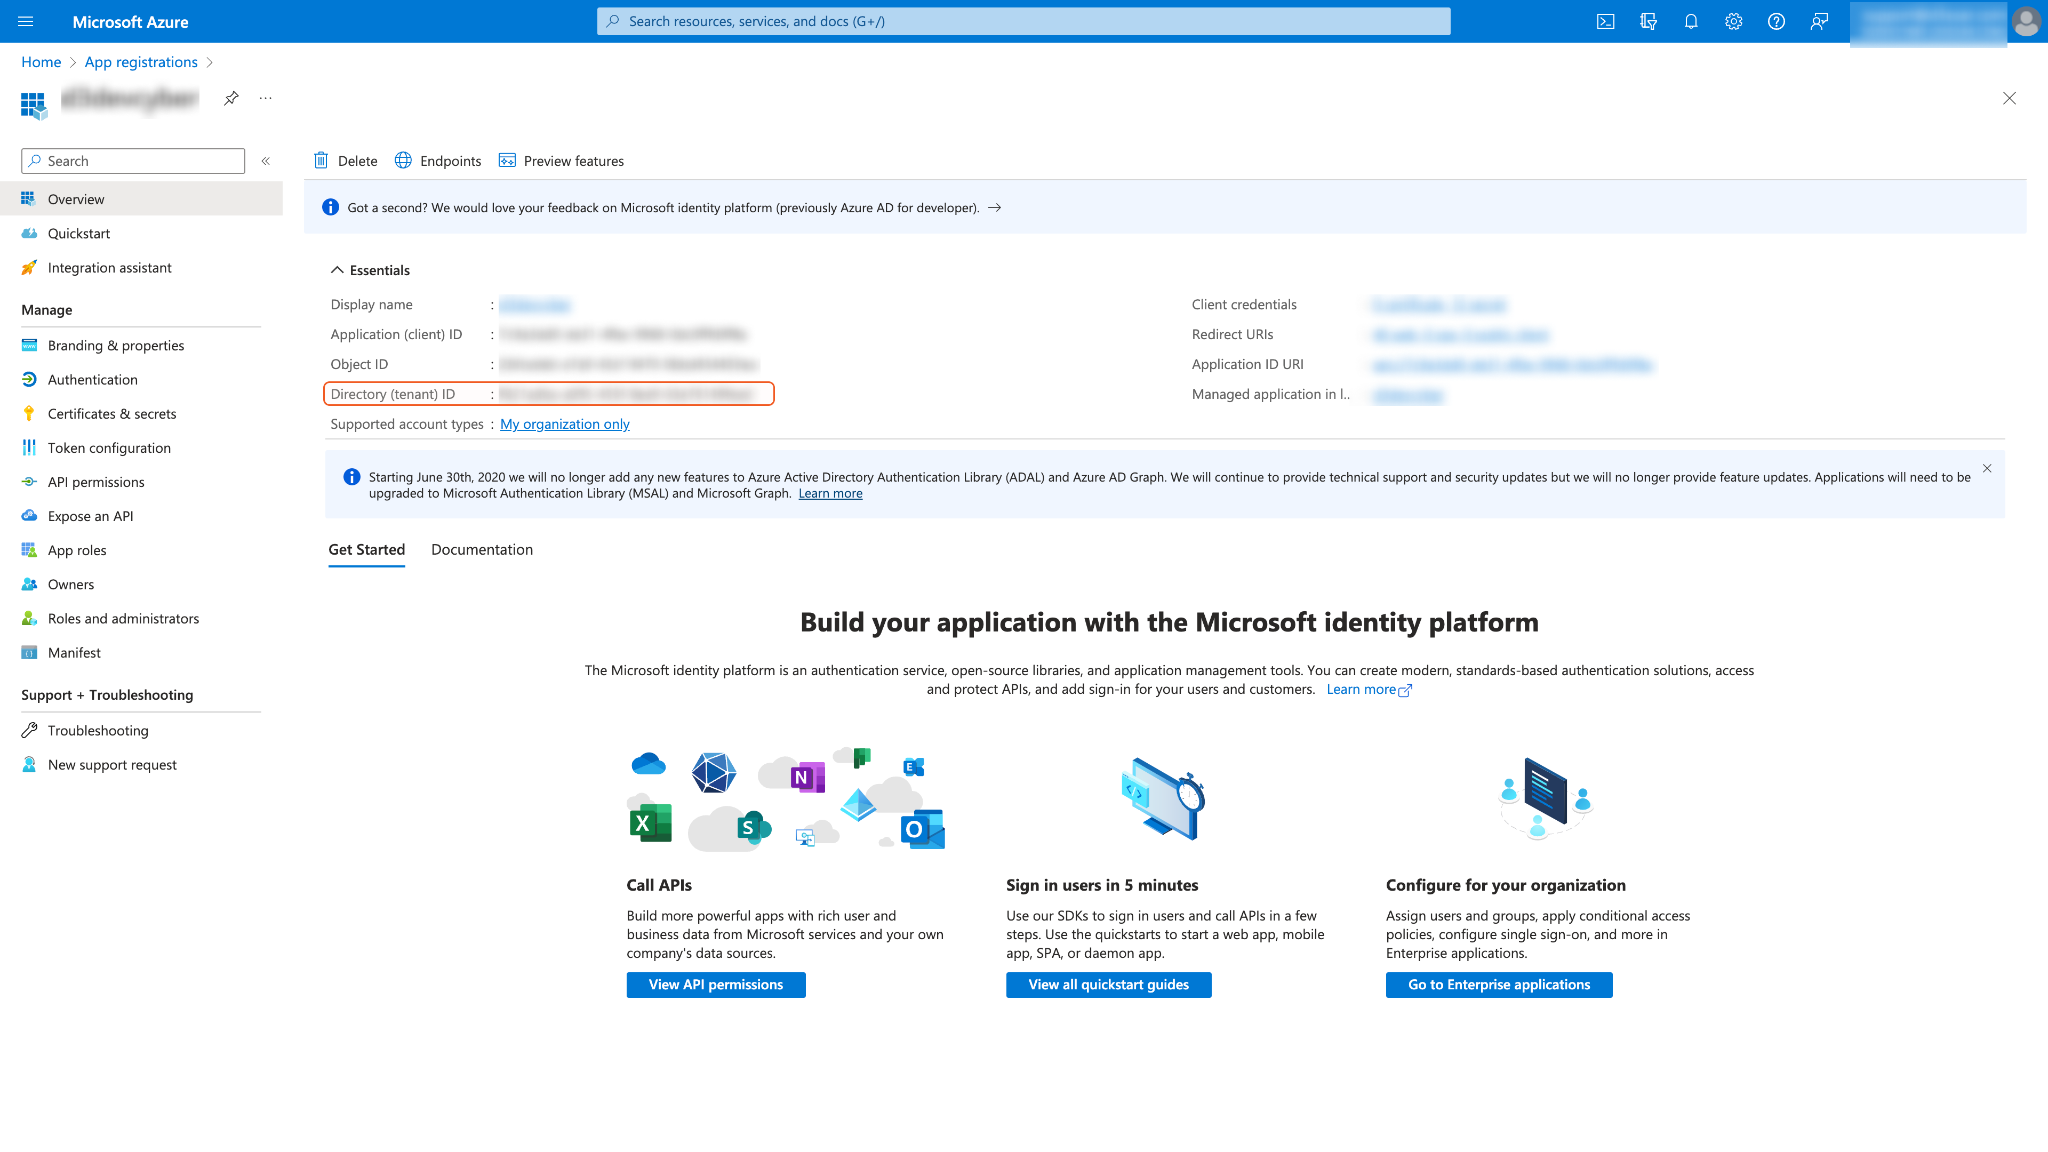
Obtain your app's Tenant ID. Go to https://portal.azure.com/#home and log in with your admin account. Navigate to App registrations, then locate and select your SharePoint tenant name. The Directory (tenant) ID will be displayed under the Essentials section. Store the ID in a secure location, it will be required to establish the connection in D3 SOAR.
Configuring D3 SOAR to Work with SharePoint
Log in to D3 SOAR.
Find the SharePoint integration.
-20241031-173226.png?inst-v=a9107af0-b04c-4e31-bb5a-938372783868)
Navigate to Configuration on the top header menu.
Click on the Integration icon on the left sidebar.
Type SharePoint in the search box to find the integration, then click it to select it.
Click + New Connection, on the right side of the Connections section. A new connection window will appear.
Configure the following fields to create a connection to SharePoint.
-20241031-173213.png?inst-v=a9107af0-b04c-4e31-bb5a-938372783868)
Connection Name: The desired name for the connection.
Site: Specifies the site to use the integration connection. Use the drop-down menu to select the site. The Share to Internal Sites option enables all sites defined as internal sites to use the connection. Selecting a specific site will only enable that site to use the connection.
Recipient site for events from connections Shared to Internal Sites: This field appears if you selected Share to Internal Sites for Site to let you select the internal site to deploy the integration connection.
Agent Name (Optional): Specifies the proxy agent required to build the connection. Use the dropdown menu to select the proxy agent from a list of previously configured proxy agents.
Description (Optional): Add your desired description for the connection.
Tenant (Optional): When configuring the connection from a master tenant site, you have the option to choose the specific tenant sites you want to share the connection with. Once you enable this setting, you can filter and select the desired tenant sites from the dropdowns to share the connection.
Configure User Permissions: Defines which users have access to the connection.
Active: Check the tick box to ensure the connection is available for use.
System: This section contains the parameters defined specifically for the integration. These parameters must be configured to create the integration connection.
Authentication Method: ACS-20250325-002058.png?inst-v=a9107af0-b04c-4e31-bb5a-938372783868)
1. Select the ACS authentication method.
2. Input the Server URL of your SharePoint server.
3. Input the saved Tenant ID.
4. Input the saved Client ID.
5. Input the saved Client Secret.
Authentication Method: Authorization Code-20250324-215658.png?inst-v=a9107af0-b04c-4e31-bb5a-938372783868)
1. Select the Authorization Code authentication method.
2. Input the Server URL of your SharePoint server.
3. Input the saved Tenant ID.
4. Input the saved Client ID.
5. Input the saved Client Secret.
6. Click on the Get Authorization button to obtain the authorization code.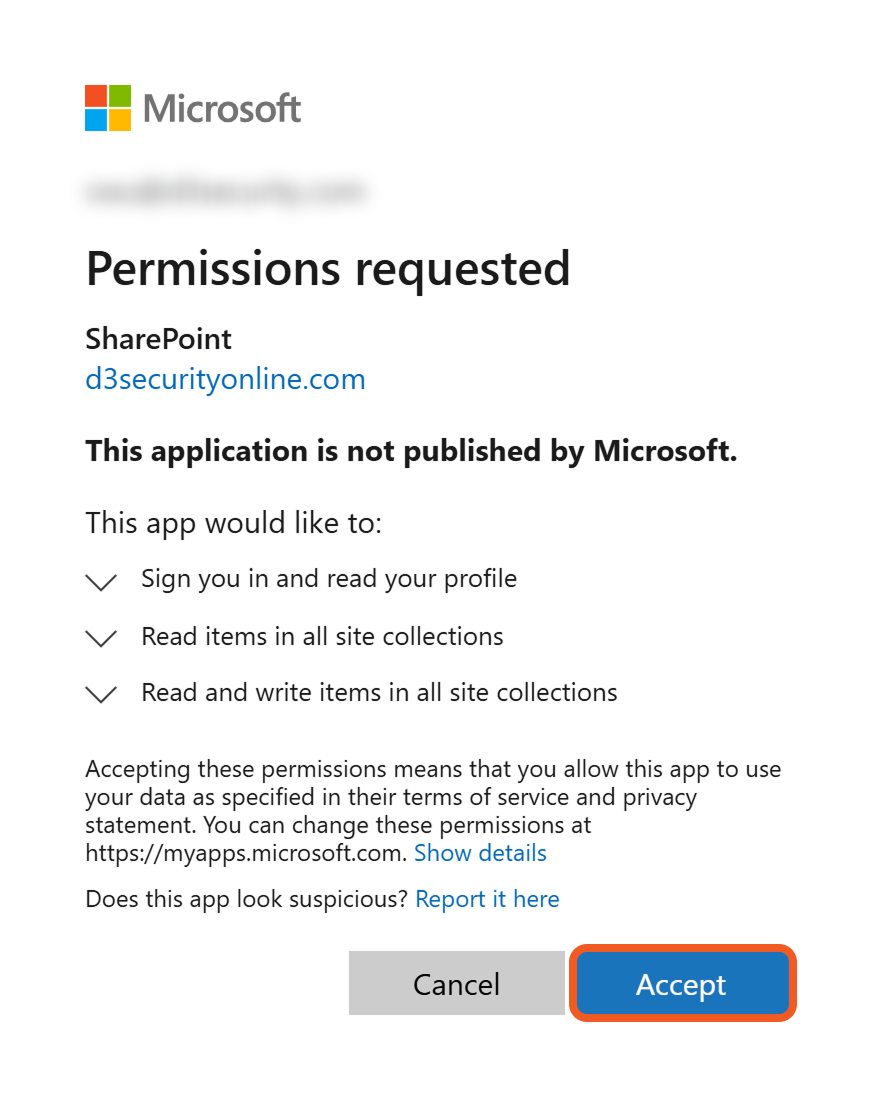
-20250324-220446.png?inst-v=a9107af0-b04c-4e31-bb5a-938372783868)
7. Input the authorization code.
8. Click on the Get Refresh Token button.
Enable Password Vault: An optional feature that allows users to take the stored credentials from their own password vault. Please refer to the password vault connection guide if needed.
Connection Health Check: Updates the connection status you have created. A connection health check is done by scheduling the Test Connection command of this integration. This can only be done when the connection is active.
To set up a connection health check, check the Connection Health Check tickbox. You can customize the interval (minutes) for scheduling the health check. An email notification can be set up after a specified number of failed connection attempts.
Test the connection.
-20250325-004512.png?inst-v=a9107af0-b04c-4e31-bb5a-938372783868)
Click Test Connection to verify the account credentials and network connection. If the Test Connection Passed alert window appears, the test connection is successful. You will see Passed with a green checkmark appear beside the Test Connection button. If the test connection fails, please check your connection parameters and try again.
Click OK to close the alert window.
Click + Add to create and add the configured connection.
Commands
SharePoint includes the following executable commands for users to set up schedules or create playbook workflows. With the Test Command, you can execute these commands independently for playbook troubleshooting.
Integration API Note
For more information about the SharePoint API, please refer to the SharePoint API reference.
READER NOTE
Certain permissions are required for each command. Please refer to the Permission Requirements and Configuring SharePoint to Work with D3 SOAR for details.
Upload File
Uploads a file to SharePoint from D3 SOAR’s database.
READER NOTE
Folder Name and Site Name are required to run this command.
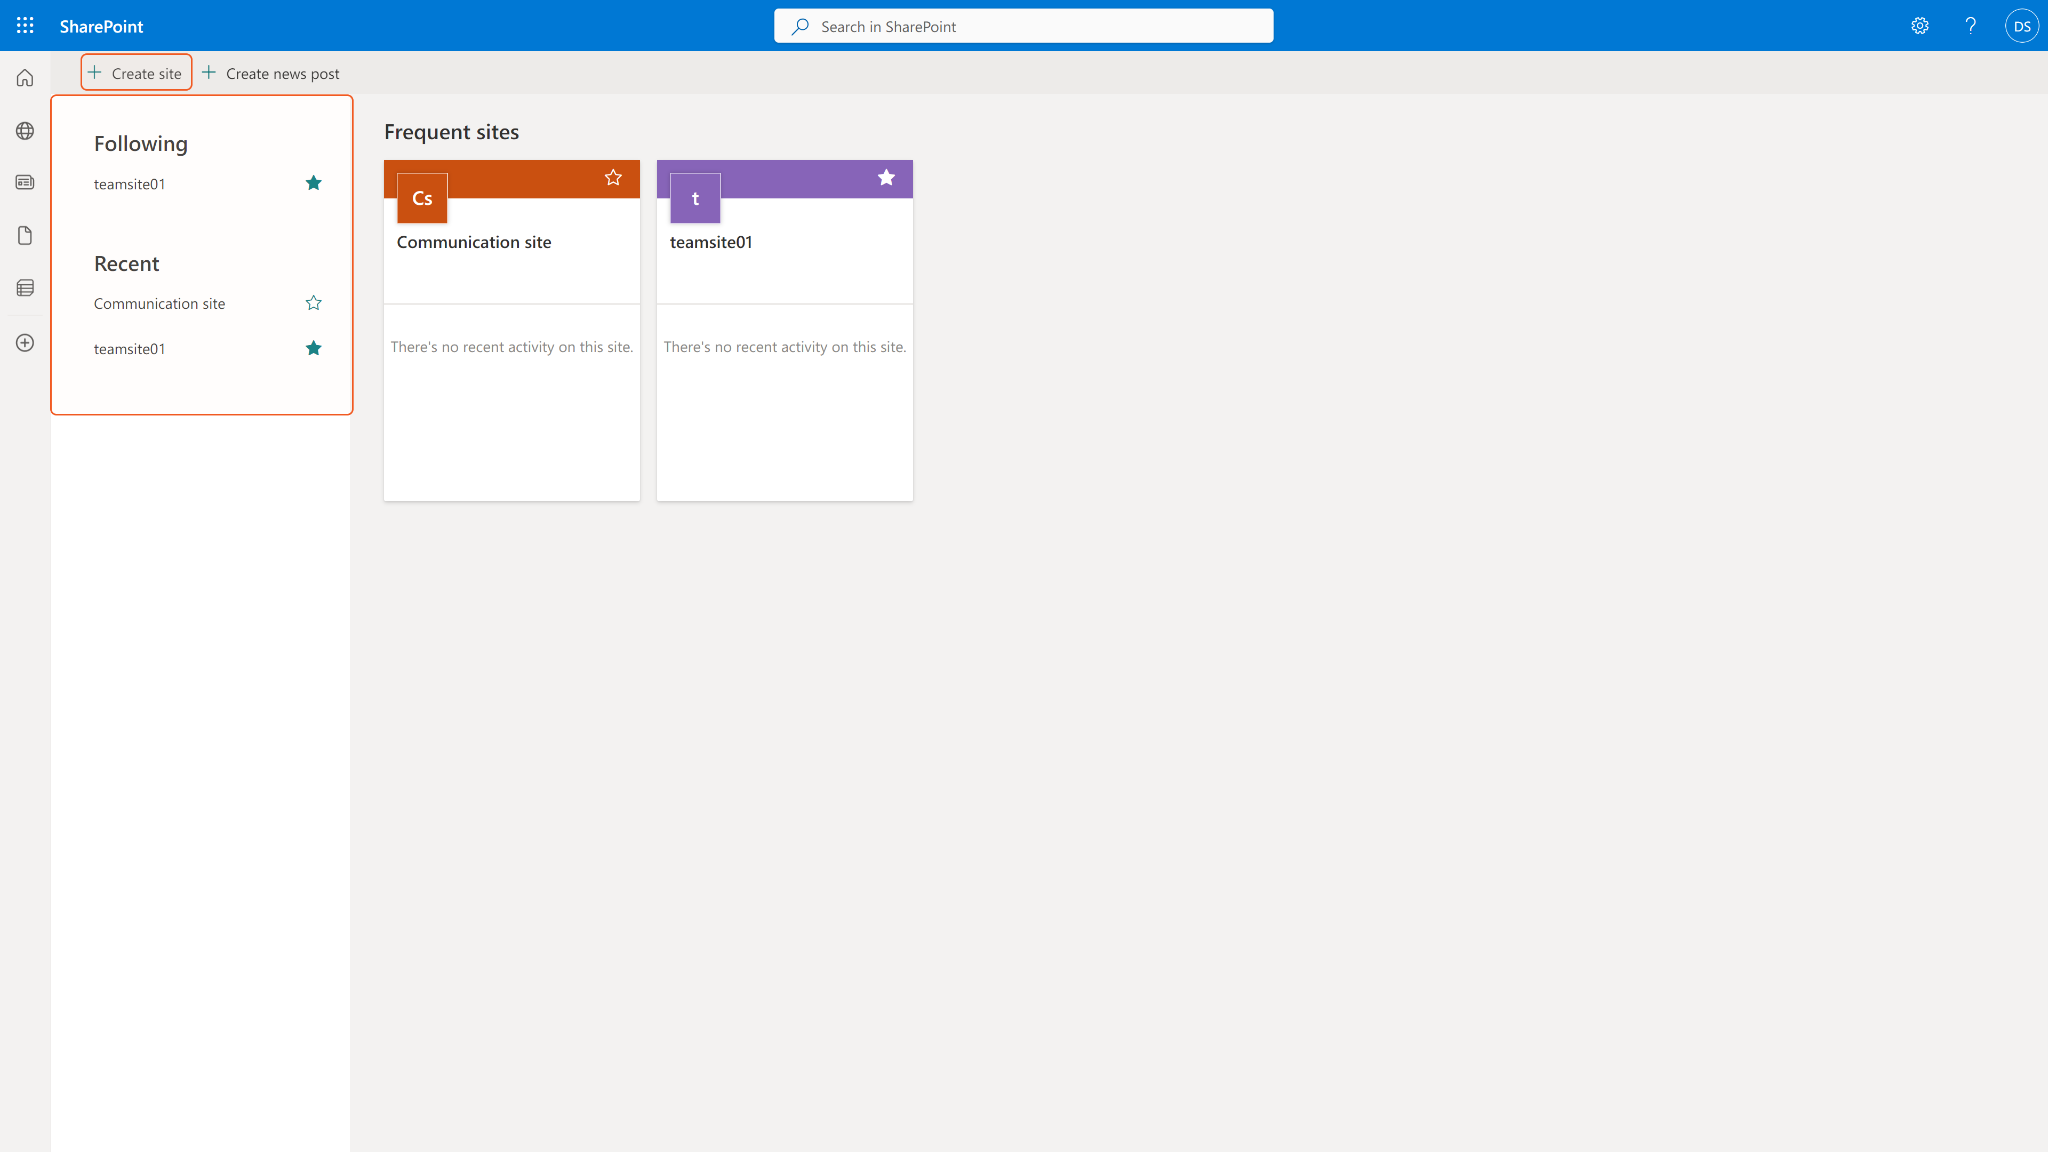
The Site Name parameter is referring to the sites on SharePoint. Sites can be viewed and created from the SharePoint home page.
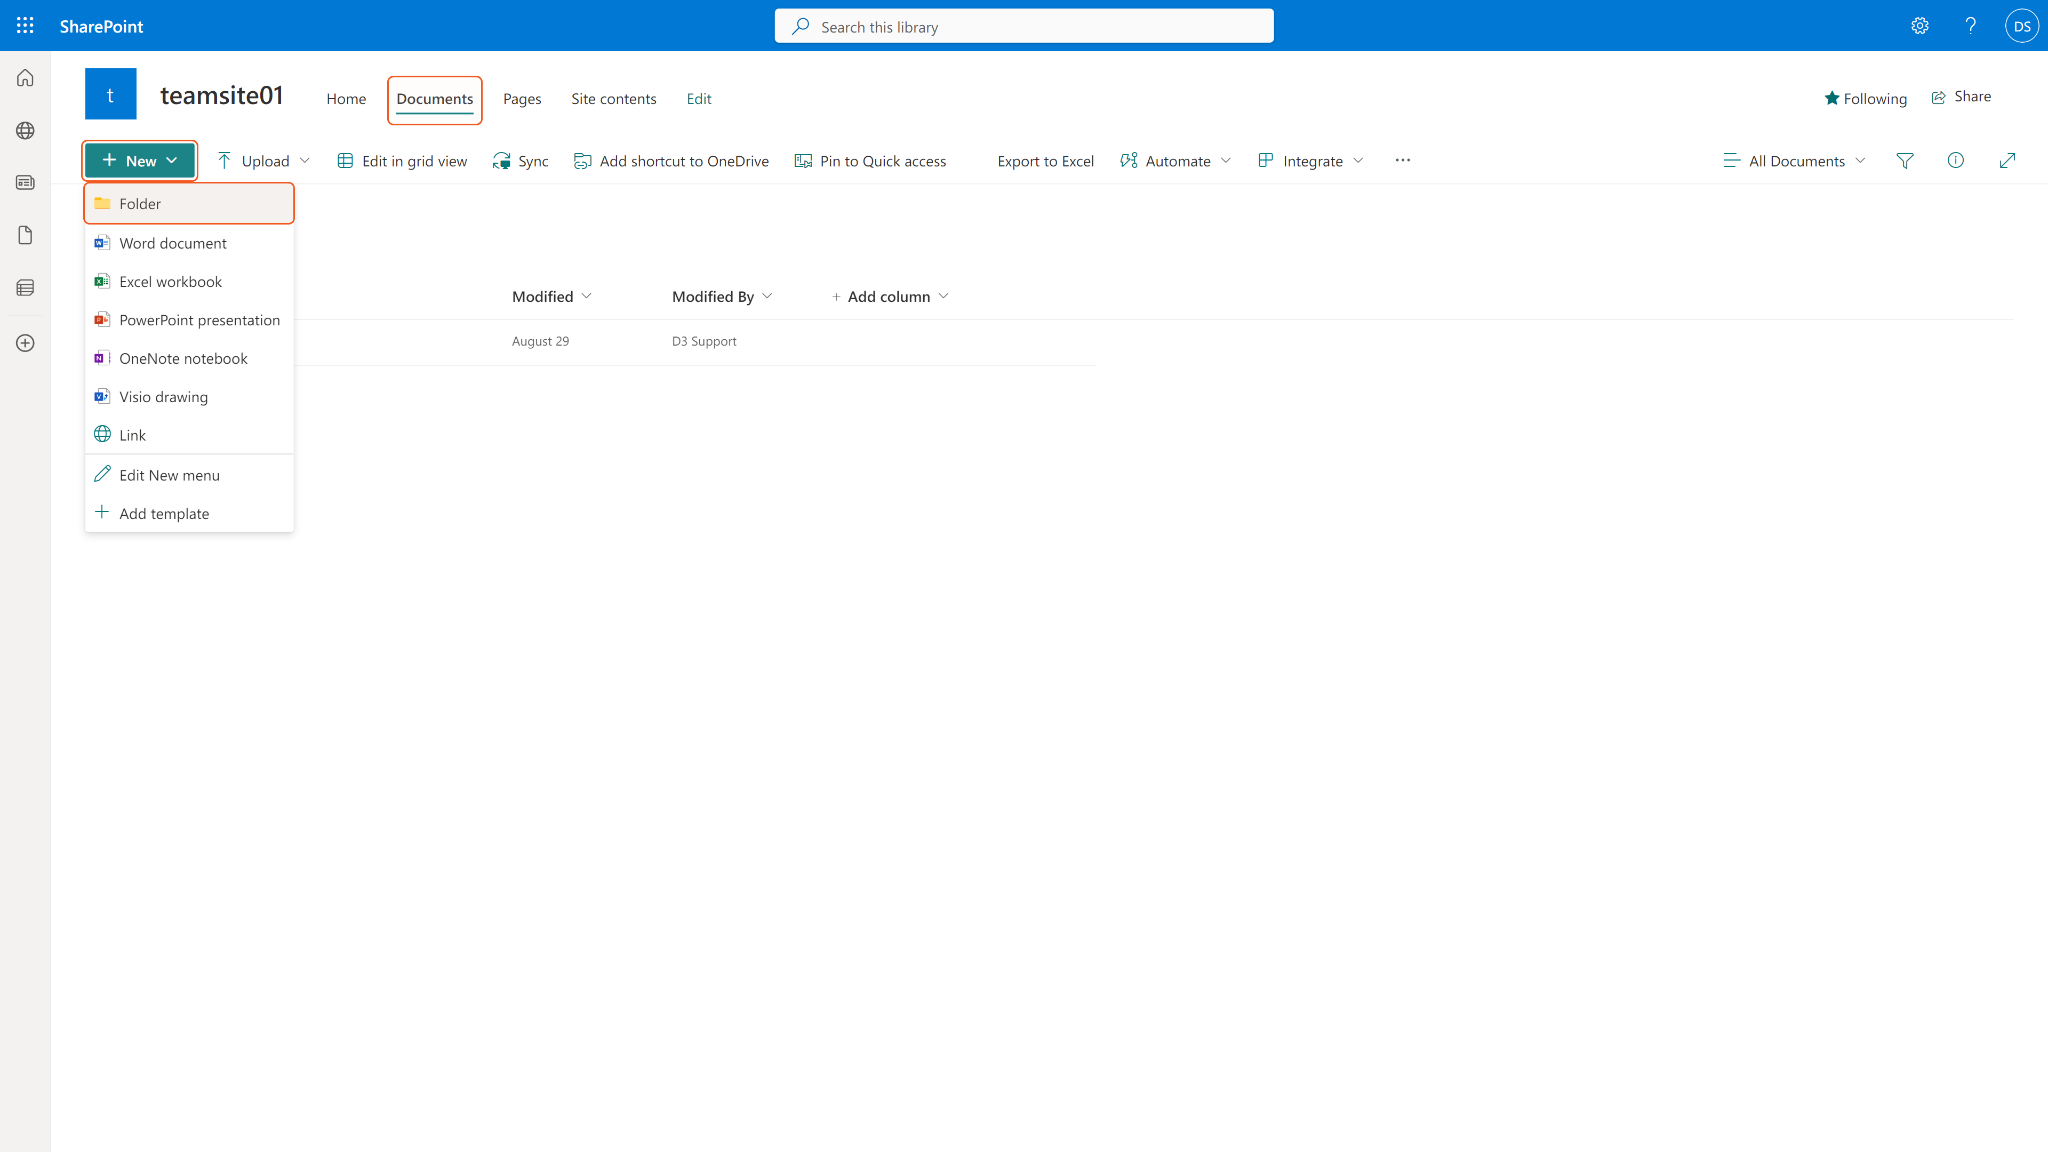
The input Folder Name must exist in the specified site. You can create a new folder or find your desired folder under the Documents tab of your selected site.
File ID and File Source
It is not recommended to use the Test Command feature with the Upload File command as it is designed for dynamic input files in Playbooks, Incident Attachments, and Artifact Attachments. There is a simple workaround to test the command:
Navigate to Configuration on the top bar menu.
Click on Utility Commands on the left sidebar menu.
Use the search box to find and select the Create a File from input Text Array command.
Click on the Test tab.
Input the required information for the parameters.
Click on the Test Command button. A D3 File ID will appear in the output data after the file has been successfully created. The D3 File Source of the created file will be Playbook File.
Input
Input Parameter | Required/Optional | Description | Example |
File IDs | Required | Chooses the file path according to the file source. The options for file paths are: Incident Attachment: Incident.file.file ID Playbook File: Task output Artifact File: Incident.Events.file.file ID | [ "473" ] |
Folder Name | Required | The name of the SharePoint folder to upload the file(s) to. | newFolder |
Site Name | Required | The SharePoint site to upload the file(s) to. | newSite |
File Source | Required | Specifies the file source. The options for file sources are: Incident Attachment File: Manually uploaded file from Incident Playbook File: Output from another Task Artifact File: Ingested Artifact in an Event | Playbook File |
Output
Error Handling
If the Return Data is Failed, an Error tab will appear in the Test Result window.
The error tab contains the details responded from D3 SOAR or third-party API calls, including Failure Indicator, Status Code, and Message. This can help you locate the root cause of a command failure.
Parts in Error | Description | Example |
Failure Indicator | Indicates the command failure that happened at a specific input and/or API call. | Upload File failed. |
Status Code | The response code issued by the third-party API server or the D3 SOAR system that can be used to locate the corresponding error category. For example, if the returned status code is 401, the selected connection is unauthorized to run the command. The user or system support would need to check the permission setting in the SharePoint portal. Refer to the HTTP Status Code Registry for details. | Status Code: 404. |
Message | The raw data or captured key error message from the integration API server about the API request failure. | Message: Folder Name Not Found. |
Error Sample Data Upload File failed. Status Code: 404. Message: Folder Name Not Found. |
Get Folder
Retrieves folder(s) from the Shared Documents library.
READER NOTE
All folders are stored under the system's "/Shared Documents" folder. To retrieve all folders, leave the parameter empty. If you need to access a specific folder, define the Server Relative URL parameter with its folder path. You can obtain the path value from the returned raw data at the path $.Folders[*].Folders[*].ServerRelativeUrl after running this command with no defined parameters.
Please note that the root folder is "/Shared Documents" and cannot be changed. To access a first-level folder, follow the root folder with the folder's name, for example, "/General". To access a subfolder, add the folder name after the parent folder's URL, for example, "/Shared Documents/General/test".
Input
Input Parameter | Required/Optional | Description | Example |
Server Relative URL | Required | The path of the folder of retrieve, starting from the root folder "Shared Documents". The path should be specified in the input field as "/Shared Documents/[Desired Folder Path]. For instance, if you want to retrieve the "test" sub-folder inside the "General" folder, you should input "/Shared Documents/General/test" as the folder path. By default, the parameter is set to "/Shared Documents", which can be used to obtain all folders. | /Shared Documents/General/test |
Output
Error Handling
If the Return Data is Failed, an Error tab will appear in the Test Result window.
The error tab contains the details responded from D3 SOAR or third-party API calls, including Failure Indicator, Status Code, and Message. This can help you locate the root cause of a command failure.
Parts in Error | Description | Example |
Failure Indicator | Indicates the command failure that happened at a specific input and/or API call. | Get Folder failed. |
Status Code | The response code issued by the third-party API server or the D3 SOAR system that can be used to locate the corresponding error category. For example, if the returned status code is 401, the selected connection is unauthorized to run the command. The user or system support would need to check the permission setting in the SharePoint portal. Refer to the HTTP Status Code Registry for details. | Status Code: 404. |
Message | The raw data or captured key error message from the integration API server about the API request failure. | Message: Server Relative URL Not Found. |
Error Sample Data Get Folder failed. Status Code: 404. Message: Server Relative URL Not Found. |
Test Connection
Allows you to perform a health check on an integration connection. You can schedule a periodic health check by selecting Connection Health Check when editing an integration connection.
Input
N/A
Output
Error Handling
If the Return Data is failed, an Error tab will appear in the Test Result window.
The error tab contains the responses from the third-party API calls including Failure Indicator, Status Code, and Message. This can help you locate the root cause of a command failure.
Parts in Error | Description | Example |
Failure Indicator | Indicates the command failure that happened at a specific input and/or API call. | Test Connection failed. Failed to check the connector. |
Status Code | The response code issued by the third-party API server or the D3 SOAR system that can be used to locate the corresponding error category. For example, if the returned status code is 401, the selected connection is unauthorized to run the command. The user or system support would need to check the permission setting in the SharePoint portal. Refer to the HTTP Status Code Registry for details. | Status Code: 404. |
Message | The raw data or captured key error message from the integration API server about the API request failure. | Message: Not Found. |
Error Sample Data Test Connection failed. Failed to check the connector. Status Code: 404. Message: Not Found. |