
Setting Up a Webhook for Microsoft Sentinel
LAST UPDATED: MAY 1, 2025
Creating a Logic App (Playbook)
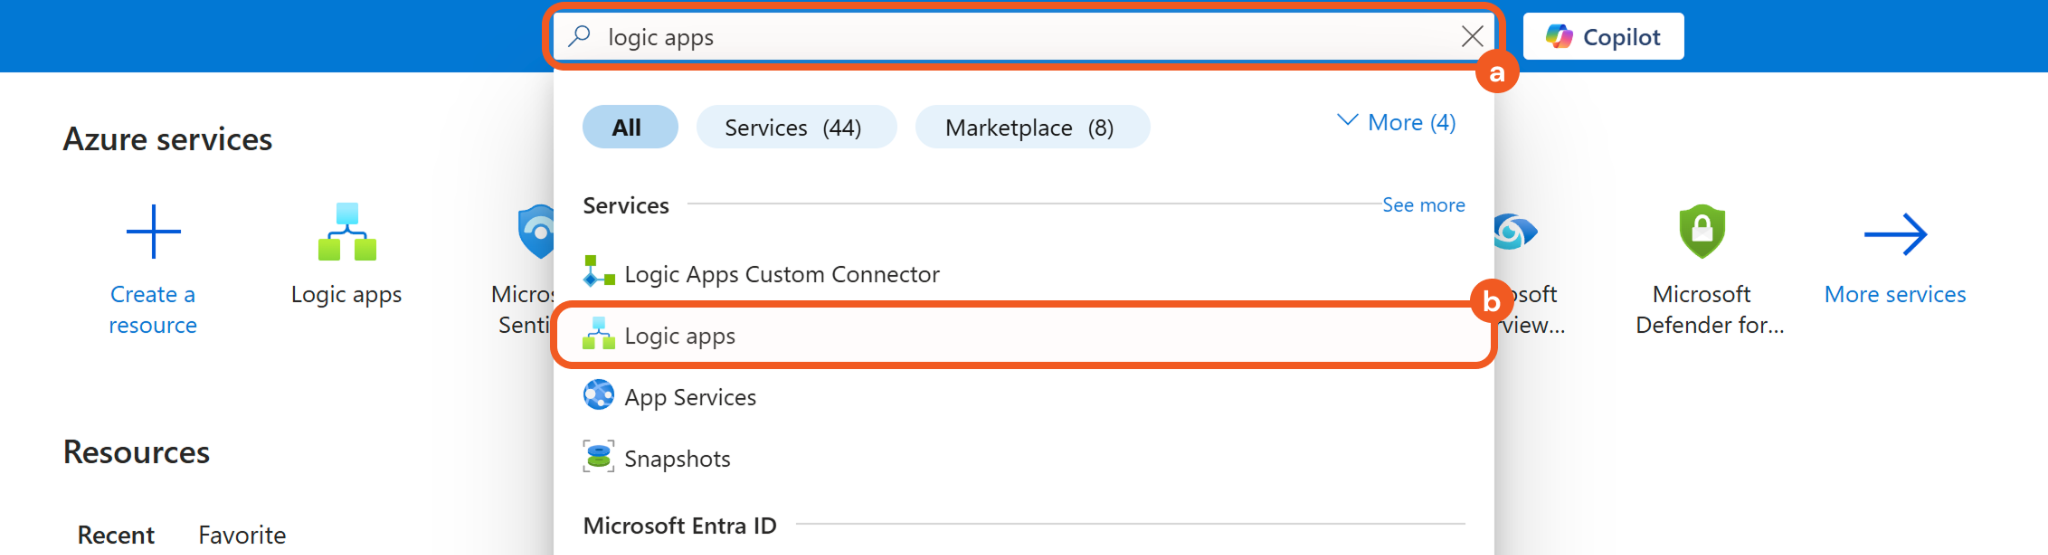
Log into the Azure Portal.
Search for Logic apps using the search bar, then click the matching result.
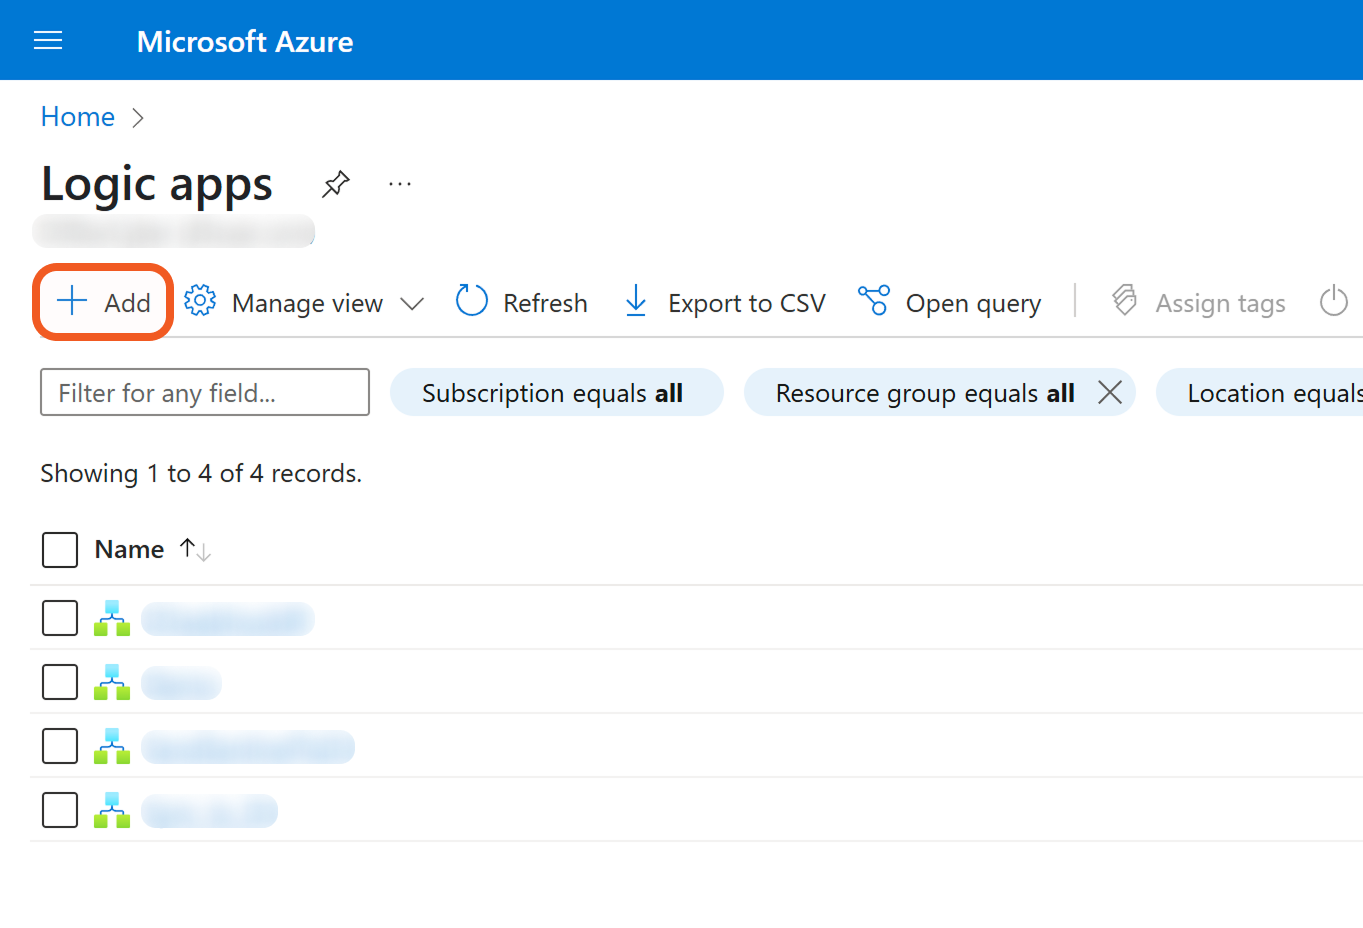
Click the + Add button to create a new Logic app.
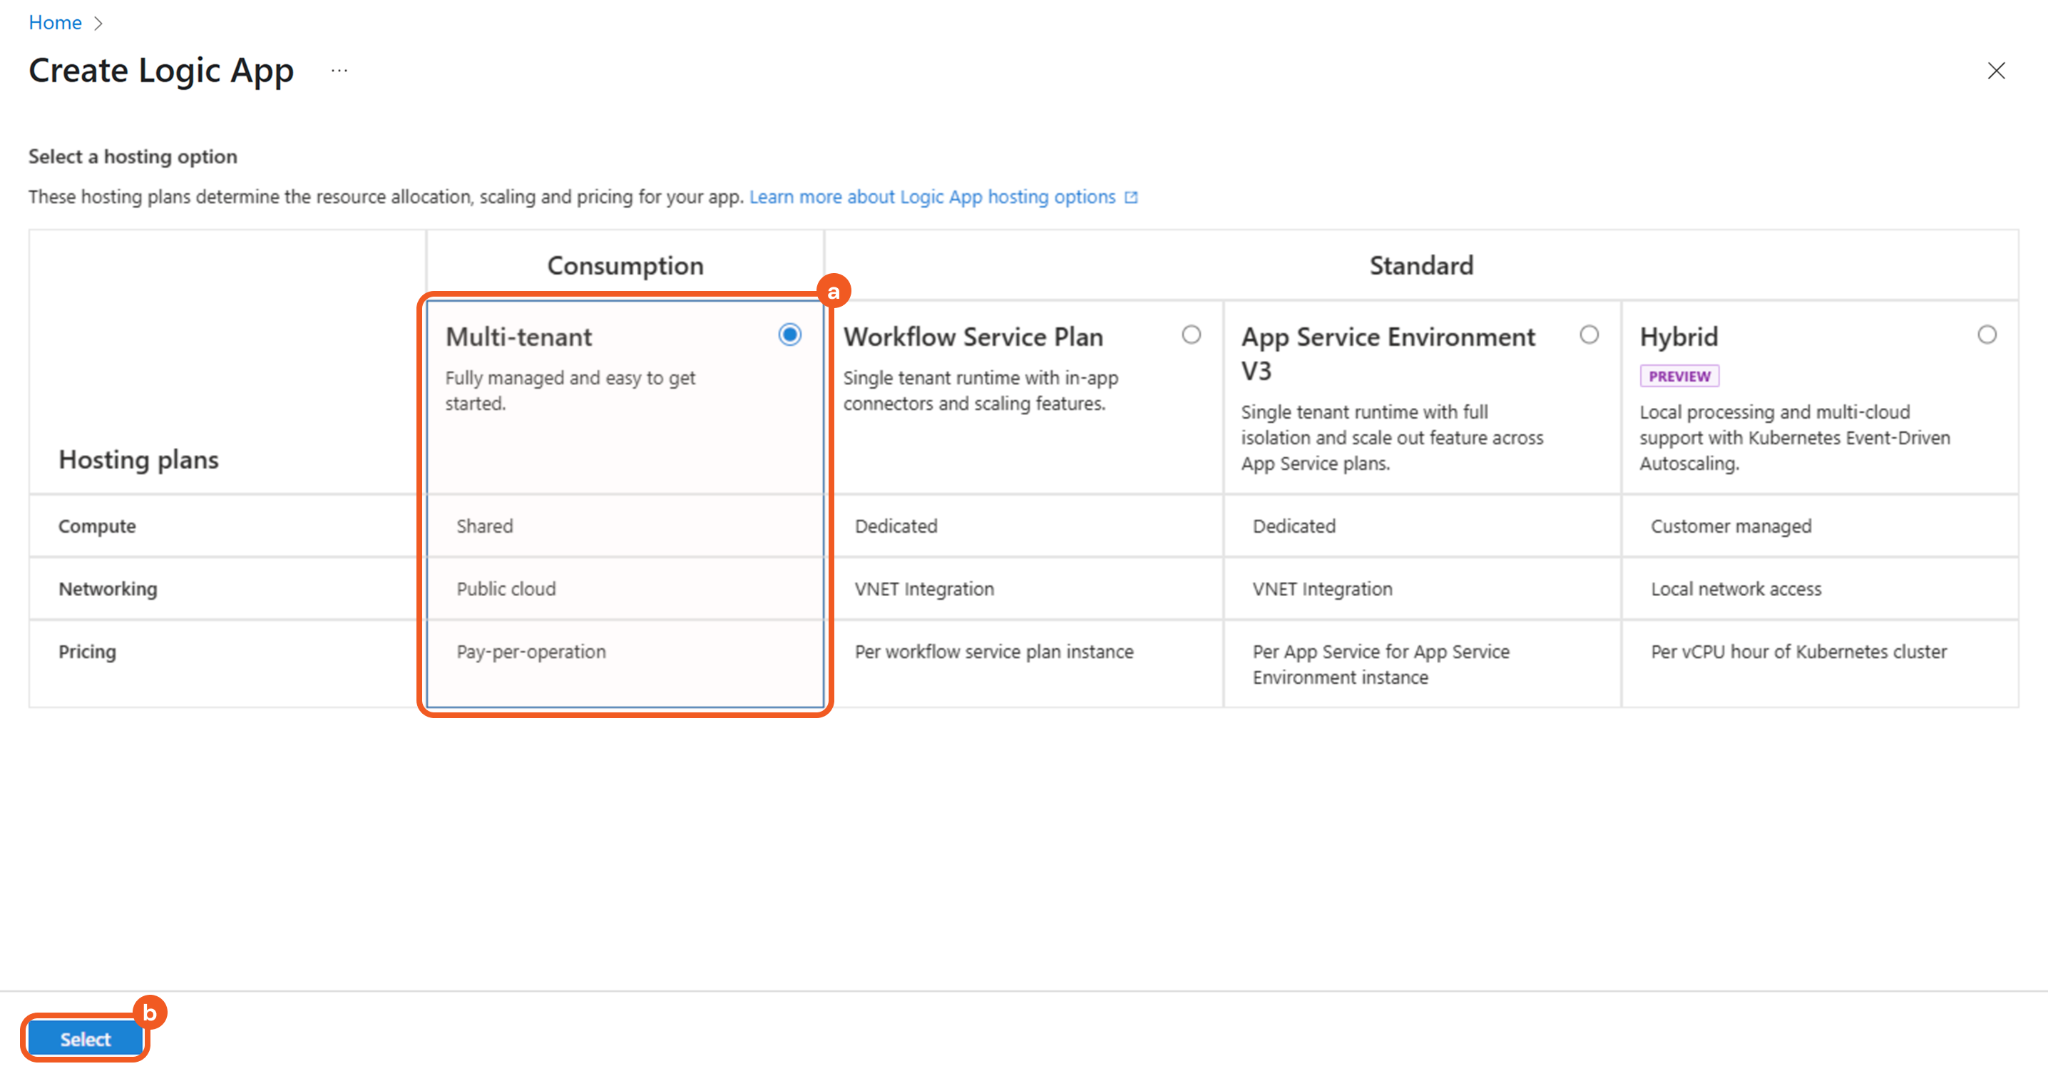
Choose the Multi-tenant option under the Consumption column, then click the Select button to proceed to the next step.
Configure the required fields.
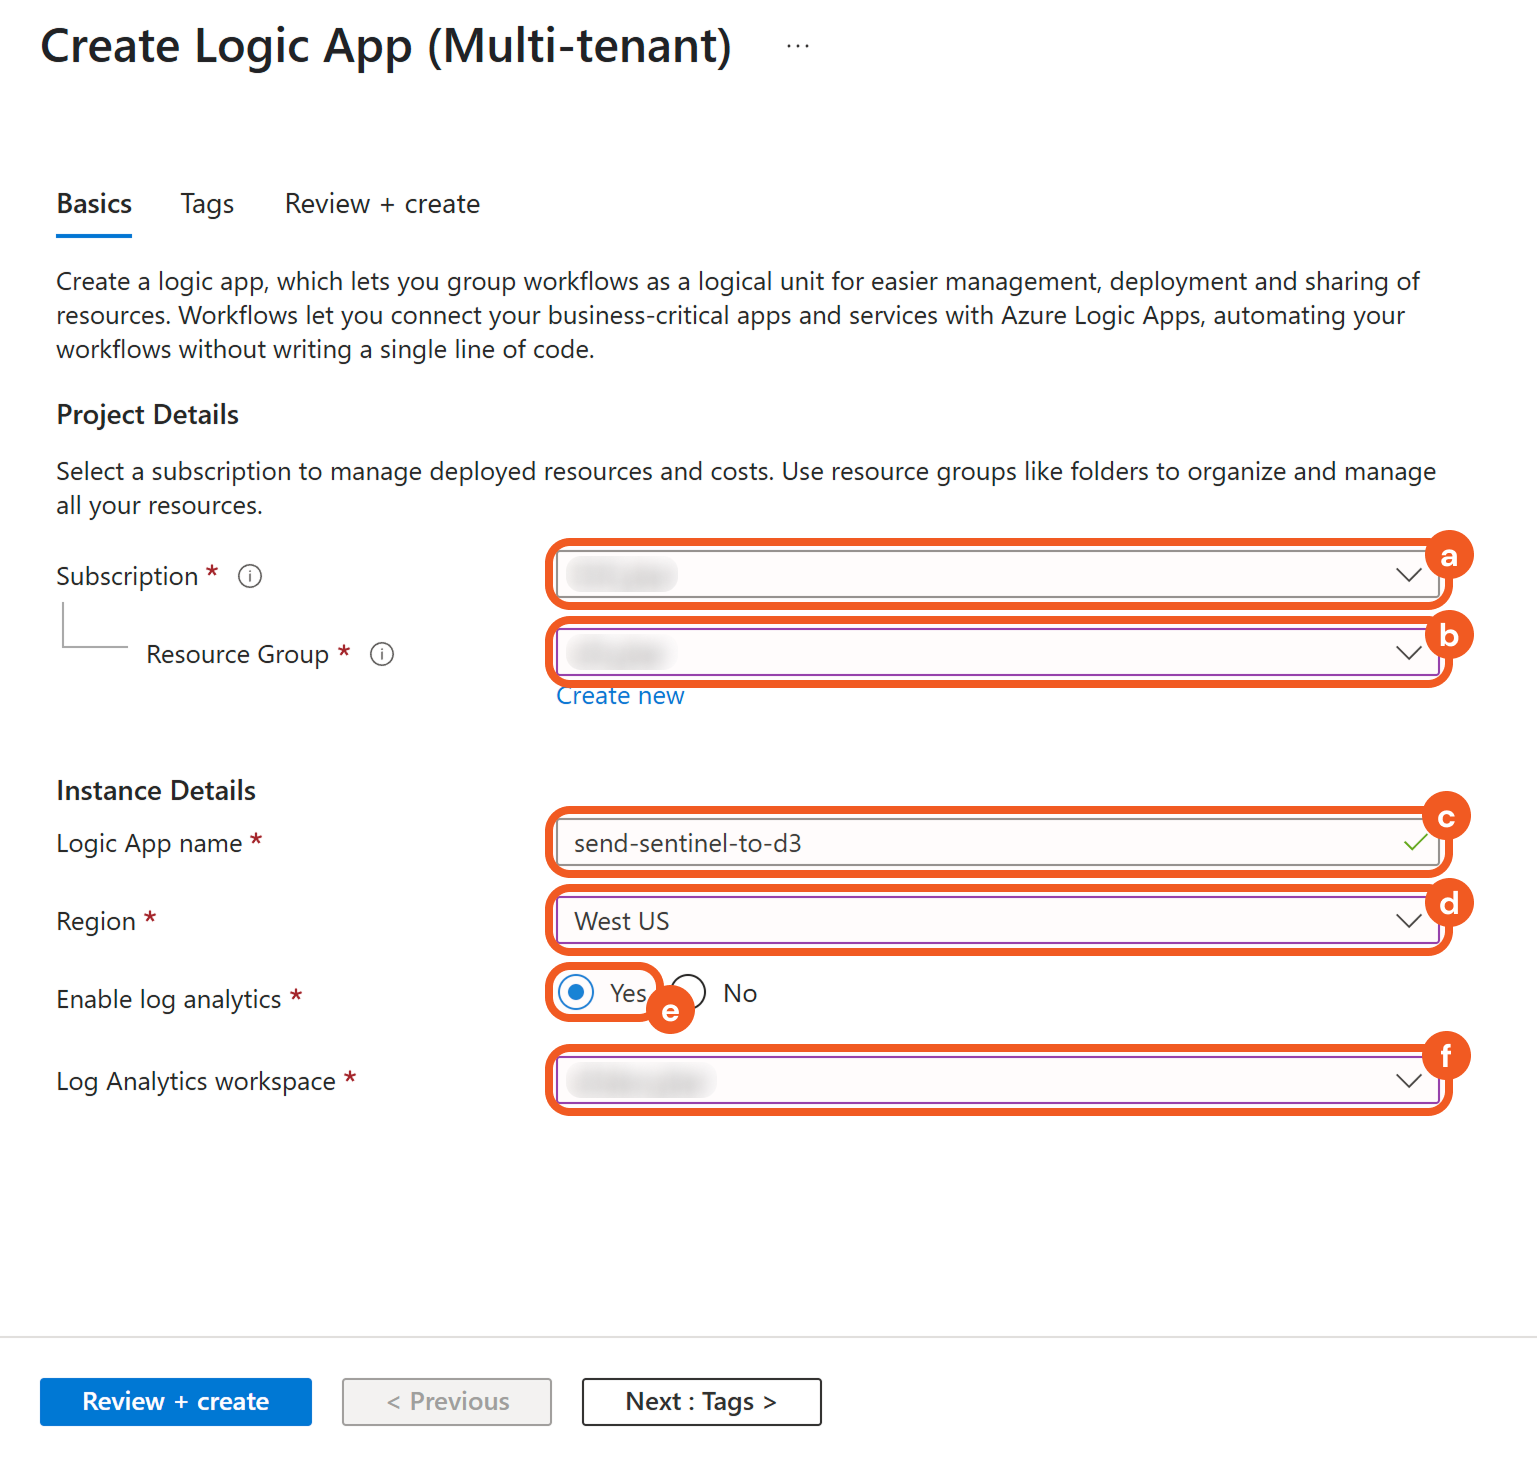
Select the subscription.
Select the desired resource group.
Enter a unique Logic app name.
Select the region.
Choose the Yes option to enable log analytics.
Select the desired Log Analytics workspace.
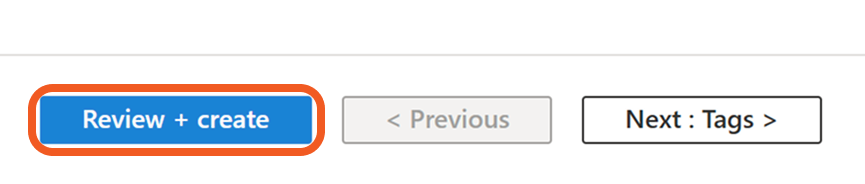
Click the Review + create button to validate the app.
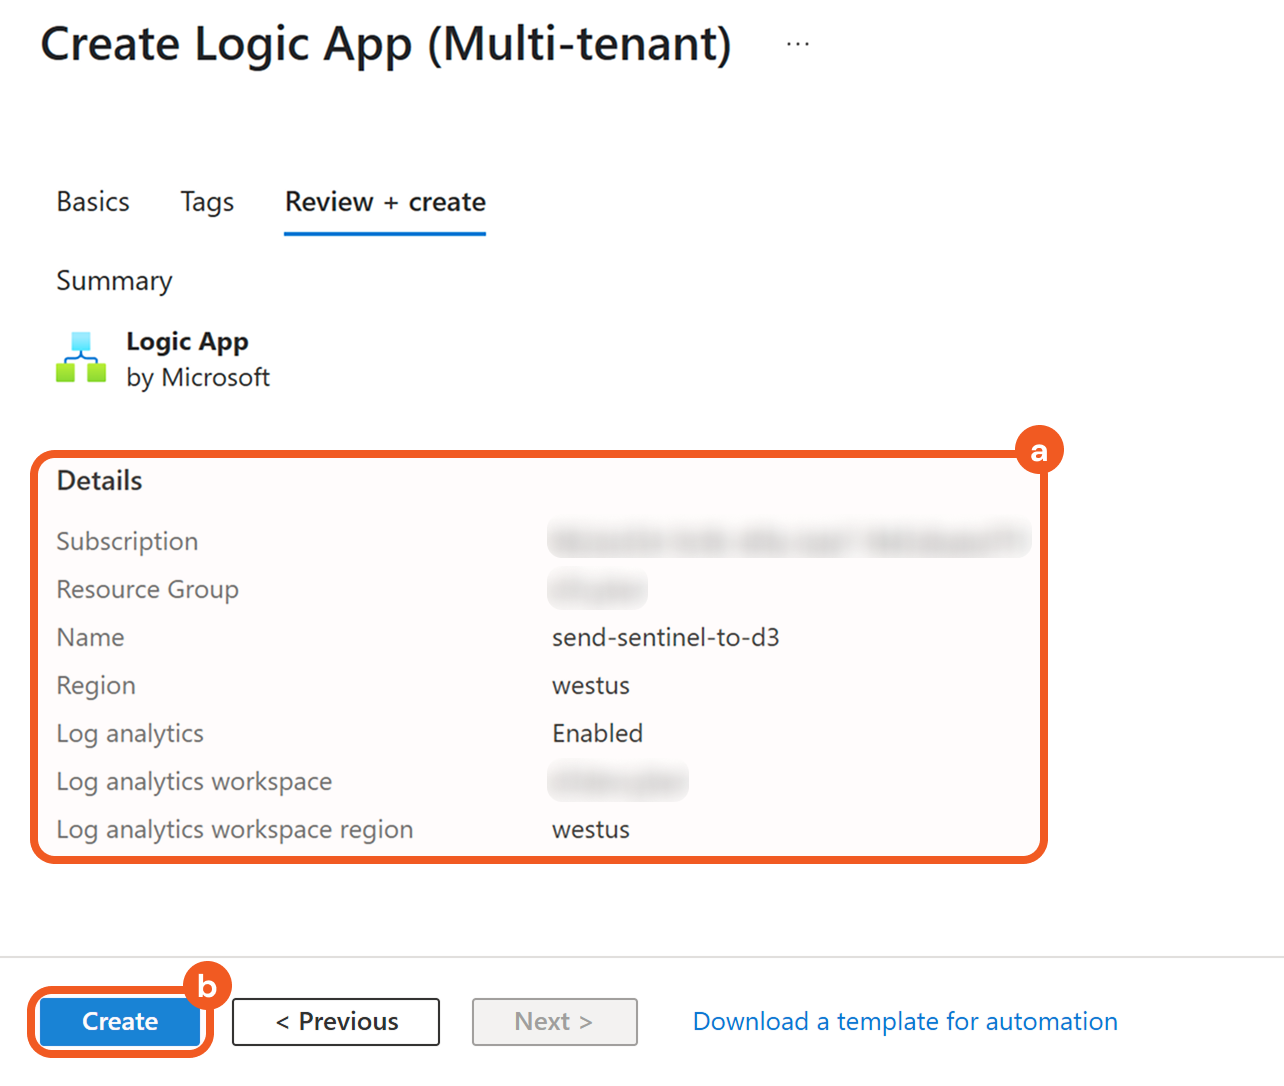
Confirm the details of the app, then click the Create button to create it.
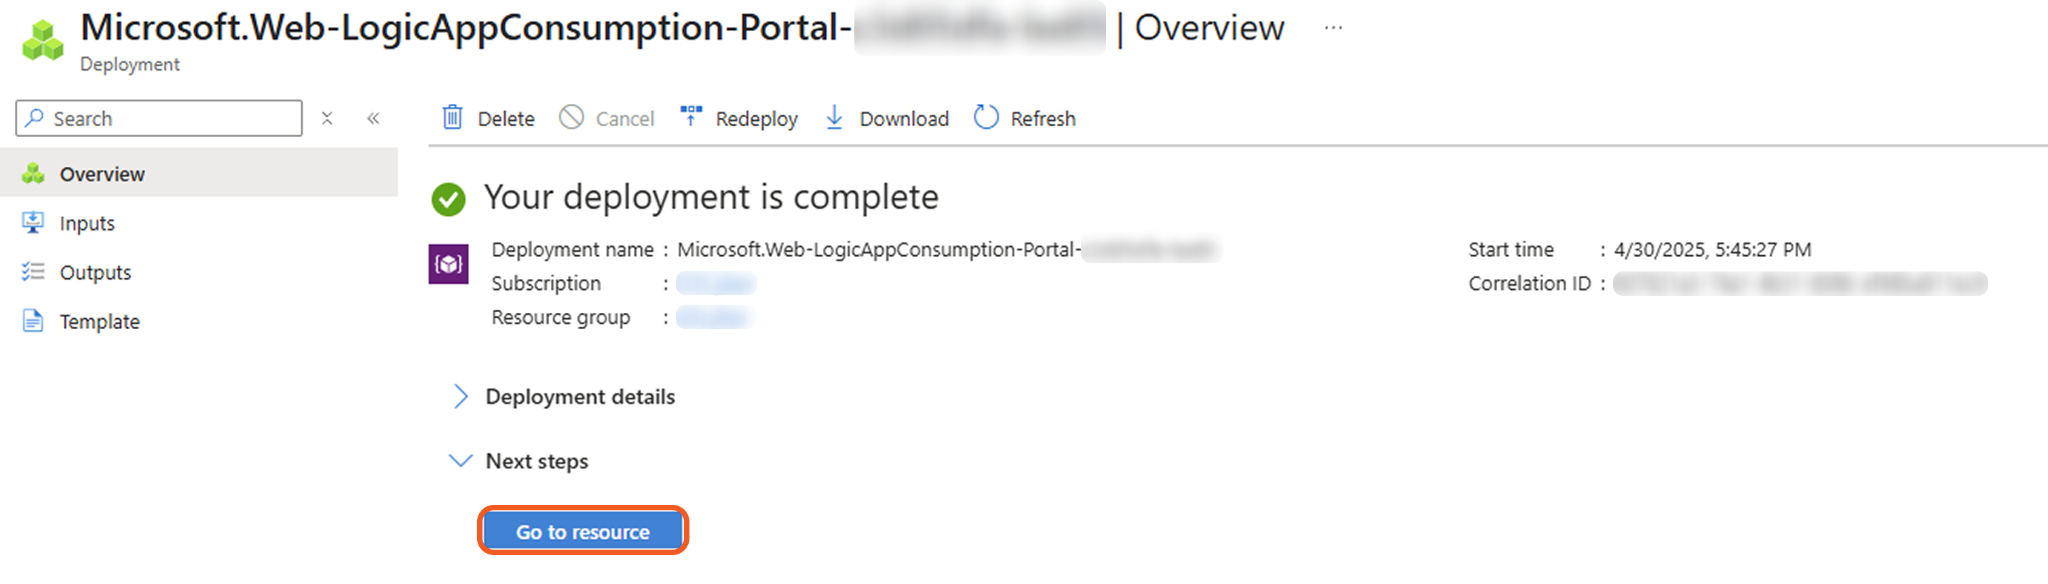
Wait until the deployment is complete, then click the Go to resource button.
Adding Triggers and Actions
Adding the Microsoft Sentinel Incident Trigger
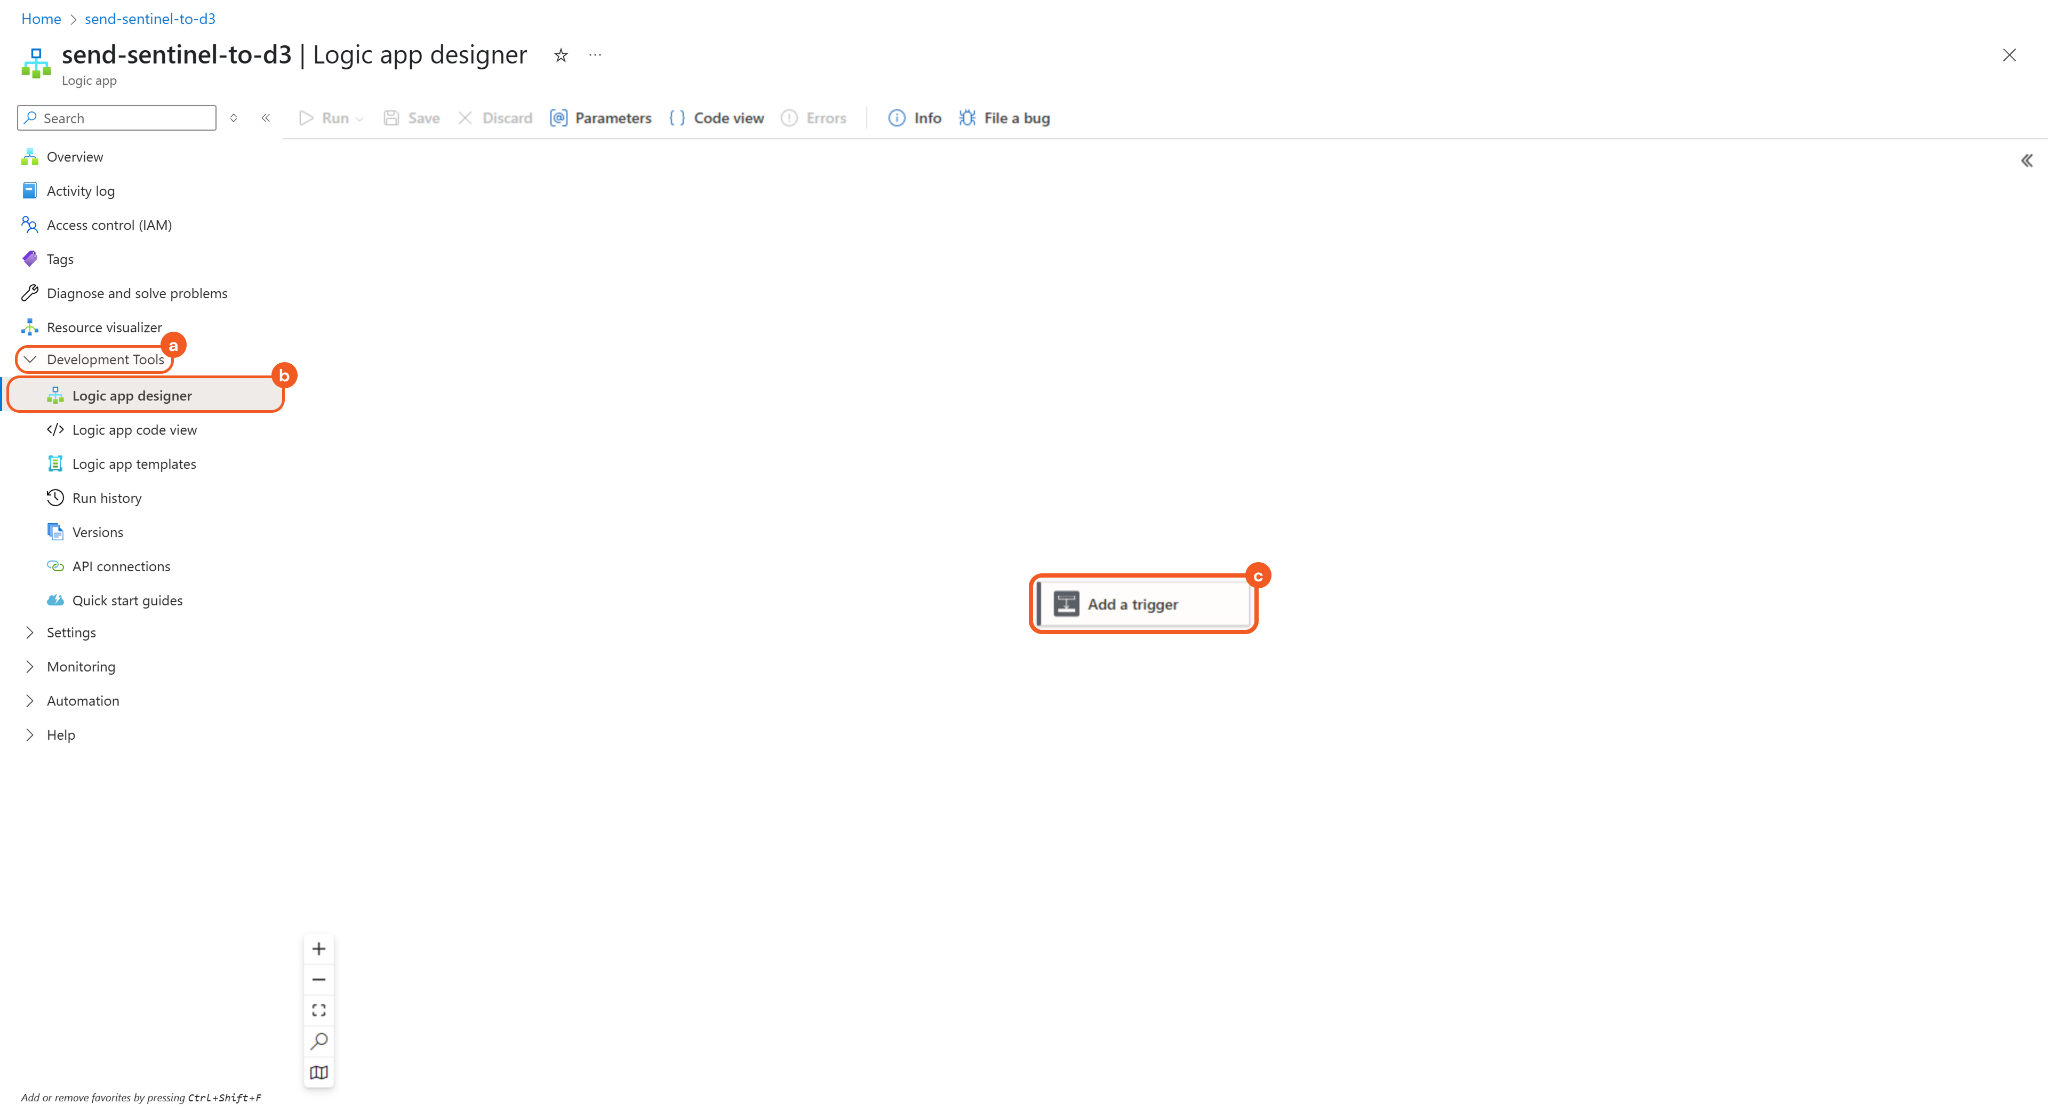
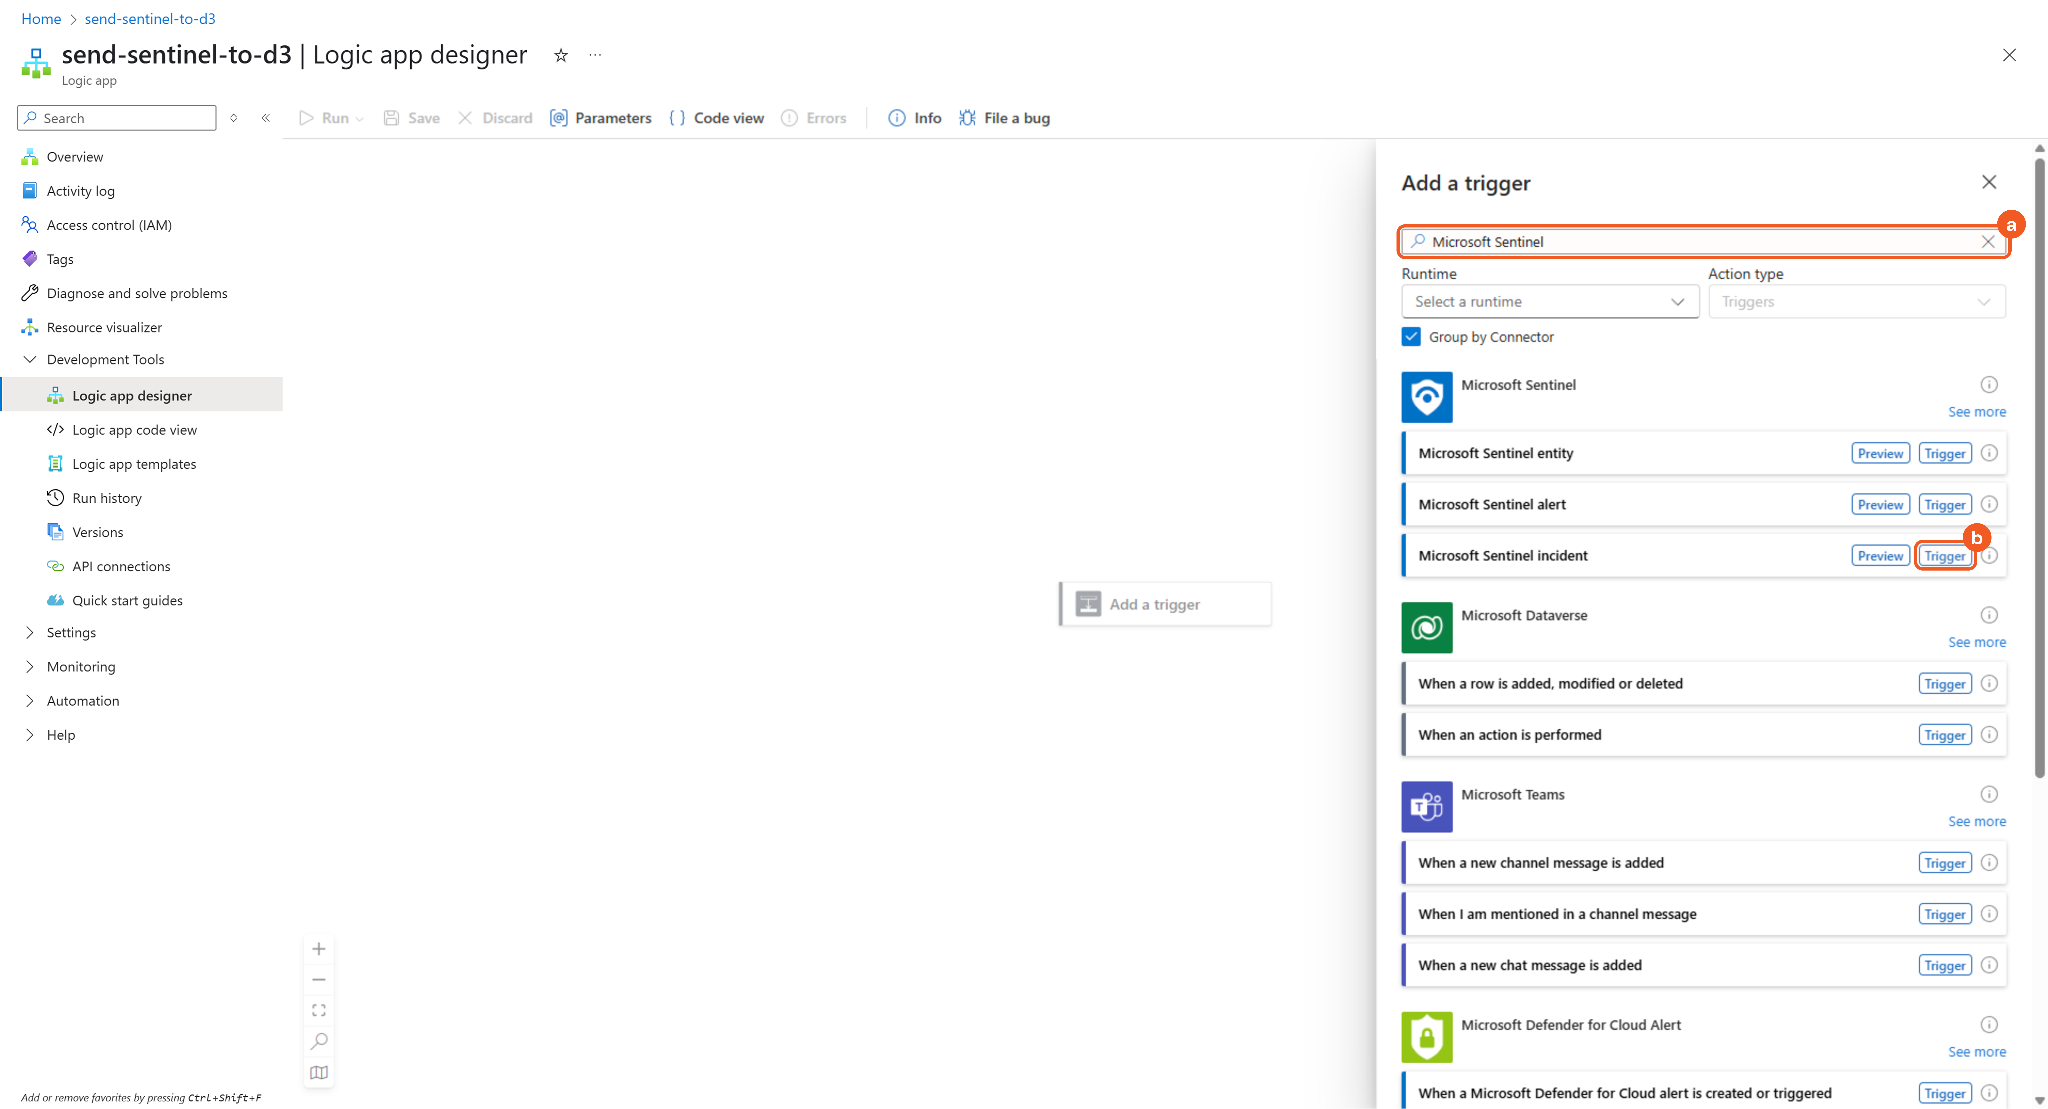
Select Development Tools > Logic app designer from the Logic App left menu, then click on the Add a trigger node.
Search for Microsoft Sentinel, then click the Trigger button in the Microsoft Sentinel Incident row.
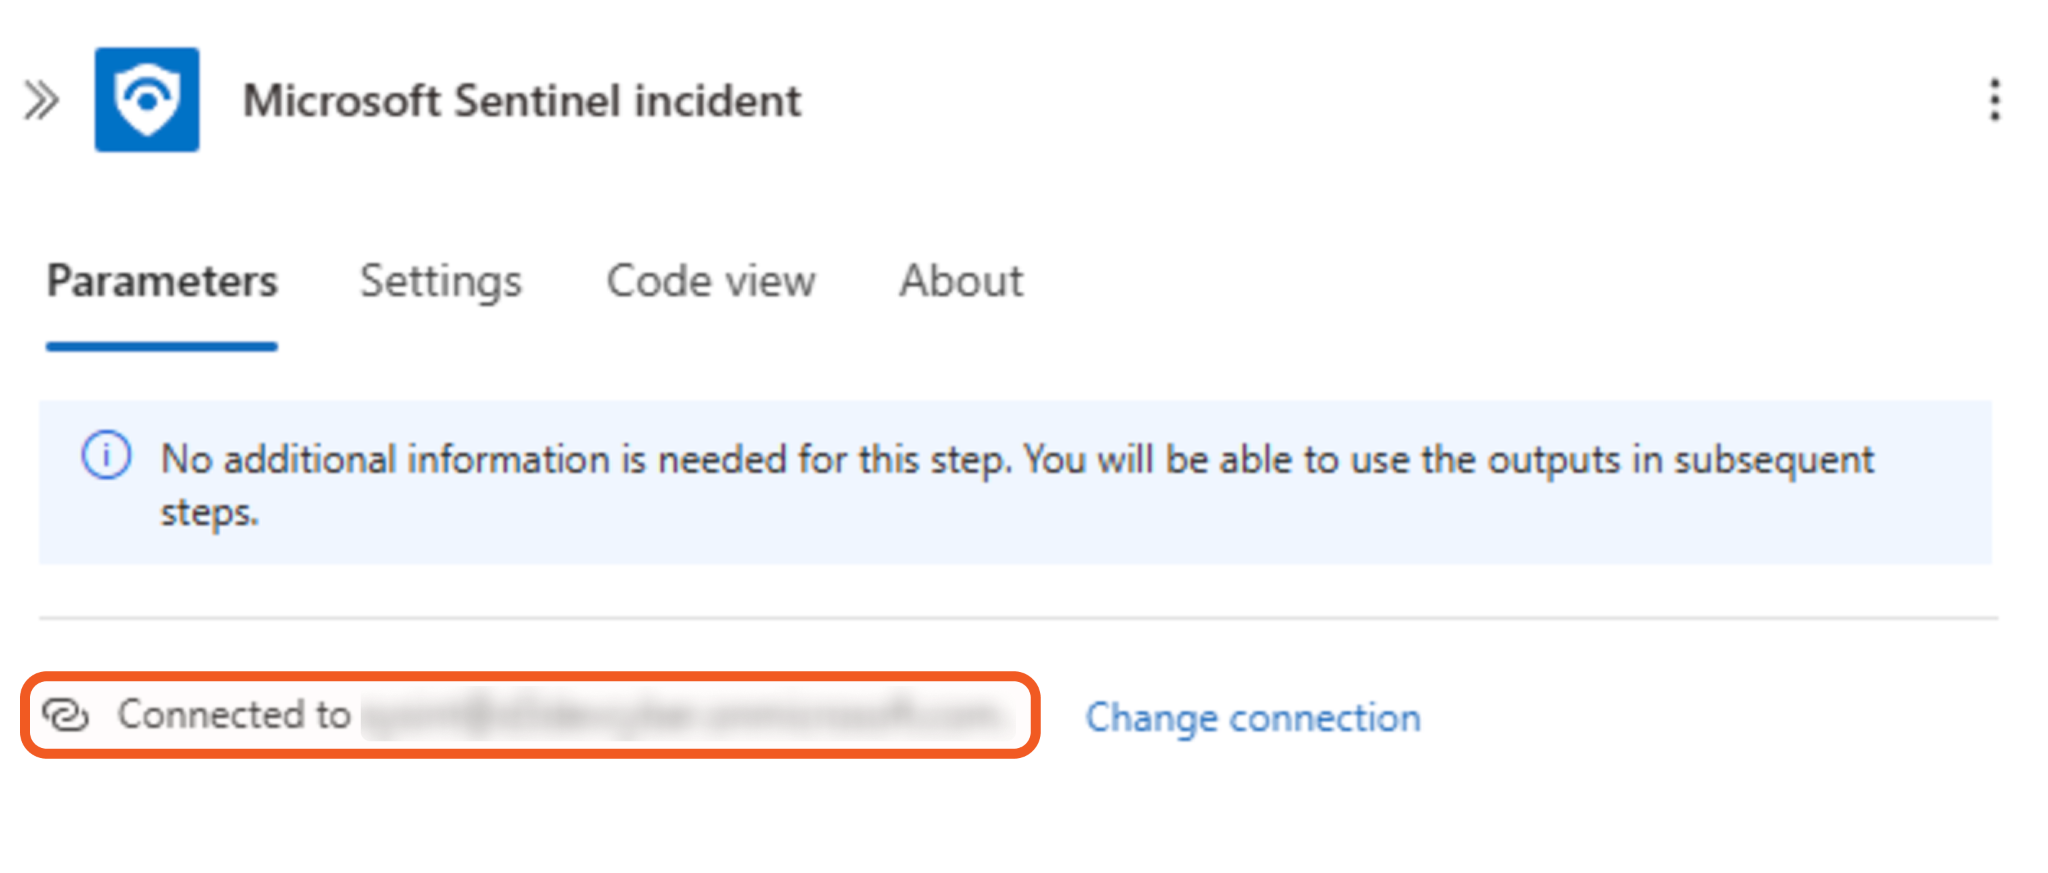
Confirm that a connection has been established.
READER NOTE
Ensure the connection is established.
Retain the default value of the settings.
Adding the Run Query and List Results Action
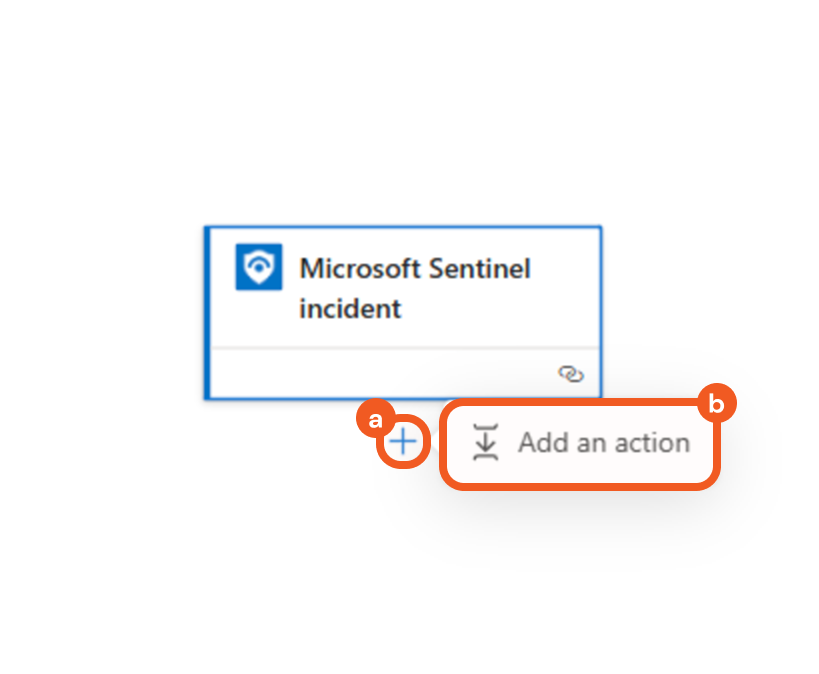
Click the + button below the Microsoft Sentinel Incident trigger, then click the Add an action button.
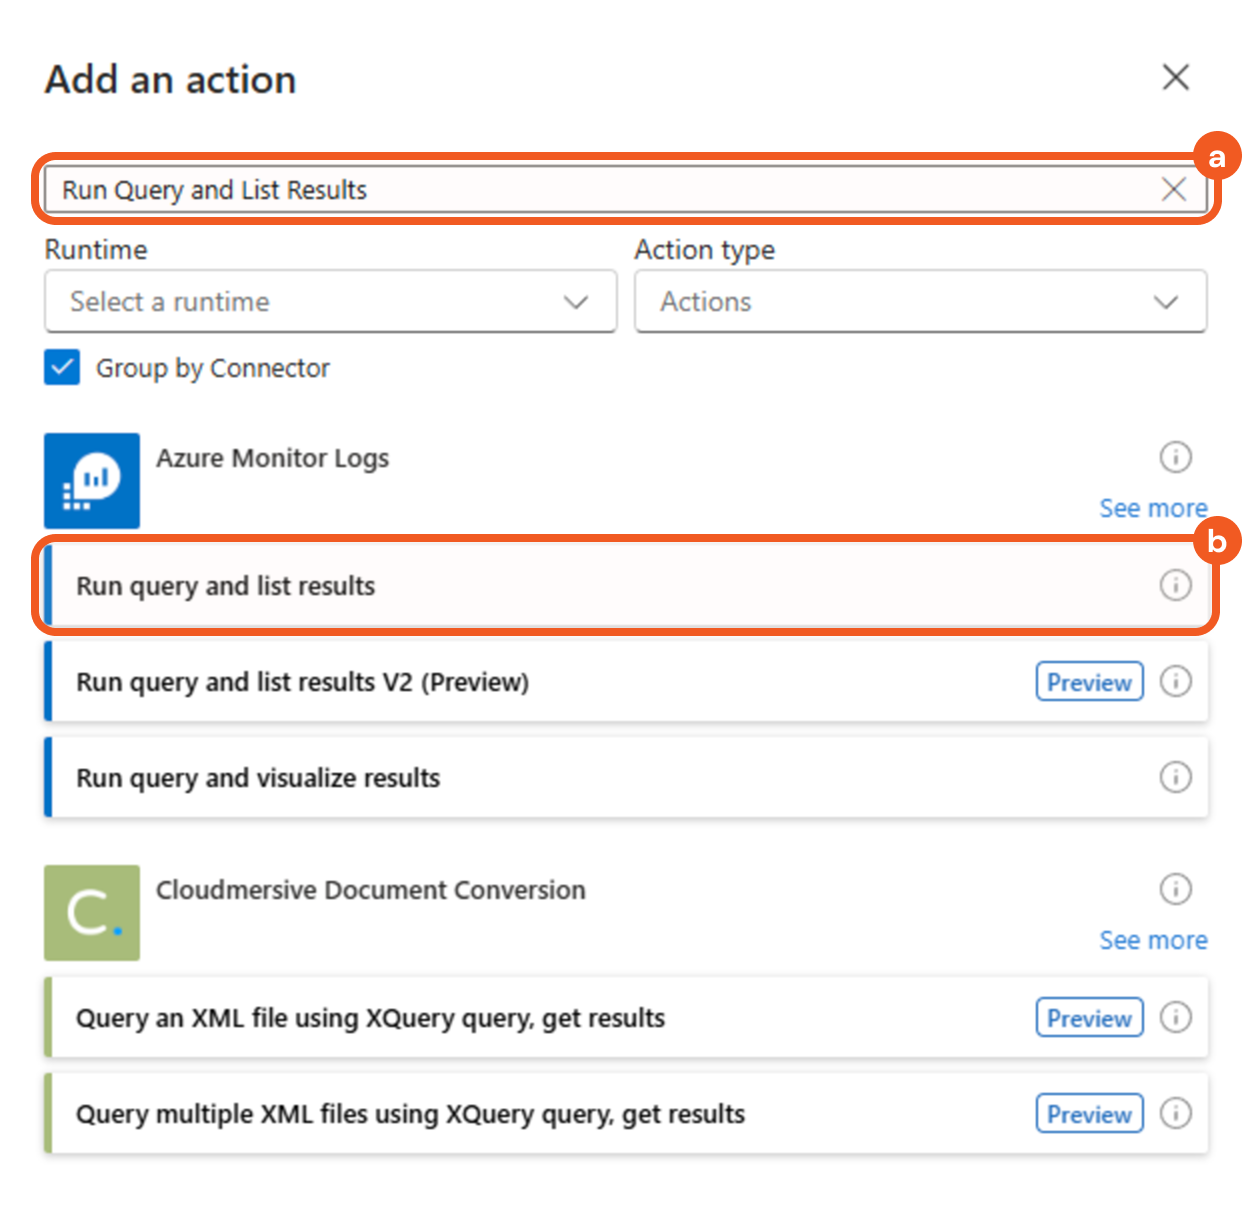
Search for the Run query and list results action from Azure Monitor Logs using the search bar, then select the matching result.
Configure the parameters as follows.
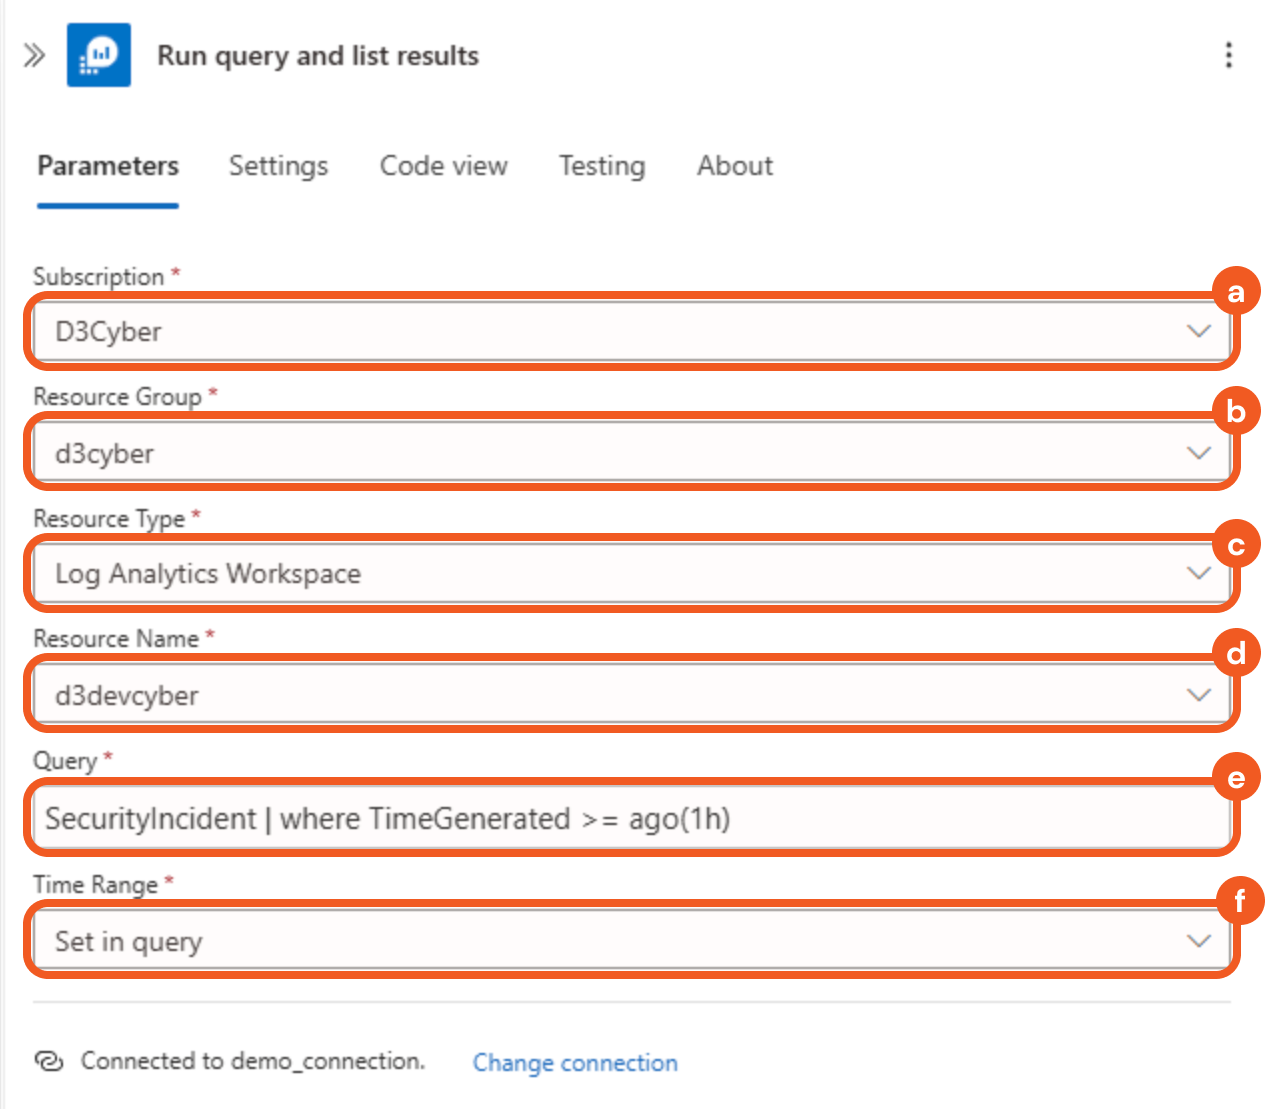
Select the subscription.
Select the resource group.
Select the Log Analytics Workspace option in the Resource Type field.
Select the resource name.
Enter SecurityIncident | where TimeGenerated >= ago(1h) in the Query field.
Select the Set in query option in the Time Range field.
Adding the Initialize Variables Action
Add an Initialize variables action below the Run query and list results action.
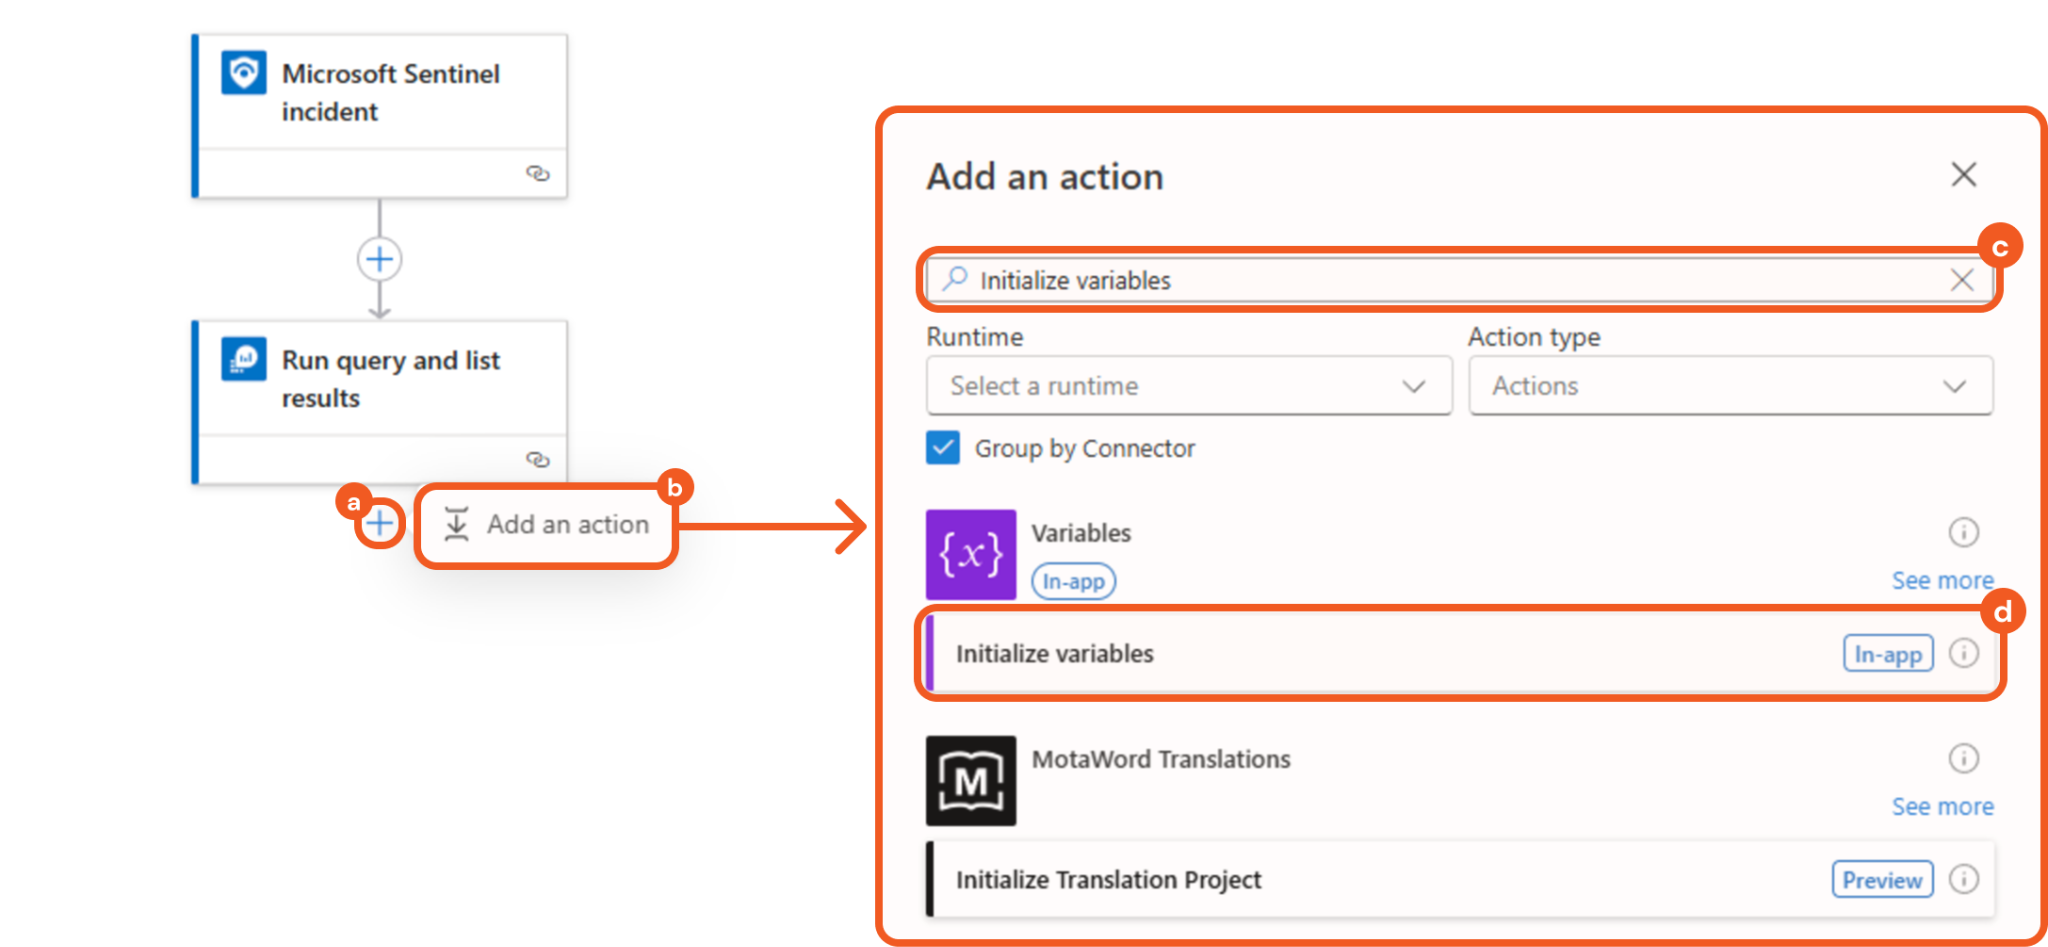
Click the + button.
Click the Add an action button.
Enter Initialize variables in the search bar.
Select the matching result.
Configure the parameters as follows.
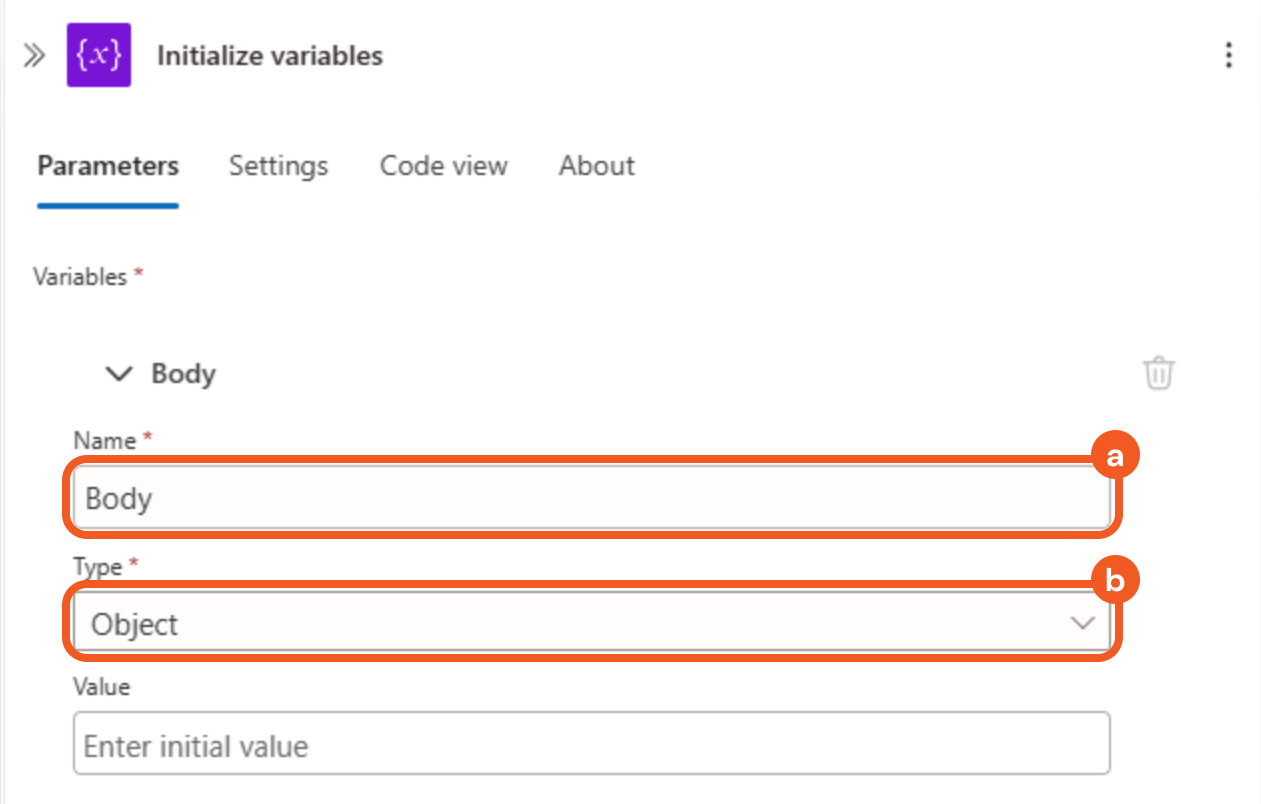
Enter Body in the Name field.
Select the Object option in the Type field.
Adding the Set Variable Action
Add a Set variable action below the Initialize variables step.
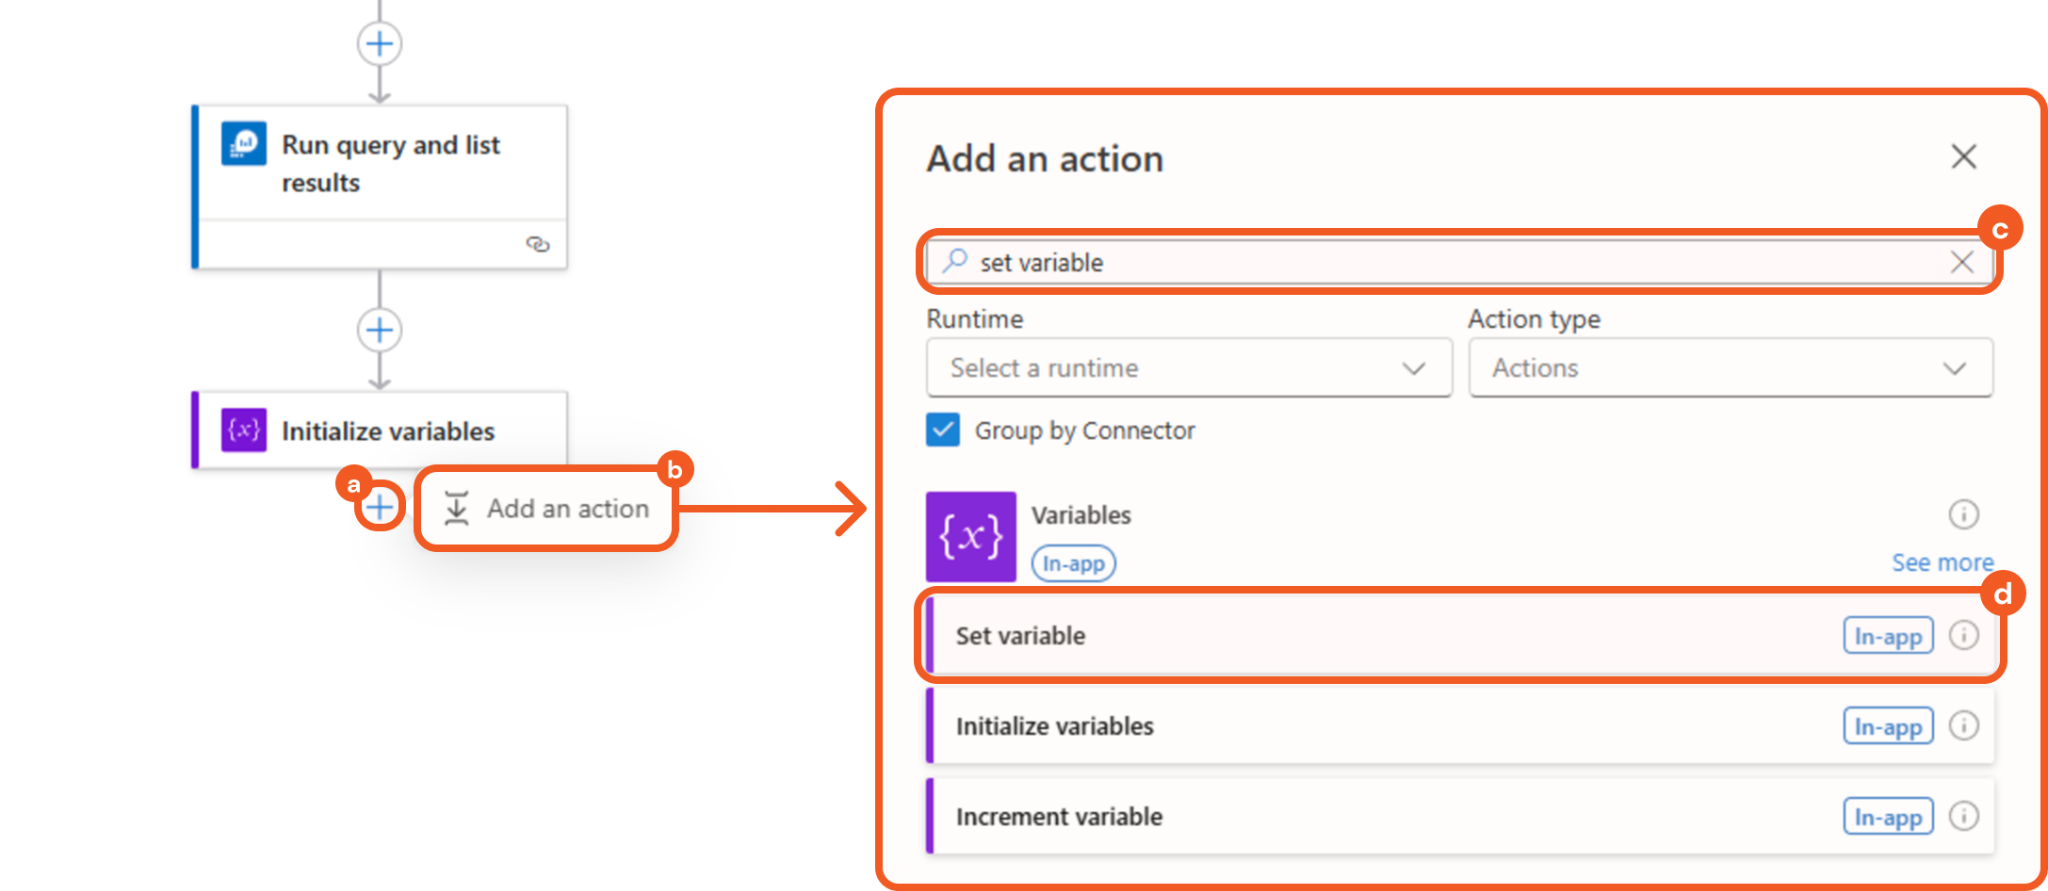
Click the + button.
Click the Add an action button.
Enter Set variable in the search bar.
Select the matching result.
Configure the parameters as follows.
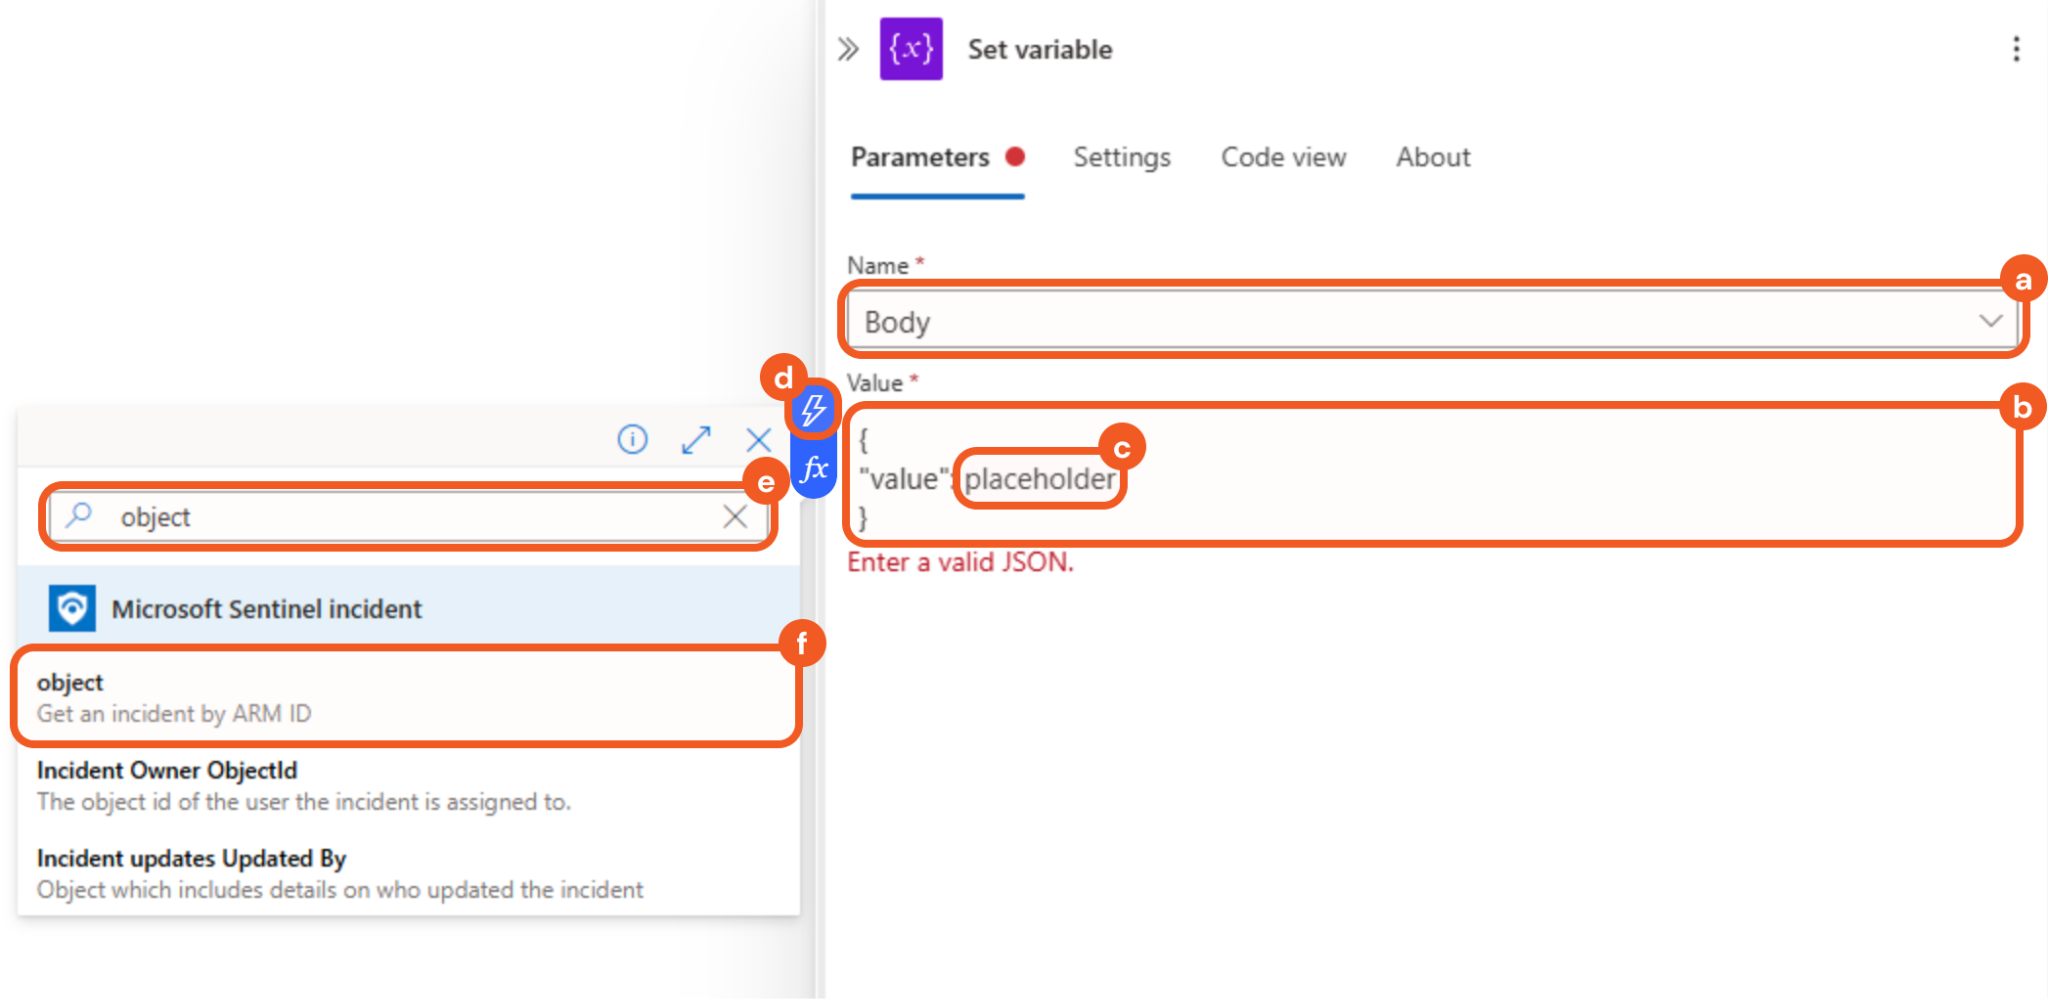
Select the Body option in the Name field.
Enter the JSON below in the Value field.
JSON{ "value": placeholder }Highlight the placeholder text.
Select the
 symbol that appears.
Enter object in the search bar.
Select the matching result.
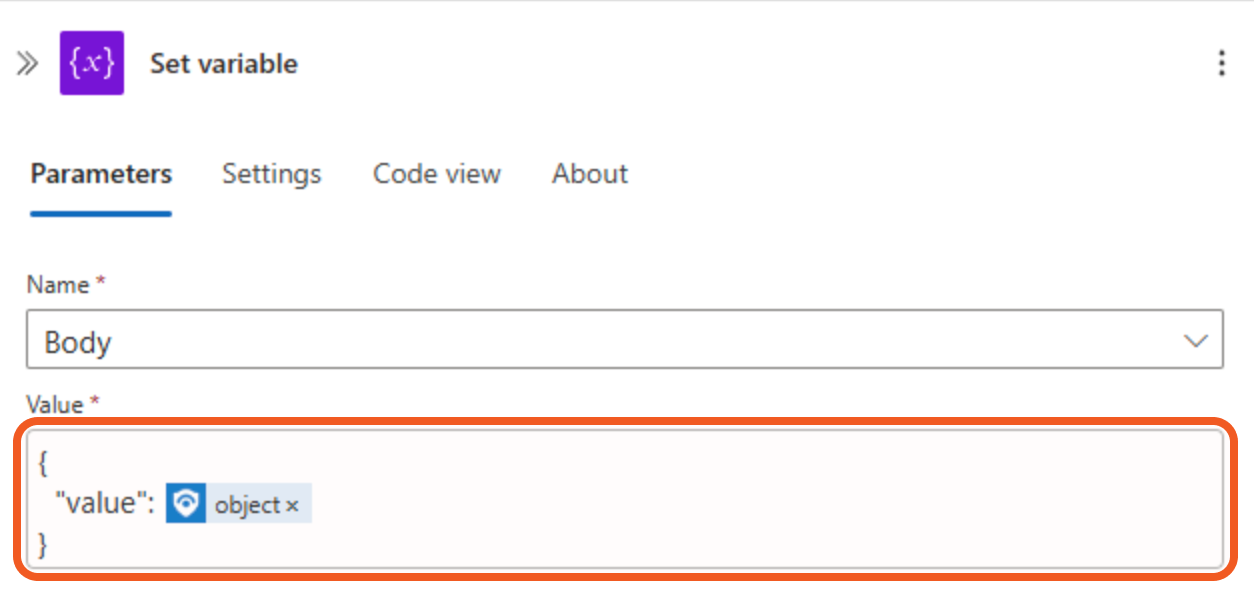
The Value field should appear as follows:
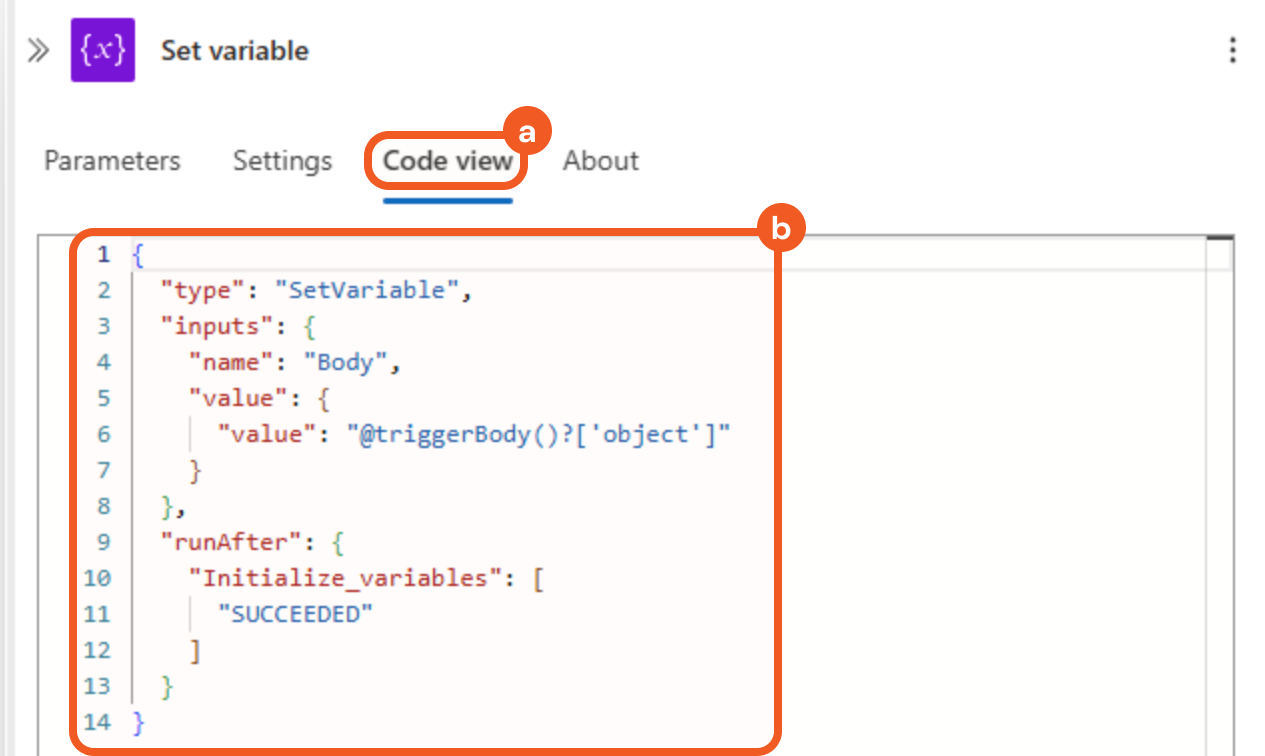
Select the Code view tab, then confirm that the code appears as follows.
Adding the Compose Action
Add a Compose action below the Set variable action.
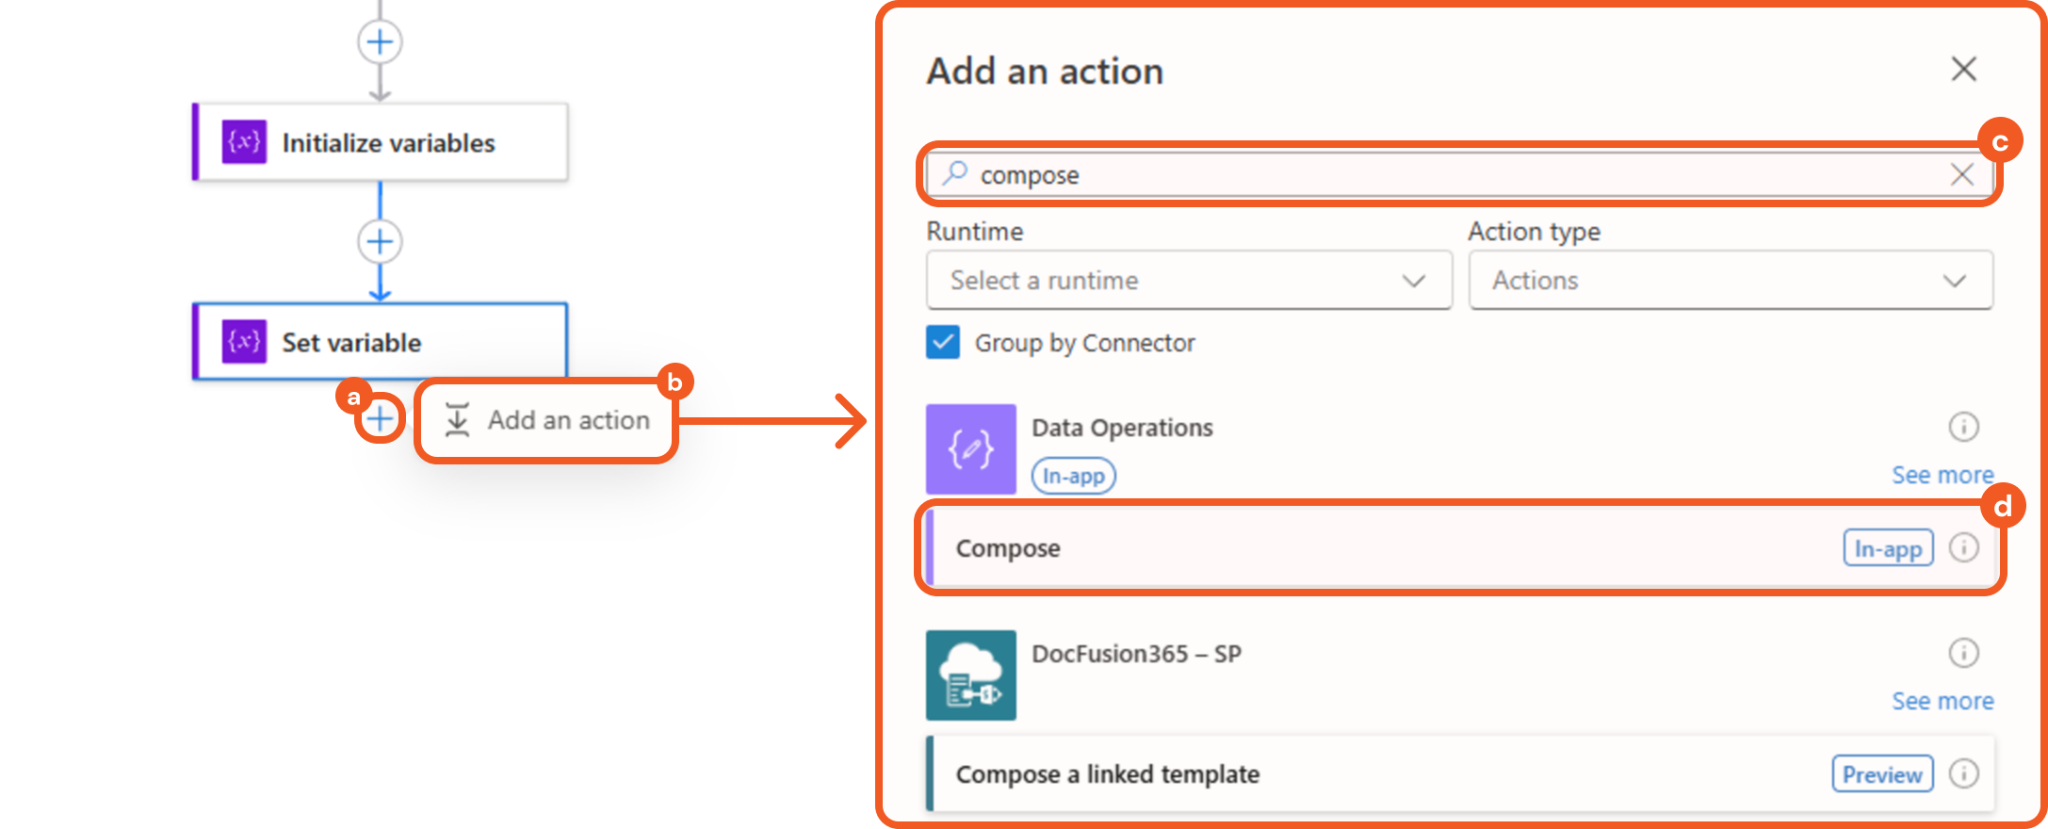
Click the + button.
Click the Add an action button.
Enter Compose in the search bar.
Select the matching result.
Configure the parameter as follows.
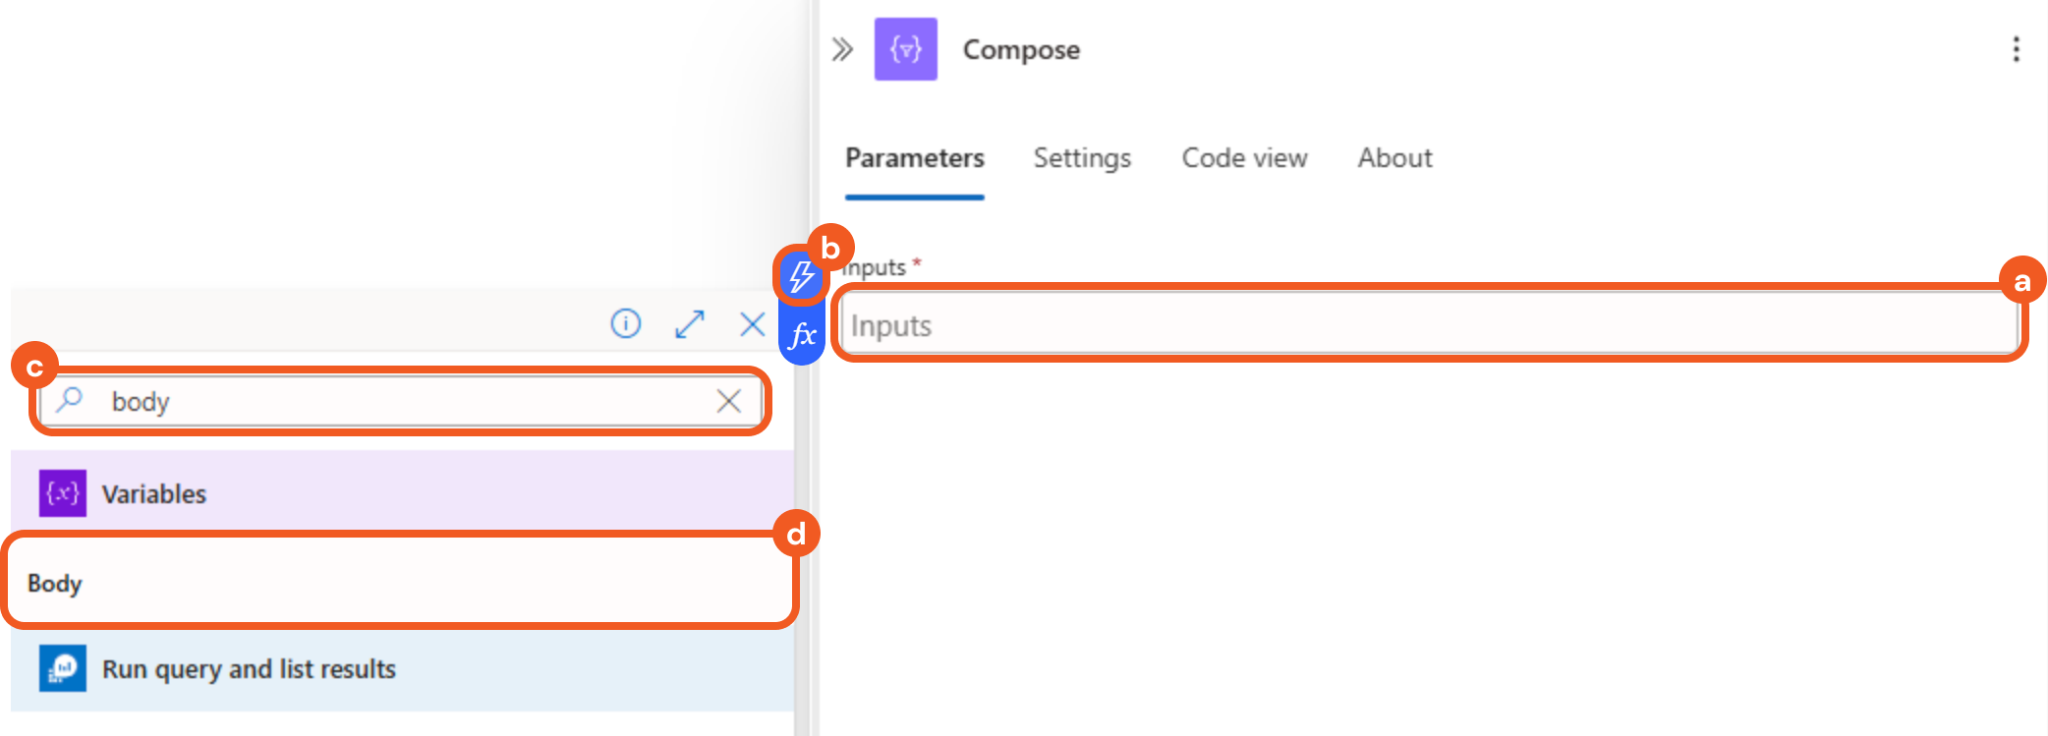
Select the Inputs field.
Select the
 symbol that appears.
Enter body in the search bar.
Select the matching result under the Variables row.
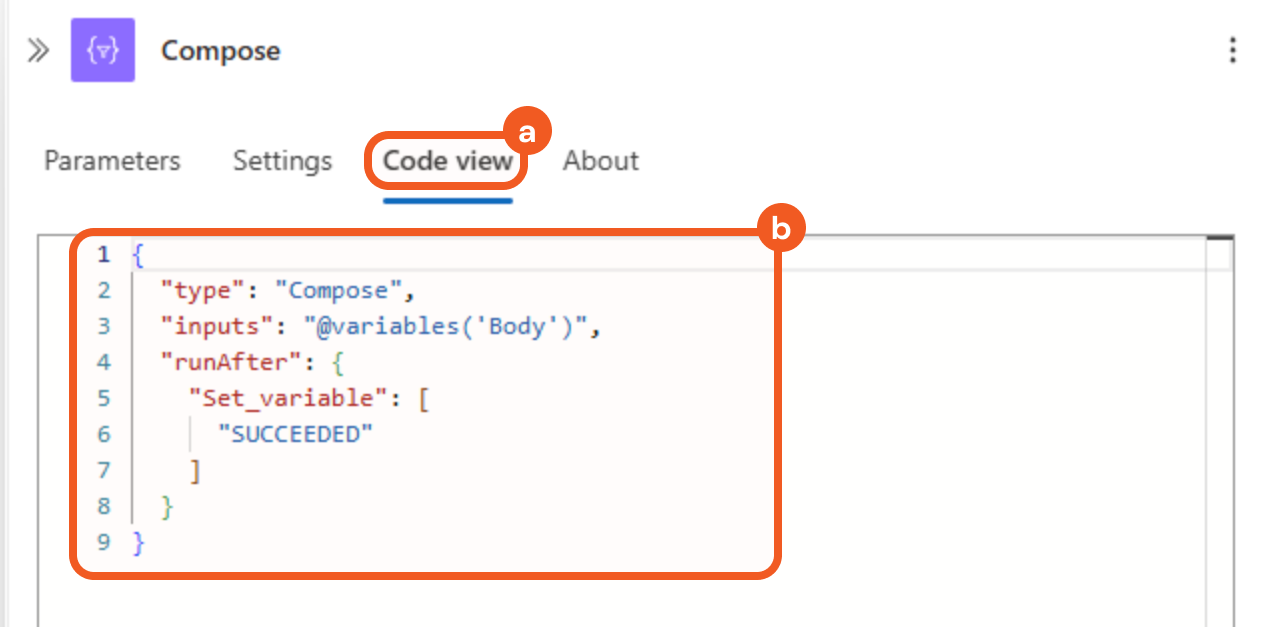
Select the Code view tab, then confirm that the code appears as follows.
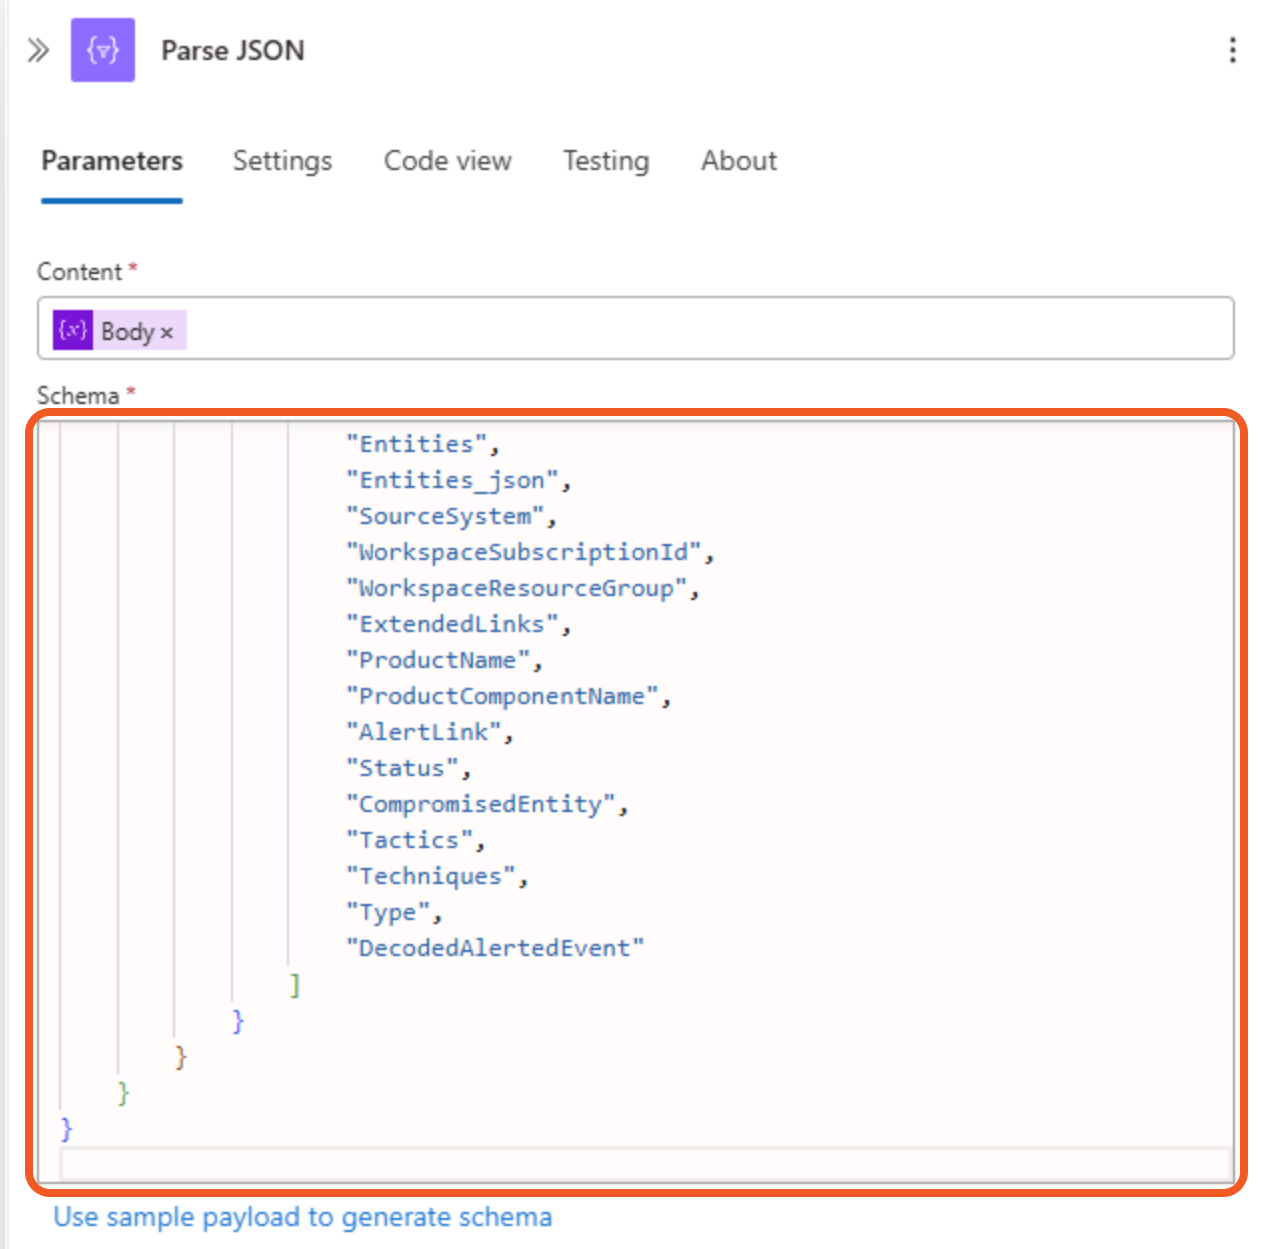
Adding the Parse JSON Action
Add a Parse JSON action below the Compose action.
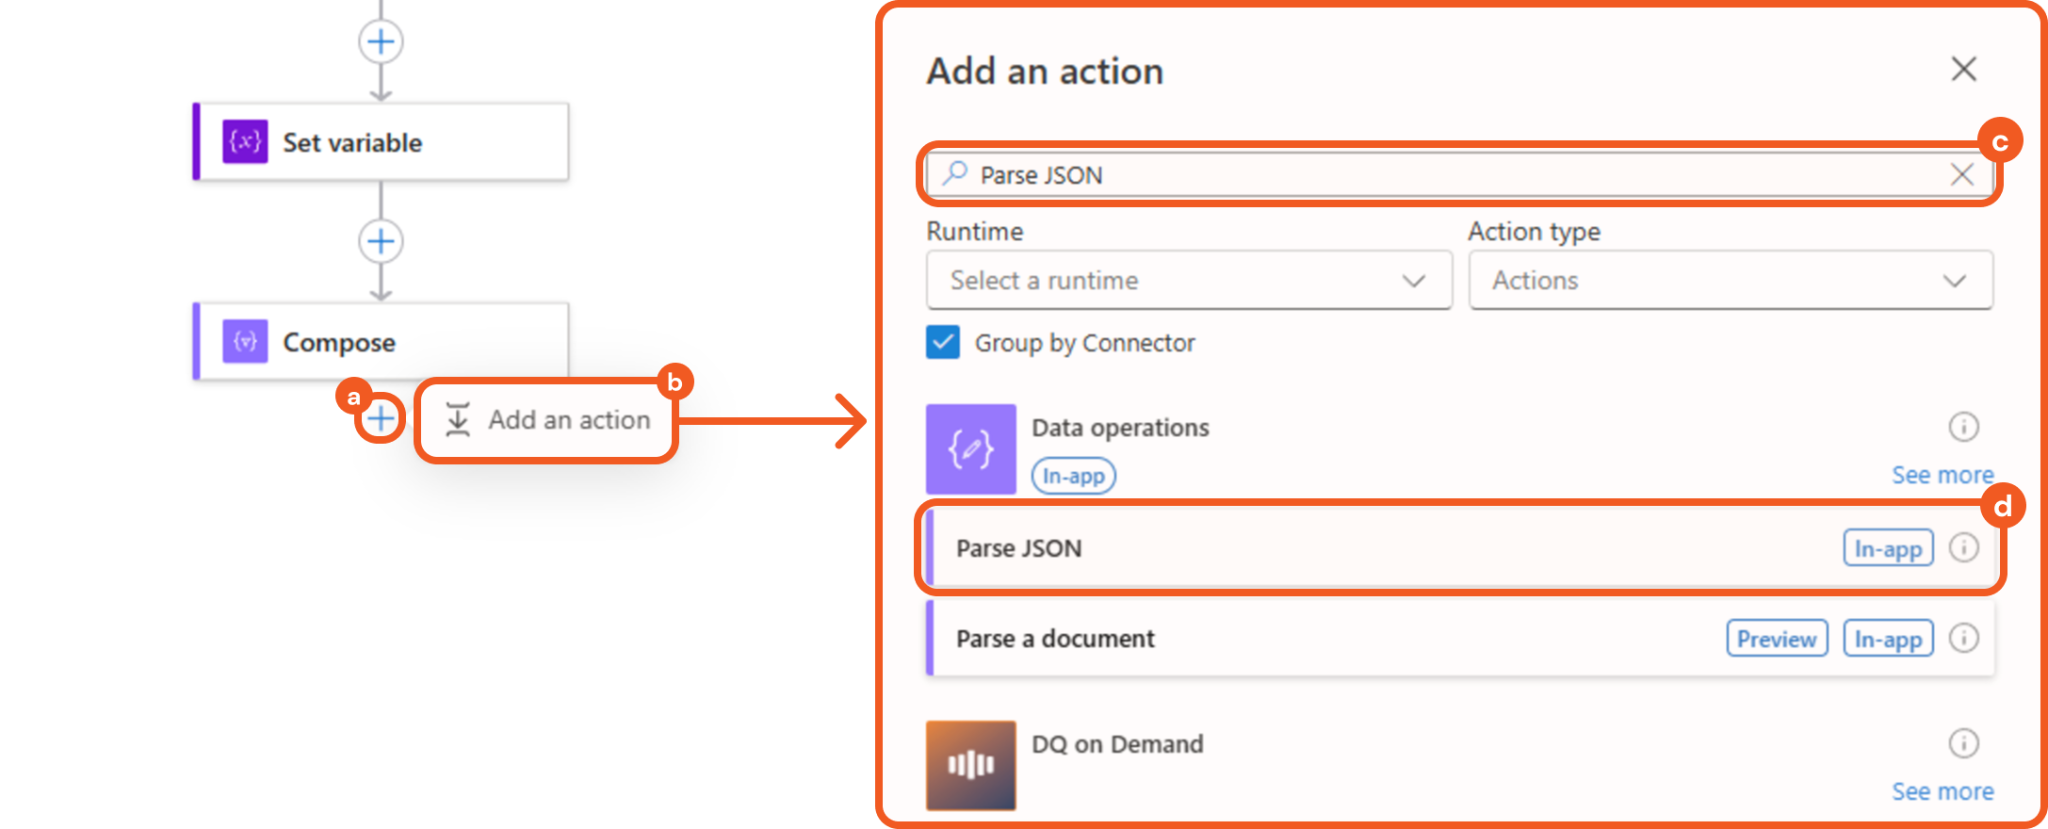
Click the + button.
Click the Add an action button.
Enter Parse JSON in the search bar.
Select the matching result.
Configure the Content field as follows.
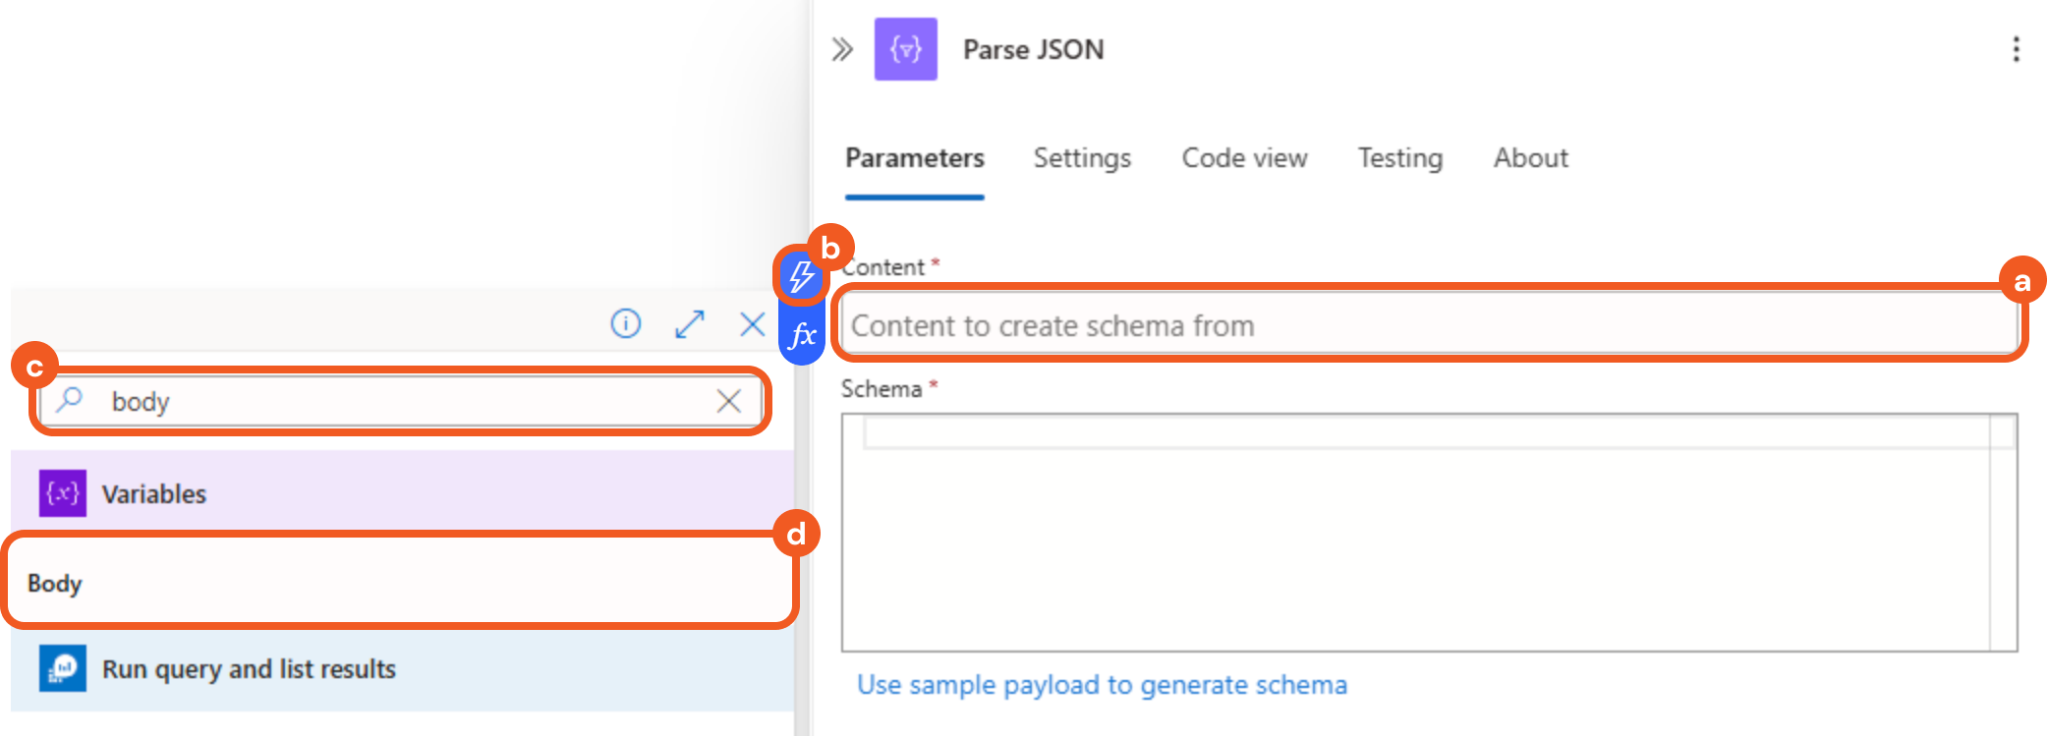
Select the Content field.
Select the
 symbol that appears.
Enter body in the search bar.
Select the matching result under the Variables row.
Paste the code contained in the Schema JSON accordion into the Schema field.
Adding an HTTP Action
Add an HTTP action below the Parse JSON action.
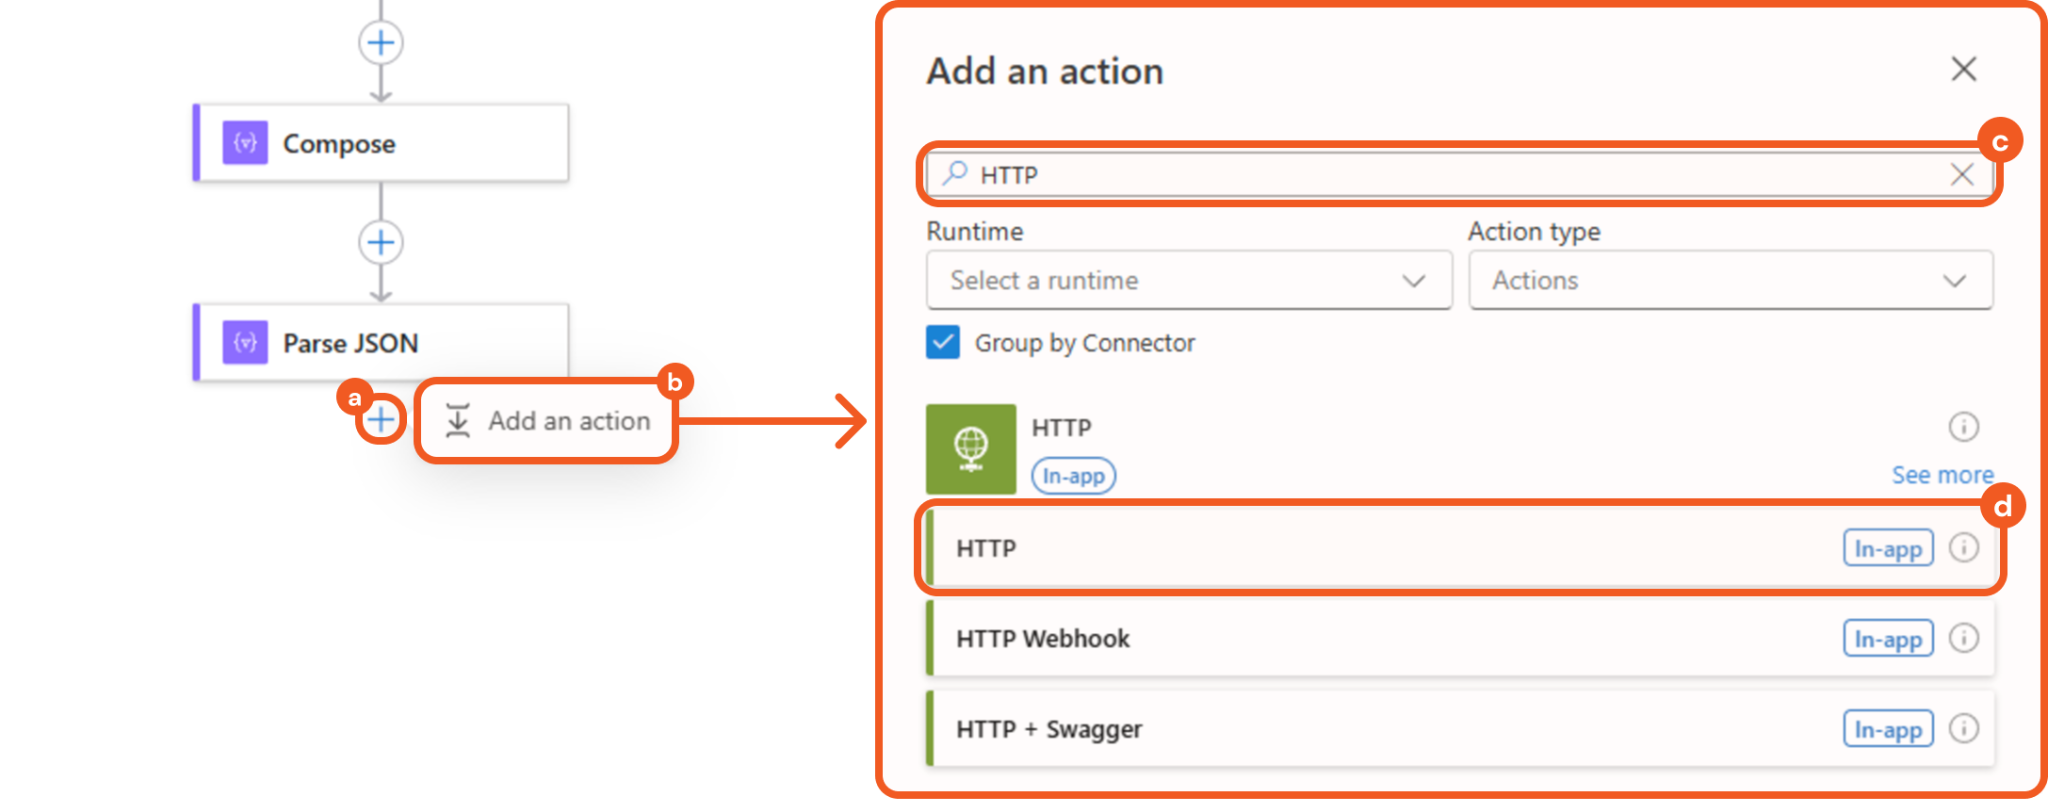
Click the + button.
Click the Add an action button.
Enter HTTP in the search bar.
Select the matching result.
Configure the parameters as follows.
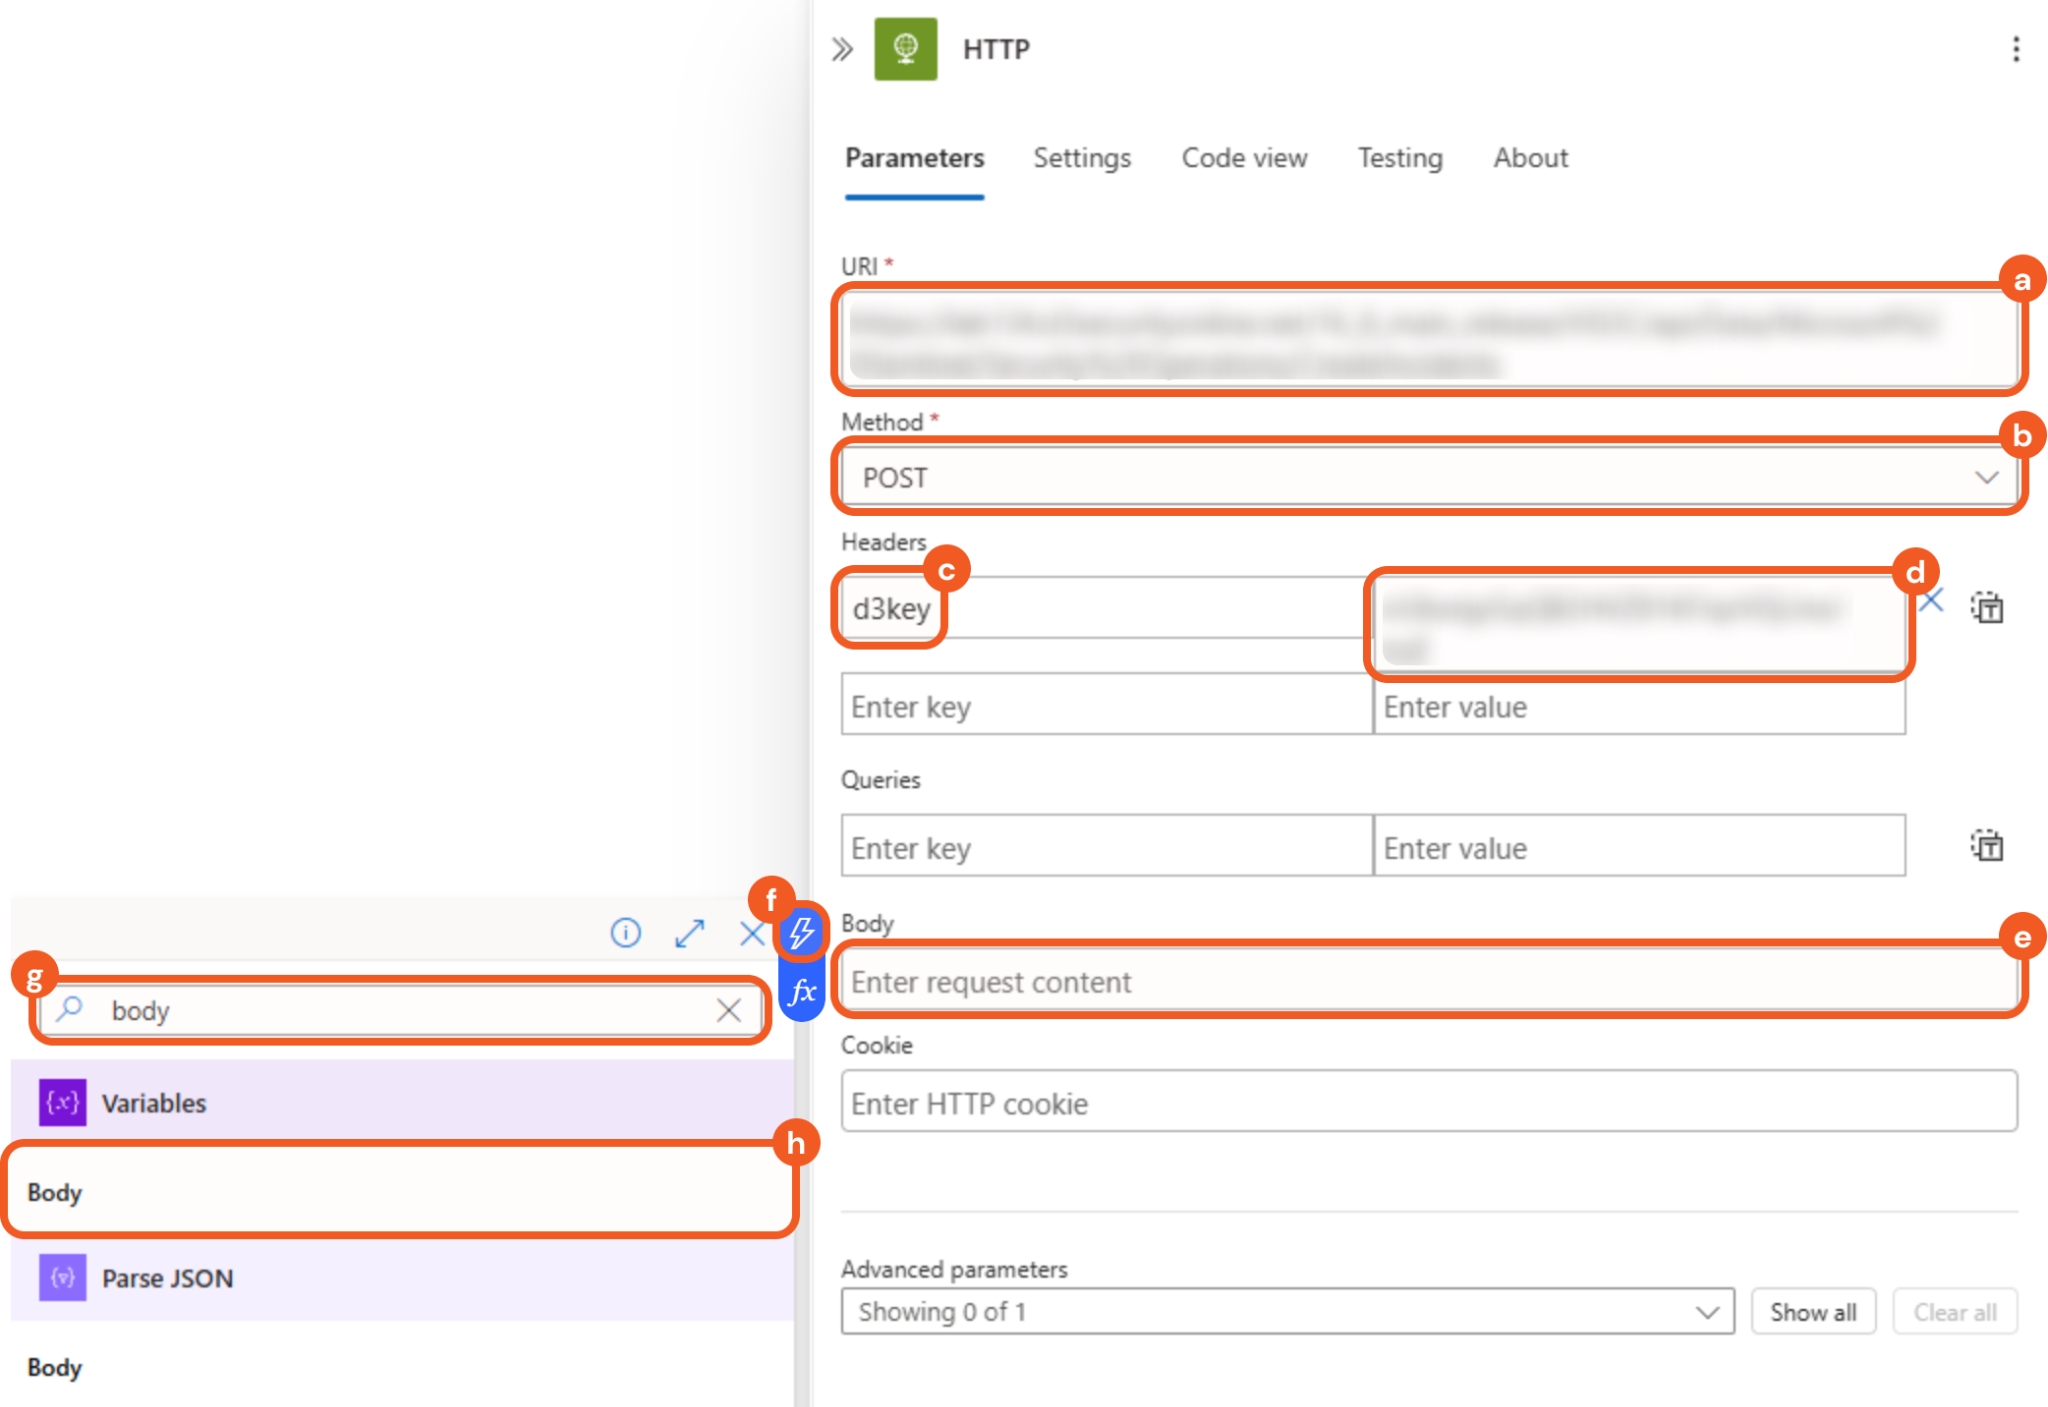
Enter the webhook request URL from vSOC in the URI field.
Select the POST option in the Method field.
Enter d3key in the left Headers field.
Enter the header key value from vSOC in the right Headers field.
Select the Body field.
Select the
 symbol that appears.
Enter body in the search bar.
Select the matching result under the Variables row.
READER NOTE
Users can find their request URL and header key value in the following steps:
Log into vSOC.
Navigate to Configuration > Integrations.
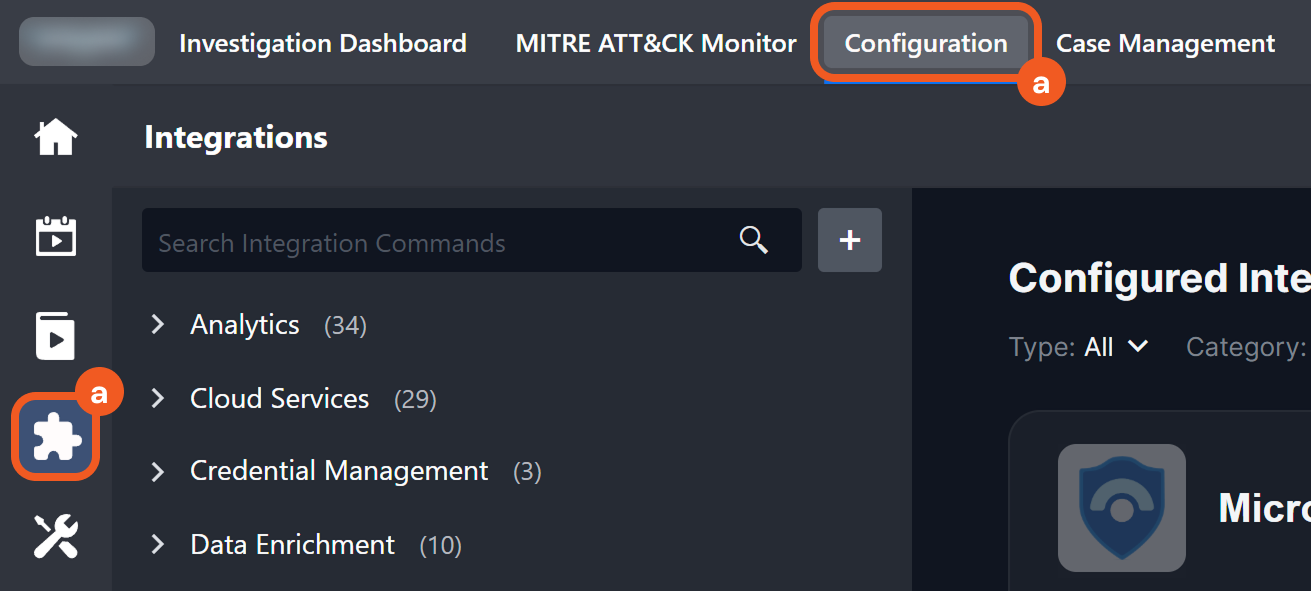
Enter Microsoft Sentinel in the search bar, select the matching result, then click the Fetch Incident card.
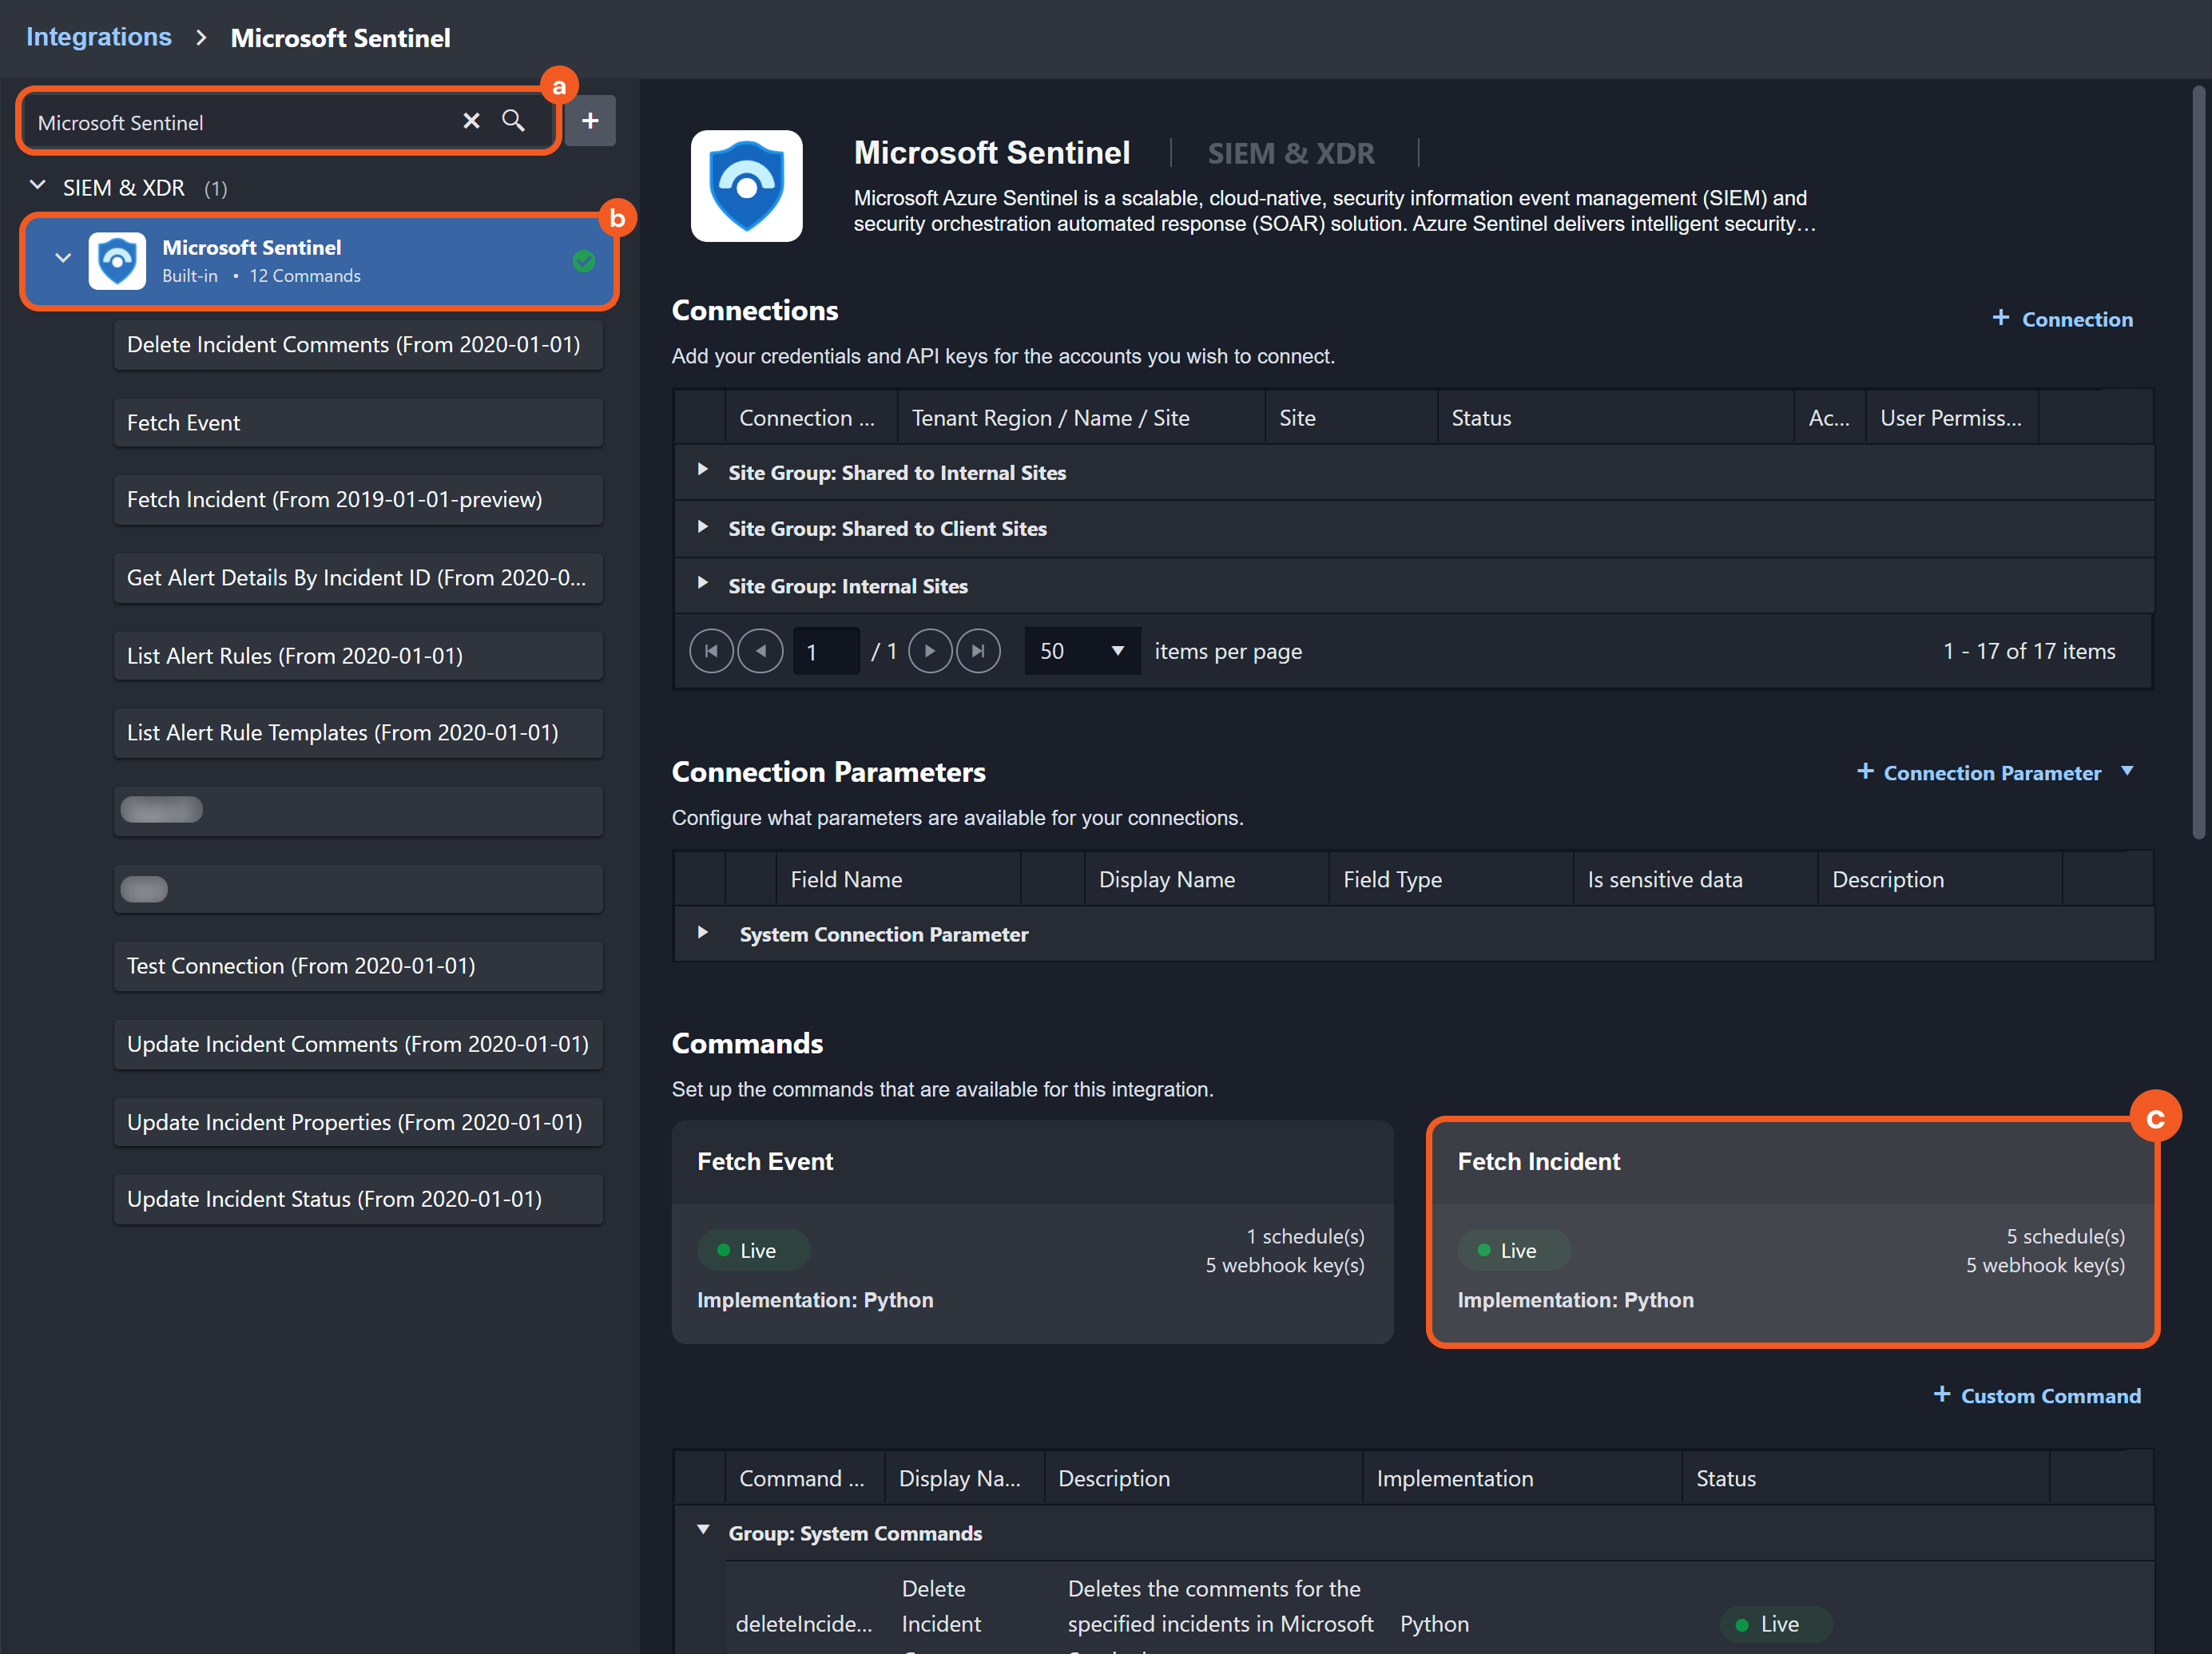
Retrieve the request URL and header value.
.png?inst-v=a9107af0-b04c-4e31-bb5a-938372783868)
Select the API Key option under the Webhook Authentication section.
Expand the desired site row.
Retrieve the request URL.
Retrieve the header value.
Adding a Send an Email (V2) Action
Add a Send an email (V2) action below the HTTP action.

Click the + button.
Click the Add an action button.
Enter Send an email (V2) in the search bar.
Select the matching result.
Configure the parameters as follows.
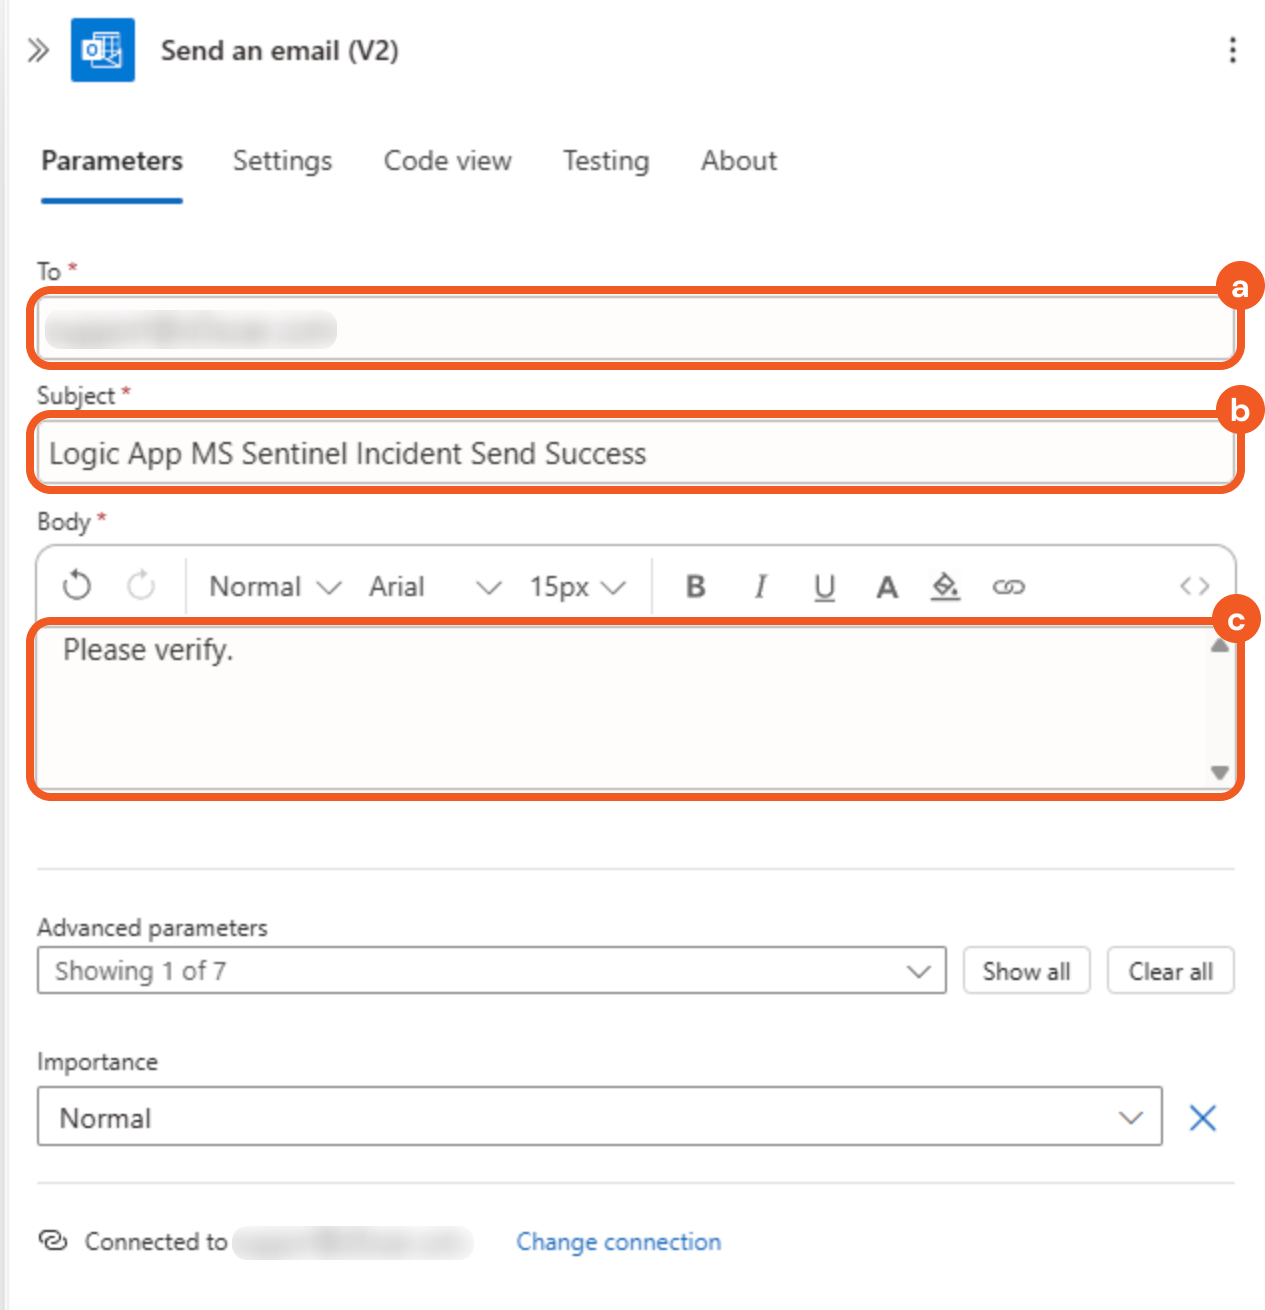
Enter the recipient address in the To field.
Enter the subject in the Subject field.
Enter the email body in the Body field.
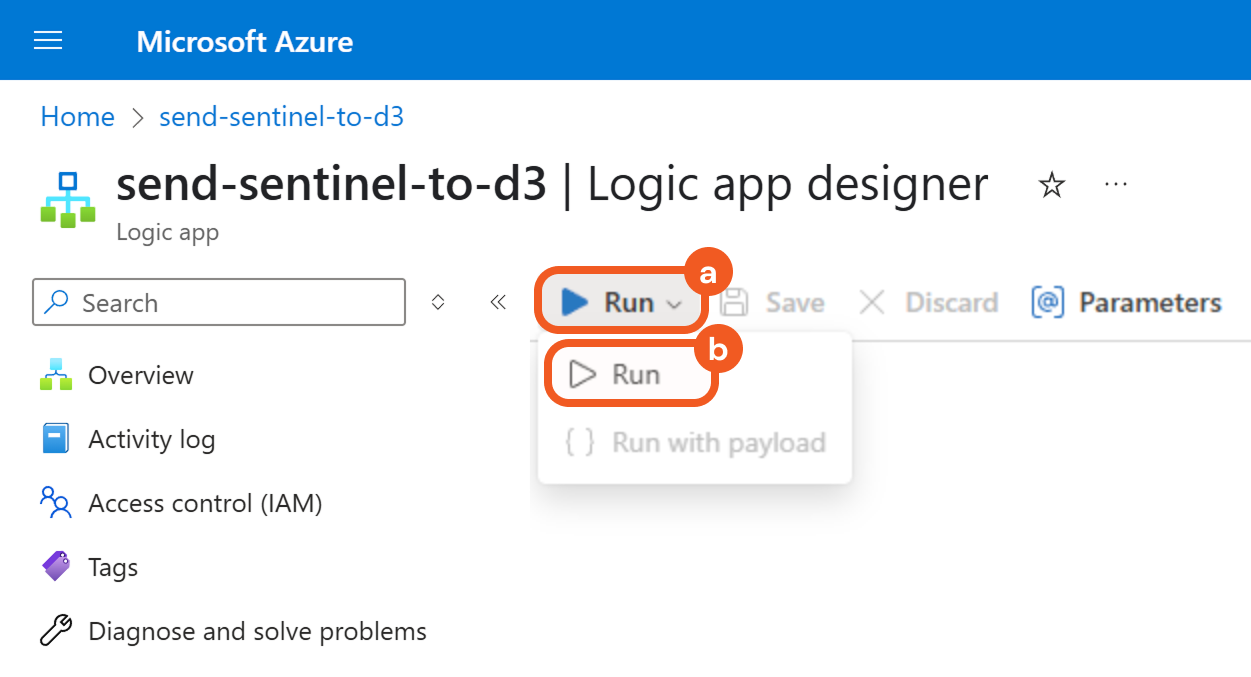
Test Running the Logic App
Click the Save button to save the app.
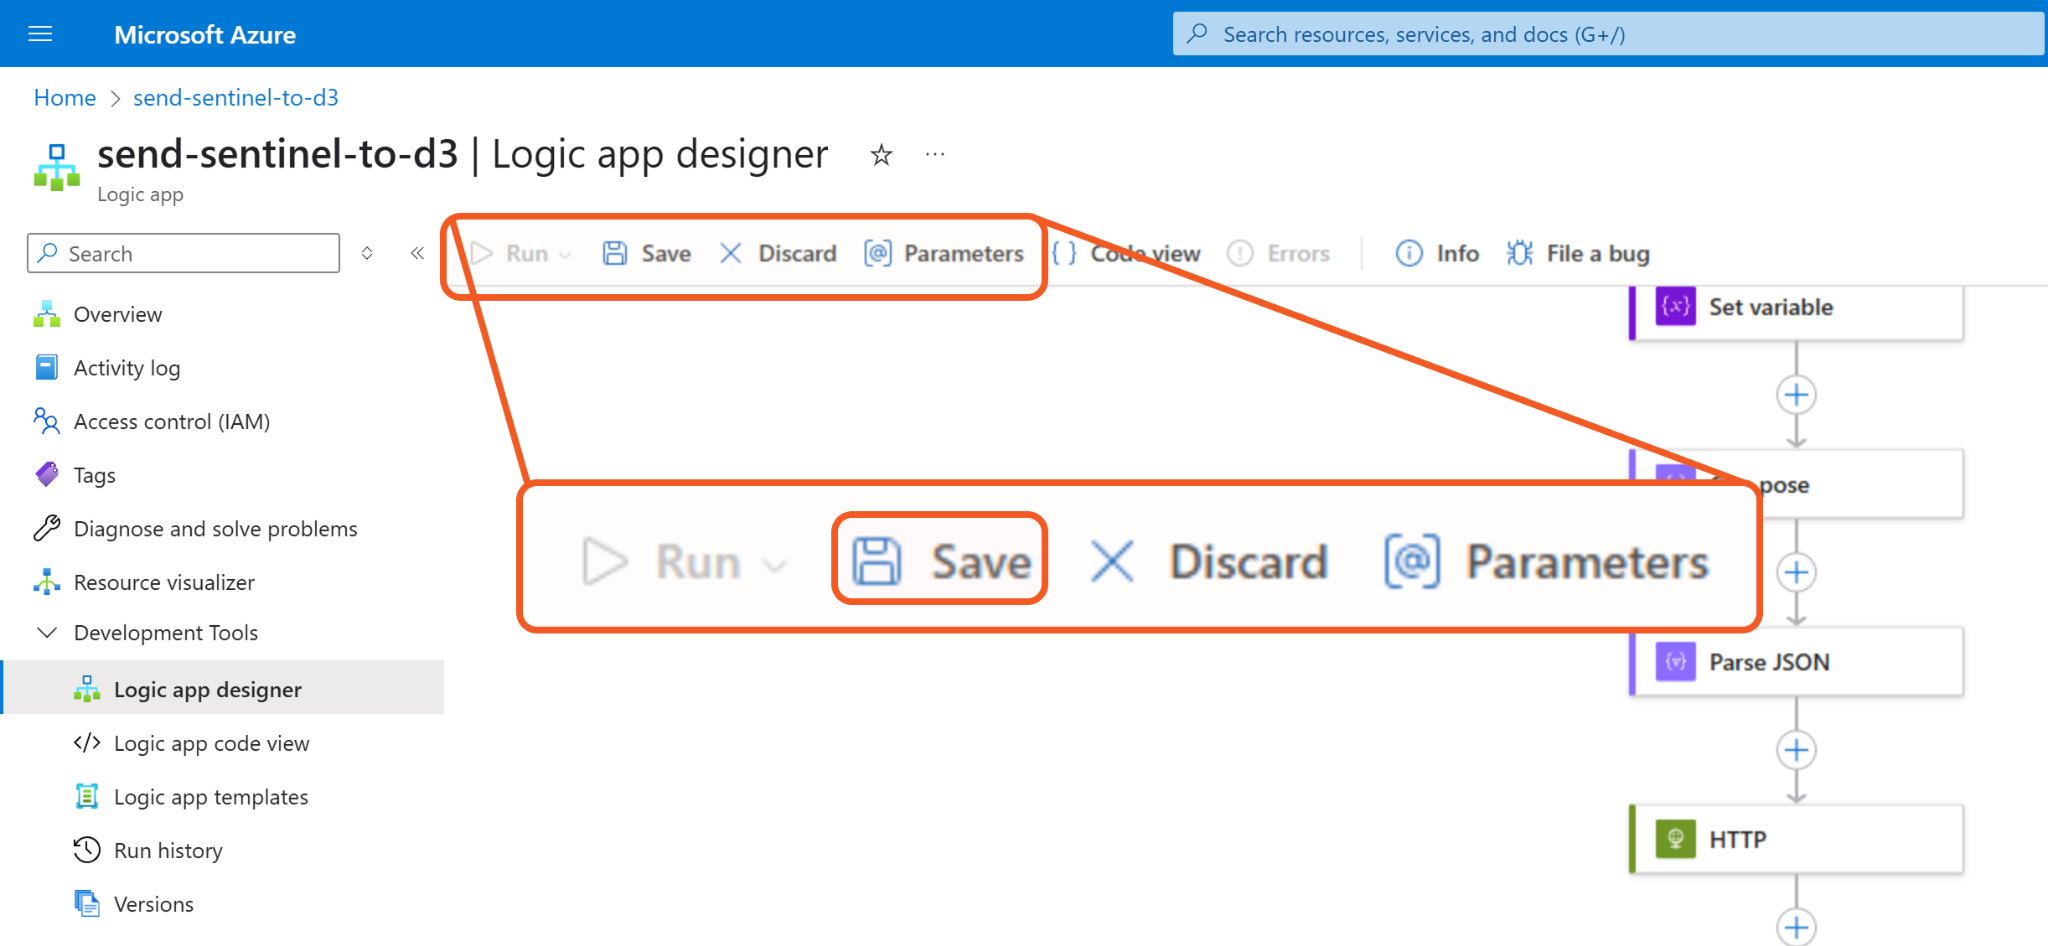
Click the Run button, then select the Run option from the dropdown to manually trigger the workflow (without incident data).
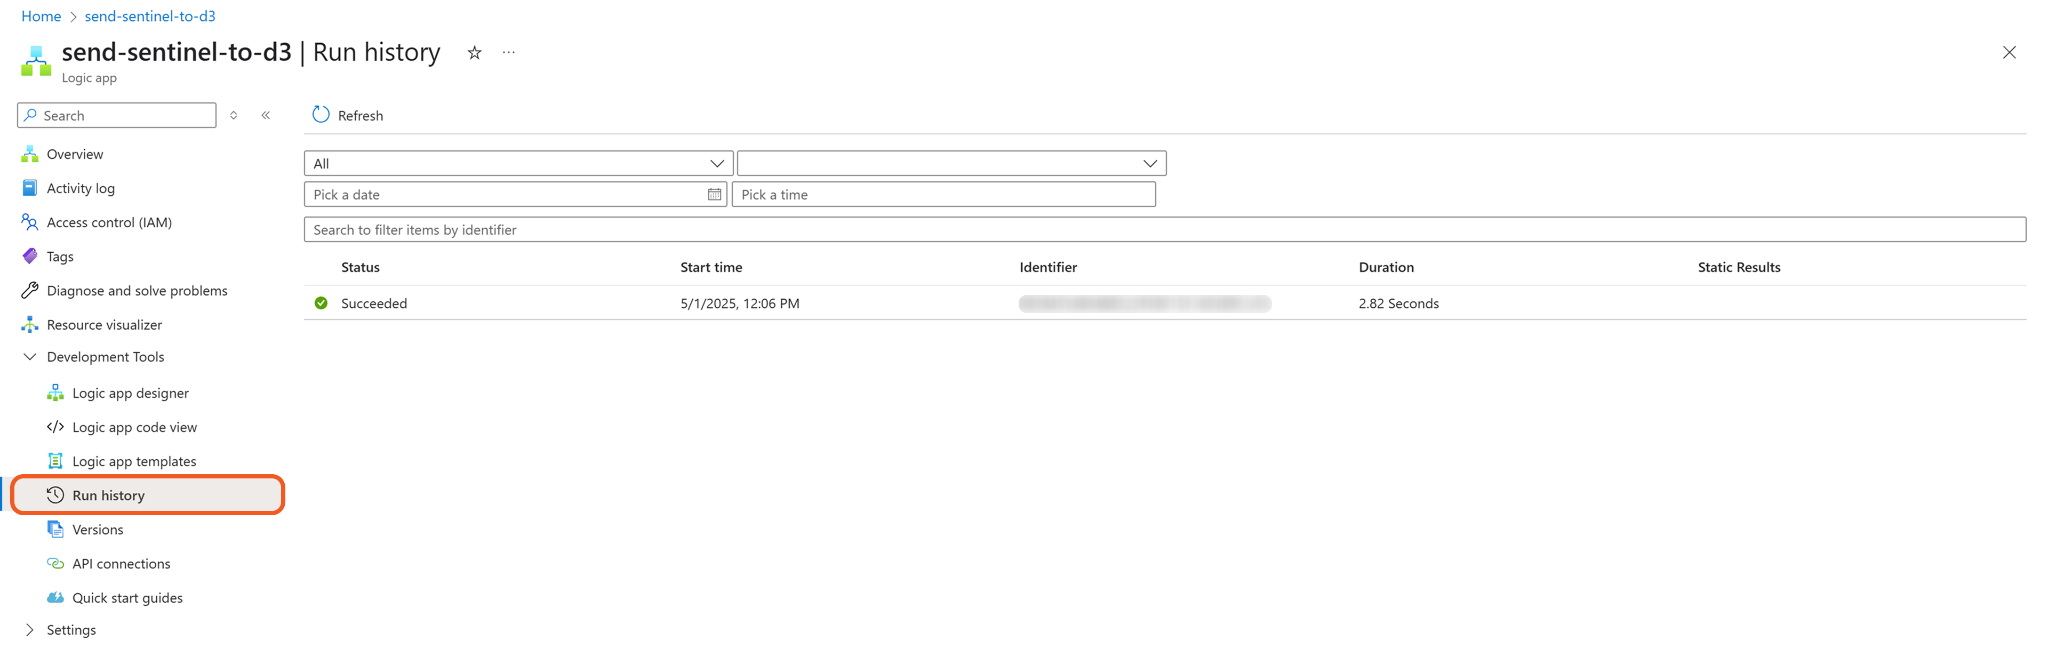
Navigate to the Run history submenu item on the left to verify the workflow execution.
Navigate to the email account specified in Step 2a of Adding an HTTP Action to verify that an email was sent following successful execution.

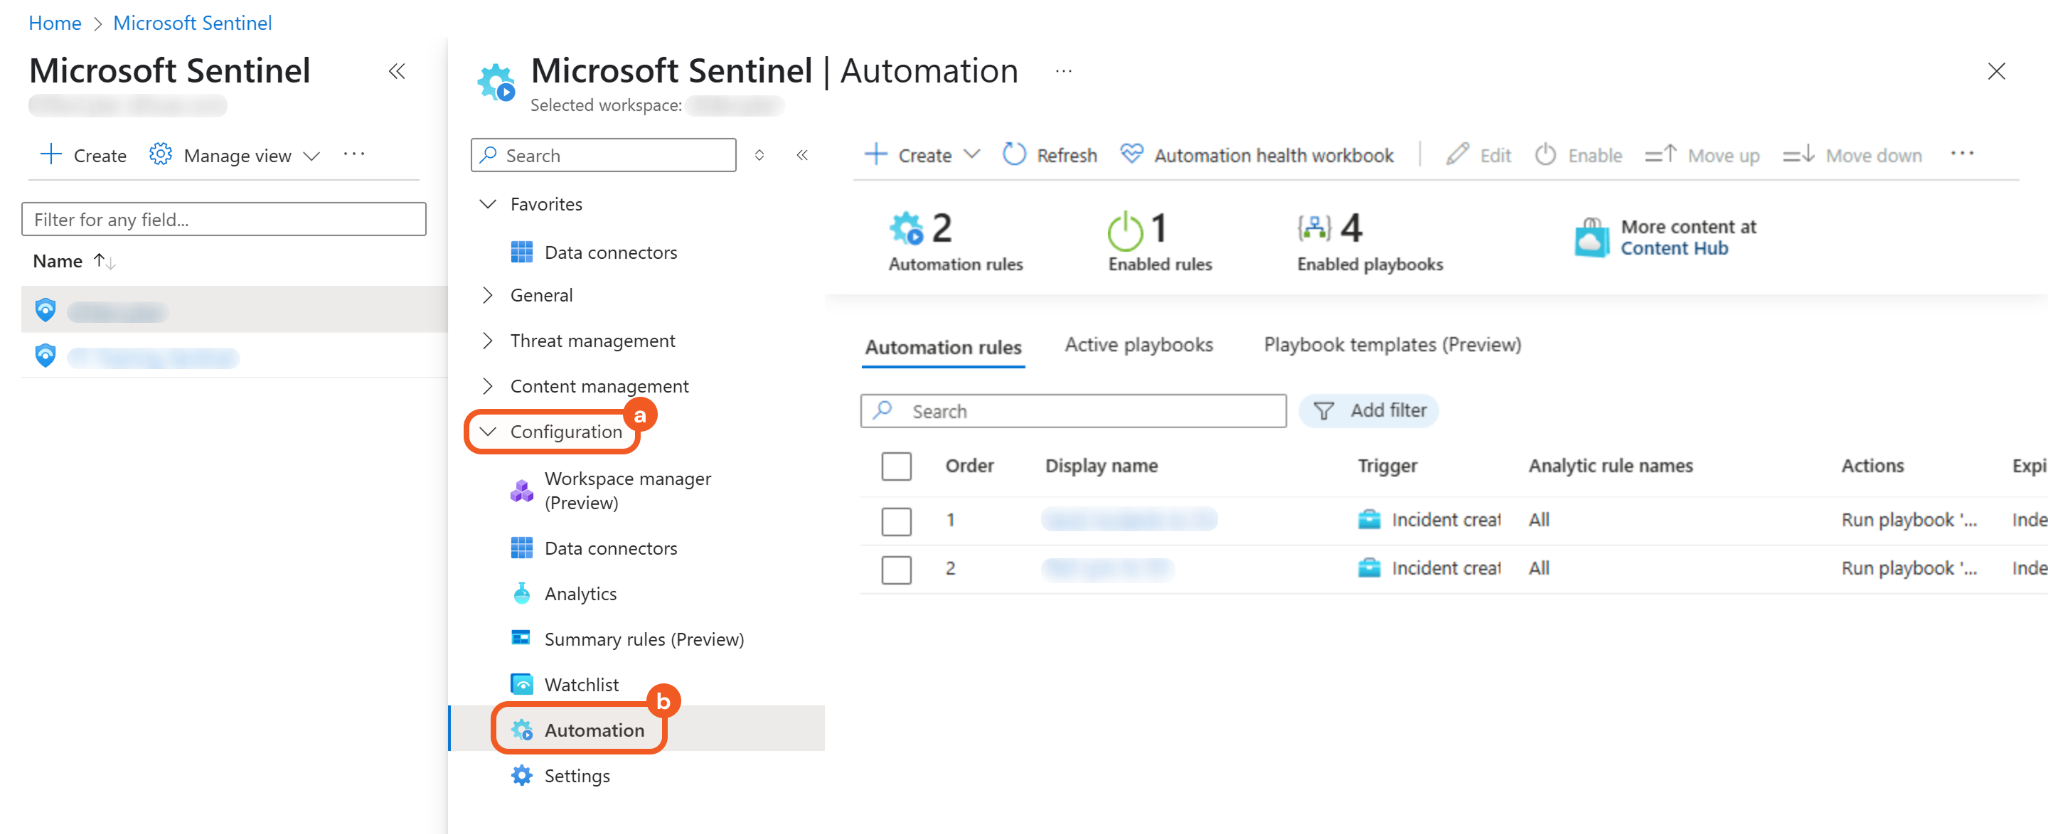
Setting Up Automation
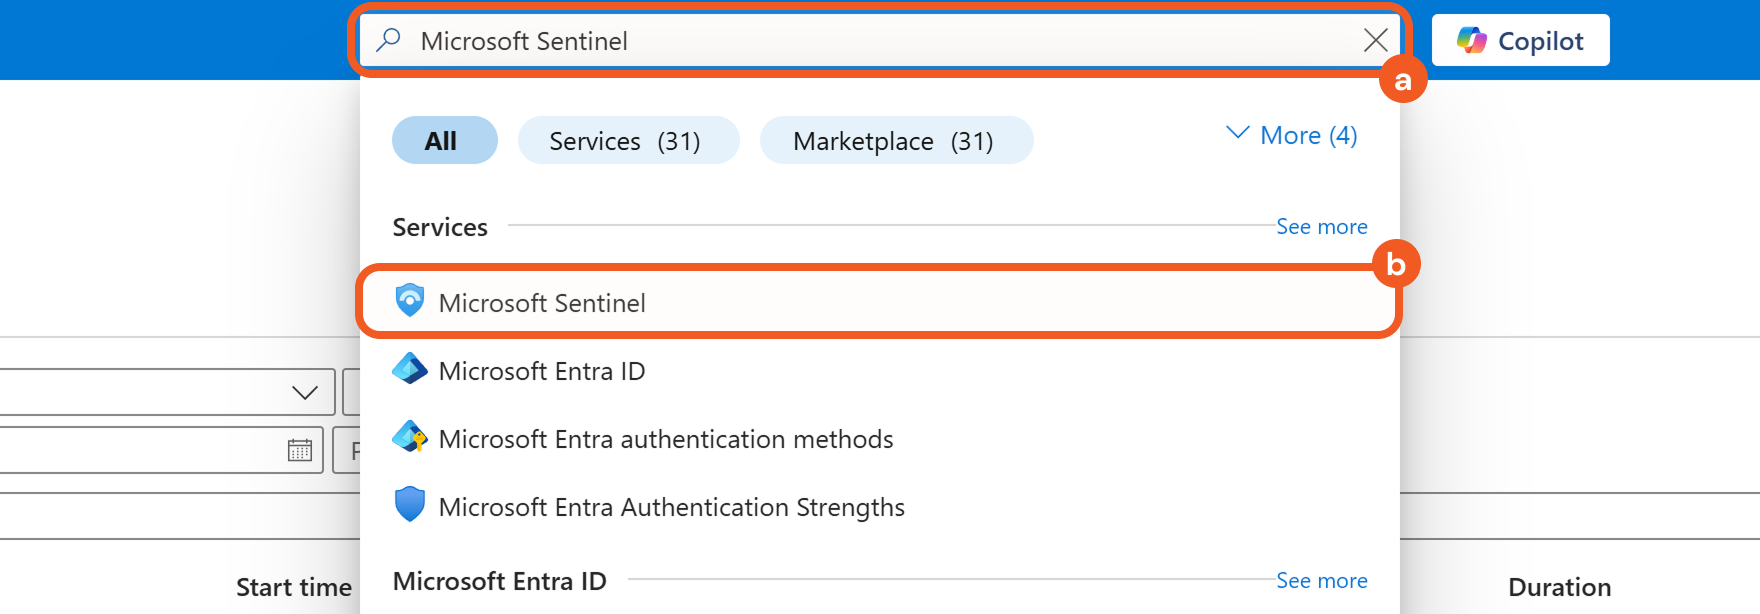
Enter Microsoft Sentinel in the search bar, then select the matching result.
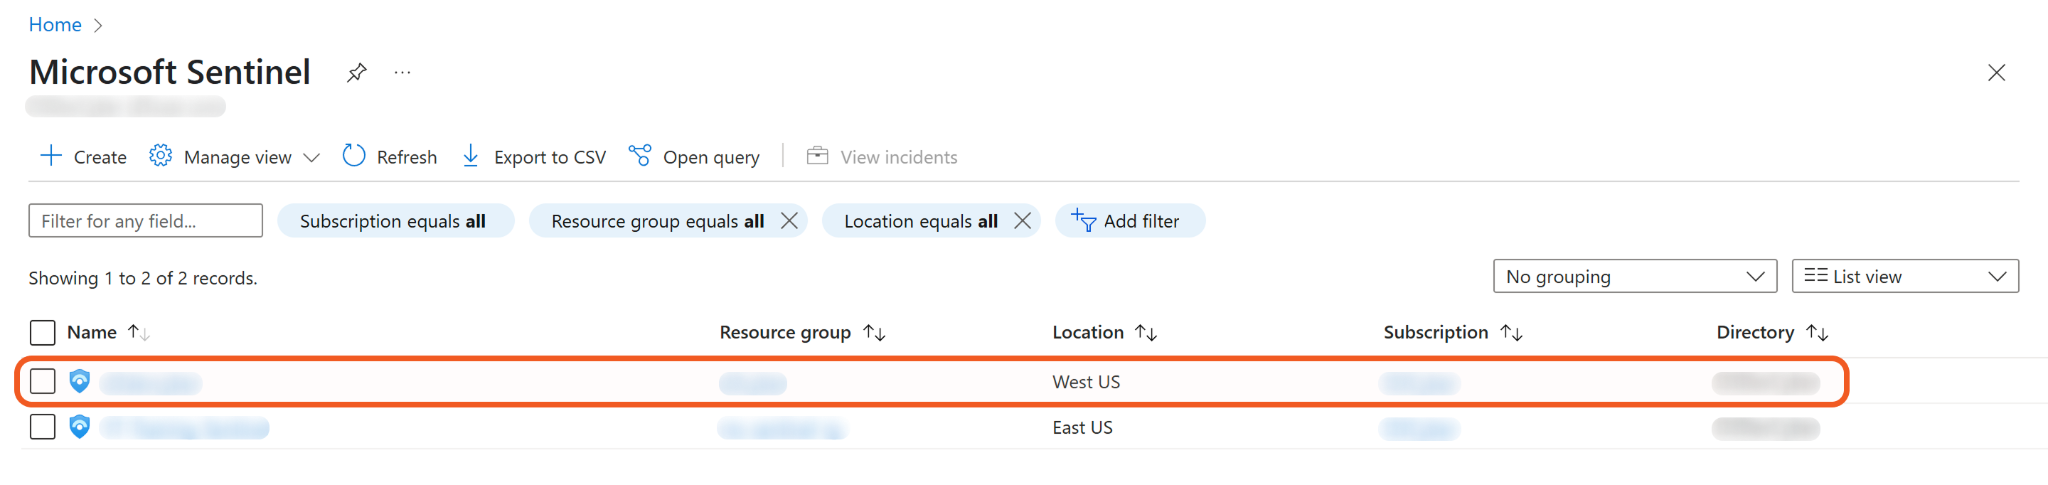
Select the desired workspace.
Navigate to Configuration > Automation.
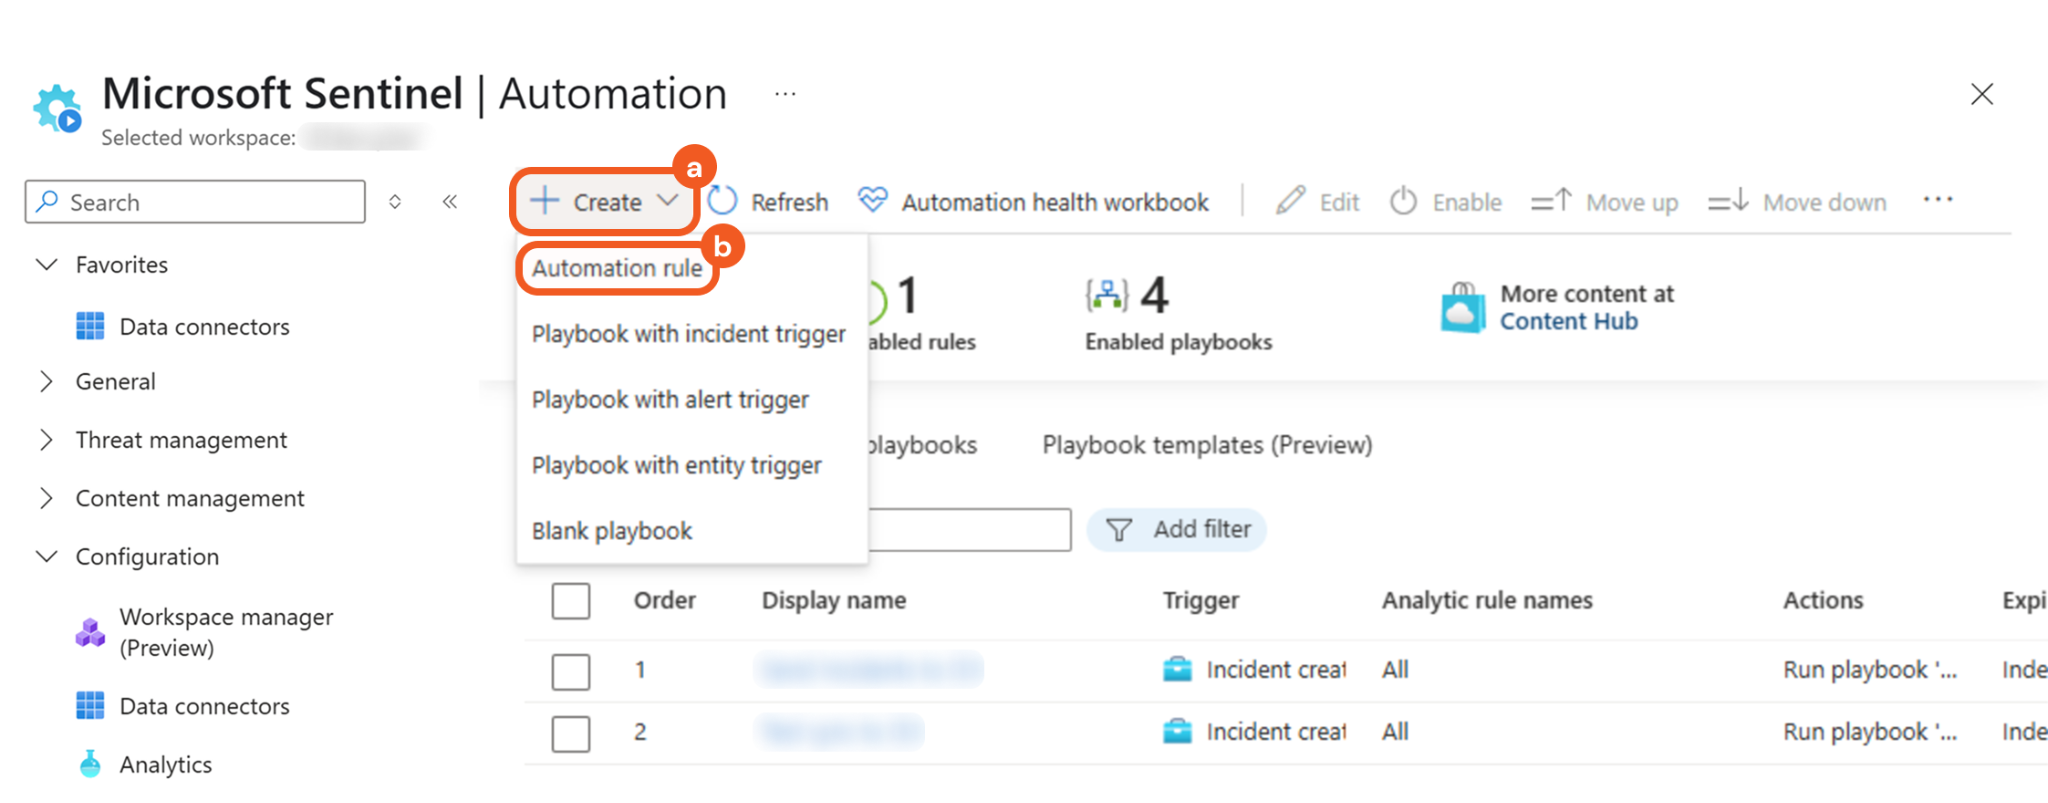
Click the + Create button, then select the Automation rule option.
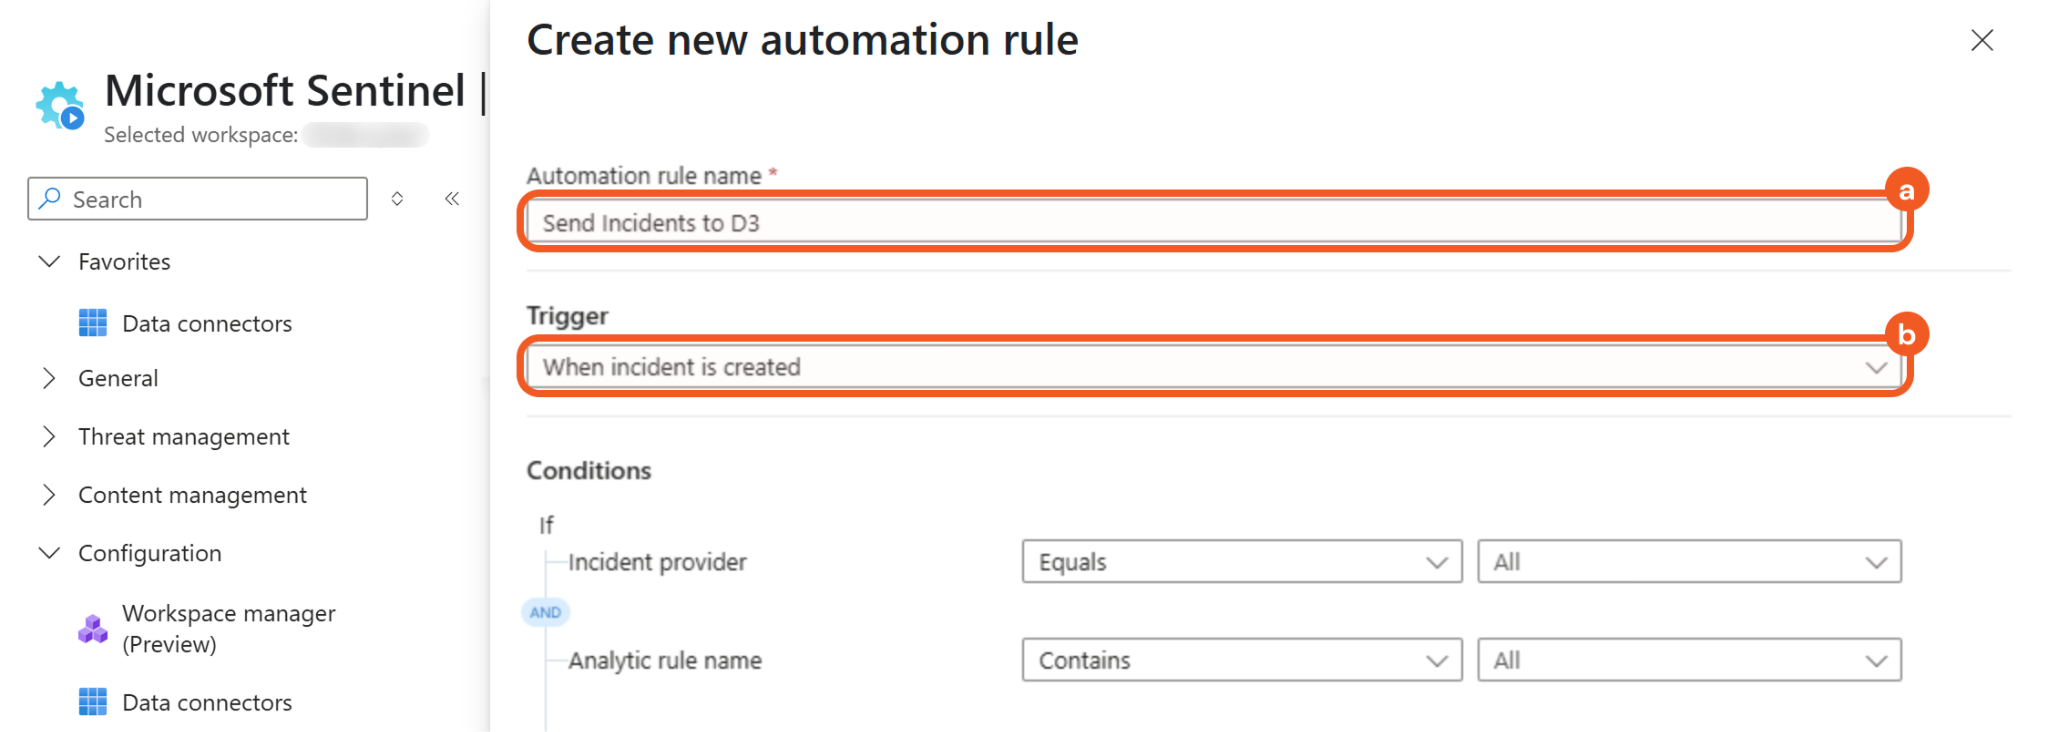
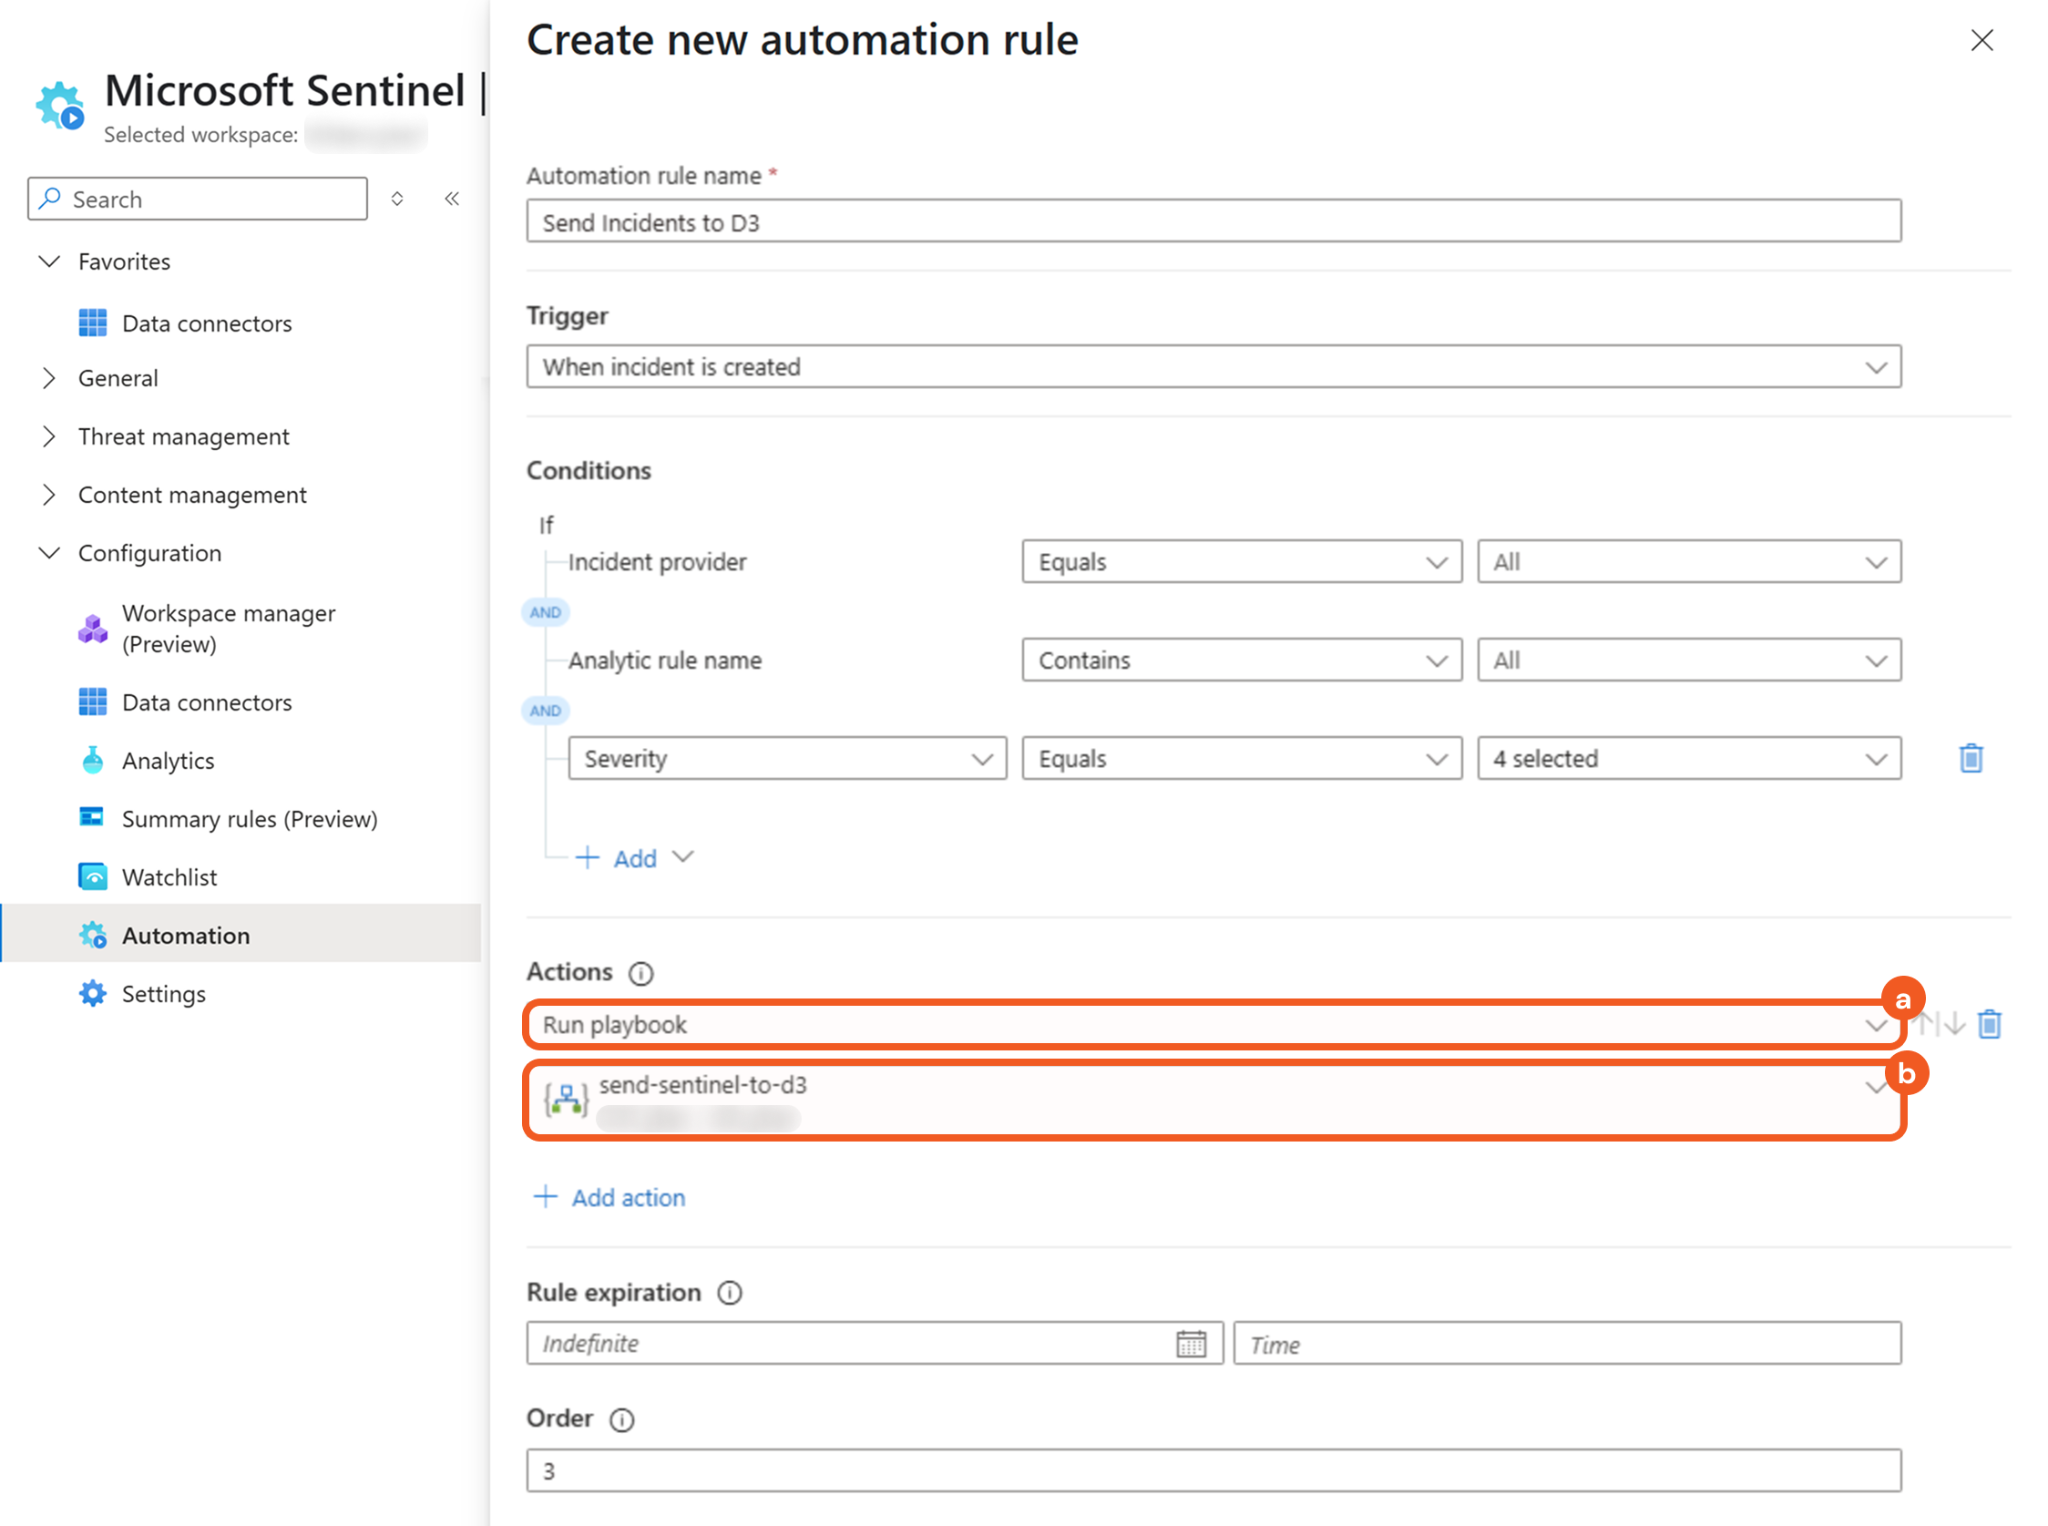
Enter a name for the automation rule (e.g., Send Incidents to D3), then select the When incident is created option in the Trigger field.
Click the + Add button to include another condition, then select the Condition (And) option.
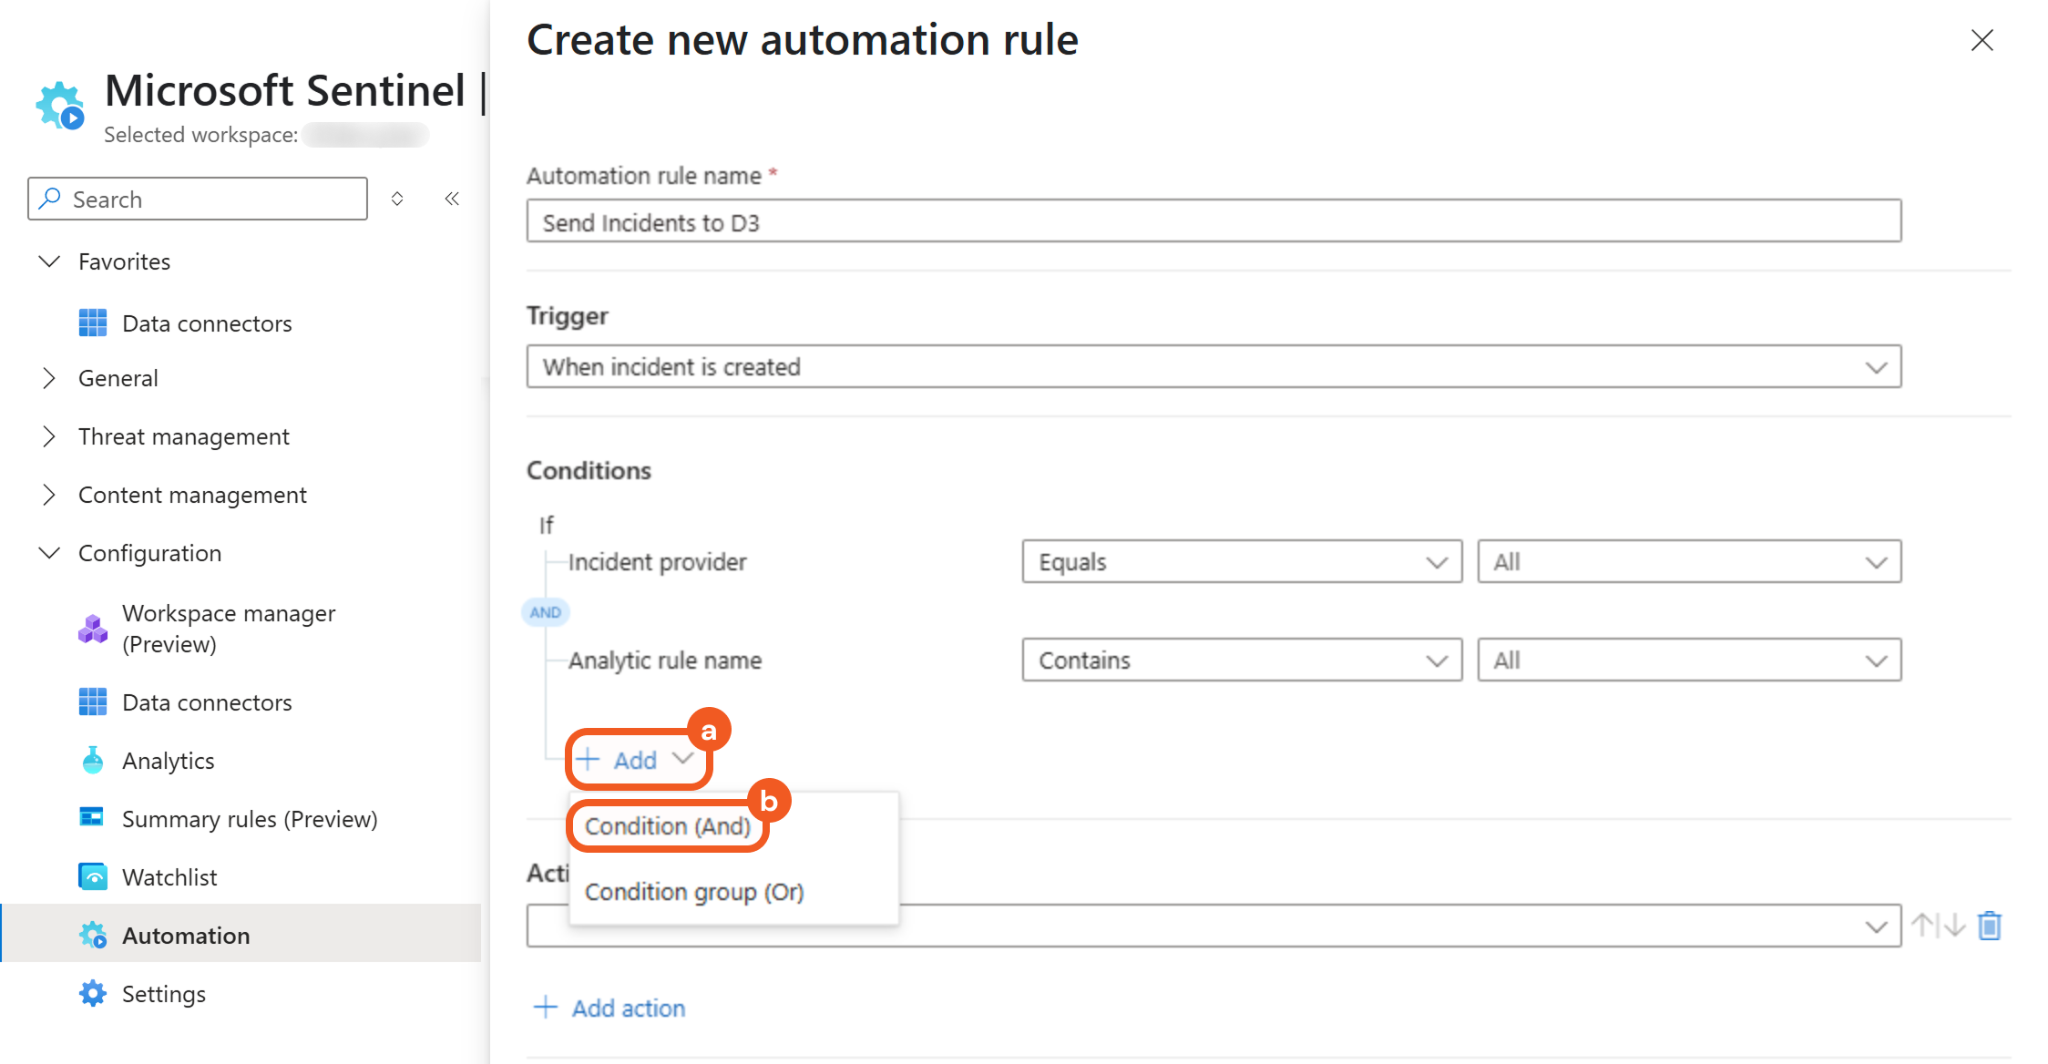
Define the condition.
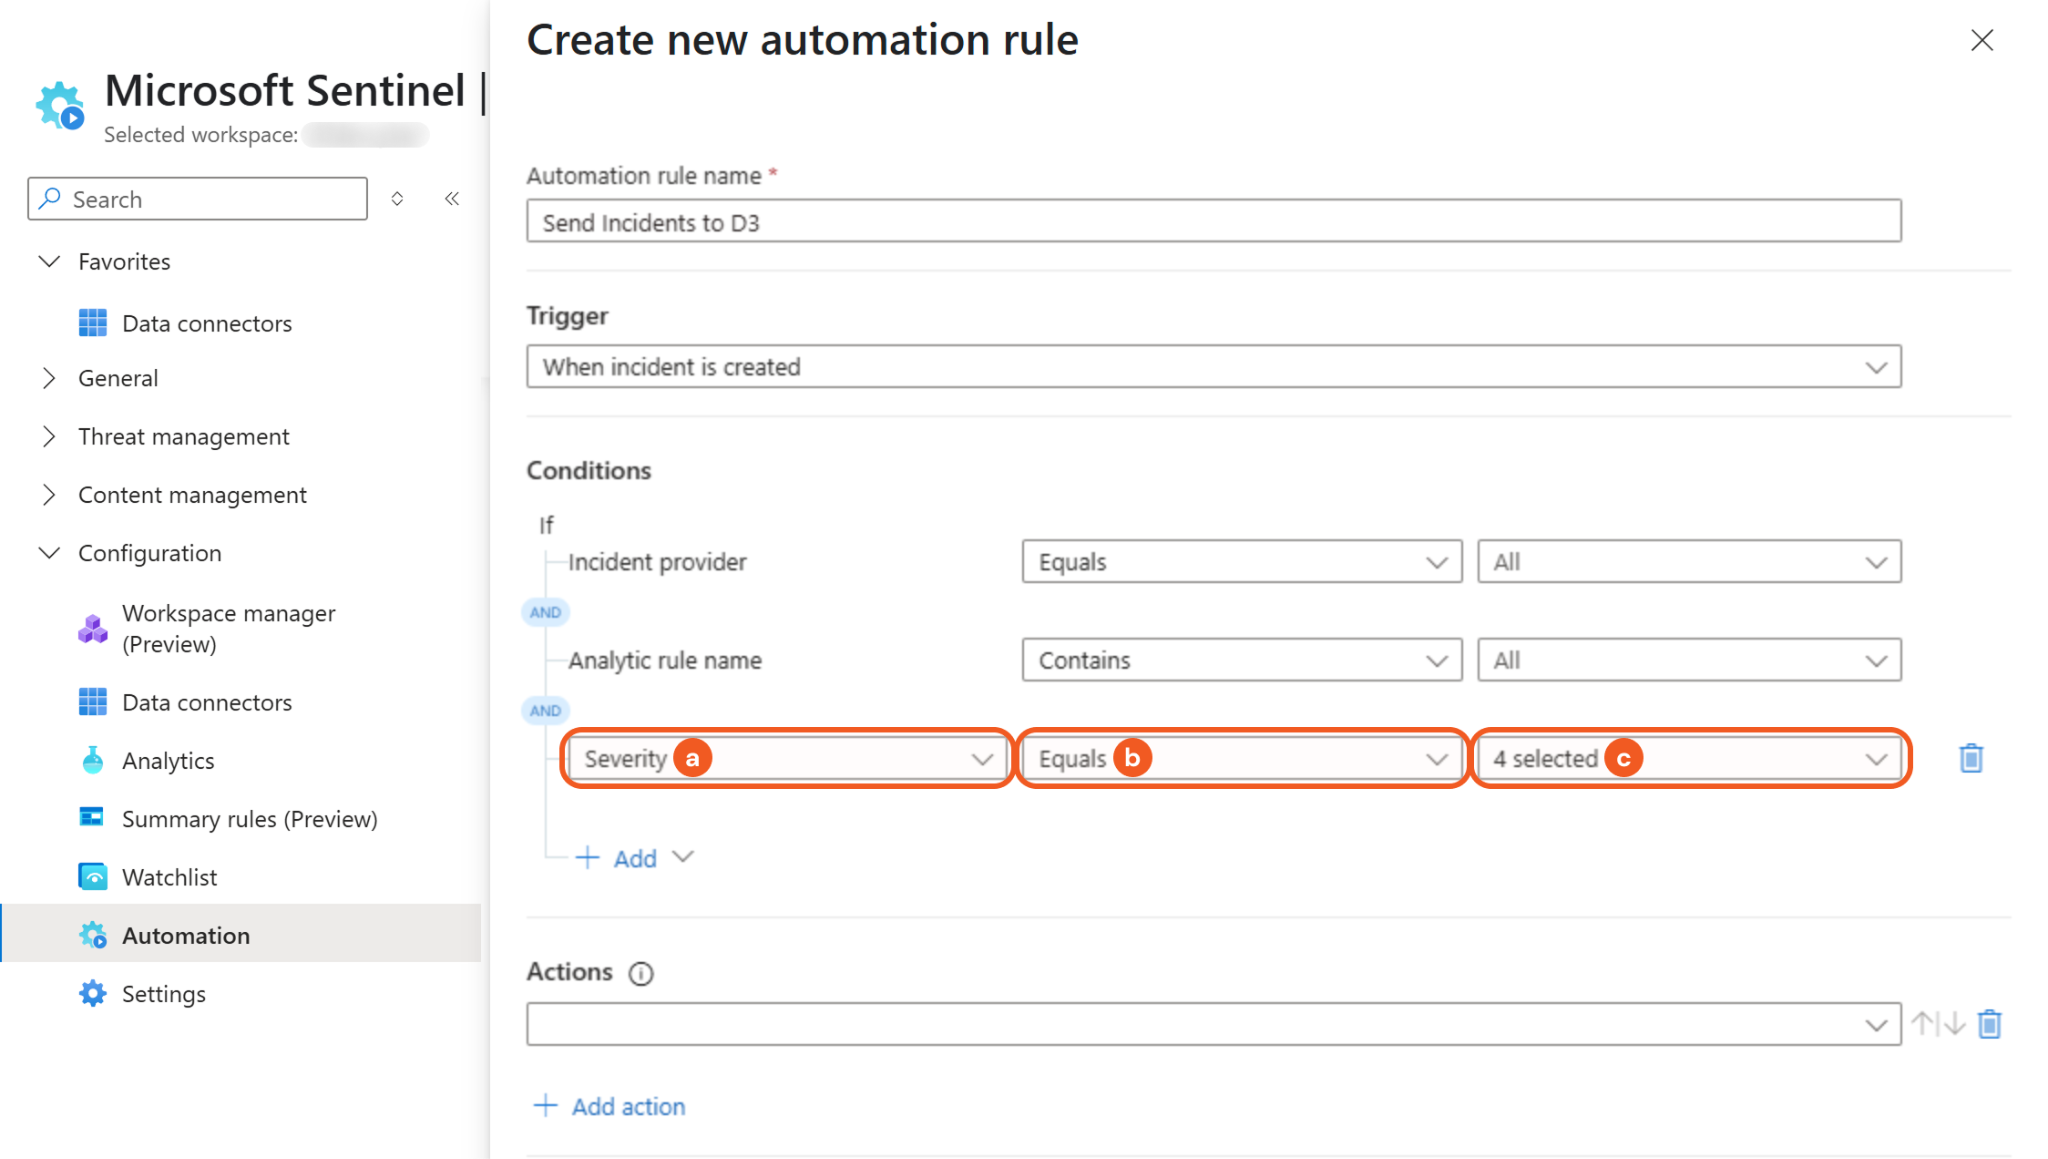
Select the Severity option.
Select the Equals option.
Select the Select all option.
Select the Run playbook option in the Actions section, then select the Logic app previously created.
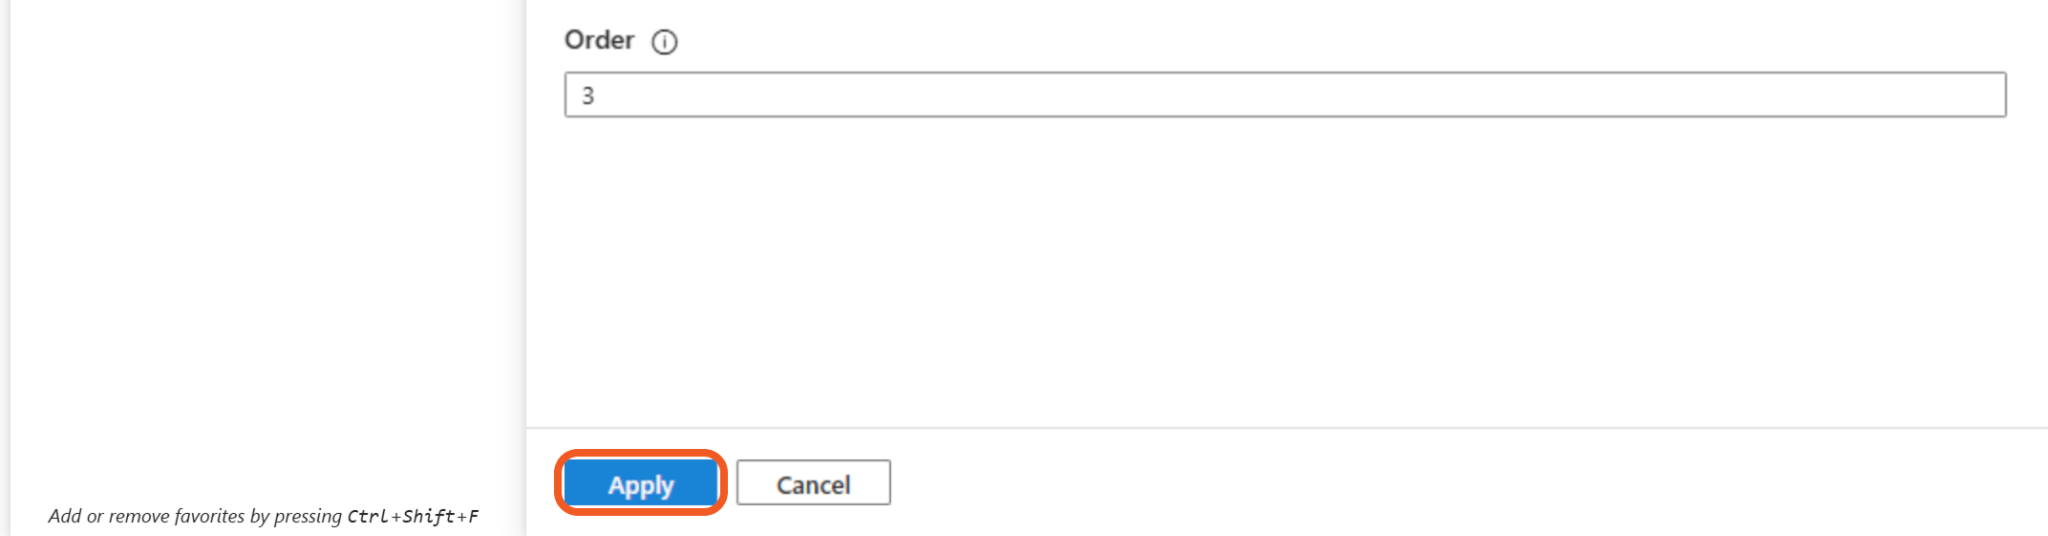
Click the Apply button to save the rule.
Ensure that the newly created automation rule is enabled.

Verifying Automation Rule Execution in vSOC
If incident data is being ingested, verify that the automation rule is functioning by checking for its ingestion job within vSOC.
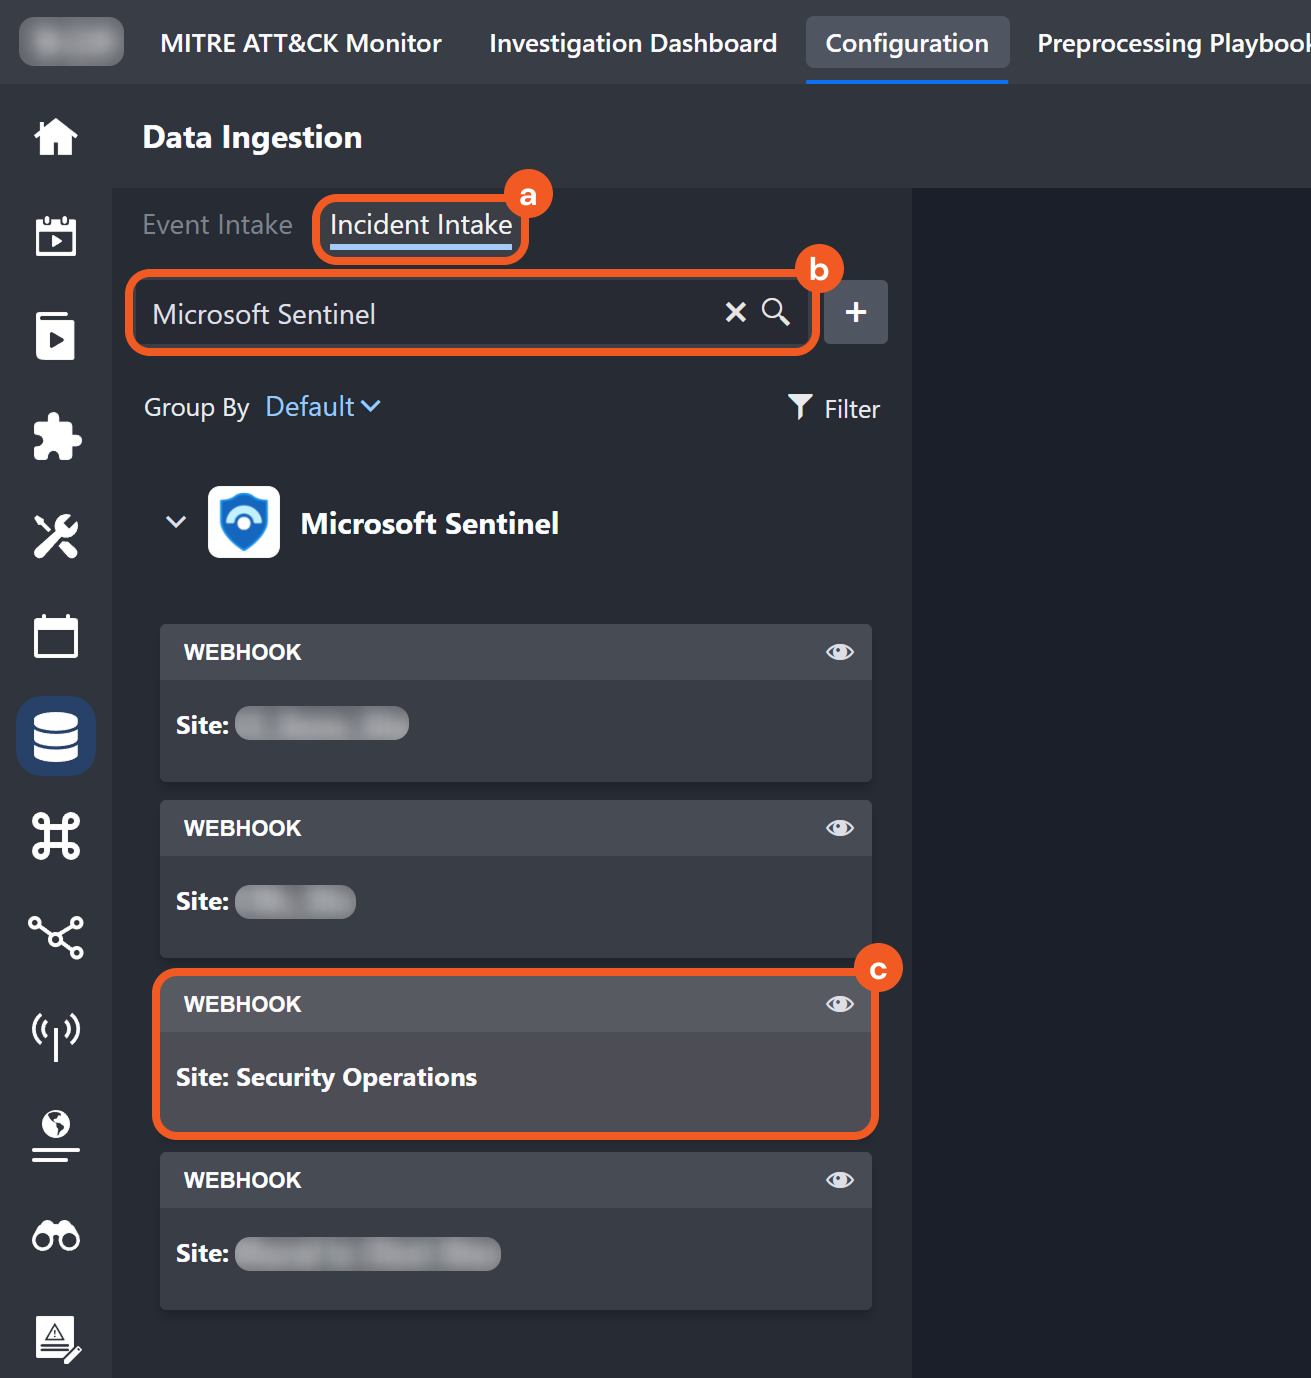
Navigate to Configuration > Data Ingestion.
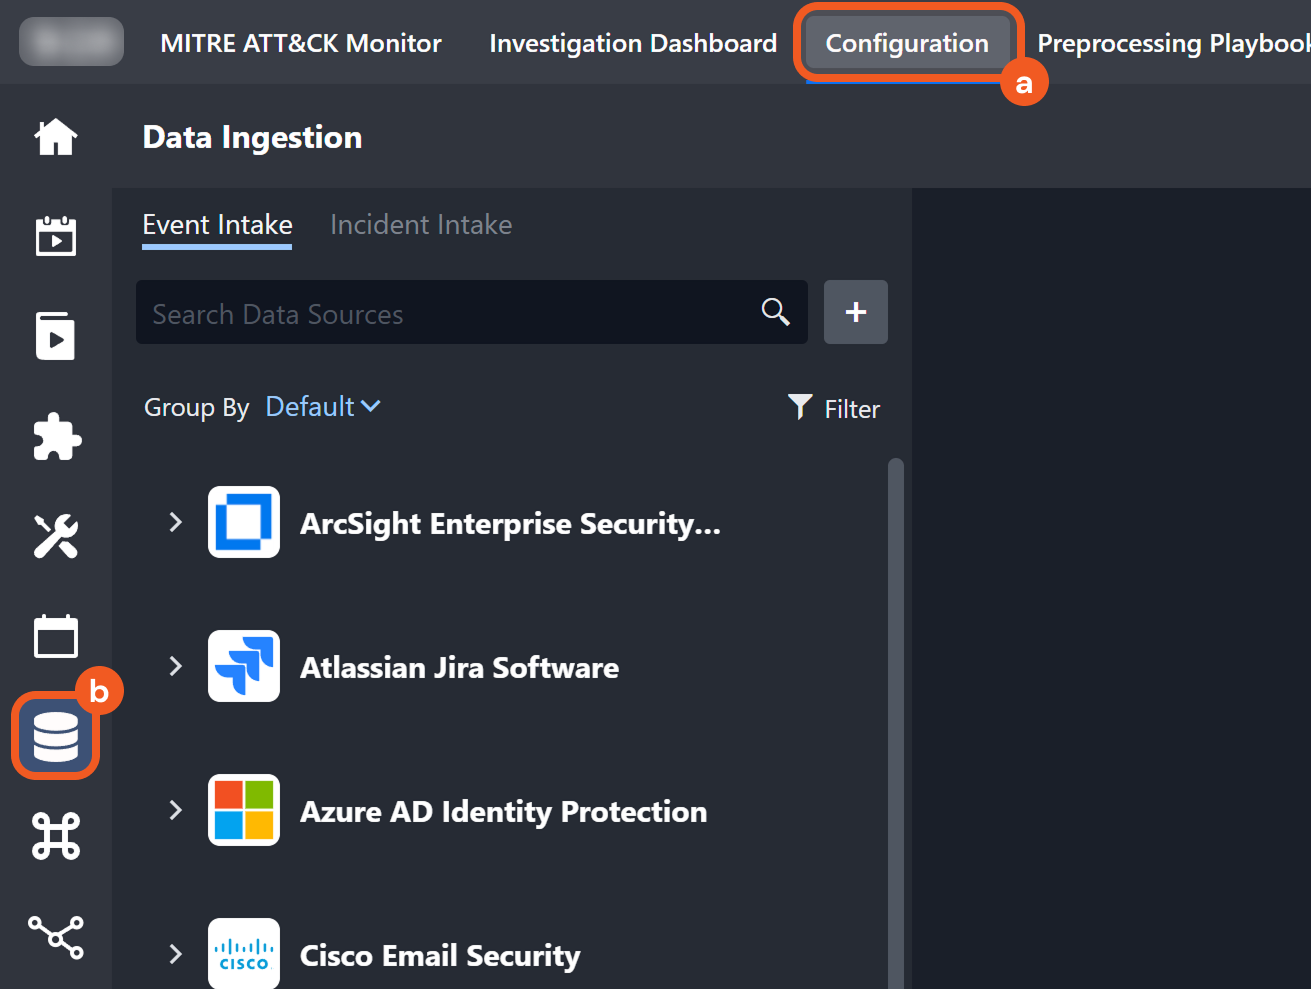
Click the Incident Intake tab, enter Microsoft Sentinel in the search bar, then select the site referenced in the request URL.
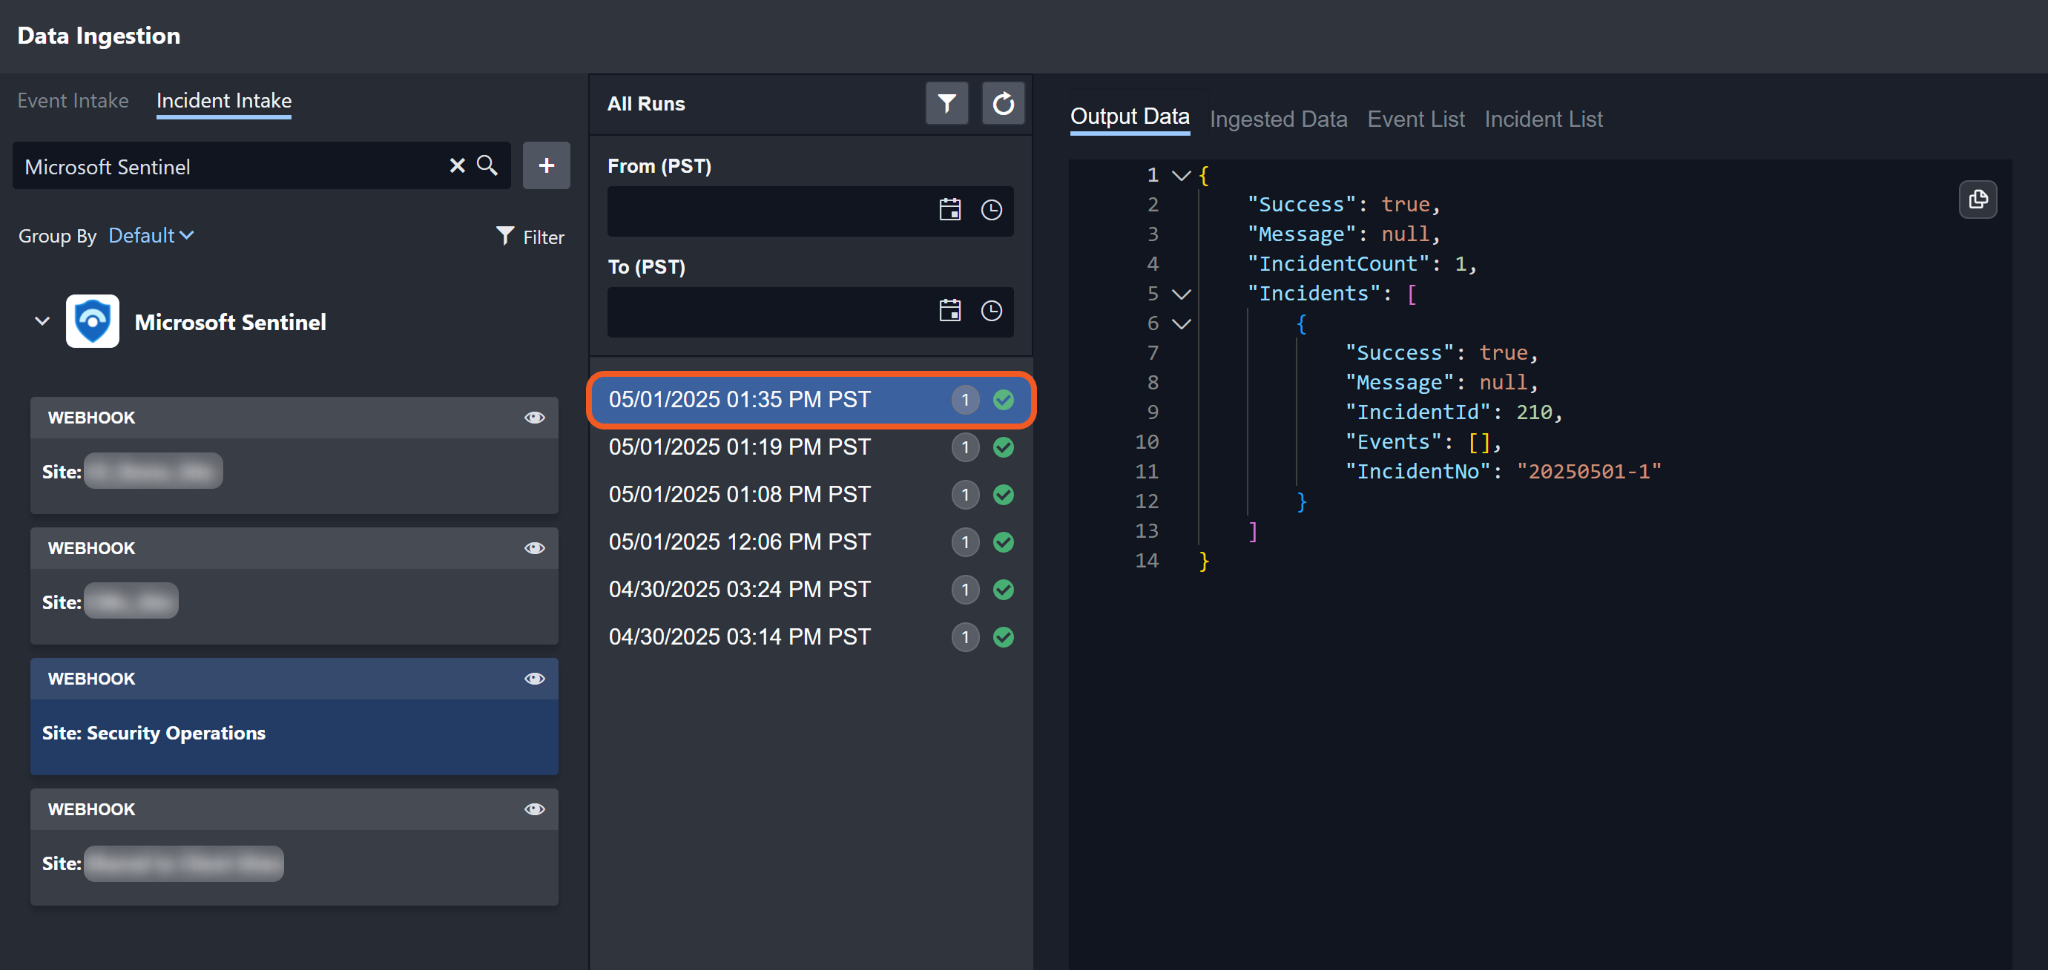
Verify successful execution of the automation rule by selecting the matching data ingestion run.
Locate the incident on the Investigation Dashboard.
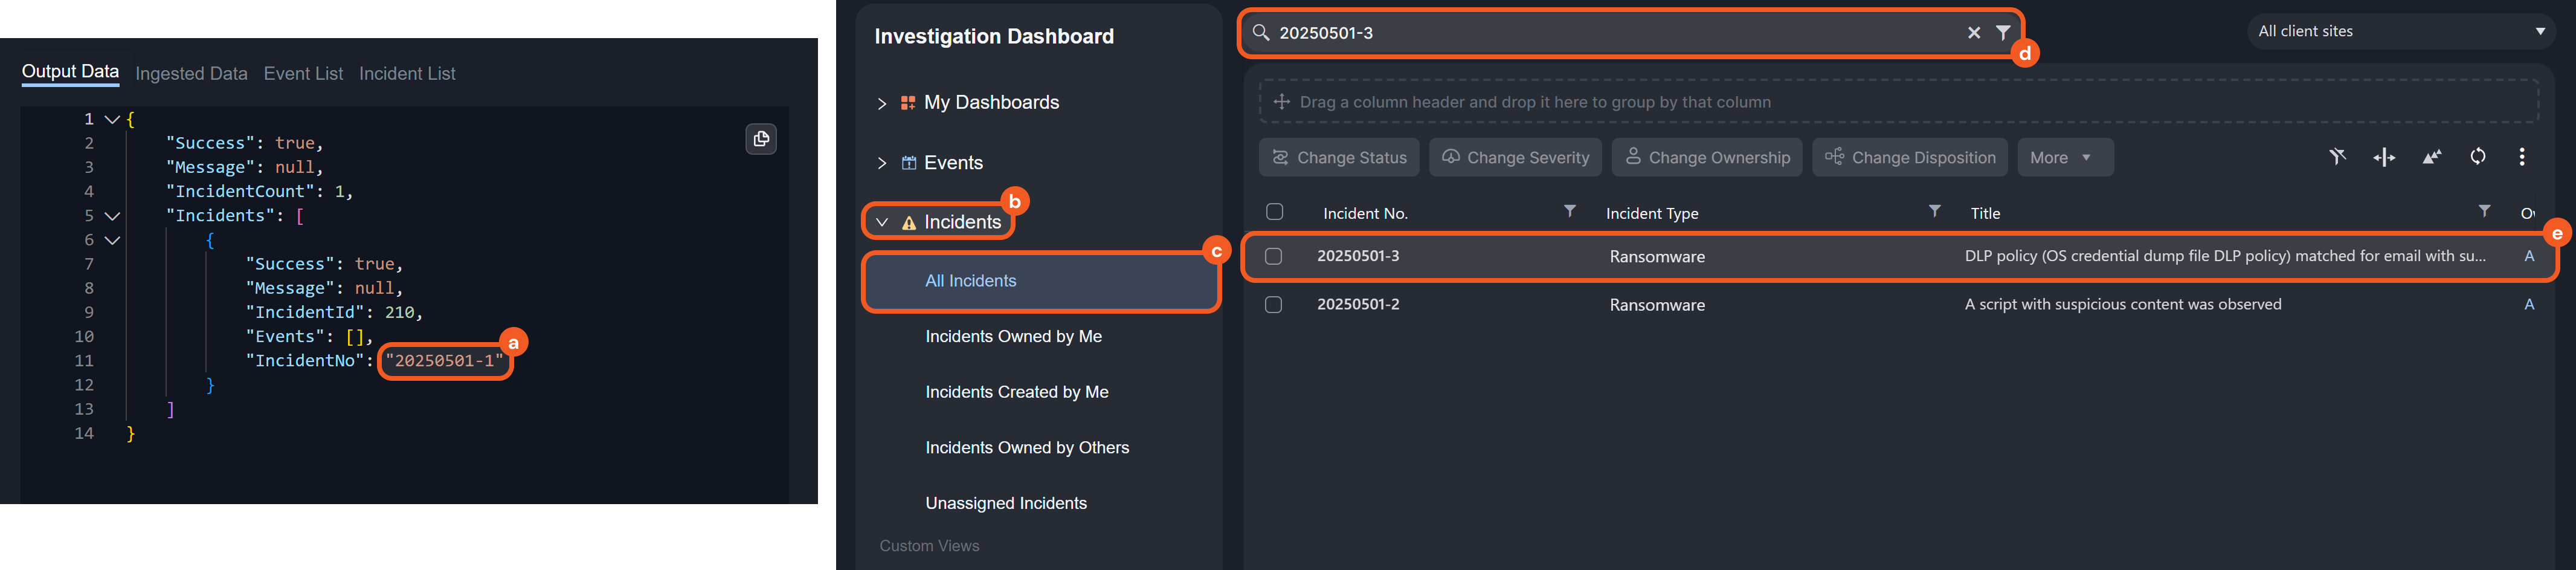
Copy the incident number.
Open the Incidents accordion.
Select the All Incidents accordion item.
Paste and enter the incident number into the search bar.
Select the matching result.