last updated: January 06, 2026
An API key is a unique token used to authenticate systems or applications accessing a platform via an application programming interface (API). This article outlines the steps for sending an API key-authenticated request using Postman to interact with the D3 platform.
Prerequisites
-
Ability to set up D3 webhook keys
Setting Up API Keys for Data Ingestion
-
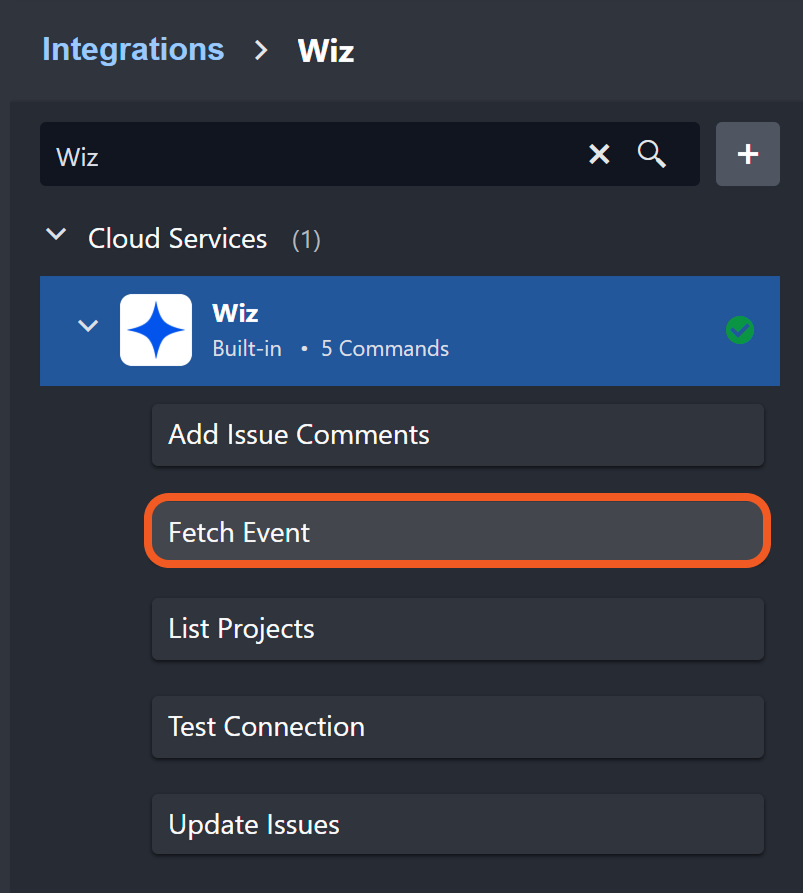
Select the event/incident intake command, such as Fetch Event.
Ensure that Webhook Authentication is toggled on.
On:-20241205-203600.png?cb=adec200865fe373fb2d21e0523c83477)
Off:-20241205-203551.png?cb=2eac2513775b413f2f526db7c7f3fa79)
From this point, users can configure their API key through either the Integrations module or the Data Ingestion module.
Setting Up API Keys from the Integrations Module
-
Click on the API Key button.
.png?cb=032de0eb7f3f86555d77e0f61dae23a0)
-
Set up the API key within the Setup API Key popup.
-
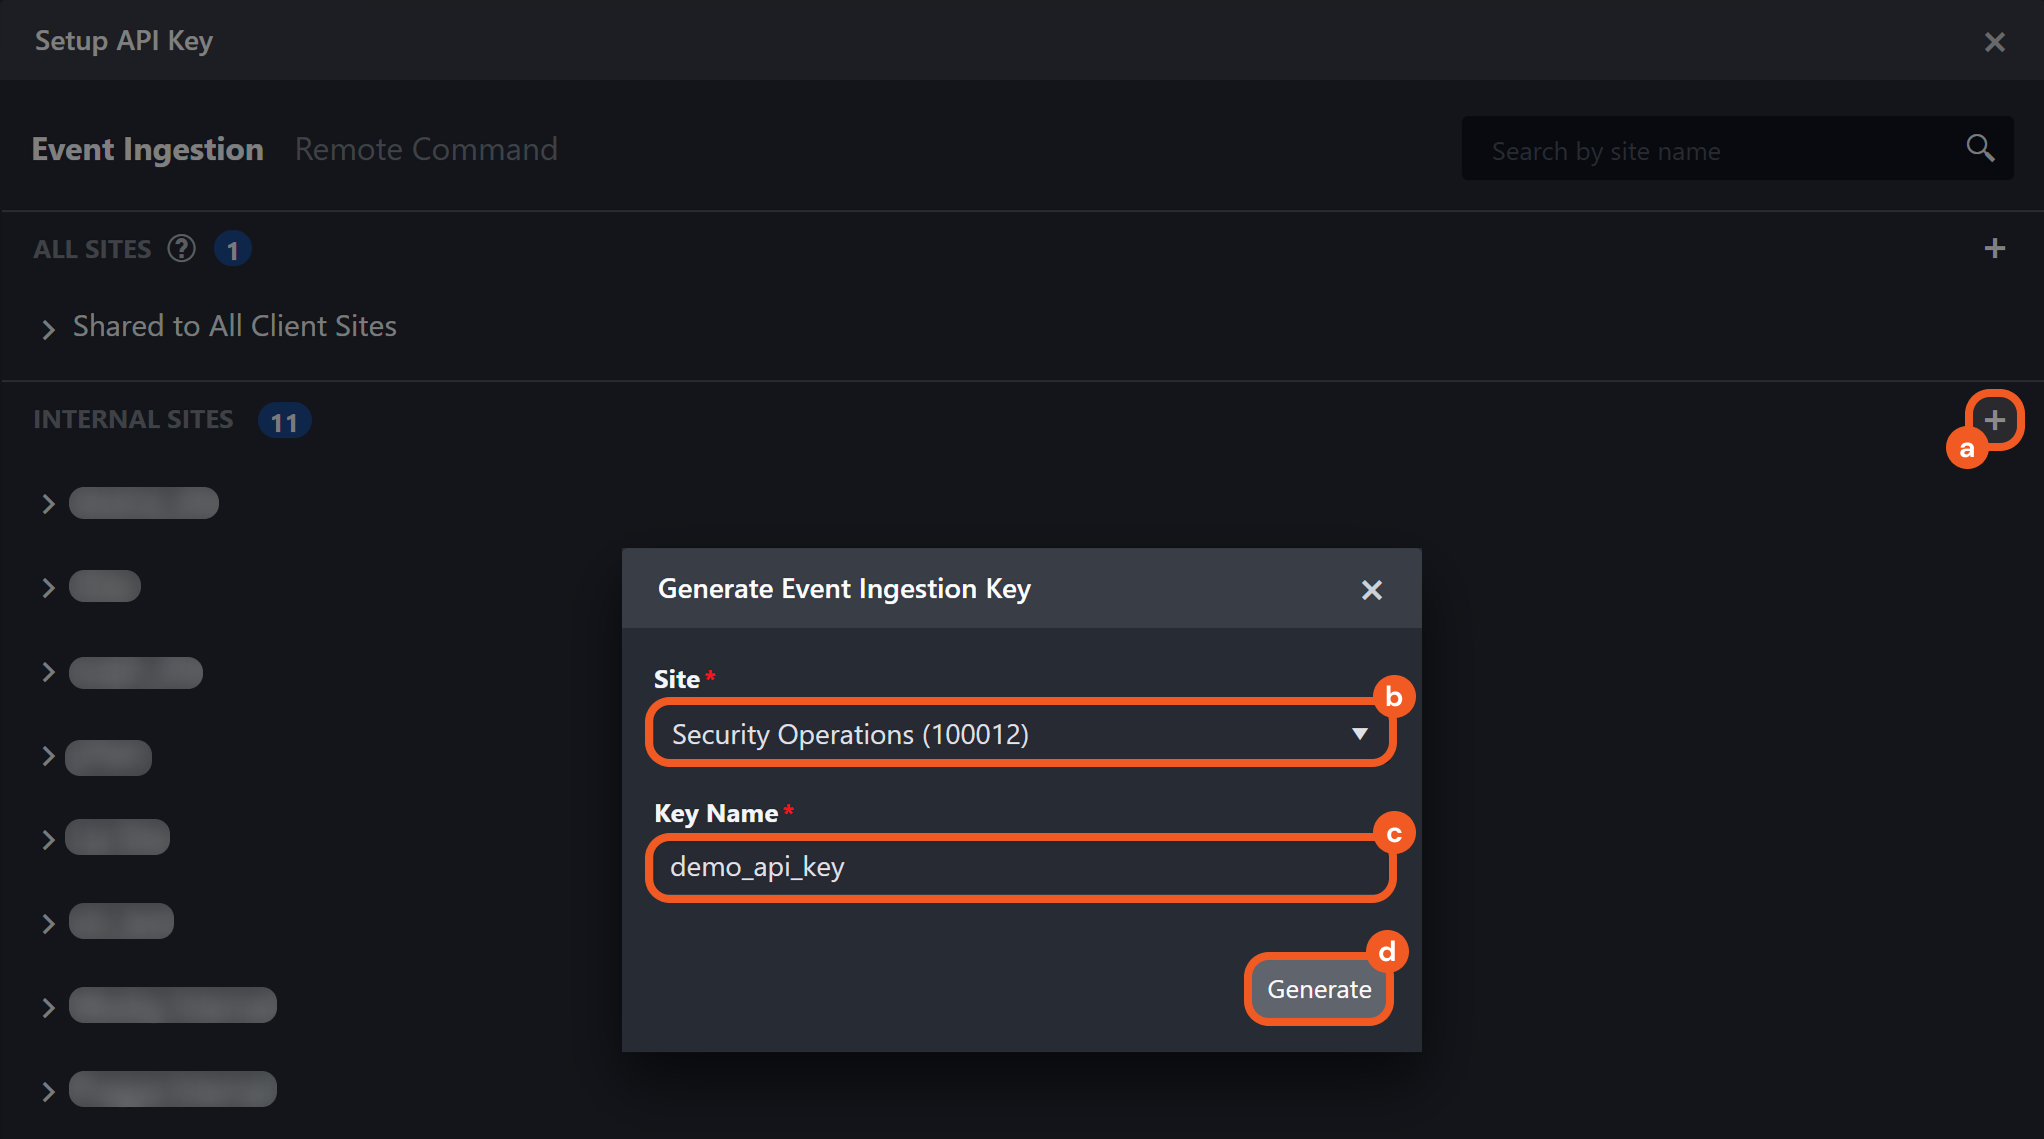
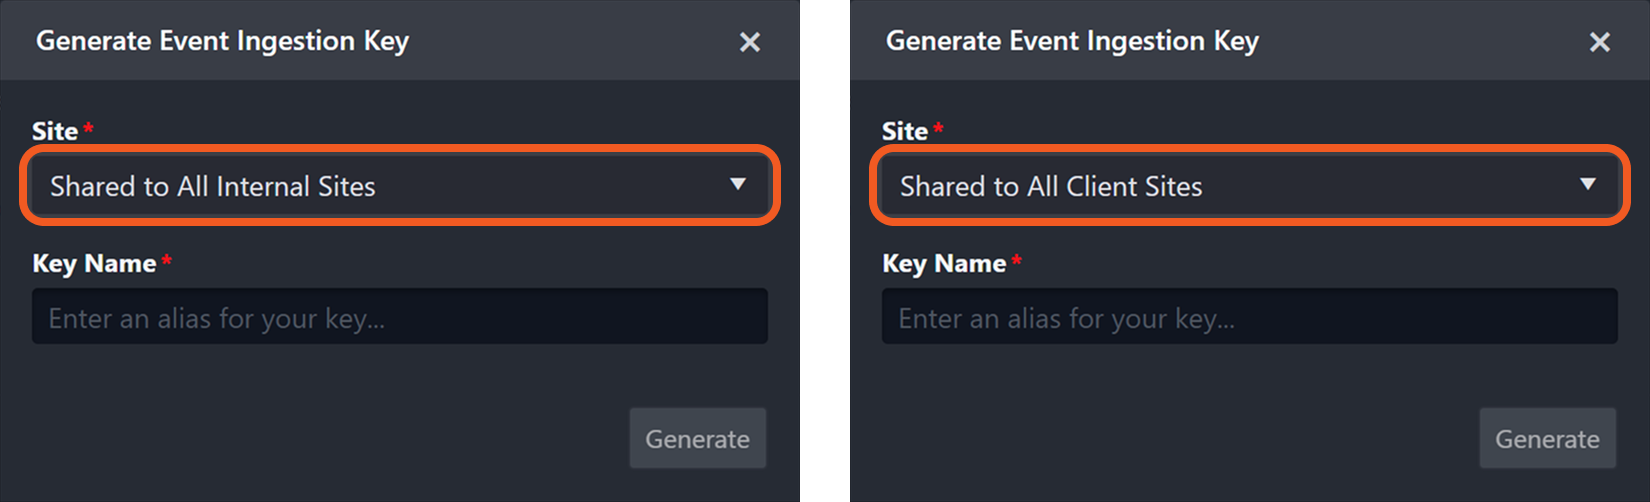
Click the + button in the INTERNAL SITES or CLIENT SITES section.
-
Select the Site to be used for the data ingestion job.
-
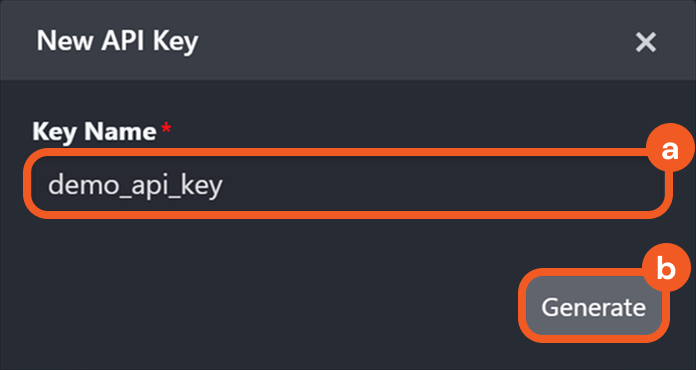
Enter a unique Key Name.
-
Click the Generate button.
-
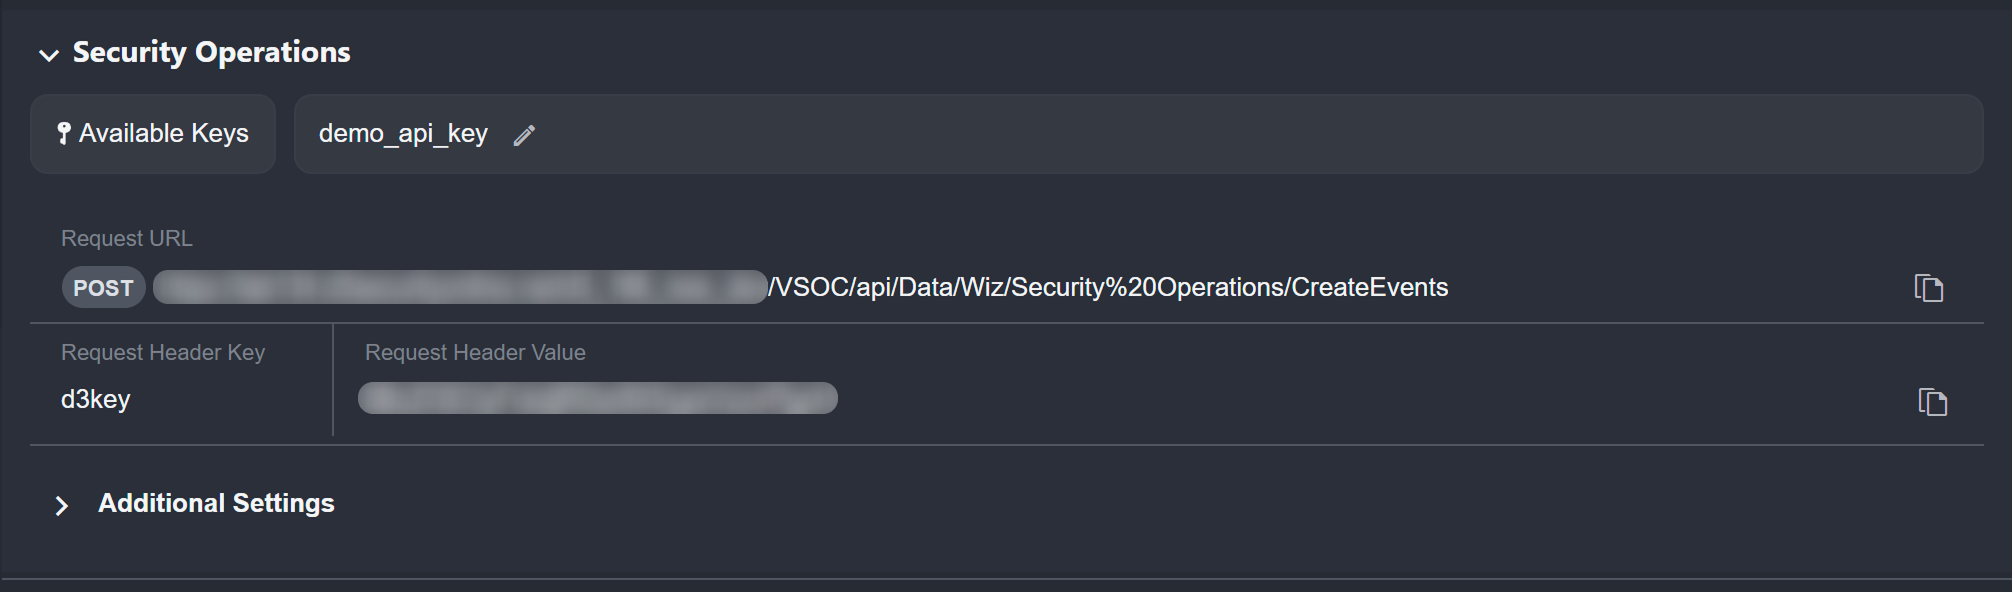
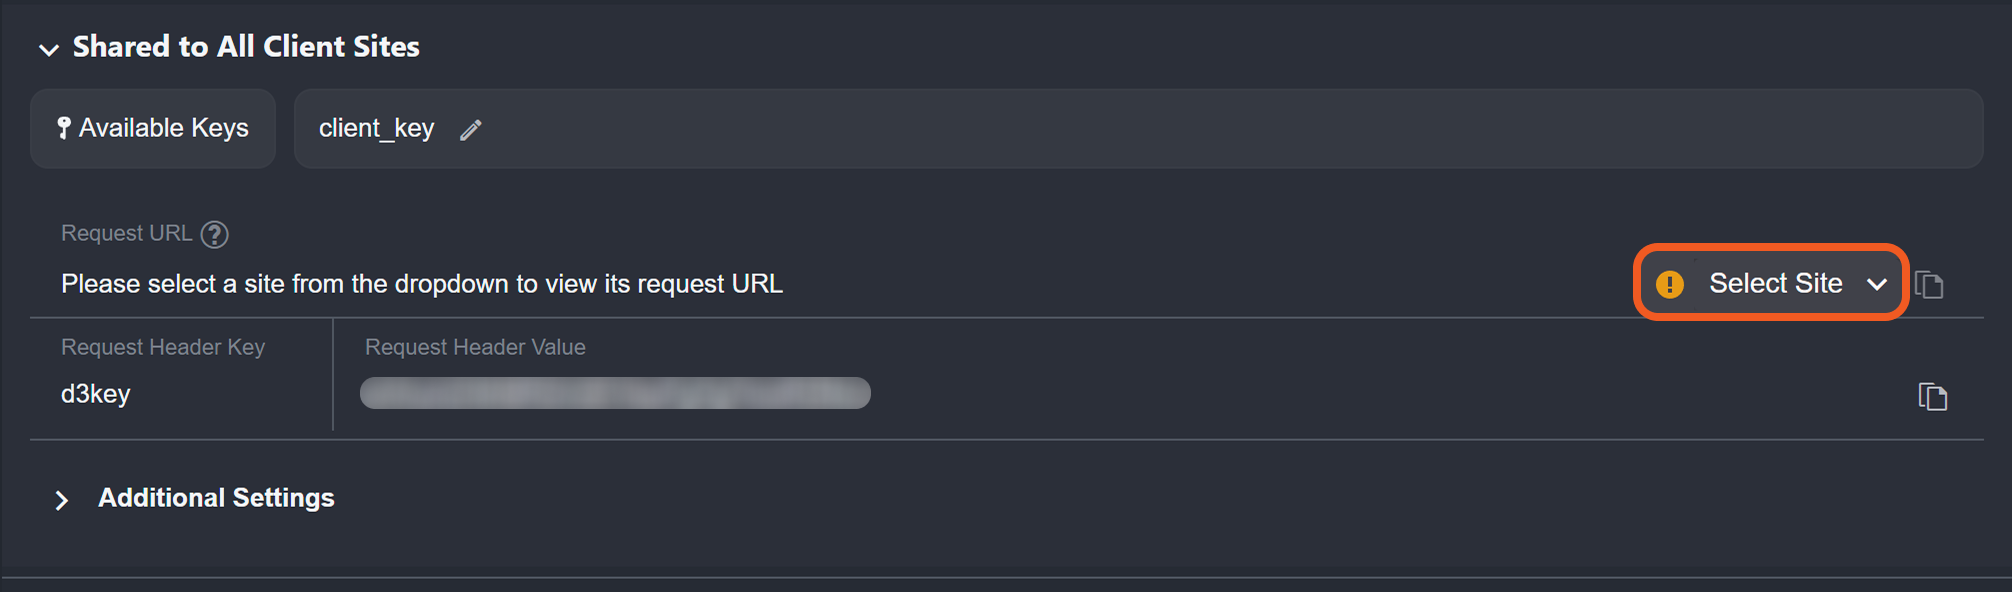
The user will see a display similar to the following:
READER NOTE
If users click the + button in the ALL SITES section, then select Shared to All Internal Sites or Shared to All Client Sites for the Site field, the API key will be shared with all corresponding sites. However, users must still select a specific site for data ingestion.
.png?cb=dd3a251a0e2c8f4f7c67be49f34b9687)
.png?cb=3db1708f4160c895867521e54be929ad)
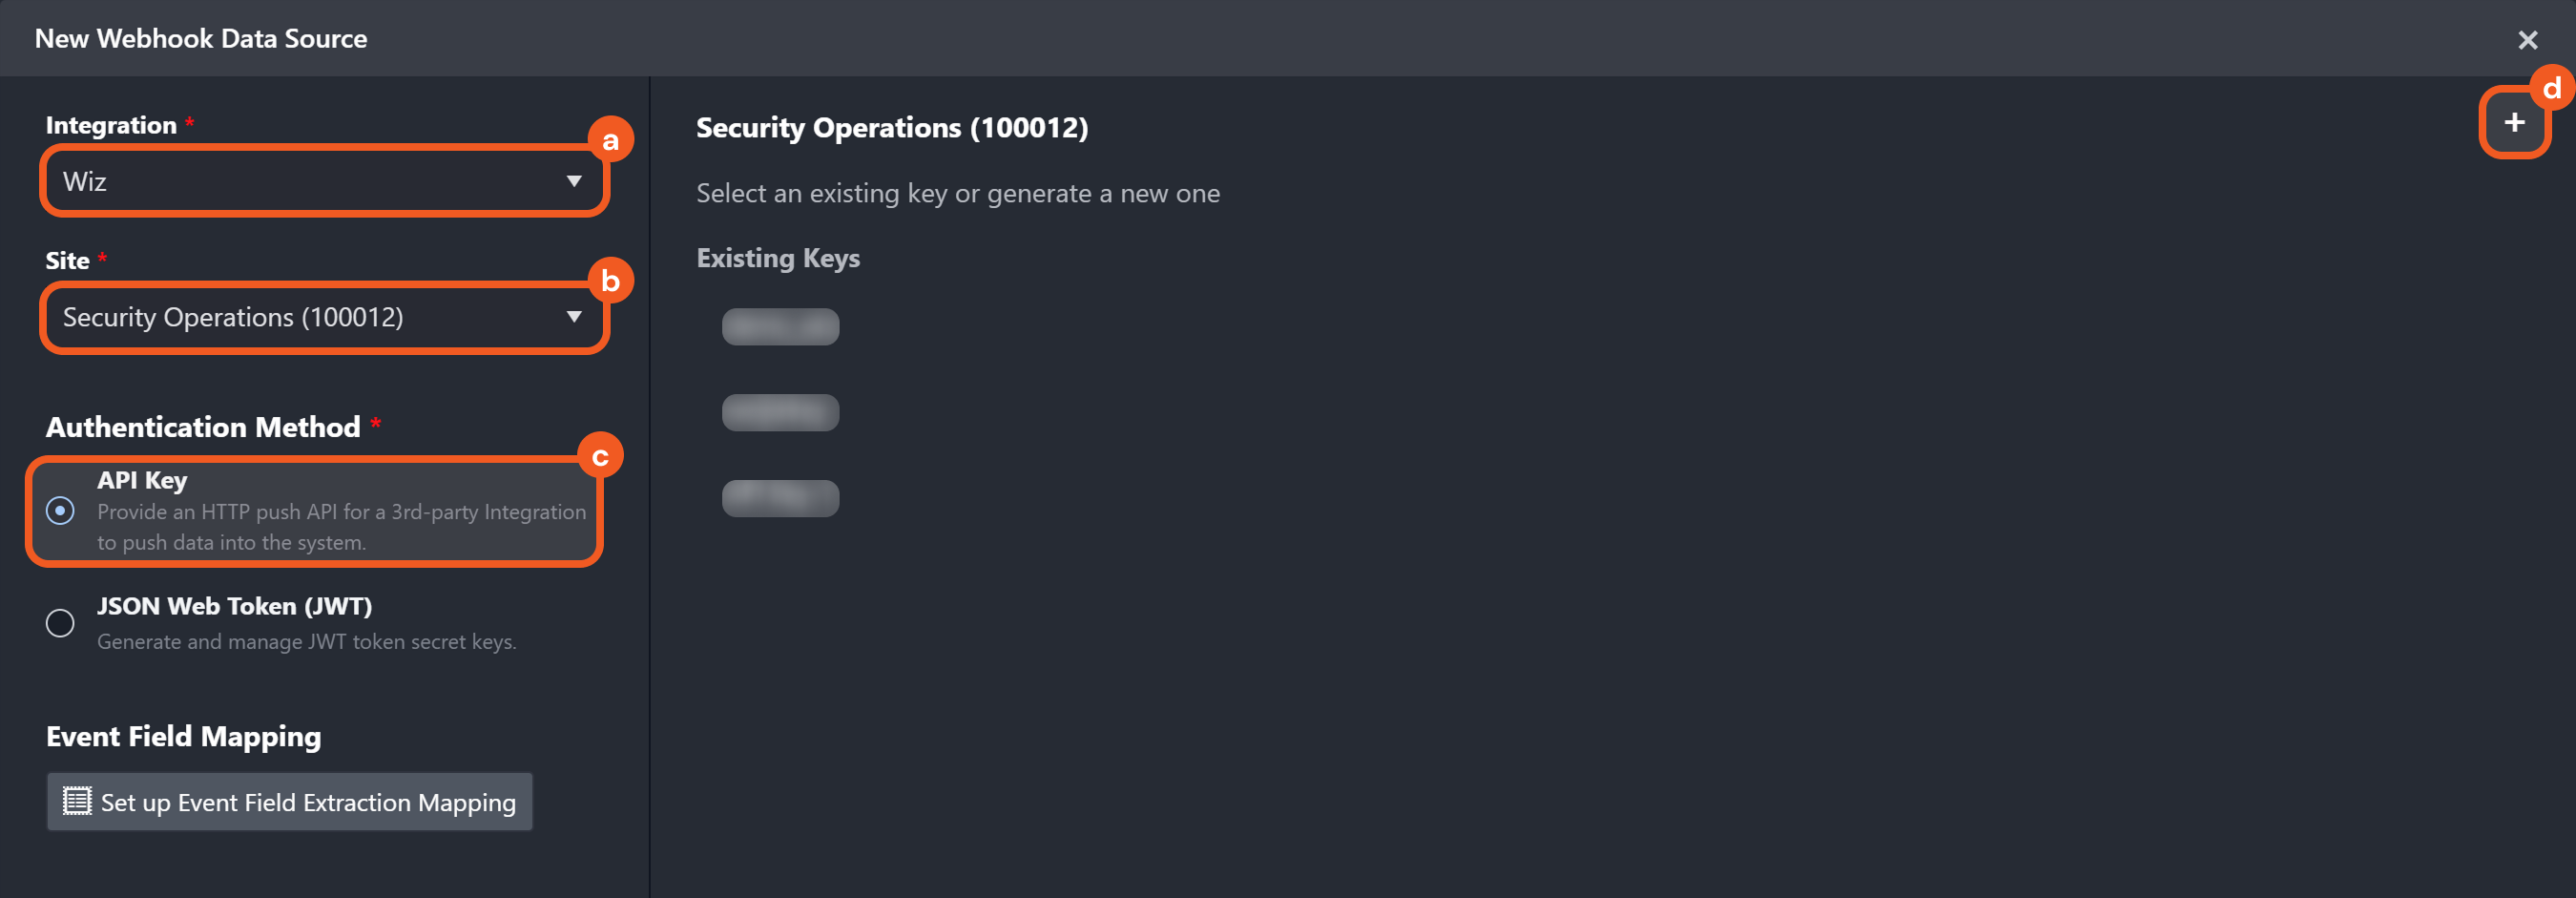
Setting Up API Keys from the Data Ingestion Module
-
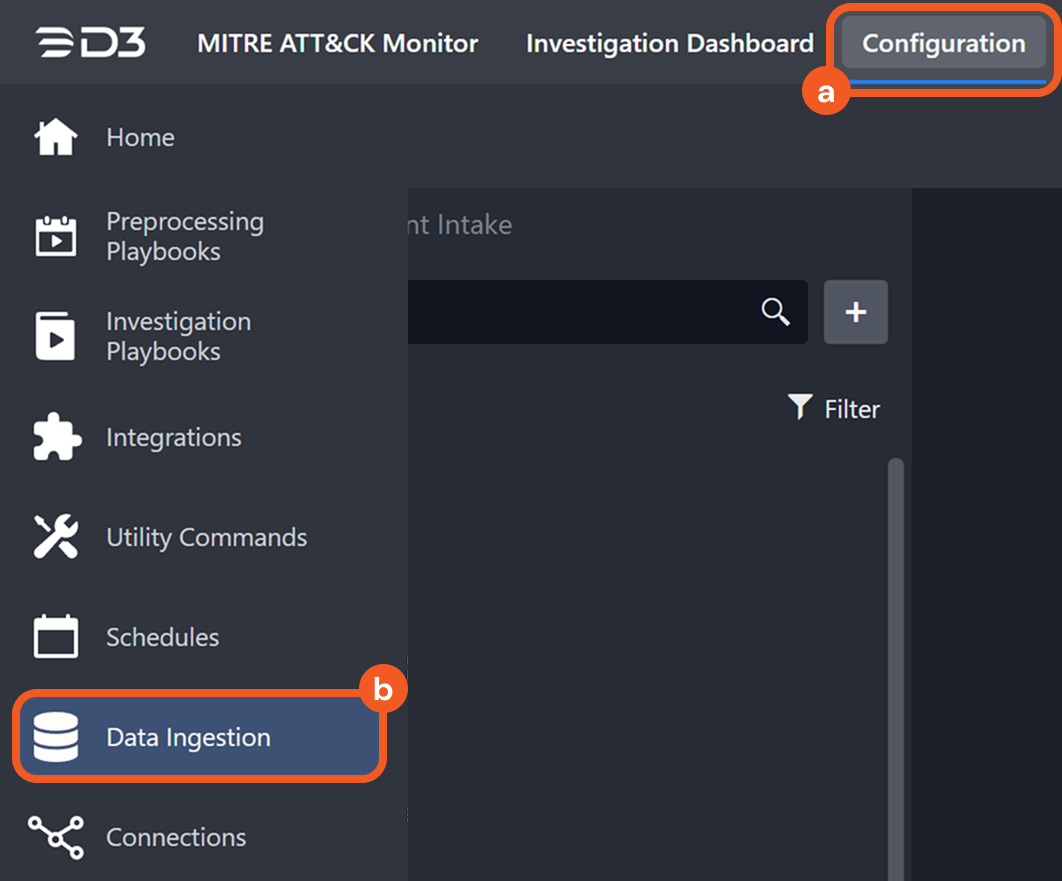
Navigate to the Configuration module, then click the Data Ingestion sub-module.
-
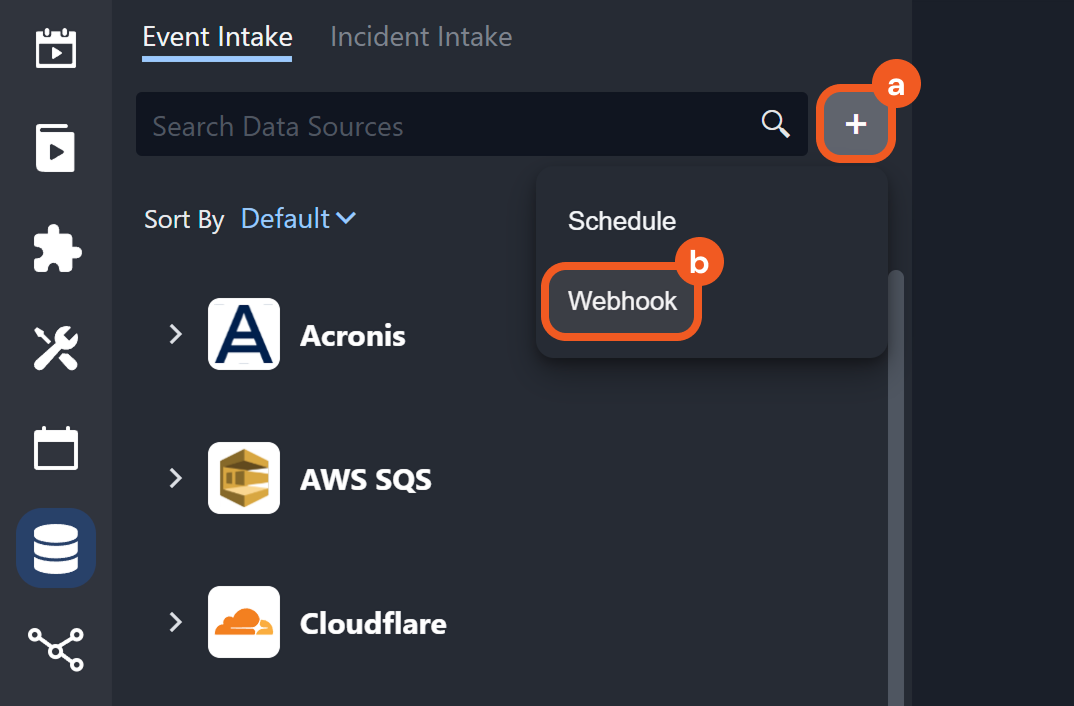
Click the + button, then select the Webhook option.
-
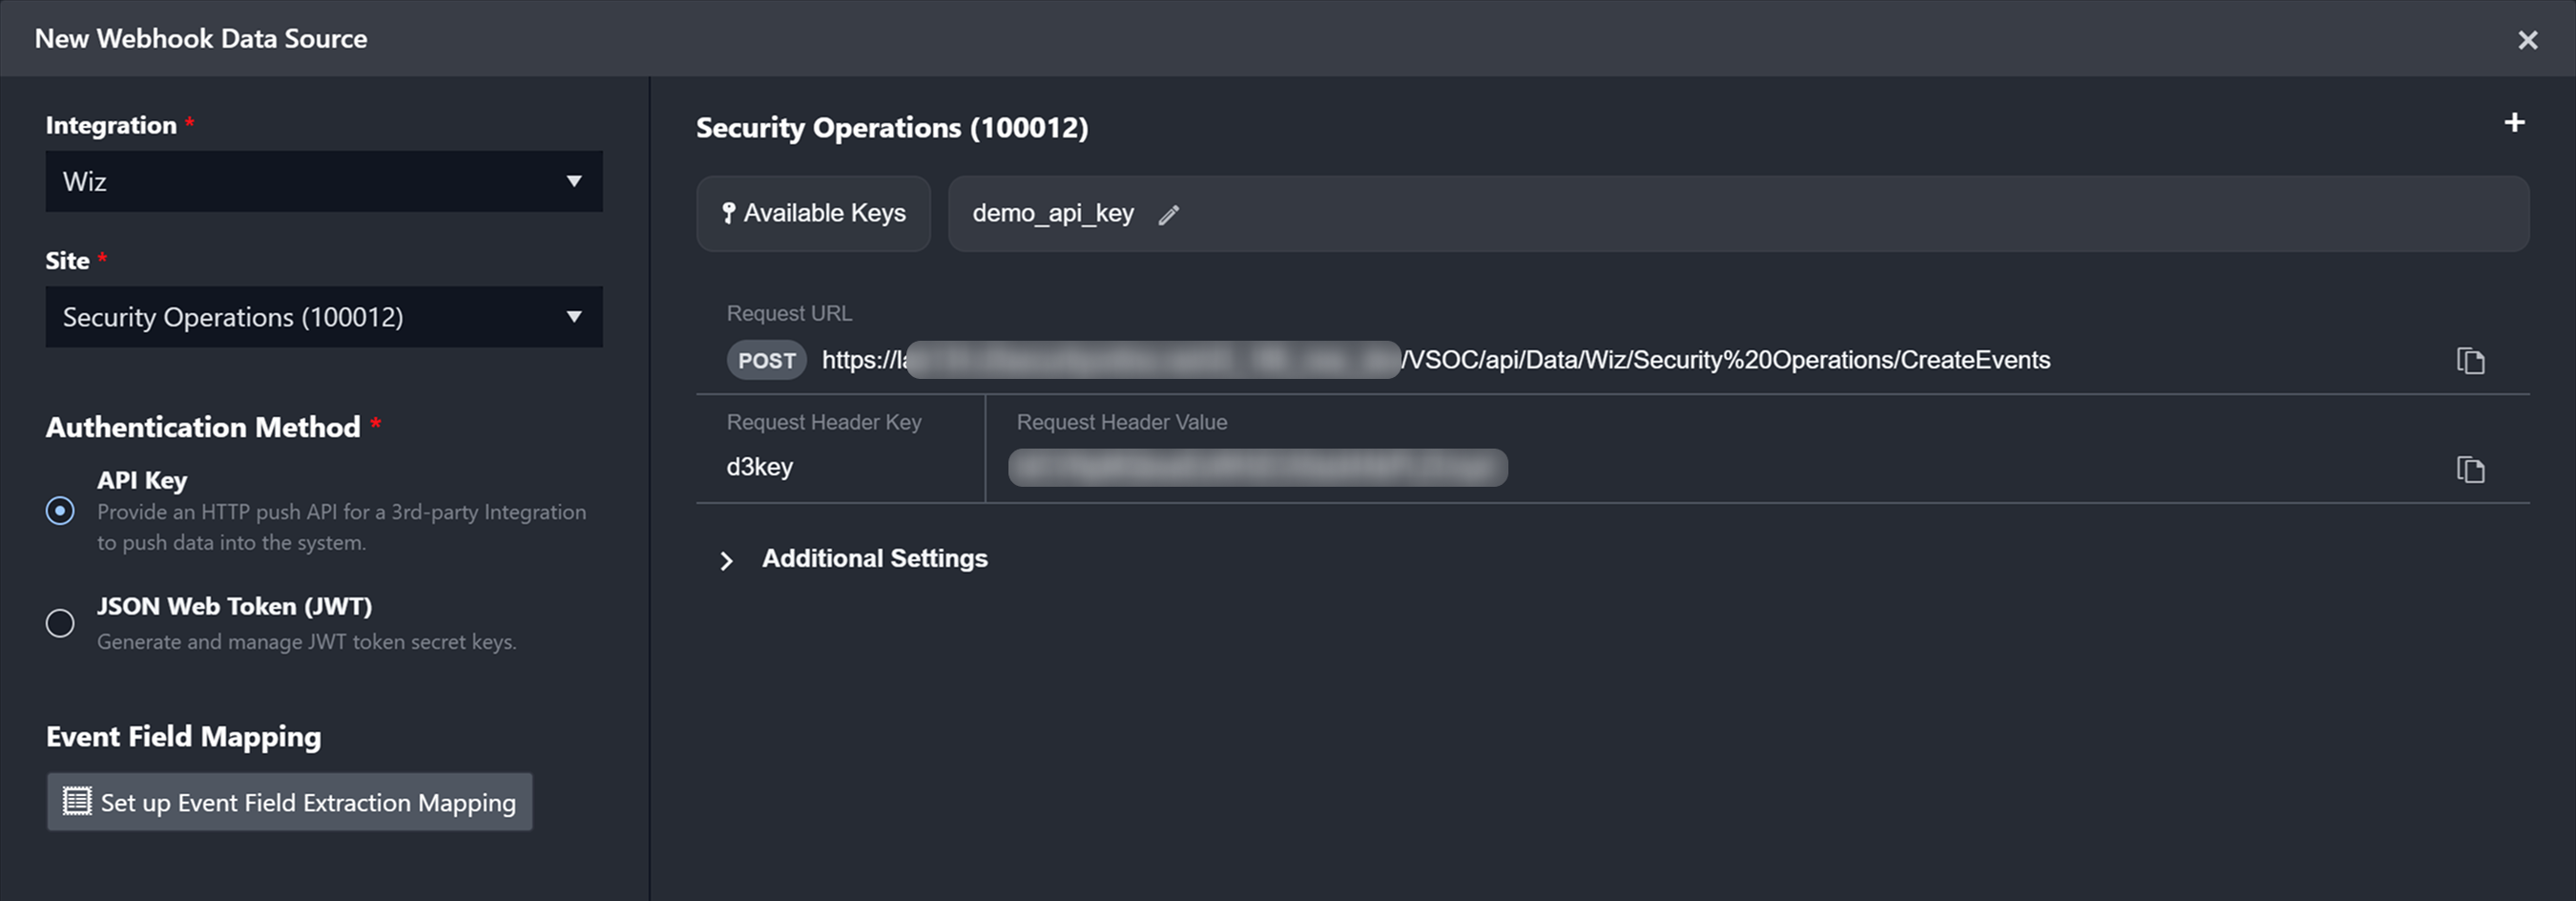
Configure the webhook data source.
-
Select the integration to use, such as Wiz.
-
Choose the site into which the data will be ingested.
-
Select the API Key checkbox in the Authentication Method section.
-
Click the + button to add a new API key.
-
-
Enter a unique Key Name, then click the Generate button.
The user will see a display similar to the following:
Setting Up API Keys for Integration Commands
-
Establish a connection between D3 vSOC and the integration. This connection must be active lab134.d3securityonline.net_16_8_staging_VSOC_LifeServer.aspx_div=dashboard&Open=Other&t2=39b6e63bd02126e691bf71ee65fc0c32d0910fc4006fef8d76409f5746341a9b (18) 3-20241205-214403.png and display a lab134.d3securityonline.net_16_8_staging_VSOC_LifeServer.aspx_div=dashboard&Open=Other&t2=39b6e63bd02126e691bf71ee65fc0c32d0910fc4006fef8d76409f5746341a9b (18) 2-20241205-214316.png status, as shown in the image below.
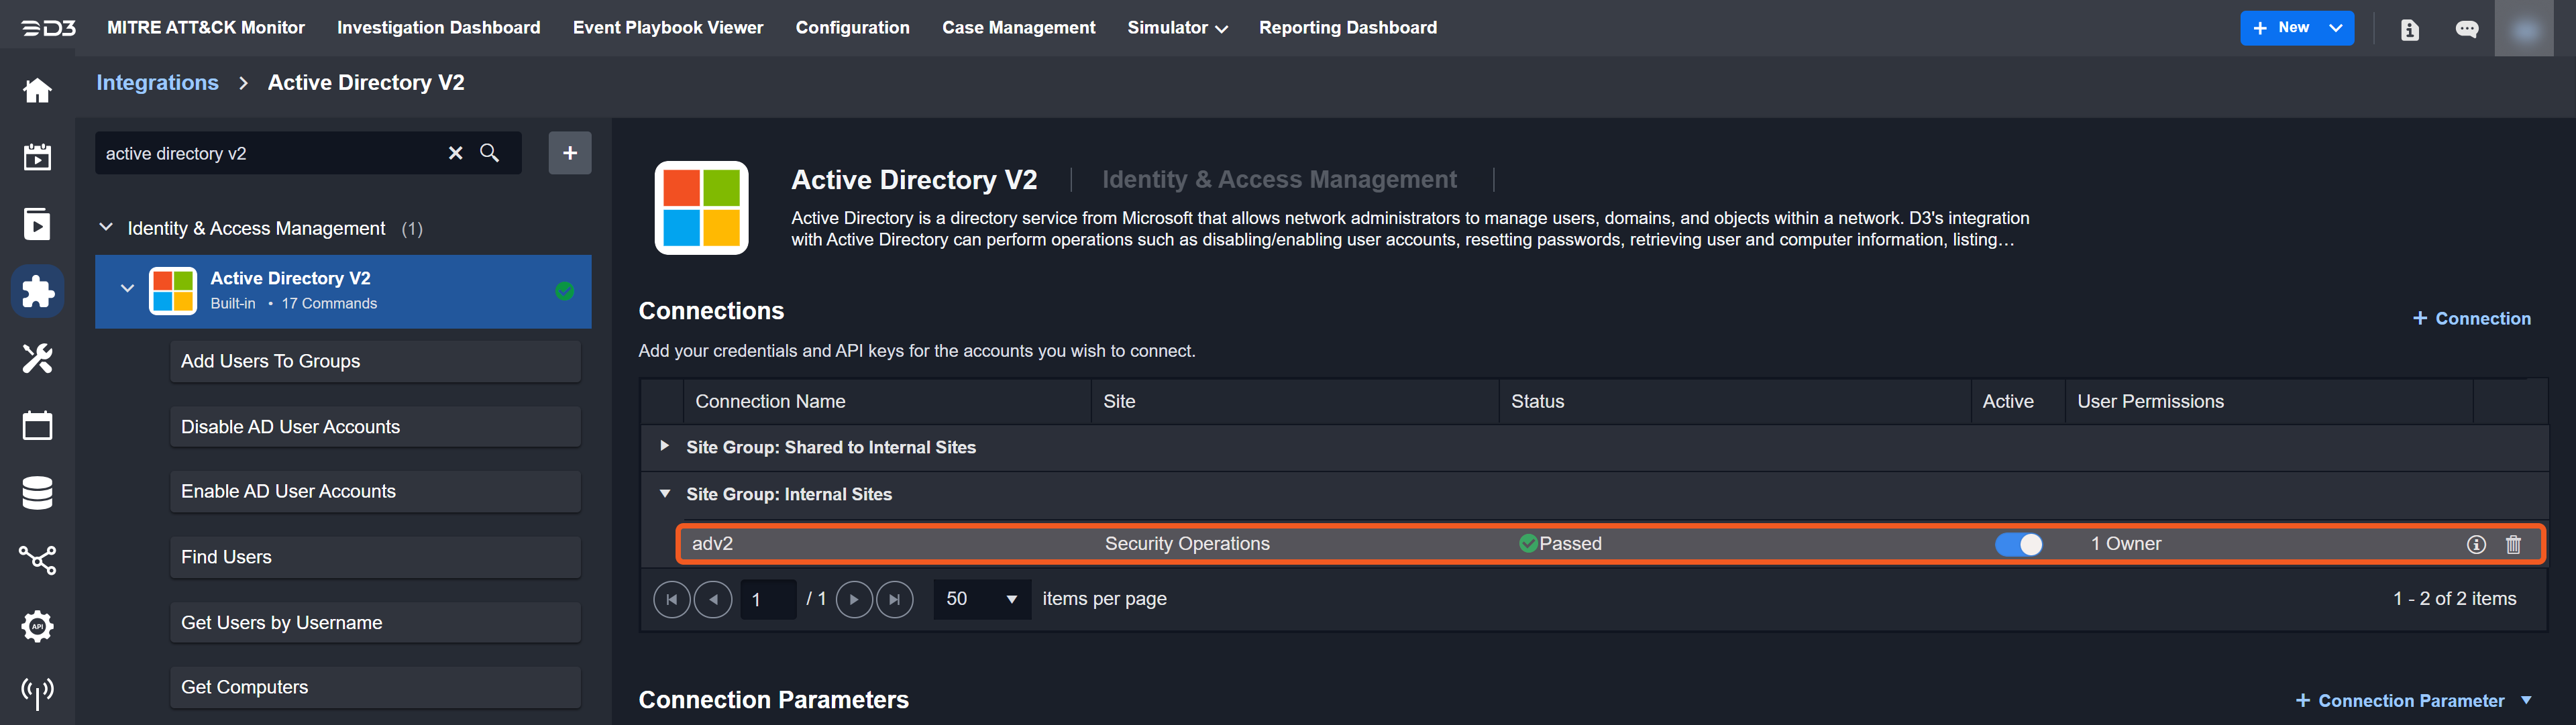
Ensure the connection is associated with a specific site. The connection in the screenshot is linked to the Security Operations site.
-
Select the desired integration command.
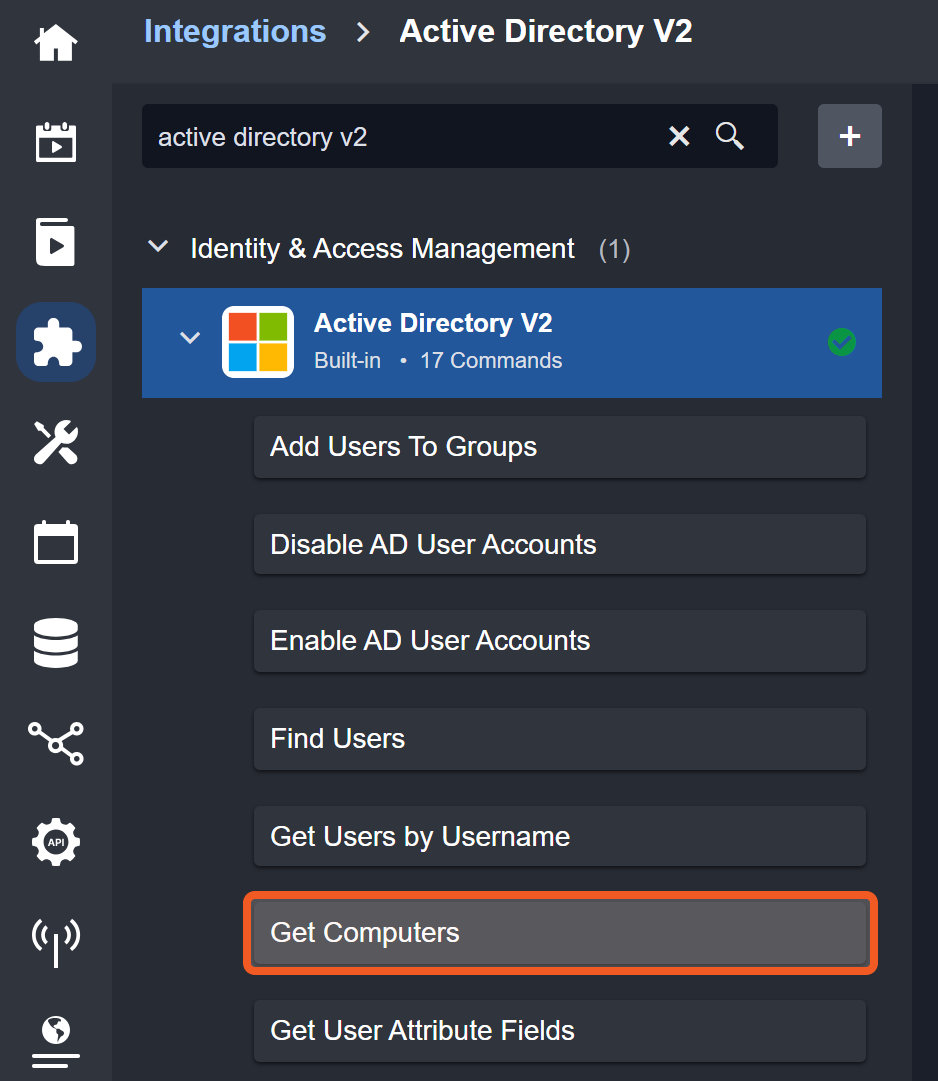
For demonstration purposes, the Get Computers command will be used.
-
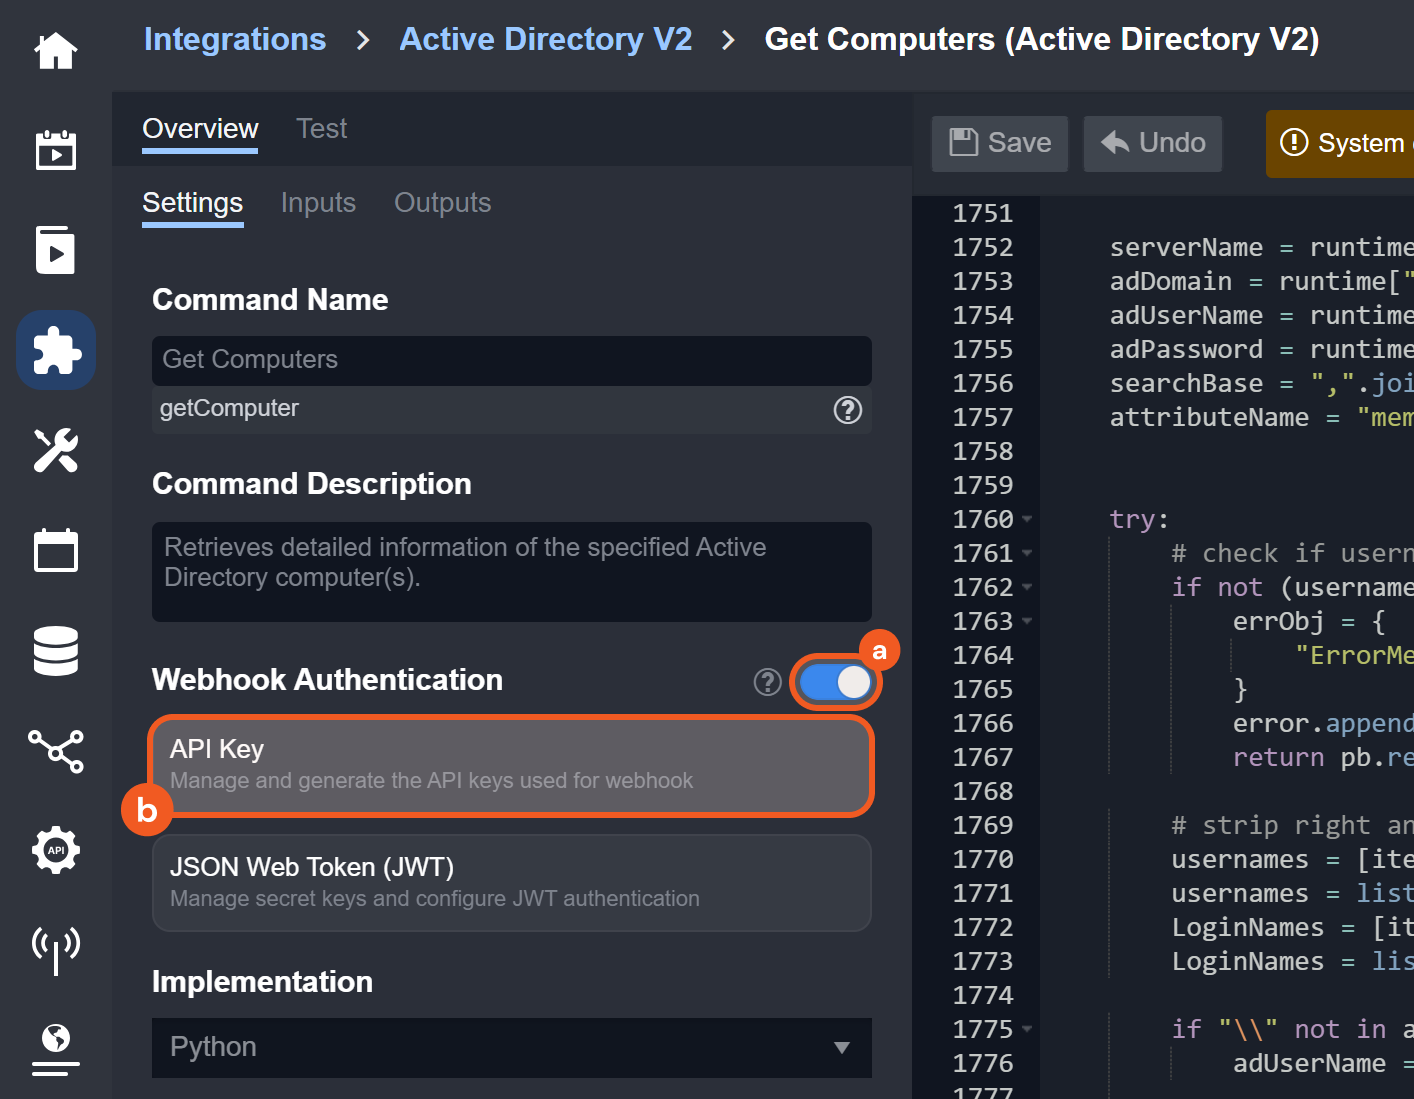
Ensure that Webhook Authentication is toggled on, then click the the API Key button.
%203-20241205-214403.png?cb=9884ac6373f192530b11b5be884843b7)
%202-20241205-214316.png?cb=16e9977f520a4cf7e34f048fdc71f286)
-
On:
-
Off:
-
Set up the API key within the Generate Remote Command Key popup.
.png?cb=3f9497f25ee6c5f5dd1cab3e2a1f16e4)
-
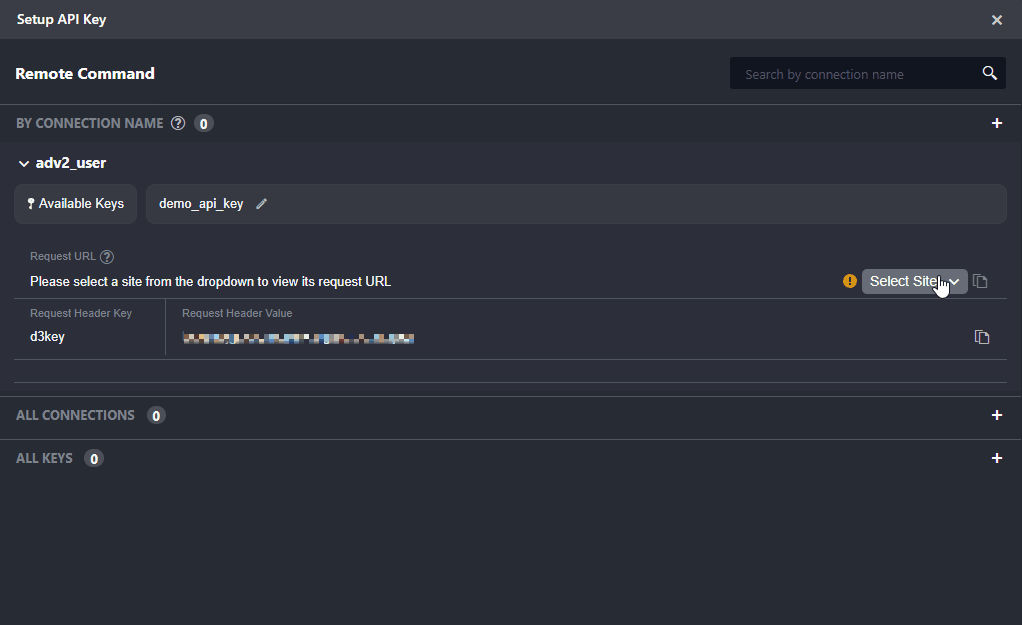
Click the + button within the Setup API Key popup.
-
Select the connection created from step 1. The connection should have the name of the site it is linked to in parentheses.
-
Enter a unique Key Name.
-
Click the Generate button.
-
The user will see a display similar to the following:
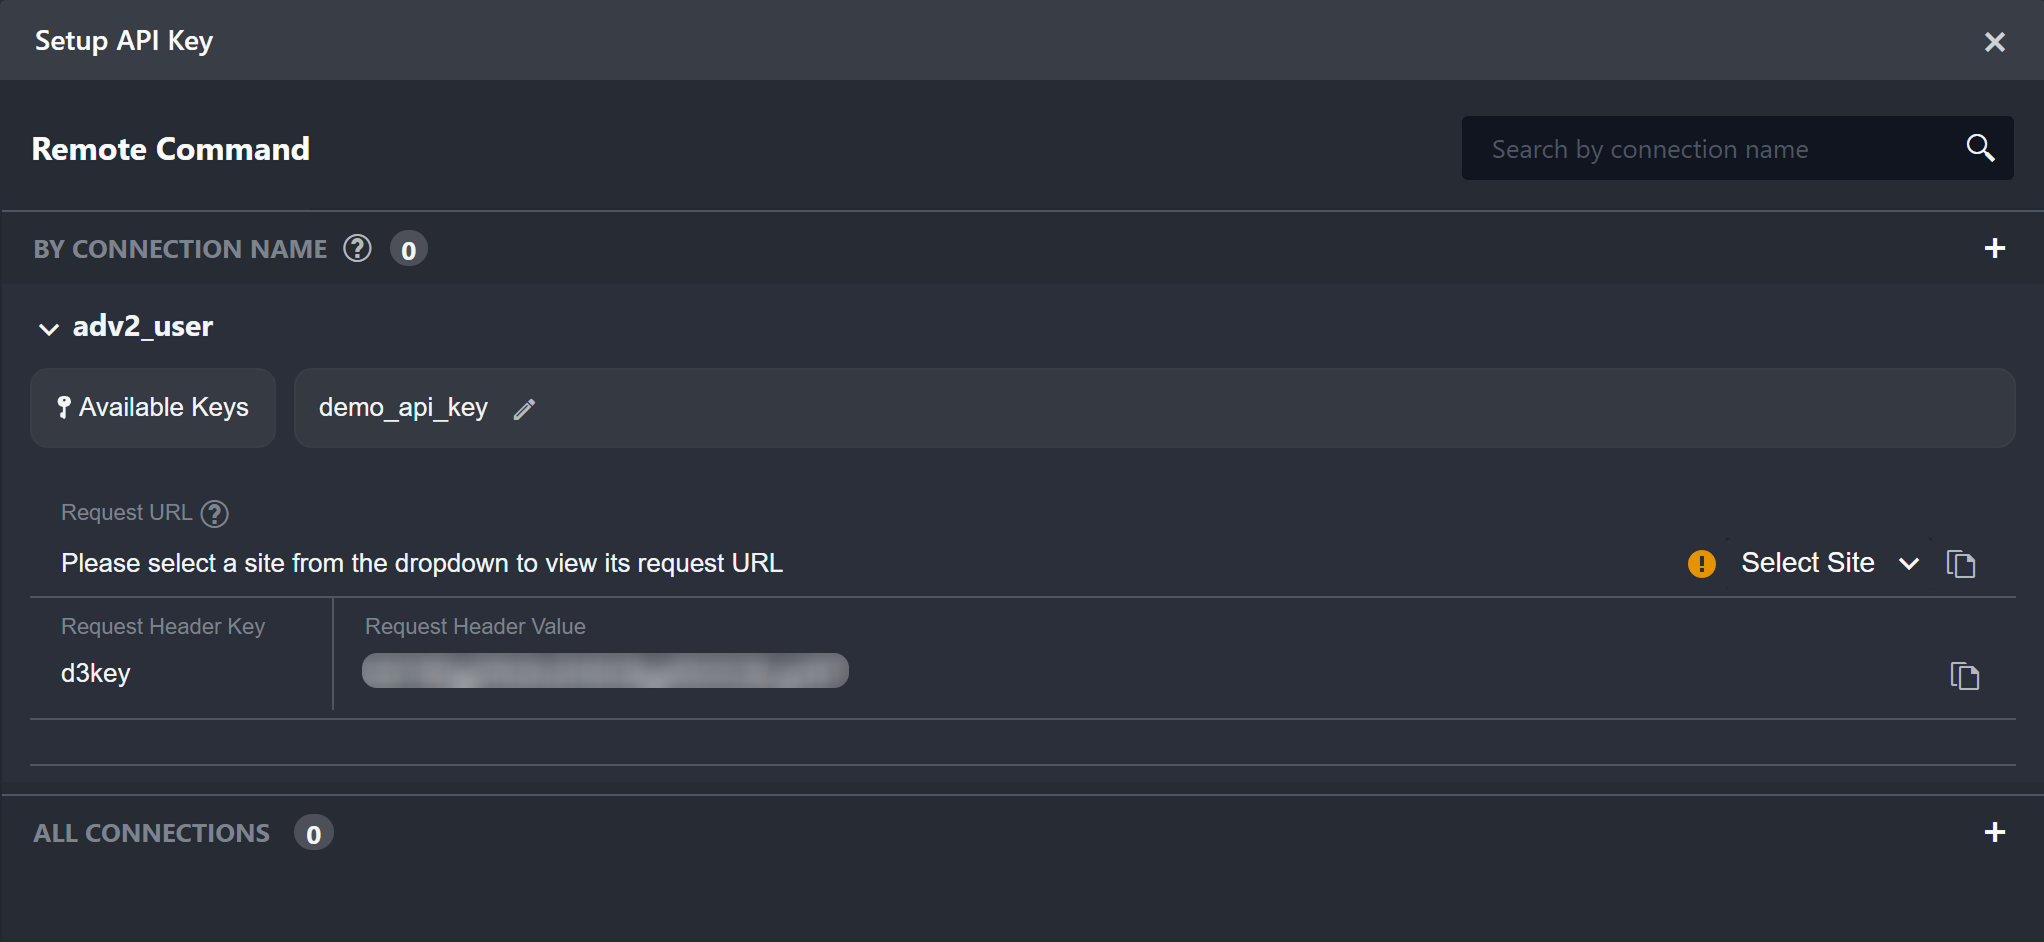
Users must select a site to display and copy the API request URL.
READER NOTE
If users selected a connection that was shared with all internal sites, then they will not see the Select Site dropdown.
.png?cb=be8c1be73c0d52c7eb2e4eff9e04a49f)
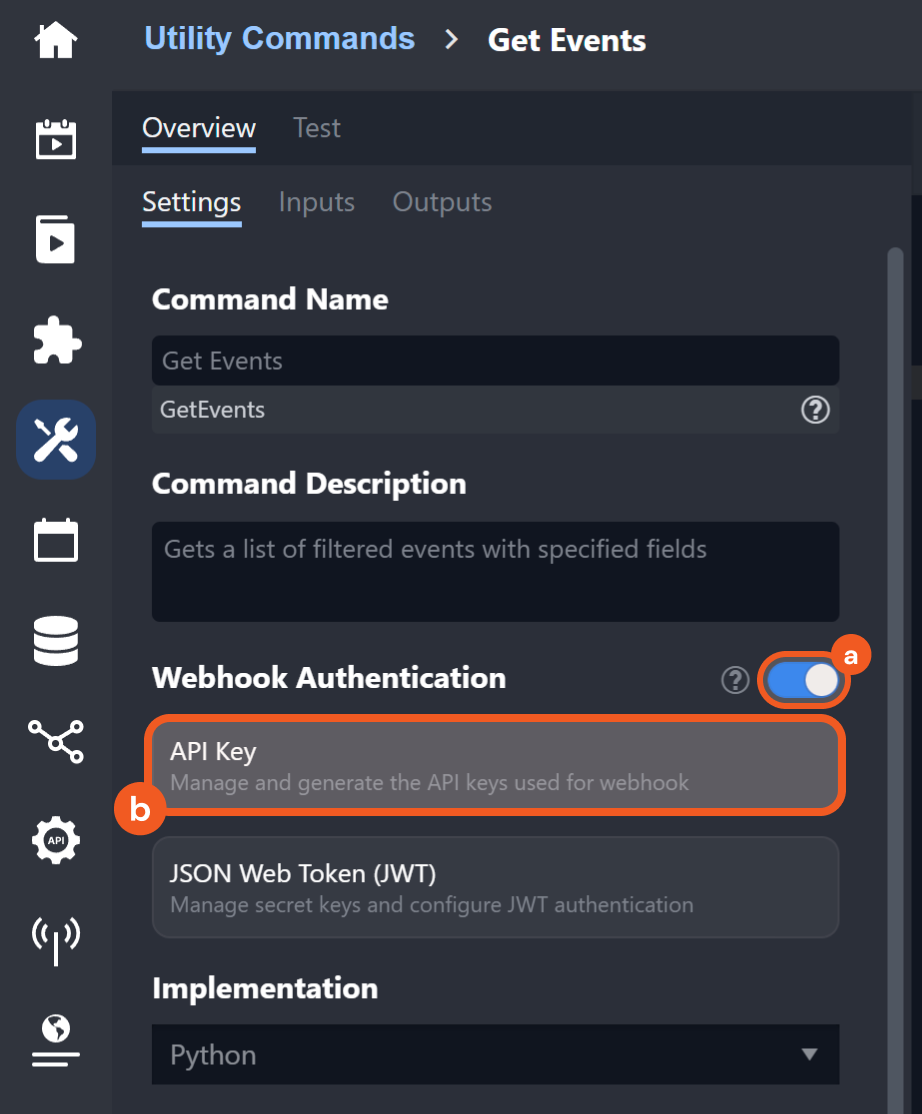
Setting Up API Keys for Utility Commands
-
Ensure that Webhook Authentication is toggled on, then click the API Key button.
-
On:
-
Off:
-
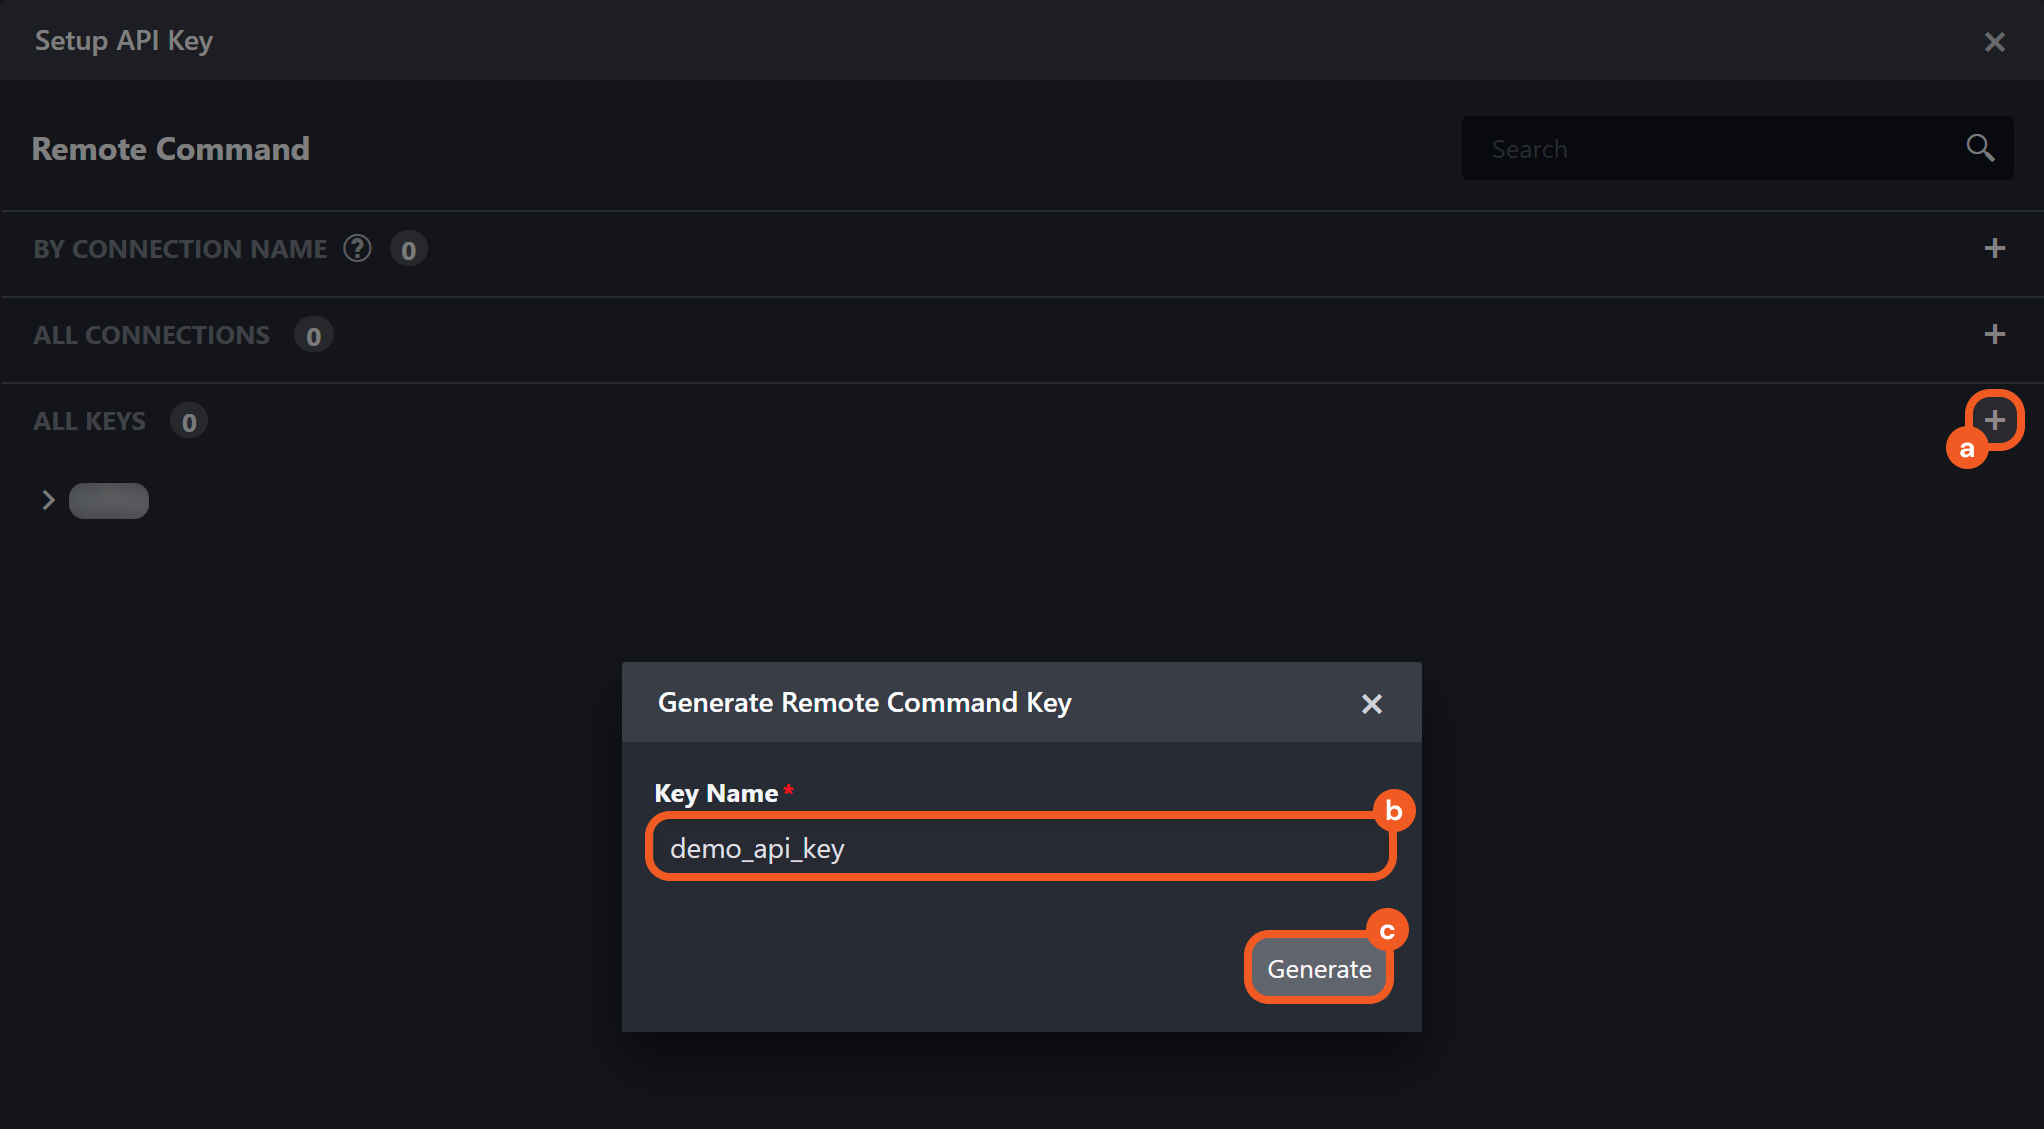
Set up the API Key in the Generate Remote Command Key pop-up.
-
Click the + button within the Setup API Key popup.
-
Enter a unique Key Name.
-
Click the Generate button.
-
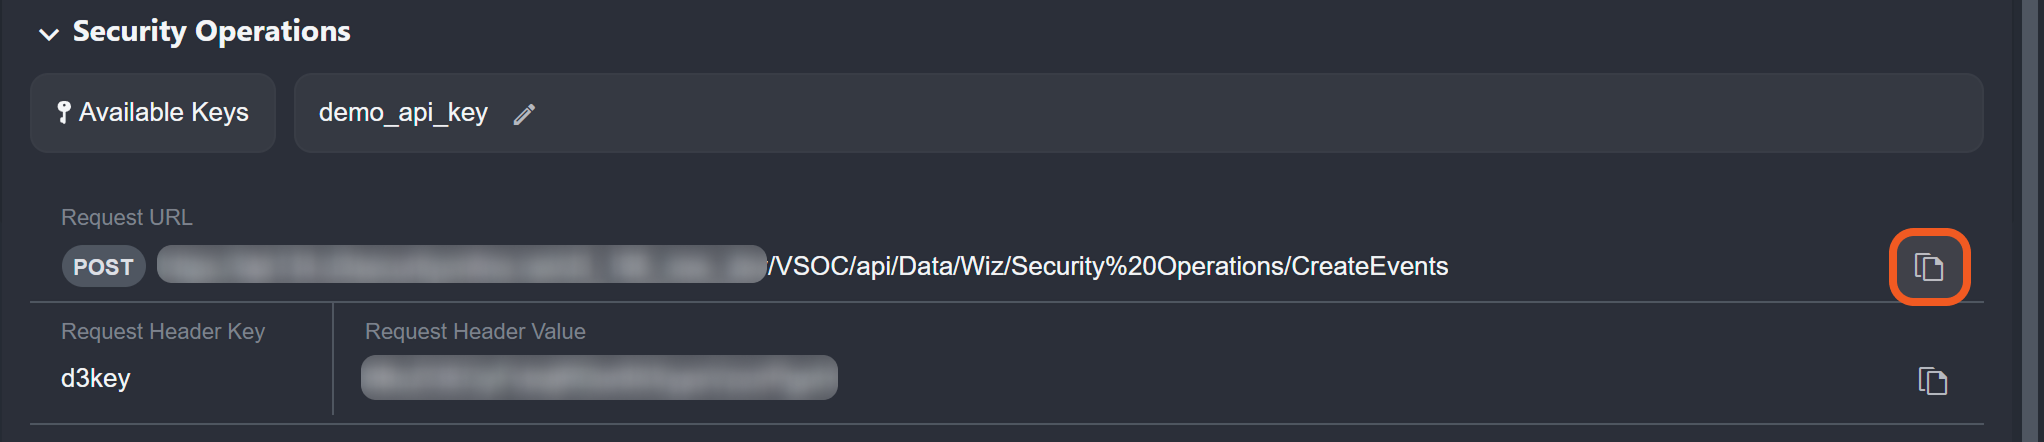
The user will see a display similar to the following:
.png?cb=01e3a256c8cb292391aac50d700026cd)
Sending an API Key-Authenticated Request: Data Ingestion
Users can send an API key-authenticated request to push data into D3 using the webhook data ingestion method to create D3 events.
READER NOTE
For clarity, the example below demonstrates how to send an API key-authenticated request using Postman. However, this approach is intended only for testing purposes. In typical use cases, webhook ingestion is handled automatically through external software or scripts.
-
Copy the request URL in vSOC.
-
In Postman, set the HTTP request method to POST, then paste the request URL in the designated field.

-
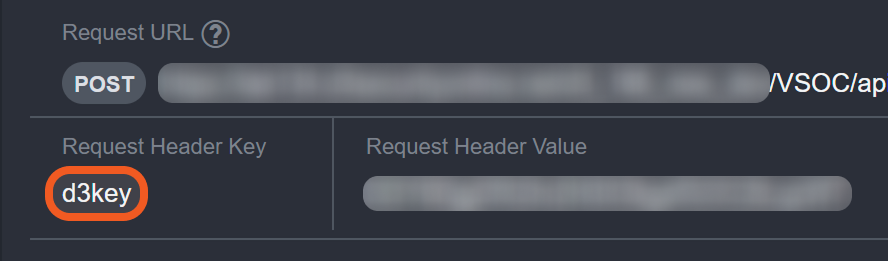
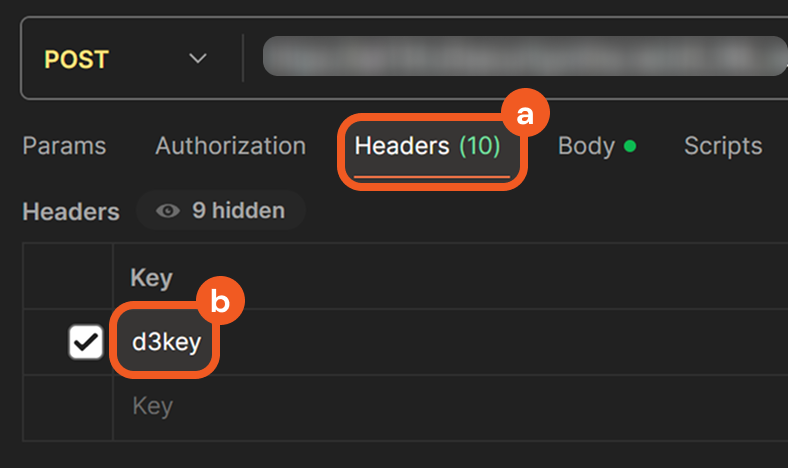
In vSOC, copy the request header key.
-
In Postman, click on the Headers tab, then paste the request header key under the Key column.
-
In vSOC, copy the request header value.

-
In Postman, paste the request header value under the Value column.

-
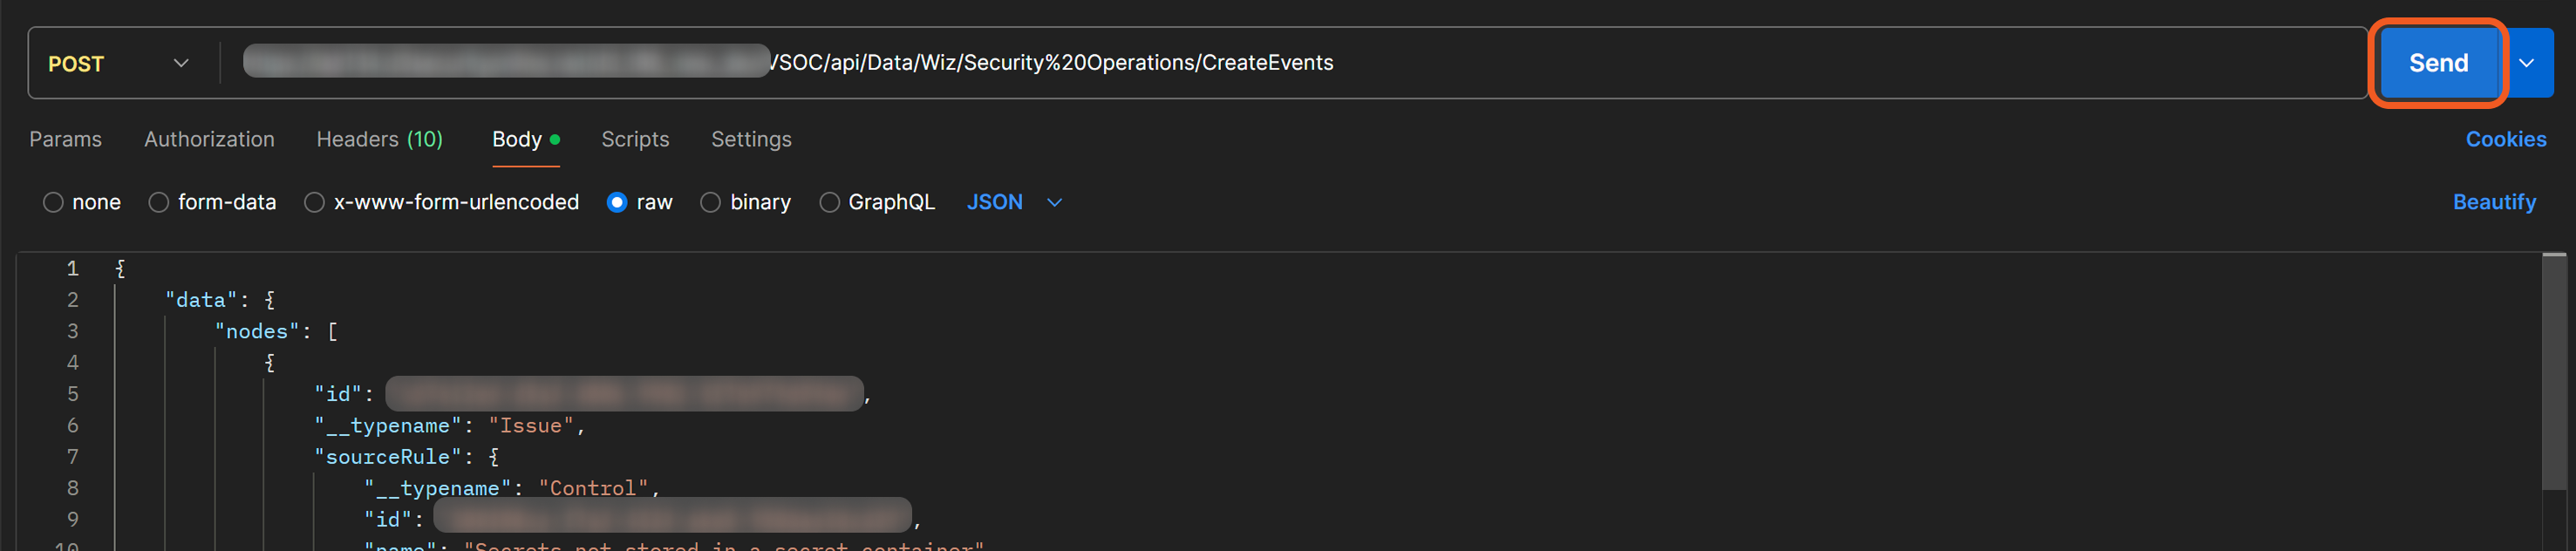
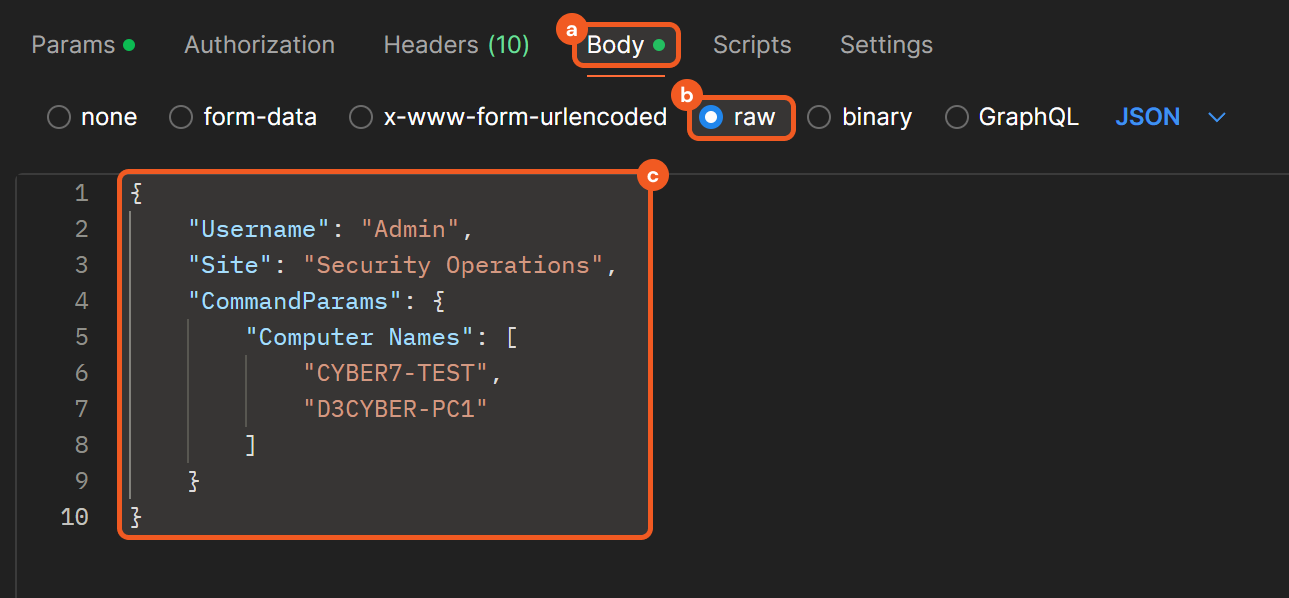
Select the Body tab, choose the raw option, then paste sample request body data.

READER NOTE*
The request body data is copied from the raw sample available under the Outputs > Raw Data tab of Wiz's Fetch Event command. Any D3 events created using this data are not real security events.
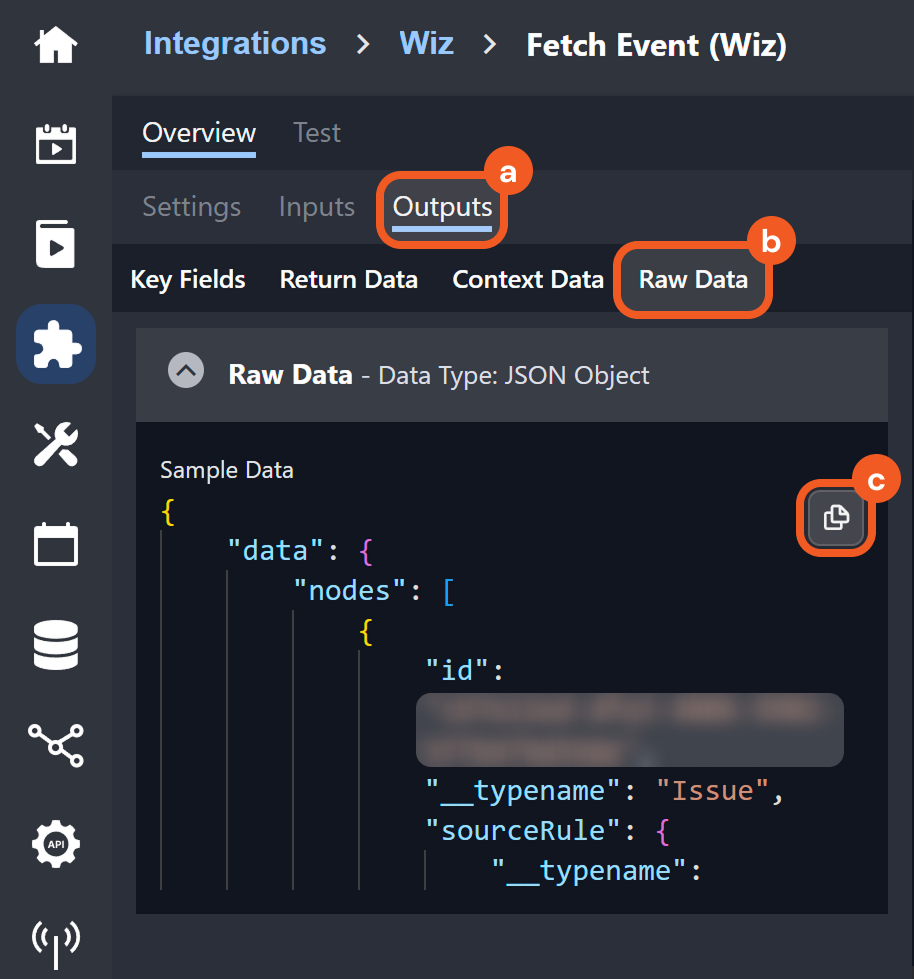
Users can treat this as a template for structuring data pushed into D3 to create D3 events, specifically for Wiz's Fetch Event command. For example, this demonstrates that the main event JSON path is data.nodes, which means that event data from Wiz should be within that path.
-
Click the Send button to send the request.
RESULT
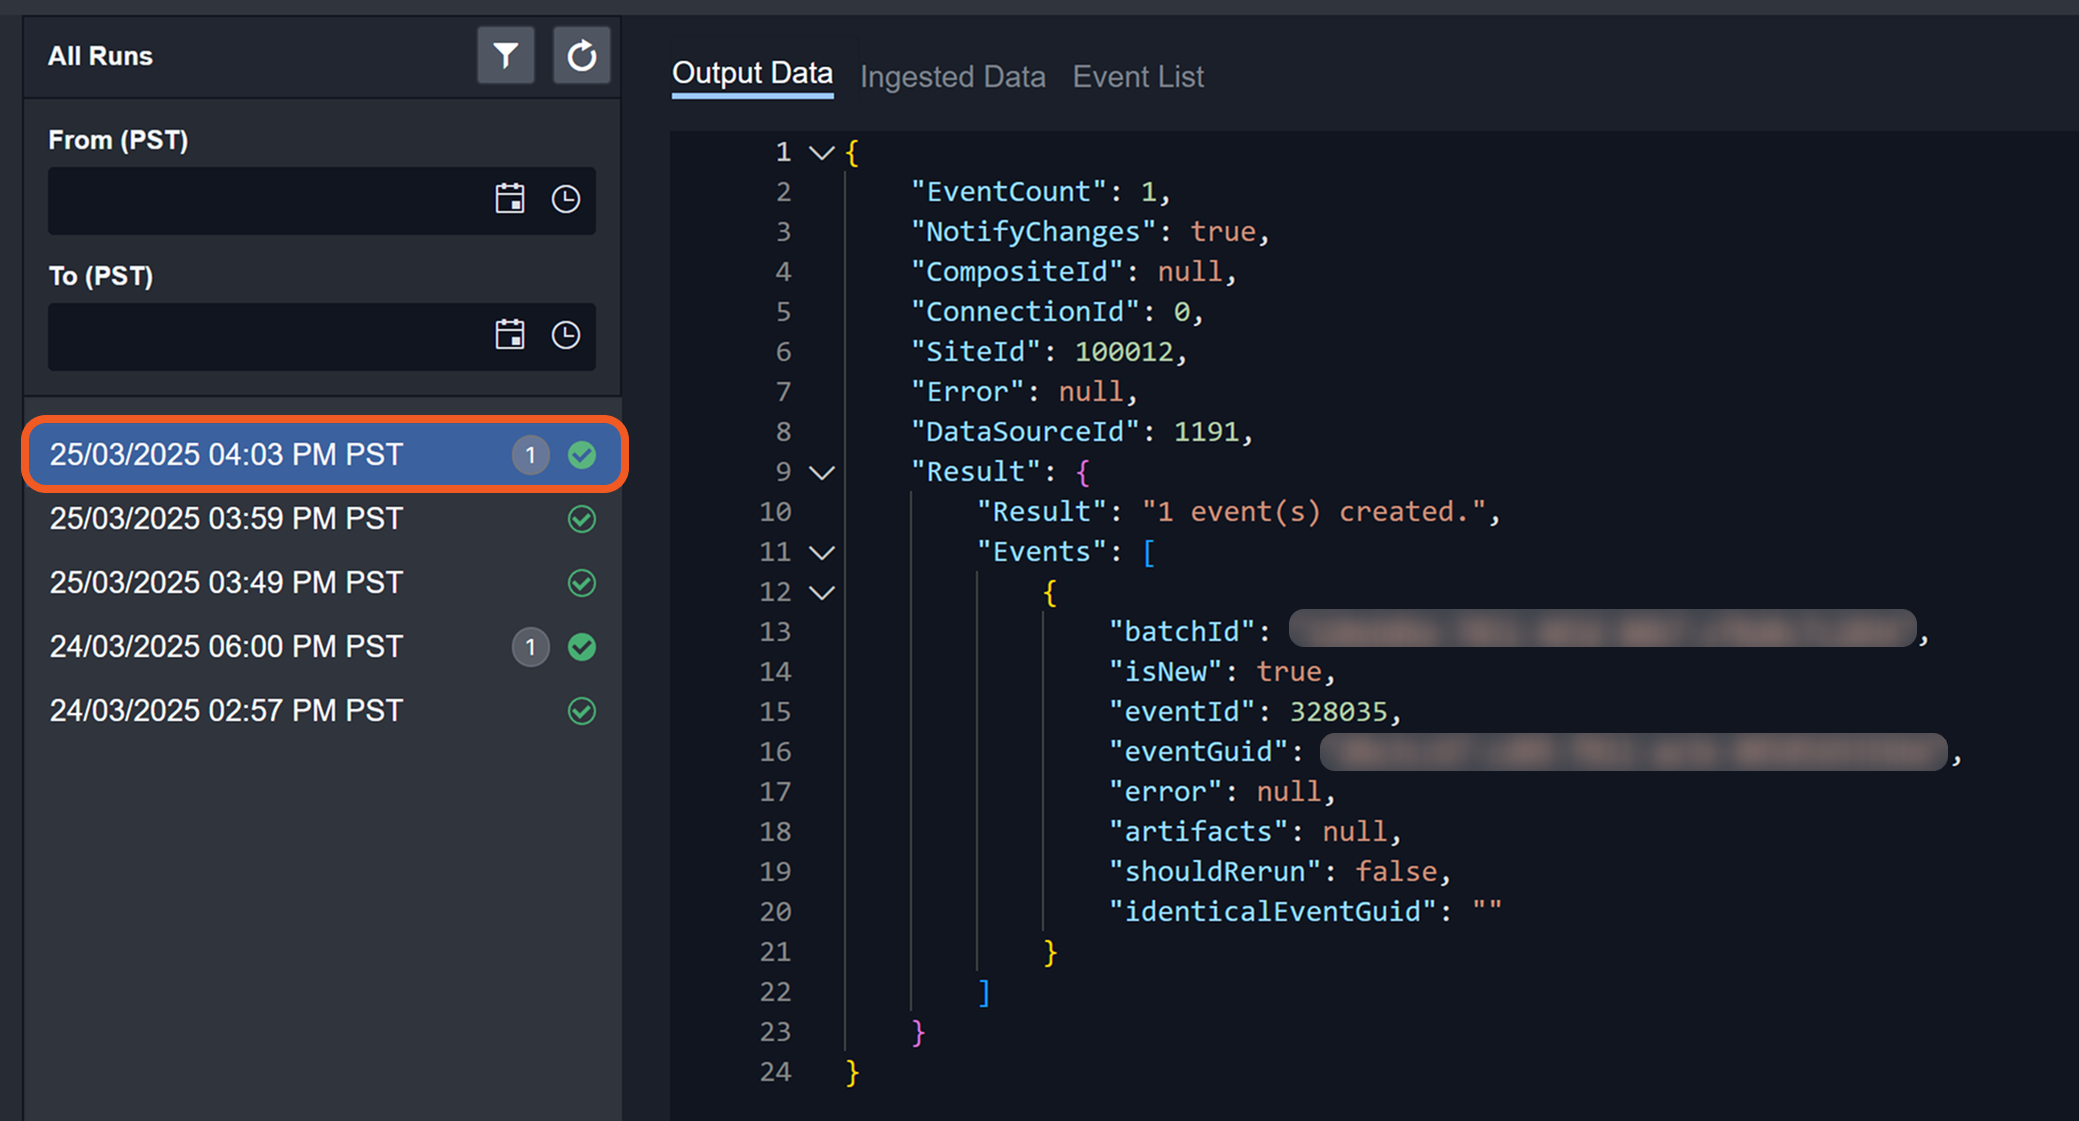
If the request is successful and the conditions for event creation are met, the ingested event can be viewed in D3 by navigating to Configuration > Data Ingestion and selecting the relevant webhook data ingestion job card (i.e., Webhook | Site: Security Operations within the Wiz accordion).
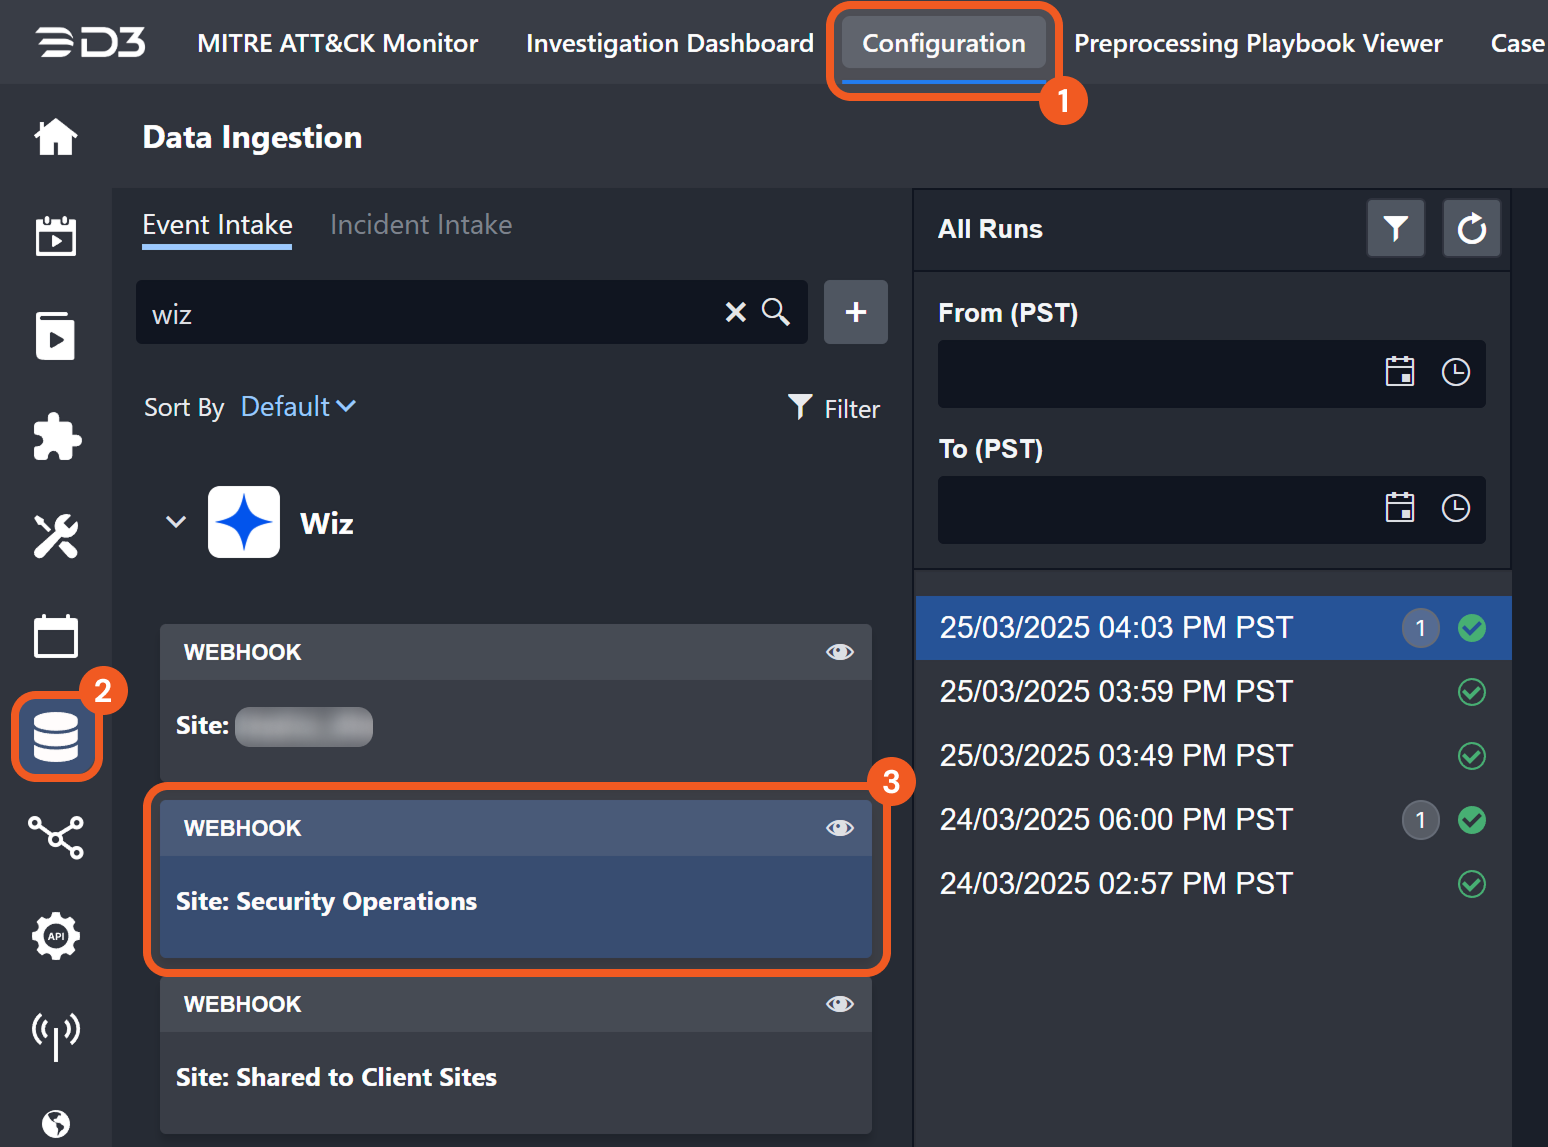
Users can view the ingestion details by clicking the corresponding timestamp.
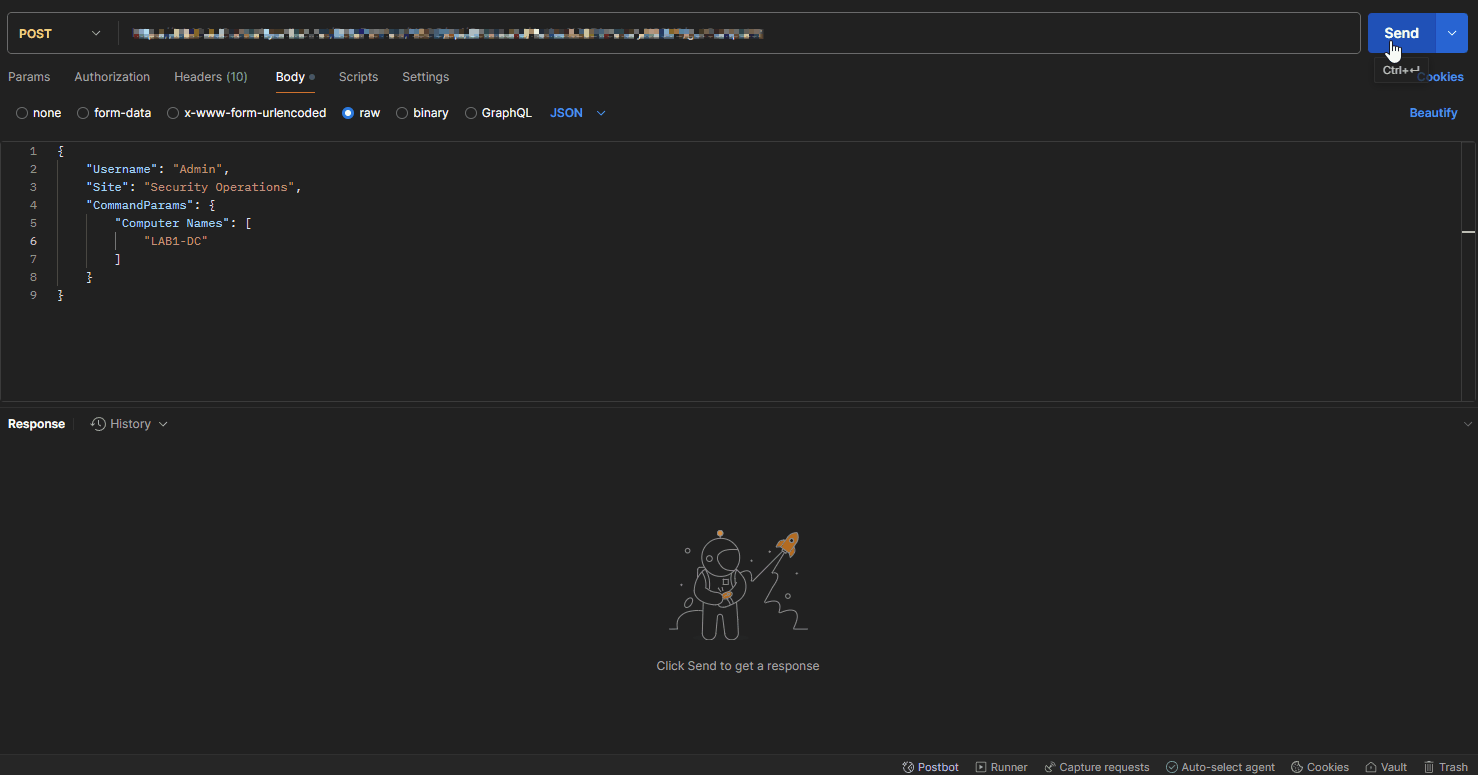
Sending an API Key-Authenticated Request: Remote Command
The process of sending an API key-authenticated request is the same for utility and integration commands. Users should consult the specific command's documentation for details on the commandParams object in the request body, as input parameters vary by command.
-
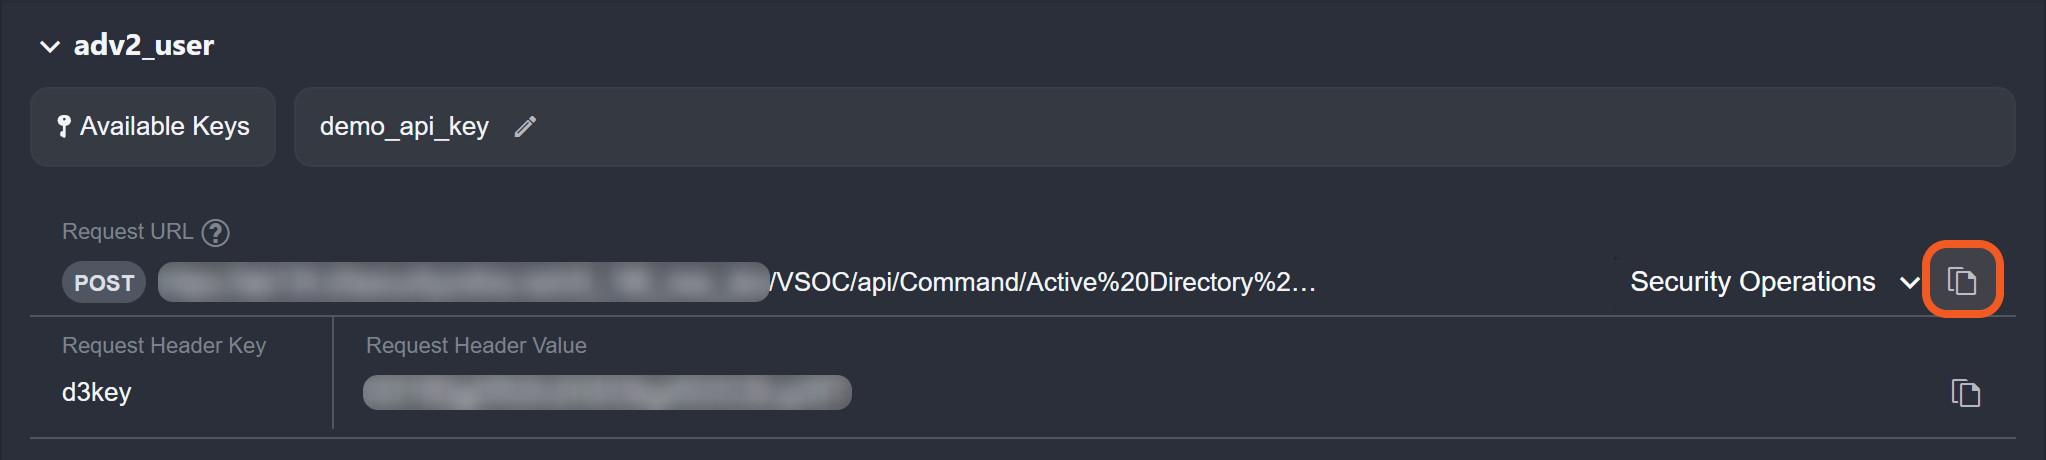
Copy the request URL in vSOC.
-
In Postman, set the HTTP request method to POST, then paste the request URL in the designated field.
.png?cb=64e22698a02969eb230b2398f07a2183)
-
In vSOC, copy the request header key.
-
In Postman, click on the Headers tab, then paste the request header key under the Key column.
-
In vSOC, copy the request header value.

-
In Postman, paste the request header value under the Value column.
-
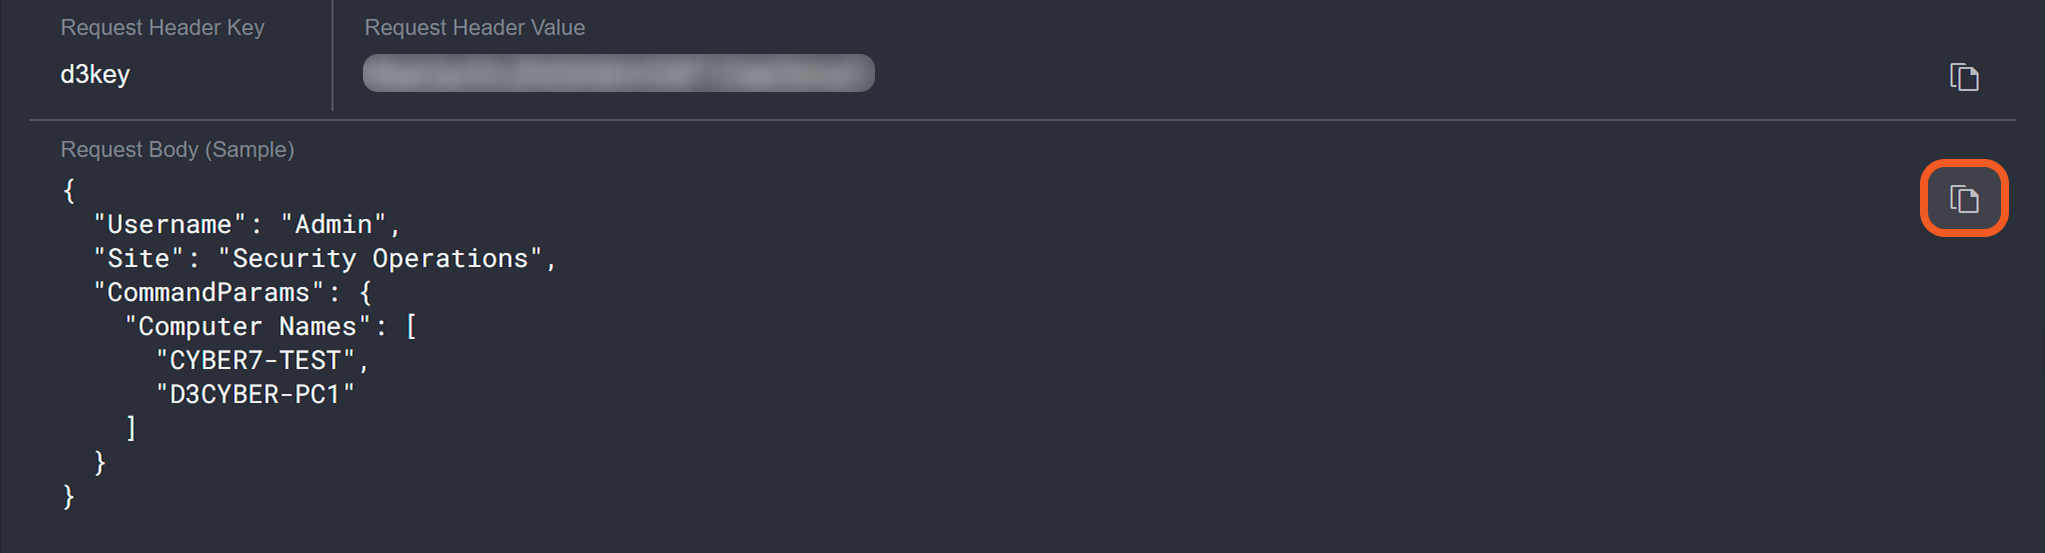
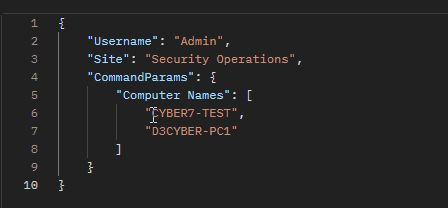
In vSOC, copy the request body sample.
-
In Postman, select the Body tab, choose the raw option, then paste the sample request body data.
-
Adjust the values as necessary.
-
Click the Send button to send the request.
.png?cb=44031ec4fc1a46802528efe6a16b093a)
RESULT
A successful call with a valid response will resemble the following: