JSON Web Token Authentication
LAST UPDATED: SEPTEMBER 12, 2025
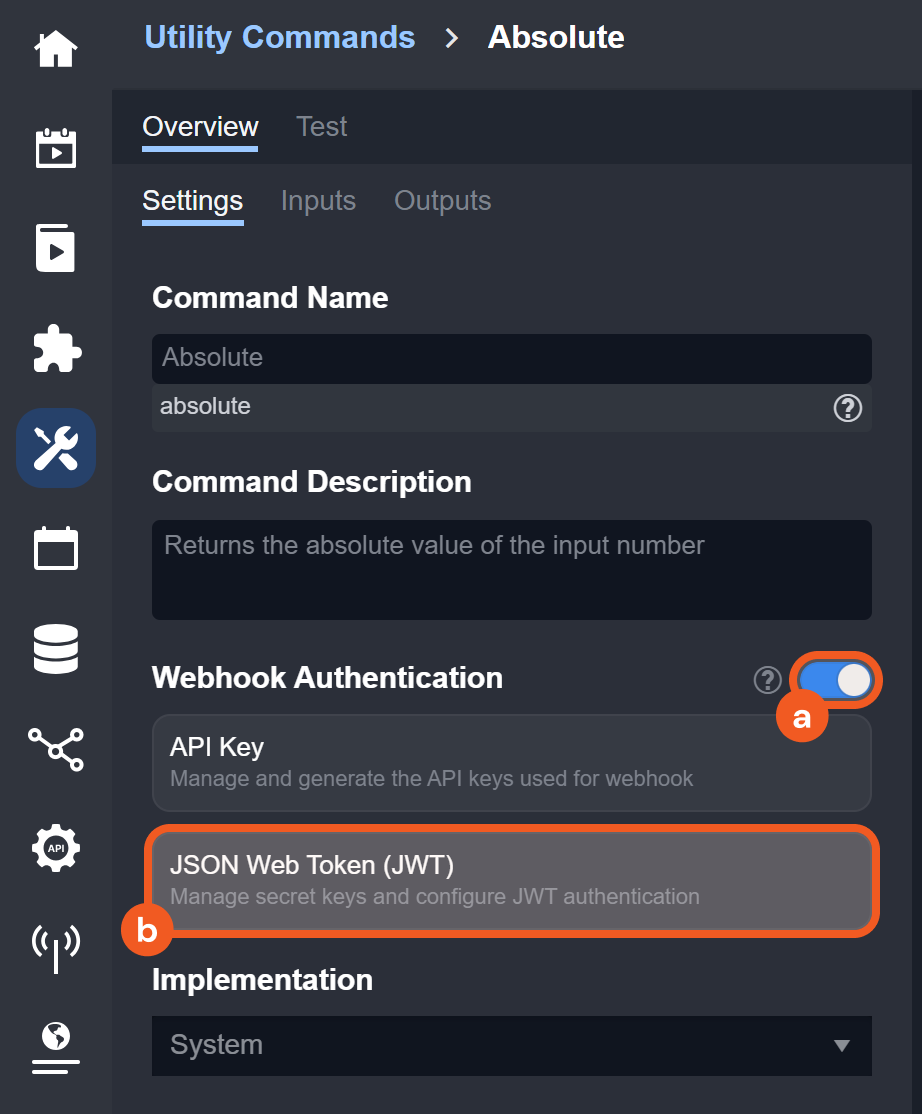
JSON Web Token (JWT) enables authentication by encoding claims within a digitally signed token, ensuring secure validation of user identity and permissions. Follow the steps in this article to send a JWT-encoded request in Postman.
Prerequisites
A JWT encoding tool, such as jwt.io or an external script.
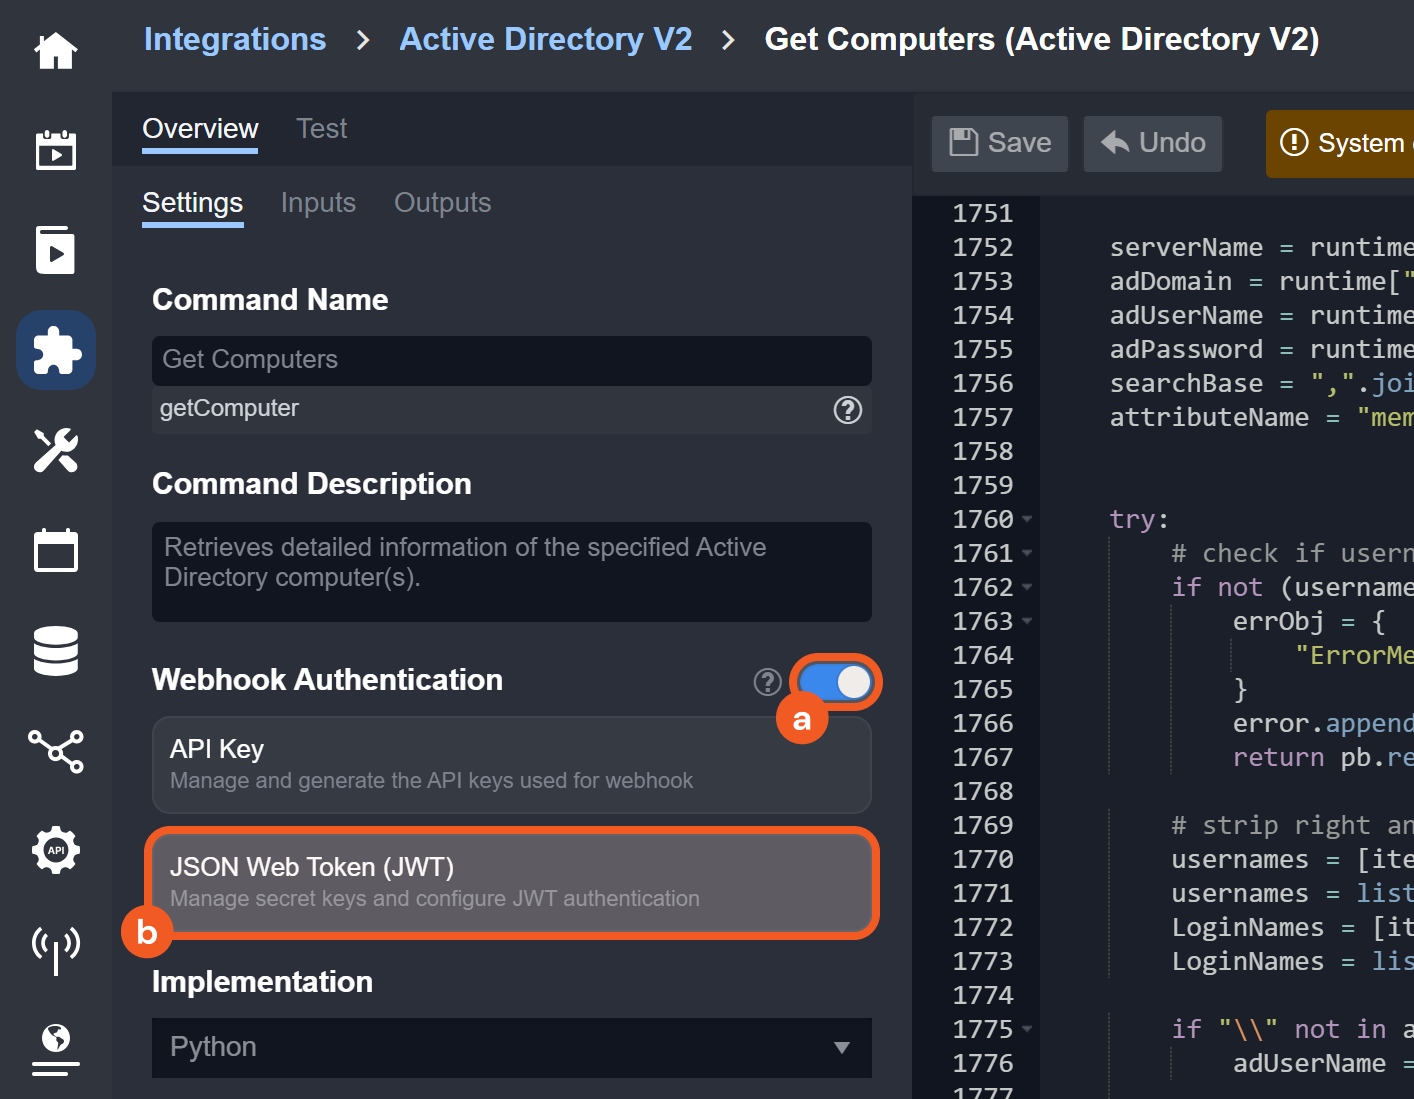
JWT webhook authentication enabled
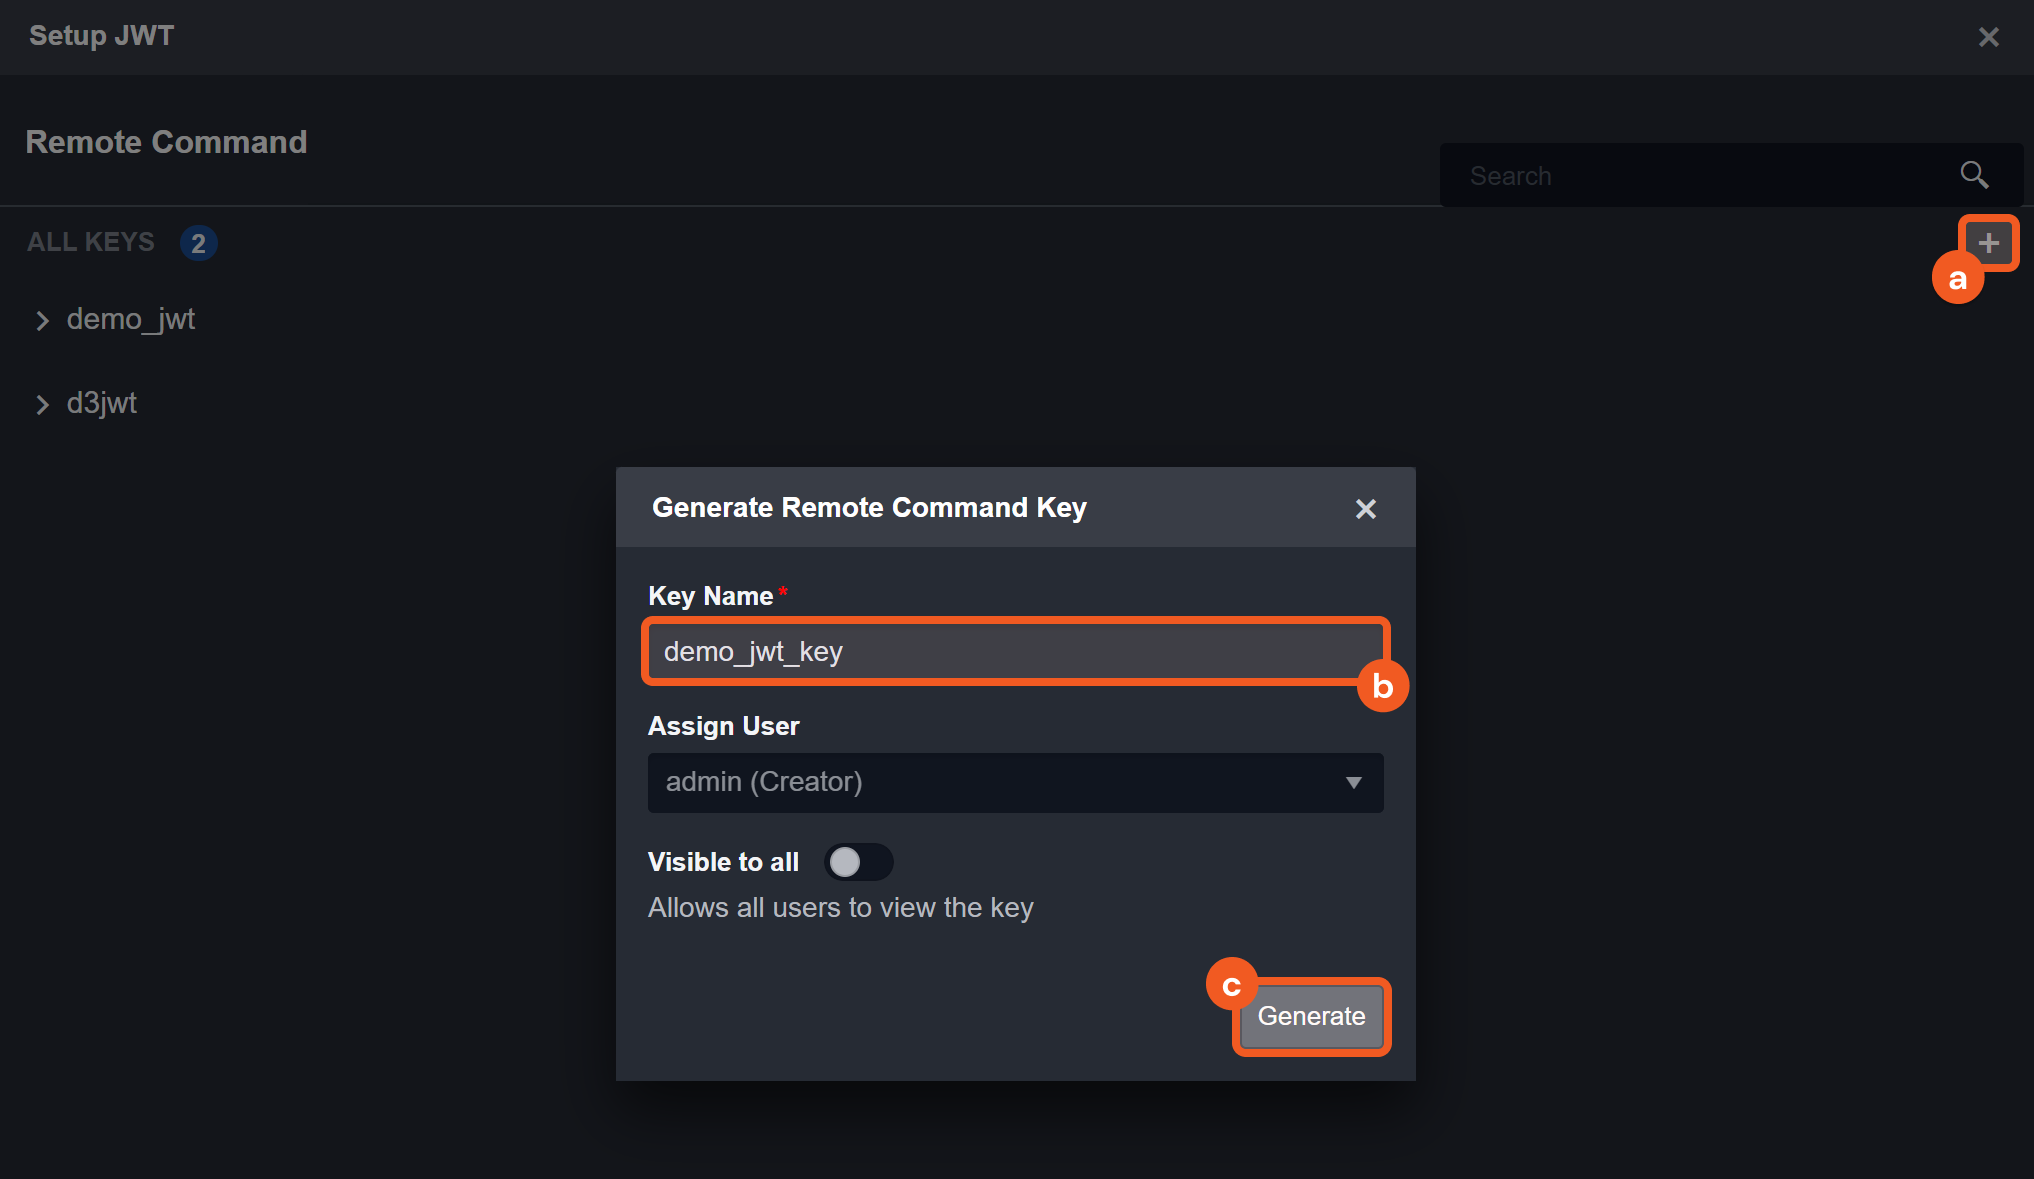
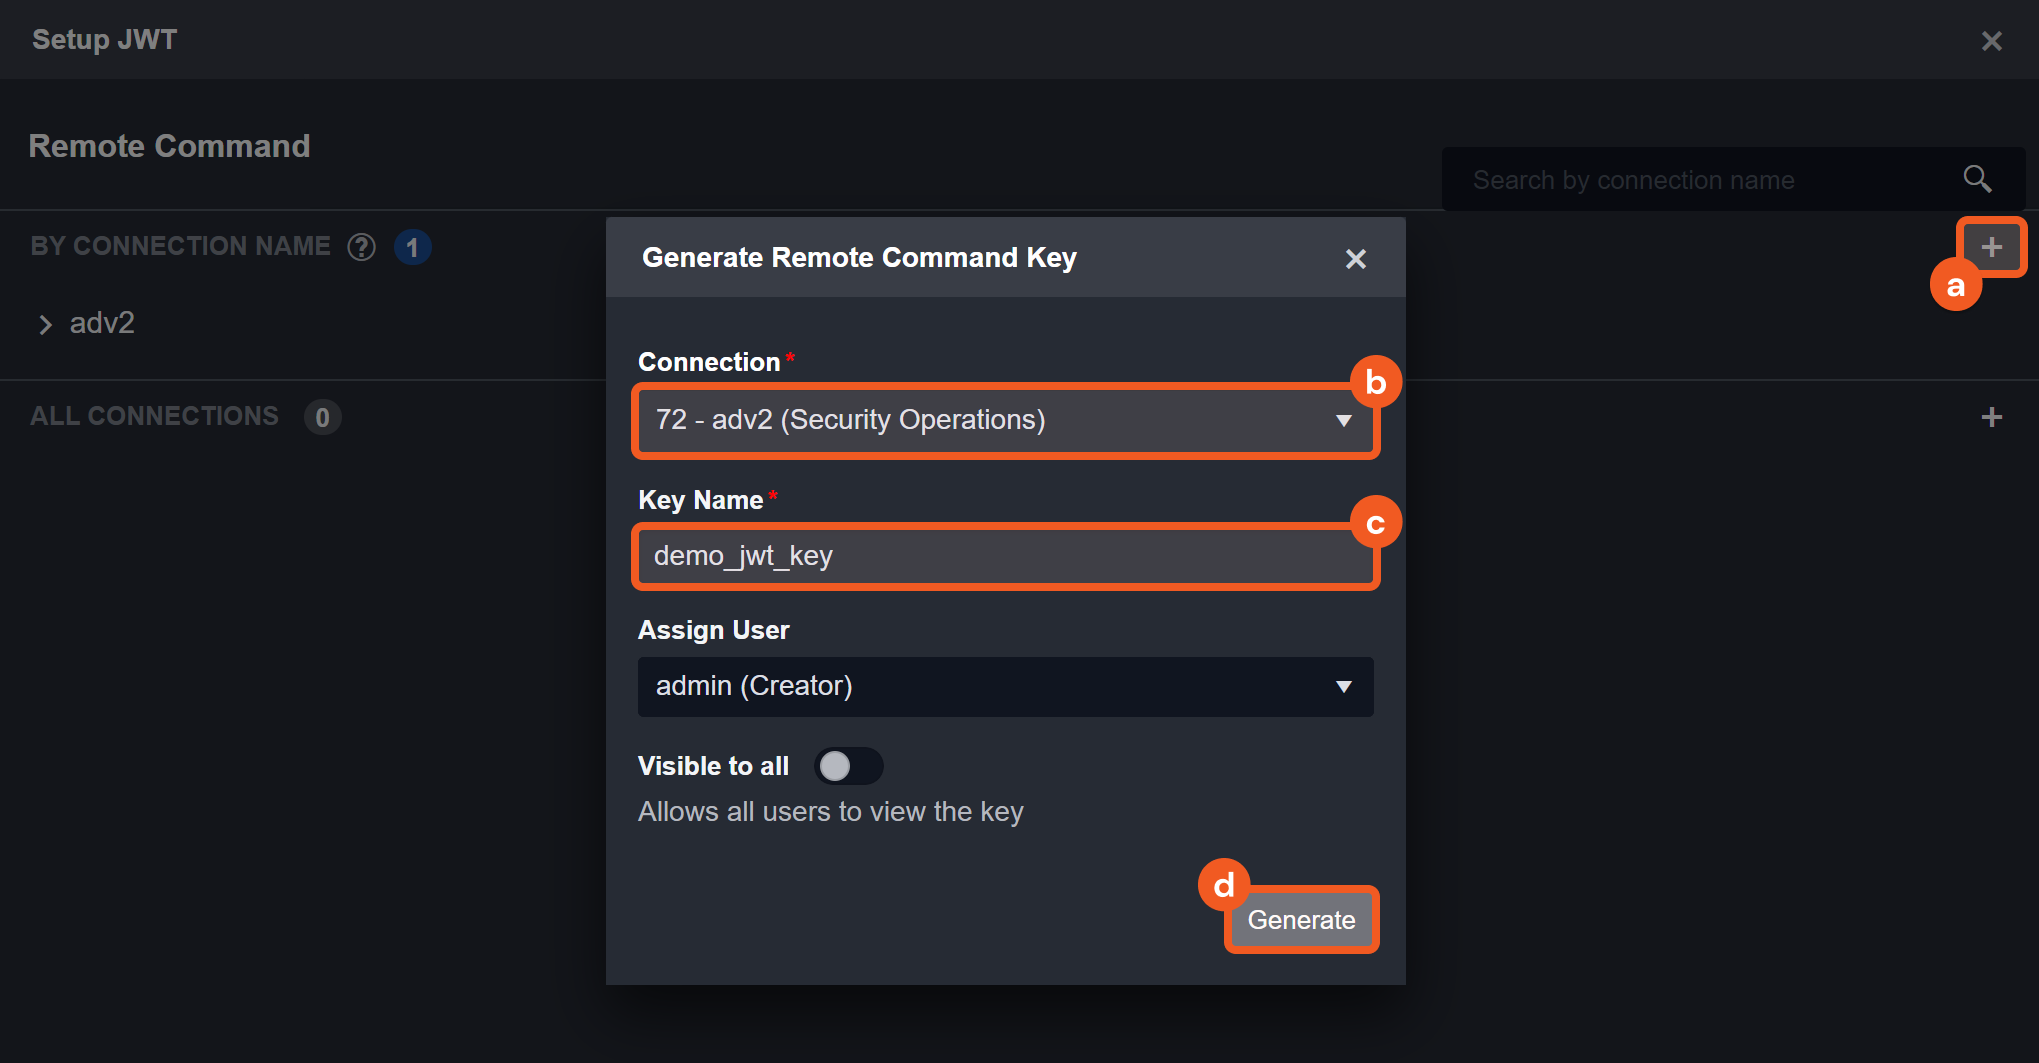
Ability to set up D3 webhook keys
READER NOTE
Each JWT Remote Command Key will have a unique Secret Key value used in generating the JWT encoding.
Setting Up and Sending a JWT-Encoded Request: Data Ingestion
Users can send an JWT-authenticated request to push data into D3 using the webhook data ingestion method to create D3 events.
READER NOTE
For clarity, the example below demonstrates how to send an JWT-authenticated request using Postman. However, this approach is intended only for testing purposes. In typical use cases, webhook ingestion is handled automatically through external software or scripts.
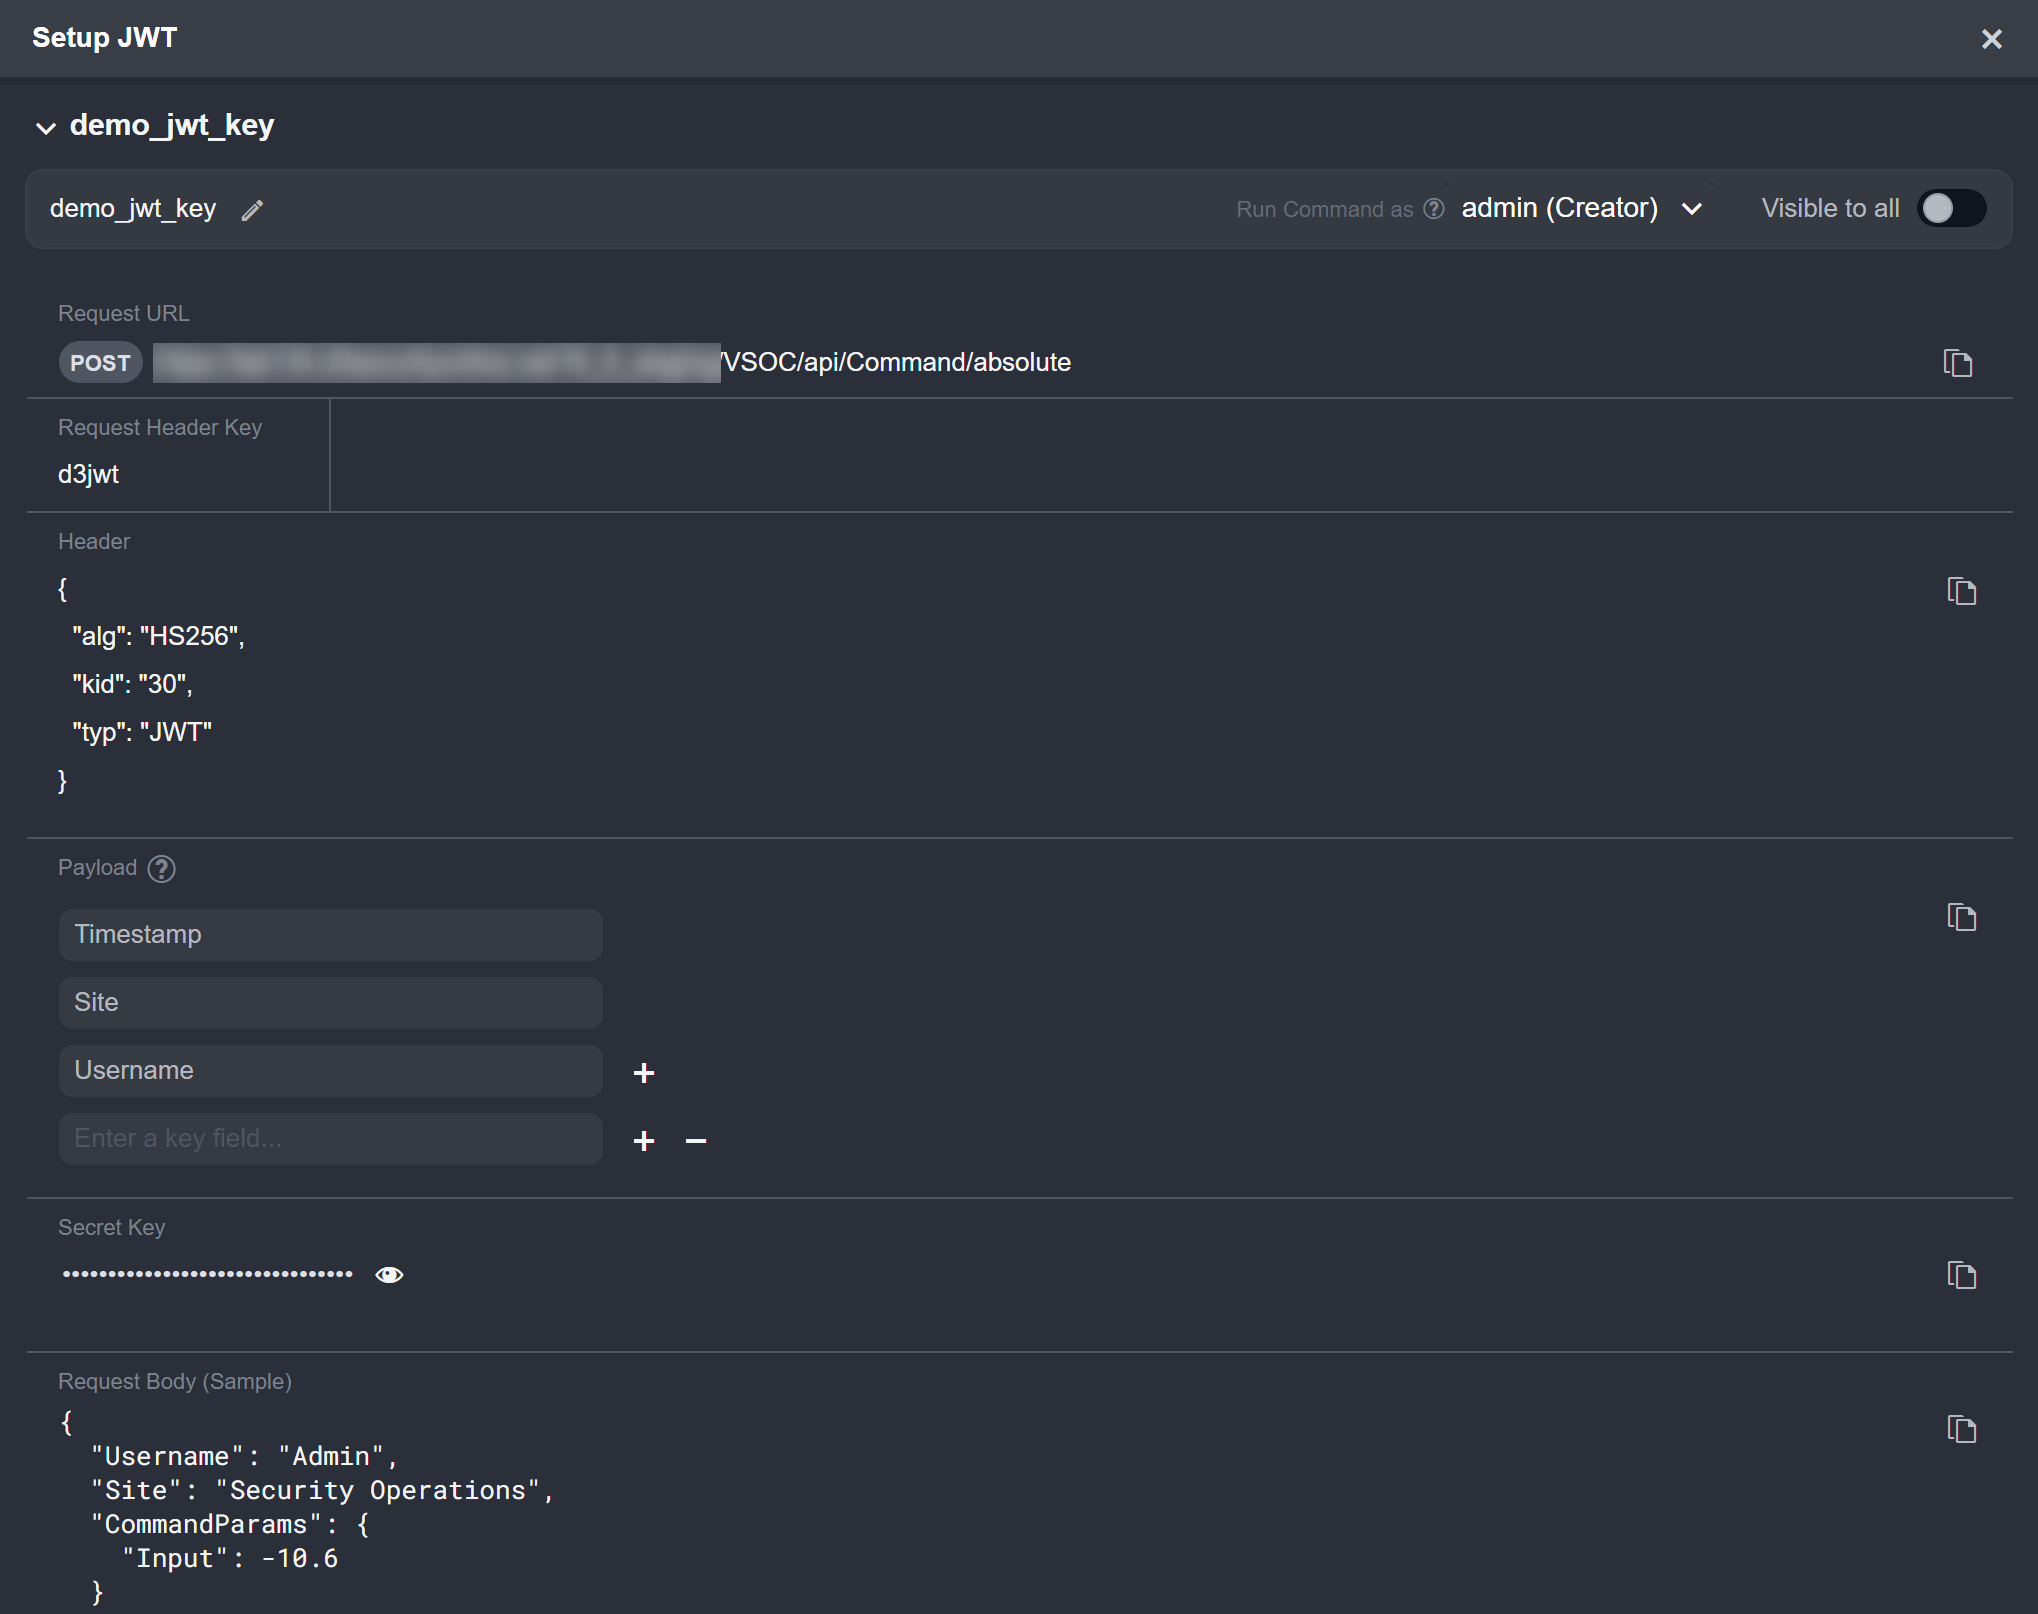
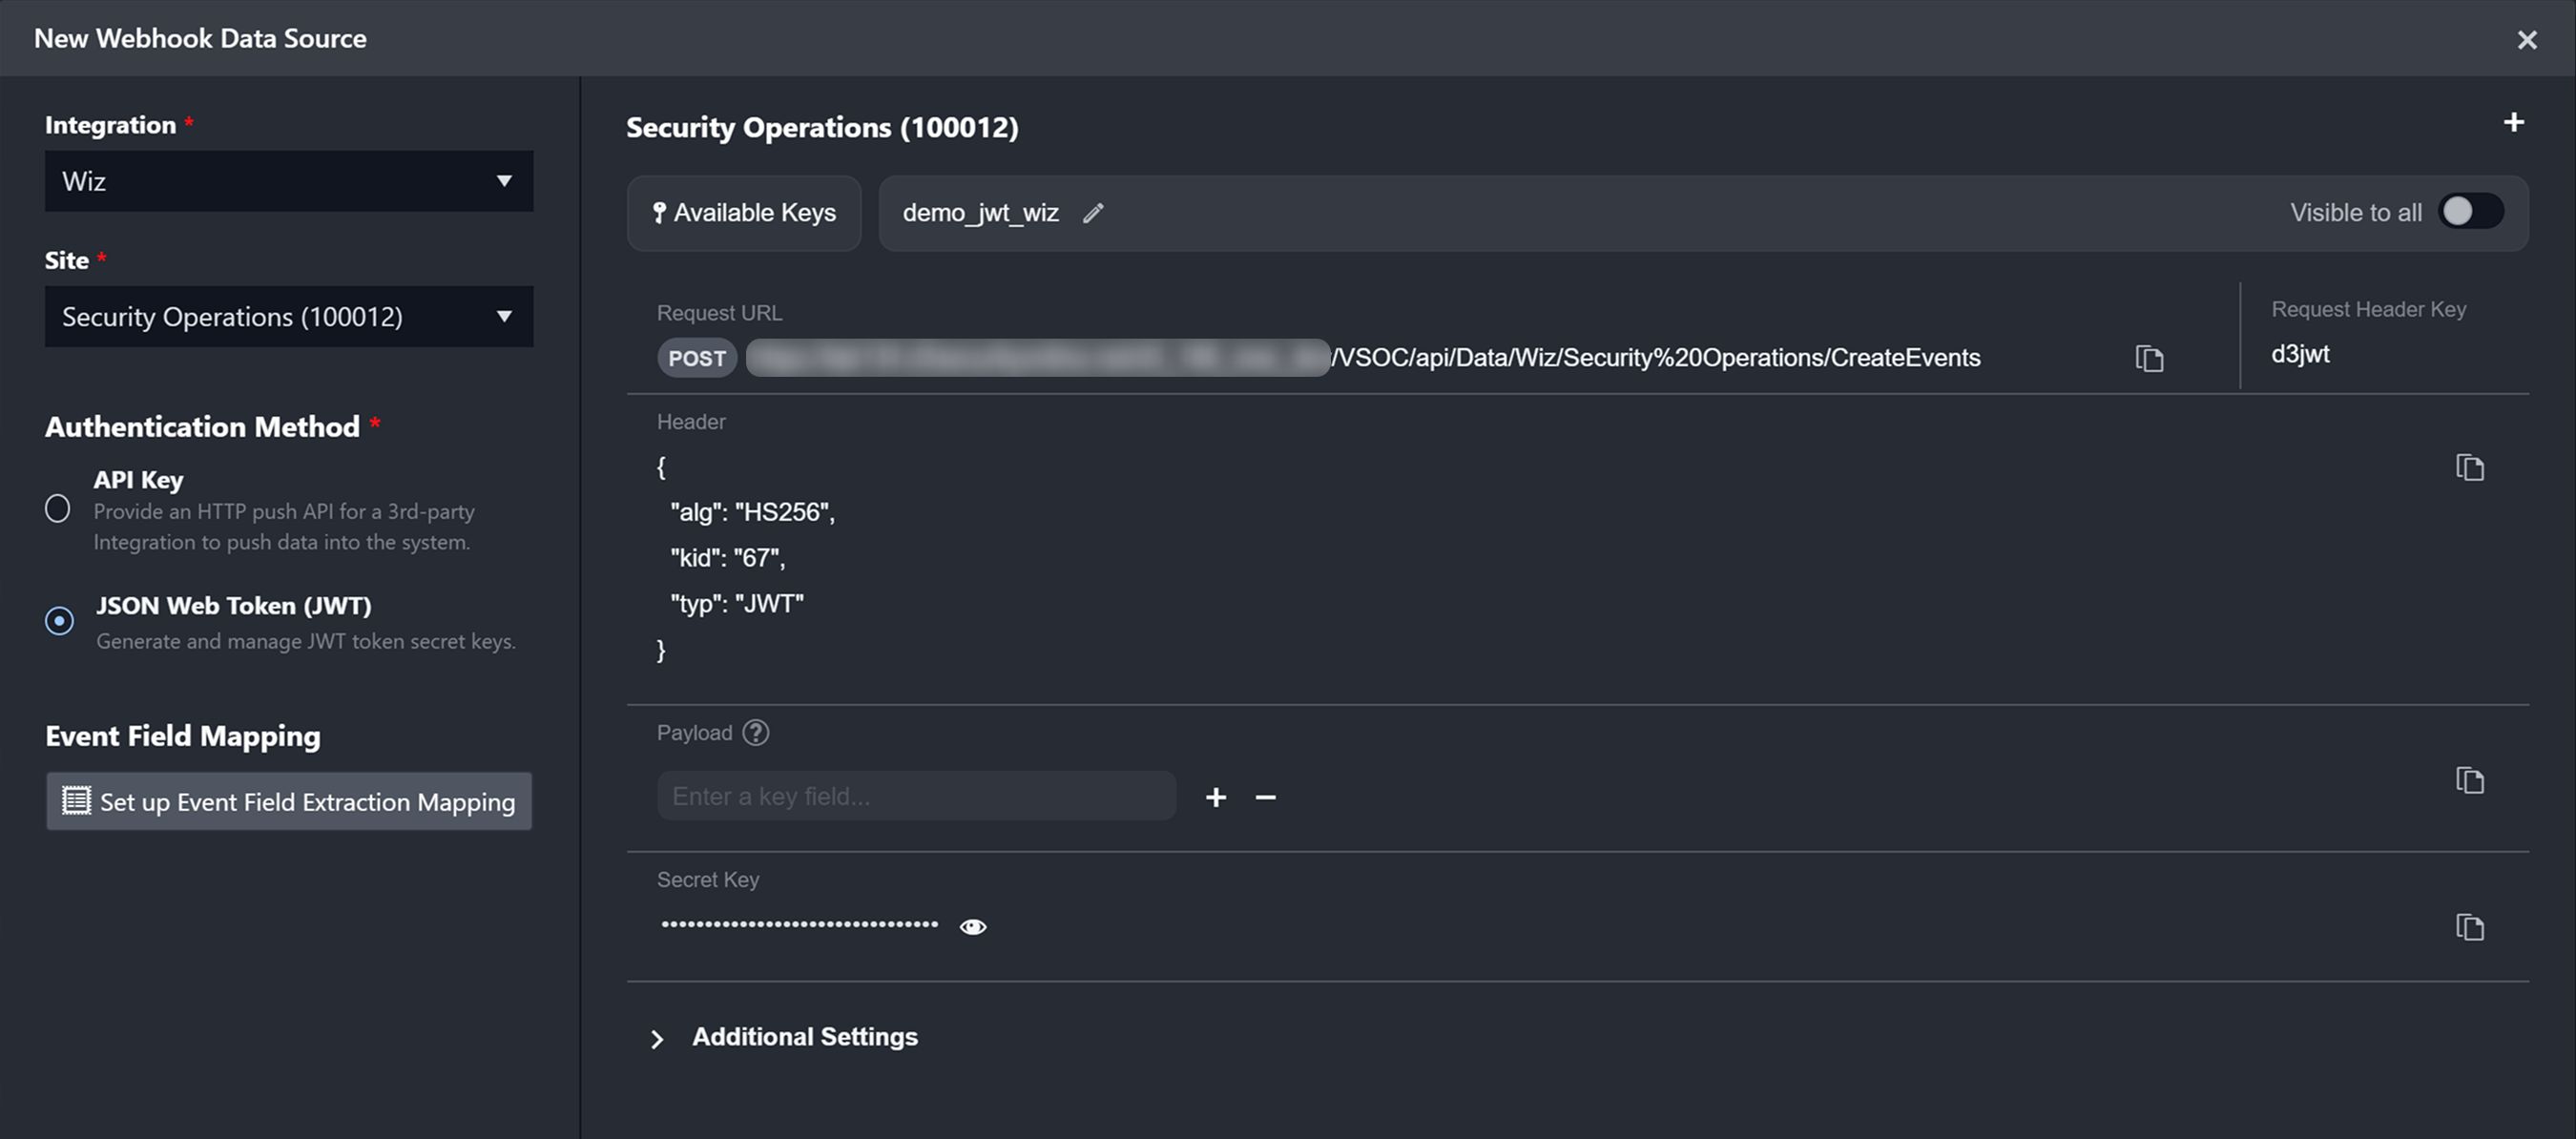
Copy the request URL in vSOC.
.png?inst-v=61833b8b-b919-485b-92eb-9eec7ea5032f)
In Postman, set the HTTP request method to POST, then paste the request URL in the designated field.
.png?inst-v=61833b8b-b919-485b-92eb-9eec7ea5032f)
In vSOC, copy the request header key.
.png?inst-v=61833b8b-b919-485b-92eb-9eec7ea5032f)
In Postman, click on the Headers tab, then paste the request header key under the Key column.
.png?inst-v=61833b8b-b919-485b-92eb-9eec7ea5032f)
In vSOC, copy the object from the Header section.

In jwt.io, click the JWT Encoder tab, then paste the object into the HEADER field.
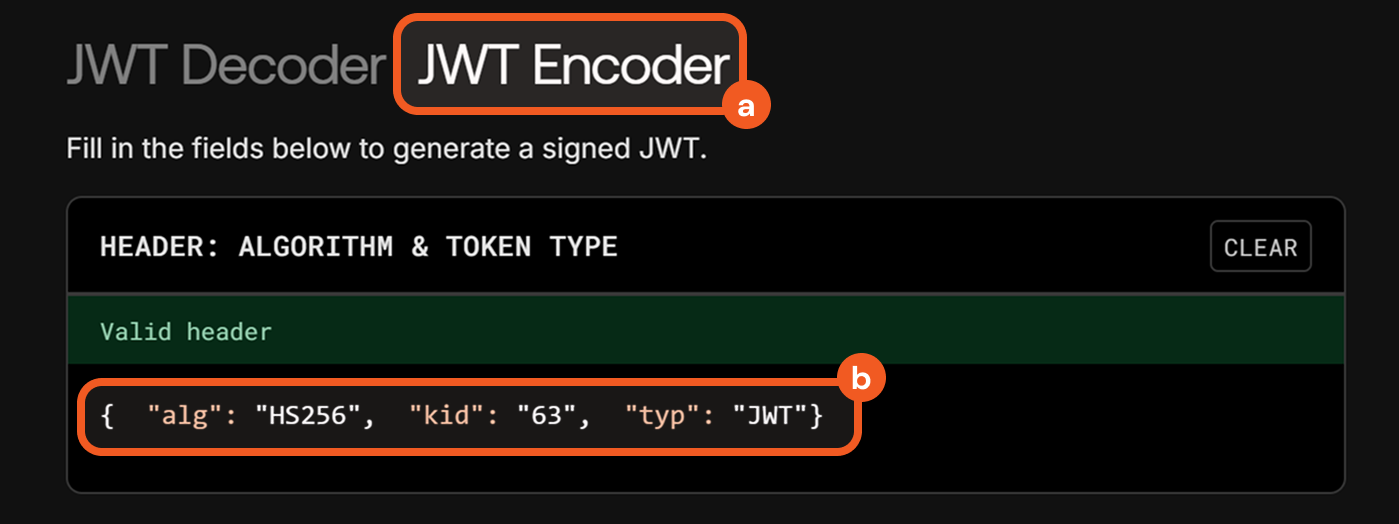
Remove the placeholder content within the curly braces to make the payload an empty object.

In vSOC, copy the Secret Key.

In jwt.io, paste the Secret Key, then copy the JSON web token.
.png?inst-v=61833b8b-b919-485b-92eb-9eec7ea5032f)
In Postman, paste in the token under the Value column for the
d3jwtkey.
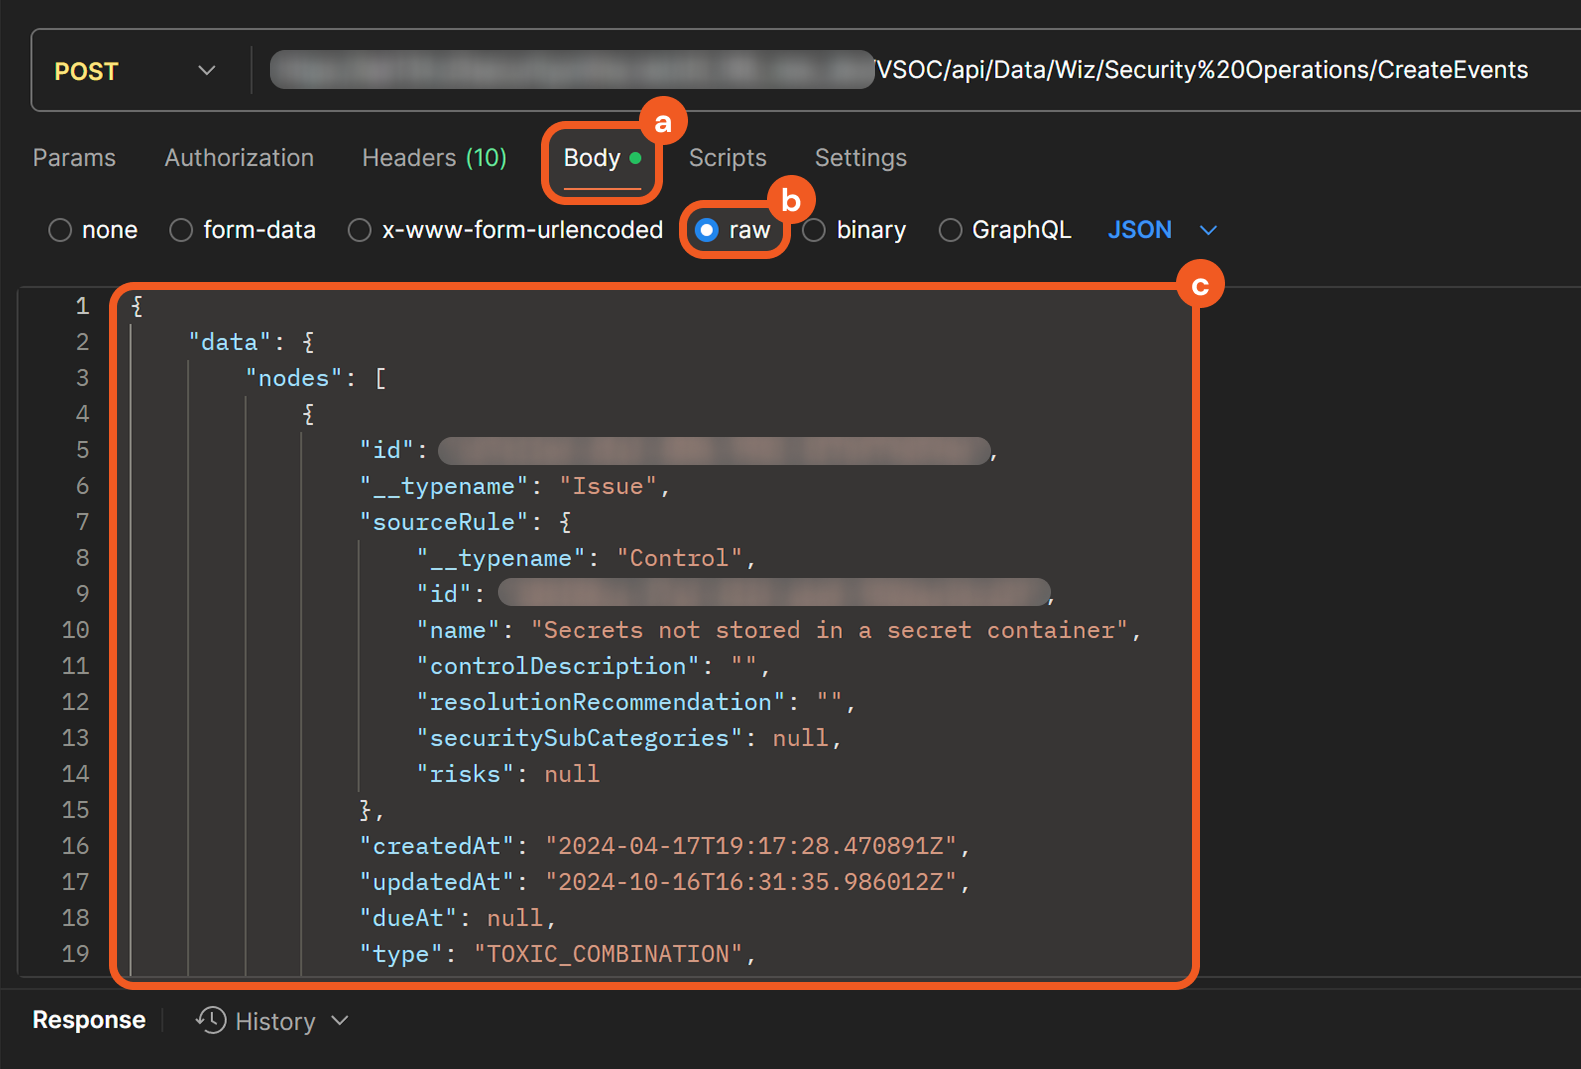
Select the Body tab, choose the raw option, then paste sample request body data.
READER NOTE*
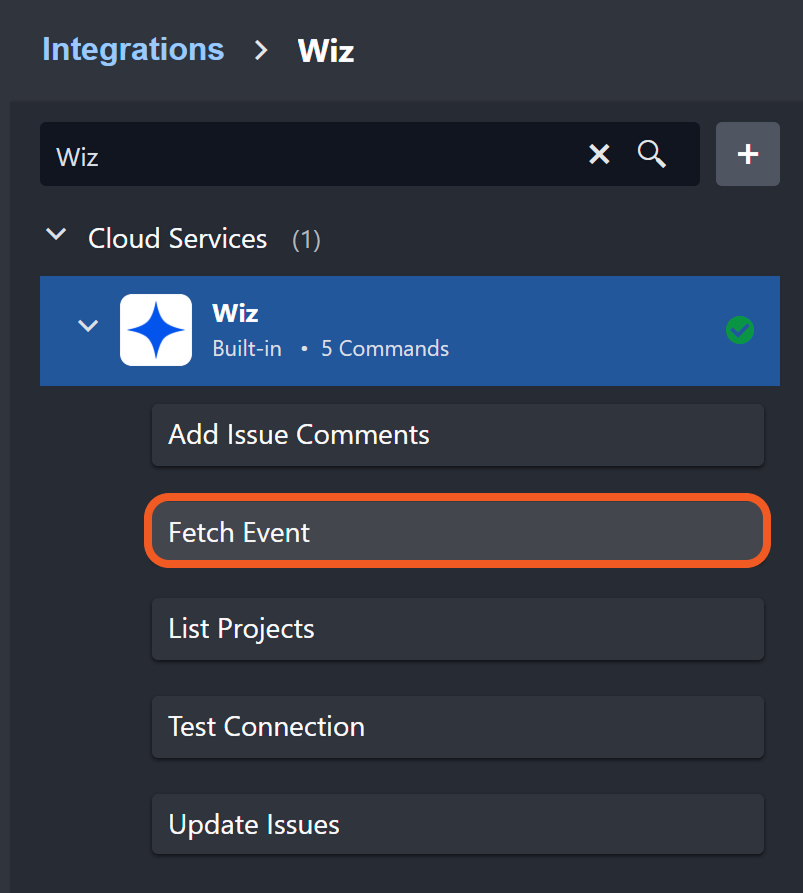
The request body data is derived from the raw sample available under the Outputs > Raw Data tab of Wiz’s Fetch Event command. Any D3 events created using this data are not real security events.
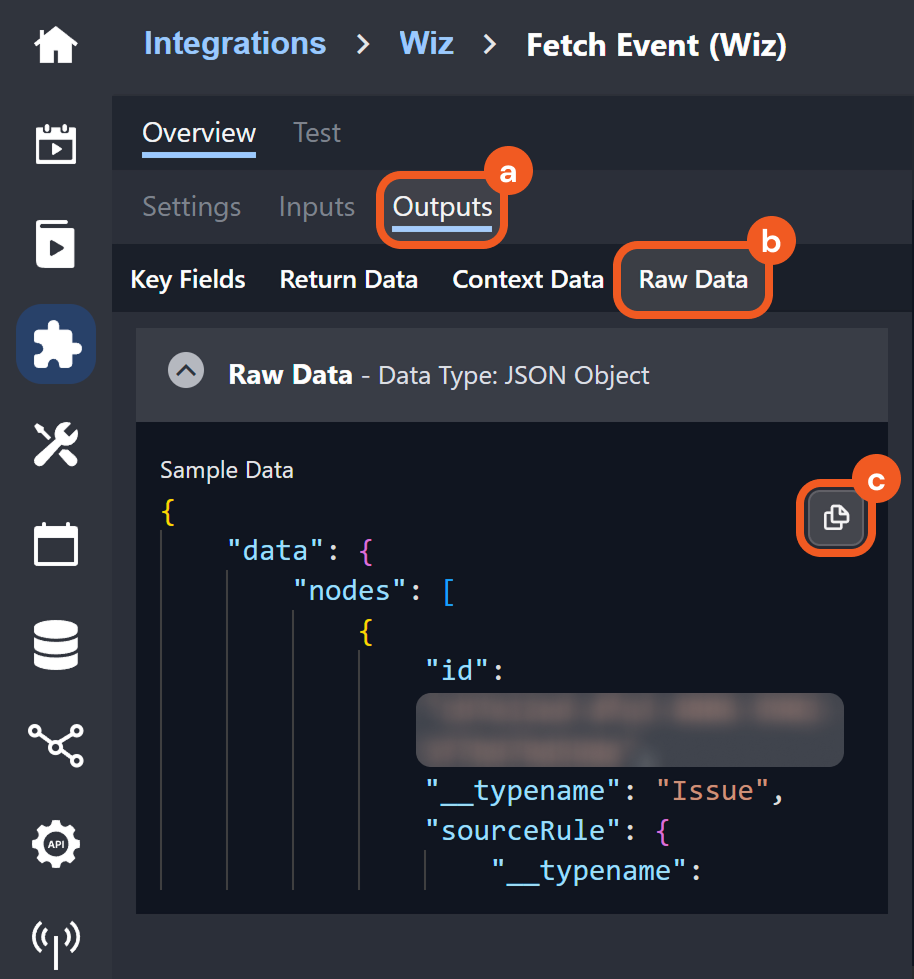
Users can treat this as a template for structuring data pushed into D3 to create D3 events, specifically for Wiz’s Fetch Event command. For example, this demonstrates that the main event JSON path is data.nodes, which means that event data from Wiz should be within that path.
Click the Send button to send the request.

RESULT
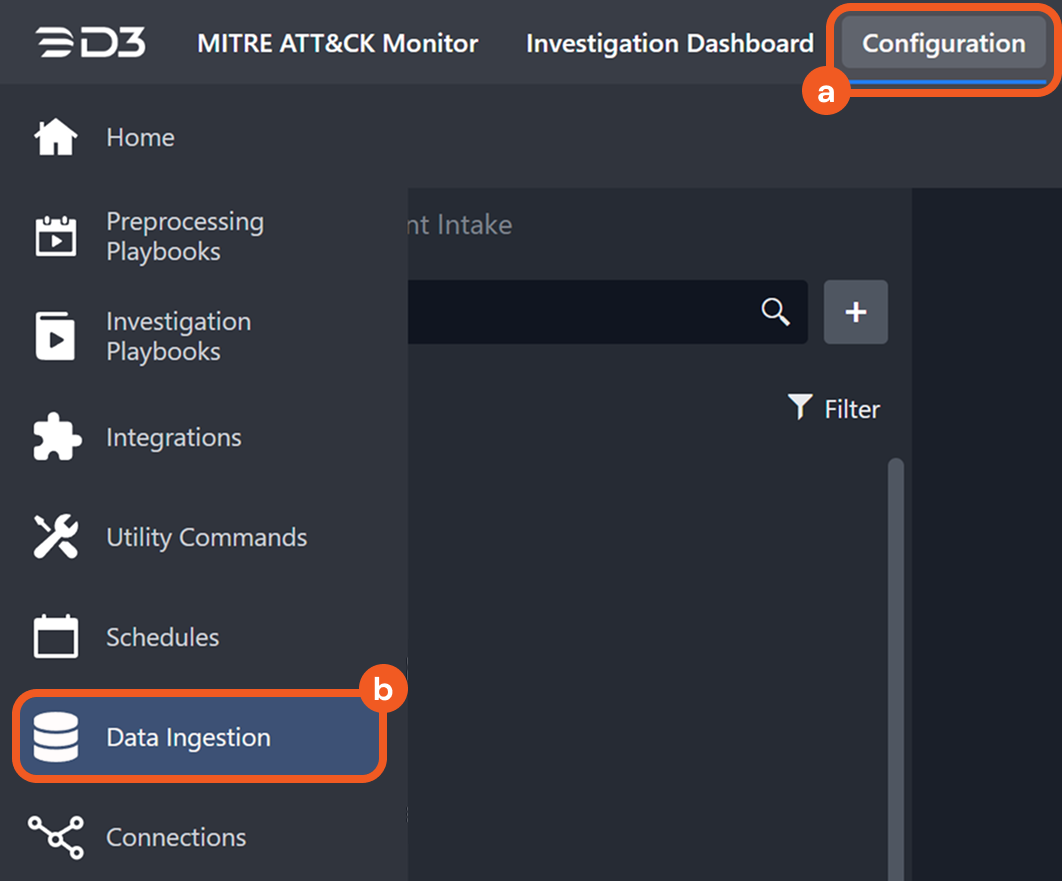
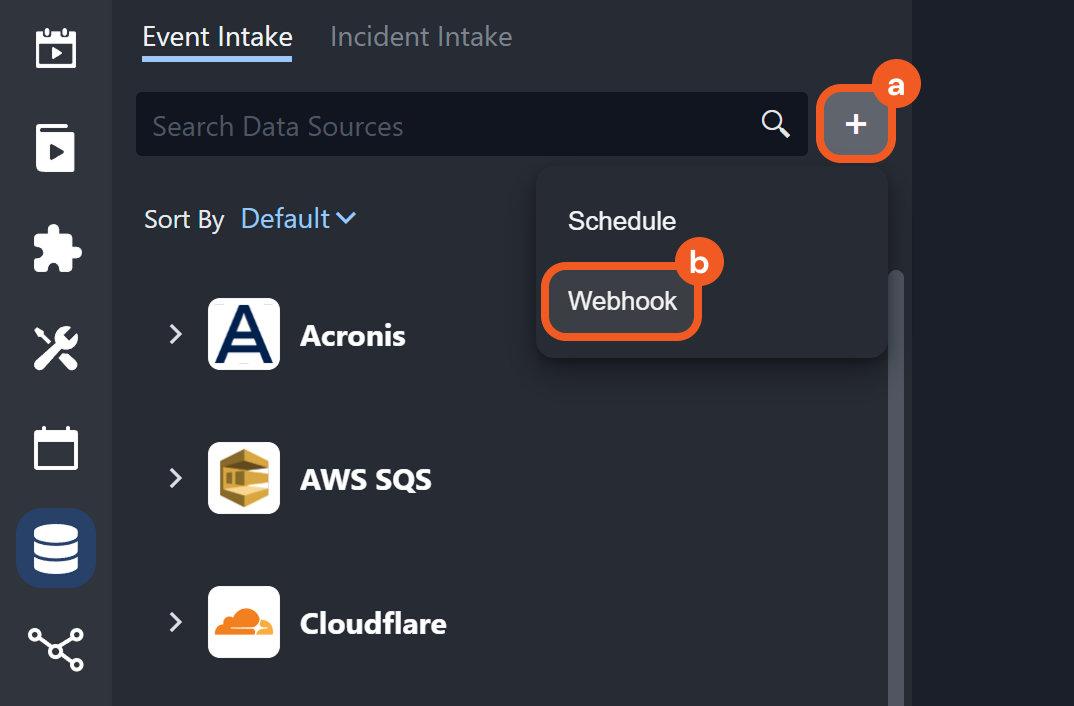
If the request is successful and the conditions for event creation are met, the ingested event can be viewed in D3 by navigating to Configuration > Data Ingestion and selecting the relevant webhook data ingestion job card (i.e., Webhook | Site: Security Operations within the Wiz accordion).
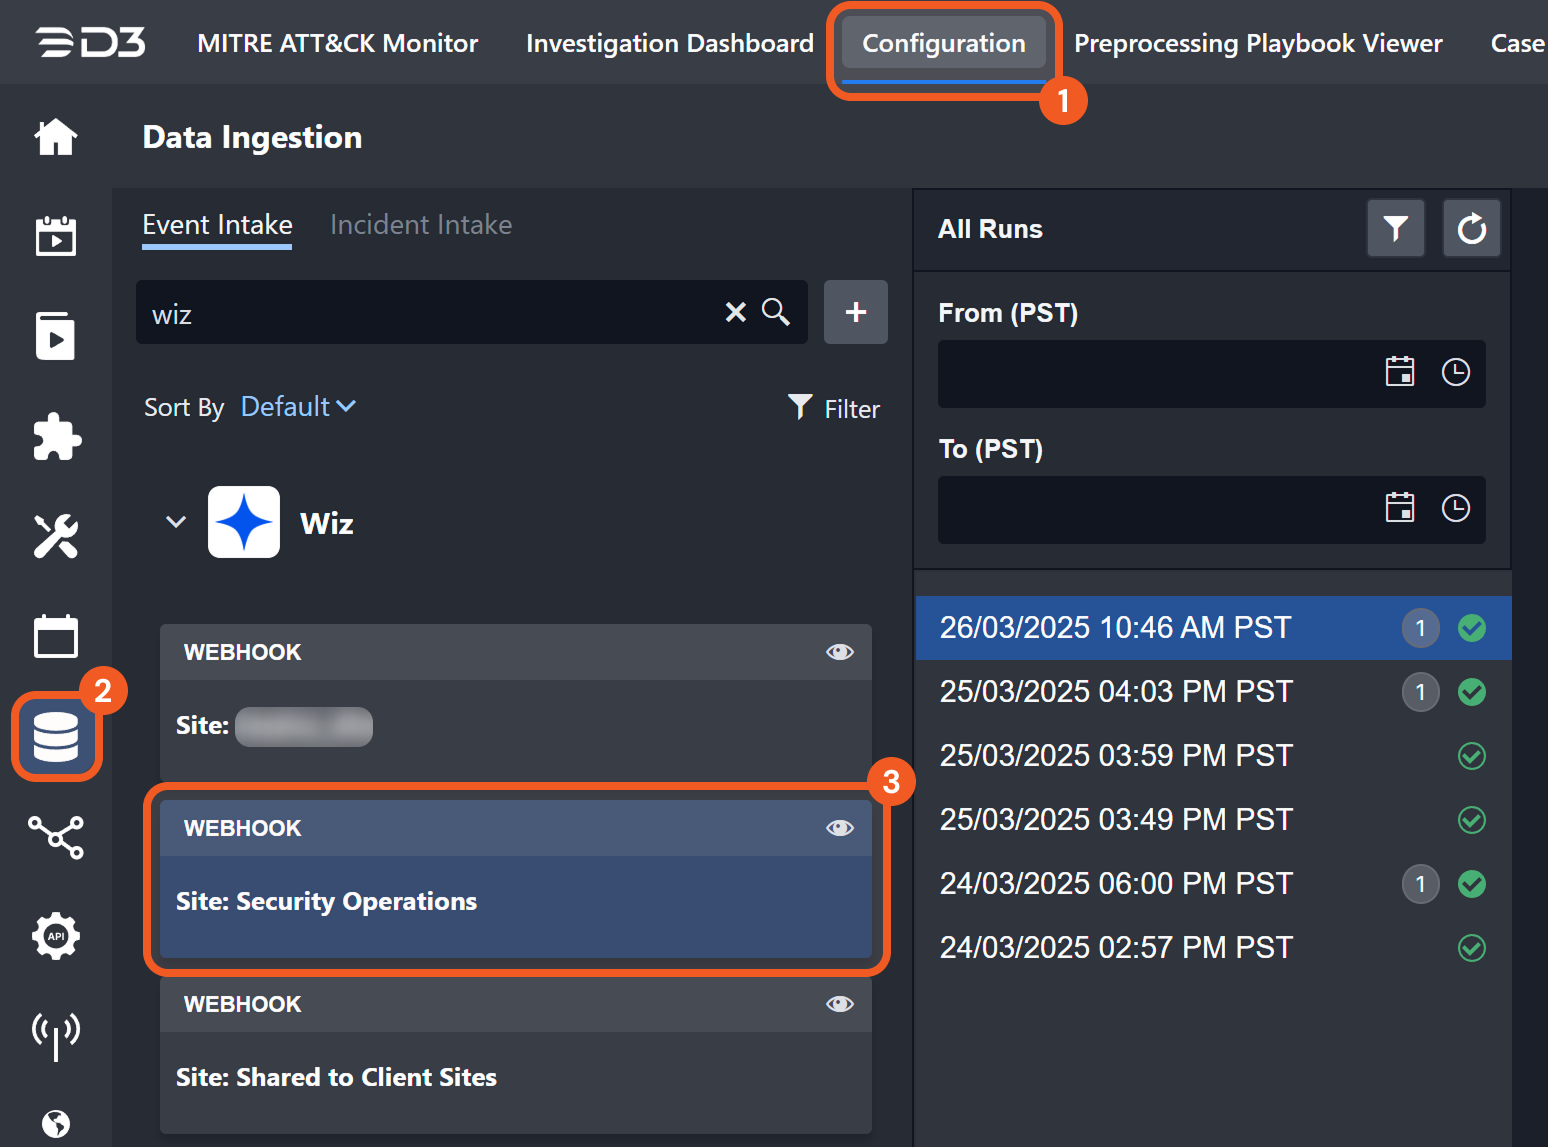
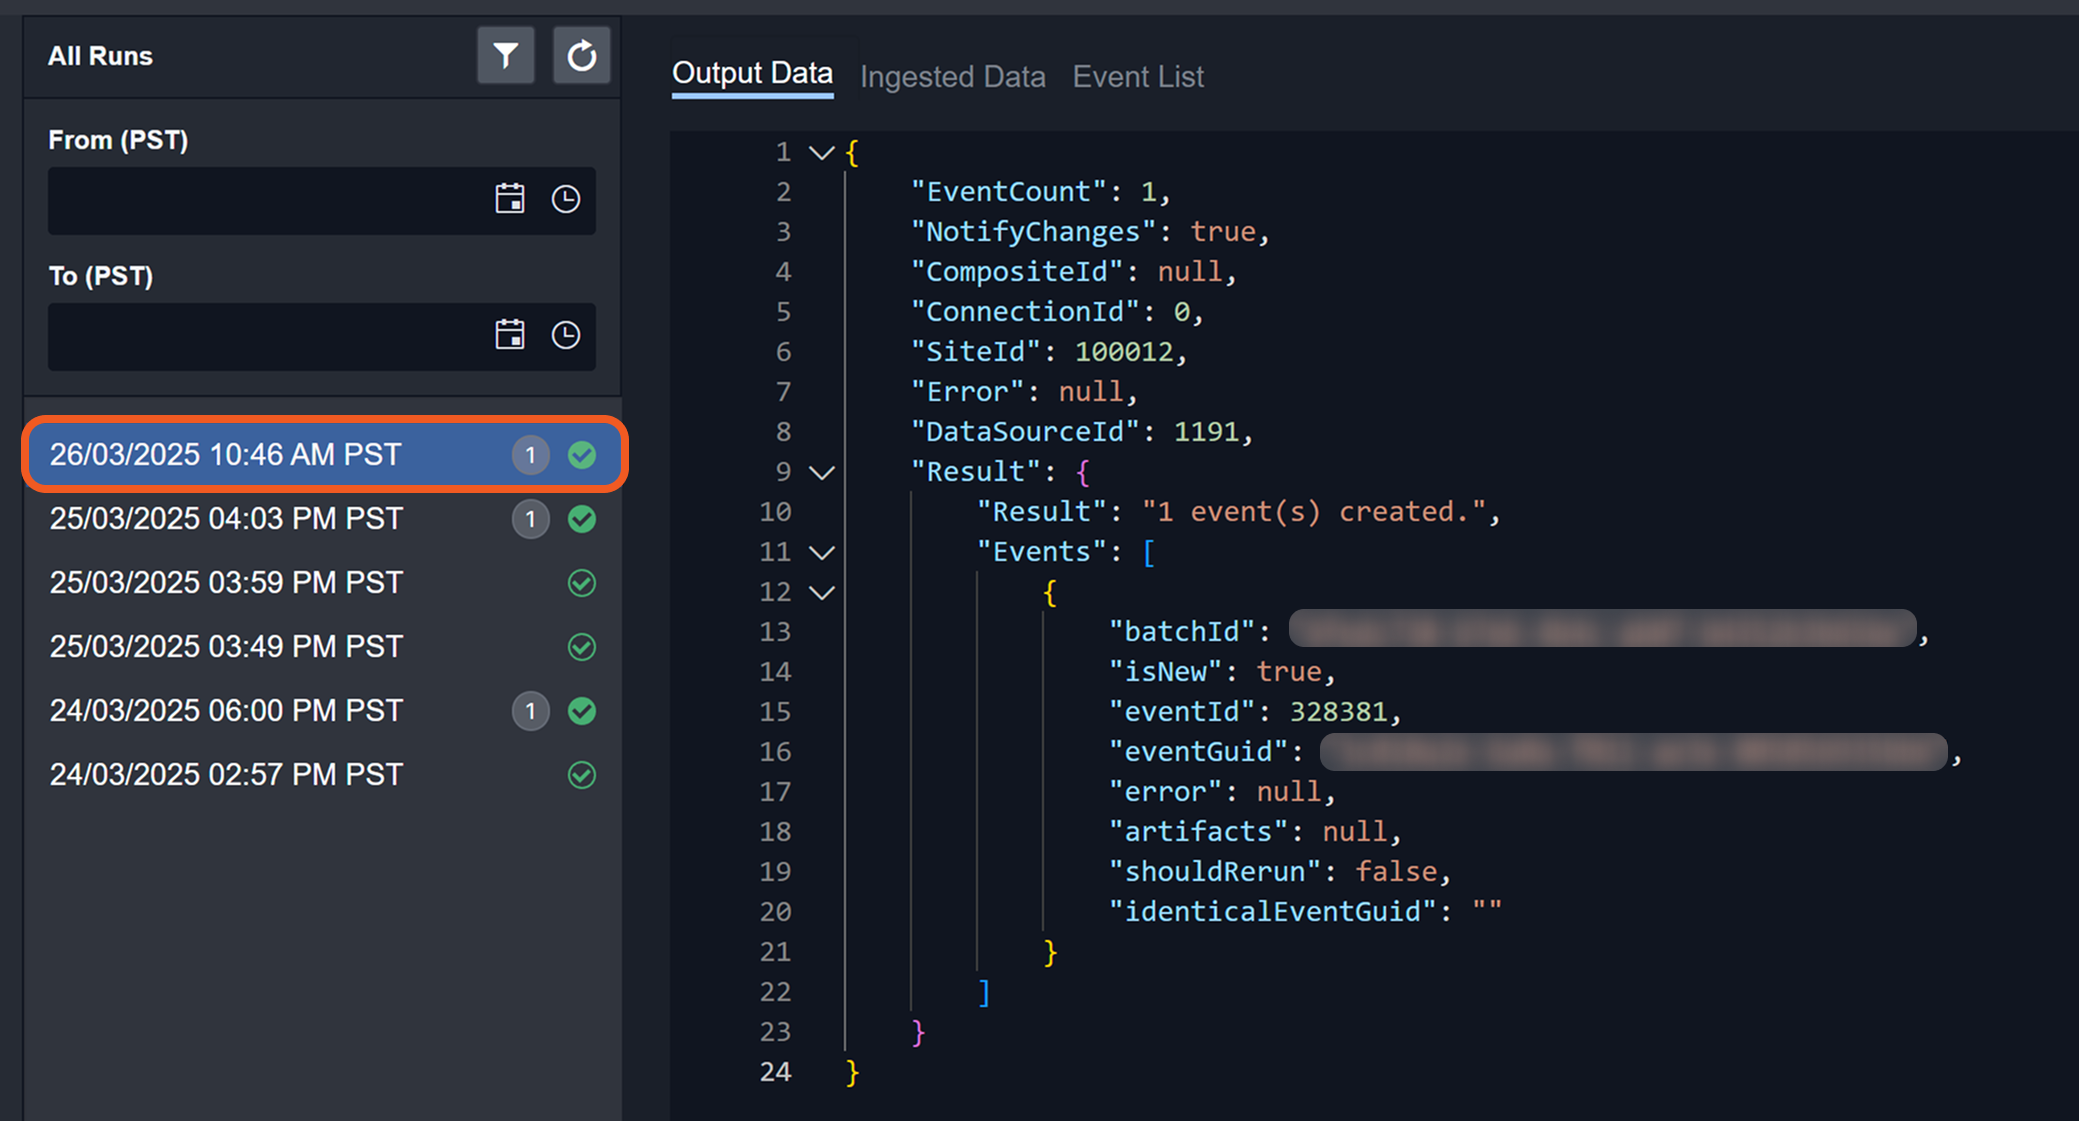
Users can view the ingestion details by clicking the corresponding timestamp.
Setting Up and Sending a JWT-Encoded Request: Remote Command
Copy the request URL in vSOC.

In Postman, set the HTTP request method to POST, then paste the request URL in the designated field.

In vSOC, copy the request header key.
.png?inst-v=61833b8b-b919-485b-92eb-9eec7ea5032f)
In Postman, click on the Headers tab, then paste the request header key under the Key column.

In vSOC, copy the object from the Header section.

In jwt.io, click the JWT Encoder tab, then paste the object into the HEADER field.
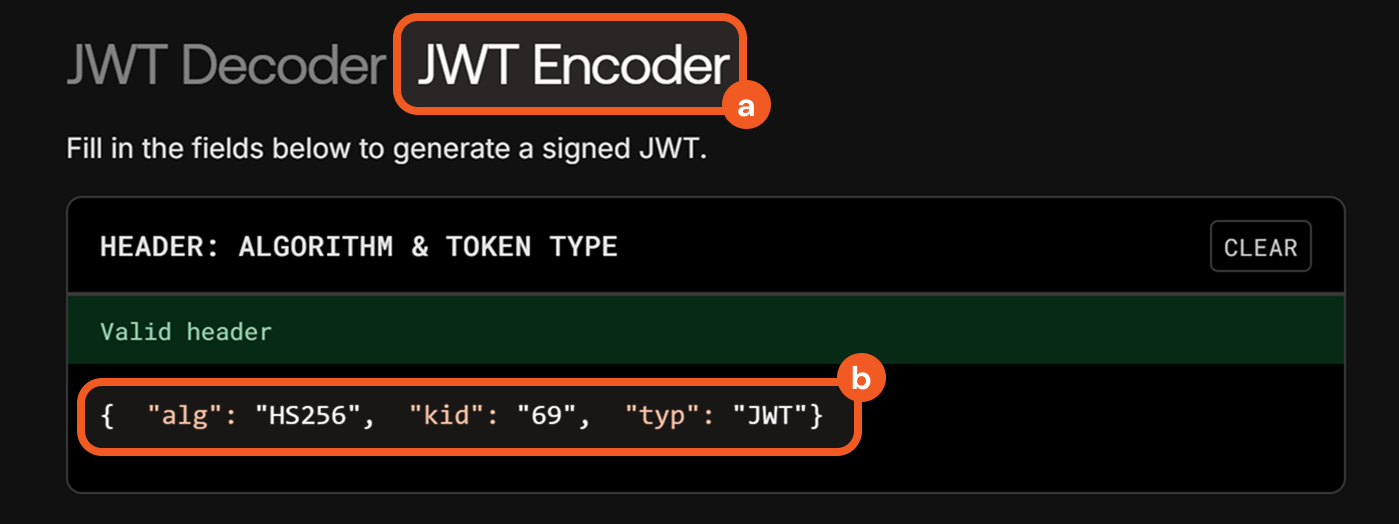
In vSOC, copy the payload.

In jwt.io, paste the payload into the PAYLOAD field.

Populate the PAYLOAD fields. For this demonstration, the completed payload is as follows:

READER NOTE*
Ensure the value of the payload's Username field matches the username of the user being granted access to the remote command key (user10 in this case).

By default, the creator is the only individual with access.
All payload data are case-sensitive.
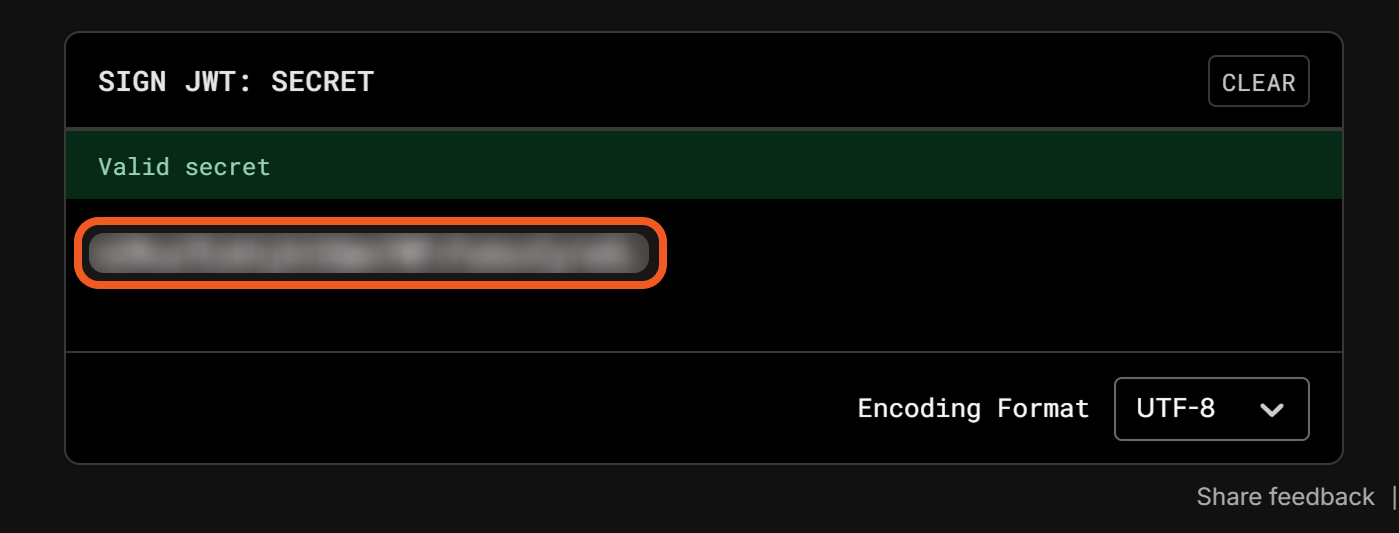
In vSOC, copy the Secret Key.

In jwt.io, paste the Secret Key.
In vSOC, copy the request body sample data.

In Postman, select the Body tab, choose the raw option, then paste the sample request body data.
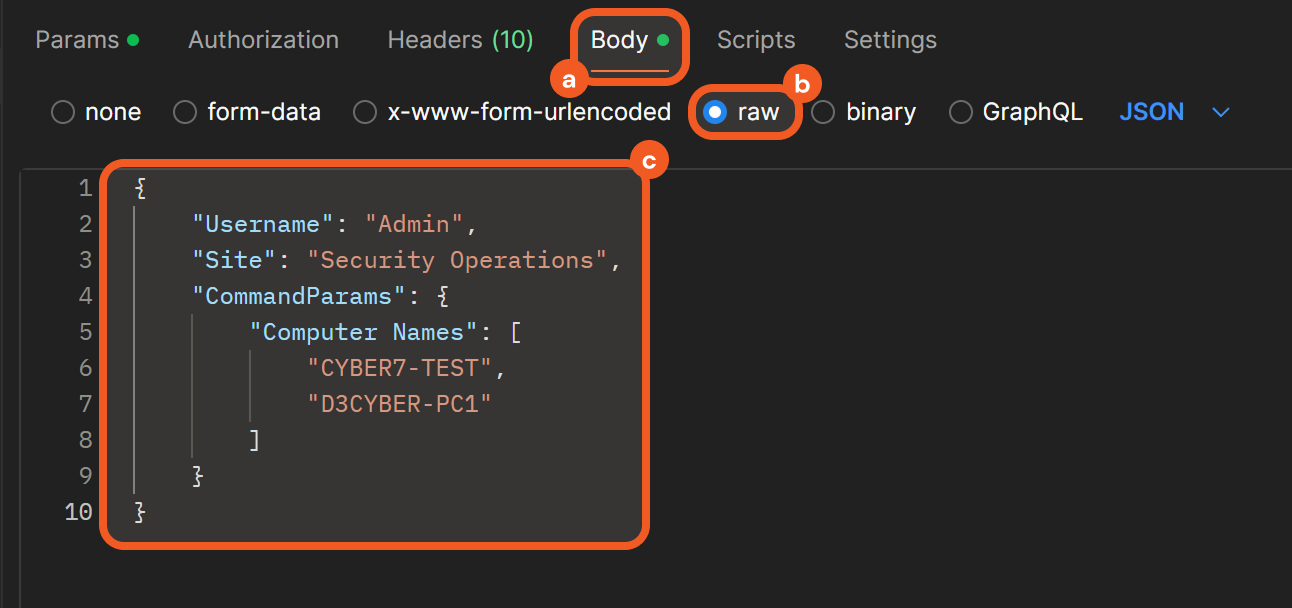
Modify the highlighted request body values to match the payload precisely.

In jwt.io, copy the encoded token.

In Postman, click on the Headers tab, paste in the token, then send the request.

RESULT
A successful request will have the 200 OK status and valid return data with no errors.
.png?inst-v=61833b8b-b919-485b-92eb-9eec7ea5032f)
Encoding Using an External Script
Users who prefer to perform JWT encoding outside a browser may do so using a script, provided they have access to the following:
Use the following instructions to perform JWT encoding in a script.
Create a new file in VS Code to contain the script.
Copy and paste the code below in the file.
PYimport jwt # Import the PyJWT library for encoding JSON Web Tokens # Define the payload – this is the data that must be included in the token payload = { "Timestamp": "", "Site": "", "Username": "" } # Define the JWT header – this specifies the algorithm and token type jwt_header = { "alg": "HS256", "kid": "", "typ": "JWT" } # Secret key used to sign the token – must be known to both sender and receiver secret_key = "a-string-secret-at-least-256-bits-long" # Generate the JWT using the payload, secret key, and algorithm jwt_token = jwt.encode(payload, secret_key, algorithm="HS256", headers=jwt_header) # Convert to string if the result is in bytes (needed for older versions of PyJWT) if isinstance(jwt_token, bytes): jwt_token = jwt_token.decode('utf-8') # Output the signed JWT string print(jwt_token)Open a new terminal and paste the command below to use pip to install the
pyjwtpackage required for JWT encoding:CODEpip install pyjwtRefer to PyJWT 2.10.1 documentation for more information.
Copy the JWT header in vSOC and replace the
jwt_headerobject in the script.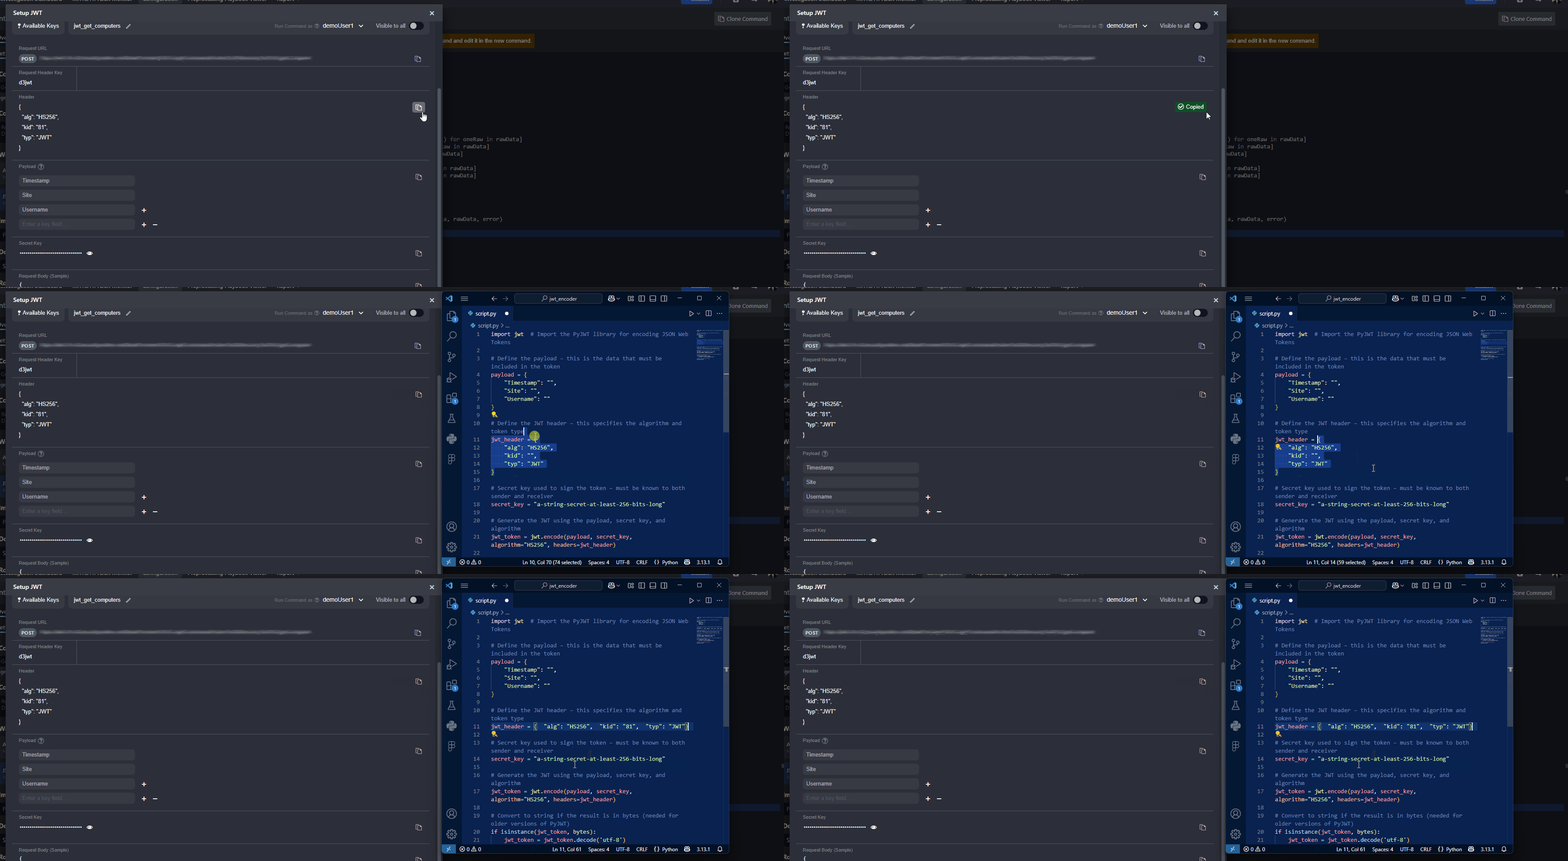
Copy the payload from vSOC and replace the
payloadobject in the script.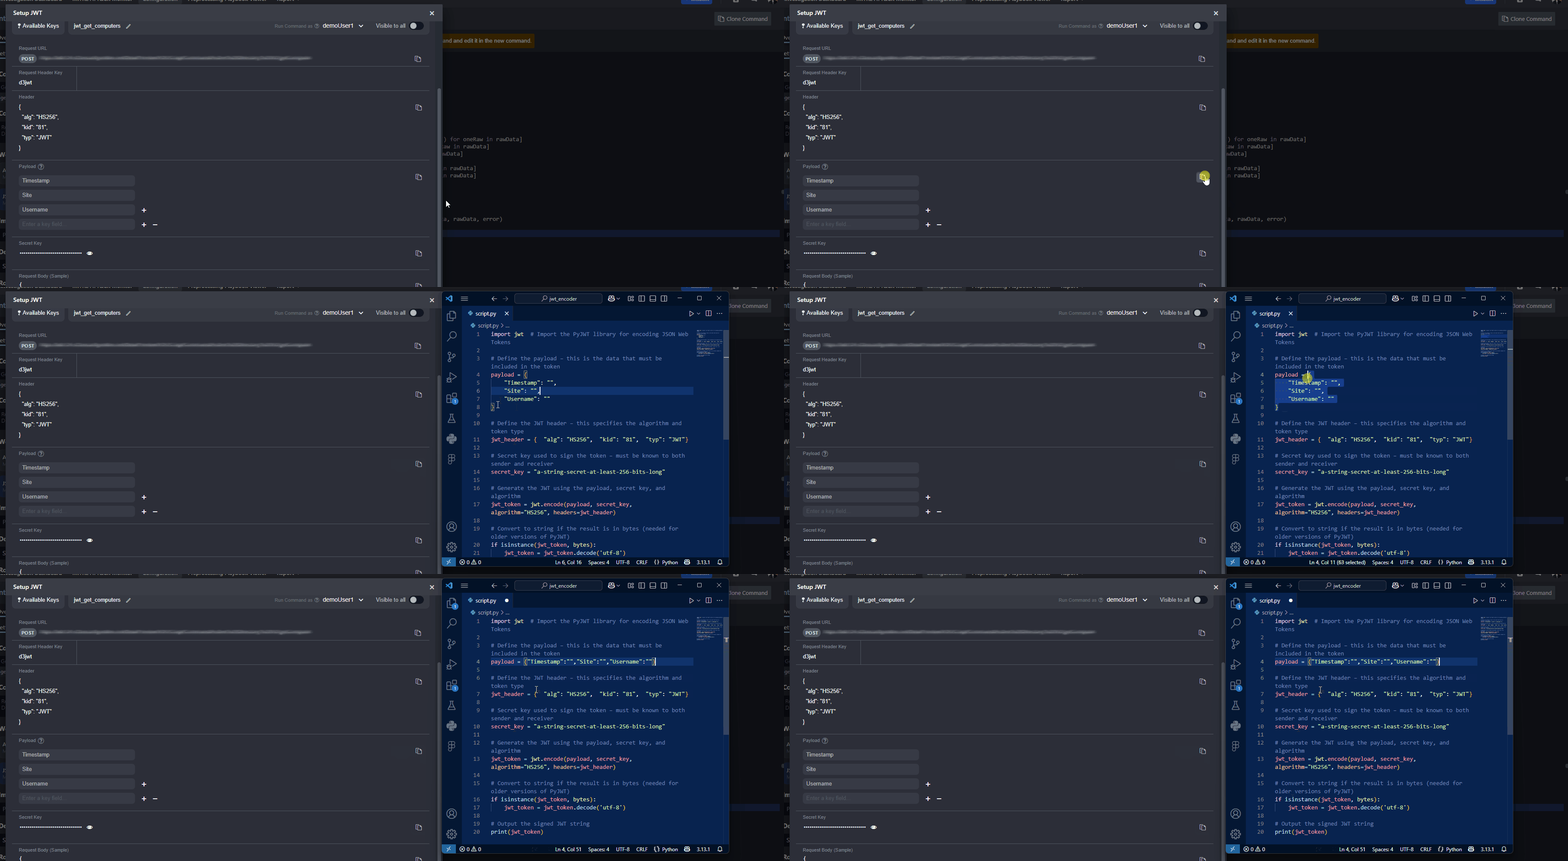
Update the payload with the correct site and username to match the request body in Postman.

The username in both the request body and payload must match the user being granted access to the remote command key.

(Optional) Adjust the value of the
Timestampfield in the script.
Copy the secret key from vSOC and replace the
secret_keyvalue in the script.
Click the down arrow beside the
 button in VS Code and select the Run Python File in Dedicated Terminal option.
Once executed, copy the encoded JWT value printed in the terminal and paste it into Postman as the value for the
d3jwtheader key..png?inst-v=61833b8b-b919-485b-92eb-9eec7ea5032f)

-20241205-193840.png?inst-v=61833b8b-b919-485b-92eb-9eec7ea5032f)
-20241205-194610.png?inst-v=61833b8b-b919-485b-92eb-9eec7ea5032f)
-20241205-200433.png?inst-v=61833b8b-b919-485b-92eb-9eec7ea5032f)
%202-20241205-214316.png?inst-v=61833b8b-b919-485b-92eb-9eec7ea5032f)

-20241205-203600.png?inst-v=61833b8b-b919-485b-92eb-9eec7ea5032f)
-20241205-203551.png?inst-v=61833b8b-b919-485b-92eb-9eec7ea5032f)
.png?inst-v=61833b8b-b919-485b-92eb-9eec7ea5032f)
.png?inst-v=61833b8b-b919-485b-92eb-9eec7ea5032f)
.png?inst-v=61833b8b-b919-485b-92eb-9eec7ea5032f)
.png?inst-v=61833b8b-b919-485b-92eb-9eec7ea5032f)
.png?inst-v=61833b8b-b919-485b-92eb-9eec7ea5032f)
.png?inst-v=61833b8b-b919-485b-92eb-9eec7ea5032f)
.png?inst-v=61833b8b-b919-485b-92eb-9eec7ea5032f)
.png?inst-v=61833b8b-b919-485b-92eb-9eec7ea5032f)
.png?inst-v=61833b8b-b919-485b-92eb-9eec7ea5032f)
.png?inst-v=61833b8b-b919-485b-92eb-9eec7ea5032f)
.png?inst-v=61833b8b-b919-485b-92eb-9eec7ea5032f)
.png?inst-v=61833b8b-b919-485b-92eb-9eec7ea5032f)
