
Keycloak
LAST UPDATED: FEBRUARY 13, 2026
Overview
This guide provides step-by-step instructions for configuring SAML authentication between Keycloak and D3 vSOC. It describes how to create and configure a SAML client in Keycloak, and how to enable login to D3 vSOC using Keycloak as the identity provider.
Configuring SAML in Keycloak
Login to the admin console of Keycloak.
.png?inst-v=baa50ef4-a1e5-47eb-85d3-cf3178379c5a)
Navigate to the Manage realms page.
-20260212-183416.png?inst-v=baa50ef4-a1e5-47eb-85d3-cf3178379c5a)
Click on the Create realm button.
-20260211-234854.png?inst-v=baa50ef4-a1e5-47eb-85d3-cf3178379c5a)
Name and finish creating the realm.
.png?inst-v=baa50ef4-a1e5-47eb-85d3-cf3178379c5a)
Click into this newly created realm.
-20260212-182944.png?inst-v=baa50ef4-a1e5-47eb-85d3-cf3178379c5a)
Verify that the name of the new realm appears at the top-left corner.
-20260212-183154.png?inst-v=baa50ef4-a1e5-47eb-85d3-cf3178379c5a)
Click on the Realm settings menu item within the left sidebar.
-20260212-184618.png?inst-v=baa50ef4-a1e5-47eb-85d3-cf3178379c5a)
Click on the SAML 2.0 Identity Provider Metadata hyperlink near the bottom of the page.
-20260212-184438.png?inst-v=baa50ef4-a1e5-47eb-85d3-cf3178379c5a)
Store the value between the <ds:X509Certificate> and </ds:X509Certificate> tags securely for later reference.
-20260212-001459.png?inst-v=baa50ef4-a1e5-47eb-85d3-cf3178379c5a)
Navigate to the Clients page.
-20260212-184147.png?inst-v=baa50ef4-a1e5-47eb-85d3-cf3178379c5a)
Click on the Create client button.
-20260212-002257.png?inst-v=baa50ef4-a1e5-47eb-85d3-cf3178379c5a)
Configure the general settings.
-20260212-003324.png?inst-v=baa50ef4-a1e5-47eb-85d3-cf3178379c5a)
Select the SAML option from the client type dropdown.
Enter your D3 vSOC URL (ending with
/VSOC/D3SOC) in the Client ID field.Click on the Next button.
Configure the Login settings.
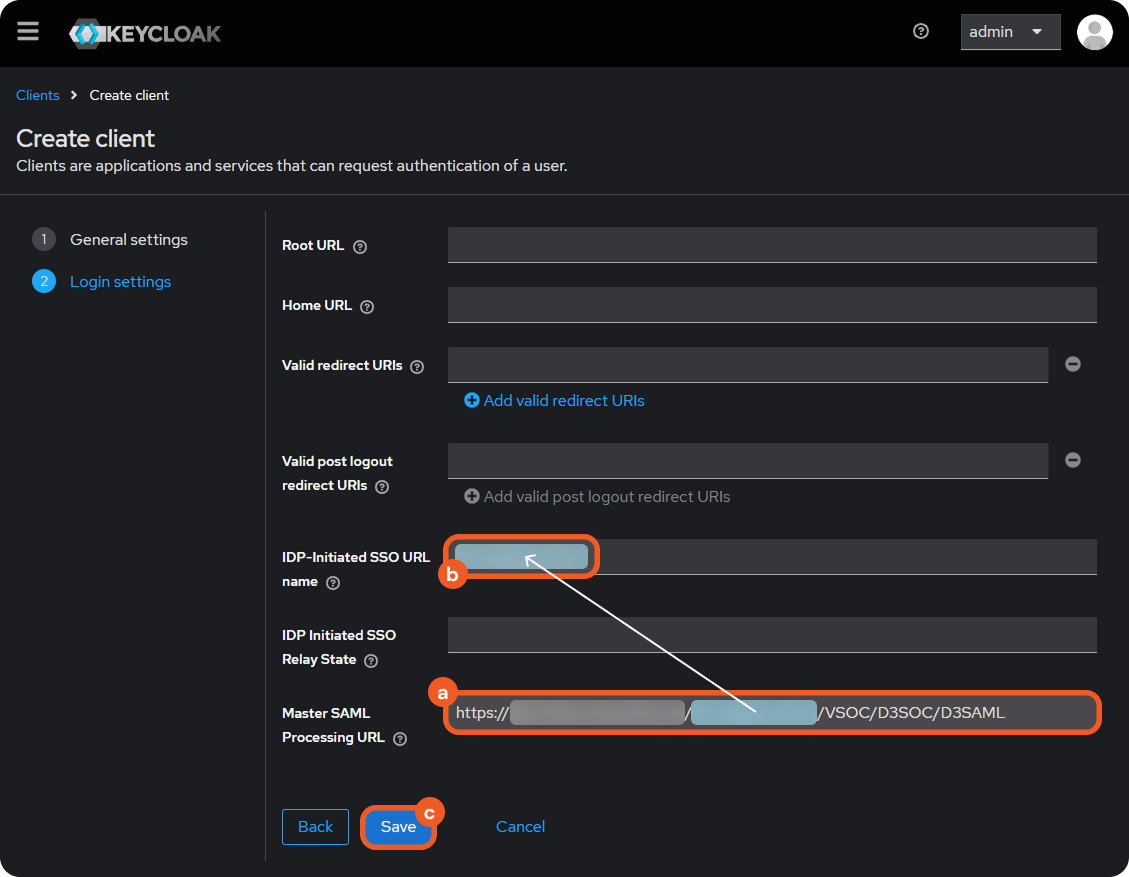
Enter your D3 vSOC URL (ending with
/VSOC/D3SOC/D3SAML) in the Master SAML Processing URL field.Enter the path between the base URL and the /vSOC/D3SOC/D3SAML endpoint in the IDP-Initiated SSO URL name field, without the leading and trailing slashes.
Click on the Save button.
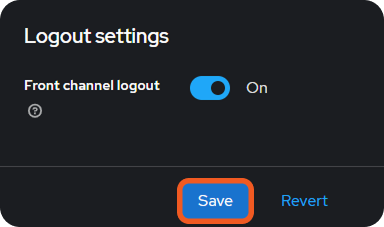
Scroll to the SAML capabilities section, then select the email option for the name ID format dropdown.
-20260212-005025.png?inst-v=baa50ef4-a1e5-47eb-85d3-cf3178379c5a)
Click on the Save button.
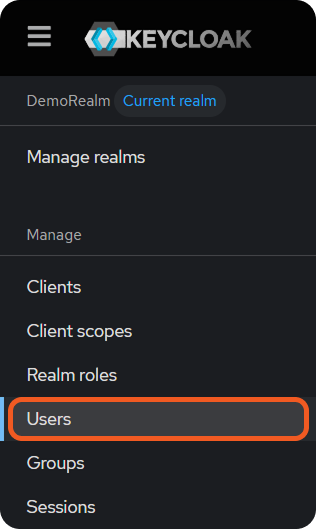
Navigate to the Users page.
Click on the Add user (or Create new user) button.
-20260212-010116.png?inst-v=baa50ef4-a1e5-47eb-85d3-cf3178379c5a)
Create the user.
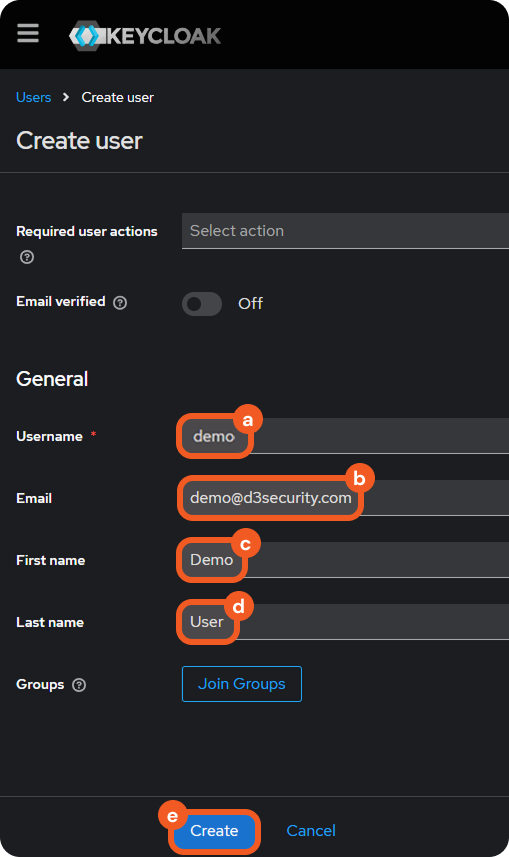
Enter a unique username.
Enter an email address.
Enter the first name of the user.
Enter the last name of the user.
Click on the Create button.
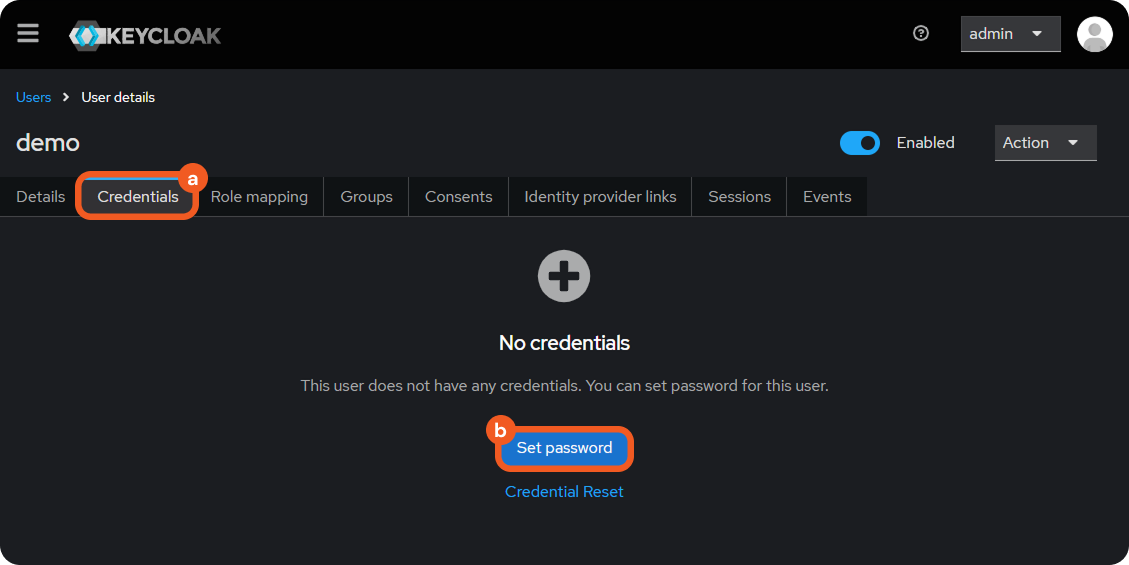
Navigate to the Credentials tab, then click on the Set password button.
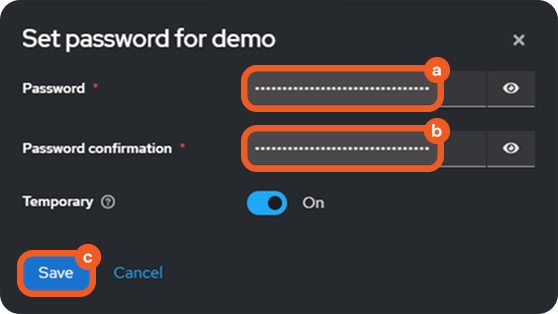
Enter and confirm a strong password, then click on the Save button.
READER NOTE
Before proceeding, ensure that you have:
Created D3 user accounts (Organization Management > Users > + Add Users).
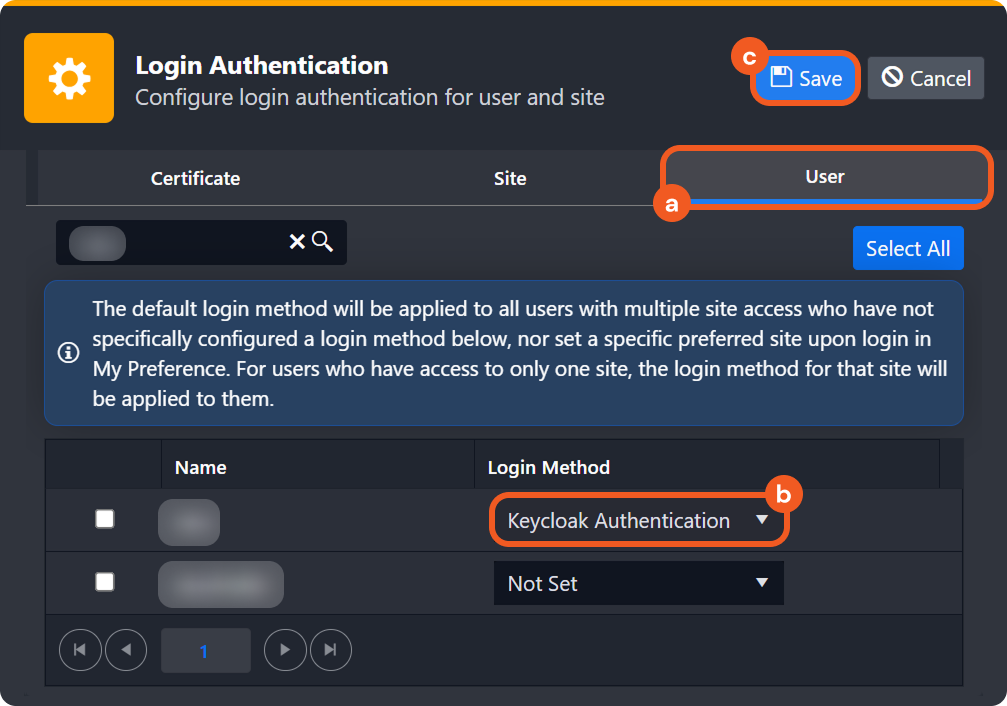
Reviewed the procedure for adding a new login method. The new Keycloak SAML login method must to be assigned to the appropriate D3 user accounts (Application Settings > Login Authentication > Users).
Reviewed the SAMLEmailIDType article. Depending on the SAMLEmailIDType configuration, the D3 login username is either the full email address or its local part.
Create a SAML20 D3 login authentication method.
-20260212-191351.png?inst-v=baa50ef4-a1e5-47eb-85d3-cf3178379c5a)
Name the authentication method.
Construct and input the target URL in the following format:
TEXThttp://<keycloak-host>:<port>/realms/<realm-name>/protocol/saml/clients/<client-id><KEYCLOAK-HOST> - The hostname or IP address of the Keycloak server.
<PORT> - The port on which Keycloak is running.
<REALM-NAME> - The name of the realm.
<CLIENT-ID> - The same value entered in step 13b.Enter the certificate value stored in step 9.
Click on the Save button.
Click on the Save button next to the Login Authentication header.

Assign the login method to D3 users.
Logging in to D3 vSOC via Keycloak
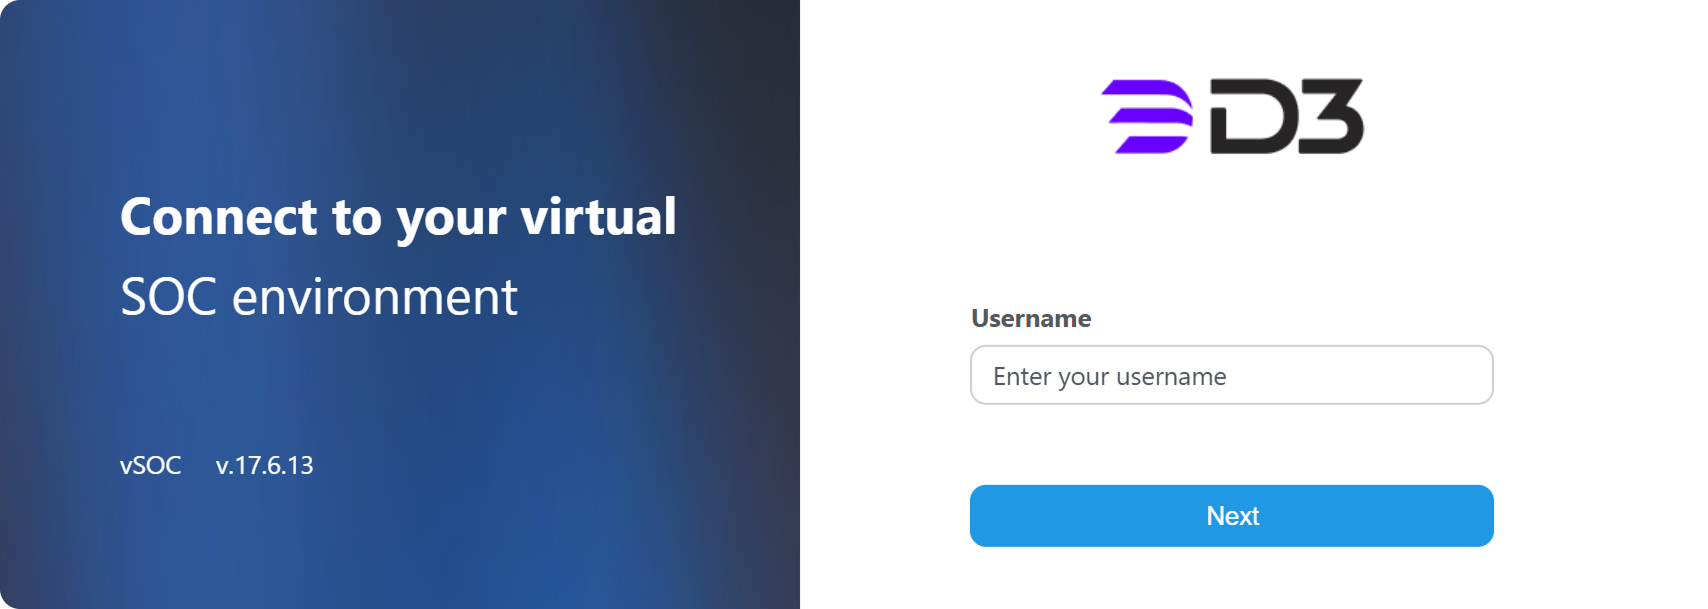
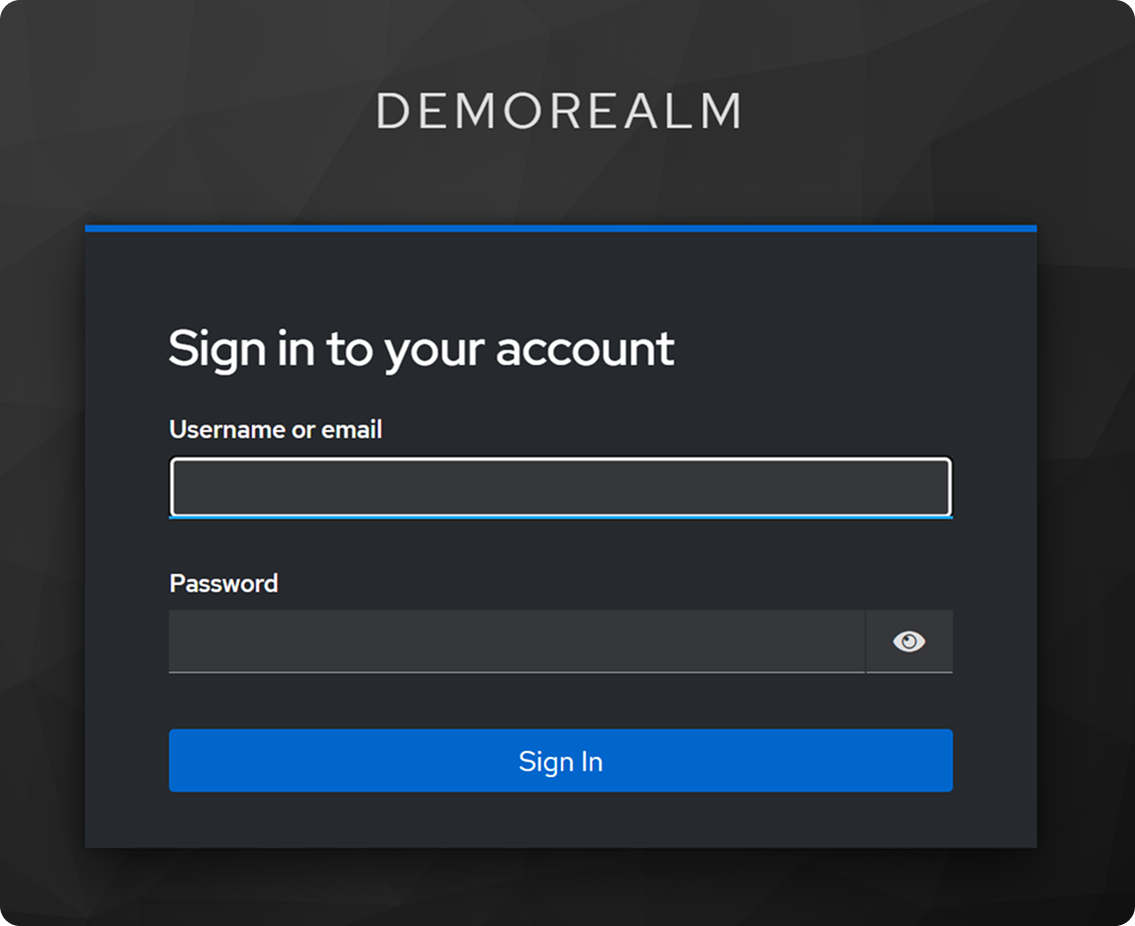
Enter the D3 username in the D3 vSOC login page for the user assigned the Keycloak authentication method in step 23b.
Enter the user credentials configured in steps 18a or 18b, and 20, on the Keycloak login page, then click on the Sign In button.
READER NOTE *
This redirect link differs from the admin console link. The correct page displays the realm name as the title (rather than "Keycloak").