
Artifact Instantiations
LAST UPDATED: SEPTEMBER 19, 2025
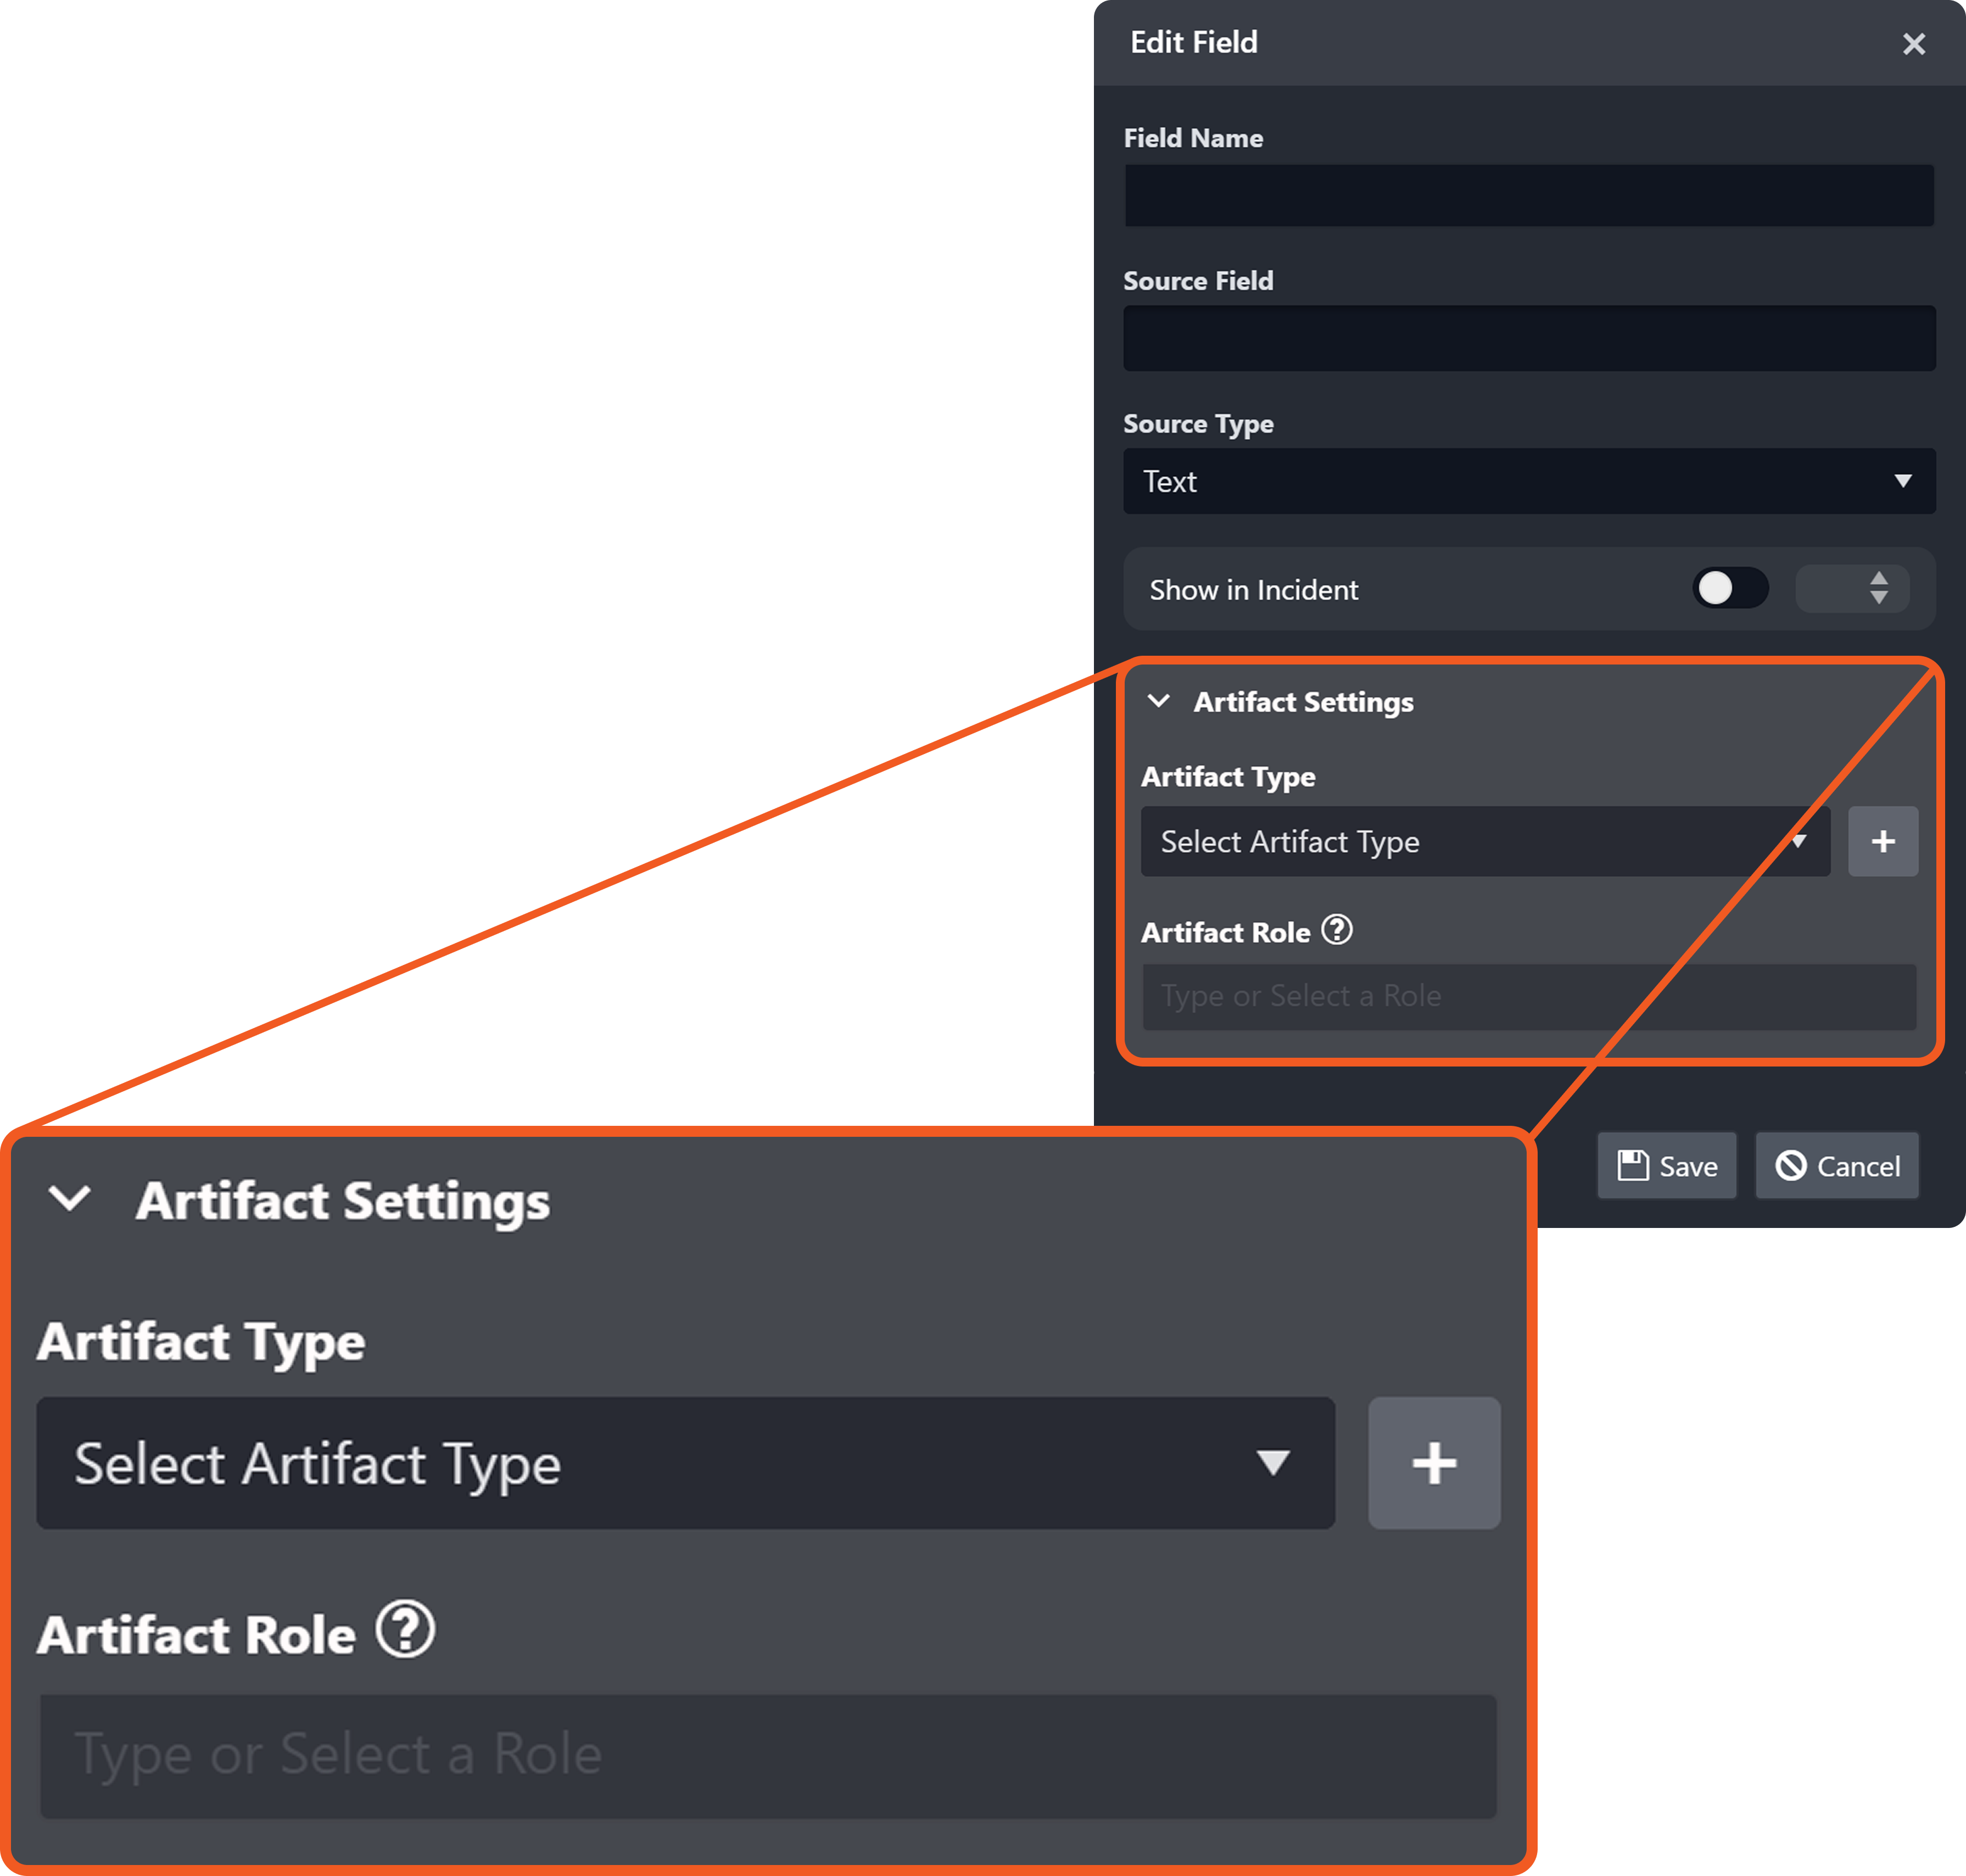
The optional Artifact Settings section in the EFM Edit Field popover defines the basis for instantiating an artifact type from ingested data. Artifact instantiations underpin relationship modeling and drive subsequent behavioral analysis.
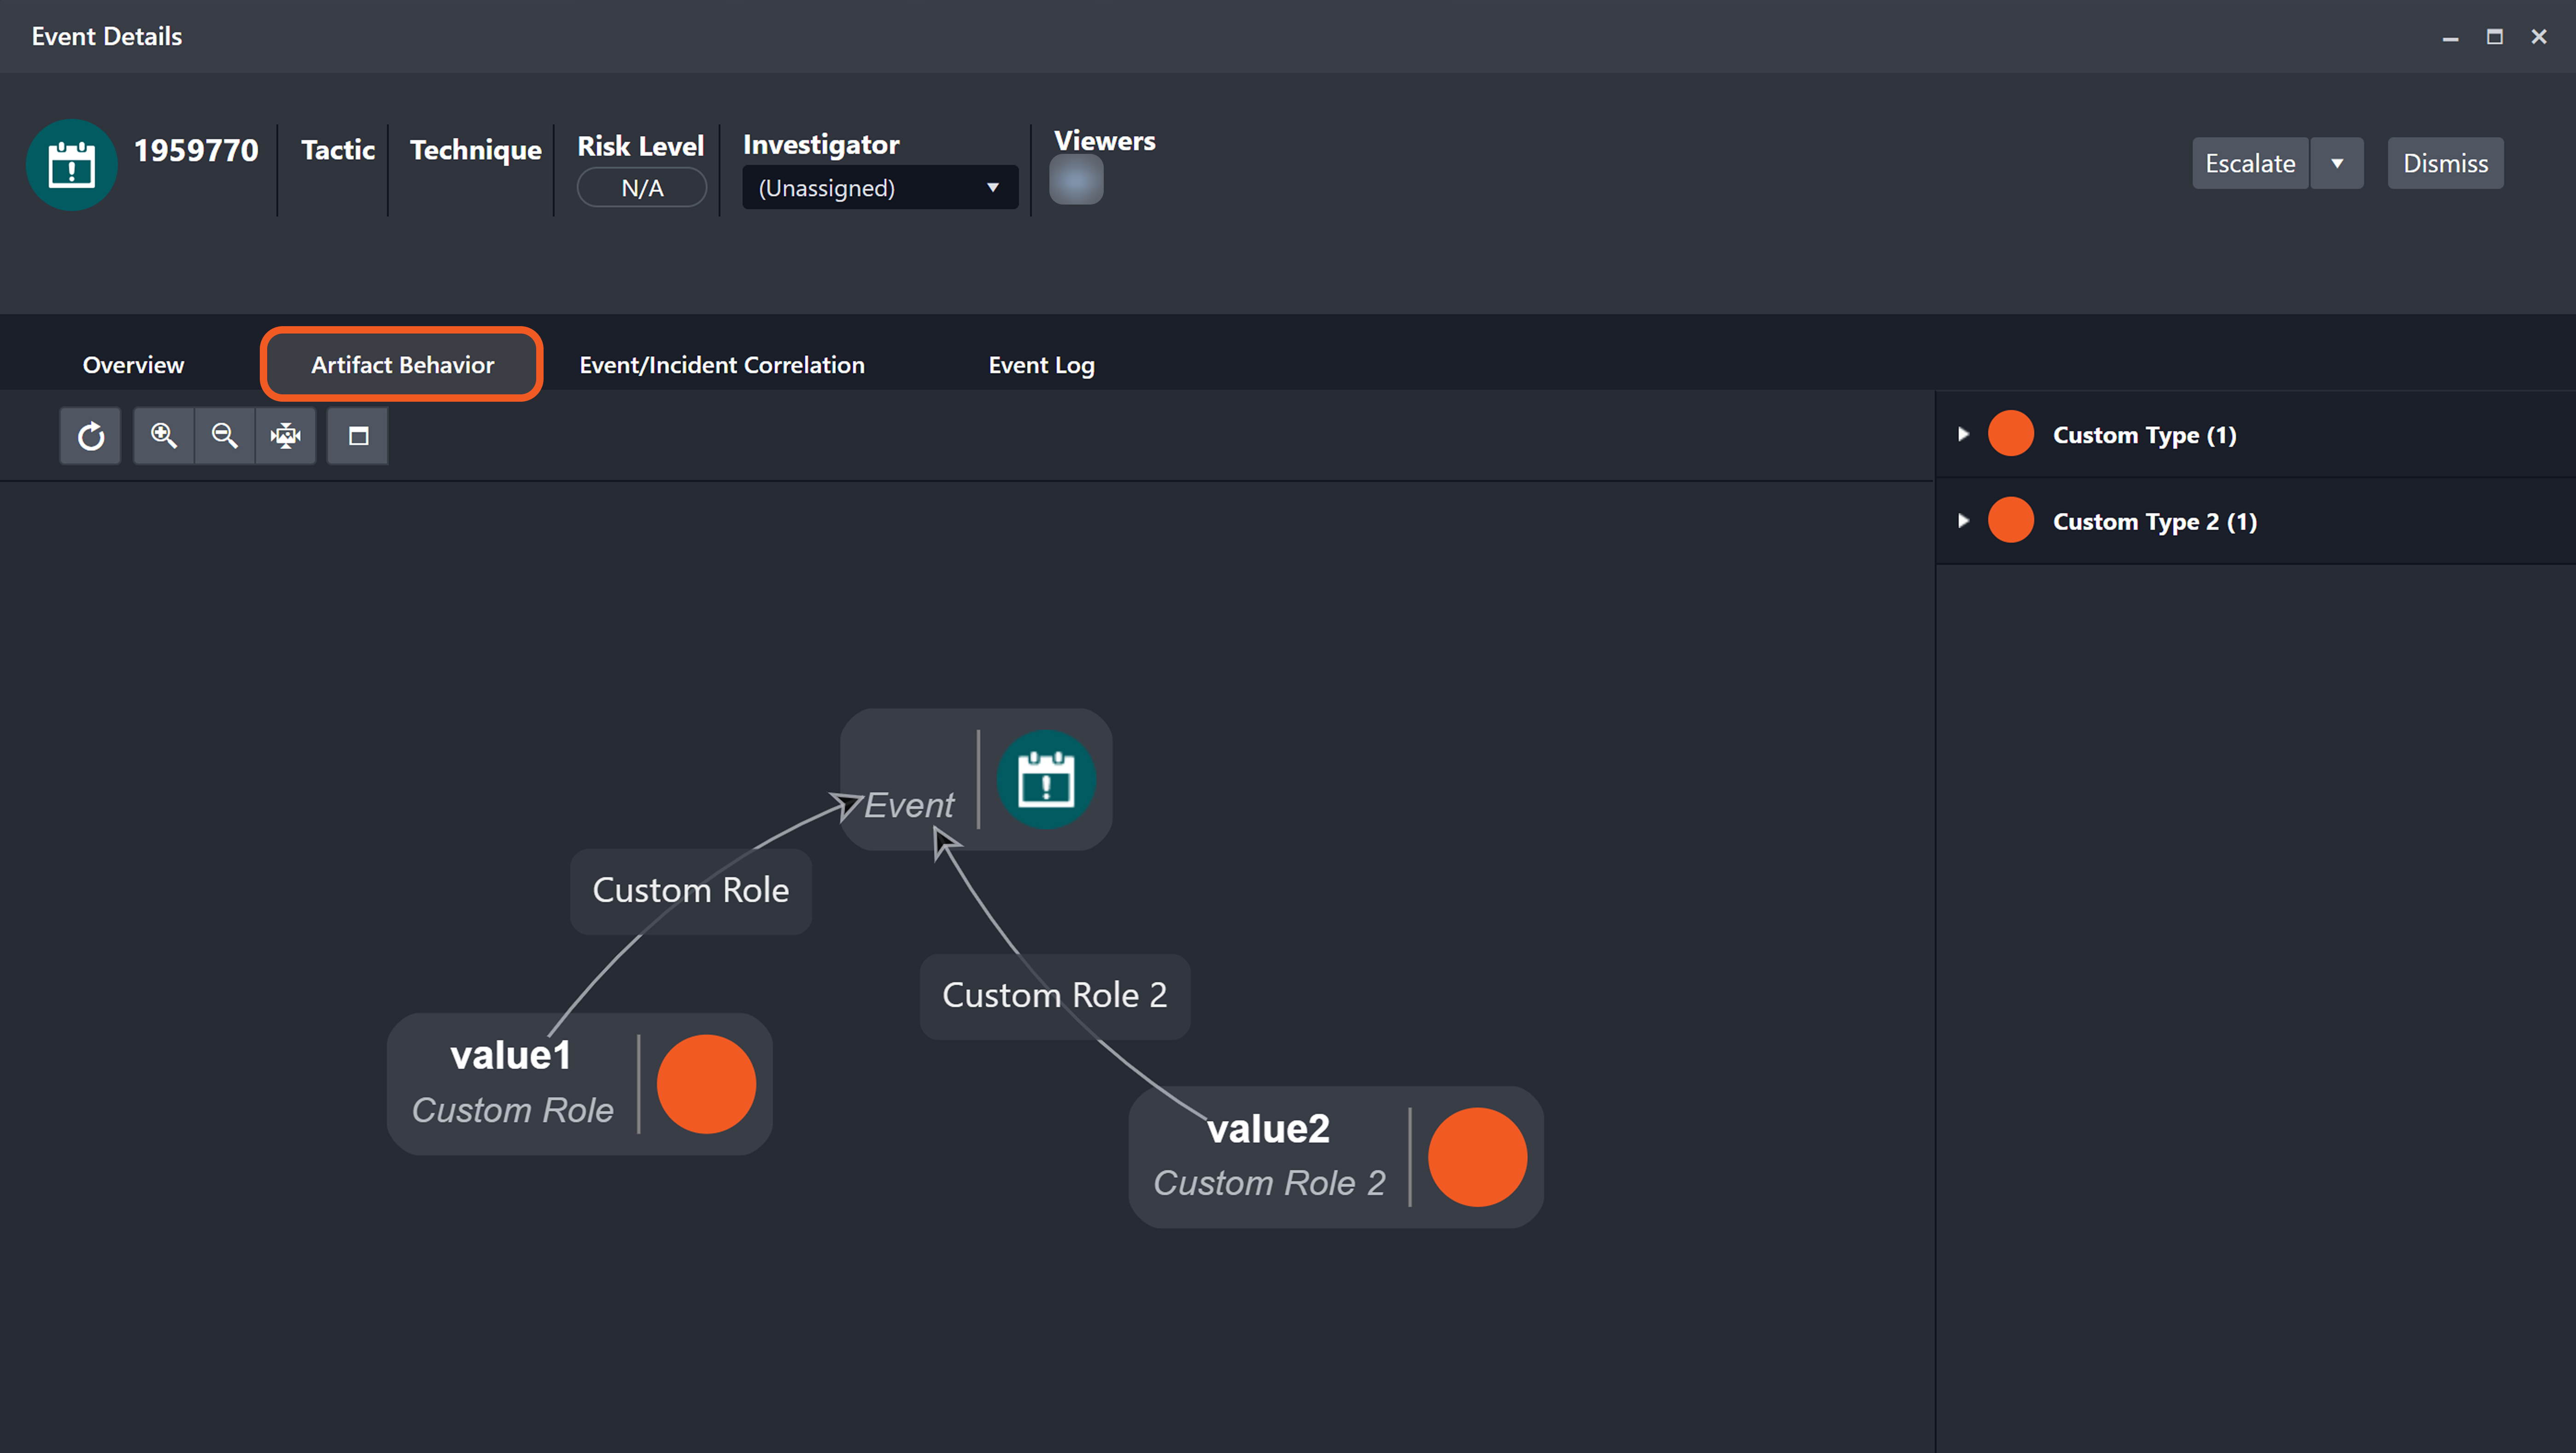
Artifact instances and their relationships together form a behavior graph. This graph is displayed in the Artifact Behavior tab of a D3 event's Event Details popover.
Artifact Settings
Configurable Parameters
The Artifact Settings accordion includes two parameters:
Artifact Type: A dropdown menu that provides the full set of supported artifact types, including both built-in (non-legacy) and any user-defined custom types.
Users may add new custom types on-the-fly via the adjacent
%201-20250624-003750.png?inst-v=a955d7a2-4130-4c65-a33e-27e848ba2a1c) button.
button.
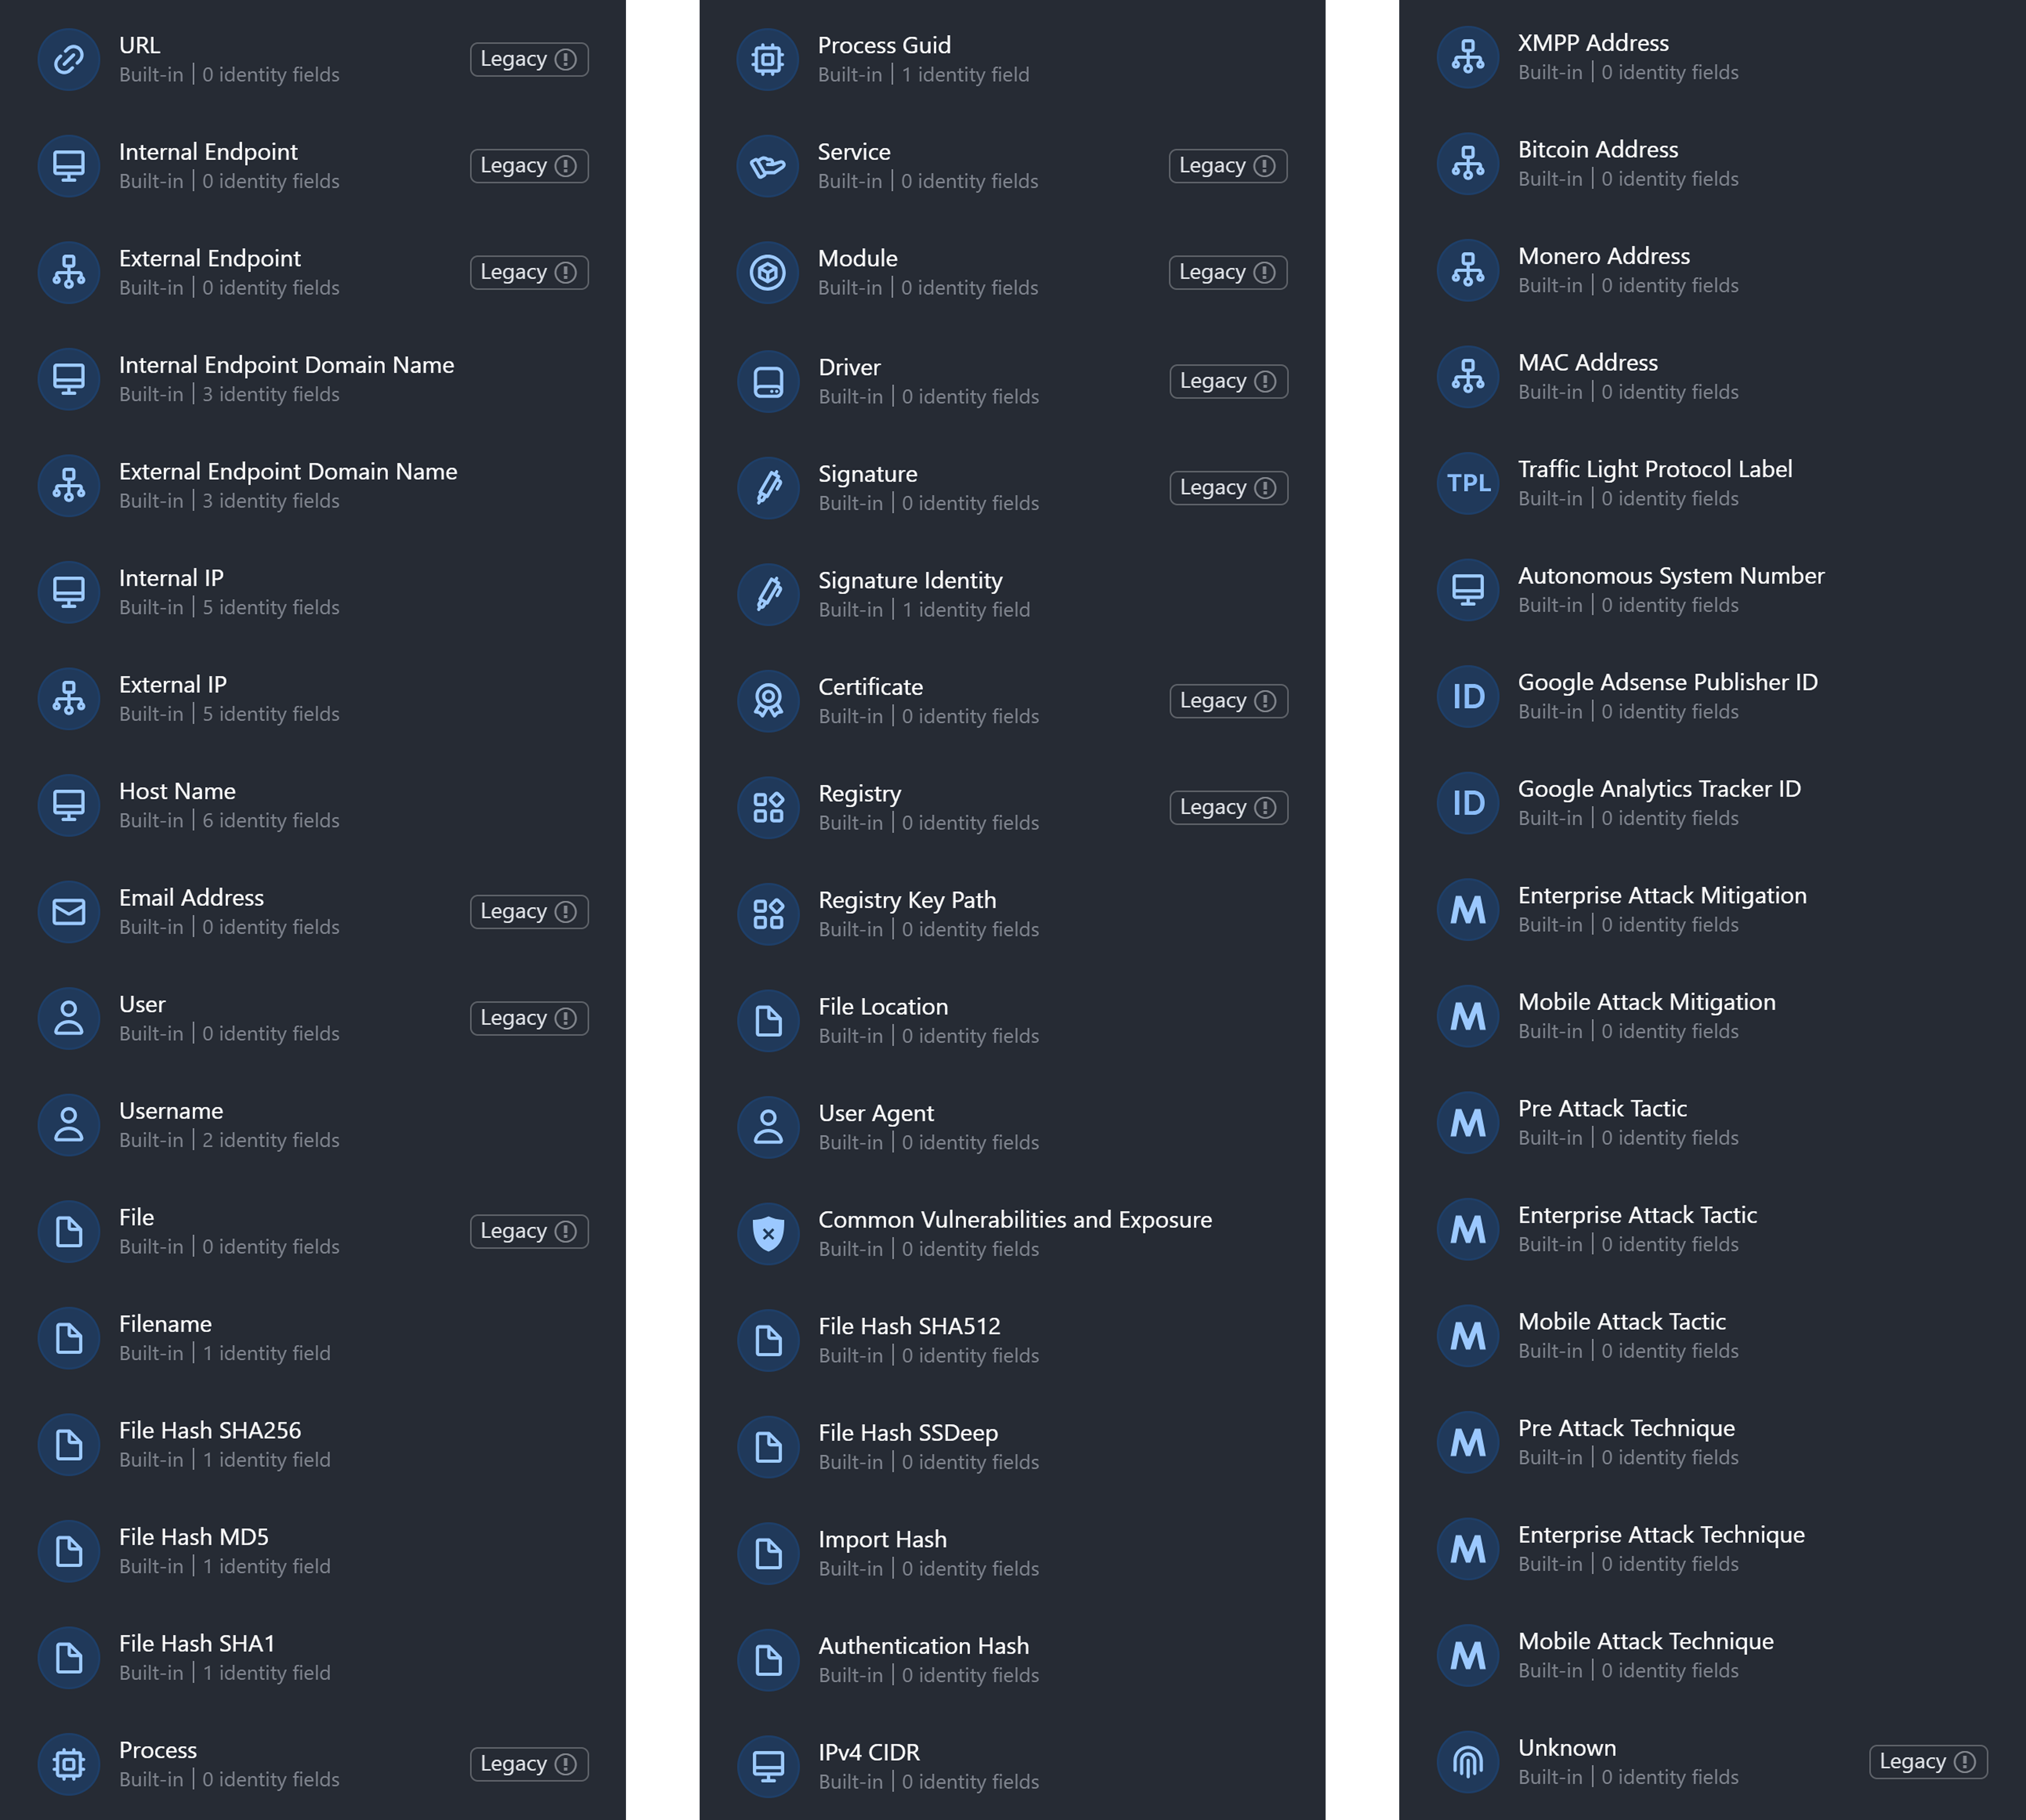
Artifact Types
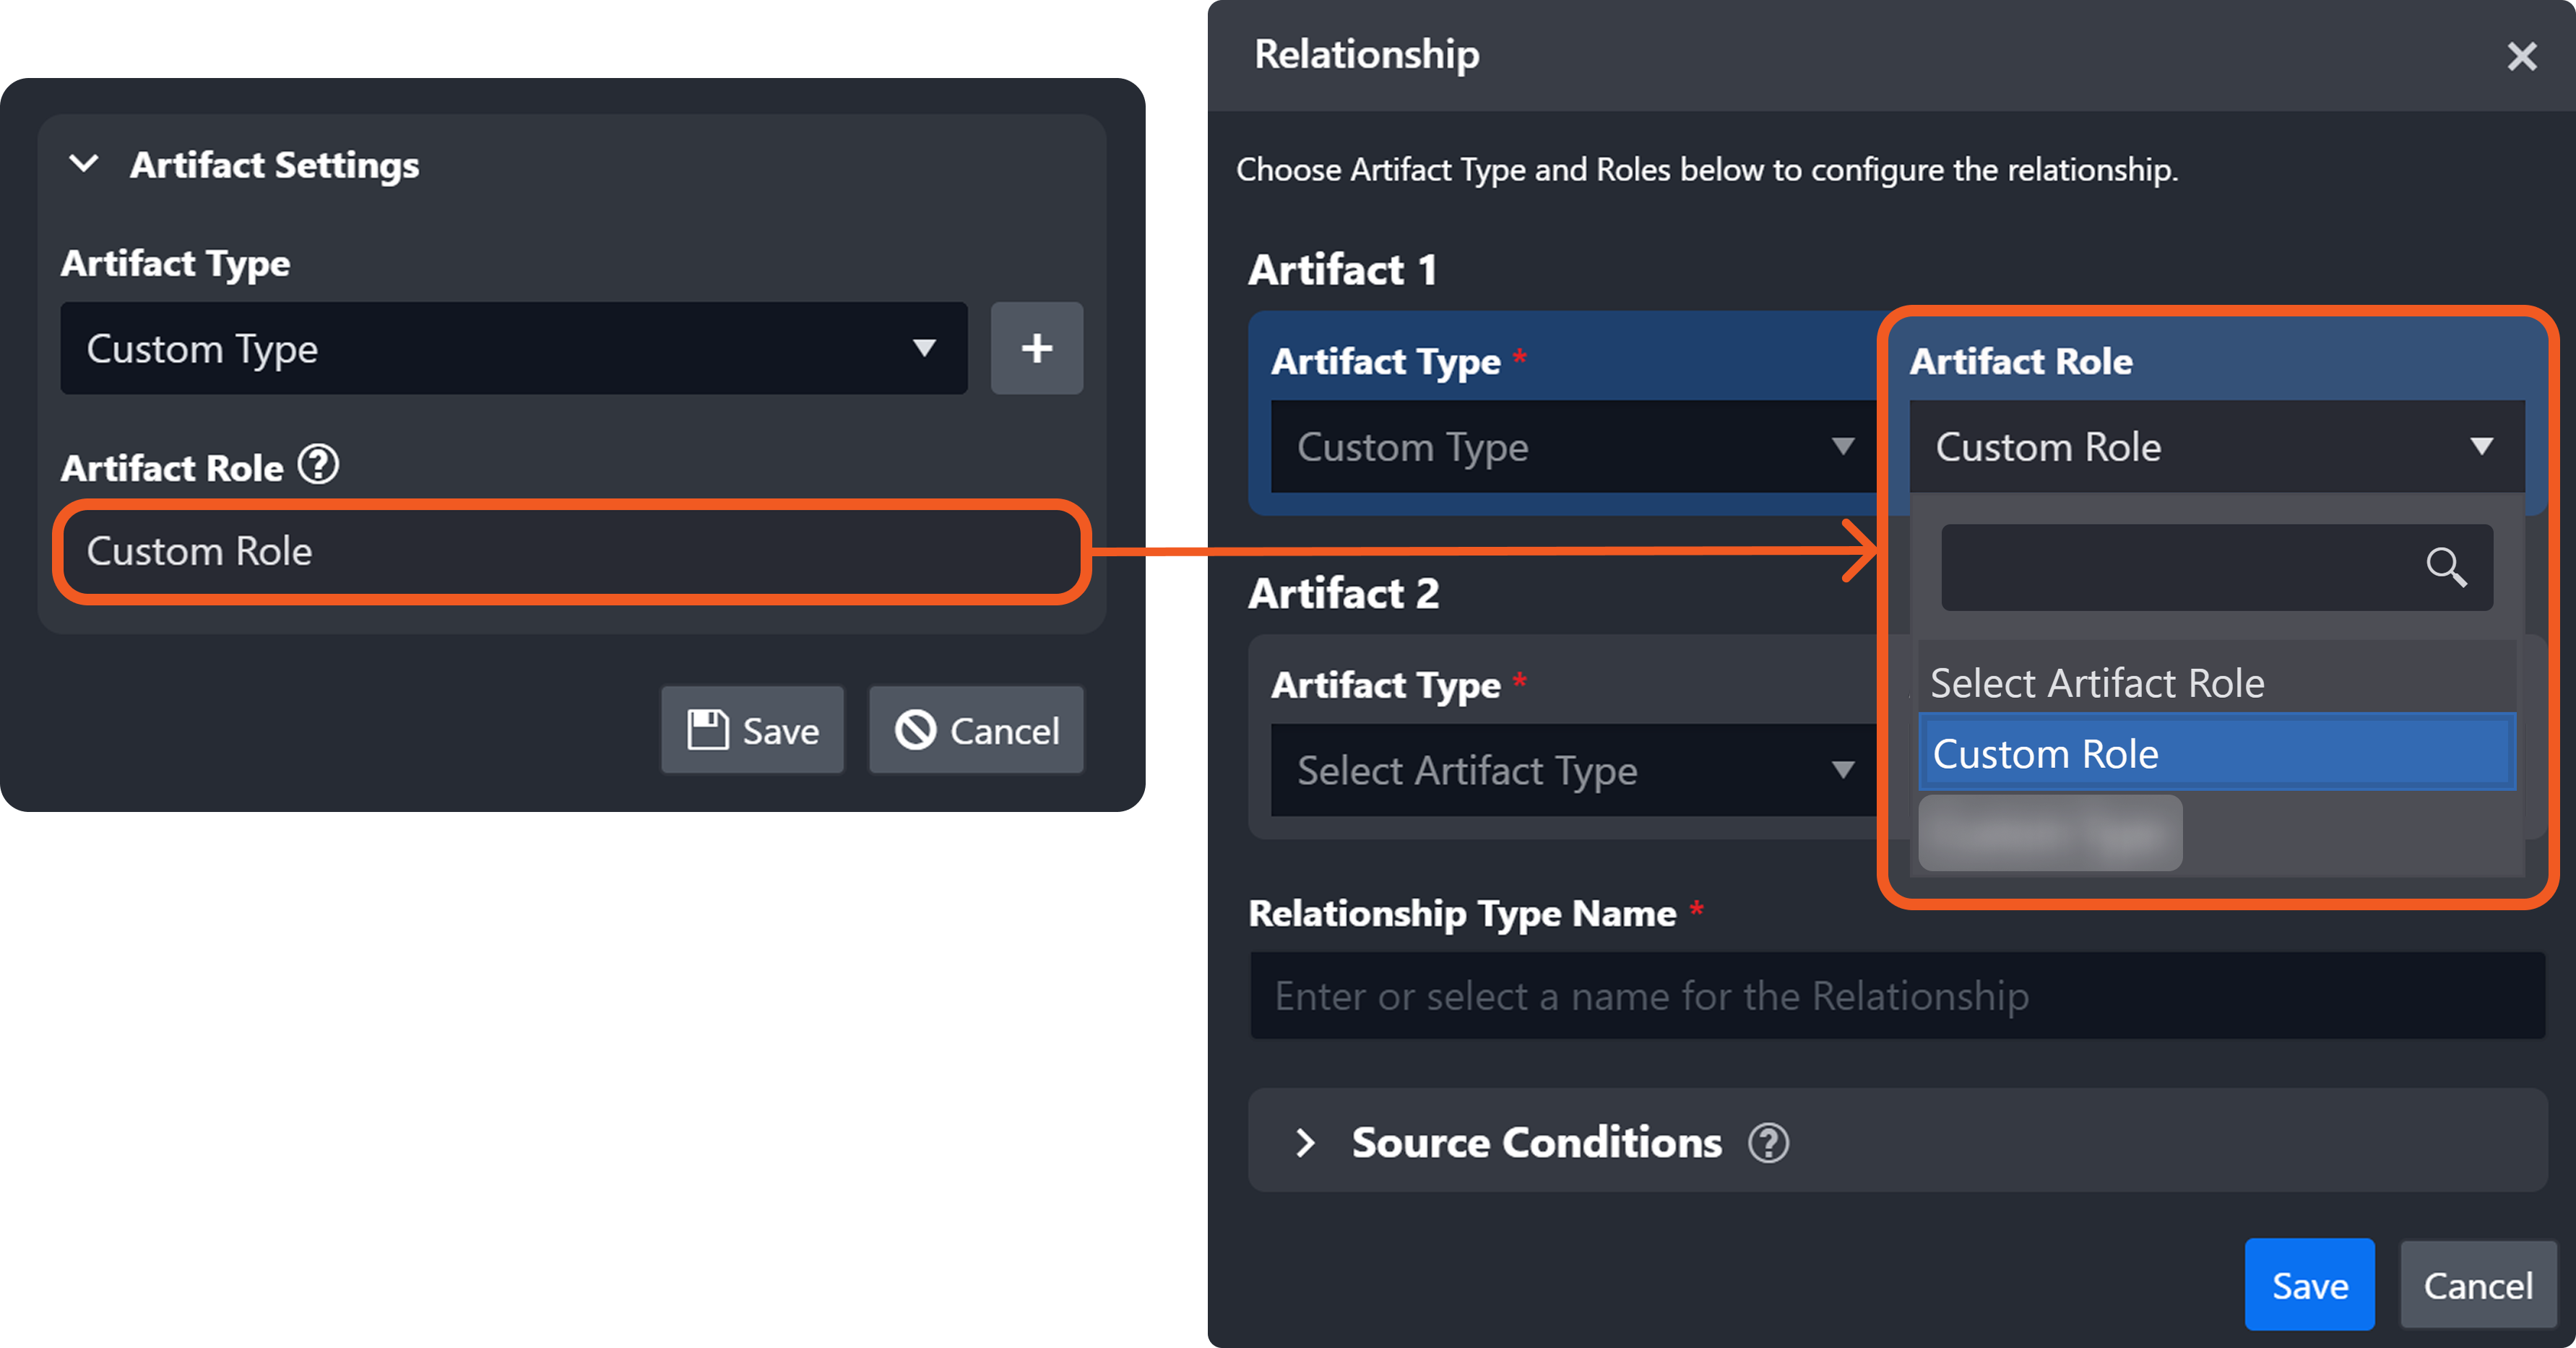
Artifact Role: A label that clarifies the function of an artifact in relation to an event.
Each string entered and saved in this field becomes a selectable option in the Relationship popover for the chosen artifact type, within the Artifact module.
By default, the value of the artifact role is identical to the artifact type.
Defining and Using Artifact Roles
Understanding Artifact Instantiation
An artifact is instantiated after data ingestion, when the following conditions are met:
The configured source field value for an EFM record matches a key in the raw data JSON.
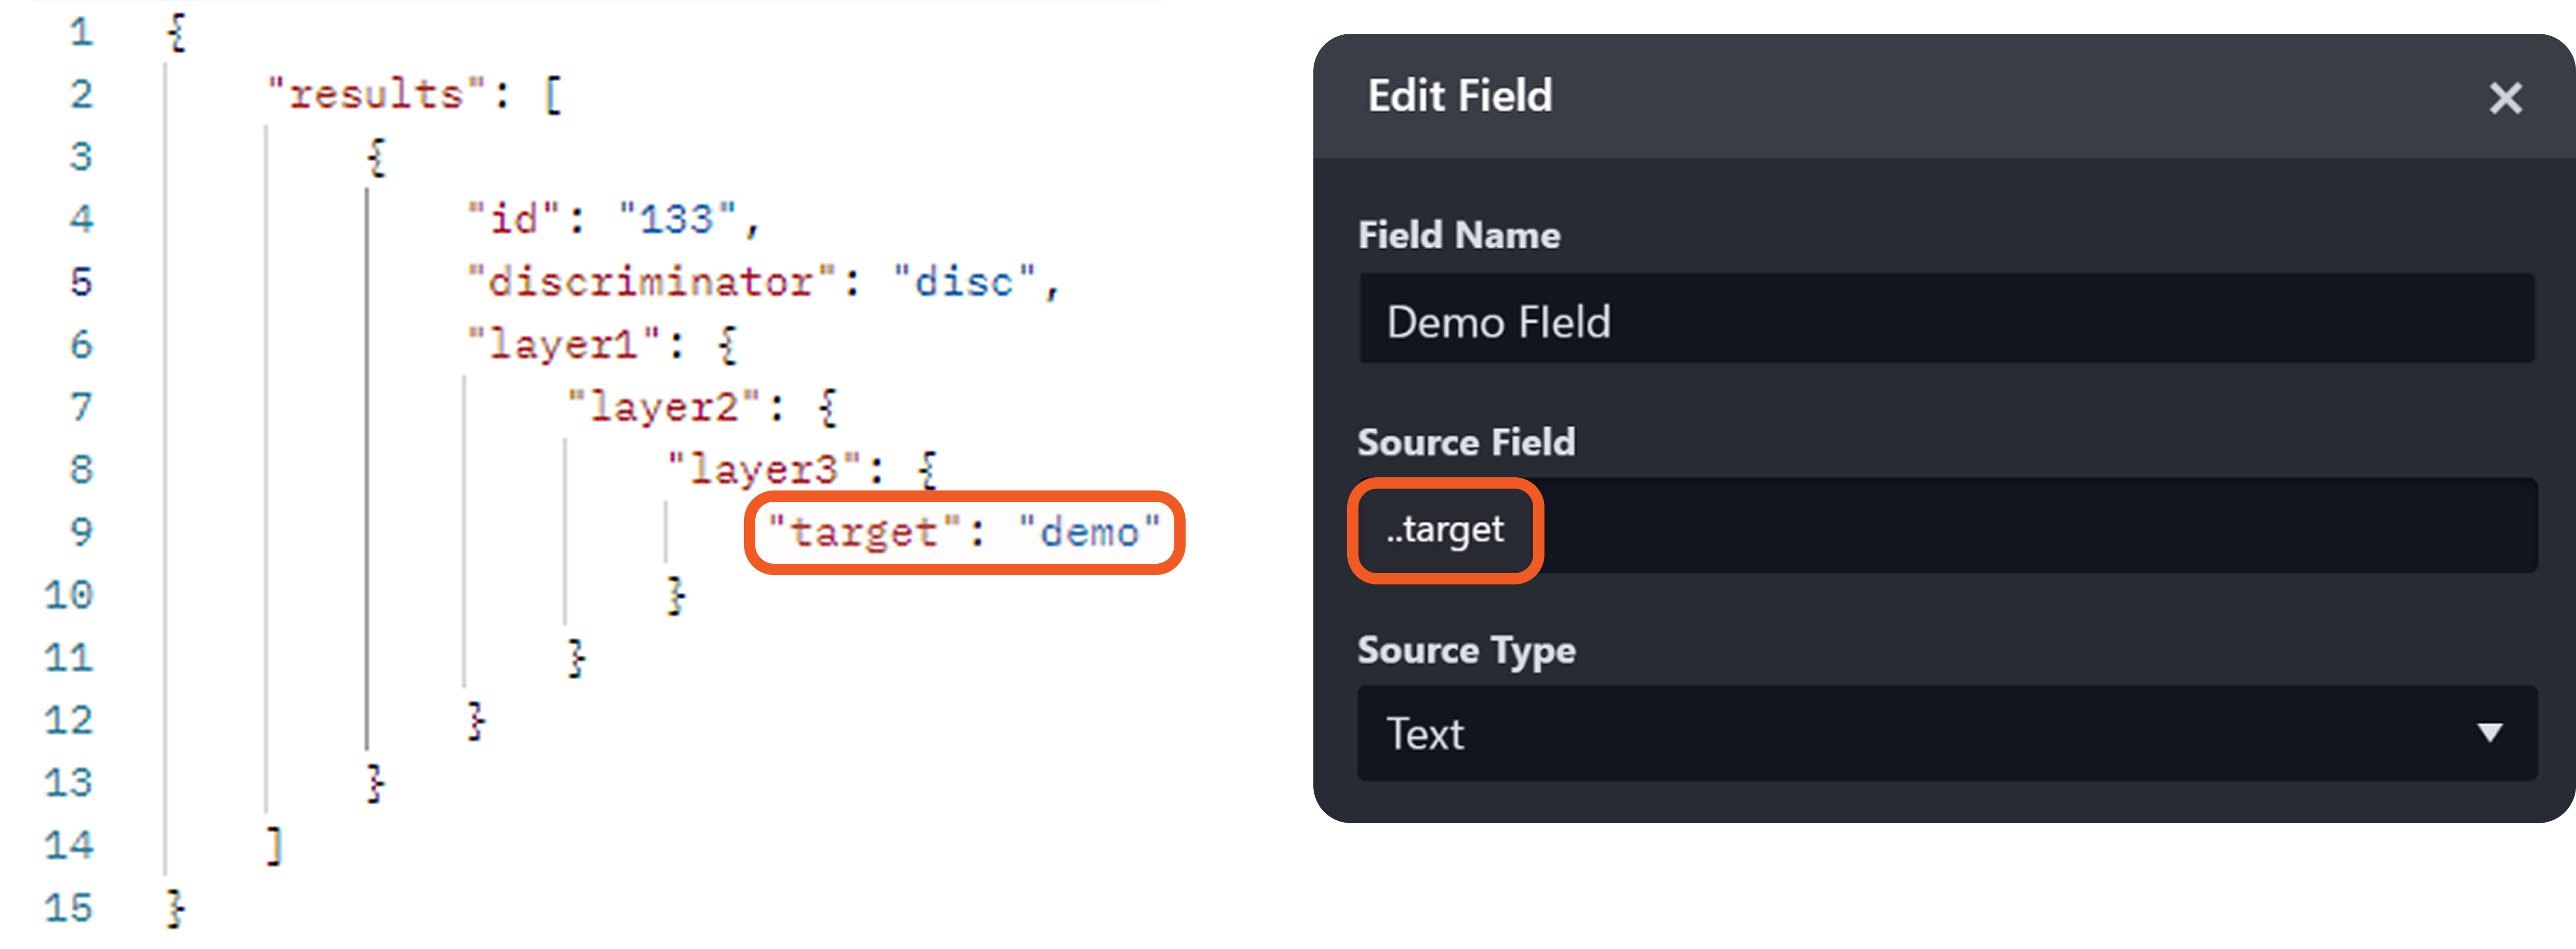
The value of the matched key is not:
an empty string
an empty list
null
An artifact type for the EFM record is configured.
Navigate to the Fetch Event command of the Zendesk integration.
-20250630-175639.png?inst-v=a955d7a2-4130-4c65-a33e-27e848ba2a1c)
Enable webhook authentication, then select the API Key option.
-20250630-183146.png?inst-v=a955d7a2-4130-4c65-a33e-27e848ba2a1c)
Create an API key, if one has not already been created. Record the selected site.
Copy the request information to Postman, then select a preprocessing playbook under the Additional Settings accordion.
-20250630-185035.png?inst-v=a955d7a2-4130-4c65-a33e-27e848ba2a1c)
In Postman:
Prepare the POST request URL.
-20250718-190151.png?inst-v=a955d7a2-4130-4c65-a33e-27e848ba2a1c)
Prepare the request header key and value.
-20250718-190210.png?inst-v=a955d7a2-4130-4c65-a33e-27e848ba2a1c)
Prepare the following payload for ingestion:
JSON{ "results": [ { "id": "1", "discriminator": "demo", "target1": "value1", "layer1": { "layer2": { "layer3": { "target2": "value2" } } } } ] }
Click on the Set Up Event Field Extraction Mapping button in D3 vSOC.
Note the Main Event JSONPath expression.
-20250916-172631.png?inst-v=a955d7a2-4130-4c65-a33e-27e848ba2a1c)
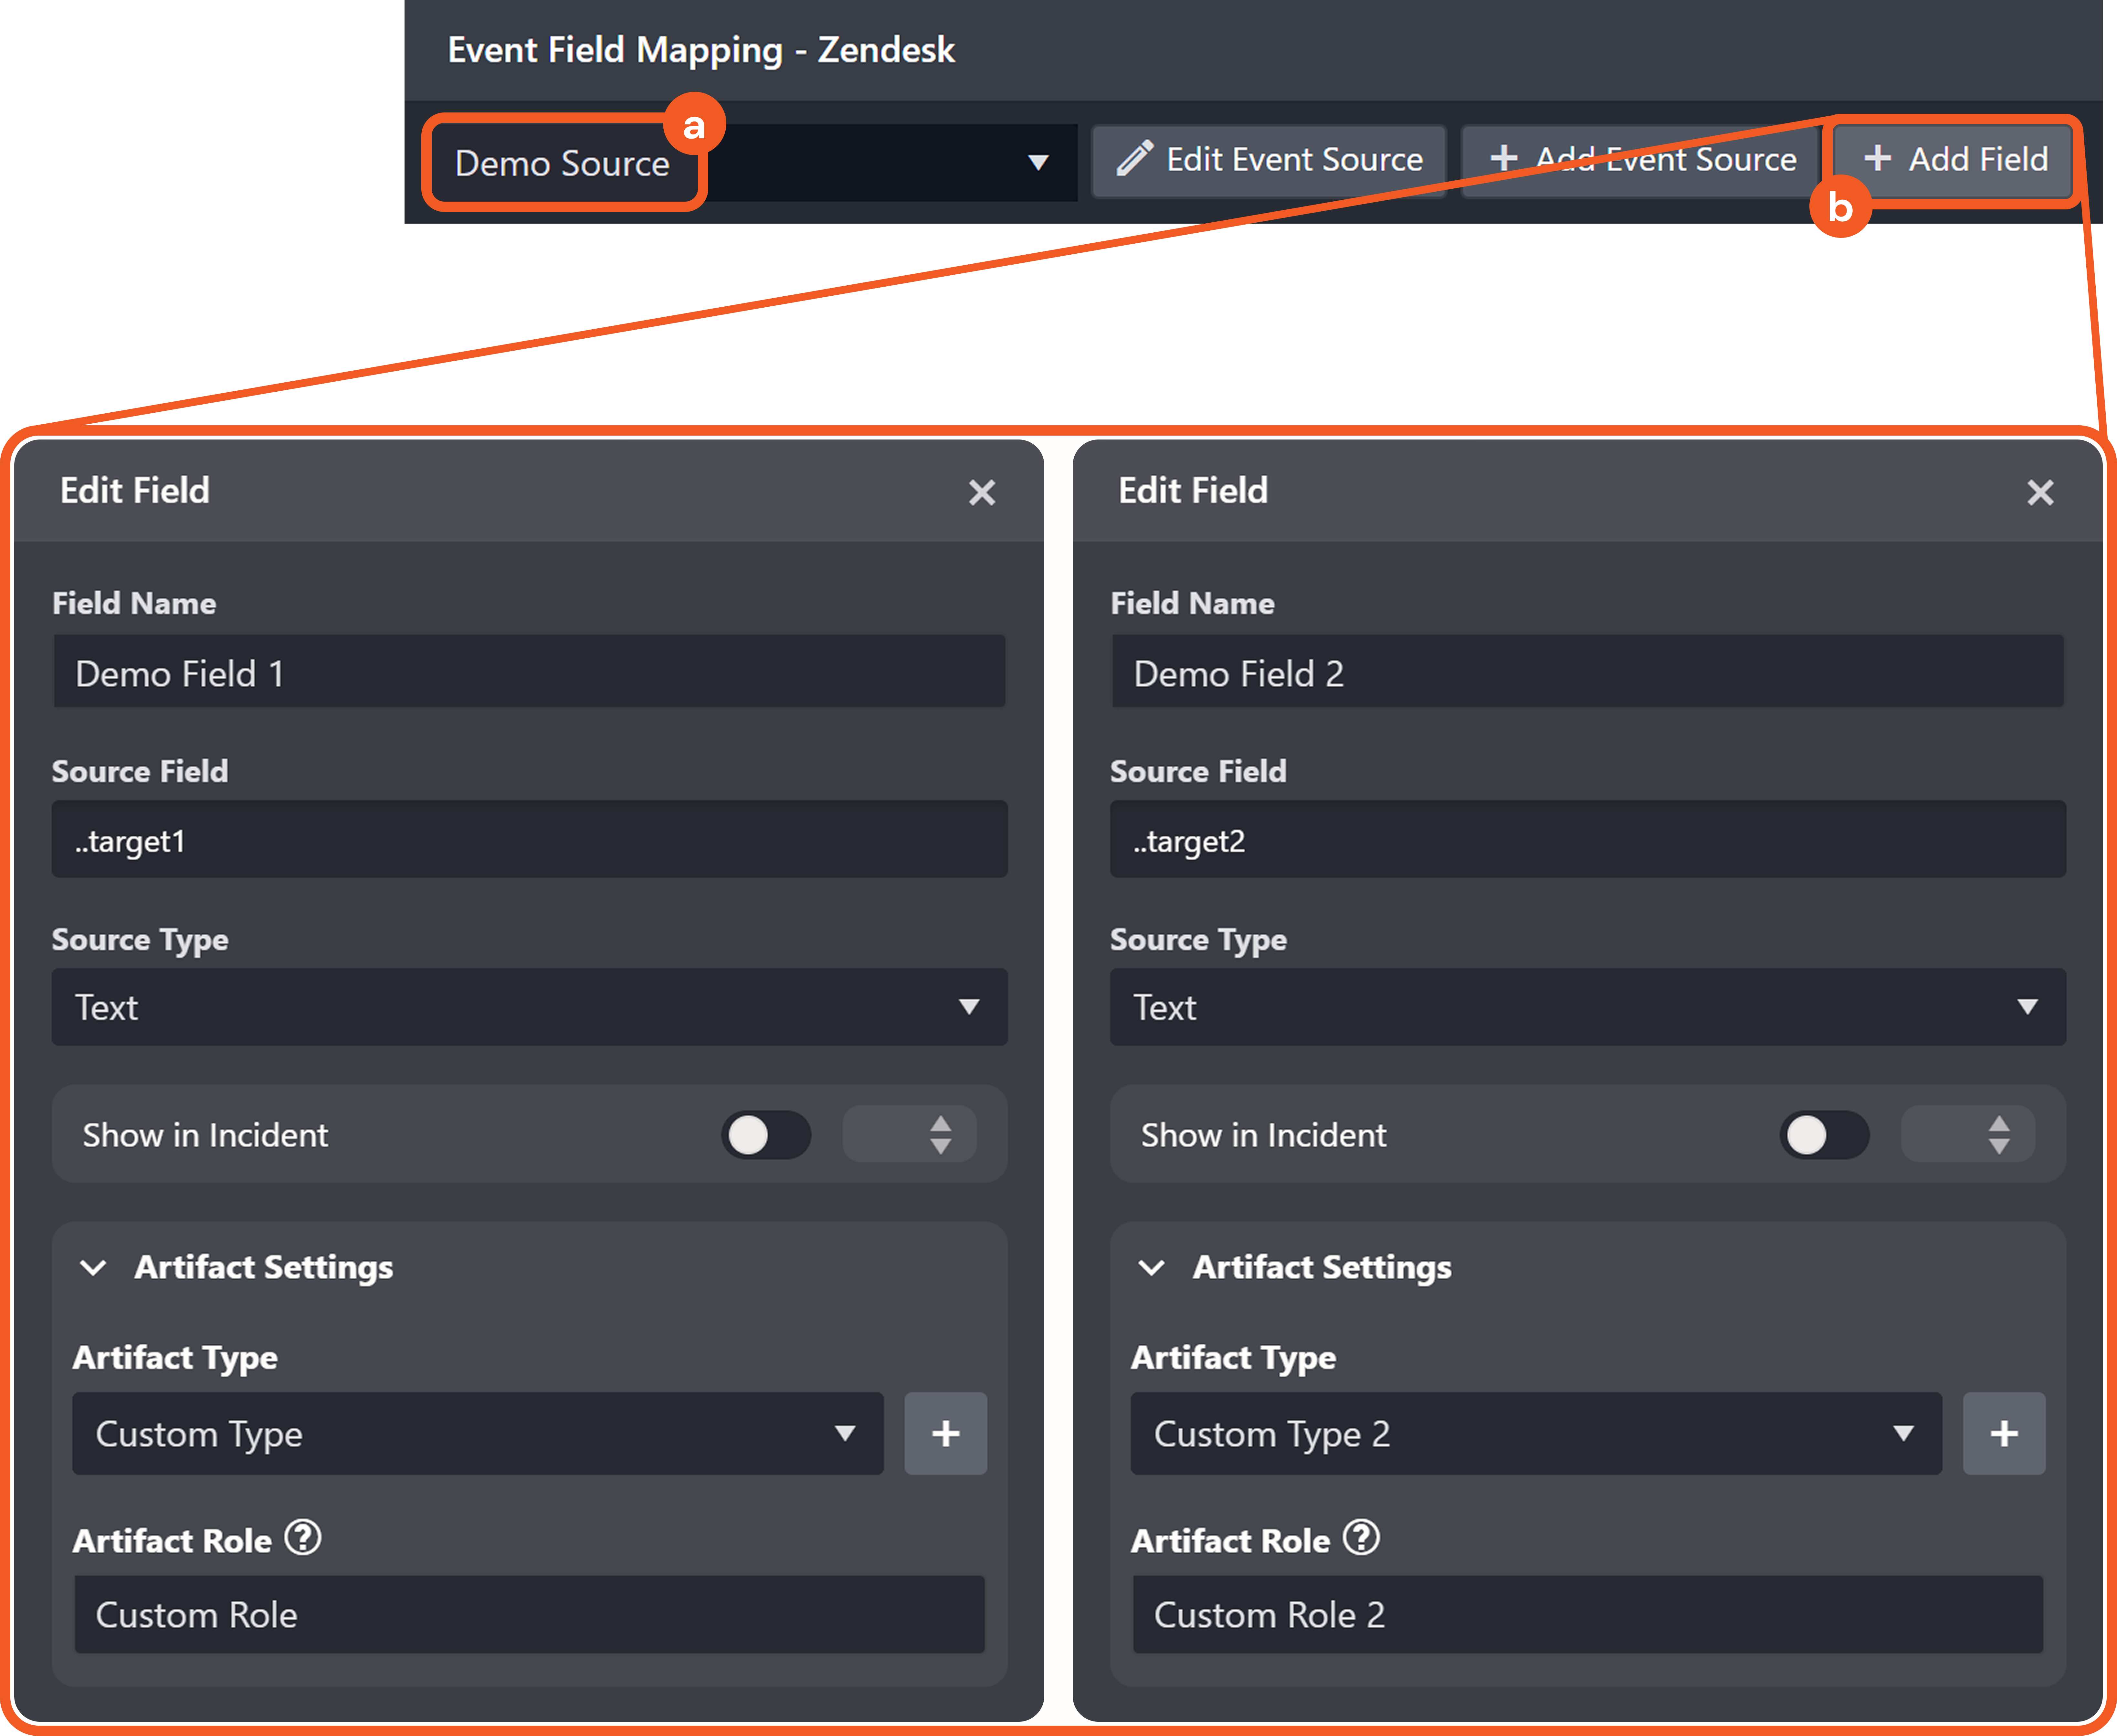
Create an event source called Demo Source using the following search string:
CODE{$.discriminator}=demoReady two custom artifact types.
Add the two EFM mapping records shown below.
Send the POST request prepared in step 4 and step 5.

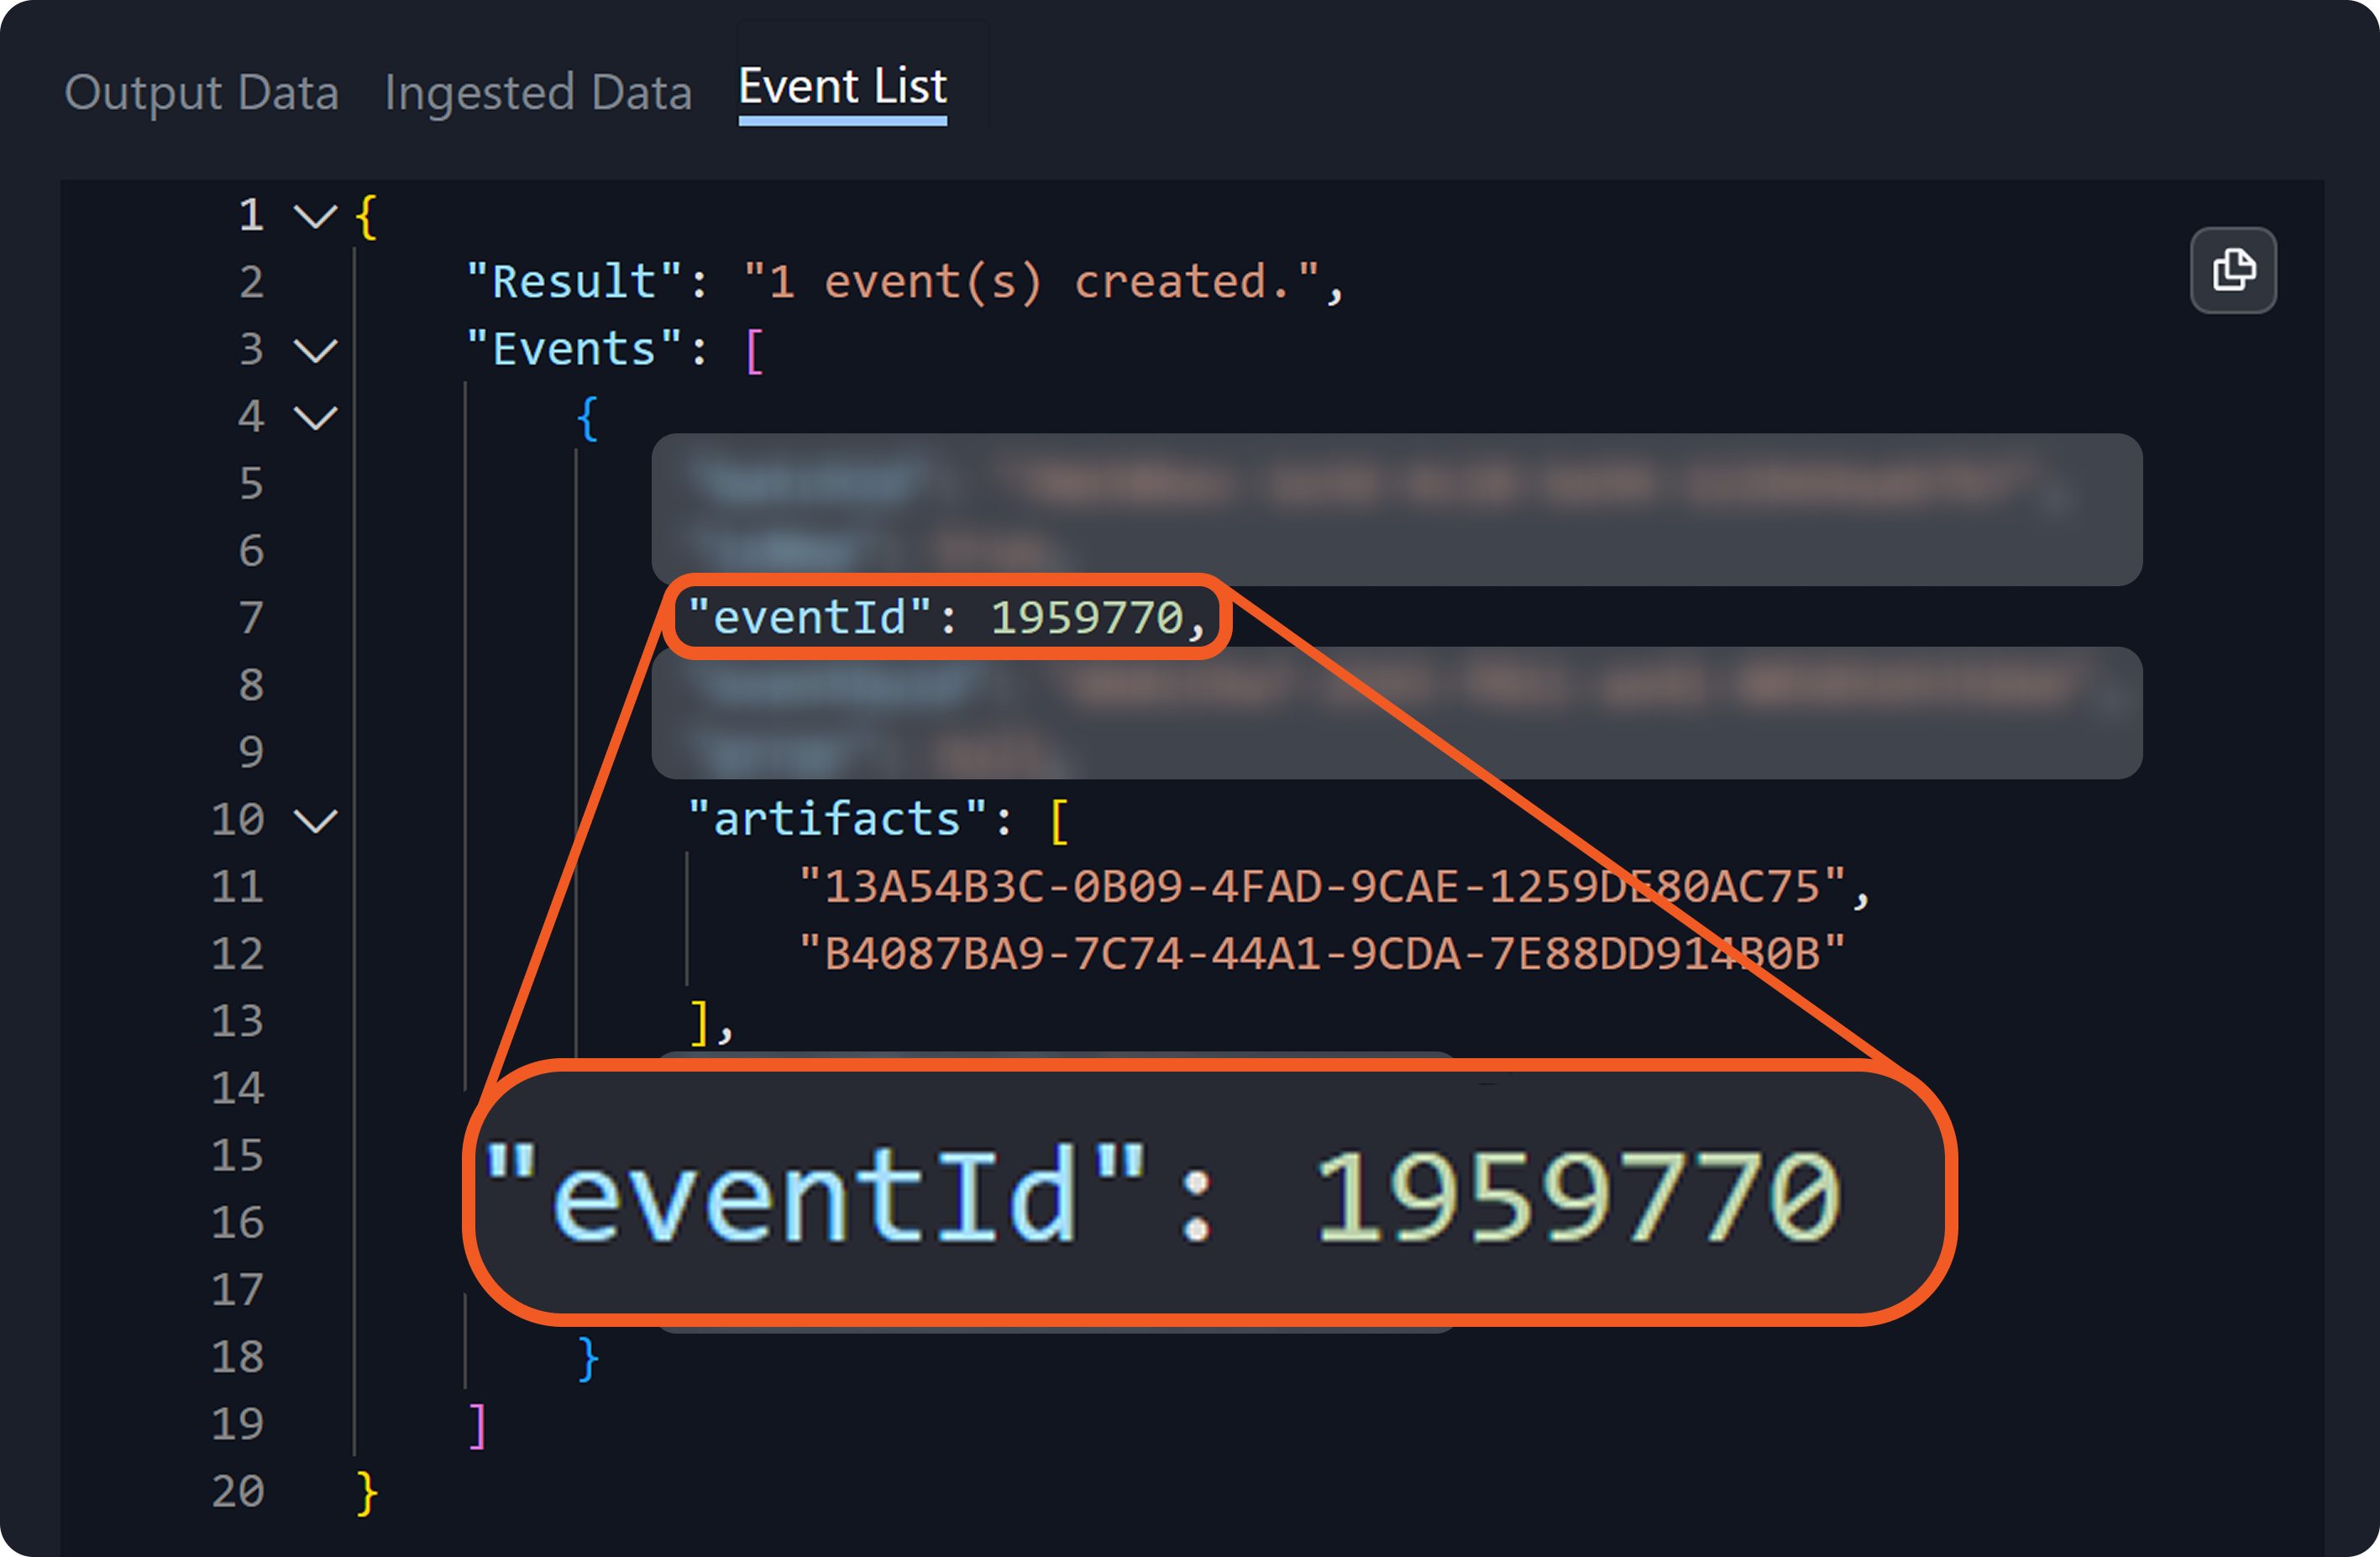
Confirm that one event and two artifacts were created, in the Data Ingestion module.
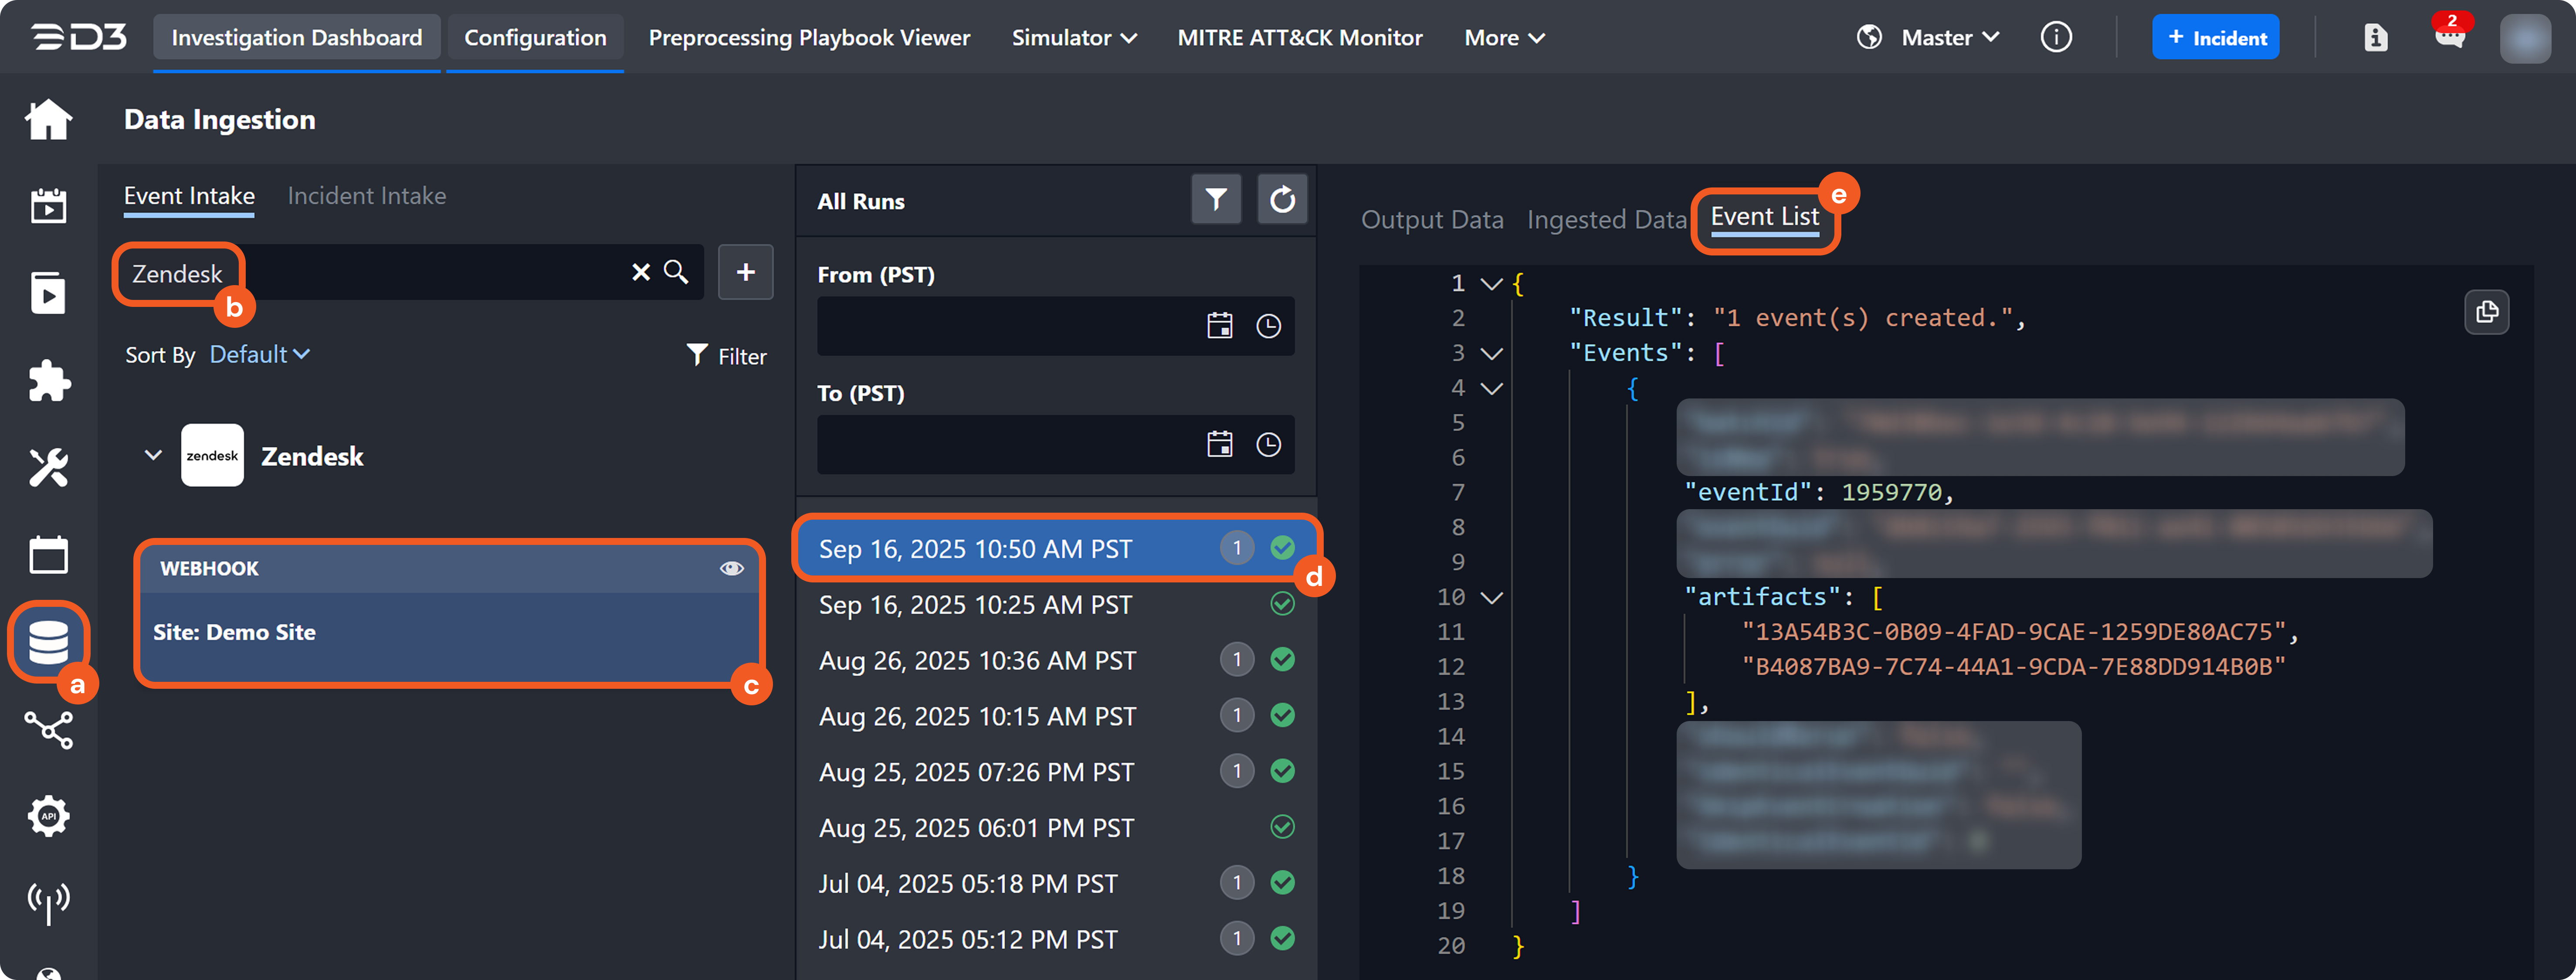
Note the eventId number.
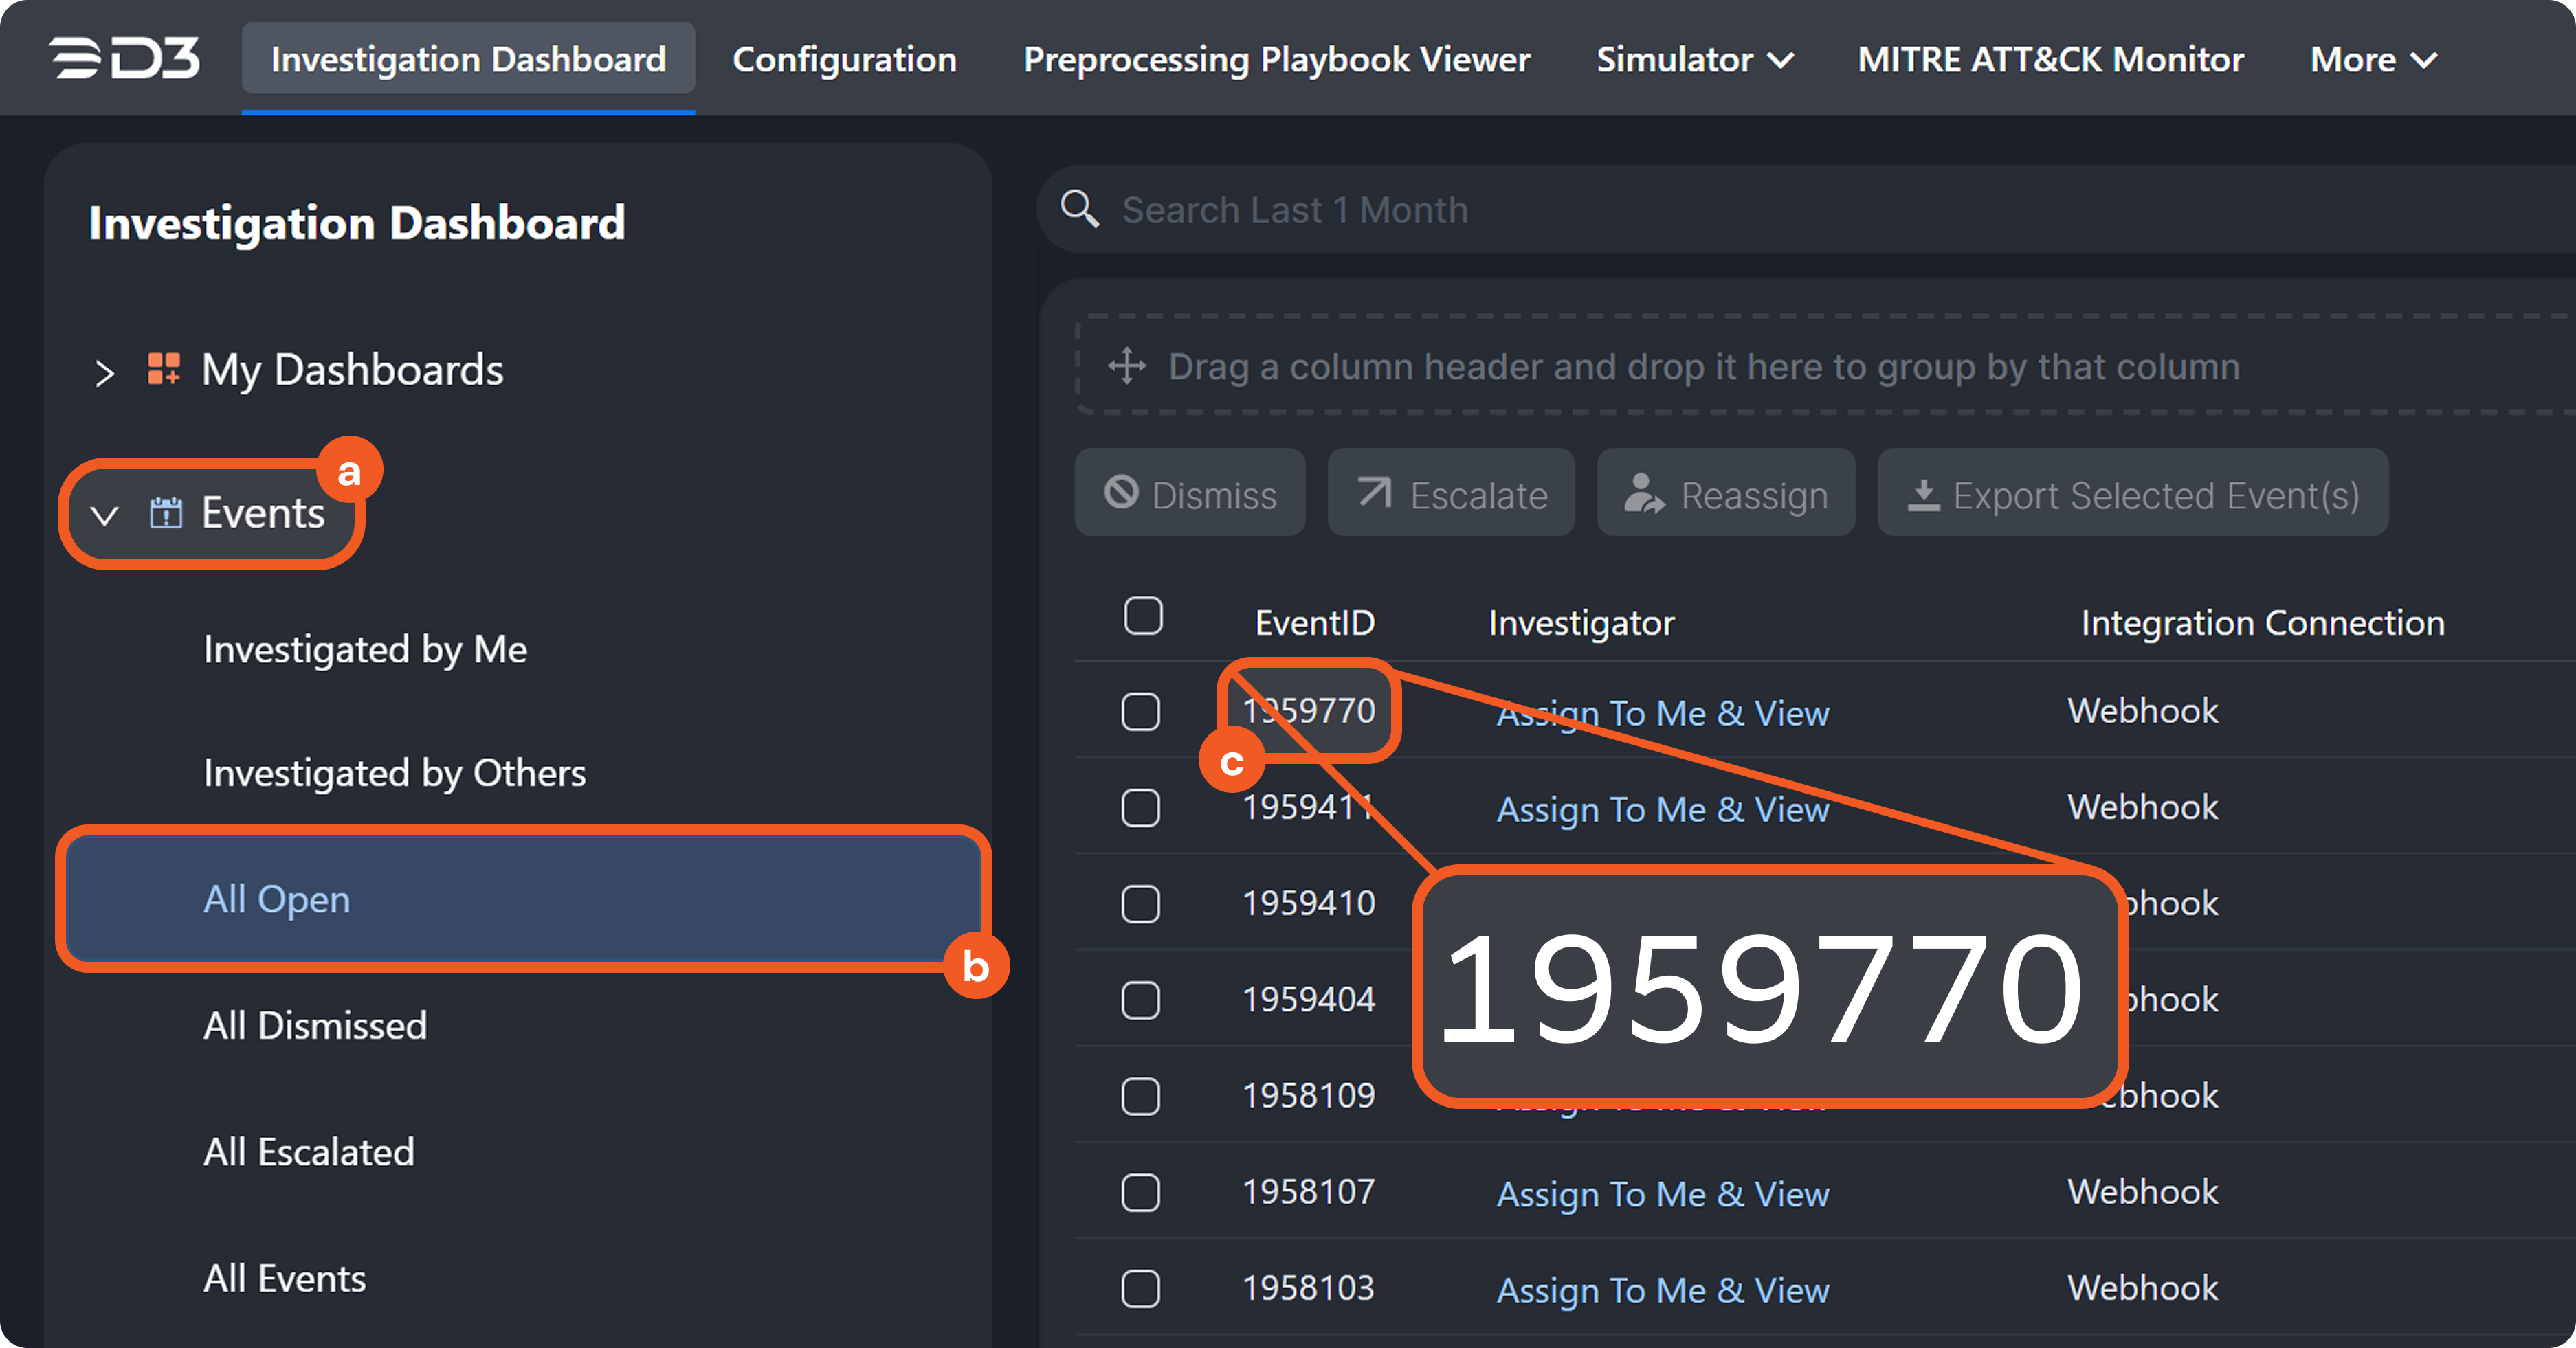
Navigate to the Investigation Dashboard module.
-20250630-190451.png?inst-v=a955d7a2-4130-4c65-a33e-27e848ba2a1c)
Select the site in which the API key was generated in step 3b.
-20250630-190521.png?inst-v=a955d7a2-4130-4c65-a33e-27e848ba2a1c)
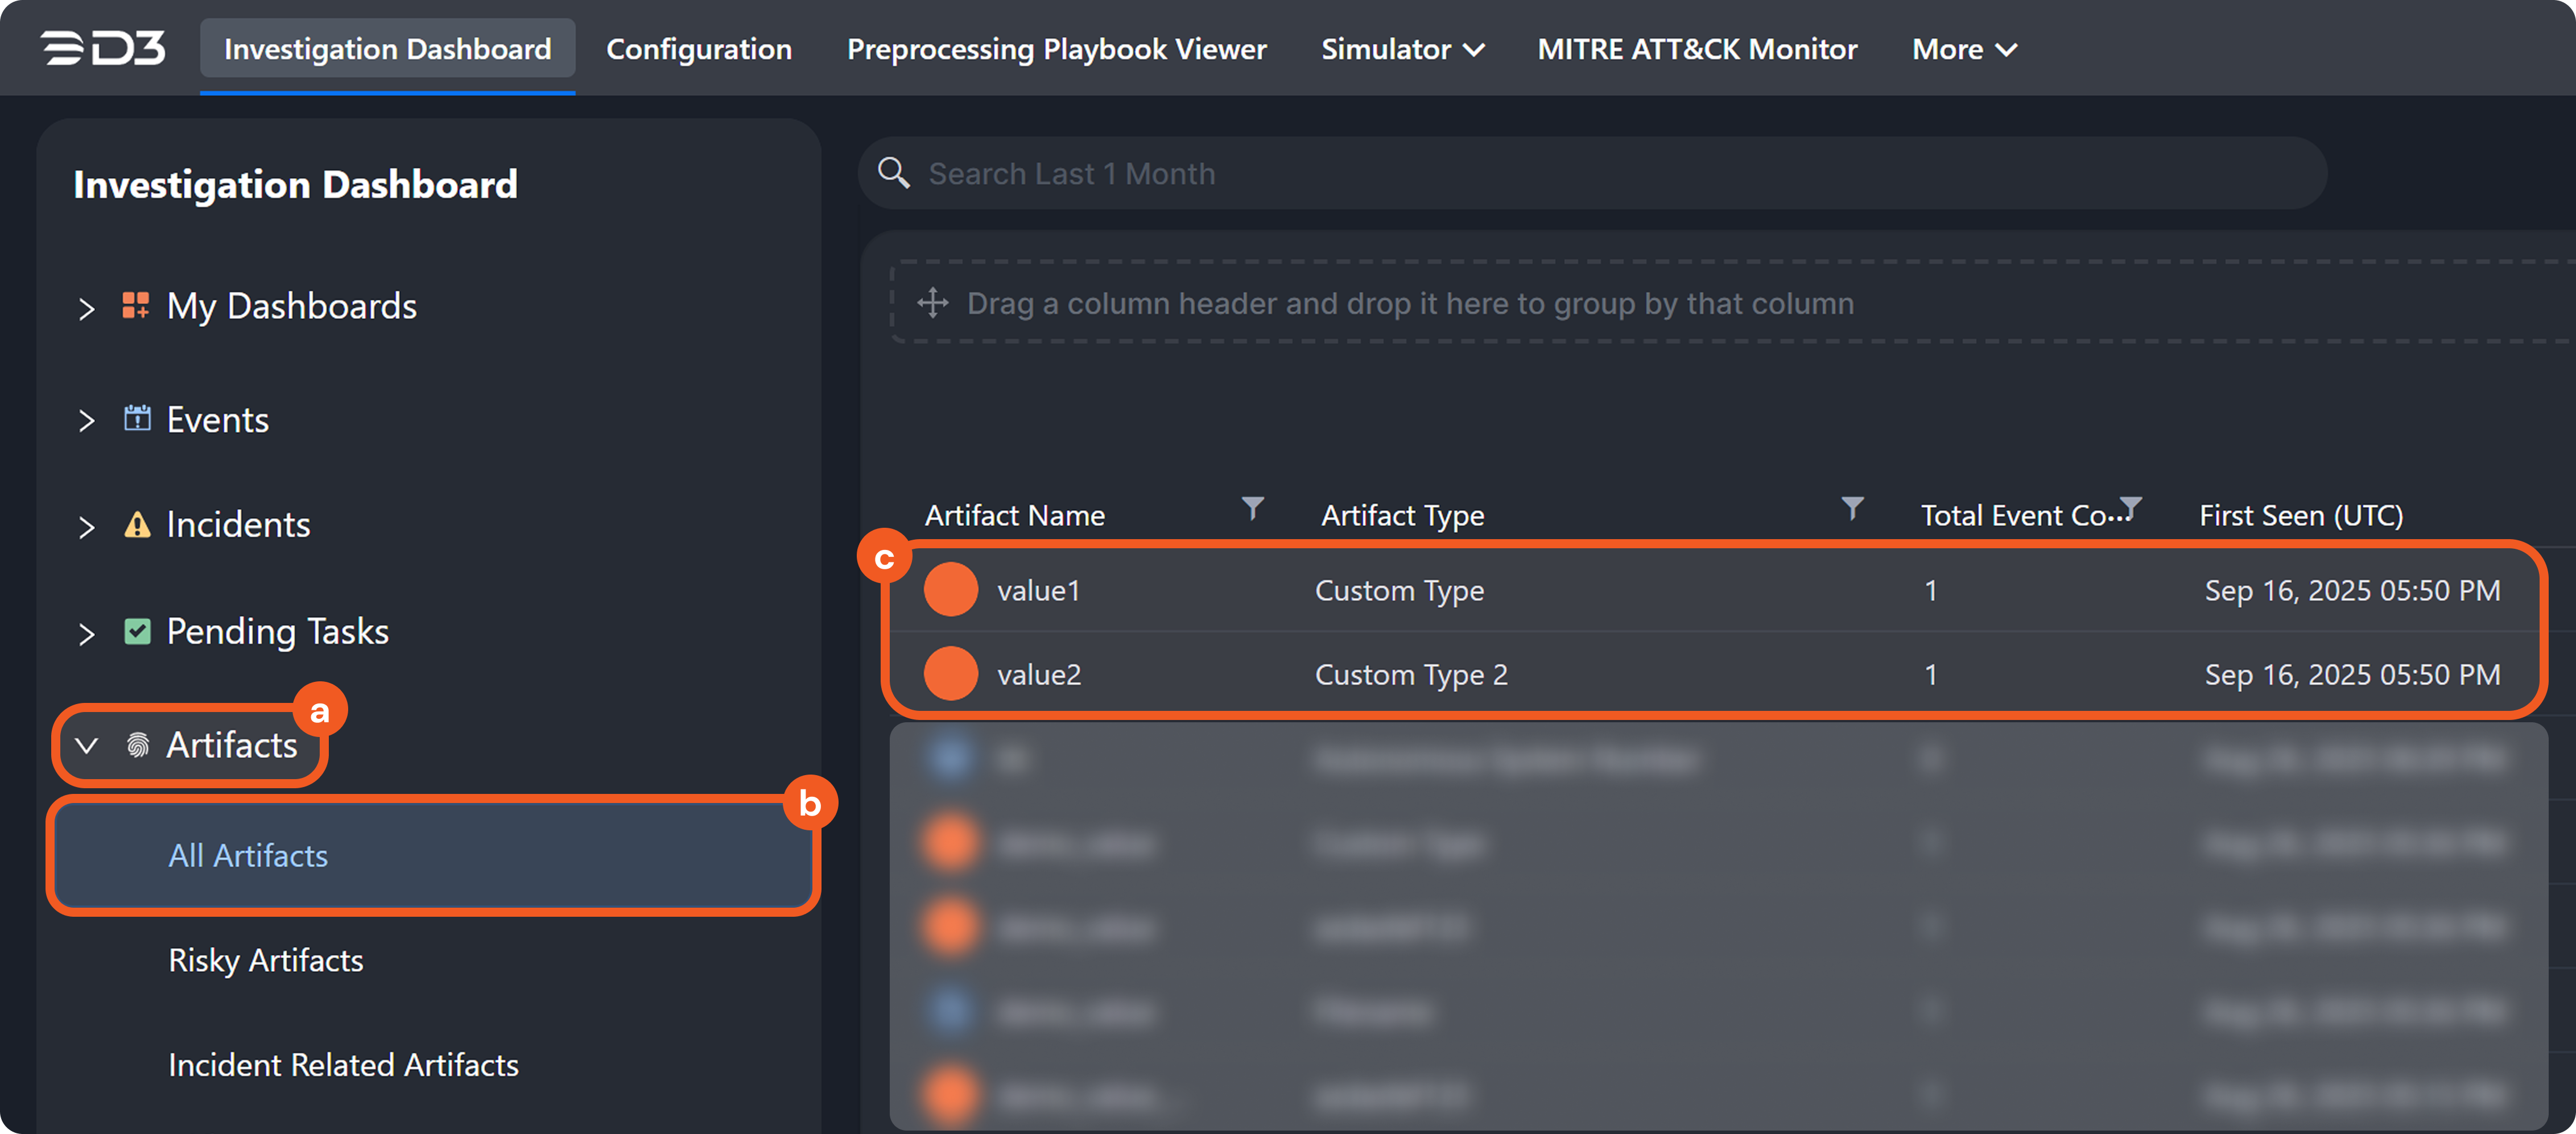
Verify that the two artifact instances are visible in the Artifacts > All Artifacts section.
Locate the event with an ID matching the one observed in step 13, then click on it.
Verify that the two artifact instances are displayed within the Artifact Behavior tab.
FAQs
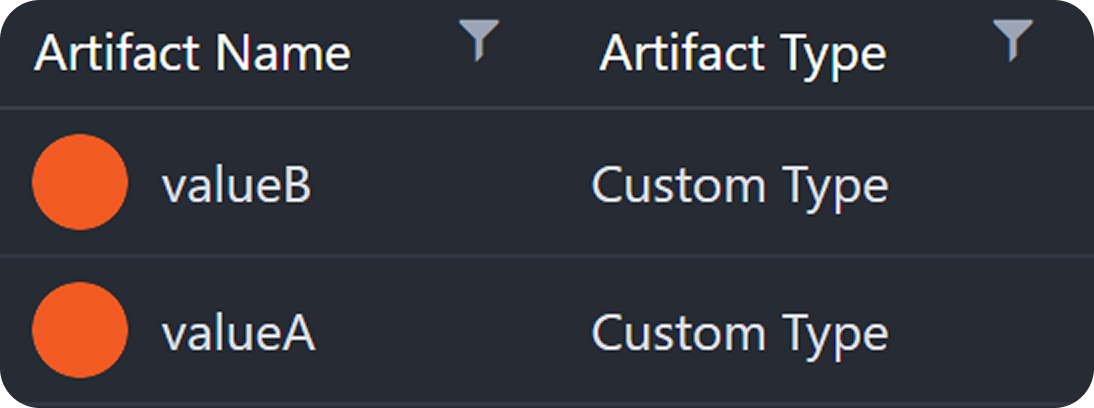
Within the Investigation Dashboard > Artifacts > All Artifacts panel, when multiple artifact names share the same artifact type, each name represents a distinct piece of data collected.
For example, two different IP addresses may both appear as artifacts of type 'External IP,' or two separate file hashes may both appear as artifacts of type 'File Hash SHA256.'