
SAML Configuration for Microsoft AD FS
LAST UPDATED: DEC 02, 2024
Overview
This guide provides step-by-step instructions for configuring SAML authentication between Microsoft Active Directory Federation Services (AD FS) and D3 vSOC. It includes setting up the SAML app in Microsoft AD FS, creating and assigning users, and enabling login via Microsoft AD FS to D3 vSOC.
Prerequisites
To enable single sign-on (SSO) through AD FS, follow these steps:
If SSO is not already enabled on AD, refer to the Troubleshooting Active Directory Federation Services Idp-initiated sign-on documentation.
For creating a new user account in Active Directory, refer to the guide on Creating a New Active Directory User Account. The username preceding the domain name must match the D3 vSOC username.
Procedure
Configuring SAML in Microsoft AD FS
Navigate to the Control Panel within the AD server, then click on the System and Security category.
-20241202-220210.png?inst-v=f0ae511a-7398-4e63-b935-74c903306443)
Click on the Administrative Tools sub-category.
-20241202-220611.png?inst-v=f0ae511a-7398-4e63-b935-74c903306443)
Double-click AD FS Management. If it is not visible, refer to the Prerequisites section to ensure the AD FS service is installed correctly.
-20241202-220753.png?inst-v=f0ae511a-7398-4e63-b935-74c903306443)
Click on the Action menu, then click on the Add Relying Party Trust menu option.
-20241202-222041.png?inst-v=f0ae511a-7398-4e63-b935-74c903306443)
Ensure that the Claims aware radio option is selected, then click on the Start button.
-20241202-222339.png?inst-v=f0ae511a-7398-4e63-b935-74c903306443)
Select the Enter data about the relying party manually radio option, then click on the Next button.
-20241202-222558.png?inst-v=f0ae511a-7398-4e63-b935-74c903306443)
Input an appropriate name for the SAML application.
-20241202-222758.png?inst-v=f0ae511a-7398-4e63-b935-74c903306443)
Click on the Next button.
-20241202-222929.png?inst-v=f0ae511a-7398-4e63-b935-74c903306443)
Select the checkbox labeled Enable support for the SAML 2.0 WebSSO protocol, enter the D3 login URL in the Relying party SAML 2.0 SSO service URL field (ensuring it includes
Login.aspx), then click the Next button.-20241202-223222.png?inst-v=f0ae511a-7398-4e63-b935-74c903306443)
Enter the D3 vSOC login URL into the Relying party trust identifier field (excluding
Login.aspx), then click the Add button.-20241202-223604.png?inst-v=f0ae511a-7398-4e63-b935-74c903306443)
Click on the Next button.
-20241202-223745.png?inst-v=f0ae511a-7398-4e63-b935-74c903306443)
Click on an access control policy in the Access Control Policy setting to restrict access, then click on the Next button. By default, access is permitted for everyone.
-20241202-224241.png?inst-v=f0ae511a-7398-4e63-b935-74c903306443)
Click on the Next button.
-20241202-224650.png?inst-v=f0ae511a-7398-4e63-b935-74c903306443)
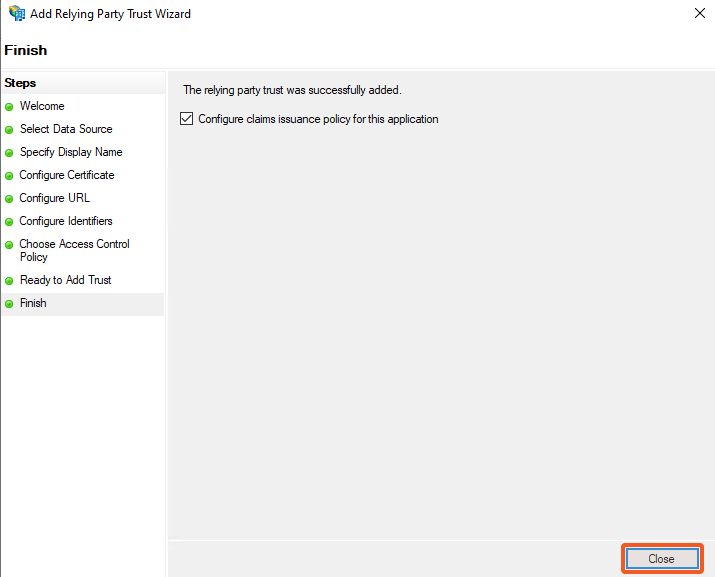
Click on the Close button to finish, and render a Edit Claim Issuance Policy for <SAML Application Display Name> popup.
The Edit Claim Issuance Policy for <SAML Application Display Name> popup can also be accessed through the Relying Party Trusts folder.
-20241203-013917.png?inst-v=f0ae511a-7398-4e63-b935-74c903306443)
Click on the Relying Party Trusts folder.
Select the application for which the claim issuance policy needs to be edited.
Click on the Edit Claim Issuance Policy option on the right.
Click on the Add Rule button within the Edit Claim Issuance Policy for <SAML Application Display Name> popup.
-20241202-225229.png?inst-v=f0ae511a-7398-4e63-b935-74c903306443)
Select Send LDAP Attributes as Claims for the Claim rule template, then click on the Next button.
-20241202-225512.png?inst-v=f0ae511a-7398-4e63-b935-74c903306443)
Enter a claim rule name, select the Active Directory attribute store, then select User-Principal-Name LDAP attribute and the Name ID outgoing claim type.
-20241202-230840.png?inst-v=f0ae511a-7398-4e63-b935-74c903306443)
Click on the Finish button.
-20241202-230942.png?inst-v=f0ae511a-7398-4e63-b935-74c903306443)
Click on the OK button to close the pop up window.
-20241202-231121.png?inst-v=f0ae511a-7398-4e63-b935-74c903306443)
View the certificate.
-20241203-011301.png?inst-v=f0ae511a-7398-4e63-b935-74c903306443)
Click on the Service folder under AD FS.
Click on the Certificates folder.
Right click on the certificate under the Token-signing section.
Click on the View Certificate option within the popup.
Click on the Details tab.
-20241202-232305.png?inst-v=f0ae511a-7398-4e63-b935-74c903306443)
Click on the Copy to File button.
-20241202-232806.png?inst-v=f0ae511a-7398-4e63-b935-74c903306443)
Click on the Next button.
-20241202-232921.png?inst-v=f0ae511a-7398-4e63-b935-74c903306443)
Select the Base-64 encoded X.509 (.CER) radio option, then click on the Next button.
-20241202-233143.png?inst-v=f0ae511a-7398-4e63-b935-74c903306443)
Select a file path to export the certificate, then click on the Next button.
-20241202-233329.png?inst-v=f0ae511a-7398-4e63-b935-74c903306443)
Click on the Finish button.
-20241202-233518.png?inst-v=f0ae511a-7398-4e63-b935-74c903306443)
Open the certificate at the saved path.
-20241202-233906.png?inst-v=f0ae511a-7398-4e63-b935-74c903306443)
READER NOTE
Before proceeding, ensure that you have:
Created D3 user accounts (Organization Management > Users > + Add Users)
Reviewed the procedure for adding a new login method. Your new Microsoft AD FS SAML login method must to be assigned to the appropriate D3 user accounts (Application Settings > Login Authentication > Users) after step 28 below.
Input the Certificate into D3 vSOC.
-20241023-030817.png?inst-v=f0ae511a-7398-4e63-b935-74c903306443)
Input the Target URL into D3 vSOC. It is a URL in the following format:
https://<domain>/adfs/ls/idpinitiatedsignon.aspx-20241023-031037.png?inst-v=f0ae511a-7398-4e63-b935-74c903306443)
Input the Assertion Consumer Service URL into D3 vSOC. This is the D3 login URL in the format:
https://<domain>/<path>/VSOC/Login.aspx
Login to D3 vSOC via Microsoft AD FS
Navigate to
https://<domain>/adfs/ls/idpinitiatedsignon.aspx.Sign in.
-20241203-004810.png?inst-v=f0ae511a-7398-4e63-b935-74c903306443)
After successfully logging in to Microsoft AD FS, the user will be redirected to D3 vSOC.
-20241023-032501.png?inst-v=f0ae511a-7398-4e63-b935-74c903306443)