
JSON Web Token Authentication
LAST UPDATED: DEC 5, 2024
JSON Web Token (JWT) enables authentication by encoding claims within a digitally signed token, ensuring secure validation of user identity and permissions. Follow the steps in this article to send a JWT-encoded request in Postman.
Prerequisites
JWT webhook authentication enabled
Open the Web Config settings.
-20241205-193840.png?inst-v=371f1d1c-04a9-4ab6-b1b3-4bd0b1313402)
Click on the Configuration navigational link.
Click on the Application Settings icon.
Click on the Web Config option.
-20241205-194610.png?inst-v=371f1d1c-04a9-4ab6-b1b3-4bd0b1313402)
Set the EnableEnhanceWebhookAuthentication radio option to True.
Click on the Save button.
-20241205-200433.png?inst-v=371f1d1c-04a9-4ab6-b1b3-4bd0b1313402)
Ability to set up D3 webhook keys
-20241205-203941.png?inst-v=371f1d1c-04a9-4ab6-b1b3-4bd0b1313402)
Ensure that Webhook Authentication is toggled on.
On:
-20241205-203600.png?inst-v=371f1d1c-04a9-4ab6-b1b3-4bd0b1313402)
Off:
-20241205-203551.png?inst-v=371f1d1c-04a9-4ab6-b1b3-4bd0b1313402)
Click on the JSON Web Token (JWT) button.
-20241205-204643.png?inst-v=371f1d1c-04a9-4ab6-b1b3-4bd0b1313402)
Click on the + button within the Setup JWT popup.
Enter a unique Key Name.
Click on the Generate button
The user will see a display similar to the following:
Establish a connection between D3 vSOC and the integration. This connection must be active
%203-20241205-214403.png?inst-v=371f1d1c-04a9-4ab6-b1b3-4bd0b1313402) and display a
and display a %202-20241205-214316.png?inst-v=371f1d1c-04a9-4ab6-b1b3-4bd0b1313402) status, as shown in the image above.
status, as shown in the image above.-20241205-212847.png?inst-v=371f1d1c-04a9-4ab6-b1b3-4bd0b1313402)
Ensure the connection is associated with a specific site. The connection in the screenshot is linked to the Security Operations site.
Select the desired integration command.
-20241205-214706.png?inst-v=371f1d1c-04a9-4ab6-b1b3-4bd0b1313402)
For demonstration purposes, the Get Computers command will be used.
-20241205-214910.png?inst-v=371f1d1c-04a9-4ab6-b1b3-4bd0b1313402)
Ensure that Webhook Authentication is toggled on.
On:
Off:
Click on the JSON Web Token (JWT) button.
-20241205-222803.png?inst-v=371f1d1c-04a9-4ab6-b1b3-4bd0b1313402)
Click on the + button within the Setup JWT popup.
Select the connection created from step 1. The connection should have the name of the site it is linked to in parentheses.
Enter a unique Key Name.
Click on the Generate button.
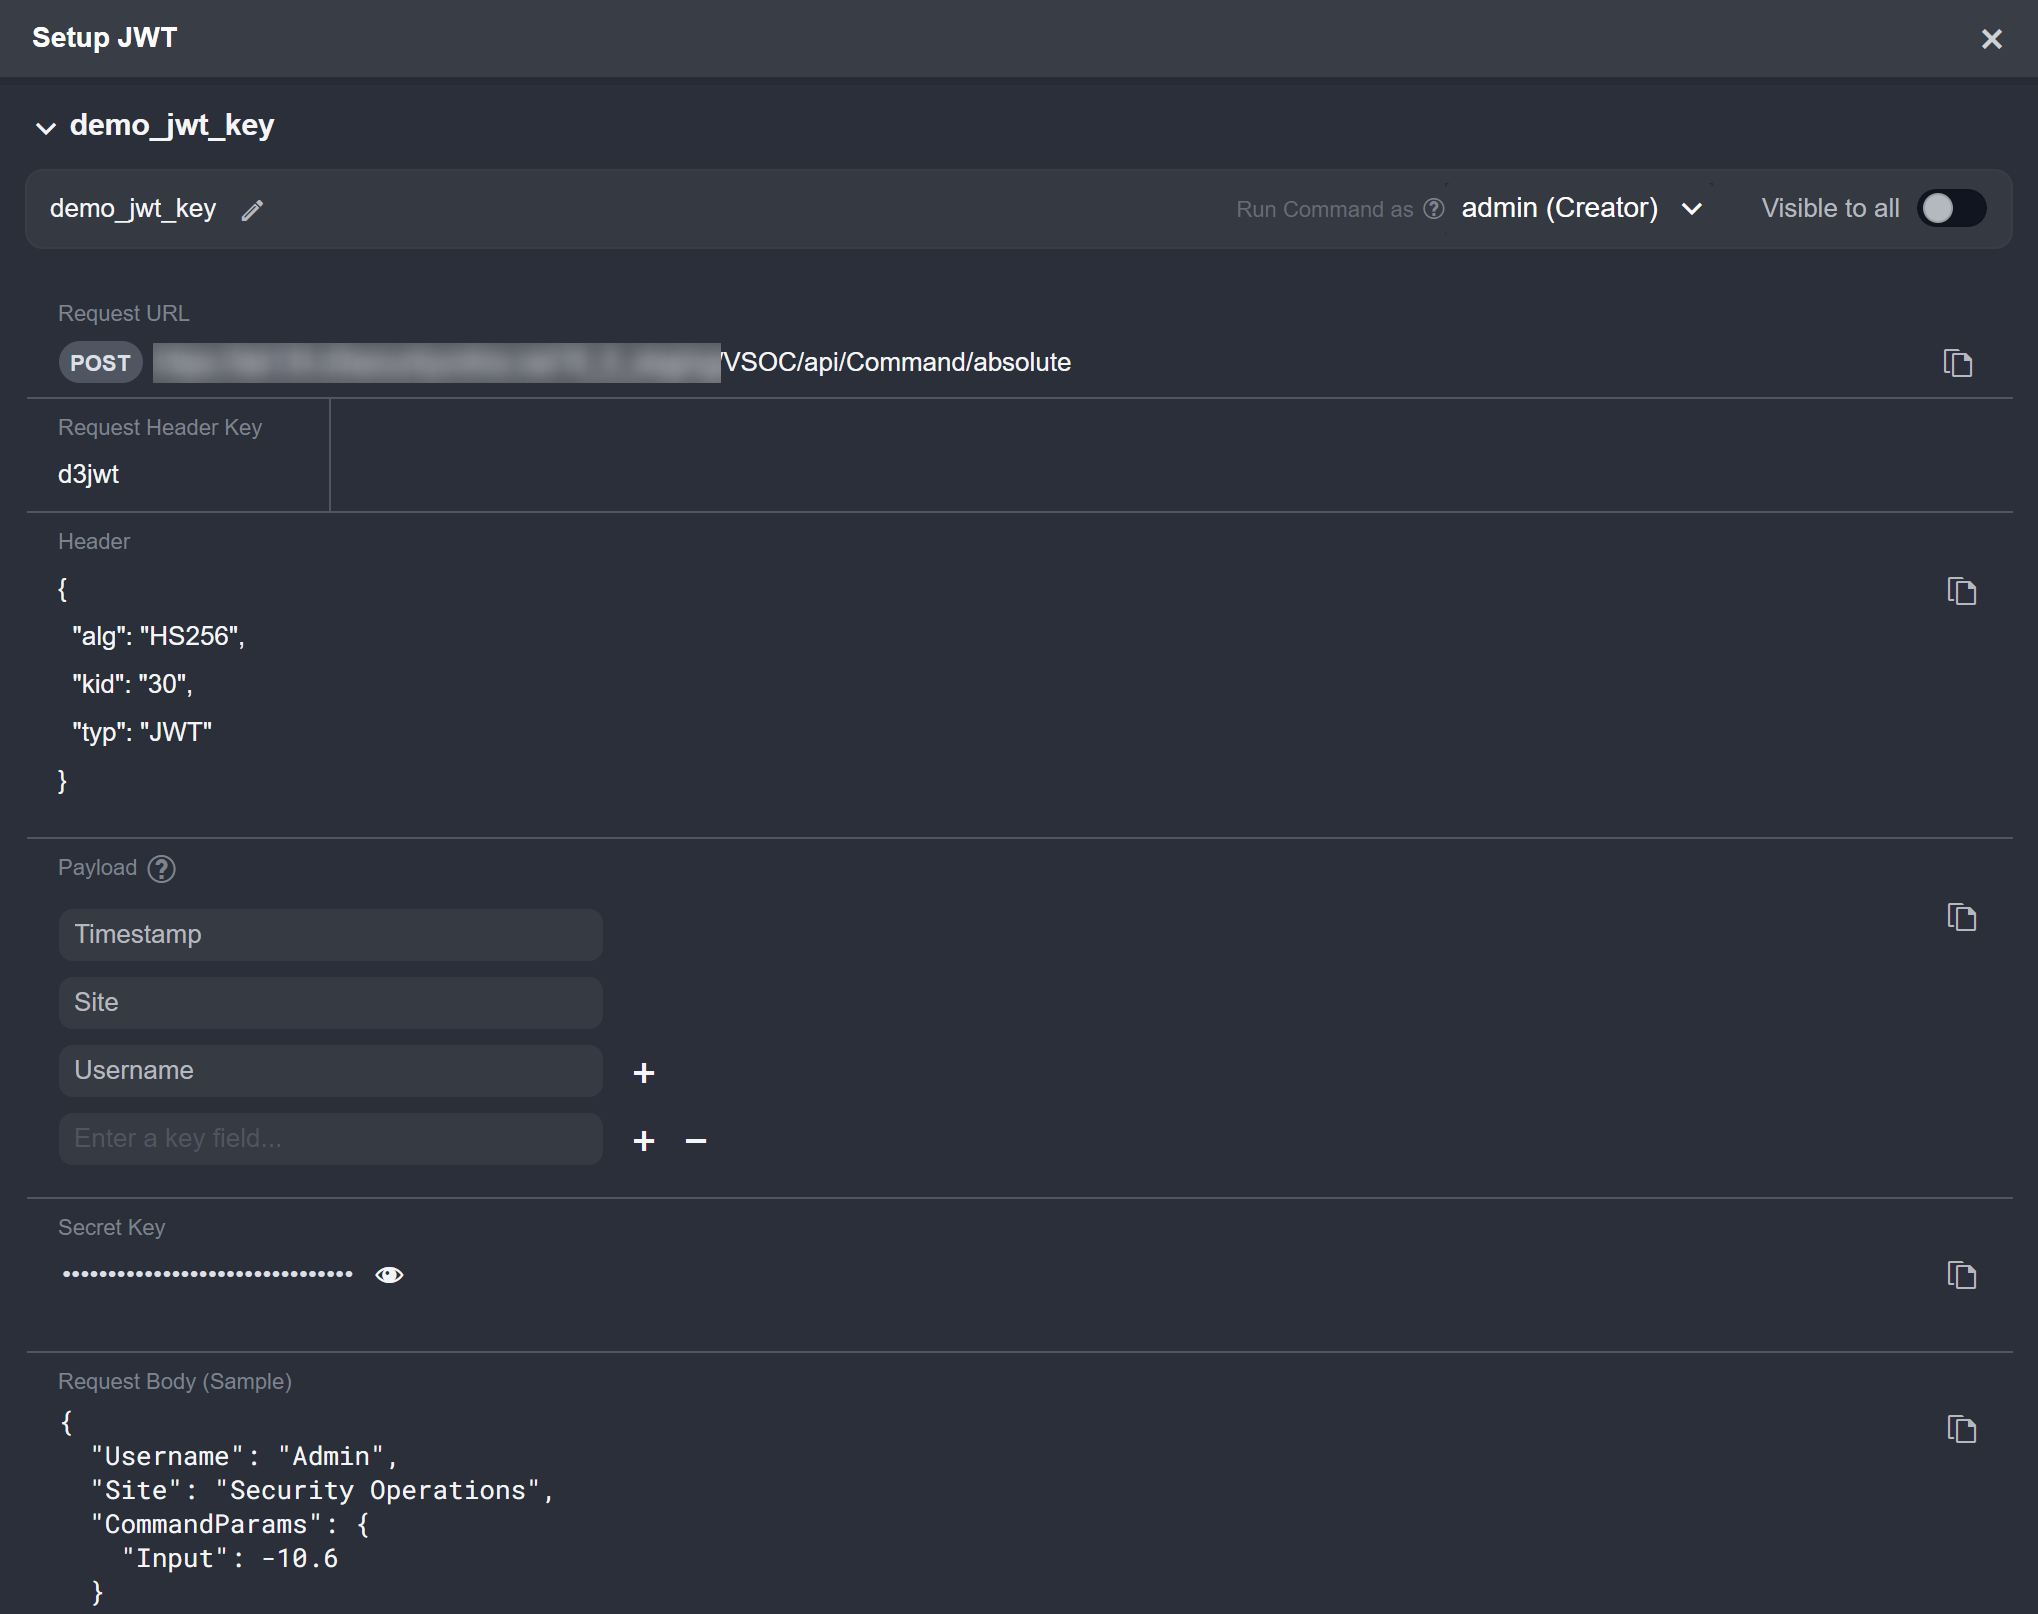
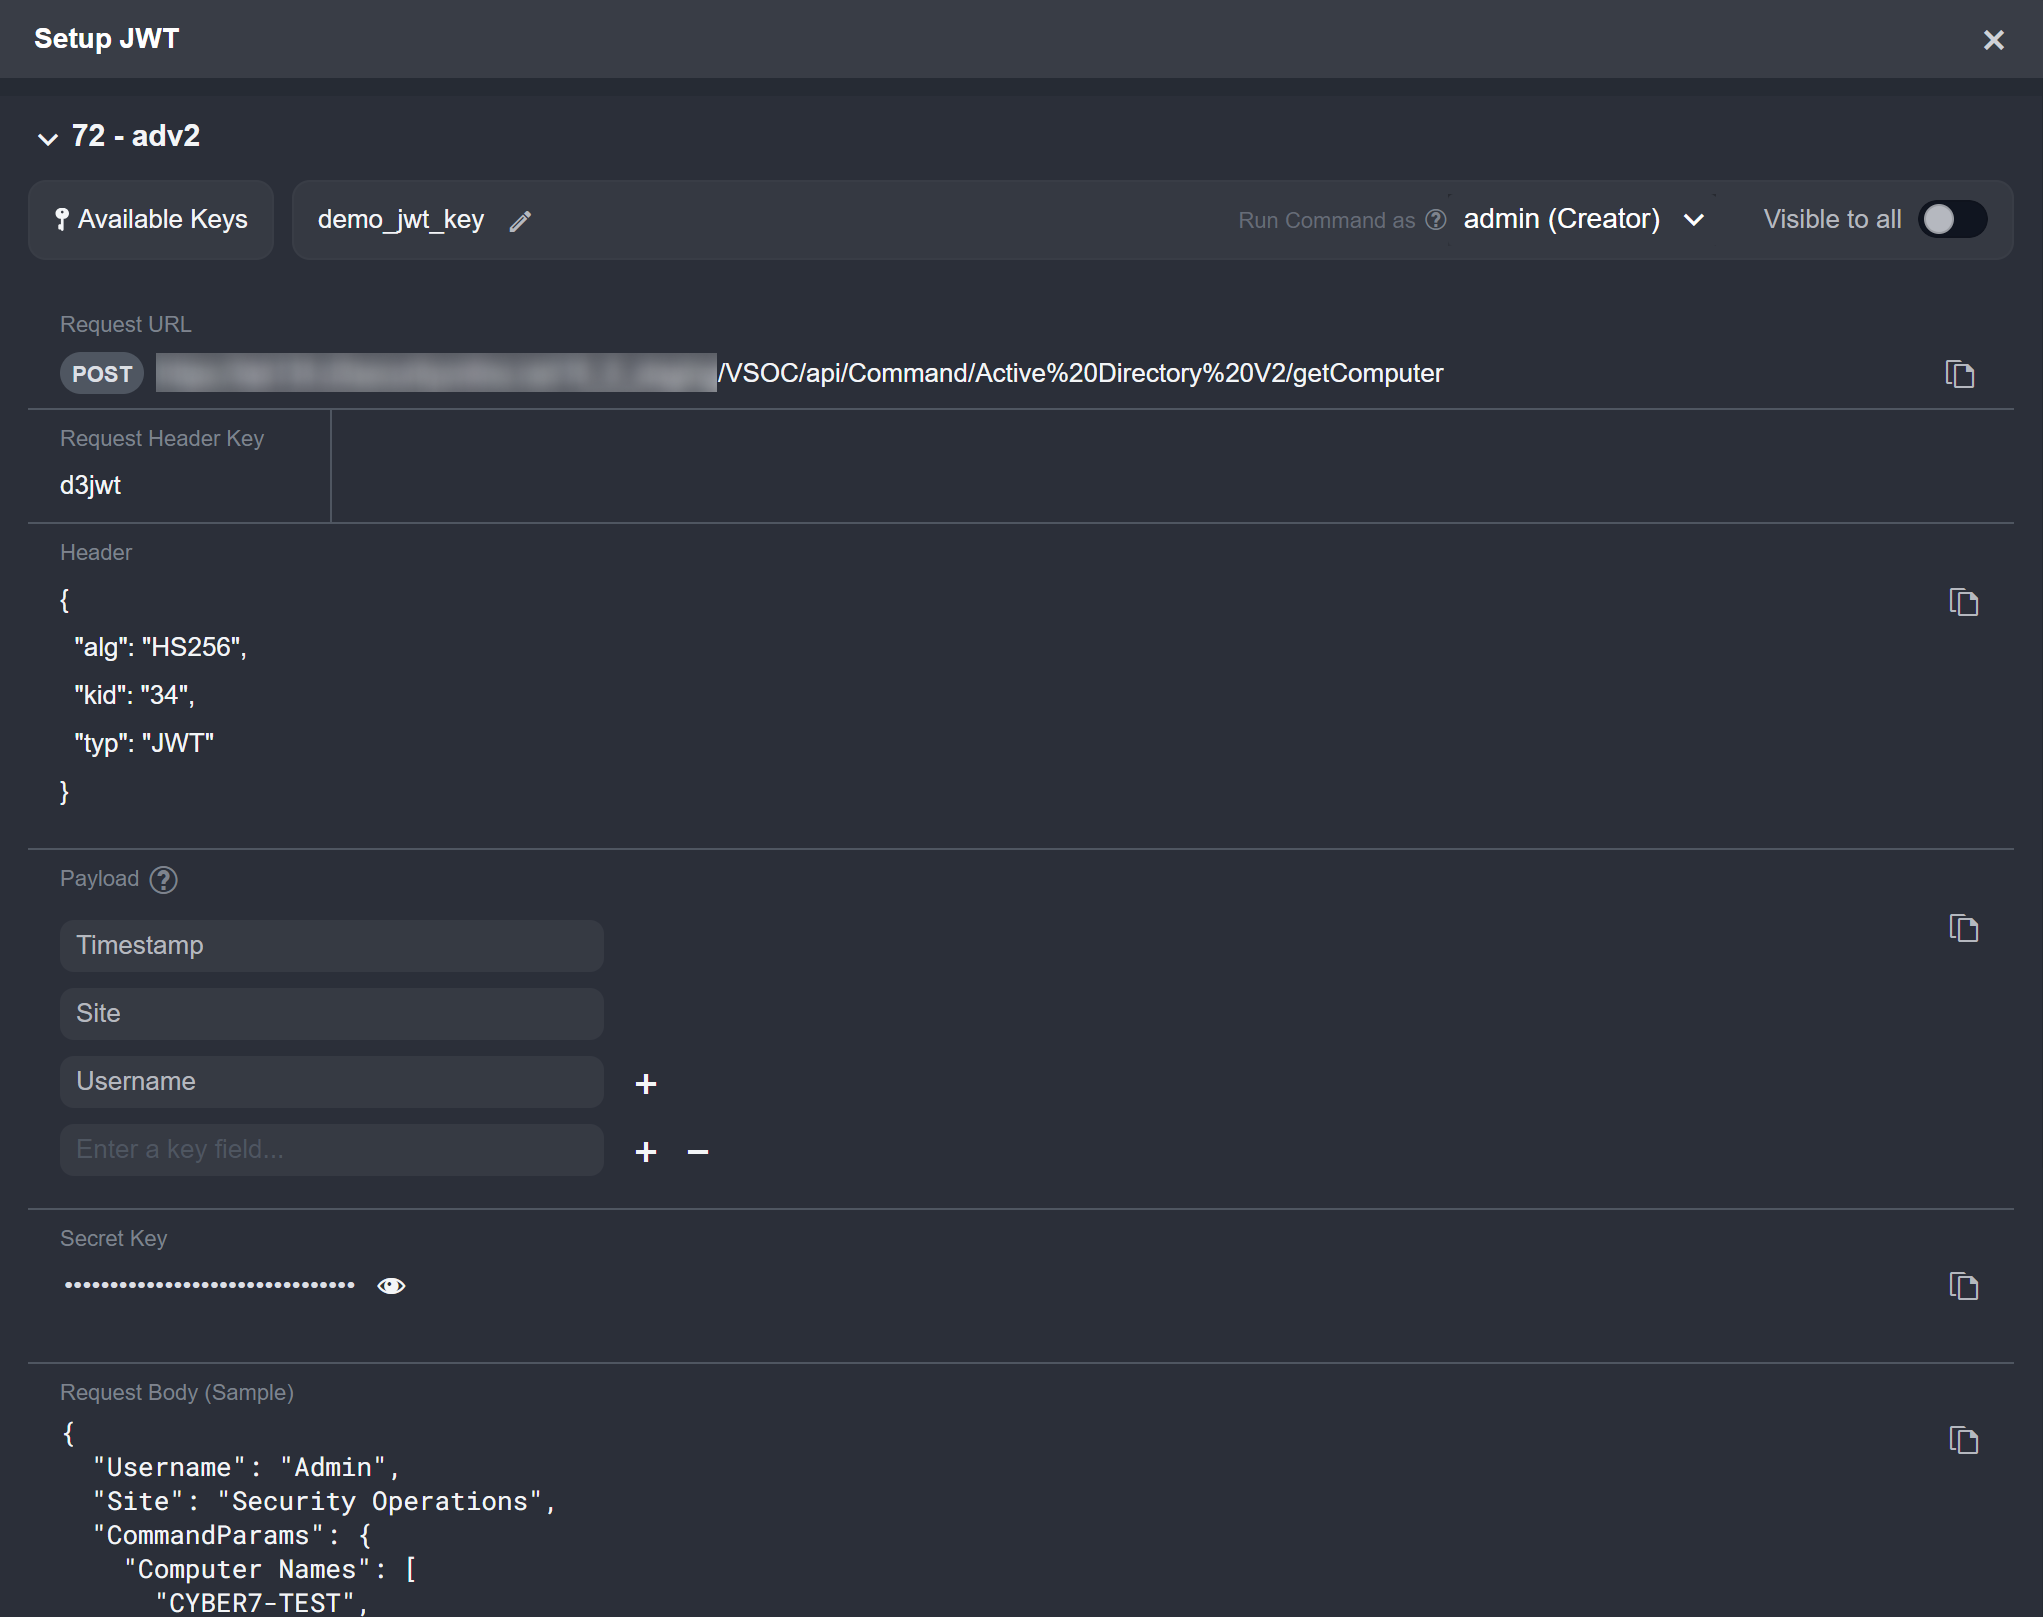
The user will see a display similar to the following:
READER NOTE
Each JWT Remote Command Key will have a unique Secret Key value used in generating the JWT encoding.
Setting Up and Sending a JWT-Encoded Request
Copy the request URL in vSOC.
.png?inst-v=371f1d1c-04a9-4ab6-b1b3-4bd0b1313402)
In Postman, set the HTTP request method to POST, then paste the request URL in the designated field.
.png?inst-v=371f1d1c-04a9-4ab6-b1b3-4bd0b1313402)
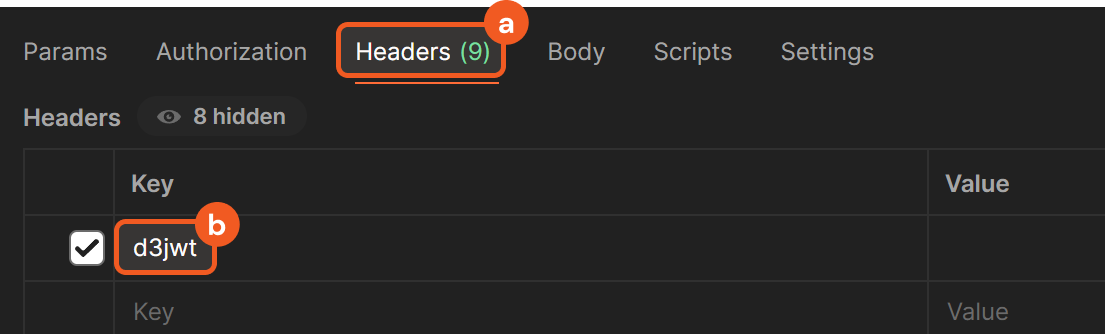
In vSOC, copy the request header key.
.png?inst-v=371f1d1c-04a9-4ab6-b1b3-4bd0b1313402)
In Postman, click on the Headers tab, then paste the request header key under the Key column.
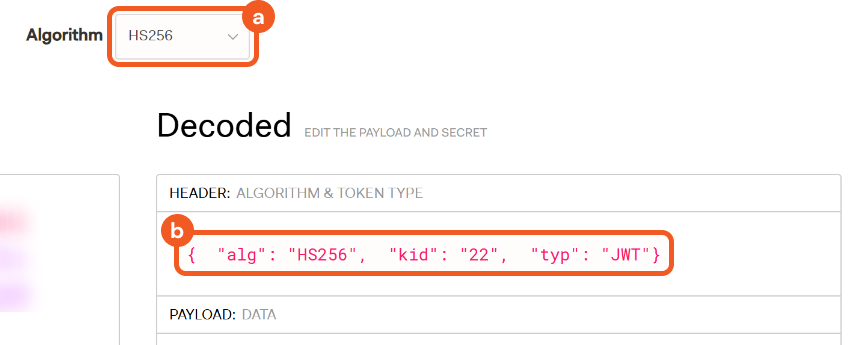
In vSOC, copy the object from the Header section.

In jwt.io, ensure that encoding algorithm is HS256, then paste the object into the HEADER field.
In vSOC, copy the payload.

In jwt.io, paste the payload into the PAYLOAD field.
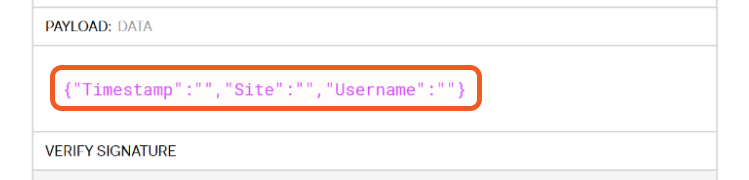
Populate the PAYLOAD fields. For this demonstration, the completed payload is as follows:
.png?inst-v=371f1d1c-04a9-4ab6-b1b3-4bd0b1313402)
READER NOTE
Ensure the value of the payload’s Username field matches the username of the user being granted access to the remote command key (demo_user in this case).

By default, the creator is the only individual with access.
All payload data are case-sensitive.
In vSOC, copy the Secret Key.

In jwt.io, paste the Secret Key.
.png?inst-v=371f1d1c-04a9-4ab6-b1b3-4bd0b1313402)
In vSOC, copy the request body sample data.

In Postman, select the Body tab, choose the raw option, then paste the sample request body data.
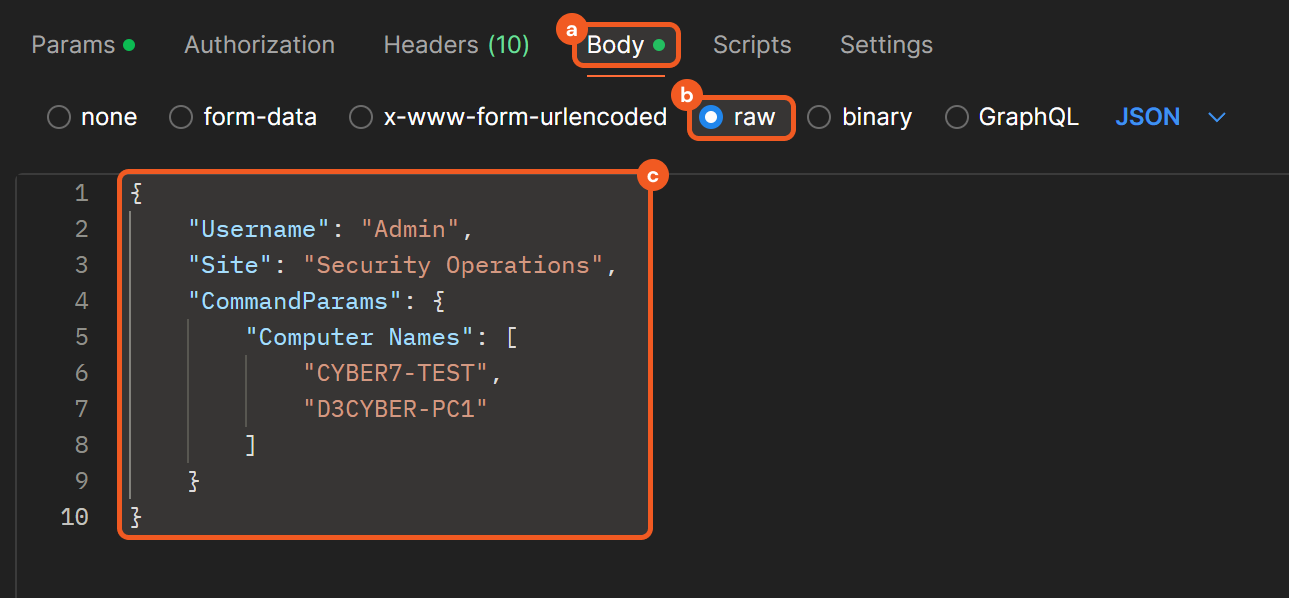
Adjust the values to match the payload exactly.
.png?inst-v=371f1d1c-04a9-4ab6-b1b3-4bd0b1313402)
In jwt.io, copy the encoded token.
-20241206-011646.png?inst-v=371f1d1c-04a9-4ab6-b1b3-4bd0b1313402)
In Postman, click on the Headers tab, paste in the token, then send the request.
-20241206-013239.png?inst-v=371f1d1c-04a9-4ab6-b1b3-4bd0b1313402)