
Artifacts
Overview
In cybersecurity, an Artifact can be a particular trace of information extracted from an event or incident left behind from cyber activity. For example, an artifact that can be extracted from a network traffic event may be endpoint IP addresses. We refer to information such as the endpoint IP as an artifact entity. D3 SOAR maps raw source data to over 100 of our data model fields in order to create artifact entities, extracting relevant details and drawing relationships between artifact types. When we extract several similar artifact entities, we can categorize these together as an artifact type.
D3 SOAR has two types of artifacts:
There are 13 built-in artifact types that come out-of-the-box. In addition, SOC teams can create their own custom artifact types in the Configuration module to enhance their security automation by defining artifact identity, role, relationships and conditions that allow the system to auto-detect and extract source-specific artifacts.
This document outlines all the information you will need to know about configuring custom D3 SOAR Artifacts and how to configure them.
UI Structure
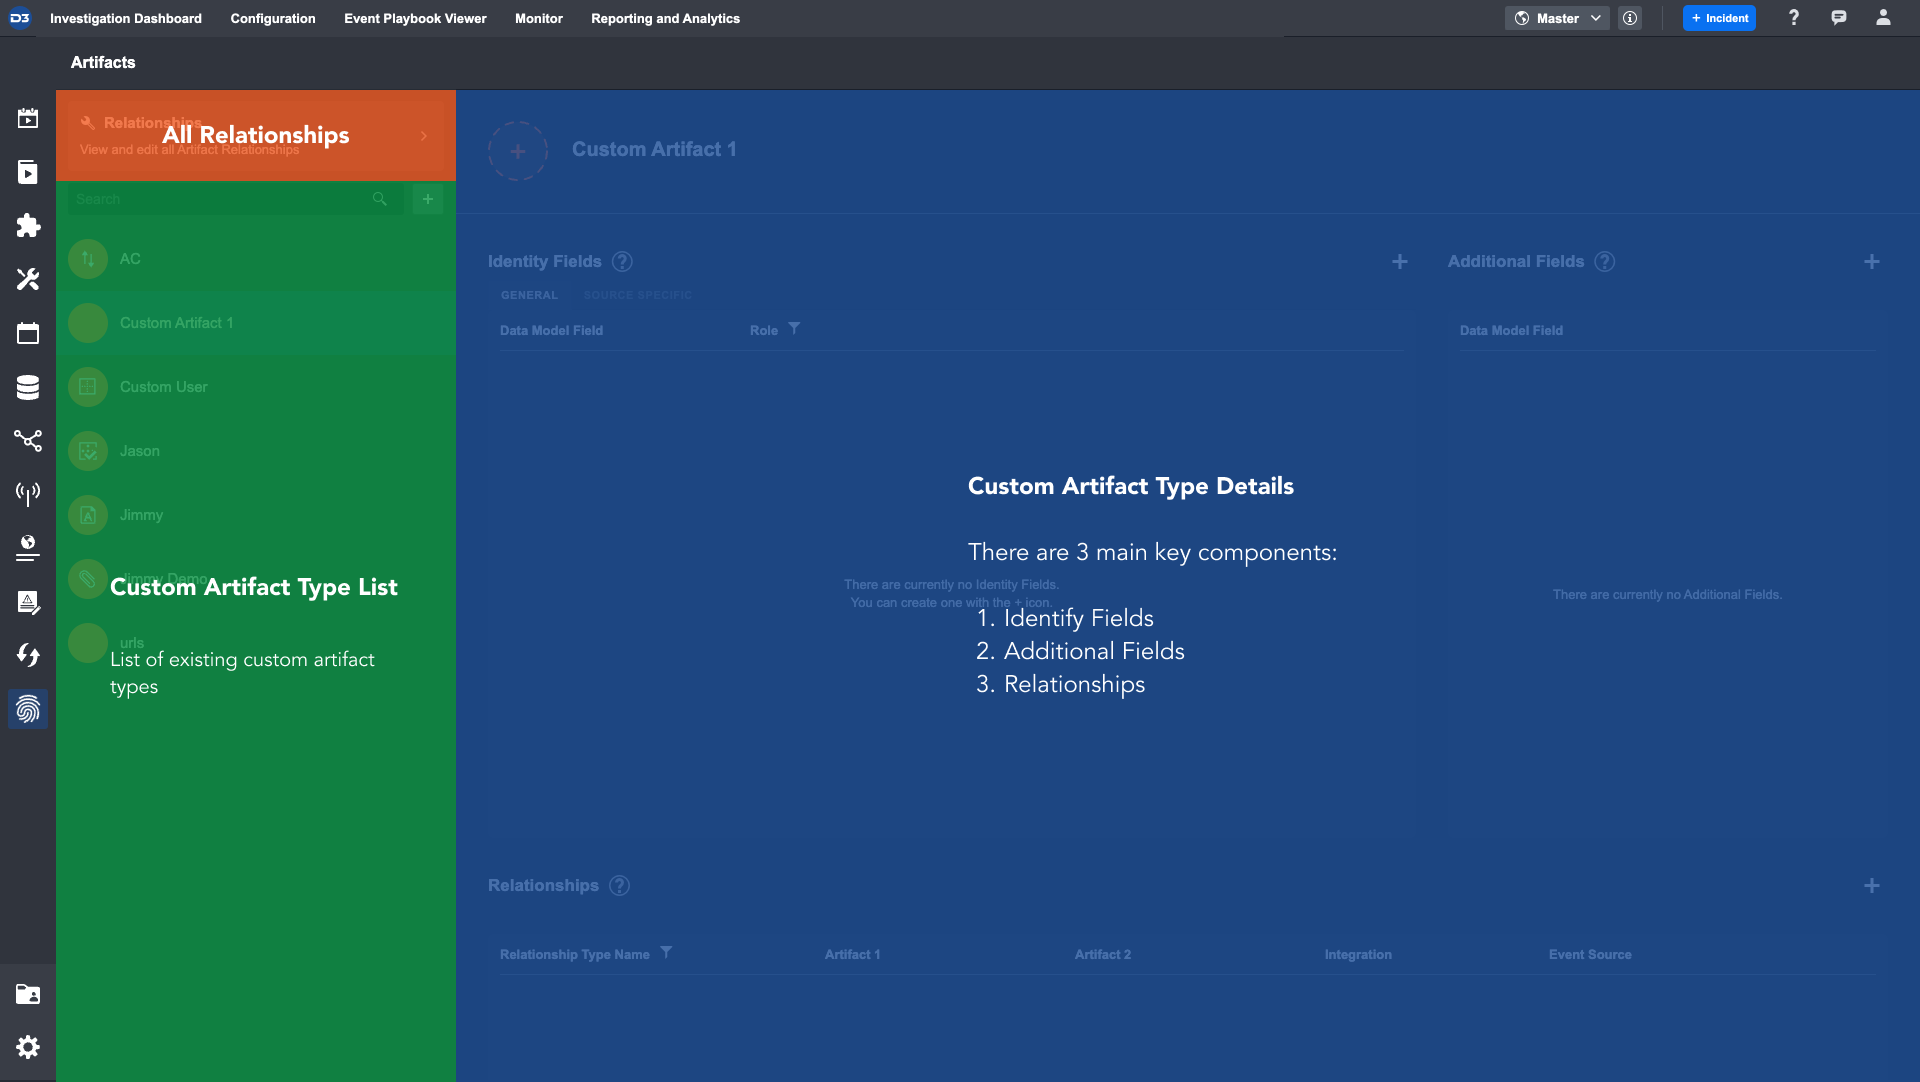
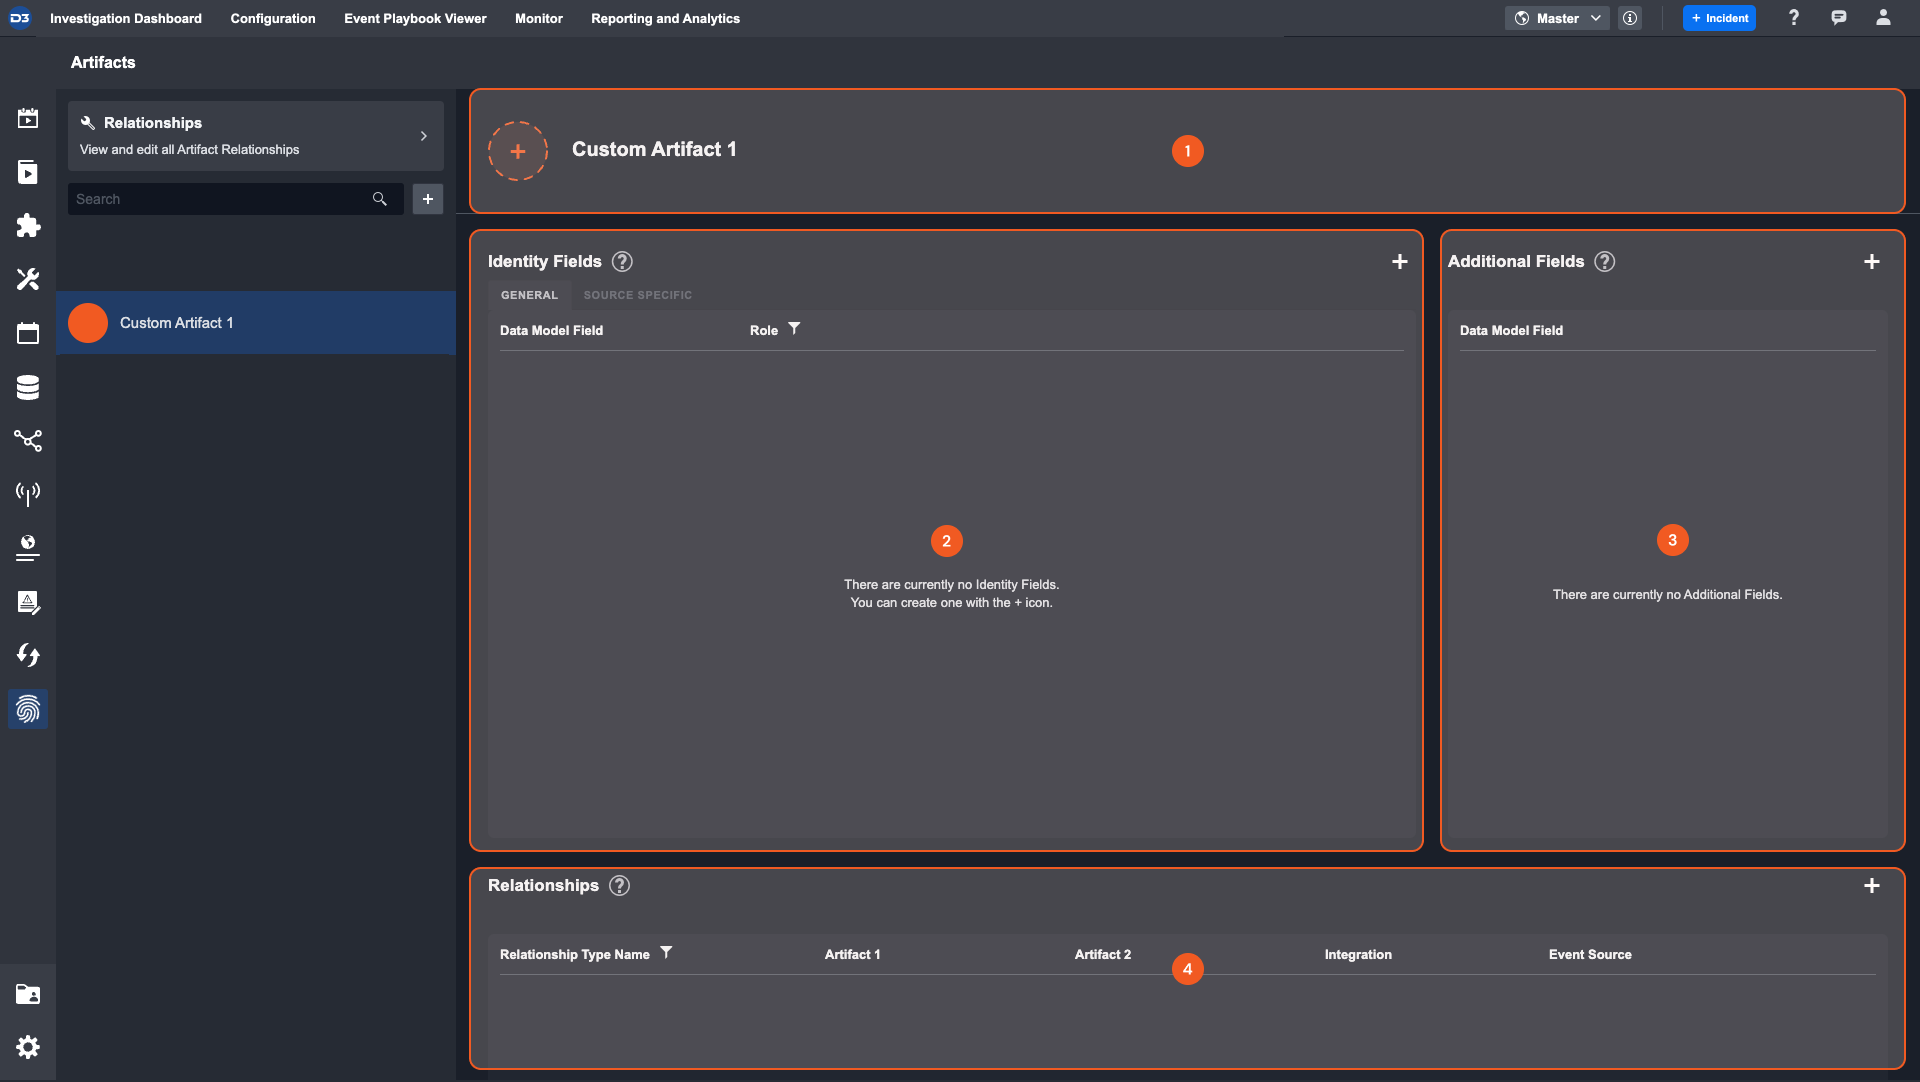
The Artifacts’ UI contains the following components:
All Relationships | A button to show all artifact type relationships, where you can: Add relationships Delete relationships View all Artifact relationships |
|---|---|
Custom Artifact Type List | Sorted alphabetically, the list allows you to: Search for an Artifact Type Add new custom Artifact Type |
Custom Artifact Type Detail | Allows you to customize the elements of a custom Artifact Type including: Identity Fields
Additional Fields
Relationships
|
Features
Built-In Artifact Types
D3 offers users 13 out-of-the-box, built-in system Artifact Types. Below is a chart of them and the required data model field for artifact creation. If you want to create a new artifact in an event or incident, you need to satisfy these minimum requirements:
Built-in artifact type: | Data Model Requirement: |
|---|---|
 Internal Endpoint | One of: HostFQDN HostName IPAddress |
 External Endpoint | One of: HostFQDN HostName IPAddress |
 URL | URL |
 File | Requires one of: SHA256 MD5 SHA1 FilePath FileName |
 User | UserName |
 Email Address | EmailAddr |
 Process | ProcessGuid |
 Service | Both of: ServiceId ServiceName |
 Module | ModuleBaseAddr |
 Driver | DriverBaseAddr |
 Signature | Signature |
 Certificate | Both of: CertName CertSerial |
 Registry | Both of: RegistryKey RegistryPath |
These cannot be edited or removed. All built-in artifact types have a blue icon for identification.
Custom Artifact Types
In addition to the built-in artifact types offered by D3, you also have the power to create custom artifact types to fit your needs. Custom Artifact Types will have user-defined identities, additional fields and relationships, allowing SOC teams to have greater flexibility in artifact detection and organization.
All custom Artifact Types are comprised of 4 elements:
Header—Change the icon and view the Artifact Type name. All custom Artifact Types use an orange icon to differentiate it from built-in Artifact Types.
Identity Field—Data model fields that identify artifact entities.
Additional Fields—Supplementary data fields that relate to this Artifact Type.
Relationships—View and Add to a list of relationships for this Artifact Type.
Identity Fields
An Identity Field is a specific data model field that defines an artifact's primary characteristic. In other words, when creating a custom artifact, you will need to specify which D3 data model field accurately represents the artifact type.
A data model field can only be used once per artifact type. For example, if a Data Model Field is already being used as an identity field, it cannot also be used as an additional field. The exception to this rule is that a source specific identity field can share the same data model field as a general identity field. In this case, two artifact entities will be extracted, one for the general identity and another for the source specific.
Reader Note
If the same data model field is used in two different artifact types, an event or incident will generate two artifact entities, one for each type.

There are two types of identity fields:
General — Creates artifacts from all ingested data, regardless of integration or method of ingestion.
Source specific — Creates artifacts that are ingested through a specific Integration and Event Source.
Reader Note
Only general identity fields can be created in artifact configuration. Source specific identity fields must be created within the event intake field-mapping of a specific integration and event source.
General Identity Fields
The General Identity Fields apply to all ingested data, regardless of integration and event source. You must determine at least one Data Model Field that represents this artifact type. Data model fields can be edited and changed for each integration under event-field mapping. Furthermore, as best practice, you should assign a Role to the selected data model field that explains the role it plays within this artifact type. The role should describe the artifact entity in artifact behaviour and artifact relationships. If no specific role is assigned, then the role will be the defaulted to the artifact type name.
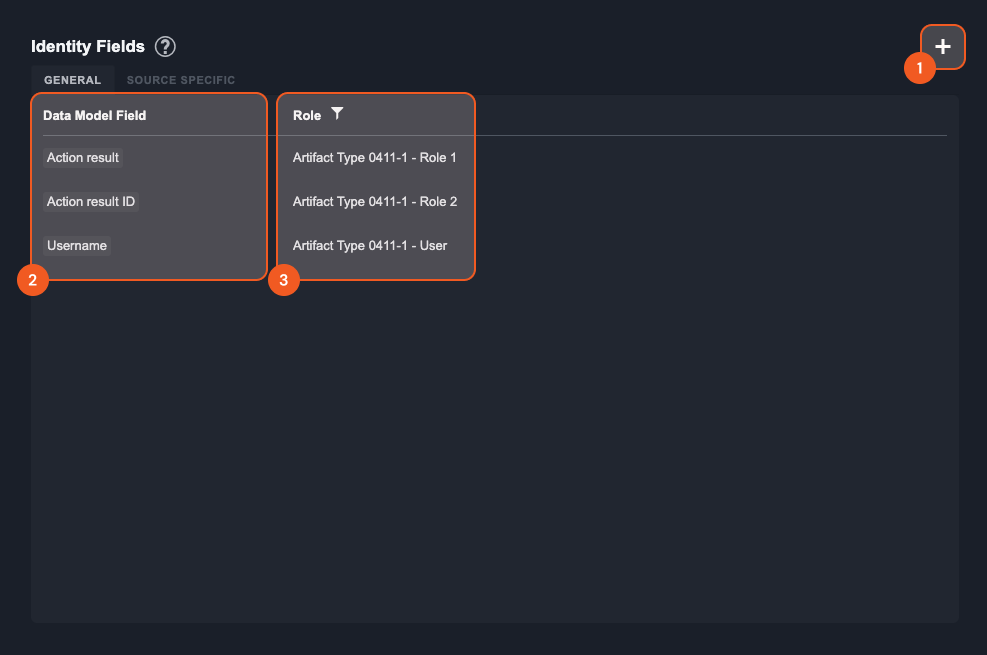
Add a new general identity field
Data Model Field—This column shows a list of data model fields that have been selected, which serve as the current identity fields of this artifact type.
Role—This column shows the corresponding roles to the data model field. You can filter the identity field by roles.
Source Specific Fields
The Source Specific fields are identity fields that create artifact entities only when the data is ingested through a specific integration and event source. Source specific fields can only be created and edited through an integration’s Event Field Mapping. The list of source specific fields shows an overview of all source specific mapping in this artifact type. If you wish to make changes, the redirect icon will take you to the specific integration and event intake.
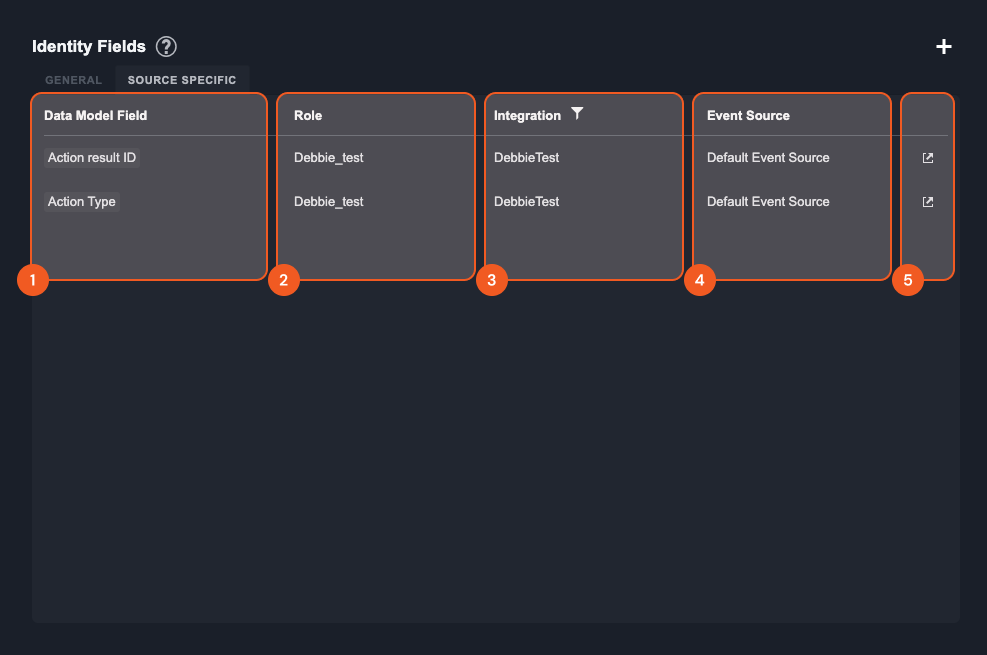
Data Model Field—The data model field that was specified in event field mapping. This field will be used for the creation of artifact entities of this type.
Role—The reader-friendly role assigned to this data model field
Integration—The name of the Integration that is this identity field’s source
Event Source—The specific event source inside of the integration that the identity field belongs to
Redirect—This icon redirects you to the specific integration and event source for this artifact identity field
Additional Fields
Additional Fields are supplementary information for this artifact type. They are not used to identify artifact entities but serve as extra fields that describe an artifact. The only parameter needed for an additional field is a valid data model field.
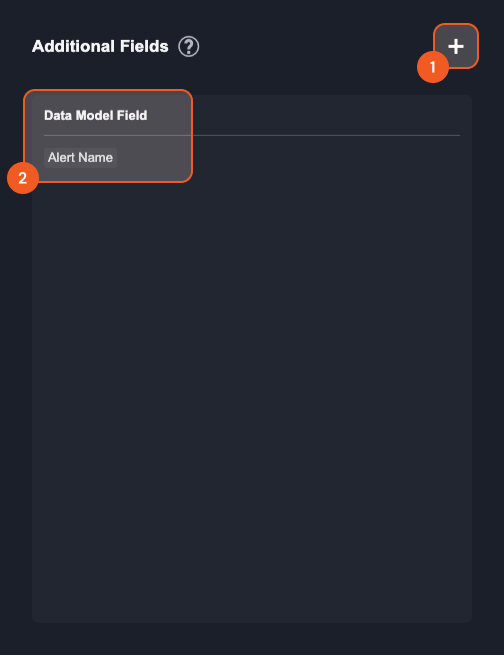
Add additional fields. This is a multi-select batch-add action, and you can select several data model fields at once.
Data Model Field—This is a list of the data model fields that are serving as additional fields for this artifact type
The ? icon provides a brief description of Additional Fields.
Relationships
All relationships between artifacts can be viewed by clicking the button above the search or inside specific custom artifact type configurations.d
Relationships can be drawn between any two Artifact Types, with the option of specifying a Role for either of the two artifact types. There is an additional option to add a source condition for the relationship. The source condition ensures that this relationship will only be created between artifact entities that also satisfy the specified Integration (and Event Source).
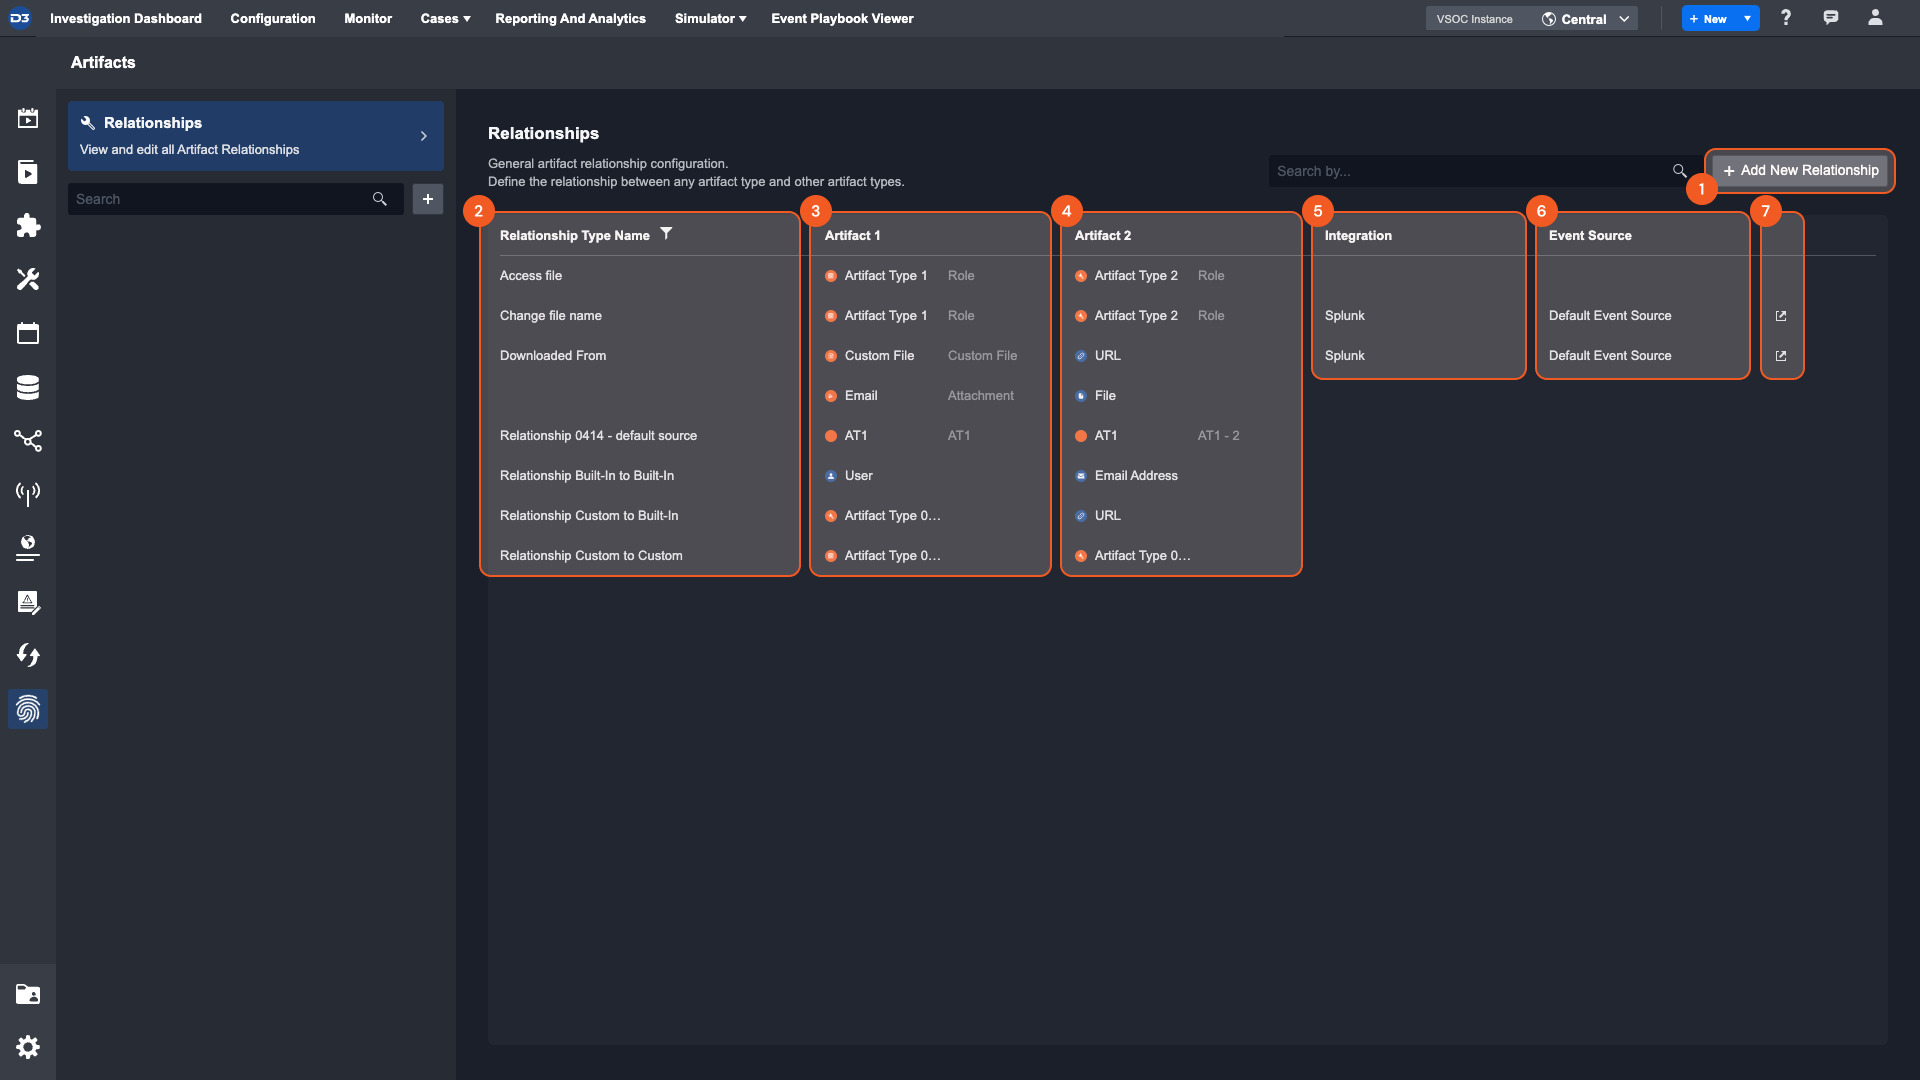
Add New Relationship button—Create a new relationship between two artifact types
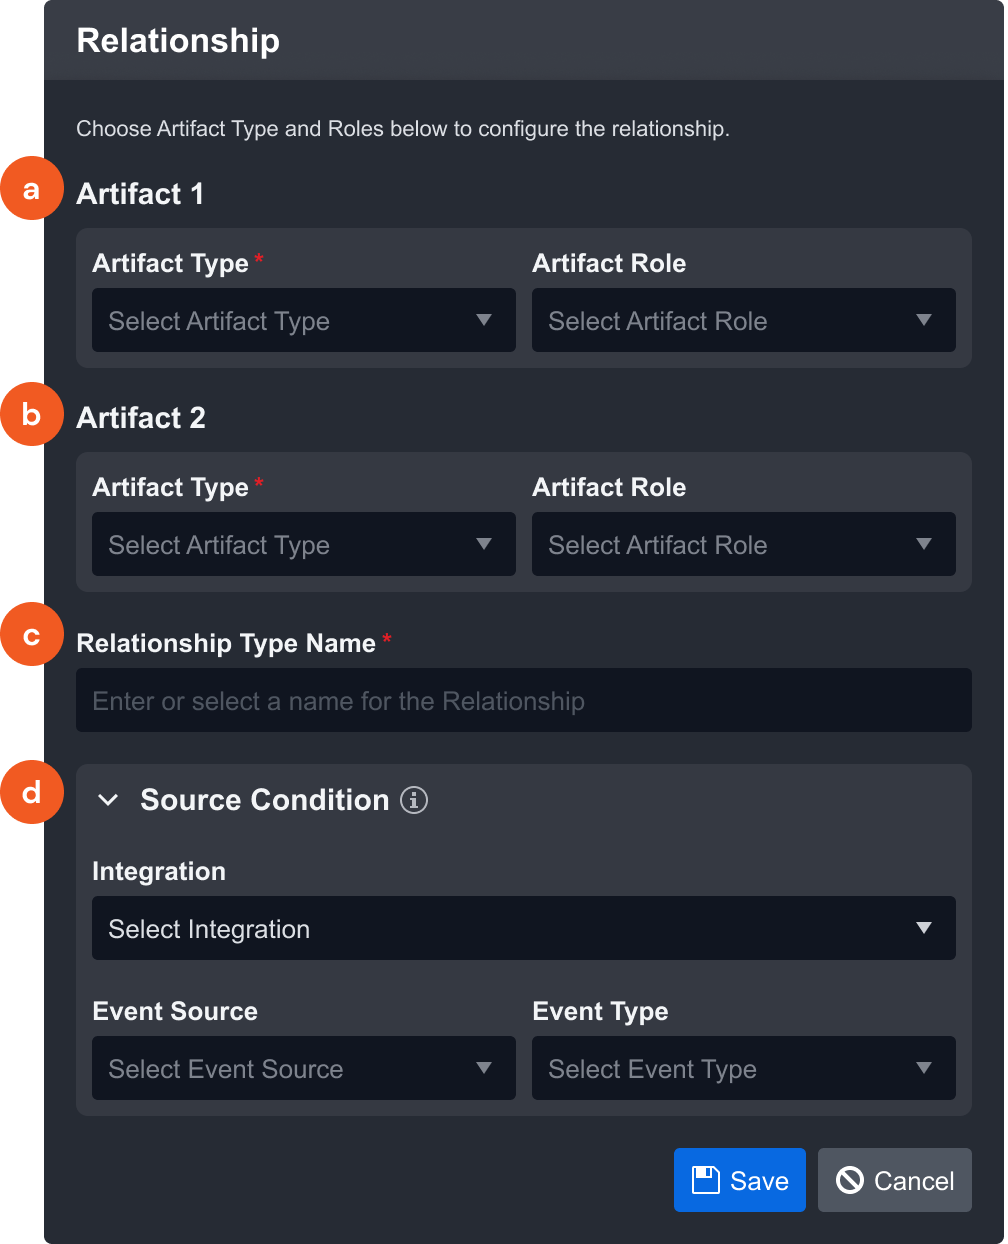
Artifact 1—Assign the first Artifact in the relationship. The Artifact Type is required, but a Role is optional.
Rader Note
If a Role is not assigned, the relationship will be created with every Role in that Artifact Type.
Artifact 2—Assign the second Artifact in the relationship. The artifact type is required but a Role is not.
Relationship Type Name—Select a relationship name from the dropdown or create your own. Names can be reused, so it is a good idea to create commonly used ones.
(Optional) Source Conditions—Specify an Integration and event source that data must be ingested through in order for this relationship to be made.
Relationship Type Name—The name assigned to a relationship. There are several system-defined relationship types, but you can also create your own. These can be reused as many times as you’d like, and the table can be sorted according to the name.
Artifact 1—The first artifact type in the relationship. This will be assigned based on the order in creation. This must contain an artifact type but is not required to have a role.
Artifact 2—The second artifact type in the relationship. This is also assigned based on the order in creation. It also must contain an artifact type but does not have to have a role.
Integration—This is the Integration source condition parameter, indicating that only artifacts ingested through this Integration will be assigned this relationship.
Event Source—Further details the source conditions under which this relationship is drawn. Only artifacts ingested through this event source will be assigned this relationship.
Redirect—This icon redirects you to the specific Integration and Event Source for the source condition
Reader Note
Relationships can be made between two roles of the same artifact type. Additionally, relationships can be made between custom and built-in system artifact types.
Field Mapping
Source specific identity fields can be configured inside of event and incident field mapping, making it specific to an integration and event source. These must be created and edited within the event or incident field mapping.
In the overview of the event or incident intake command of an integration, there is an event field mapping section.
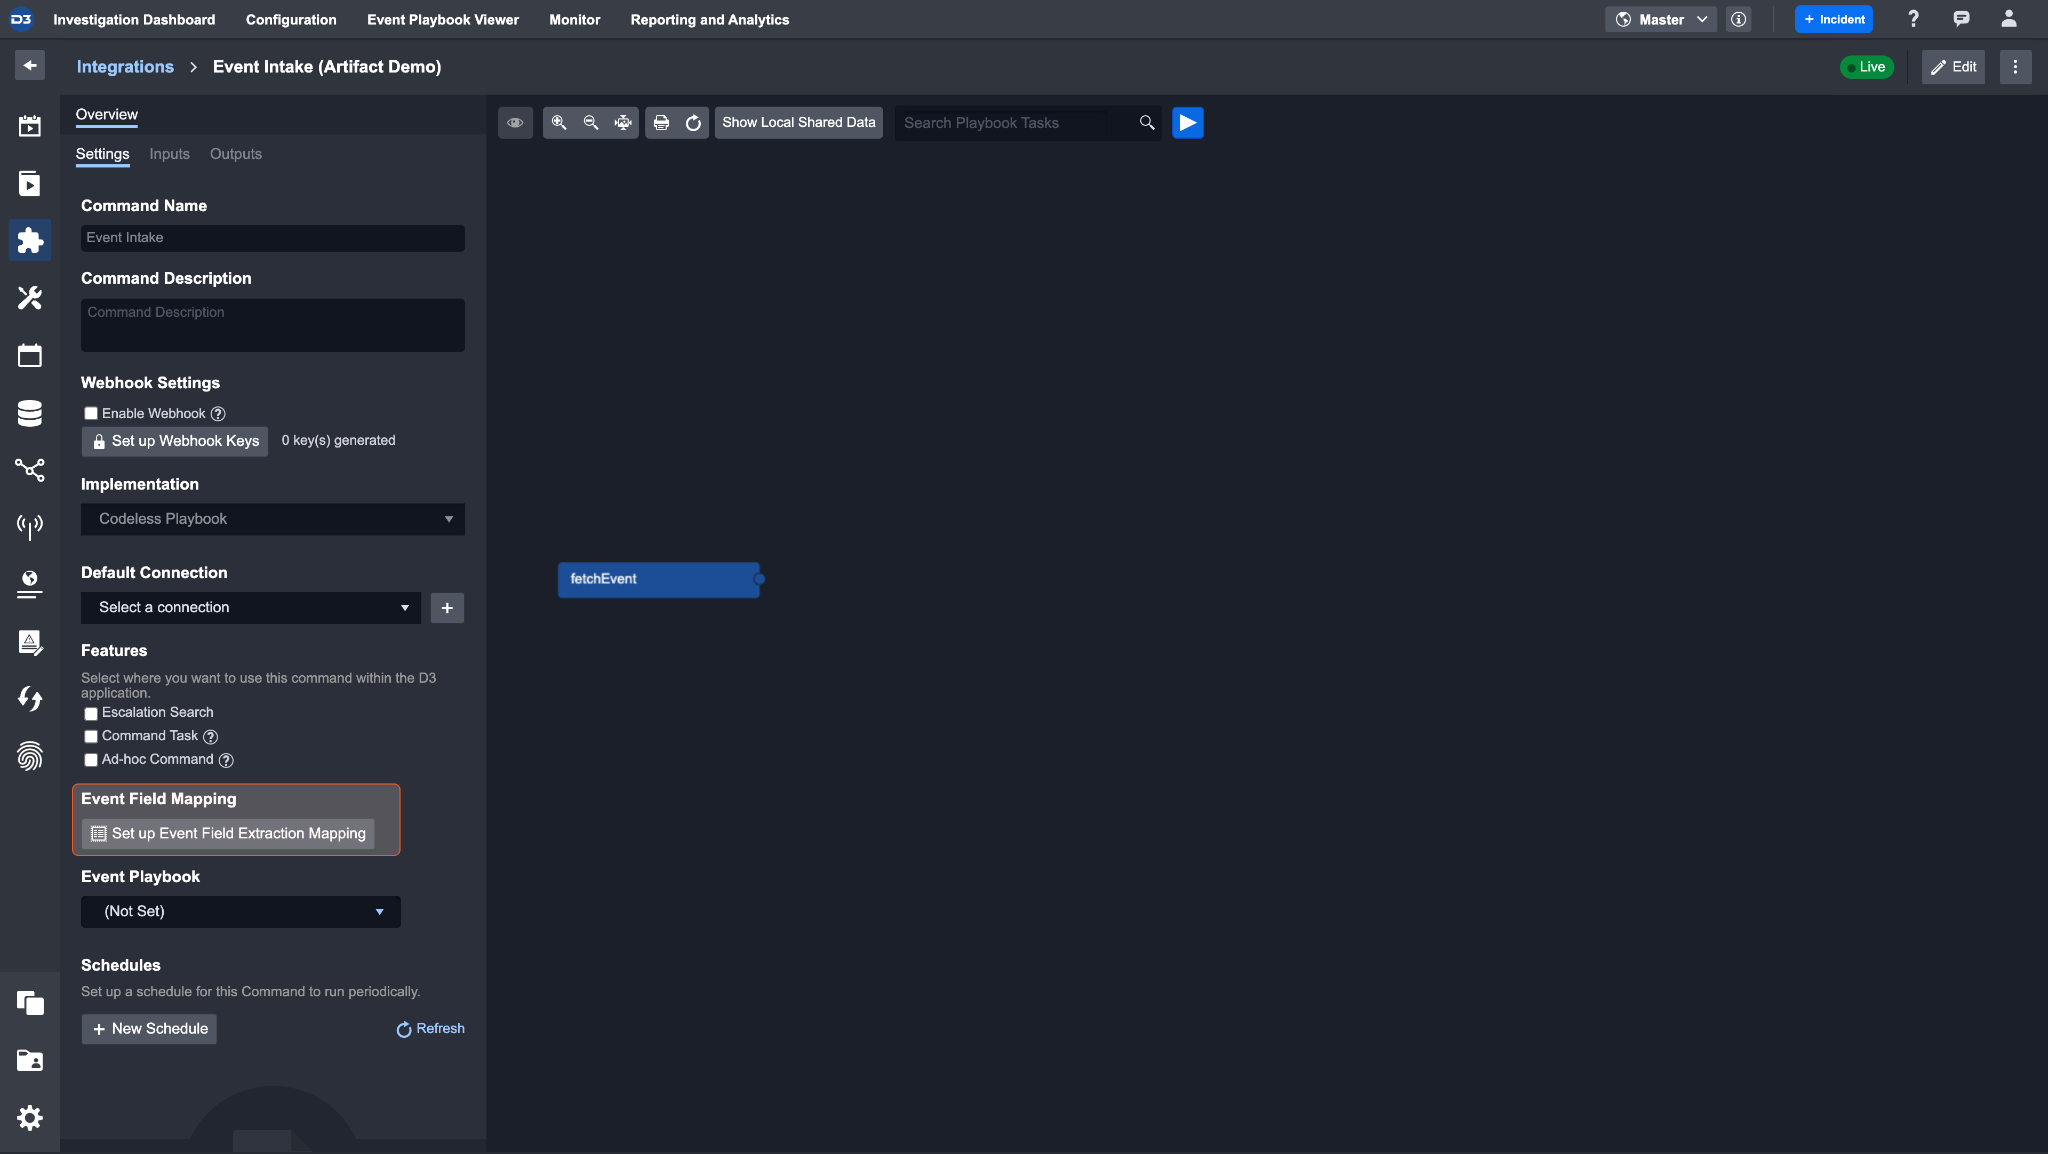
Click Setup Event Field Extraction Mapping and open the event field mapping window.

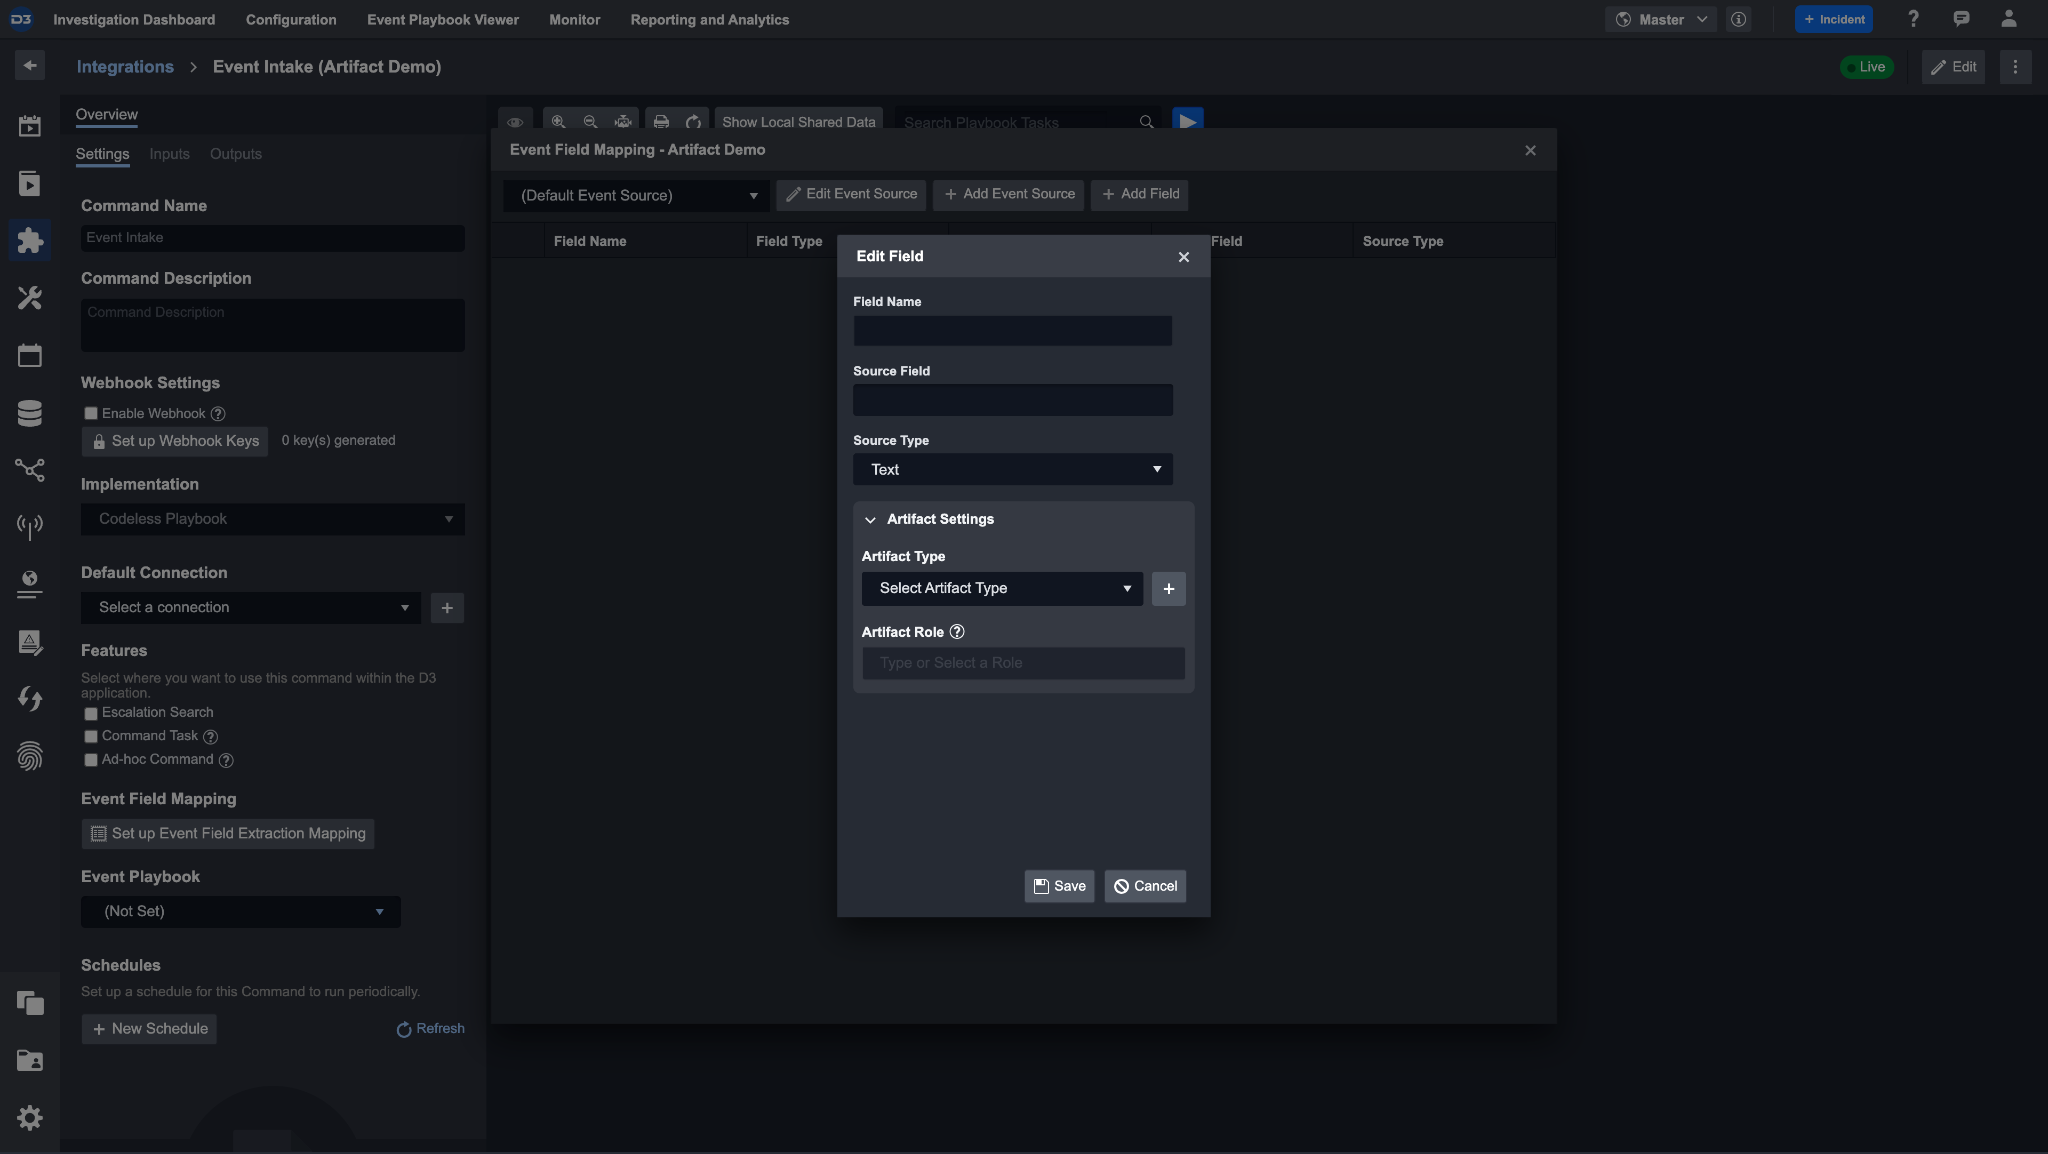
Clicking the add new field will open up the edit field pop-up, which prompts you to fill in the data model fields and its source, as well as the option to fill in the artifacts setting.
By filling the artifact settings, you specify the artifact type and role that an artifact entity will have when it is ingested through this integration and event source.
After configuring the artifact setting, the source specific identity field will appear inside of that artifact type. A redirect icon will allow you to go back to the integration and event source to edit the artifact type configuration.
Creating a Custom Artifact Type
Configuring a custom artifact type can be an integral part of building a full-feature cybersecurity automation platform. A SOC team may have integrations that generate events or incidents with artifact entities. These entities are often correlated with one another, and analysts may need to easily map their identity and/or relationships.
When monitoring a network traffic event, the event may have an internal IP address as an artifact. Thus, a potential use-case for custom artifact types is creating a custom internal IP address with relevant identity fields for network traffic events.
First, we will set up the artifact type by defining a data model field that identifies it. Then, we will set up a few additional fields that will provide supplementary information about the artifact type. And finally, we will assign a relationship between the internal IP address and an external IP address. After setting up the artifact type, we will also show what an event ingested artifact entity of a custom artifact type looks like.
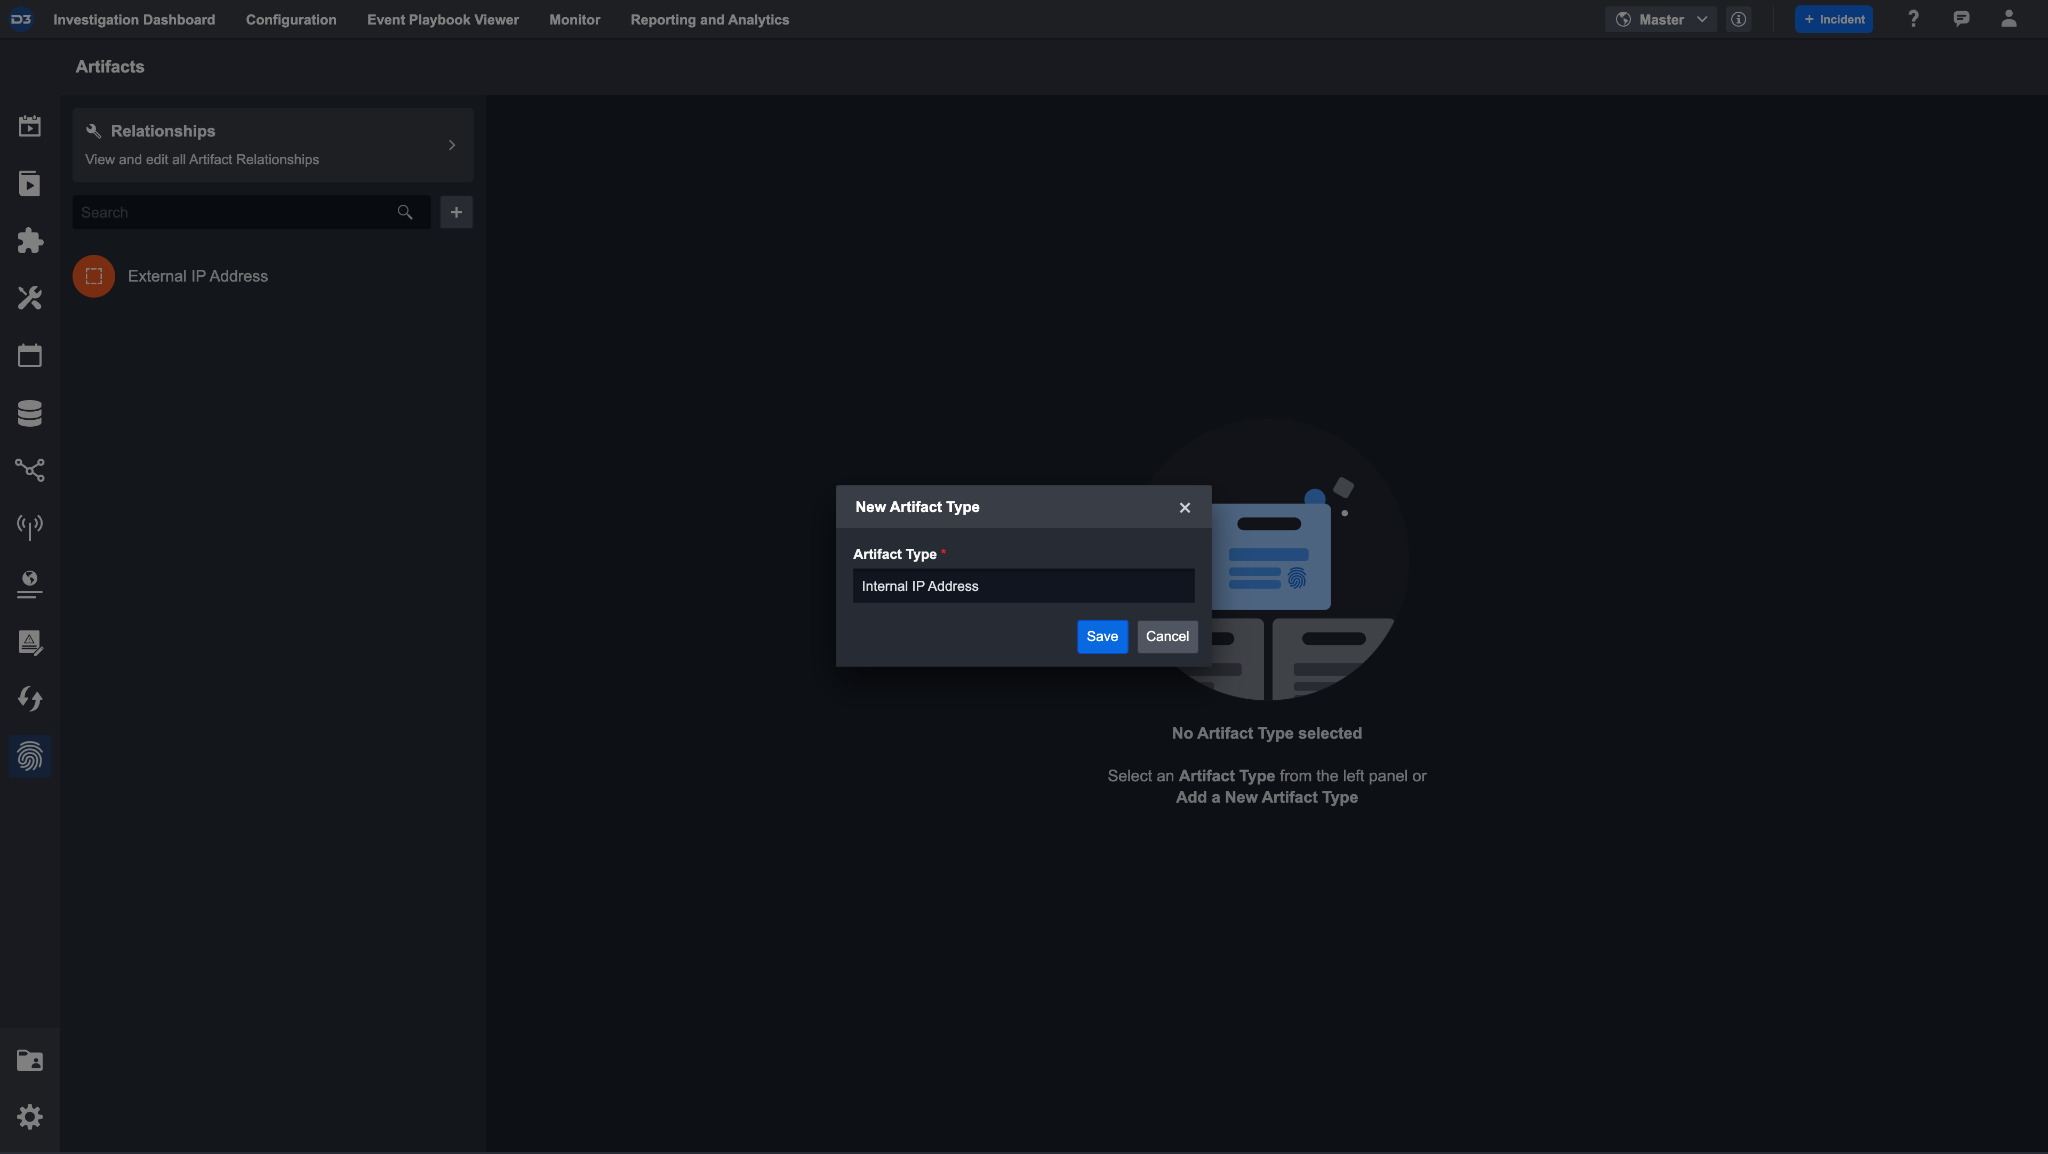
Create the custom type and call it Internal IP Address to demonstrate the use-case above.
Navigate to Configurations > Artifacts. Click on the + button to create a new artifact type. Enter Internal IP Address and save. This cannot be changed to prevent duplicate artifact types. After clicking save, you should see an empty artifact type.
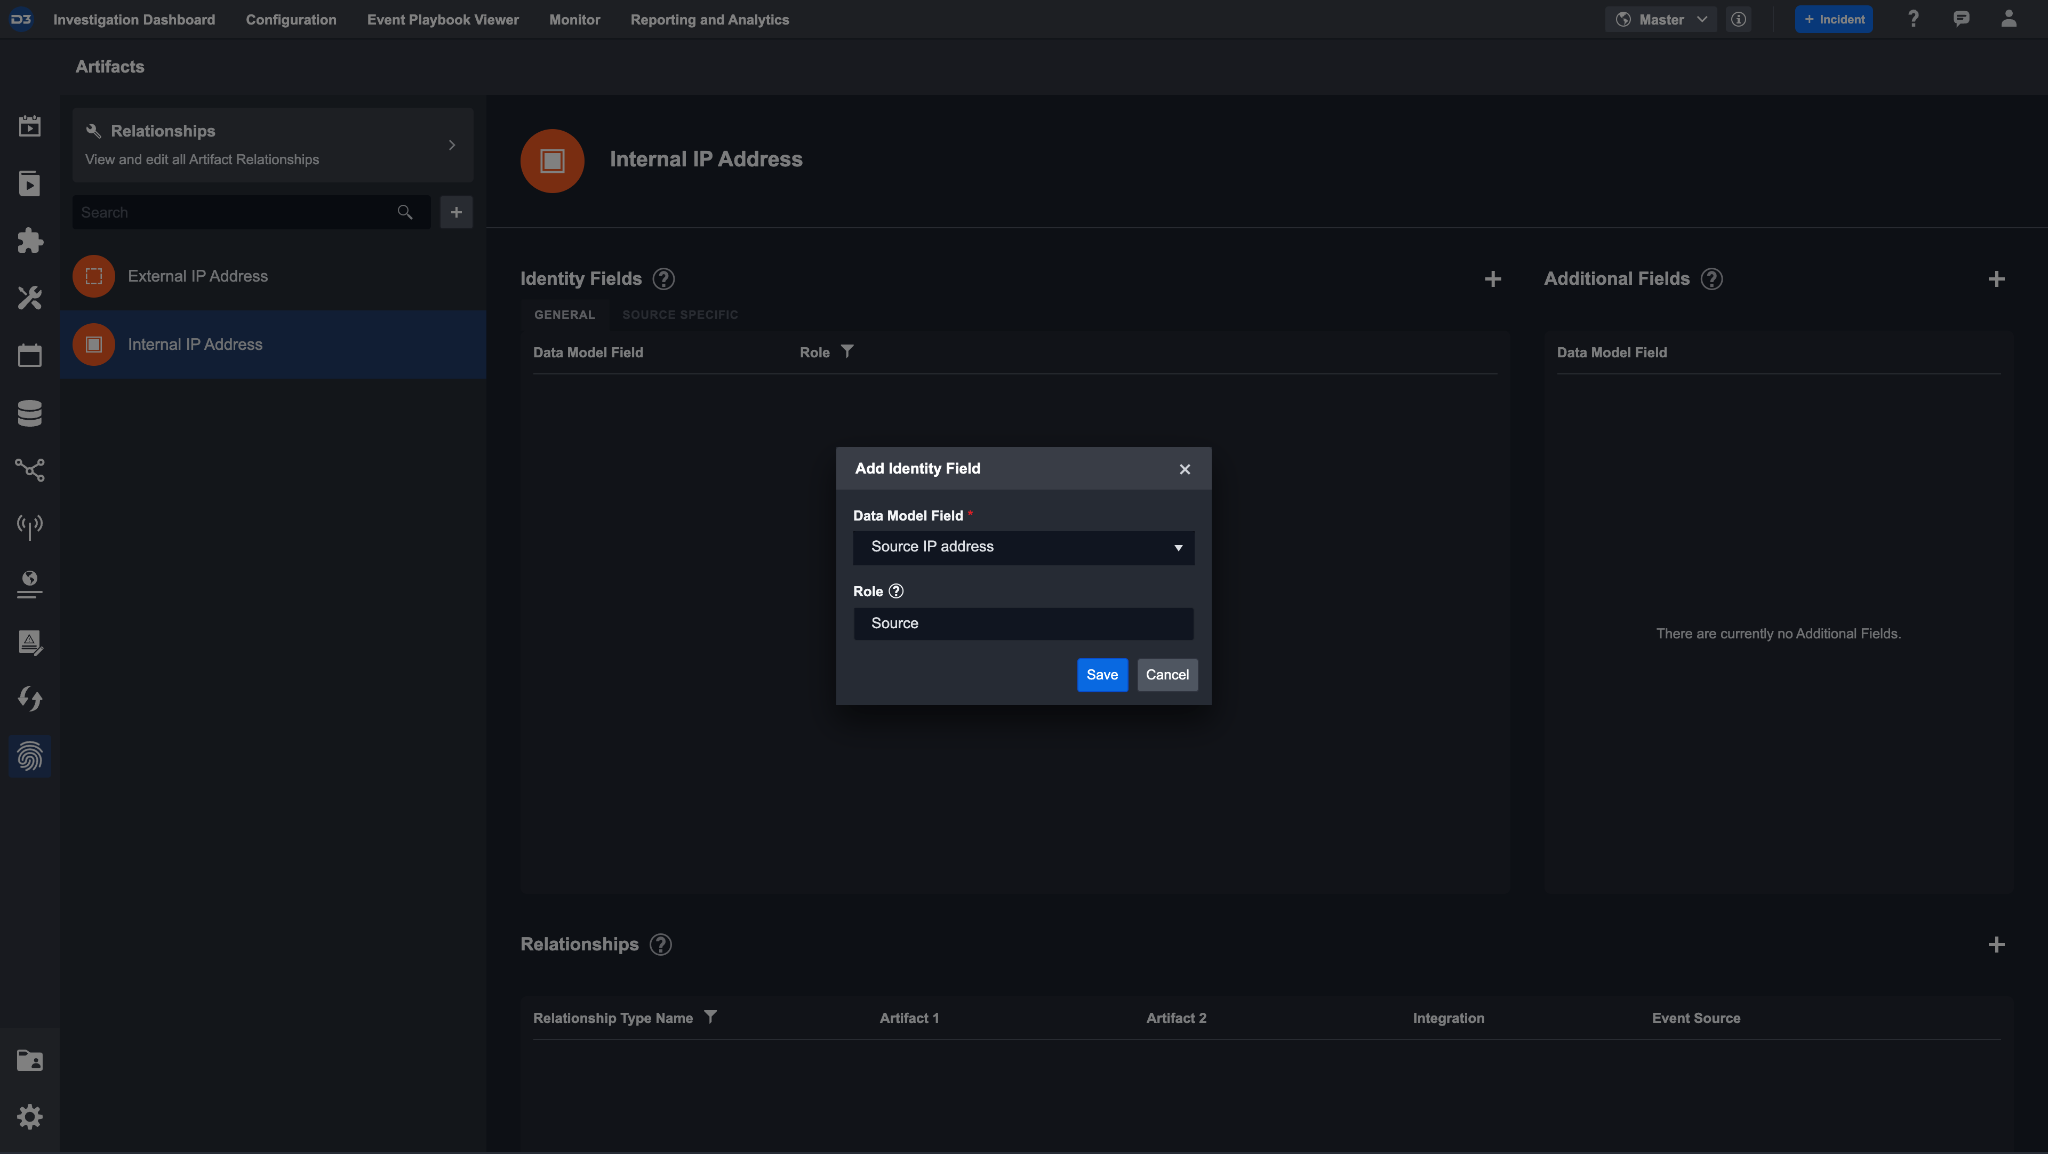
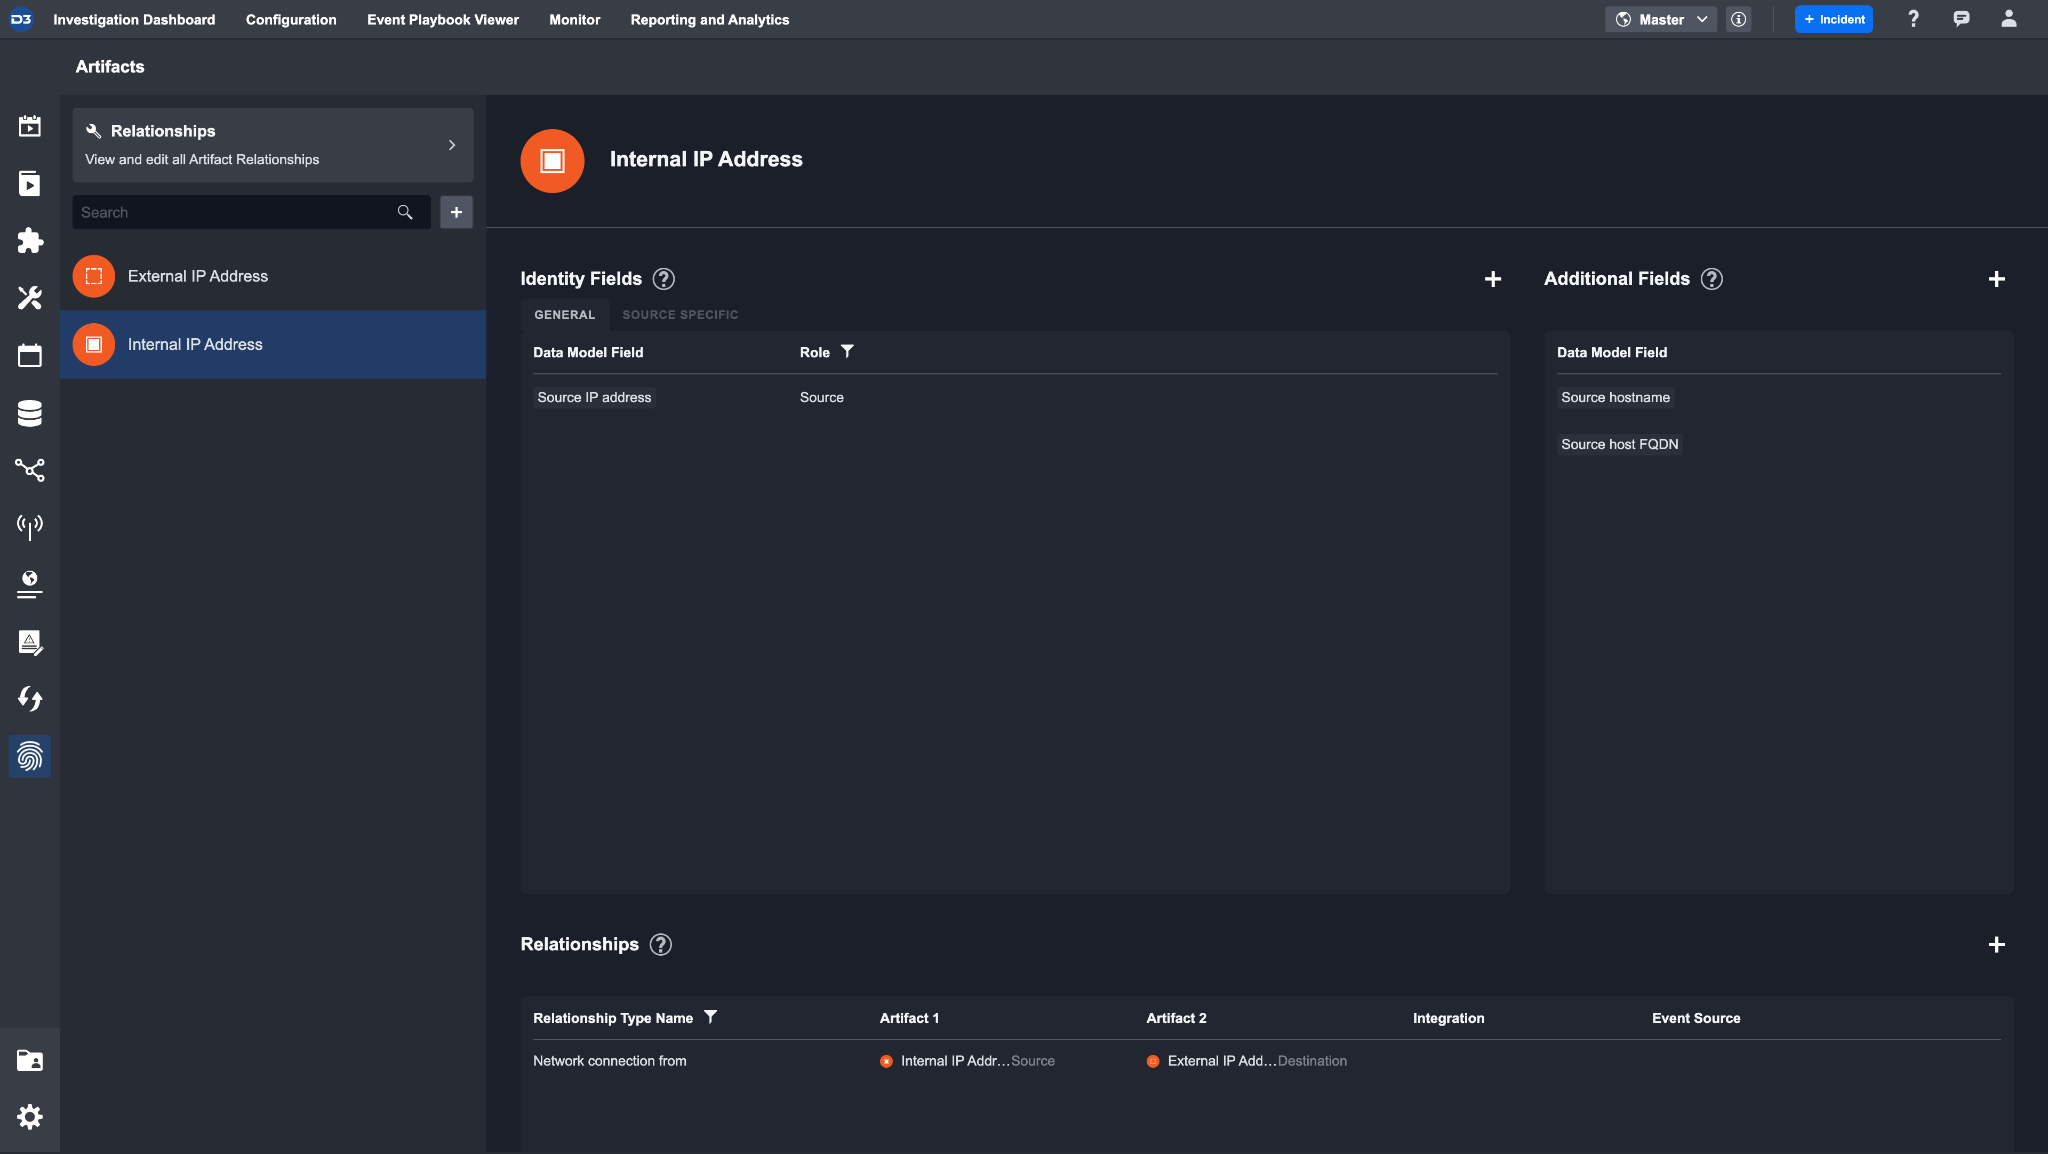
One of the identifiers of an internal IP address is its source IP. In order to identify this type of internal IP address artifact, we need the data model field for a Source IP Address. This data model would therefore have the role of Source.
To add this identity field, click the + icon next to the identity fields header. Select the built-in D3 data model field Source IP address and give it the role Source. This ensures that any event with a source IP address will create an artifact entity of type internal IP address.
Reader Note
In the artifacts configuration page, you can only add new general identity fields. To add an identity field that receives data specific to an integration, do so in the Event Field Mapping inside of an integration’s event intake command.
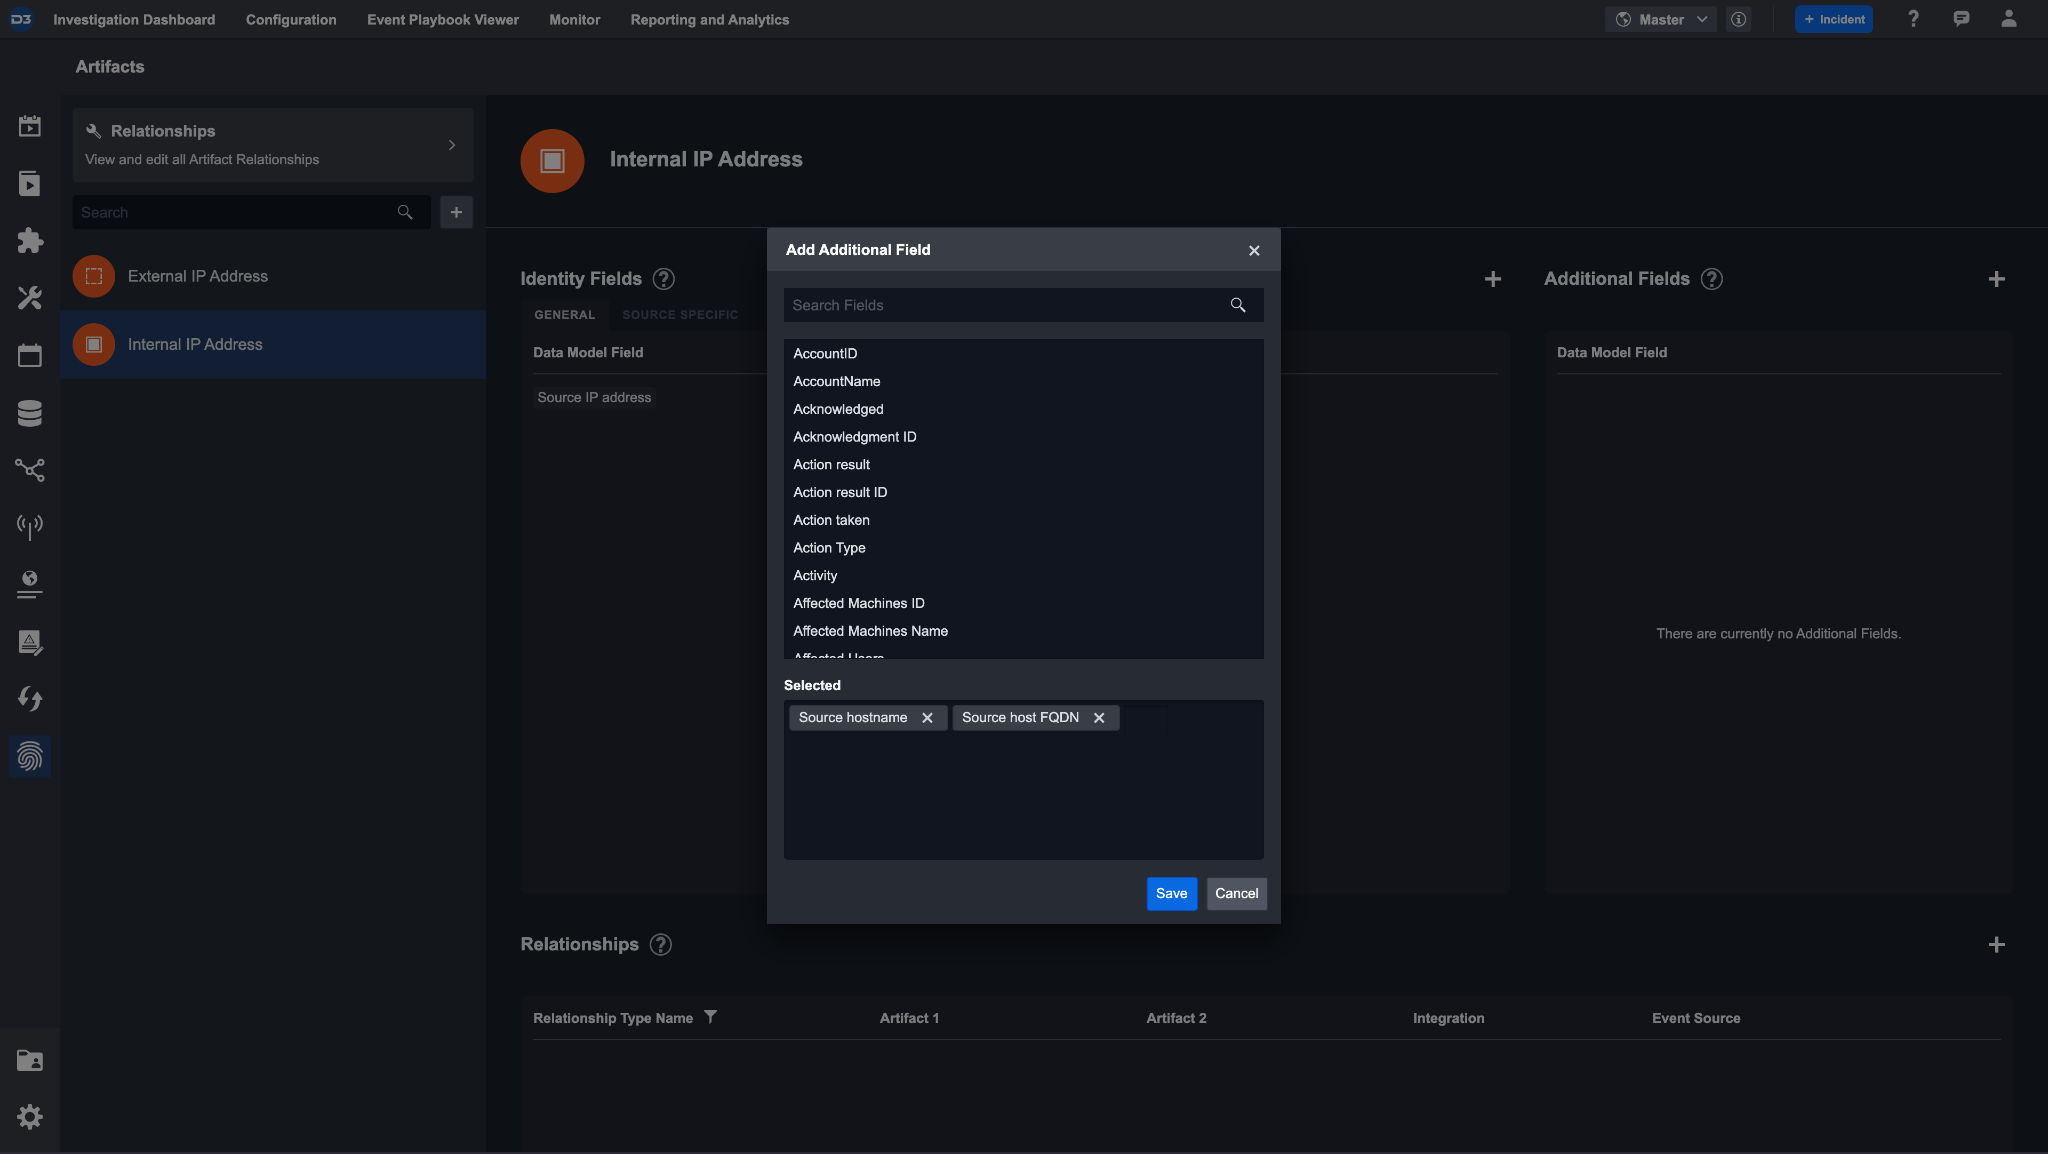
Some other details that you may want to know about an internal IP address are its source hostname and FQDN. However, these are not needed for generating the artifact entity, therefore we assign them as additional fields.
Select these by clicking the + icon to the right of additional fields. You can batch add additional fields for convenience. Now, if a network traffic event is ingested, the artifact entity will be identified by its source IP and have additional information such as its hostname or FQDN.
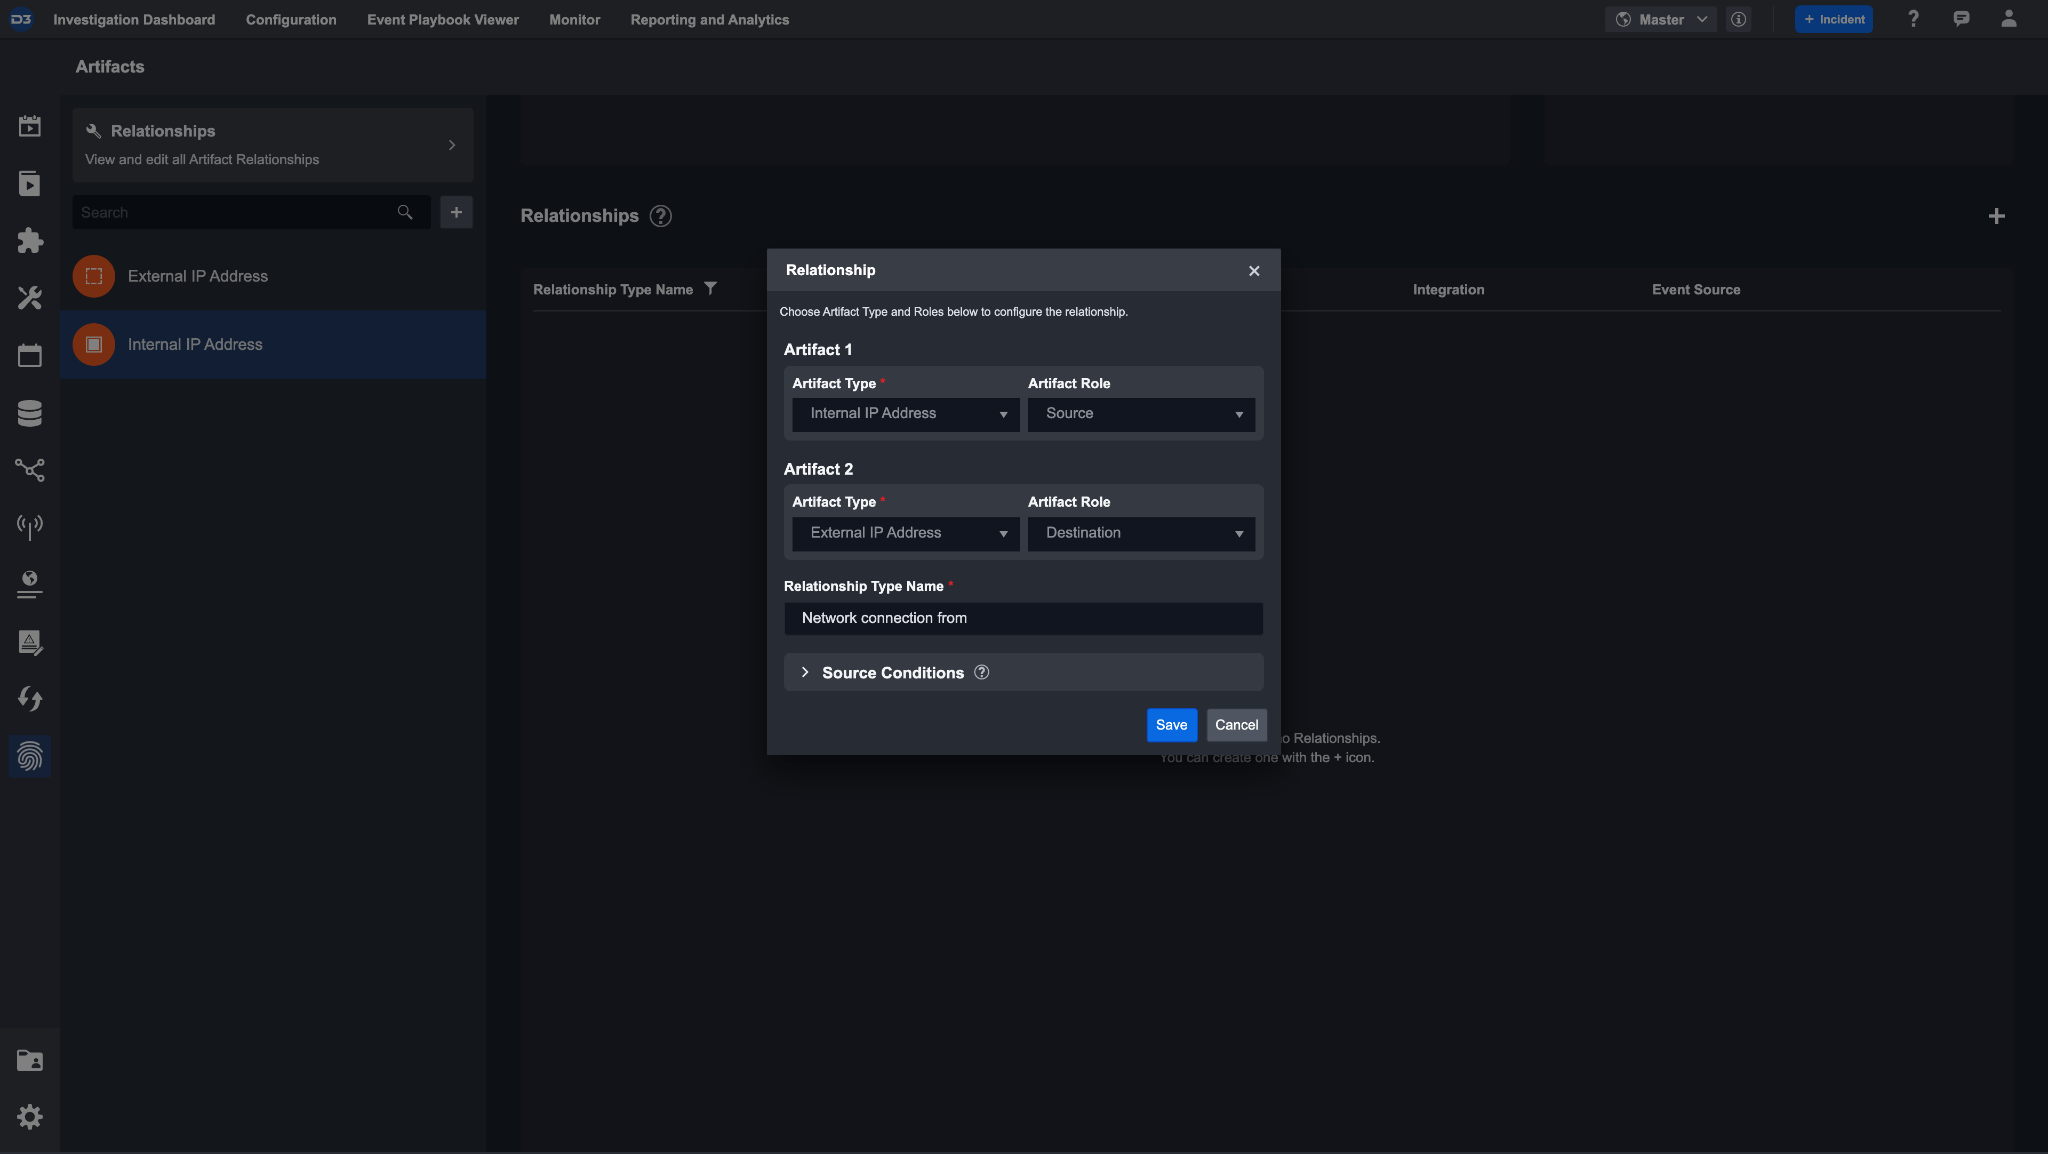
An internal IP address may have network traffic between an external IP address. In this case, we will assign a relationship between these artifact types.
To configure the relationship, click the + icon. The first artifact type will be automatically filled in with internal IP address. Fill in the role source for this relationship. Select the second artifact type as the external IP address artifact type, with the role Destination. Then, name the relationship to Network connection from so that it can be labeled as the network flow from an internal IP to an external IP.
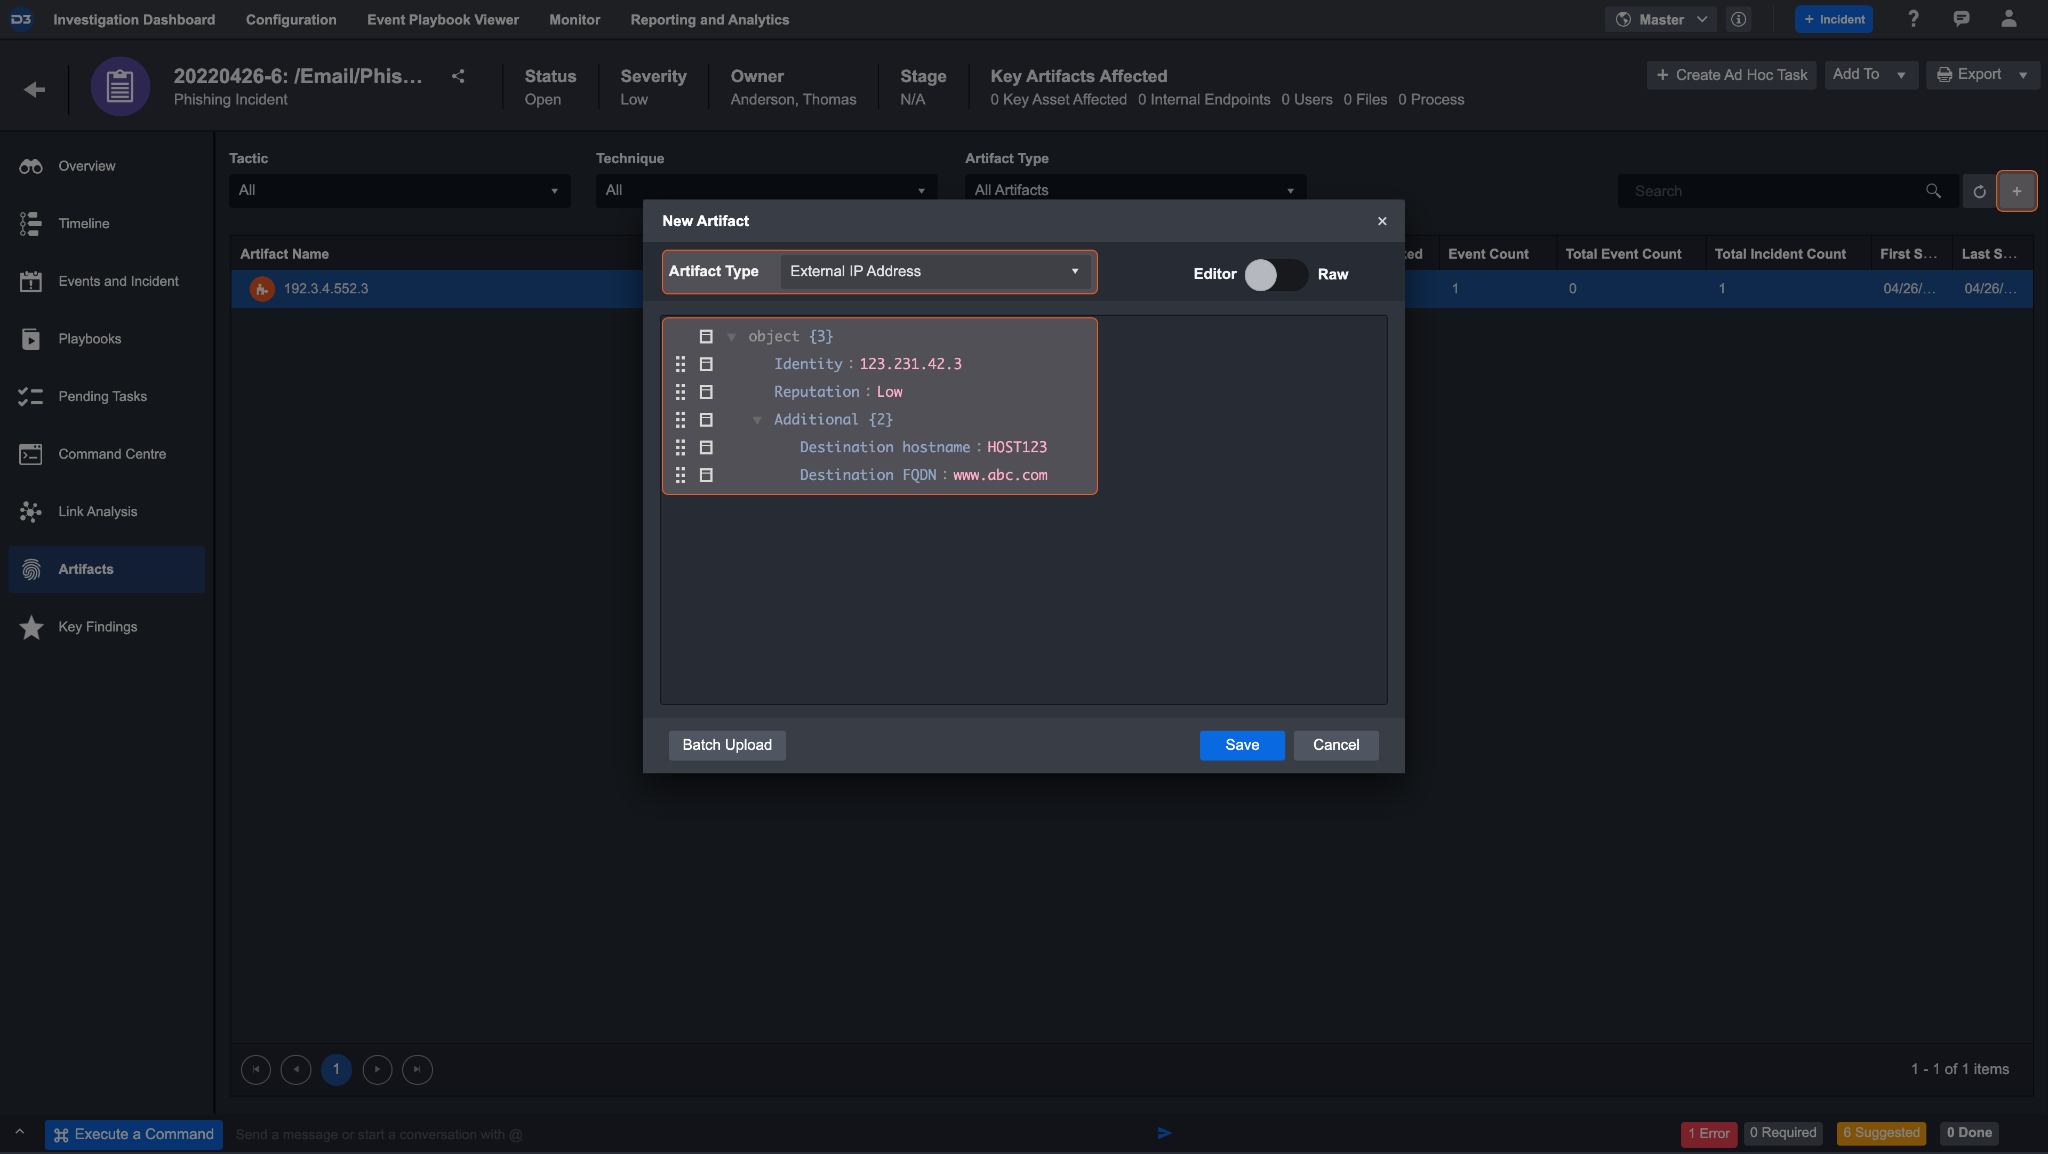
After setting everything up, your custom artifact should look like this:
Reader Note
Make sure the data model fields are set up in event intake field mapping. If needed, you can create custom data model fields to accommodate your cyber investigation.
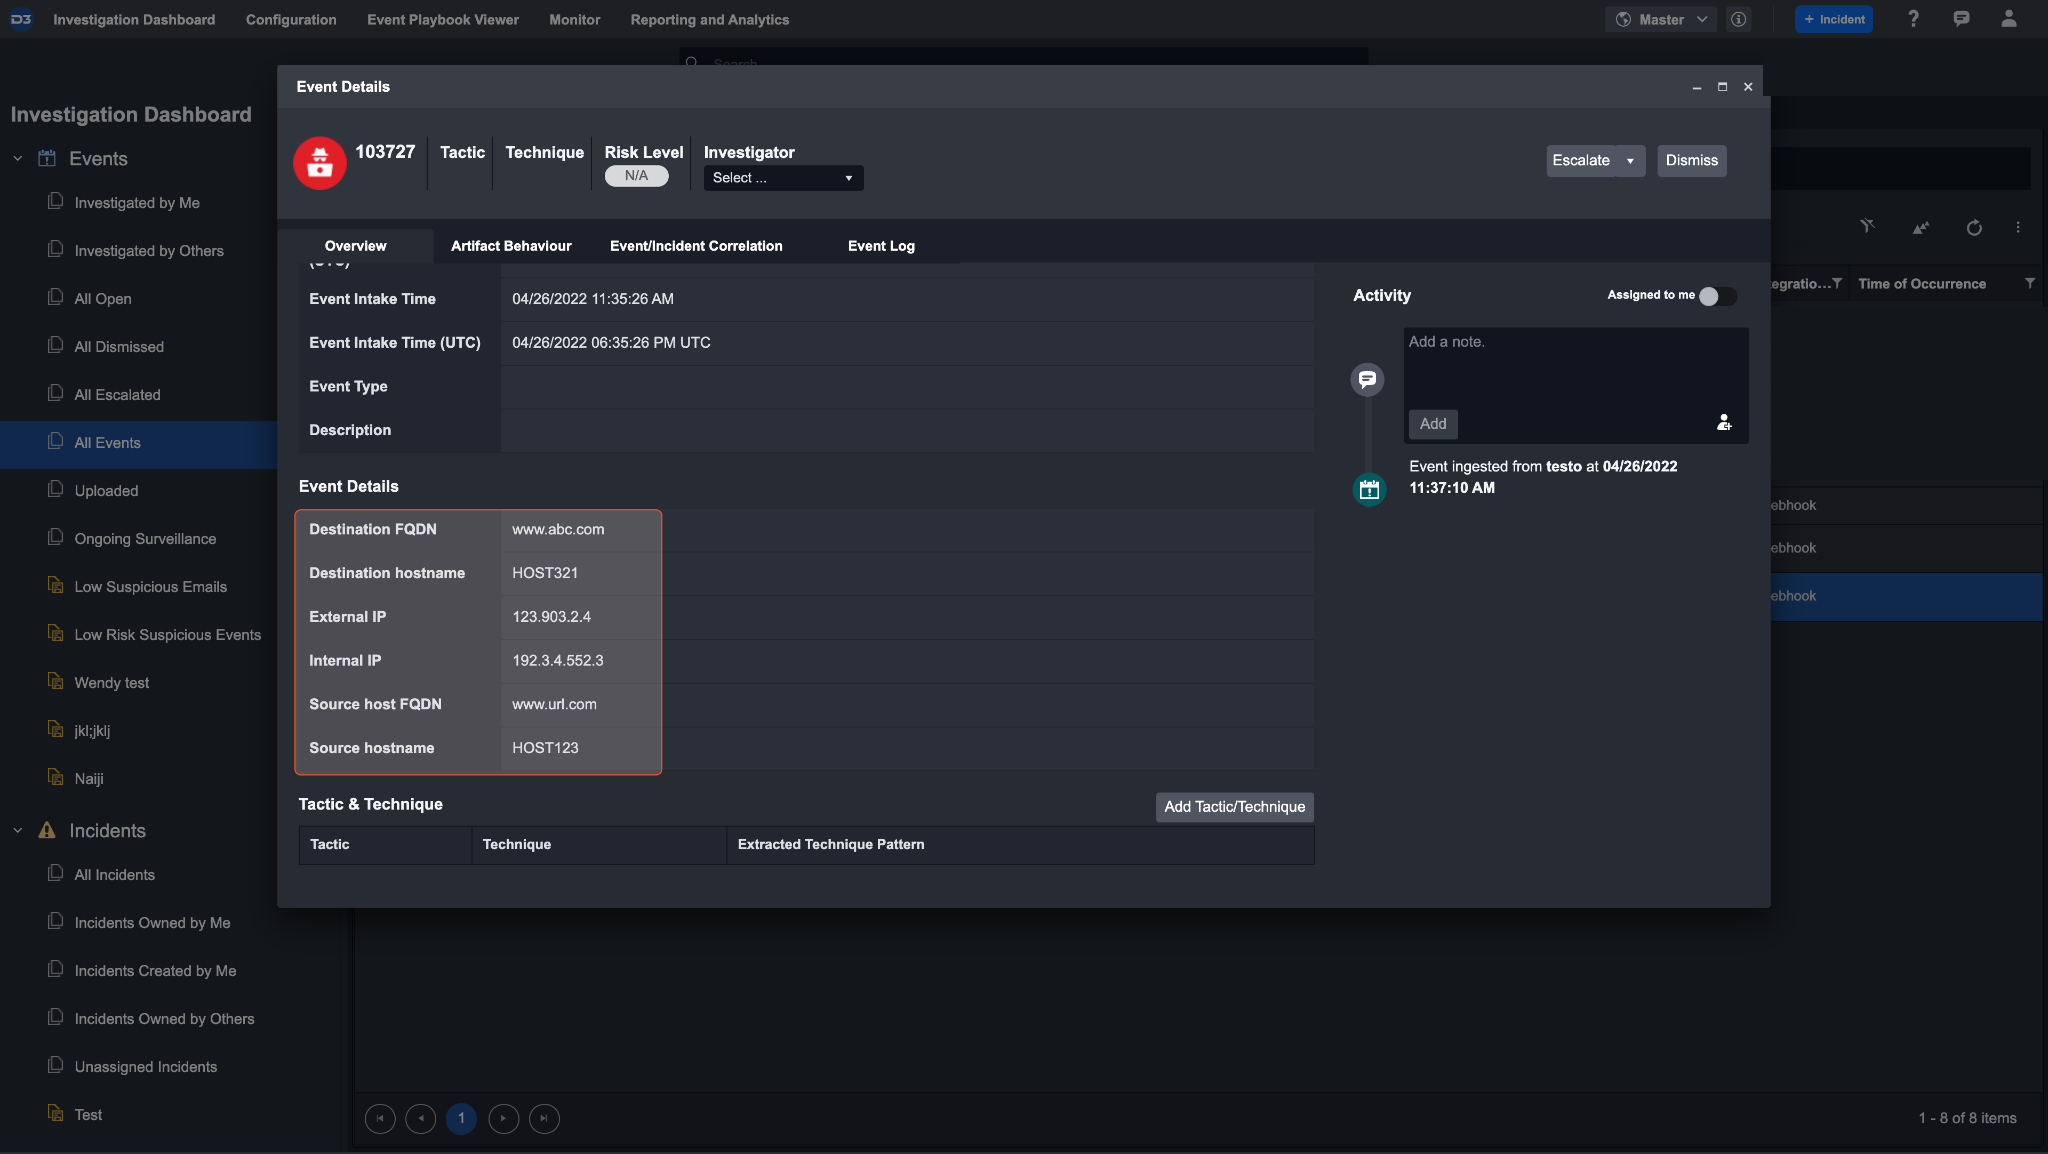
When an event is ingested, all of the details of this event can be seen in the event details page. Some of the event data will generate an artifact. For example, since we have artifact types internal IP and external IP address, this event should create two artifacts, one for each type.
Click on the artifact behaviour tab. You will see that two IP artifacts have been ingested under custom artifact types. There is also a relationship between these two artifacts, showing that the network connection is from a source IP to a destination IP.
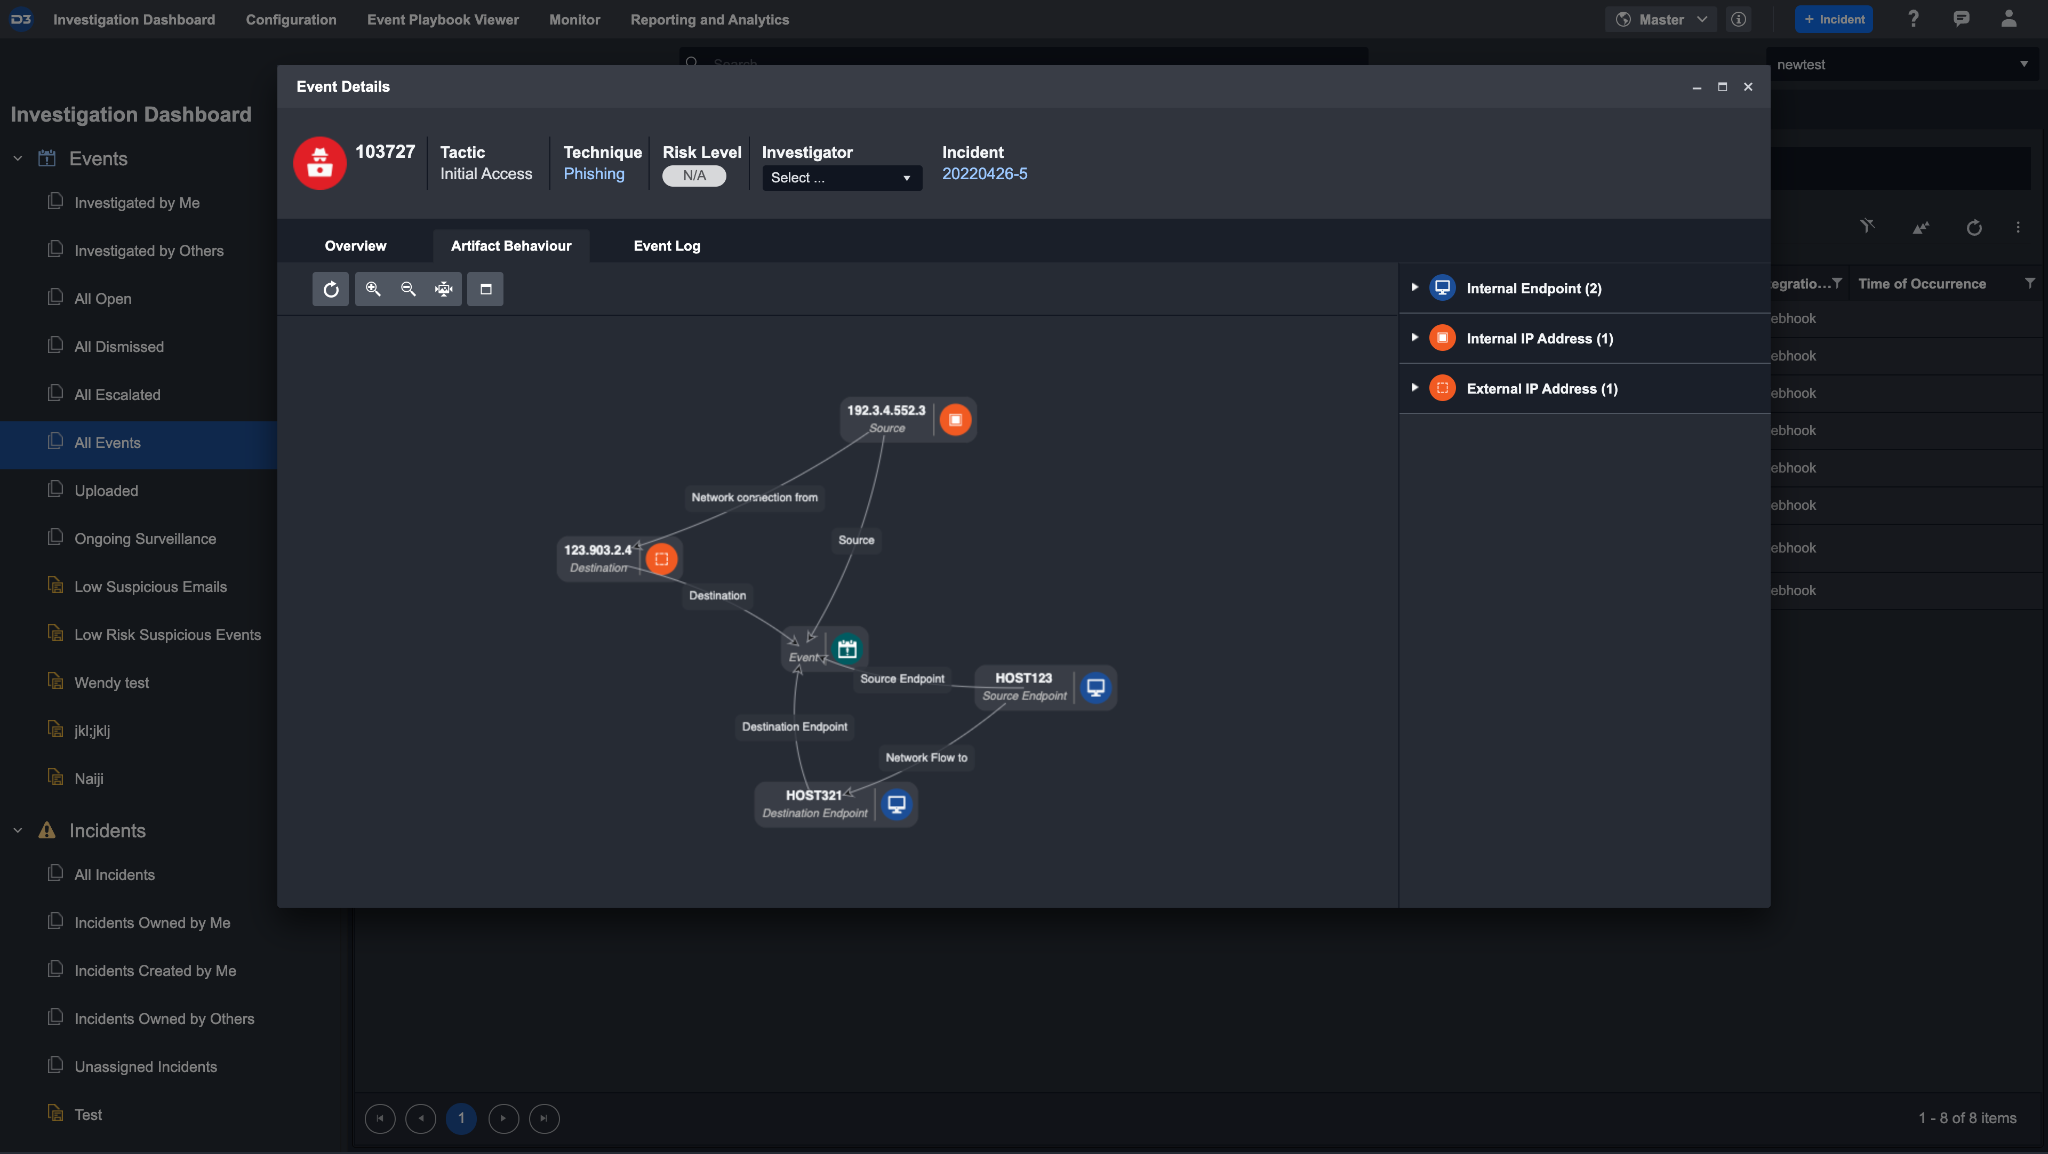
Upon escalating an event into an incident, you will have access to further breakdown of the artifacts
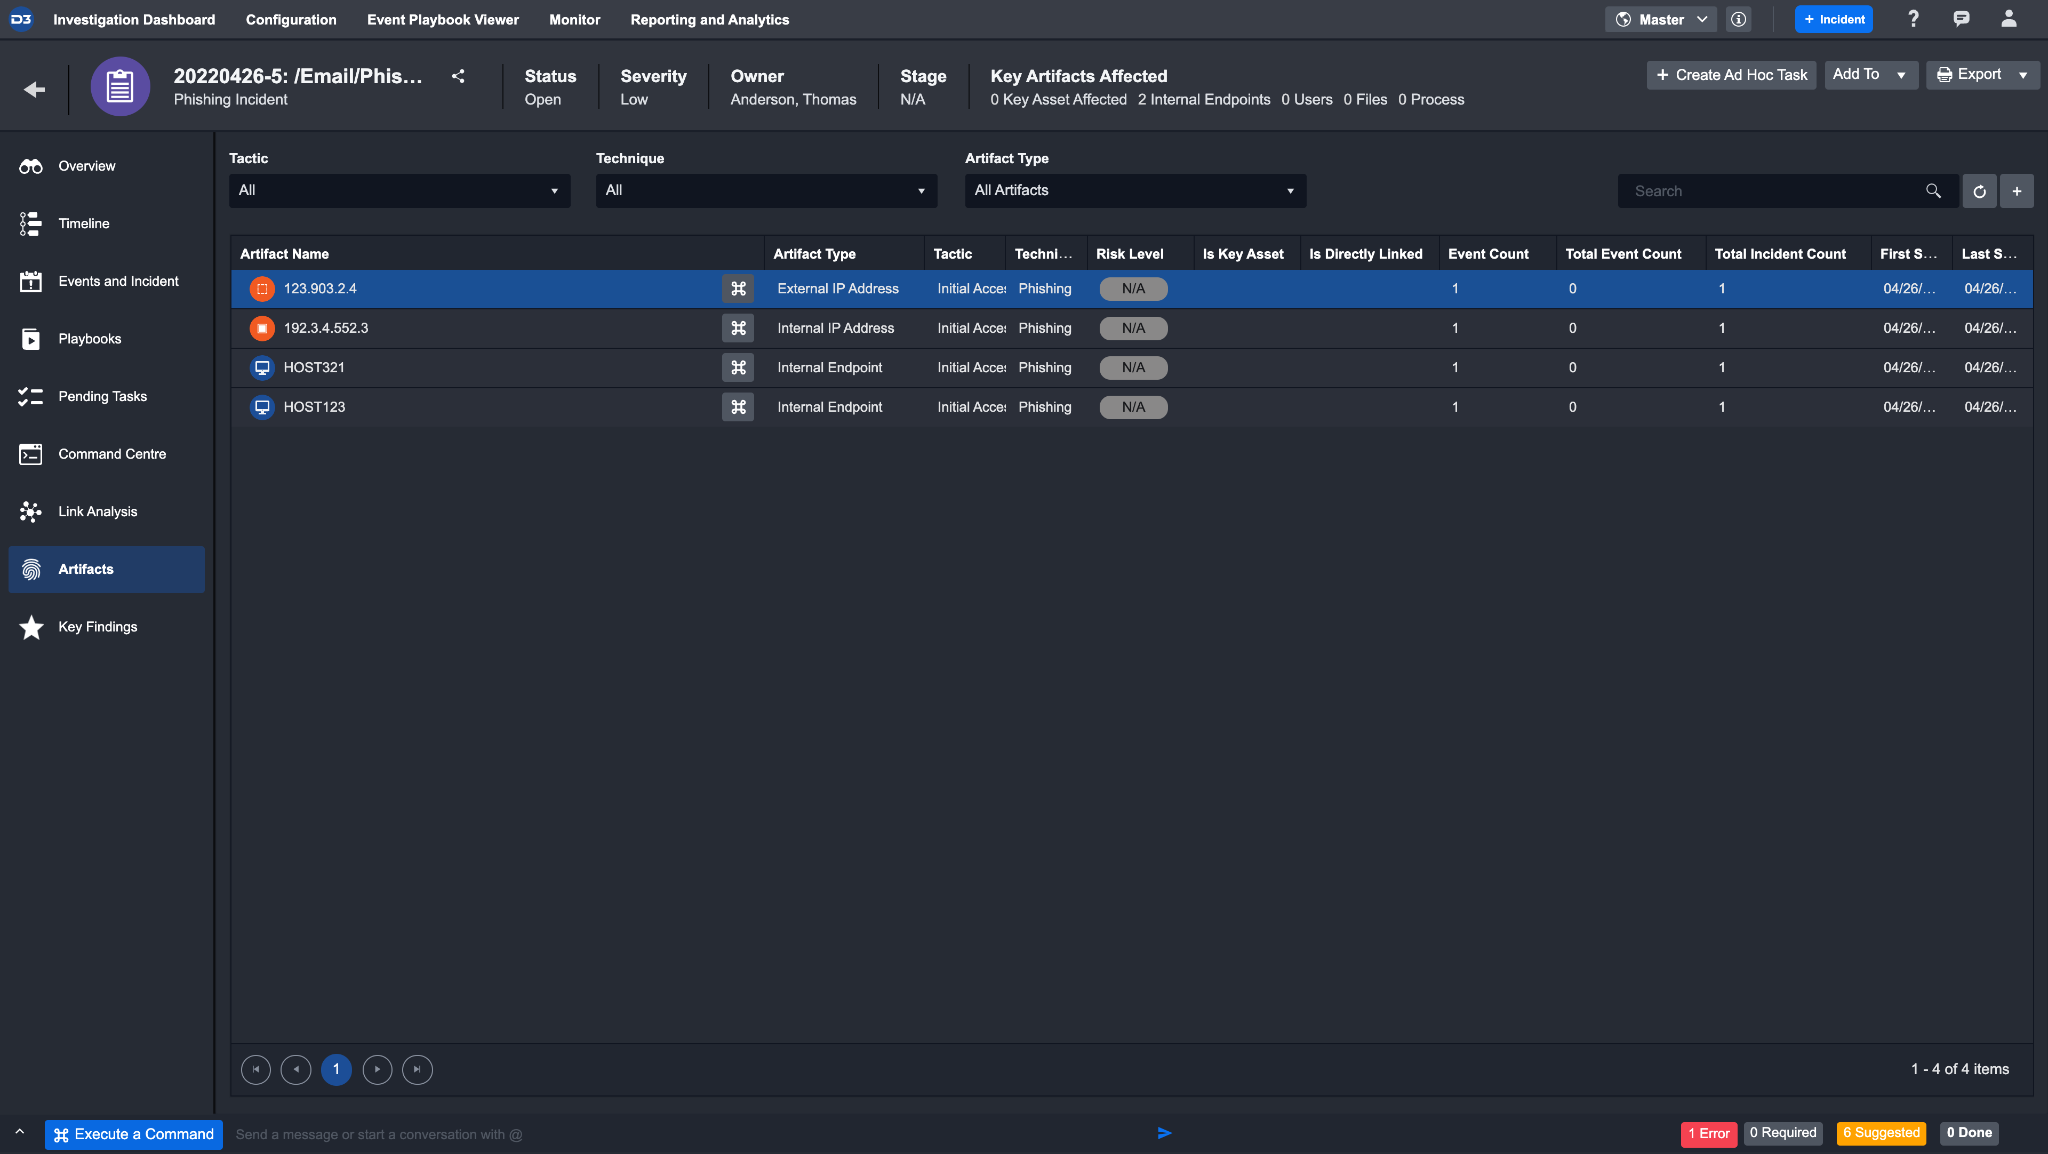
Clicking into an artifact will open its details page.
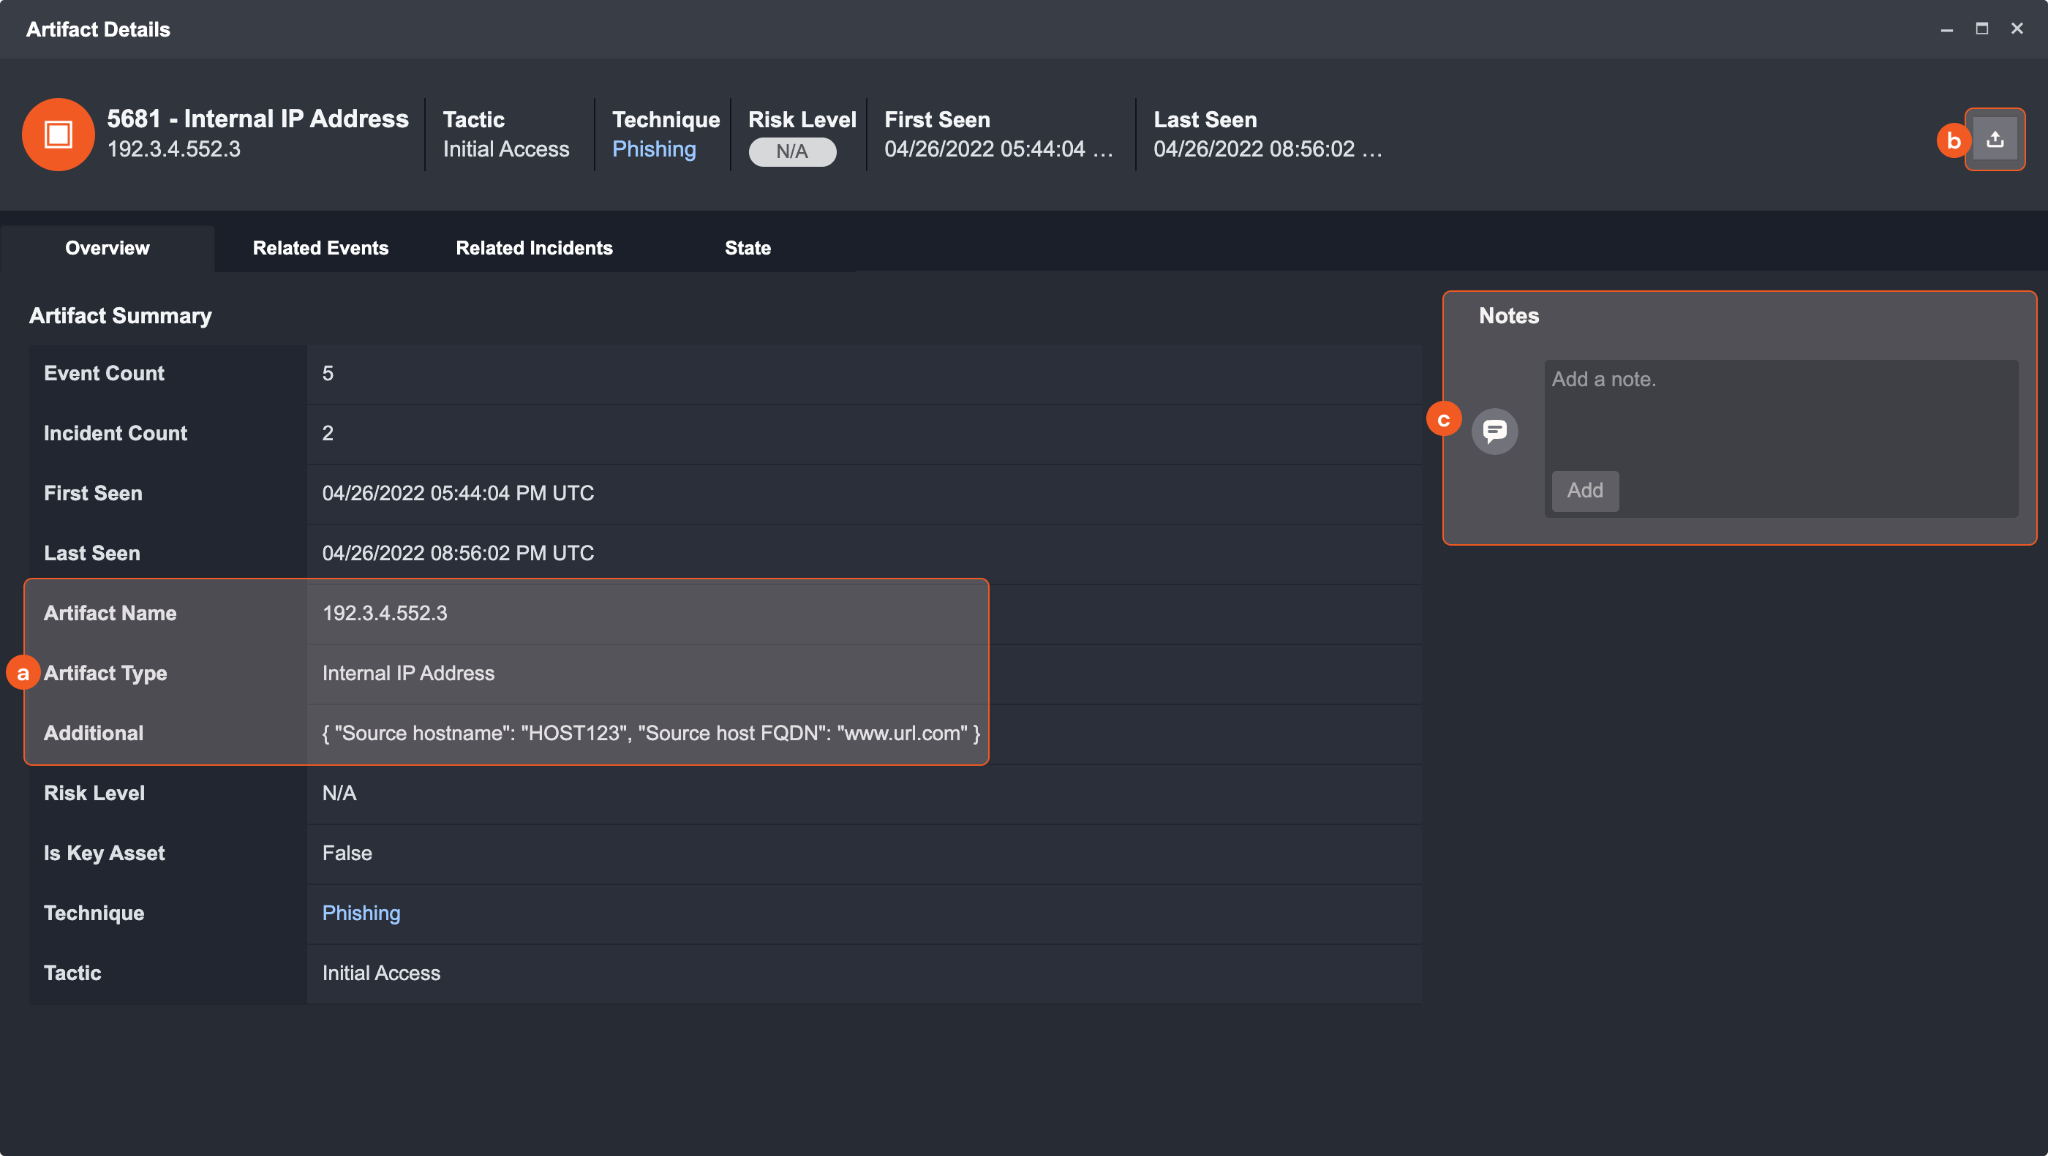
a. This area shows the information about the artifact type and its name, as well as related additional details.
b. Click on the Export button to export this specific artifact entity in STIX 2.1 format.
c. Add any notes that may be important for describing this artifact.
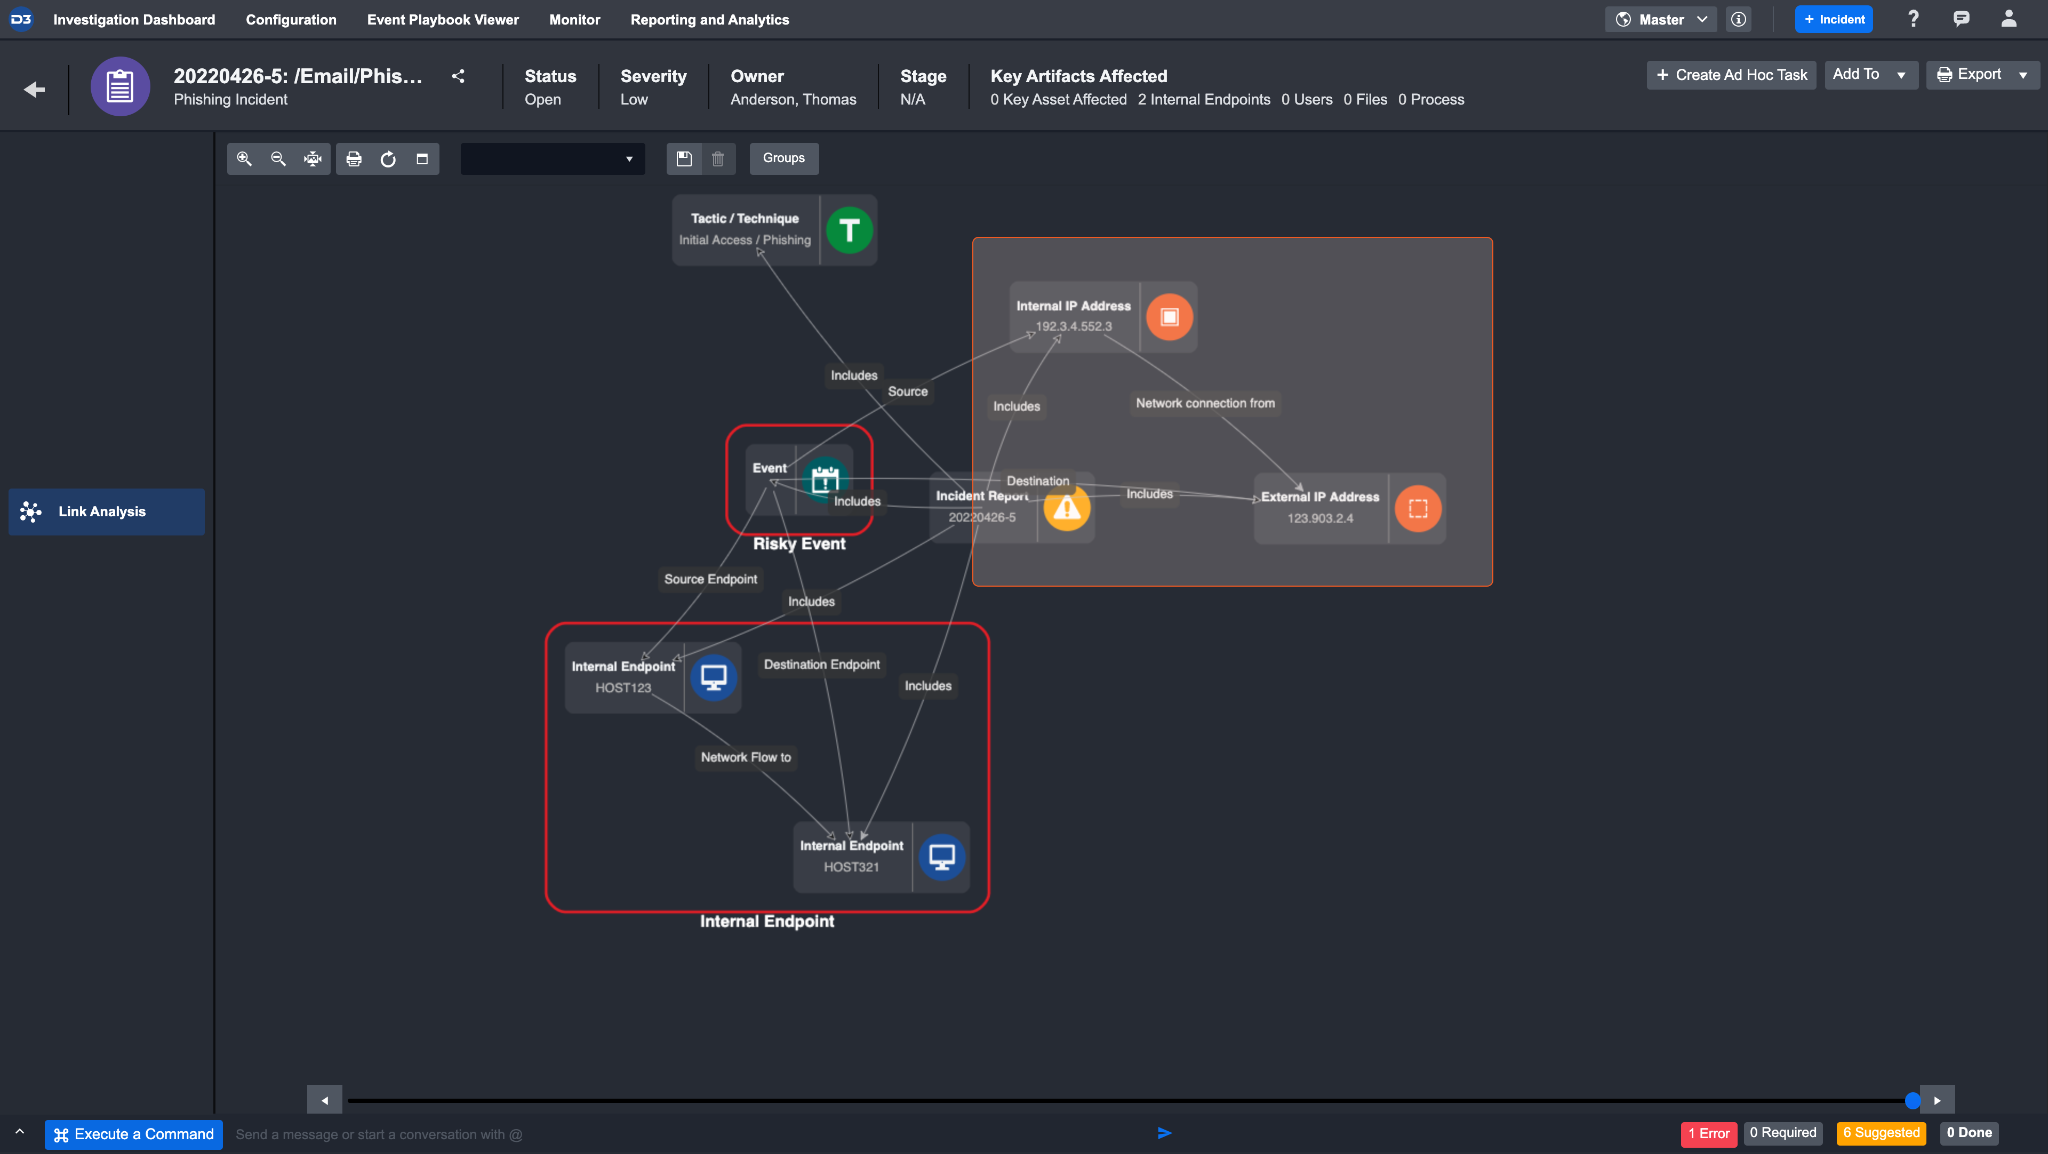
Navigate to the link analysis section of the incident workspace to see the artifacts in relation to different events and incidents, as well as any related artifacts that may also have been ingested.
View all artifacts that have been created during investigation in the Investigation Dashboard
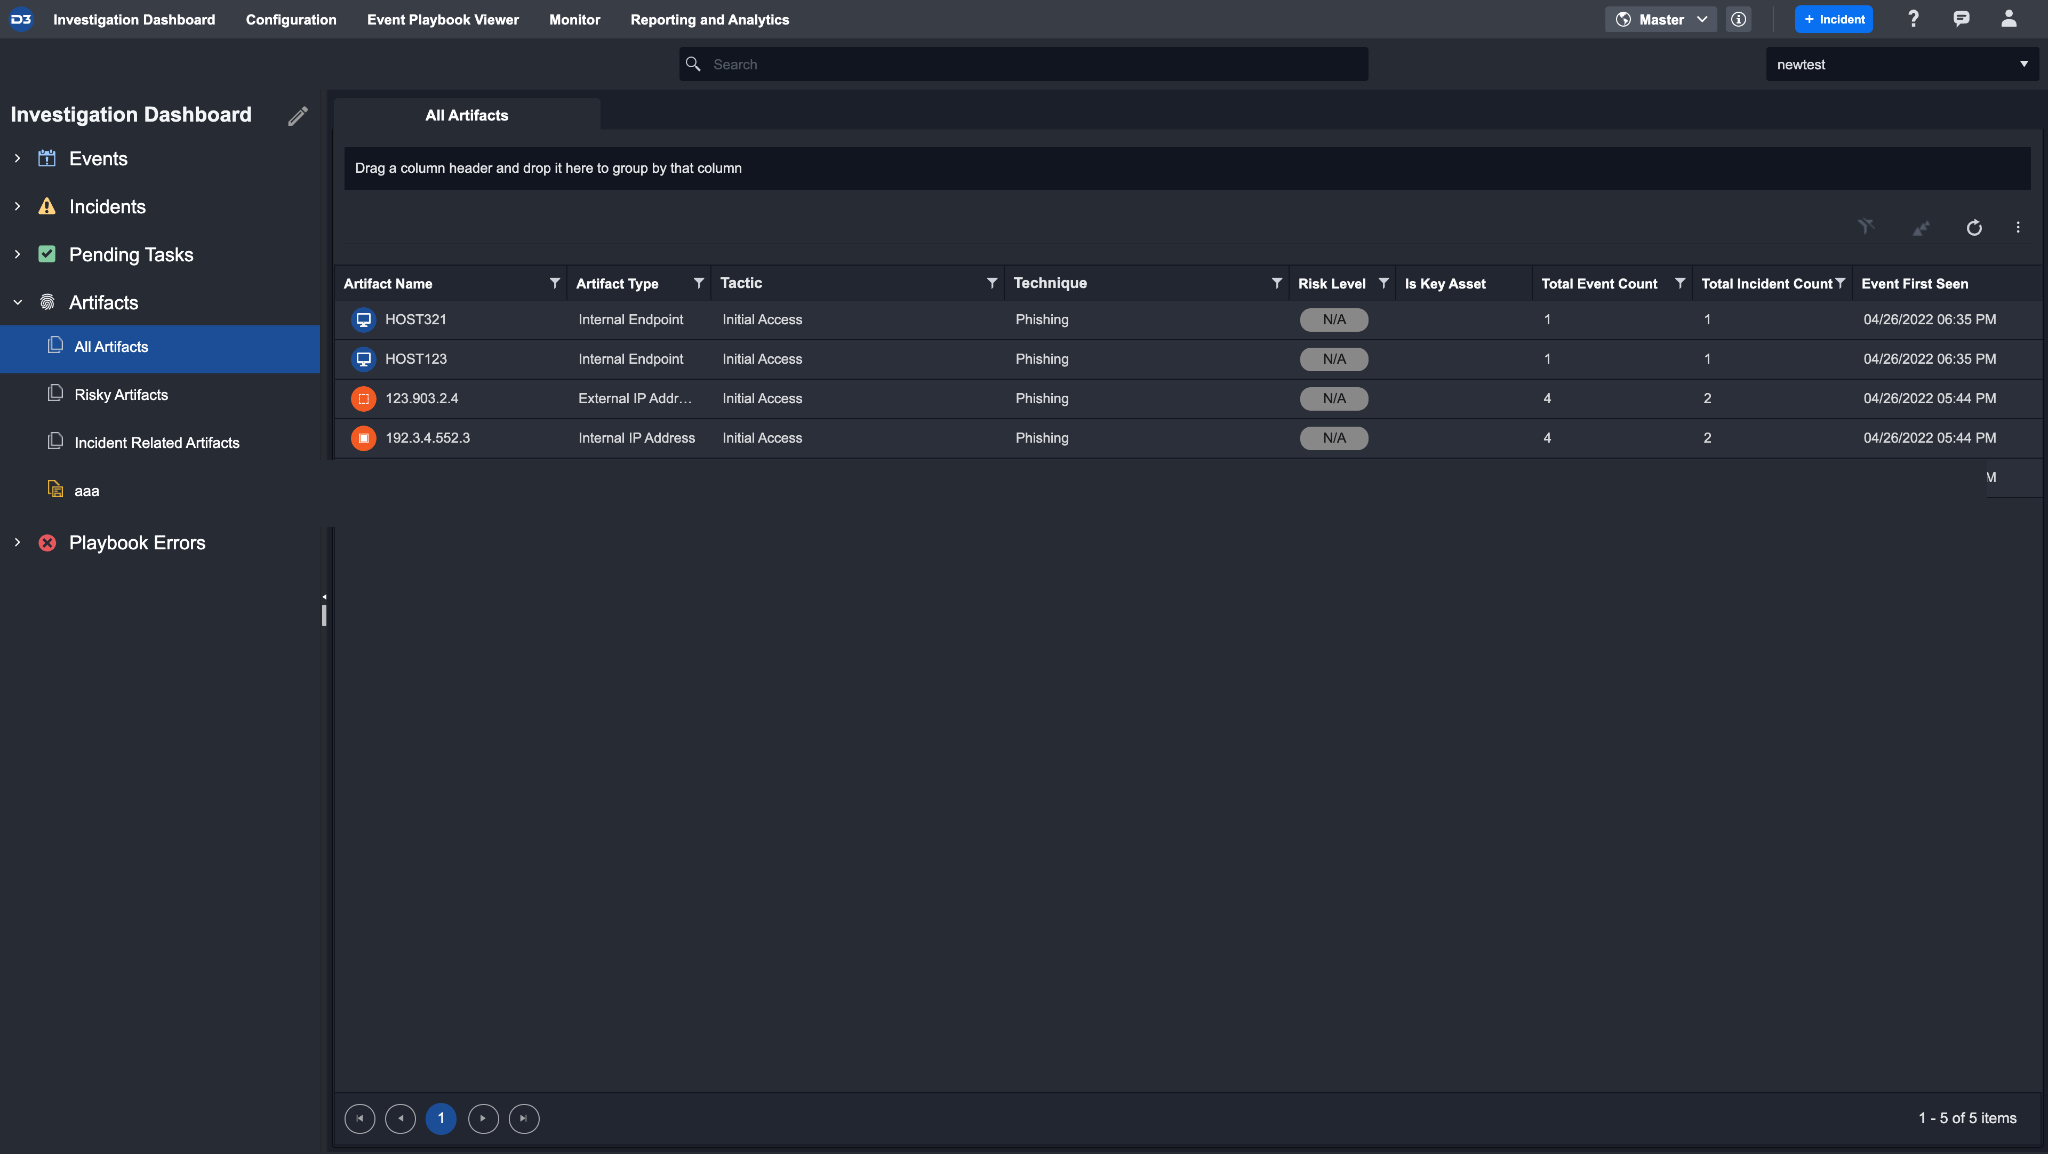
If there are artifact entities that were not created but need to be imported as a part of the investigation, manually upload them in the incident workspace. Click the + button on the top right corner of the artifacts section to upload an artifact.
Related Utility Commands
Link Incidents to Related Artifacts
The "Link Incidents With Related Artifacts" utility command correlates incidents with their associated artifacts. The command has the following configurable input parameters:
Input Parameters | Description |
|---|---|
Artifact Types | The artifact types to filter the correlated artifacts. |
Artifact Names | The names of the artifacts to correlate to the incident(s). |
Incident Link Criteria | The option to associate artifacts that partially or fully match the specified criteria. When any artifact types or names are provided, it implies that the partial or full matches are restricted to those specific artifact types or names. For example, let's consider Incident A, which has an artifact with IP 1.1.1.1 and URL https://www.example.com , and Incident B, which has artifacts with IPs 1.1.1.1, 2.2.2.2, and URL https://www.example.com . If the artifact types are specified as IP and URL, and the criteria are set to fully match, Incident B will not be linked to Incident A because it doesn't precisely match both the IP and URL. However, if the artifact types are specified as only URL, and the criteria are set to fully match, Incident B will be linked to Incident A because it fulfills the precise match criteria for the URL. |
Incident Sites | The list of sites you want the system to search for related incidents determines the scope of the search. When the incident is associated with an internal site, only internal sites within the specified list will be searched. Similarly, if the incident belongs to a client site, only the respective client site within the provided list will be searched. In case no specific sites are mentioned, the system will perform the search based on the site where the incident occurred. |
Incident Status | The incident status to filter the searched incidents for artifact correlation. The available incident statuses are Open, Closed, In Progress, and On Hold. |
Incident Time Range | The time range within which to search for the incident. The time range specifically pertains to the "Date Created" field associated with an incident. |
Limit | The maximum number of linked incidents. If no limit is set or the limit is greater than 50, only 50 incidents that meet the above conditions will be linked. |
Order | The order (i.e., ascending or descending) in which the system links the earliest or latest related incidents based on the specified limit. By default, the order is set to descending, linking the top incidents in the most recent order. |
Use Cases
This utility command can be leveraged within playbooks of different functions. In threat identification playbooks, the command can be utilized to automatically search for and link incidents that involve a newly identified threat artifact like an IP address, hash, or a malicious URL. This allows security teams to quickly pinpoint potential attack campaigns, enhancing their organization's cyber defense mechanisms.
In terms of automated incident response, the command can be embedded in playbooks to link incidents involving similar threat artifacts such as a certain type of malware, enabling the aggregation of information and a more informed response strategy. Risk assessment playbooks can use this command to identify recurring threats by linking incidents with shared risk-indicative artifacts, thus facilitating proactive security measures.