.png)
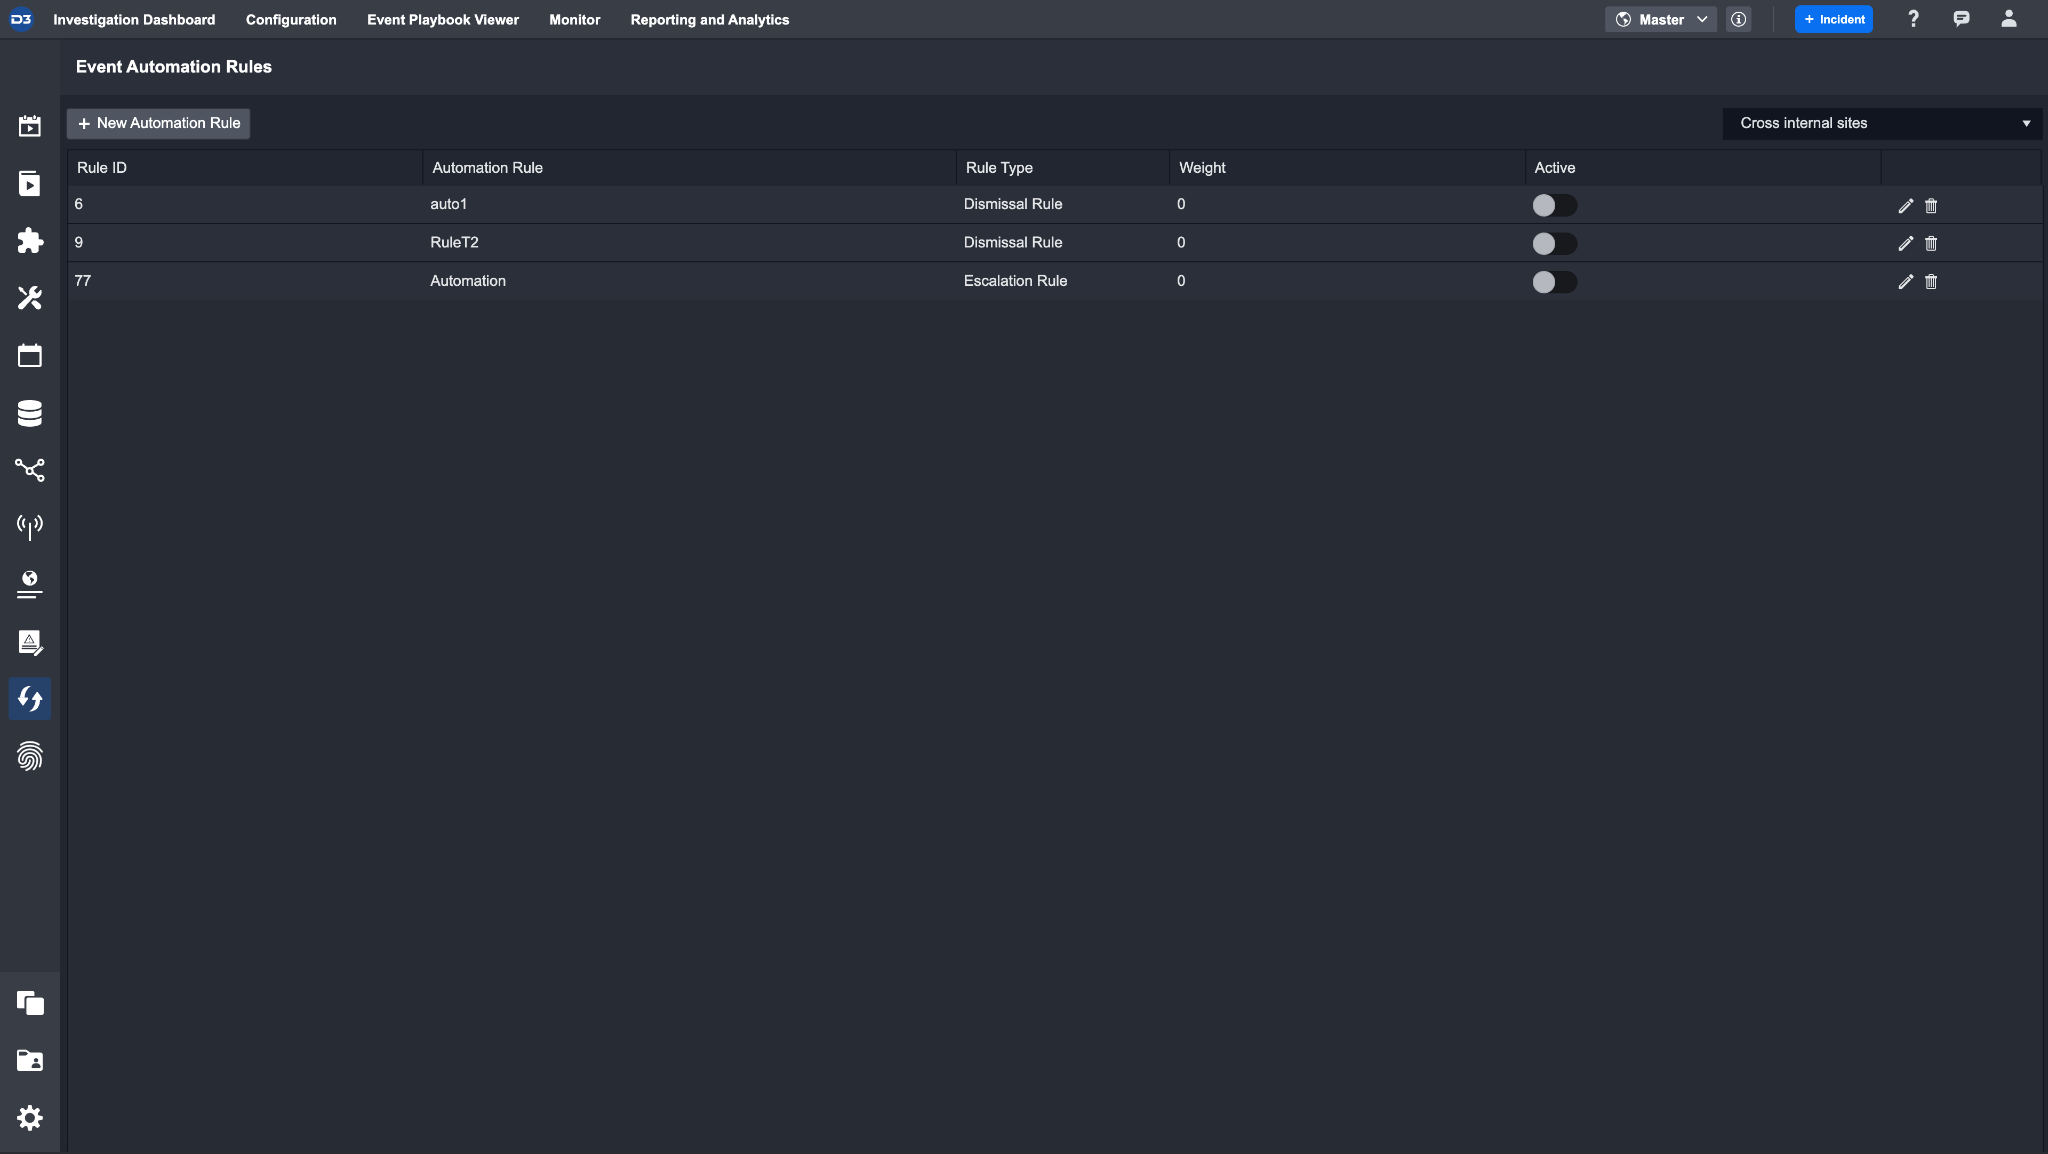
Event Automation Rules
Overview
The Event Automation Rules module enables you to automate the escalation and dismissal of events by pre-defining a set of criteria for the system to match. The ability to set predefined conditions and link multiple relevant Events / Incidents means that you can spend less time analyzing each repetitive Event and more time focusing on investigation tasks.
Adding a New Automation Rule
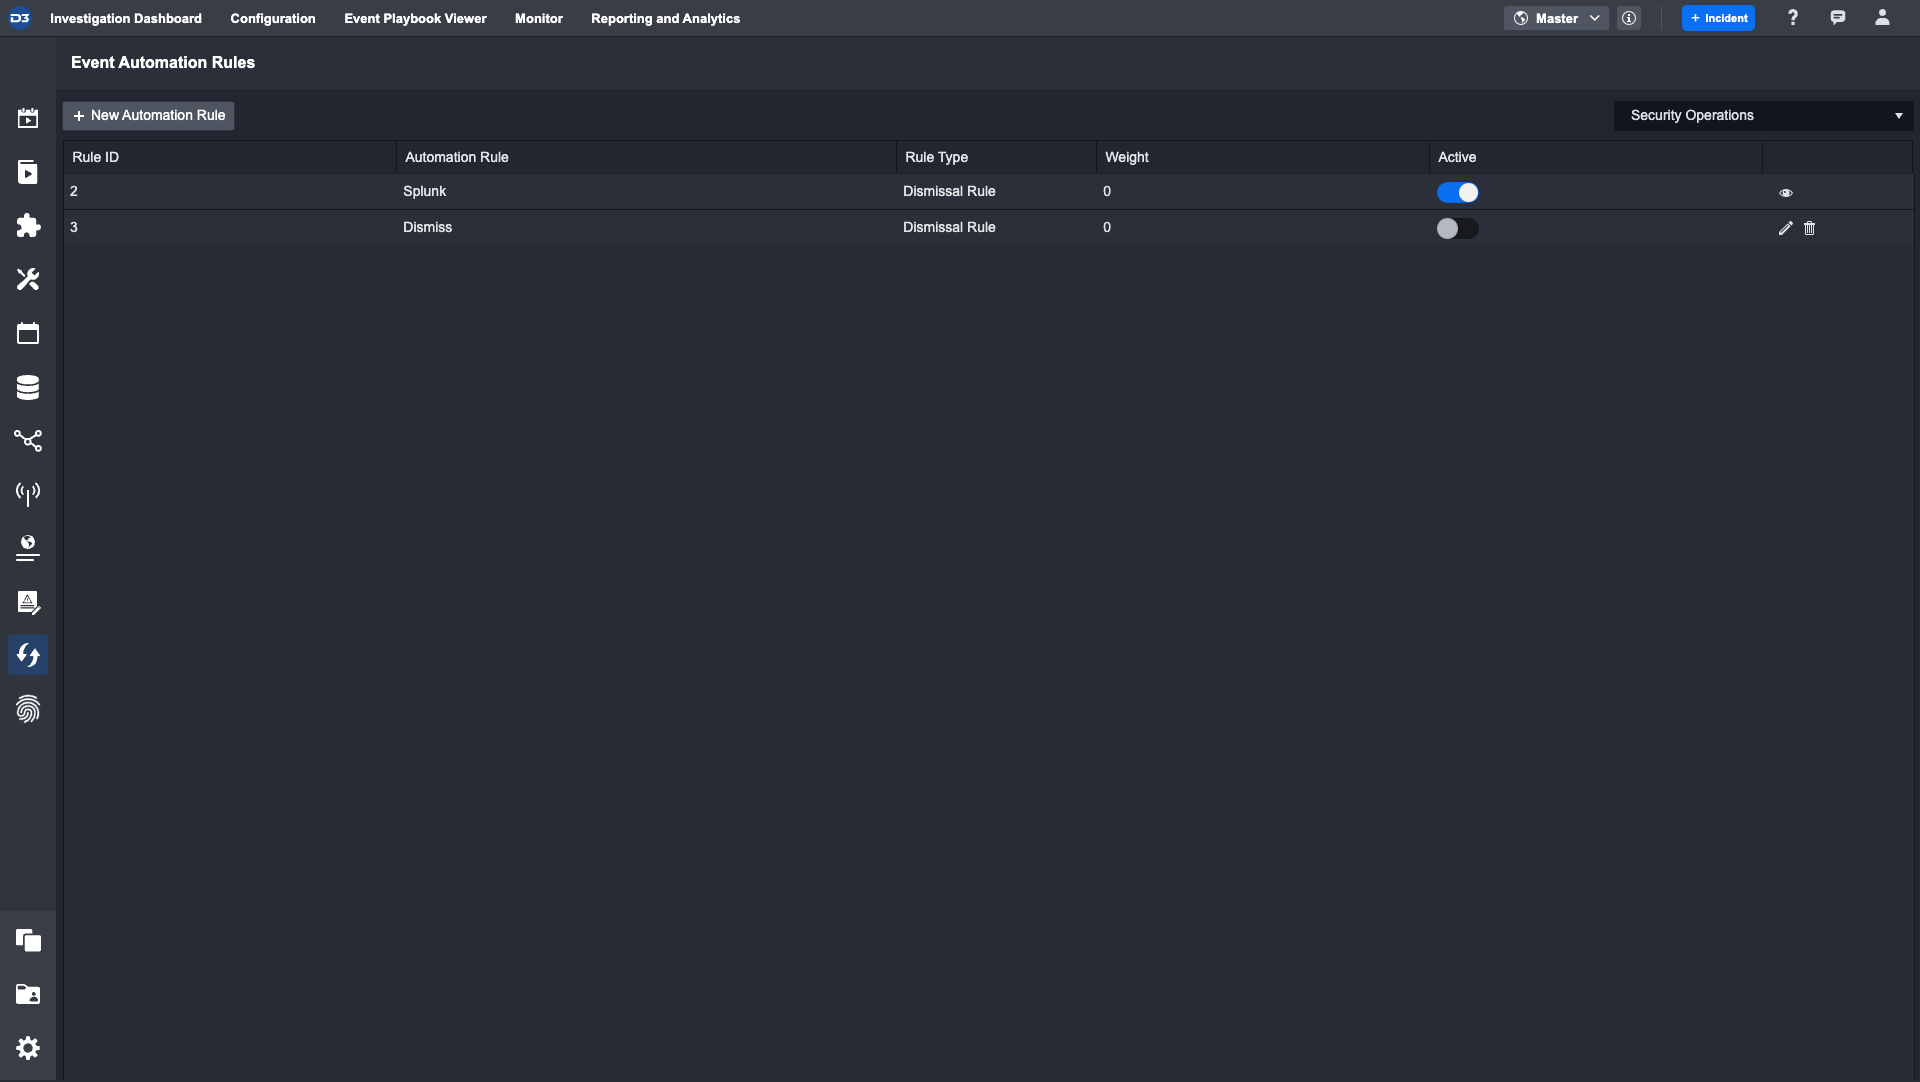
Ensure the correct Site is selected
Note: Rules can be set up for an individual Site or shared across multiple Sites by selecting the Cross Internal Sites option.
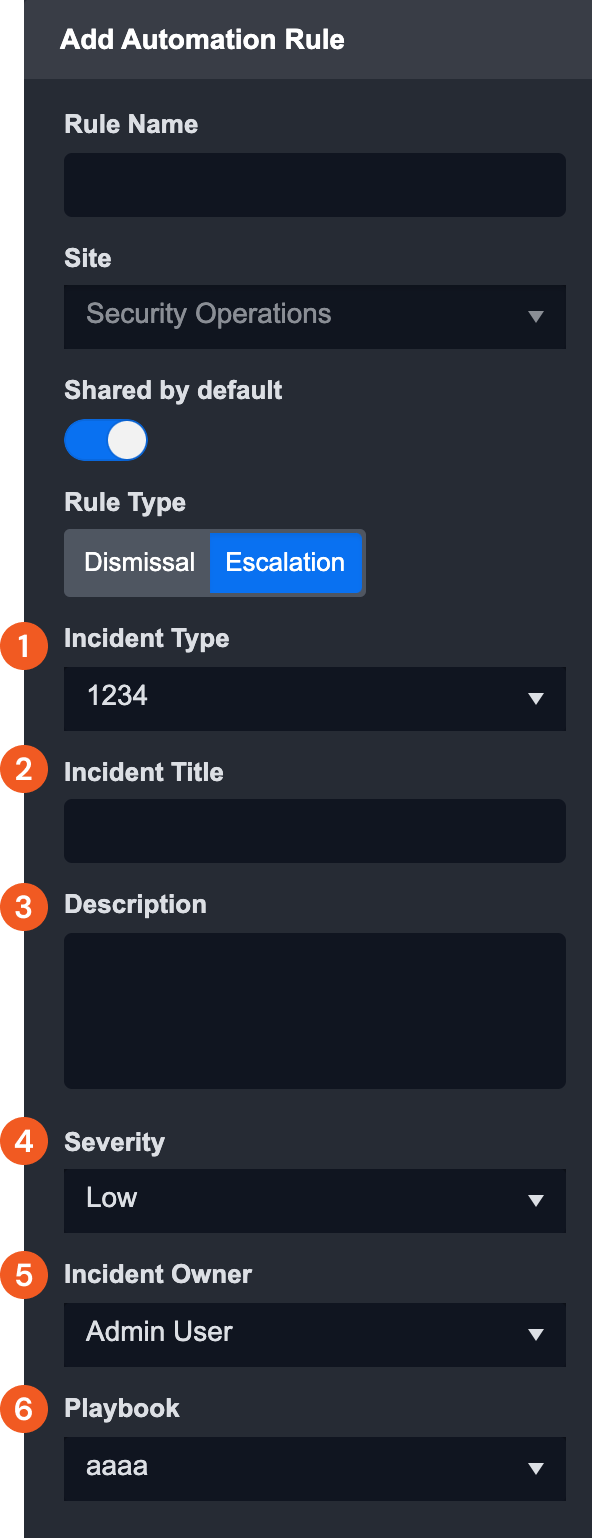
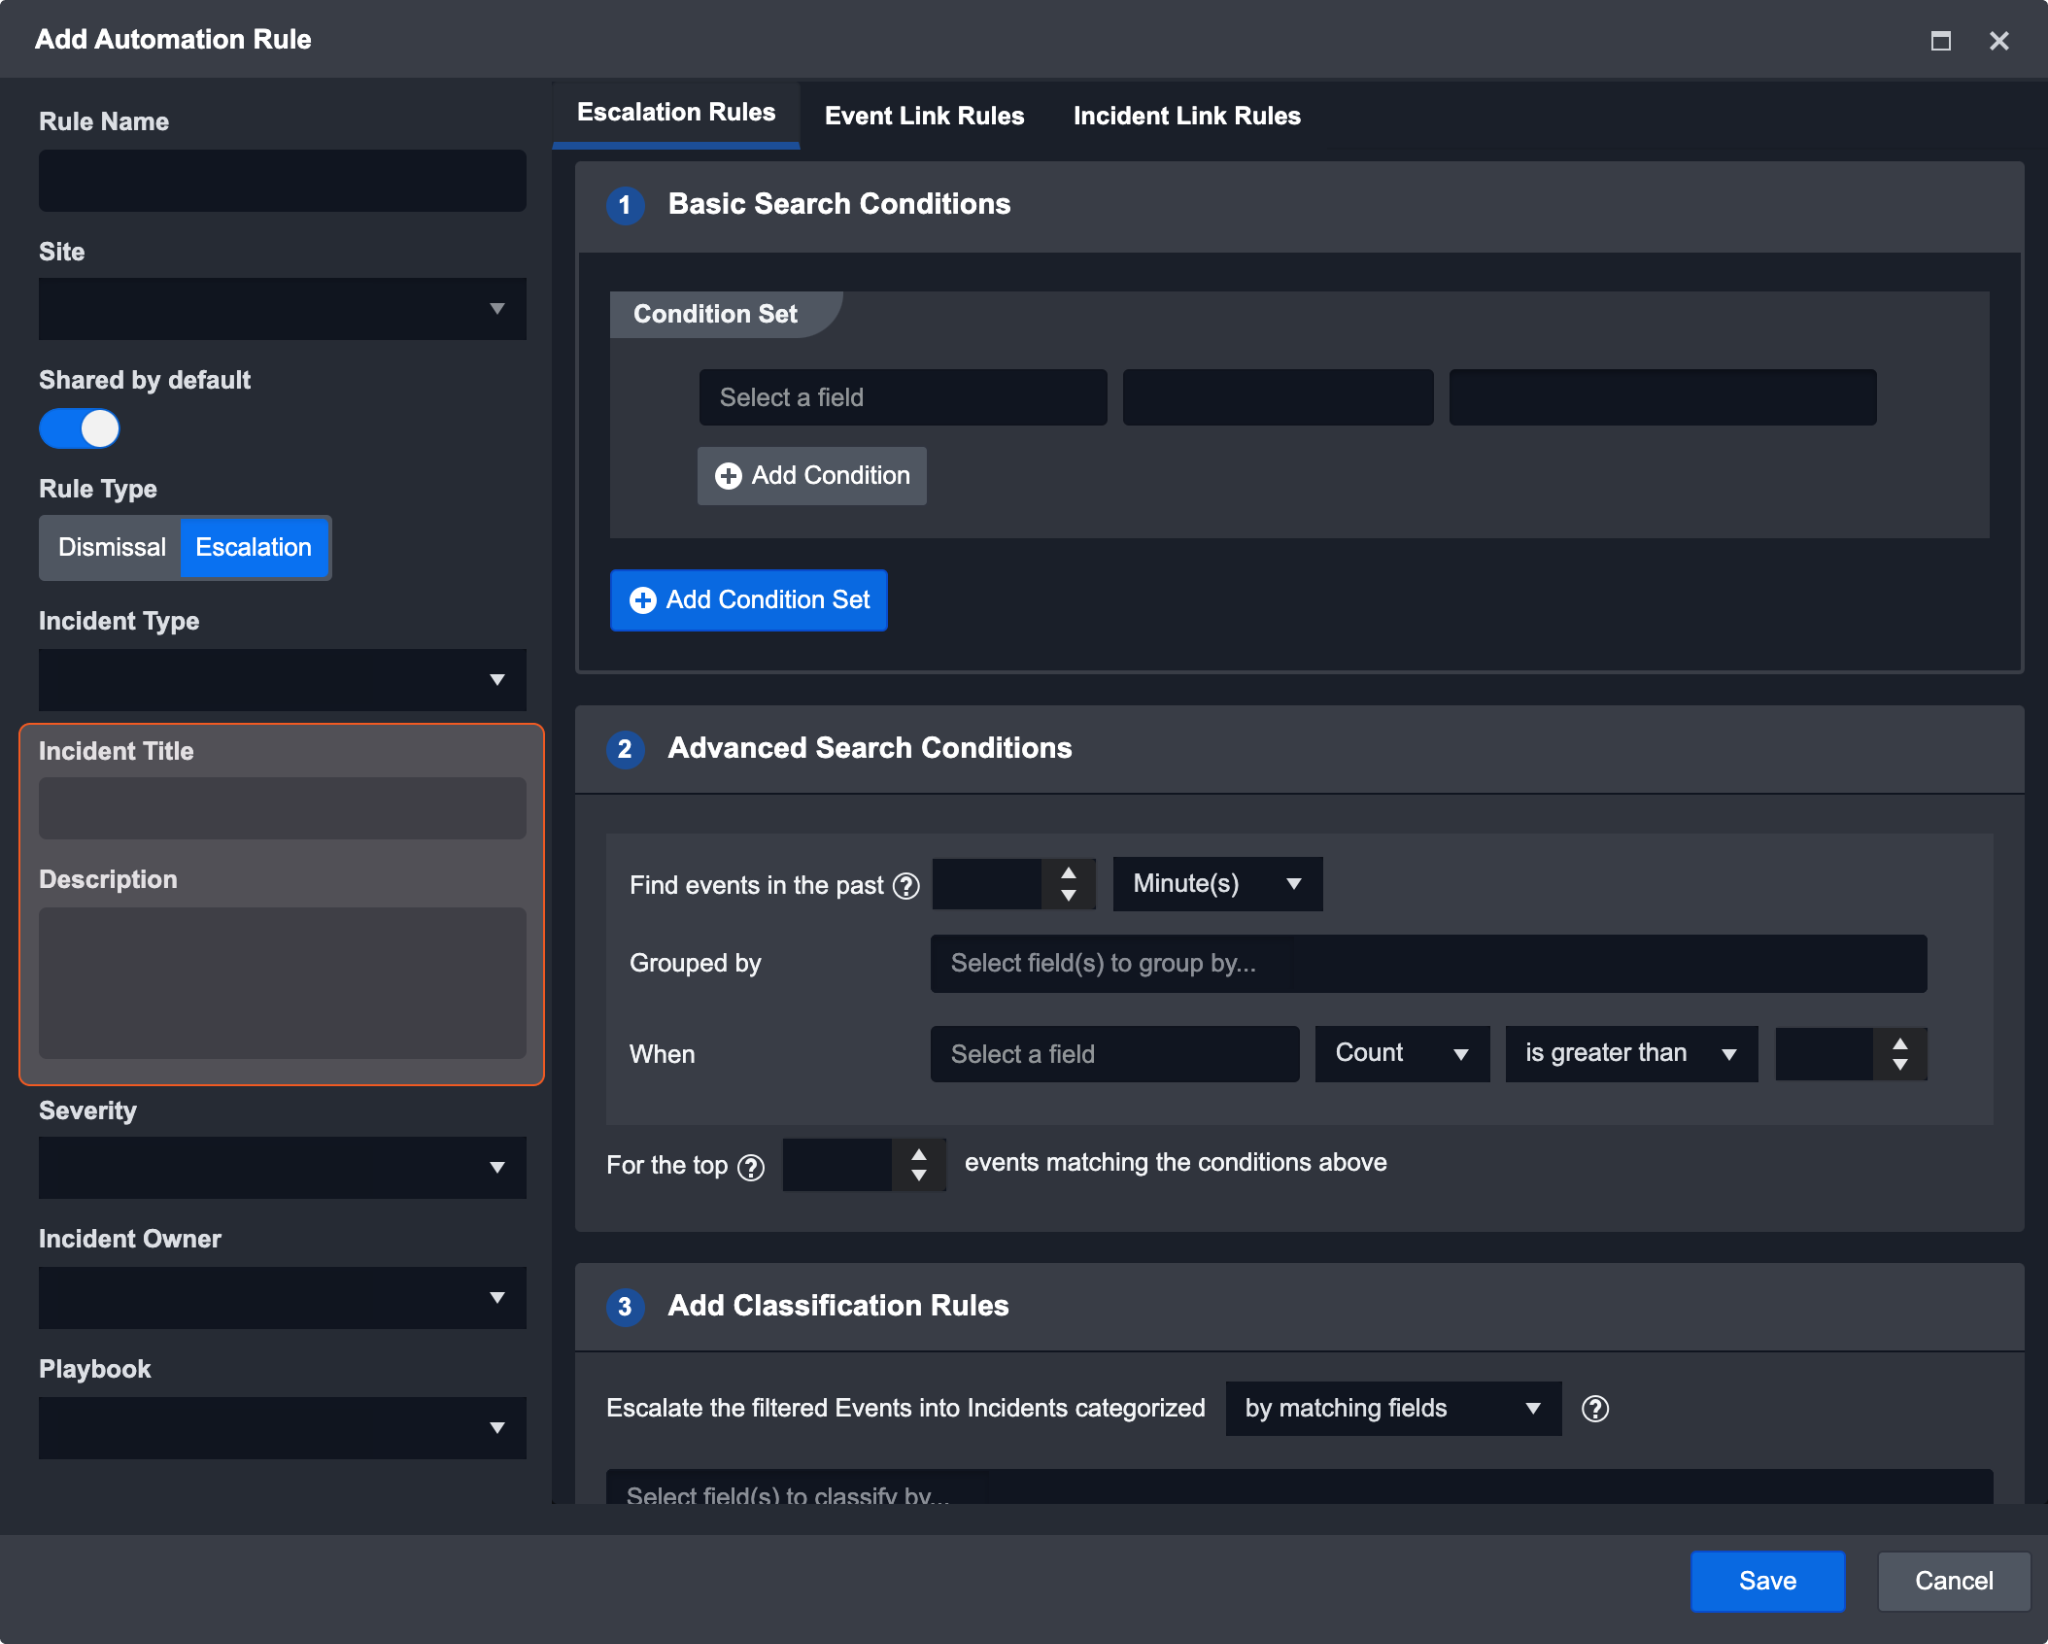
Click on the + New Automation Rule button.
.png?inst-v=156e7329-33f8-4adb-969f-b1d01cda1134)
Enter a Rule Name in the textbox field.
Select the rule type to configure: Dismissal or Escalation.
Toggle the Shared by default on to share with tenants.
Navigate to the relevant section continue:
.png?inst-v=156e7329-33f8-4adb-969f-b1d01cda1134)
Configuring an Escalation Rule
Events can automatically be escalated to an incident by satisfying the configured escalation rule.
Additional incident fields are shown for the Escalation Rule:
Incident Type
Incident Title—Supports placeholders
Description—Supports placeholders
Severity
Incident Owner
Playbook
You set up a Rule to create Incidents based on one Incident Type with the selected playbook and relevant entered fields.
Keywords can be entered in the description so that auto-escalated Incidents are distinguishable from manually-created Incidents.
Set Placeholders for Incident Title and Descriptions
Users can add placeholder JSON paths in the incident tile and description of an automation rule. This allows for the automatic extraction of event data into an incident upon escalation. When the incident is created, the placeholder fields will be replaced by event data.
The placeholder should be a valid JSON path, starting with {{ and end with }}. This JSON path can implement both event raw data and extracted data.
If the display name has space(s) inside, the path must be written in square brackets (["field name"] or ['field name']).
Raw Data
The JSON path must start with $.EventData
E.g.
{{$.EventData.eventType.name}}or{{$.EventData.["Add Root Key for Shared Context"].inputData[*]["Input Name"]}}
Extracted Data
The JSON path must be a mapped data model field. The display name must match the field name.
E.g.
{{$.["Unique Event Key"]}}or{{$.EventType.["Unique Hash"]}}
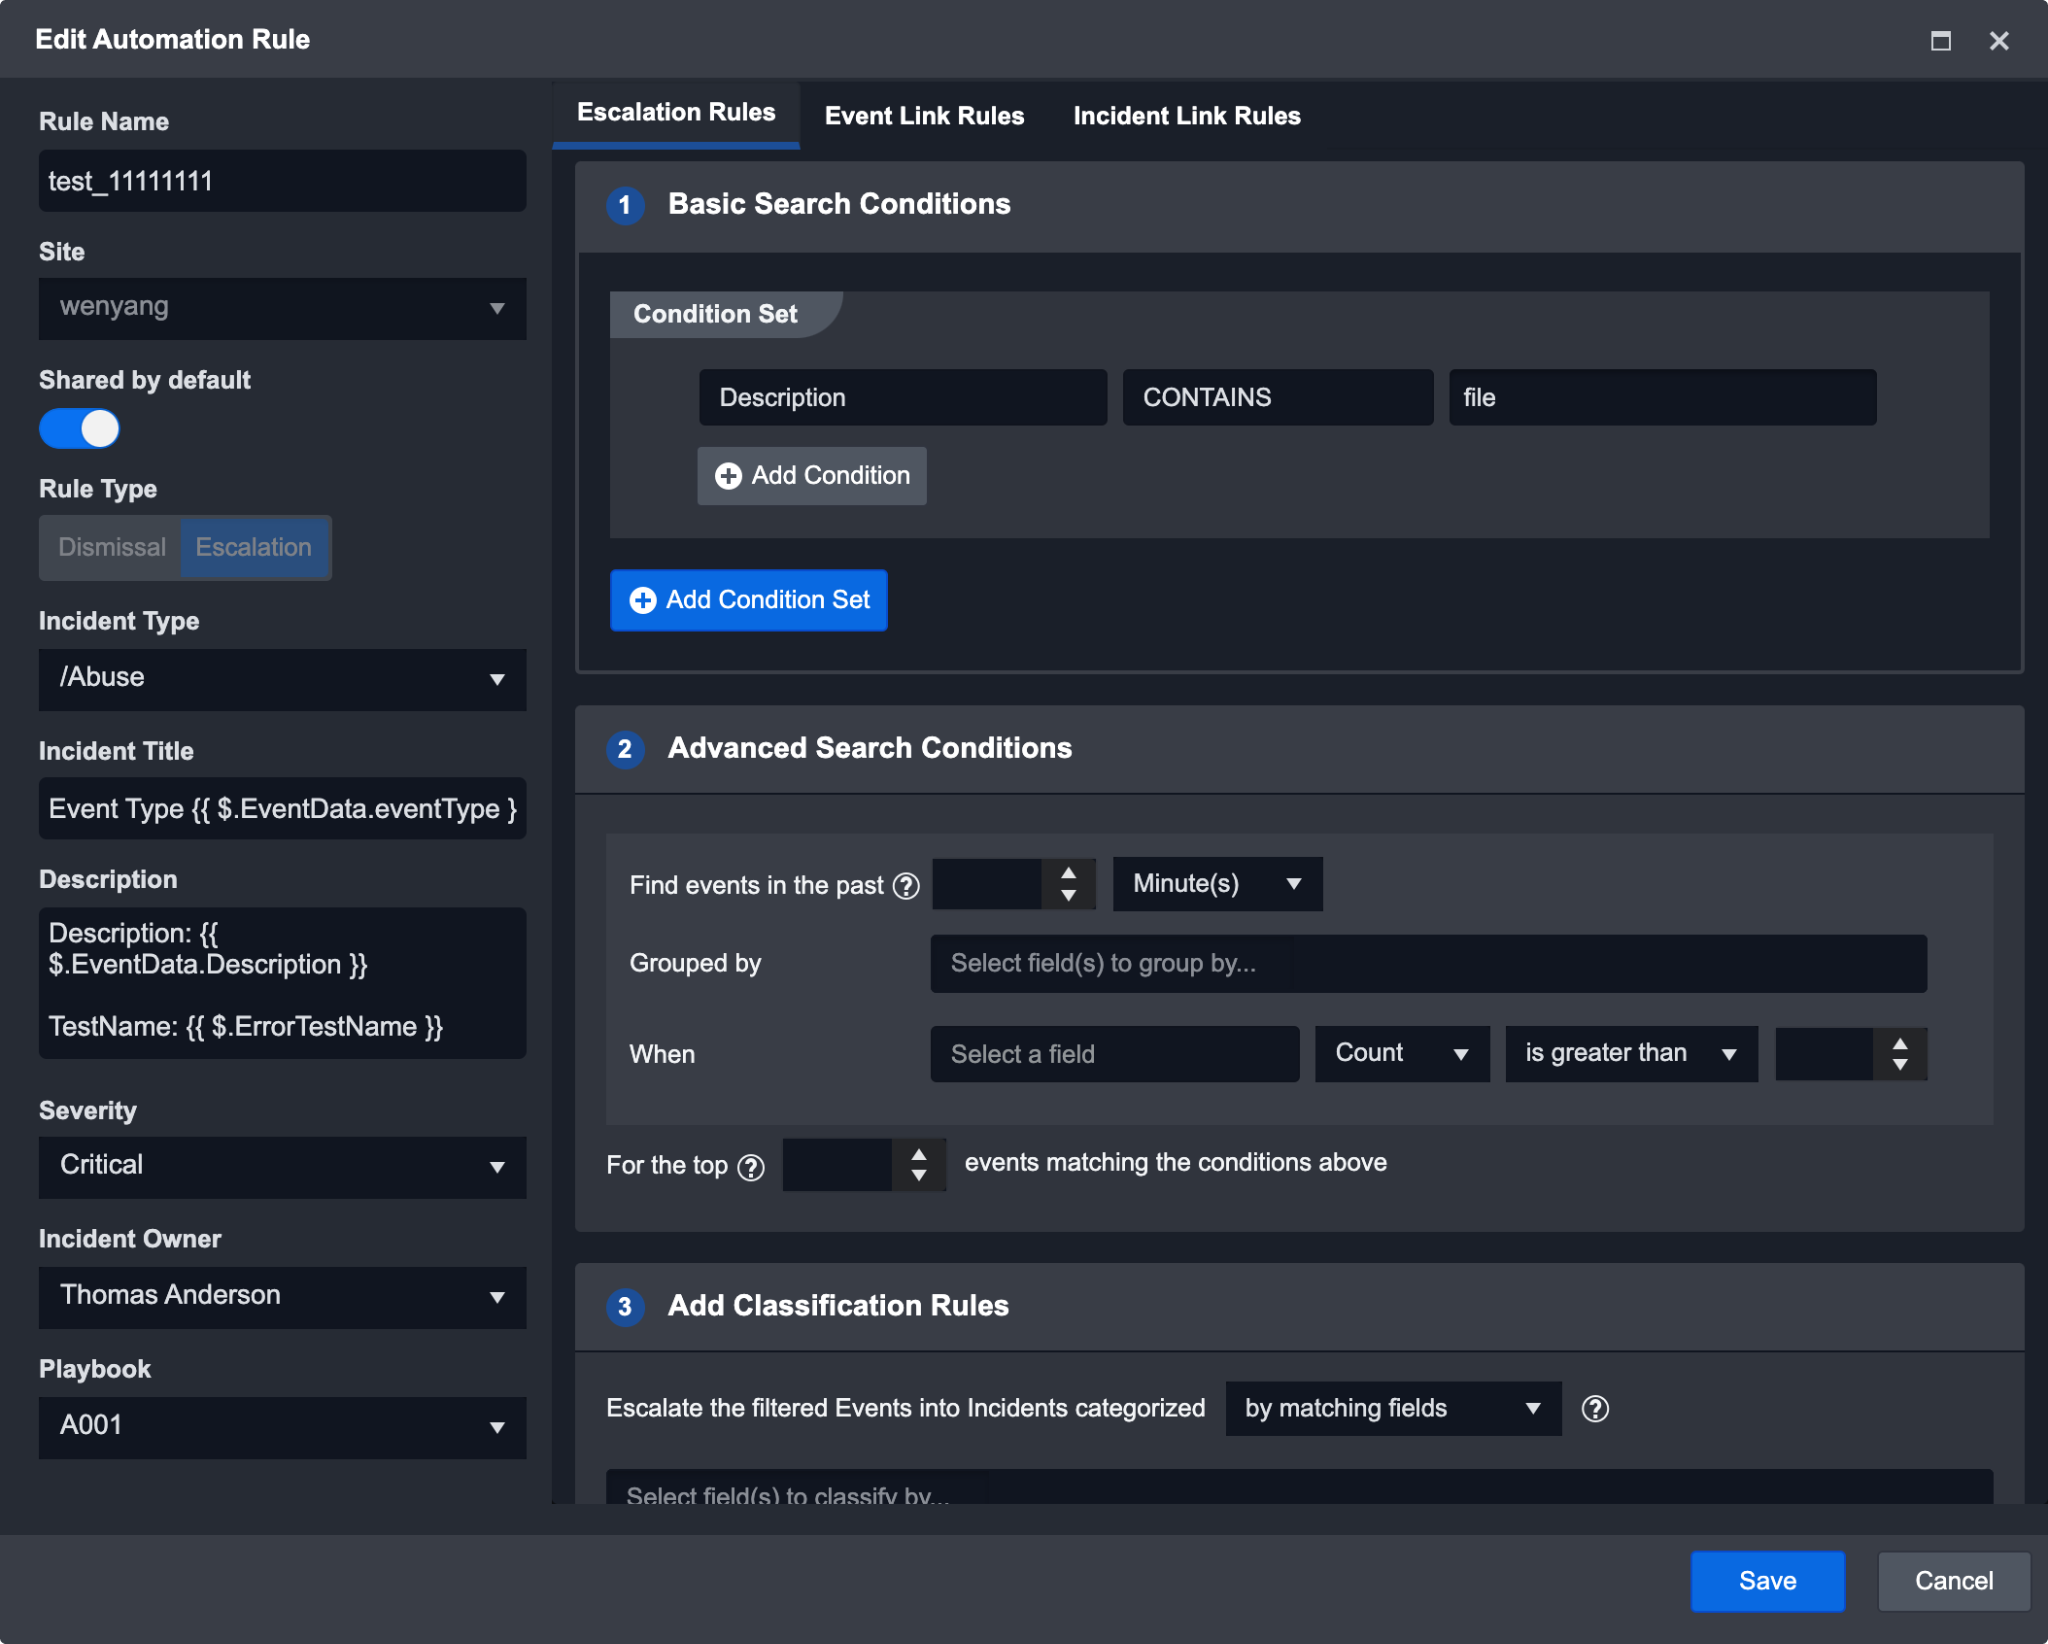
The placeholder used in this example description is:
Description: {{ $.EventData.Description }}
TestName: {{ $.["Unique Event Key"] }}
Event Data: {{ $.EventData.["Add Root Key for Shared Context"].inputData[*]["Input Name"] }}
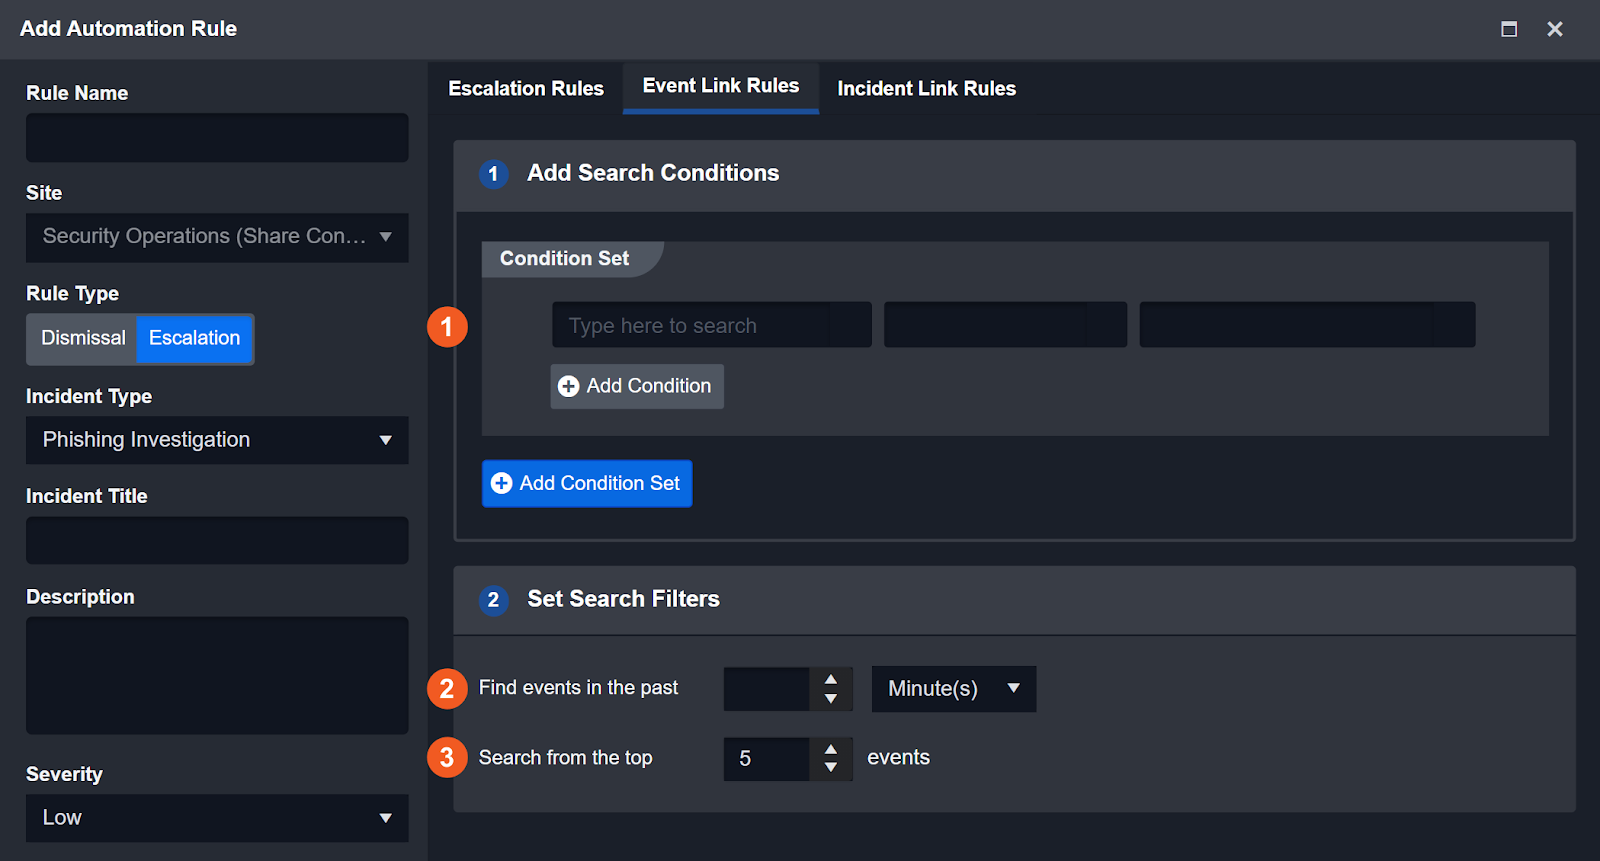
The top of the window will also reveal three tabs where you can switch between to set various levels of Automation Rules:
Escalation Rules: Only search against New Events.
Event Link Rules: Search against both New and Escalated Events.
Incident Link Rules: Search against existing Incidents.

Reader Note
The Incident Link and Event Link Rules will only be effective after the Escalation Rules are satisfied.
Basic vs. Advanced Search Conditions
There are two different ways to filter through incoming Events to determine if it should be Escalated. For the Escalation rule to be valid, you must use at least one of the two methods. You can also combine and use both search methods to fine tune your Escalation Rule. In the following sections, we will explain the Basic Search Conditions and Advanced Search Conditions in detail.
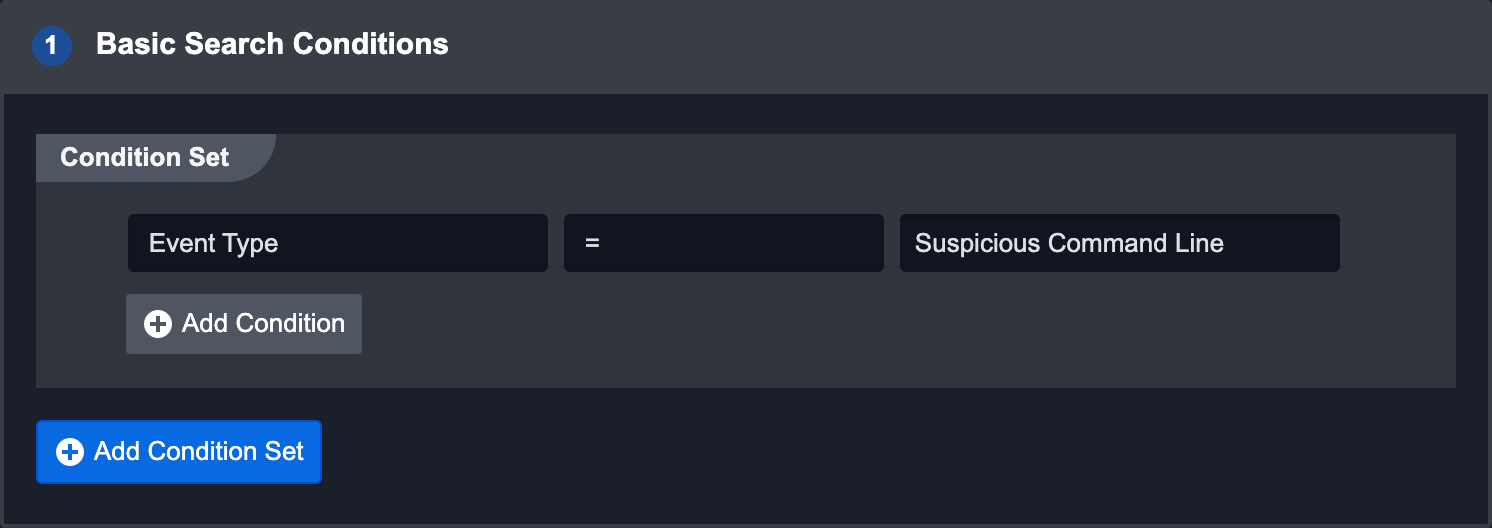
Basic Search Conditions

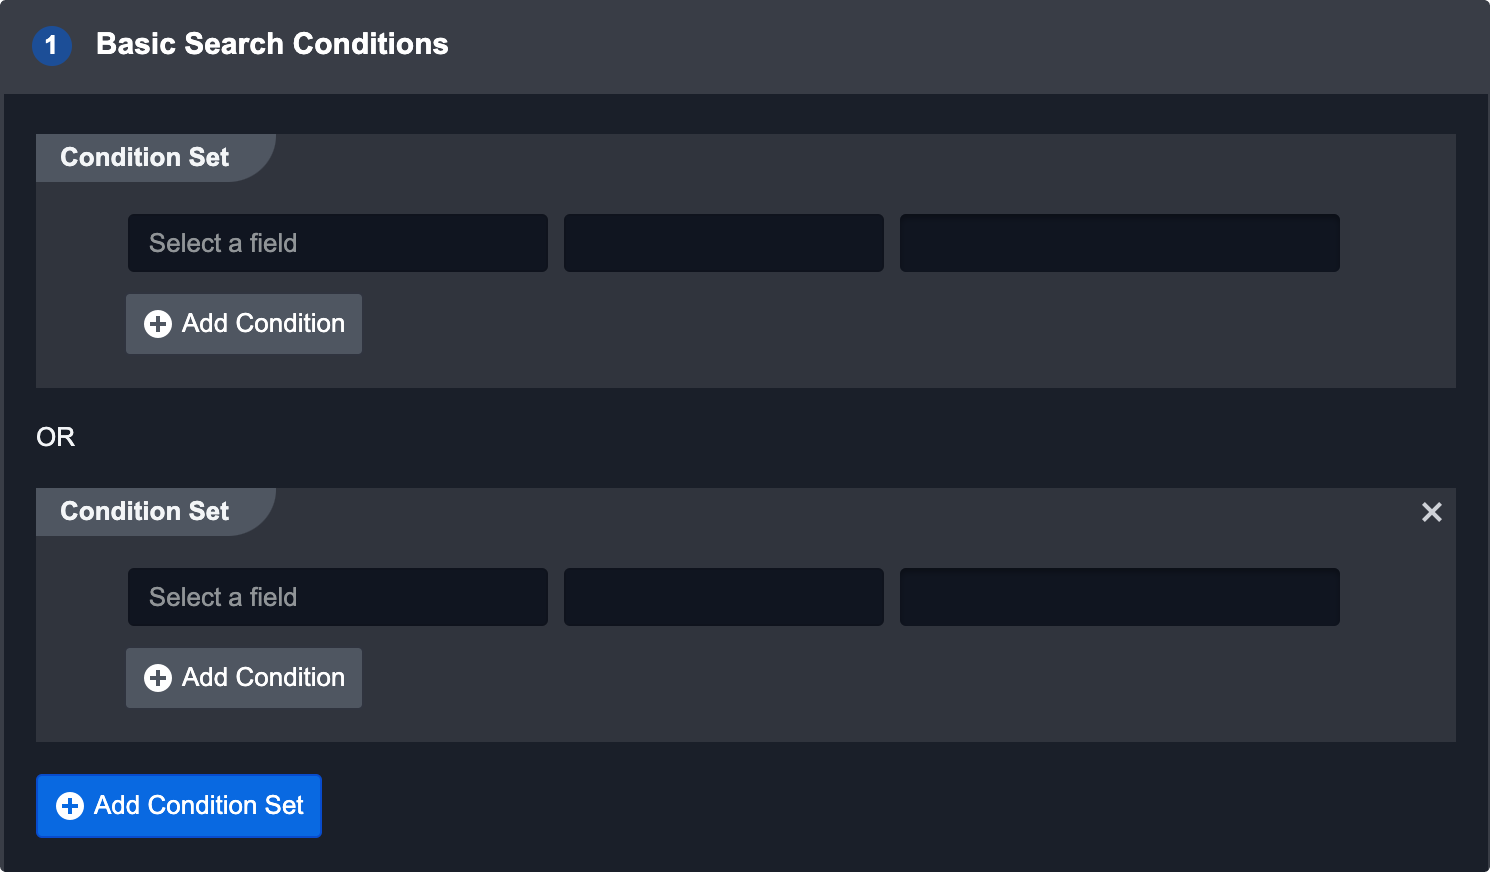
This search method applies custom Conditional Sets on ingested Events. For example, an Event with the Event type “Suspicious Command Line” would satisfy the condition in the screenshot above. Adding another condition will create an AND condition that the event must also satisfy.
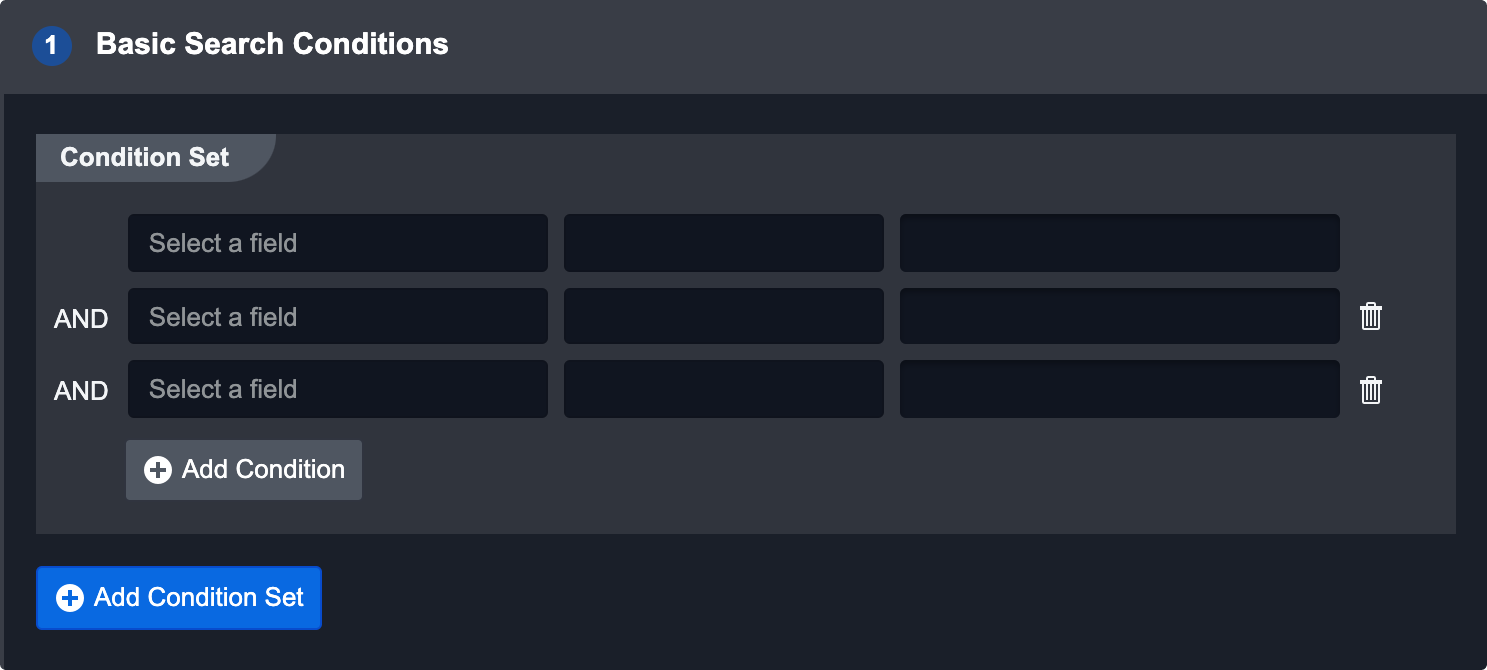
To add an additional set of conditions the event could satisfy, click the Add Condition Set button. This will create an OR conditional with the first set.
Reader Note
Special characters such as: _, #, $, %, ^, &, , , @ are not searchable in a condition set.
Advanced Search Conditions
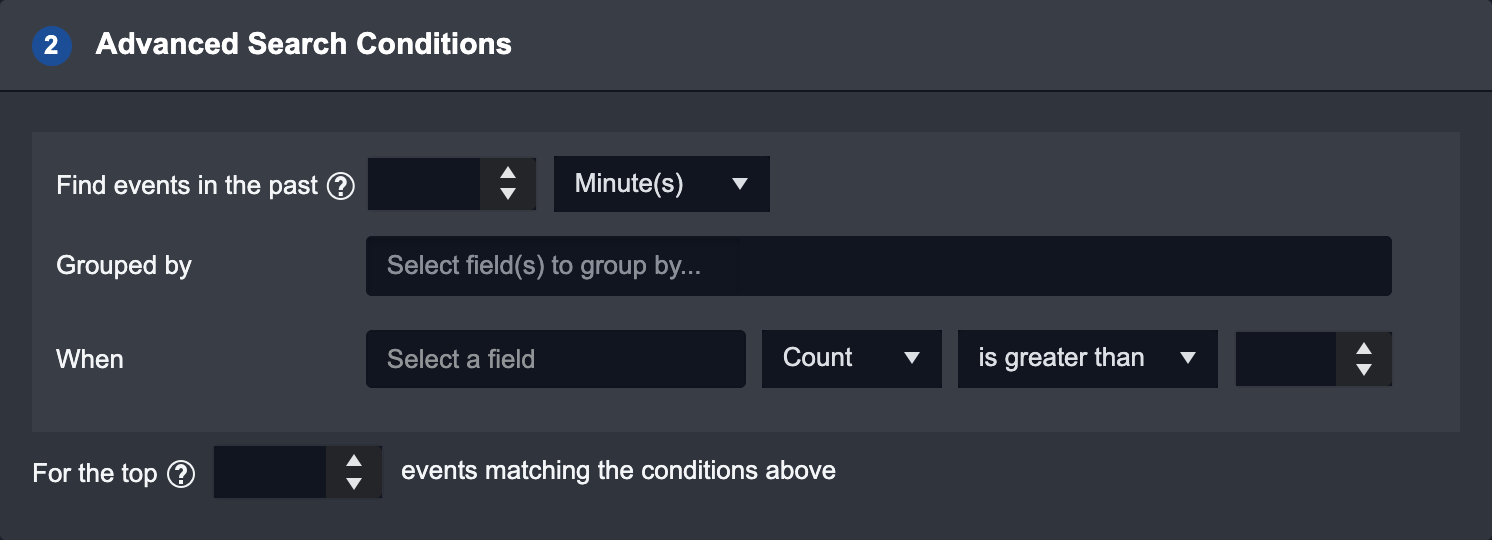
This search method provides more filtering options to allow you to fine tune your search conditions. The first three fields work in sequential order and must all be filled in order for the Advanced Search Conditions to work. They are:
Step | Field Name | Usage |
1 | Find events in the past | Set how far into the past to search Events from. The "past" time refers to the timestamp of the last created Event. |
2 | Grouped by | Put Event(s) into groups by specifying the field(s) you want to group them by. |
3 | When | After the system creates the Event group(s), filter by a different field within the grouped Events to further search for specific types of Event(s) you want to escalate. |
Classification Rules
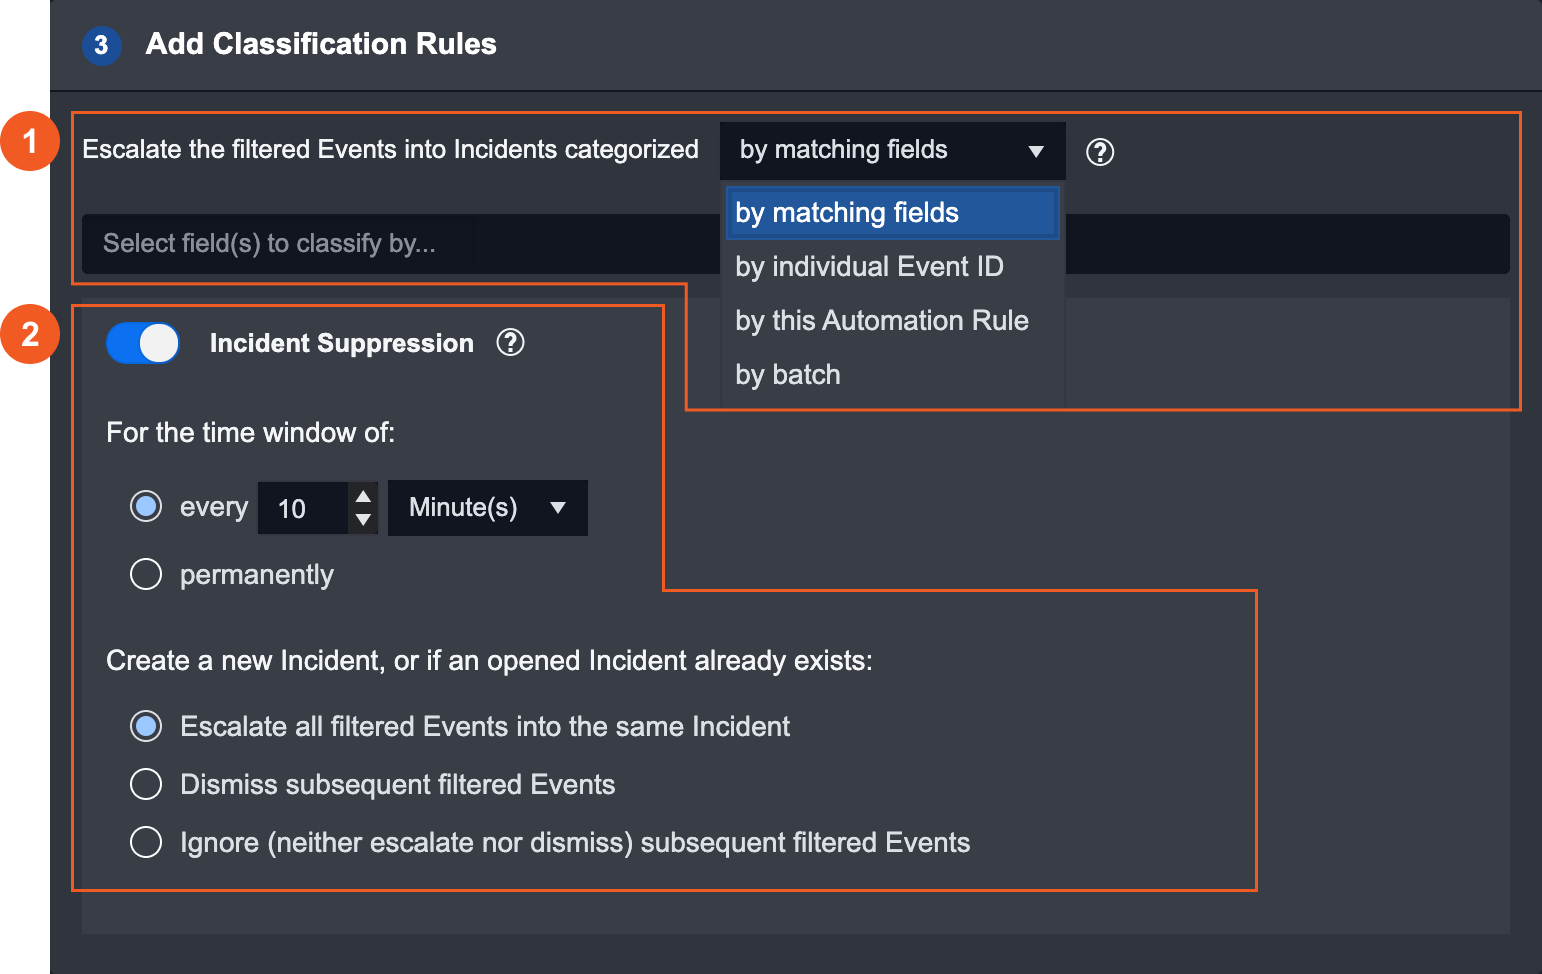
The Classification Rules are applied after the search conditions are performed. In summary, the Classification Rules allows you to further control how the Events (that satisfy your search criterias) are escalated into Incidents. By default, if you leave this section blank, each satisfying Event will be escalated into one Incident. For example, if there were three resulting Events from the search conditions, there will be three Incidents escalated, each containing one Event respectively.
To perform this classification, these fields needs to be filled:
Step | Usage |
| Choose how to categorize the satisfying Events before they escalate/dismiss/ignore. |
| After the satisfying Events are placed into specific categories, you can further configure how the Events are escalated/dismissed/ignored and by the time the Event was ingested |
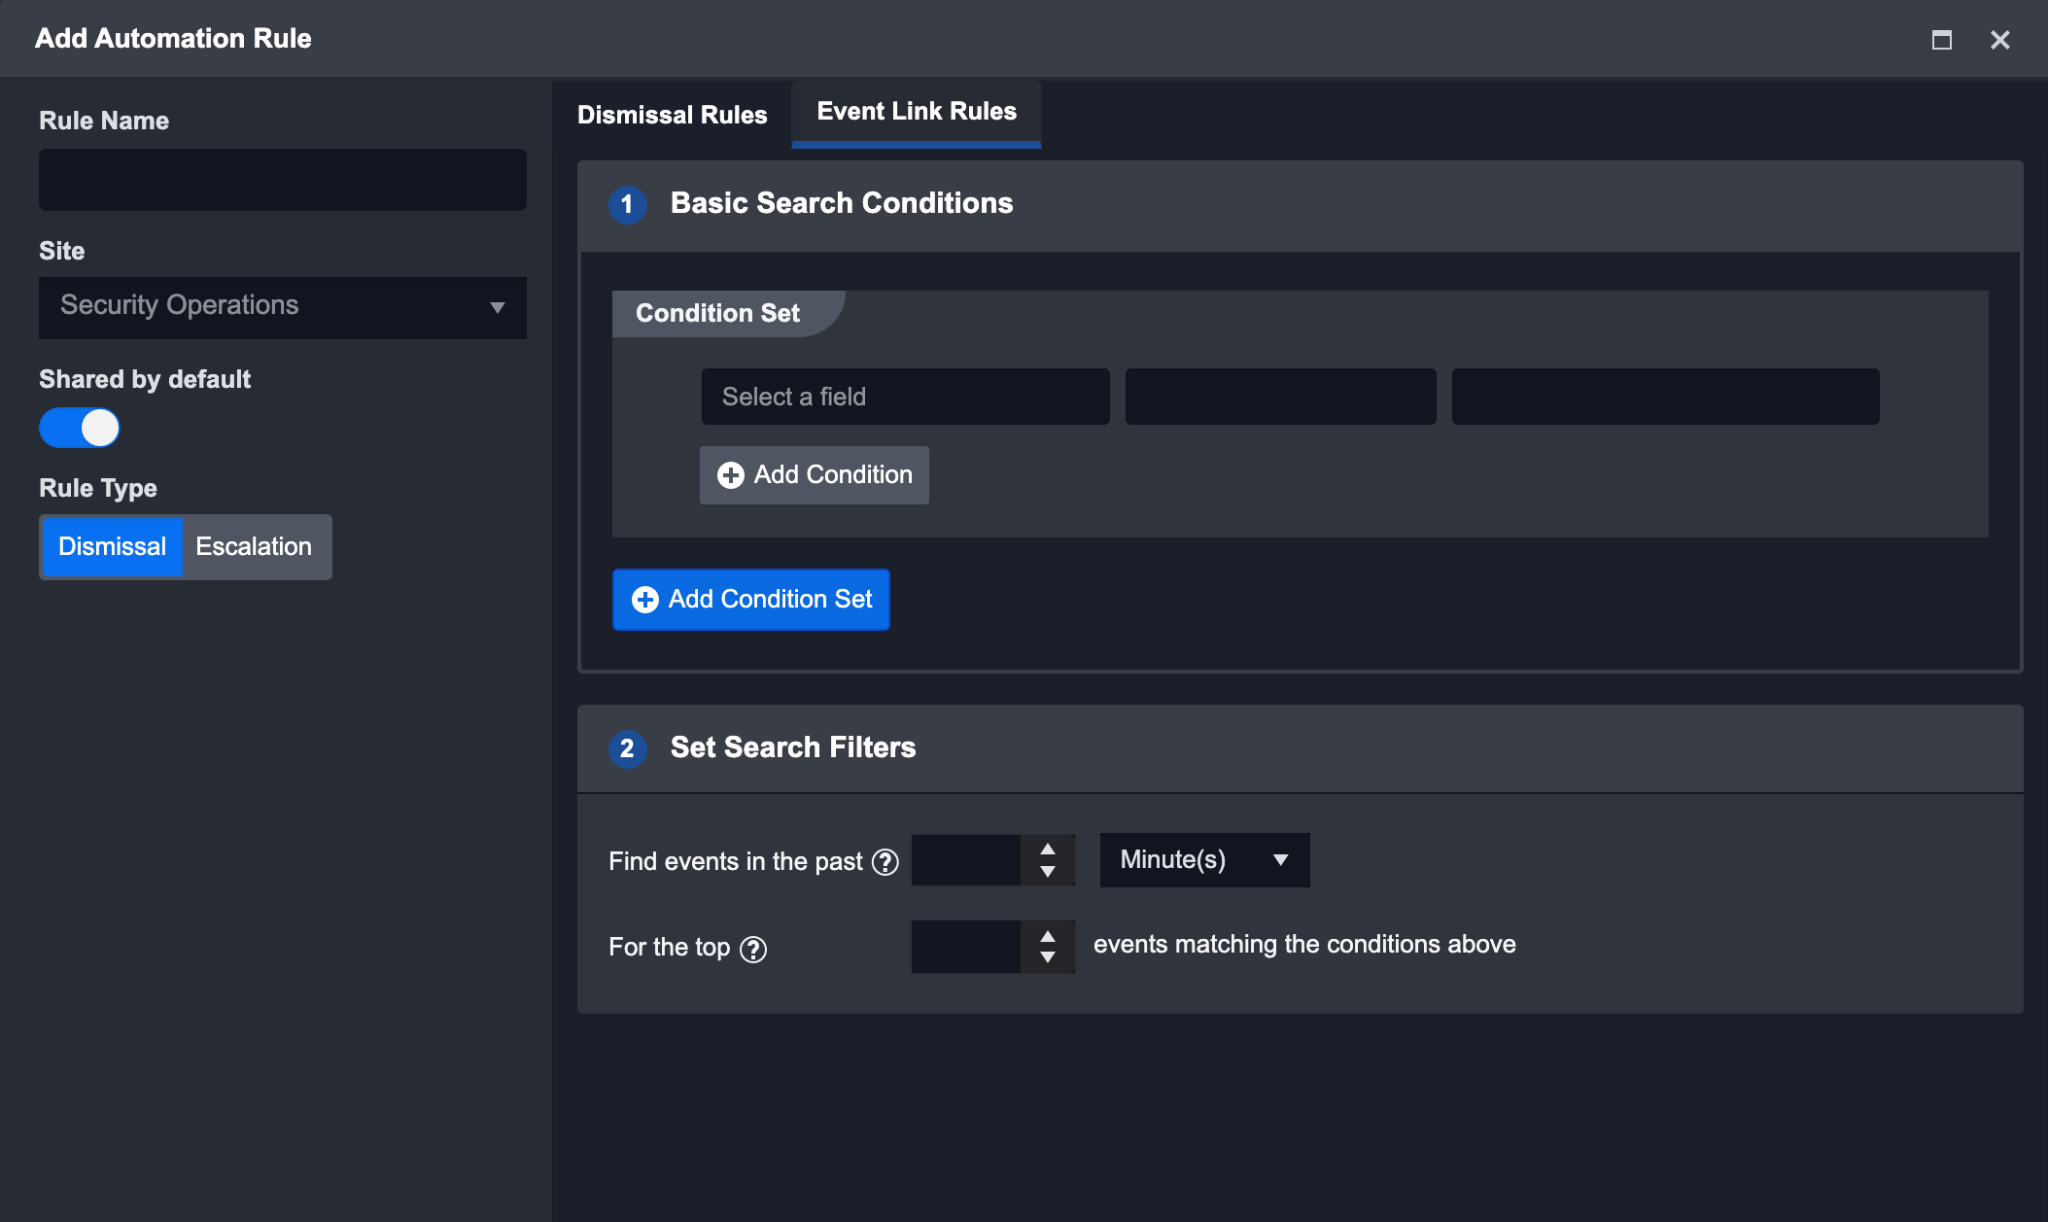
Event Link Rules
When the Escalation Rules are satisfied, certain events that match the Escalation rules are found. You can link them to more New events with a wider time range, as well as Escalated events. The rules setting of event links is similar to the Escalation Rules. The settings available are:
Condition Set – AND / OR relationship of “D3 Data Model Field” matching with conditions.
In the Past X units of time (Limit: 100) – The New events should be searched against the past X units of time.
Search from (Limit: 10000) – Search from a range of events.
Incident Link Rules
Similar to Event Link rules, you can link the escalation rules matched events to Existing incidents. The settings available are:
Condition Set – AND / OR relationship of “D3 Data Model Field” matching with conditions.
In the Past X units of time (Limit: 100) – Search for new events against the past X units of time.
Search from (Limit: 10000) – Search from a range of events.

Configuring a Dismissal Rule
Automate the dismissal of events. When the Dismissal rule type is selected the following rule settings are provided:
Dismissal Rules
Set up a search condition to apply to newly ingested events to dismiss them automatically if the search condition is satisfied.
This search method applies custom Conditional Sets on ingested Events. For example, an event with the Event type “Suspicious Command Line” would satisfy the condition in the screenshot above. Adding another condition will create an AND condition that the event must also satisfy.

To add an additional set of conditions the event could satisfy, click the Add Condition Set button. This will create an OR conditional with the first set.

Reader Note
Special characters such as: _, #, $, %, ^, &, , , @ are not searchable in a condition set.
Once an event satisfies the search criteria defined, it will be dismissed automatically.
Event Link Rules
These search conditions work very similarly to dismissal rules. However, it has the added function to search against both newly ingested and already ingested events.
Editing a Rule
To edit a rule, deactivate the rule first, and then click on the “pencil” icon to open up the edit window.
Rules with the eye icon on the last column means they are currently active. An active rule cannot be edited. They must be deactivated first for actions to be taken.
To determine the order in which automation rules are executed first, we've included a weighted score column within the Automation Rules tab. Click on this table cell to edit the weight. The automation rule with the higher weight score will be executed first.