.png)
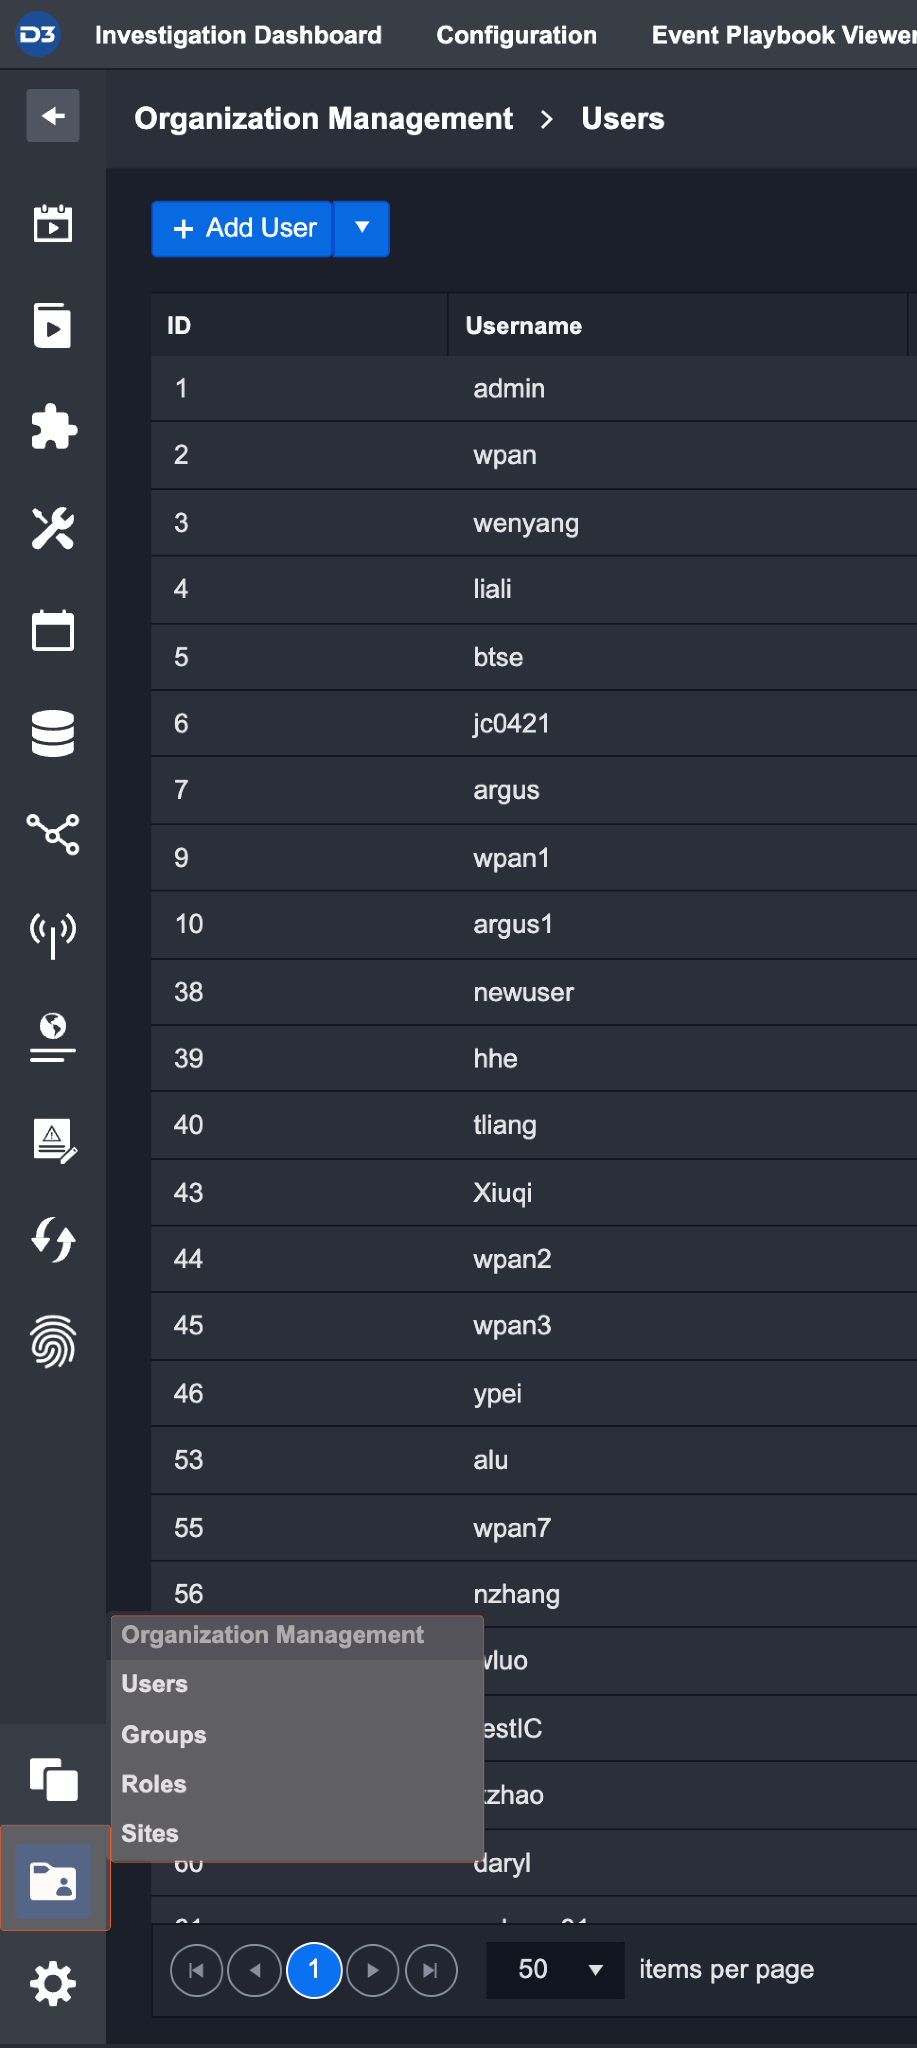
Organization Management
Overview
The Organization Management module contains the pages to configure the Users, Roles, Groups and Sites of D3 SOAR. These are essential components to the security management and user experience of D3. In addition, data segregation and organization can be easily established with this tool. This module is only available to users with administrator privileges.
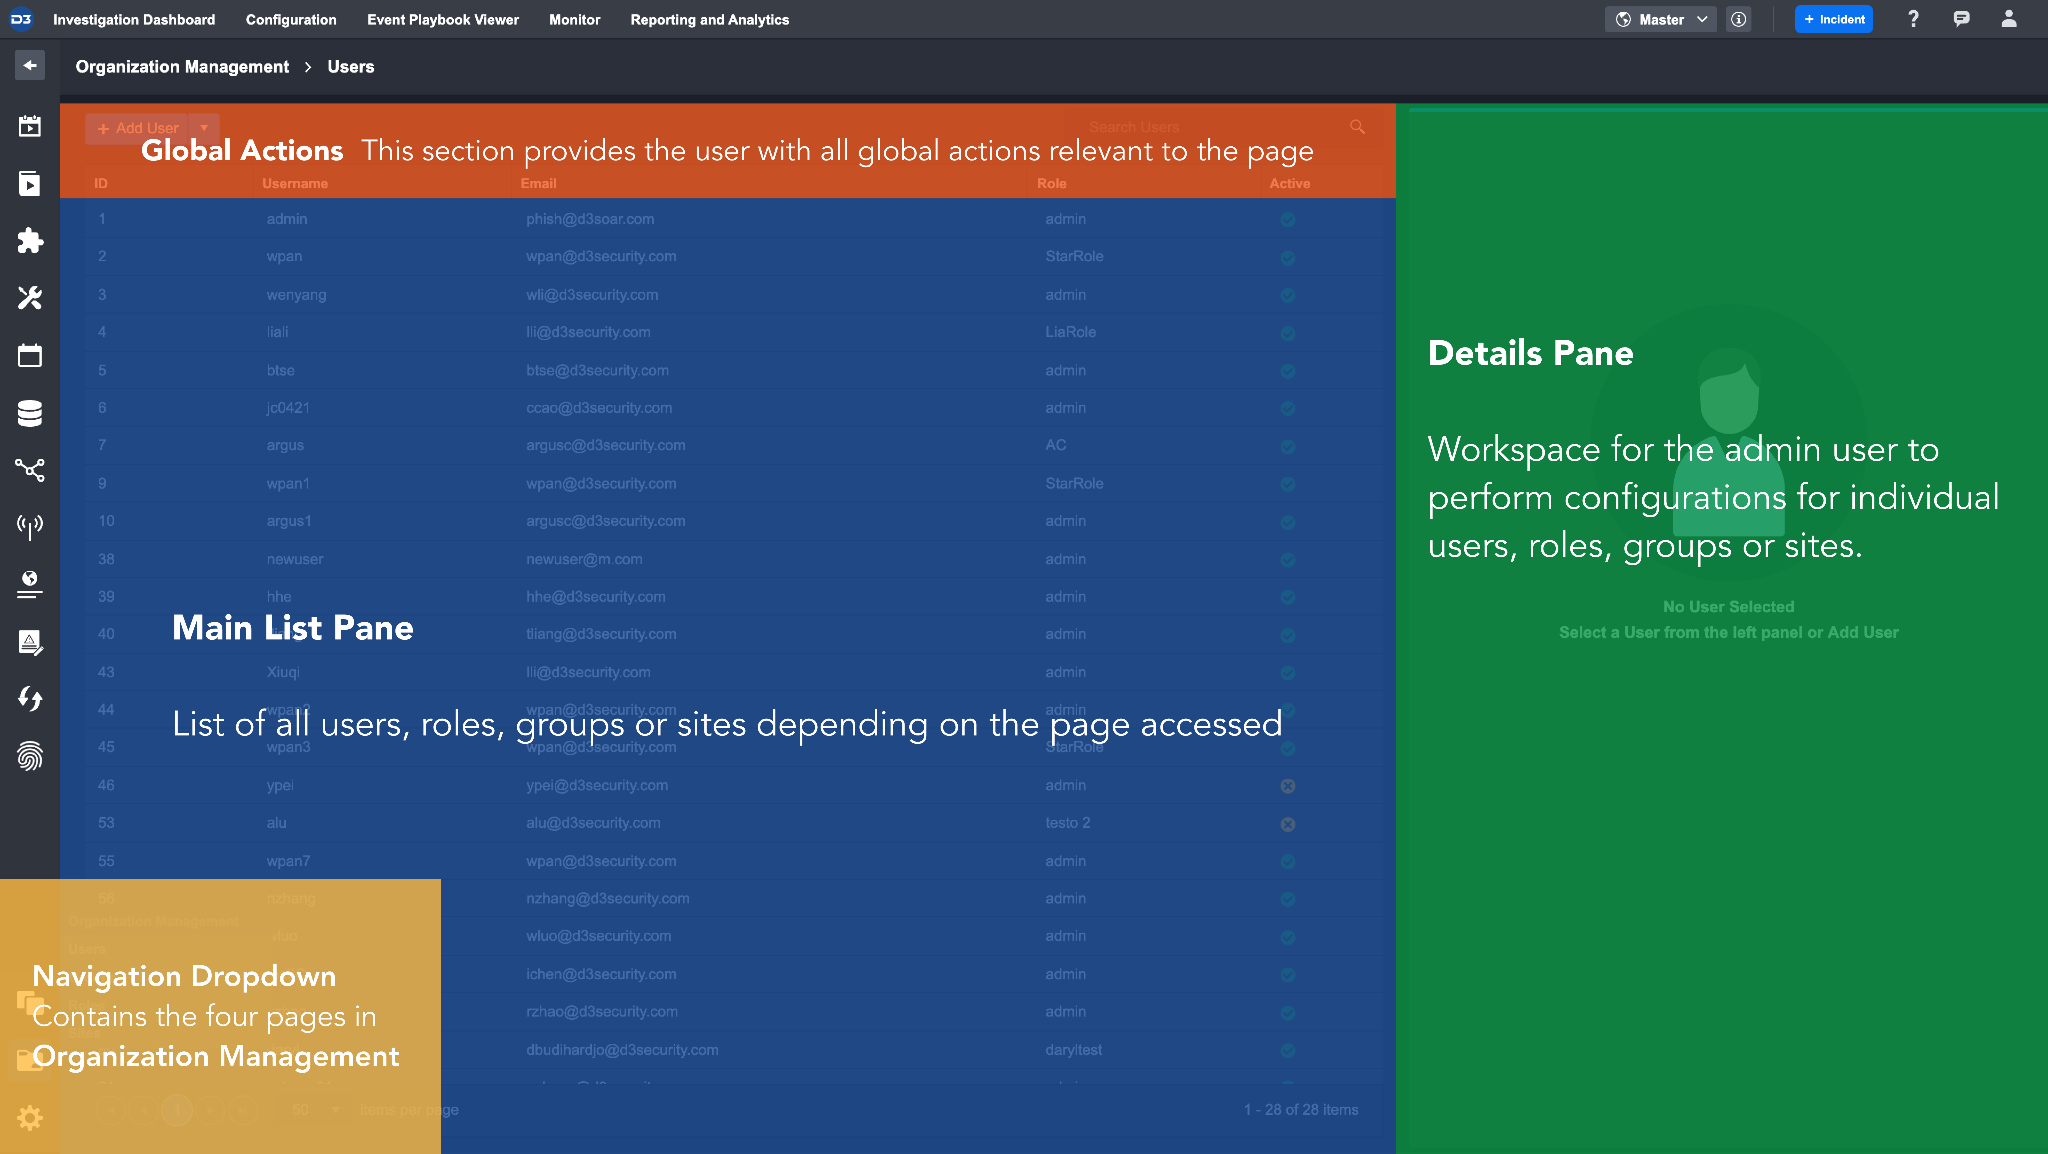
Pages under the Organization Management module have a layout pattern with the following panes:
Navigation Dropdown | Navigation menu to access Users, Groups, Roles, Sites |
|---|---|
Global Actions | Actions bar for common actions such as adding new items, searching for existing items, filtering... |
Main List Pane | Table list of information that corresponds to the selected page. |
Details Pane | Editor for viewing and editing more granular information of an individually selected User, Group, Role or Site (by clicking on a row from the Main List Pane) |
Users
Each user within the D3 platform requires a unique account, consisting of a login, password, and personal contact information. Once created, the user's privileges are regulated by their membership to a single Role within one or more Groups, and Sites.
The Users page displays a list of all user accounts created in the SOAR platform. In this page, you can do the following tasks:
Add a New User Account
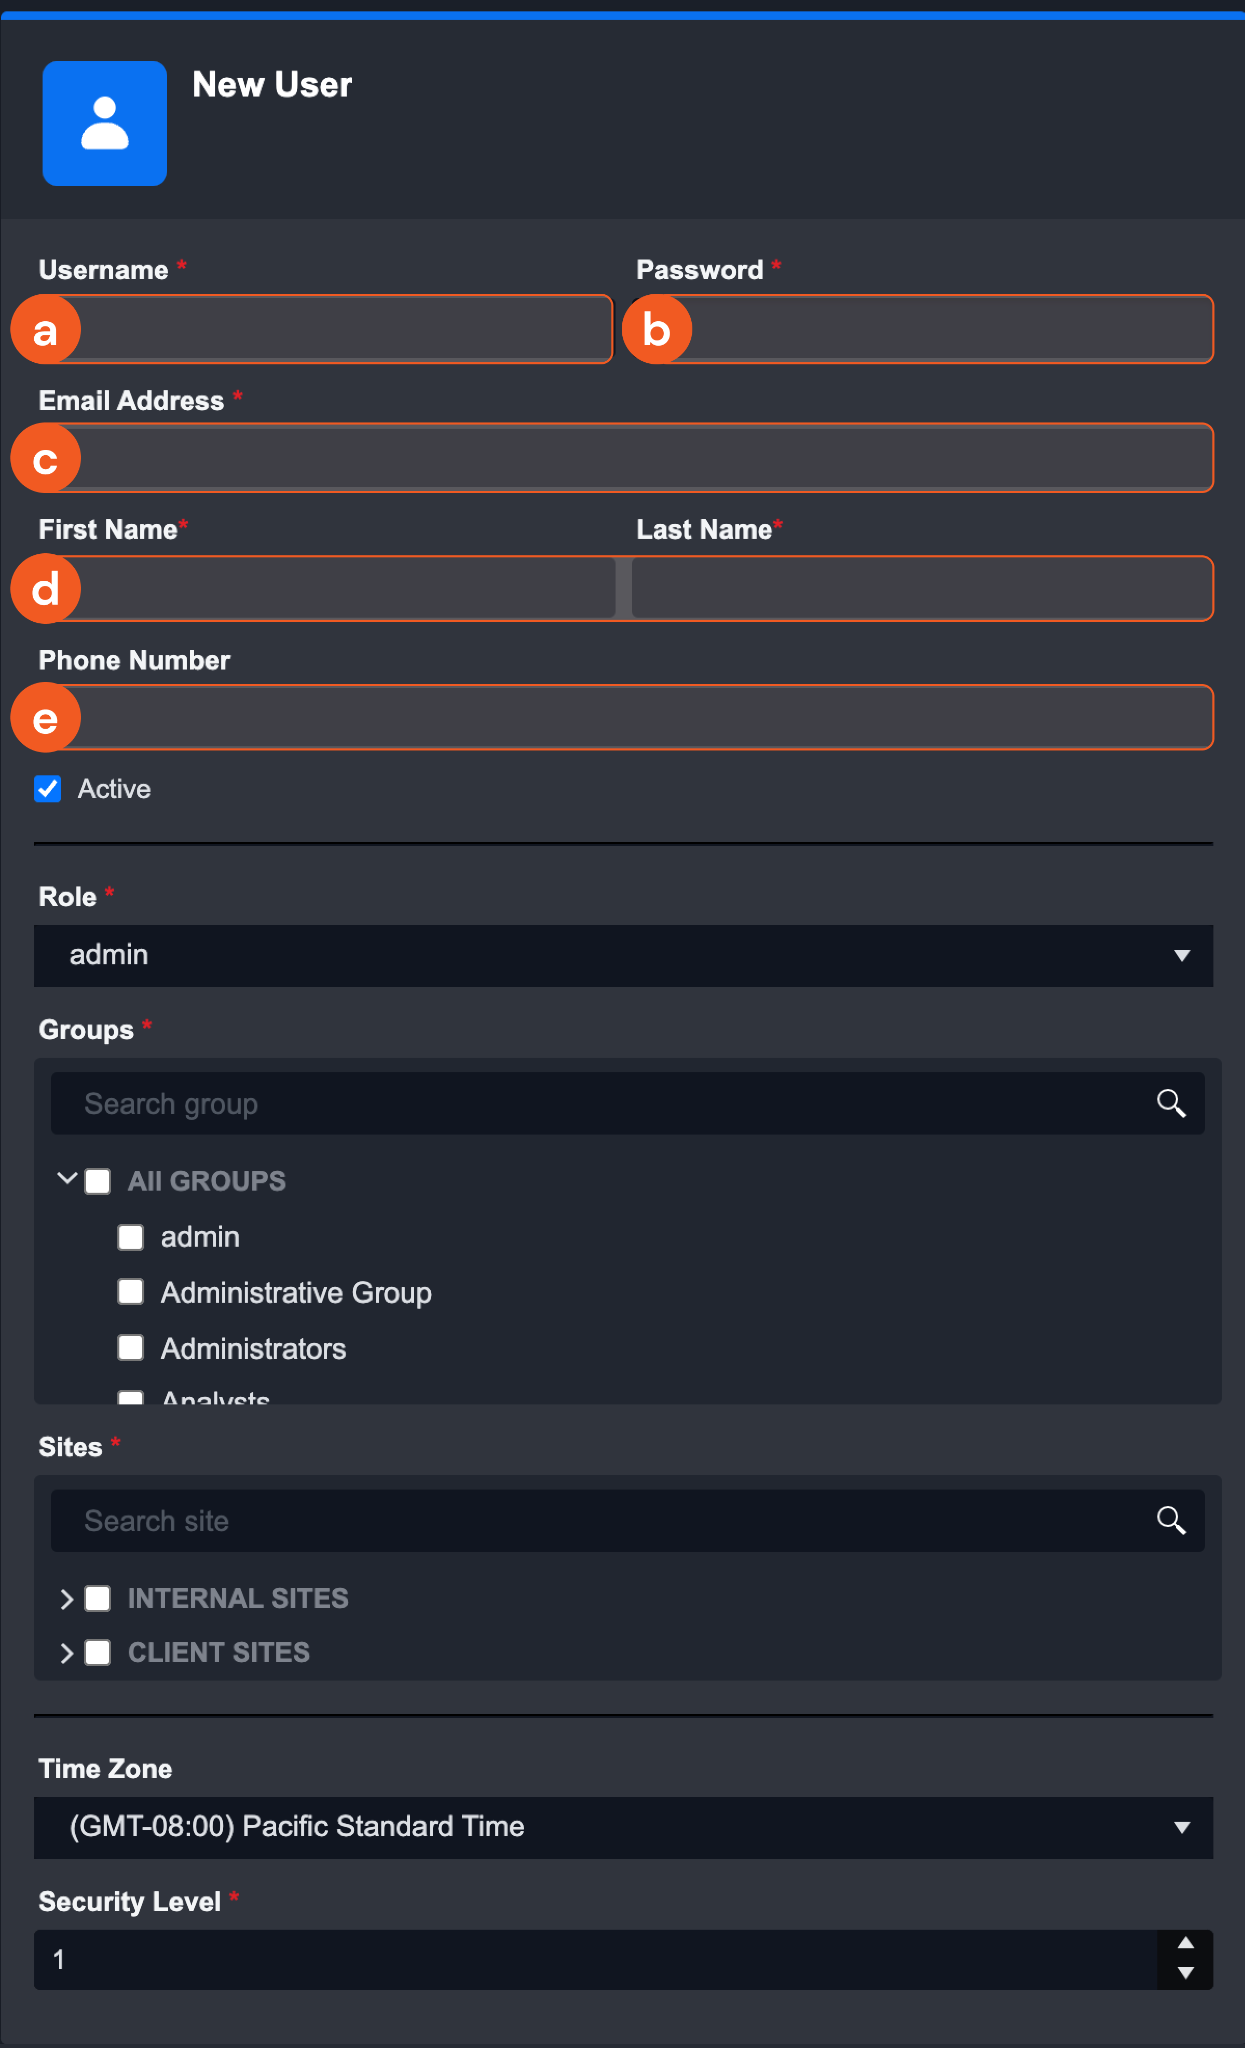
Click + Add User.
Enter details in the following fields:
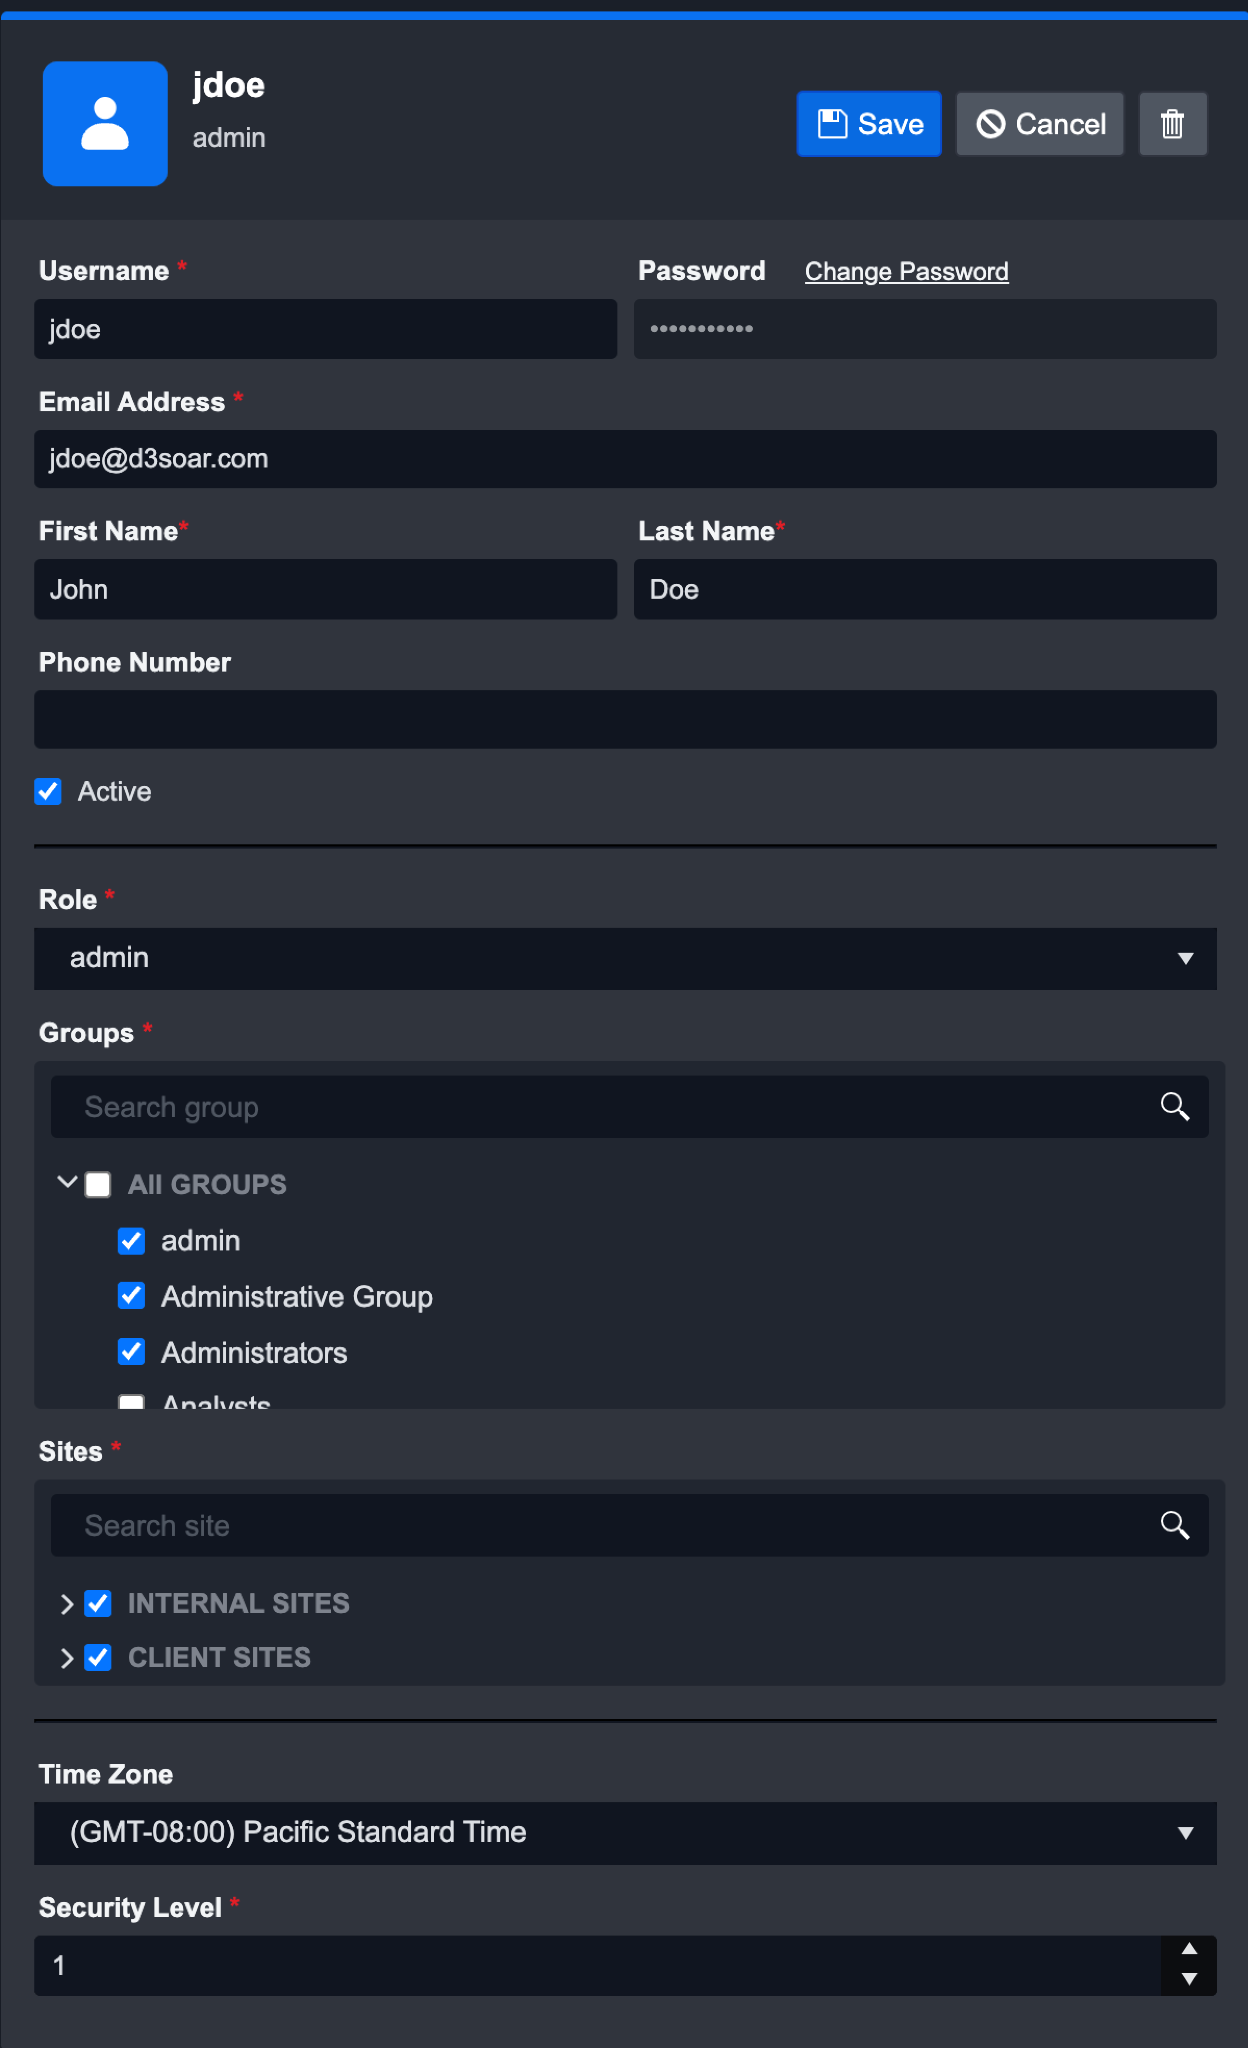
Username
Password
Email Address (the domain of the email address must be whitelisted to add that user. This can be configured in Application Settings.)
First and Last Name
Phone Number (Optional)
Select a Role from the dropdown list.
Select one or more Group(s) the user belongs to.
Select one or more Site(s) the user has access to.
Select a Time Zone. The default Time Zone is set to GMT.
Select a Security Level (only applicable if your D3 SOAR has the Case Management module)
For more information, refer to the Group Security Level section.Click on Save to add this new user.
View and Update User Details
Click on a user from the User List Pane. The selected user details will appear in the Details Pane.
Update the user details as needed. The Save and Cancel buttons will appear on the top right corner once changes have been made.
Click on Save.
Deactivate a User Account
Click on a user from the Users List. The selected user’s details will appear in the Details Pane.
Deselect the Active checkbox.
Click on Save.
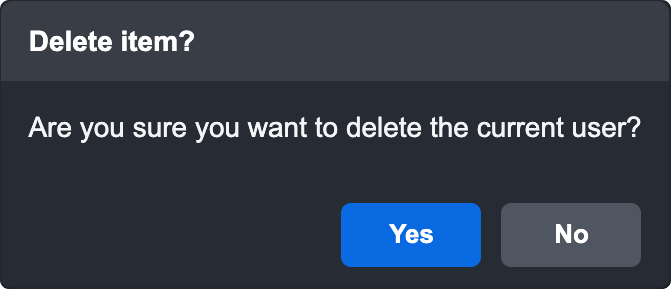
Delete a User Account
Click on the trash bin icon on the top right corner of the Details Pane. A pop-up will appear to re-confirm the deletion of this user entry.
Click Yes.
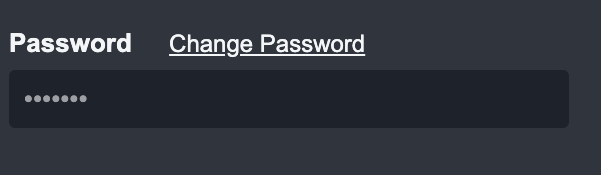
Manage User Passwords
Click on the Change Password link beside the Password label, when the input field becomes enabled, enter a new password.
Enter a new password.
Click on Save.
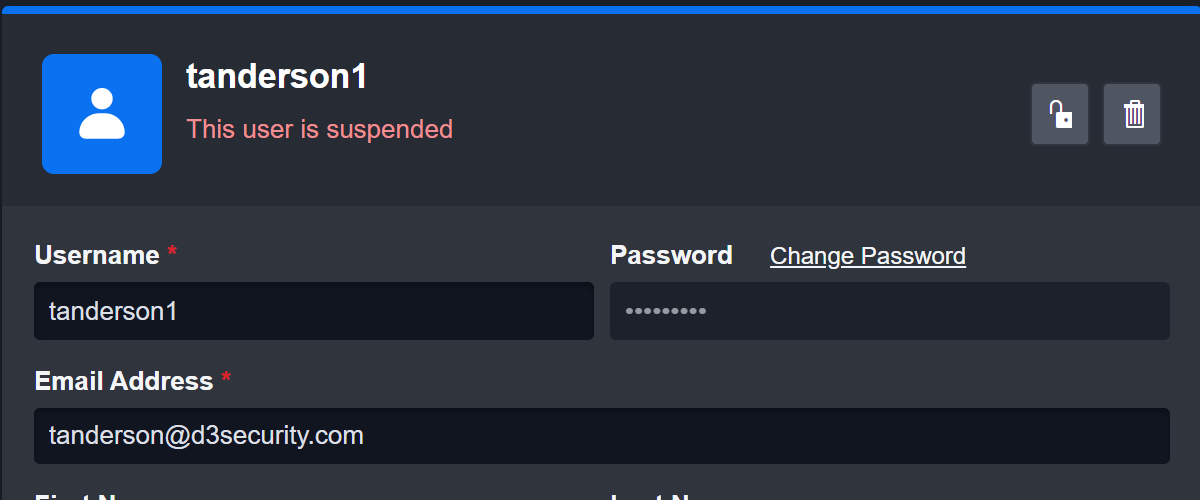
Unlock a User Account
When a user has reached the maximum number of failed login attempts, their account will be suspended.
You can directly unlock the suspended account in the Users page.
Click on the user with a lock icon next to their username in the Users List.
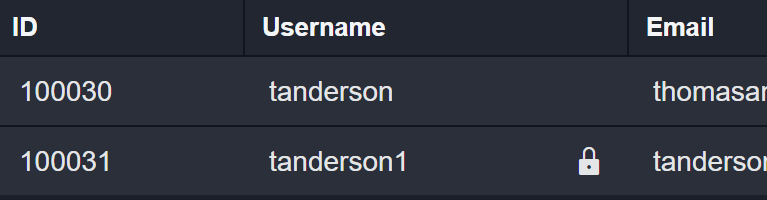
From the Details Pane, click on the unlock icon to unlock the suspended user account.
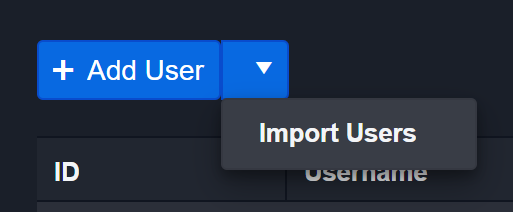
Bulk-Adding User Accounts with File Import
There may be instances where you would need to add a large volume of users into D3 SOAR (e.g. migrating existing users from another platform). You can easily bulk-add these users into D3 via the Import Users feature, without having to manually add users one at a time.
Click on the dropdown arrow icon next to the + Add User button.
Select Import Users. The Details Pane to import users will appear on the right.
Click on the download the template link to download a template CSV file.
Fill in the following information based on the template in the CSV file: Username, Email Address, First Name, Last Name, Role, Groups and Sites.
Reader Note
Phone Number is an optional field.
Save the CSV file on your computer.
Click Browse Files and select the CSV file to import into D3.
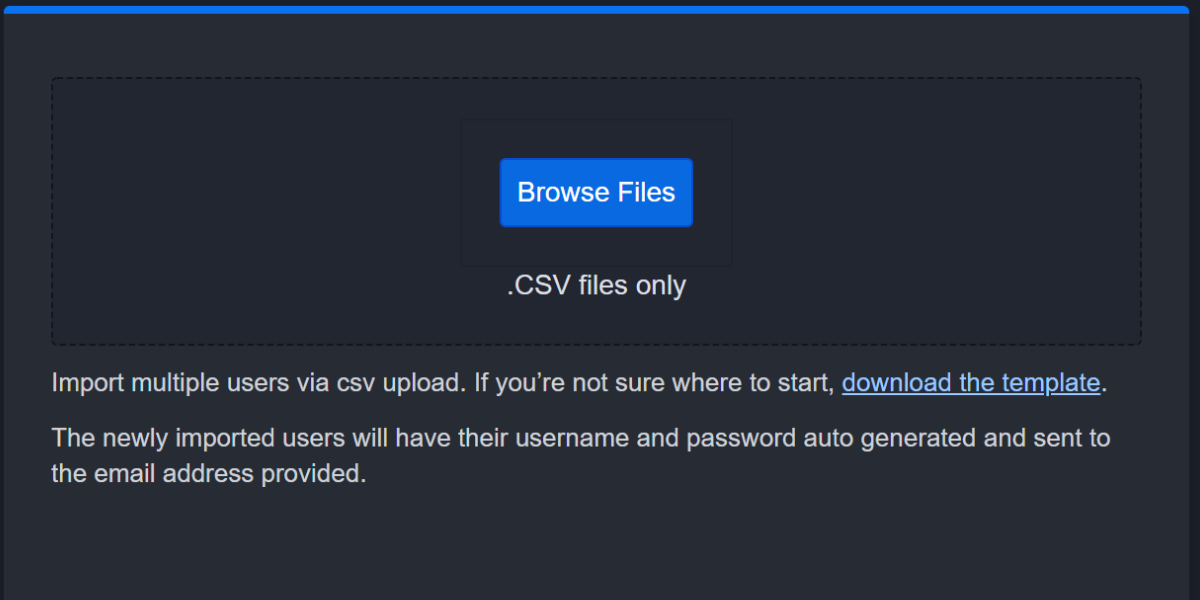
Click on the Import Users button. A confirmation modal will display showing the number of successful and failed imports.
Result
The newly imported users will appear in the Users List.

Groups
A Group is a collection of Users in D3 SOAR. A Group may contain many Users and Roles. Groups also help organizations constrain what data can be viewed or acted upon in the application; they are integral to an organization's access control policy.
For example, you can specify entire form types, sections, elements, or options for granting or denying access at the Group level.
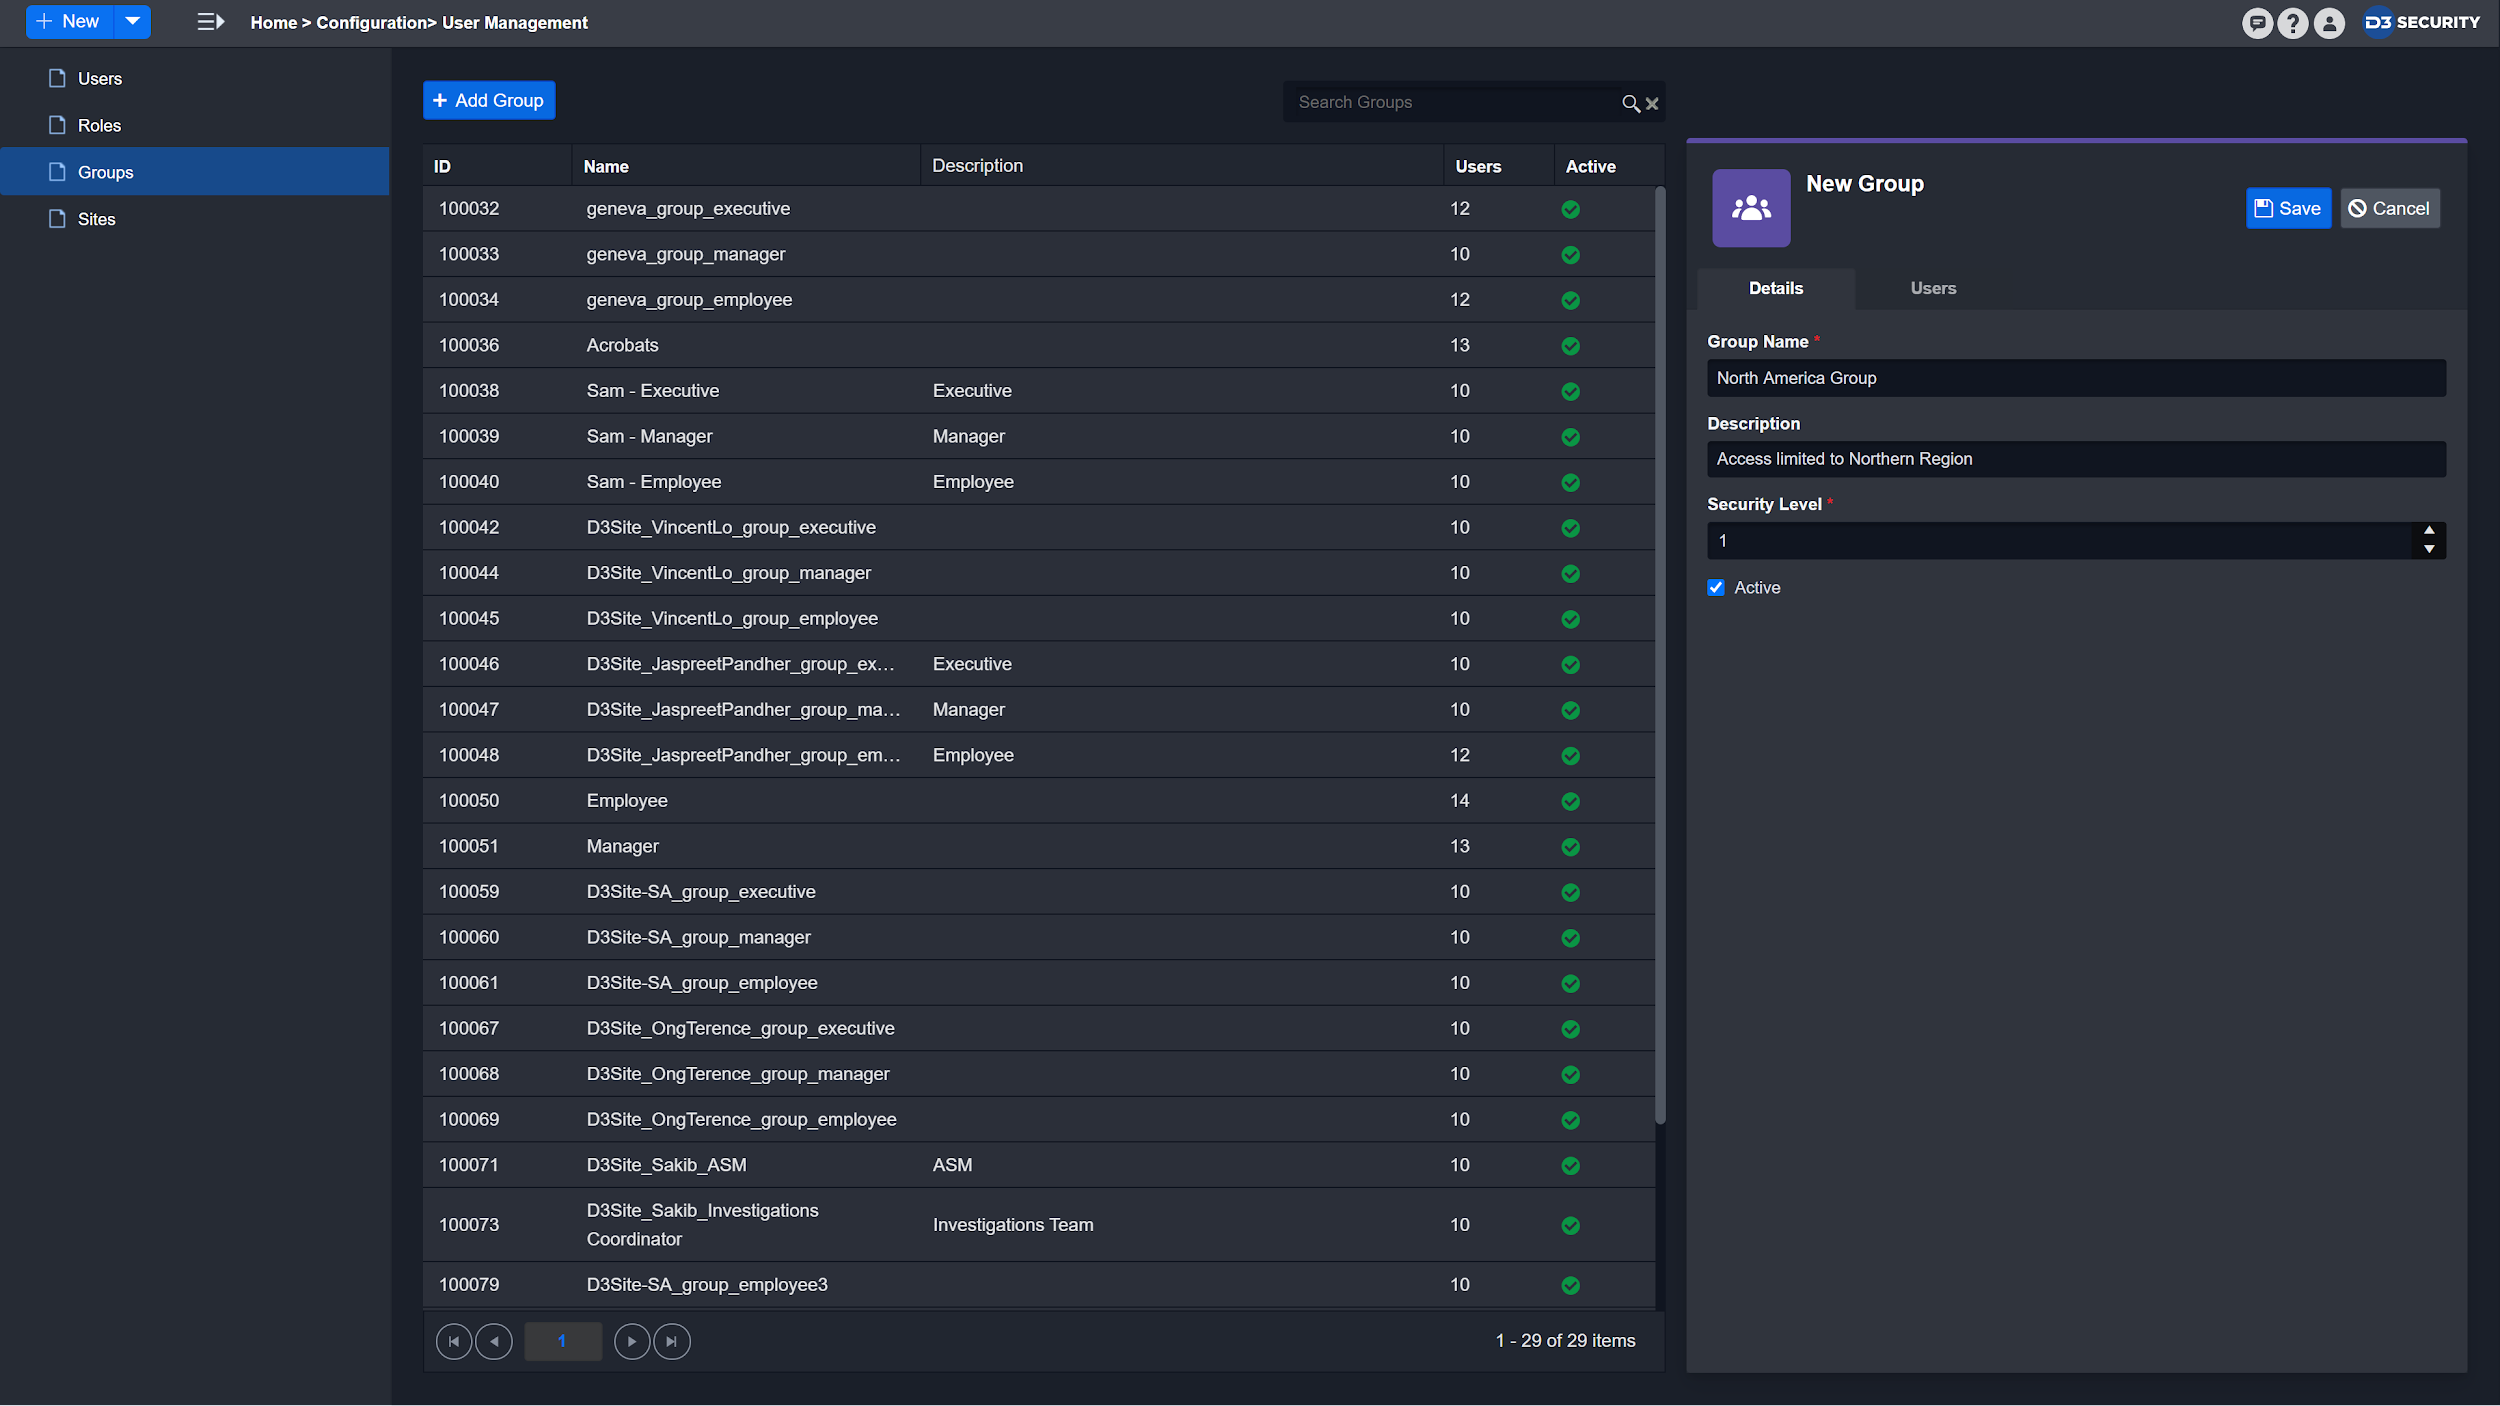
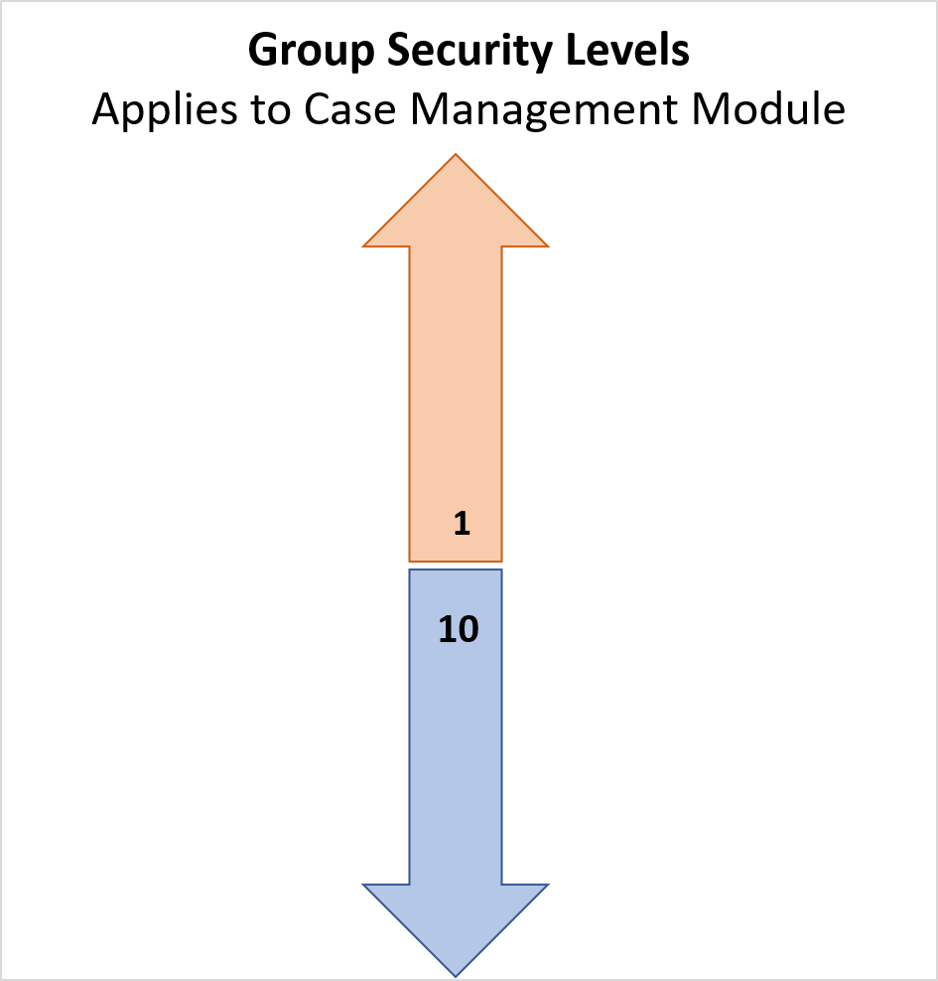
Adding a New Group
Click the + Add Group button from the Global Actions bar.
Enter Group Name.
Example - North America GroupEnter Description for the new Group.
Example - Access limited to Northern RegionSelect a Security Level for the Group. For more information, refer to the Group Security Levels section below.
Example - 1
Click on Save.
View and Update Group Details
Click on a Group from the Groups List. The Group Details will open on the right.
Update the Group Details as needed. The Save and Cancel buttons will appear on the top right corner.
Click on Save.
Deactivate a Group
Click on a Group from the Groups List.
The selected Group Details will appear on the right.Deselect the Active checkbox.
Click on Save.
Delete a Group
Click on the trash bin icon in the top right corner of the Details Pane. A pop-up will appear to re-confirm the deletion of this Group.
Click on Yes.
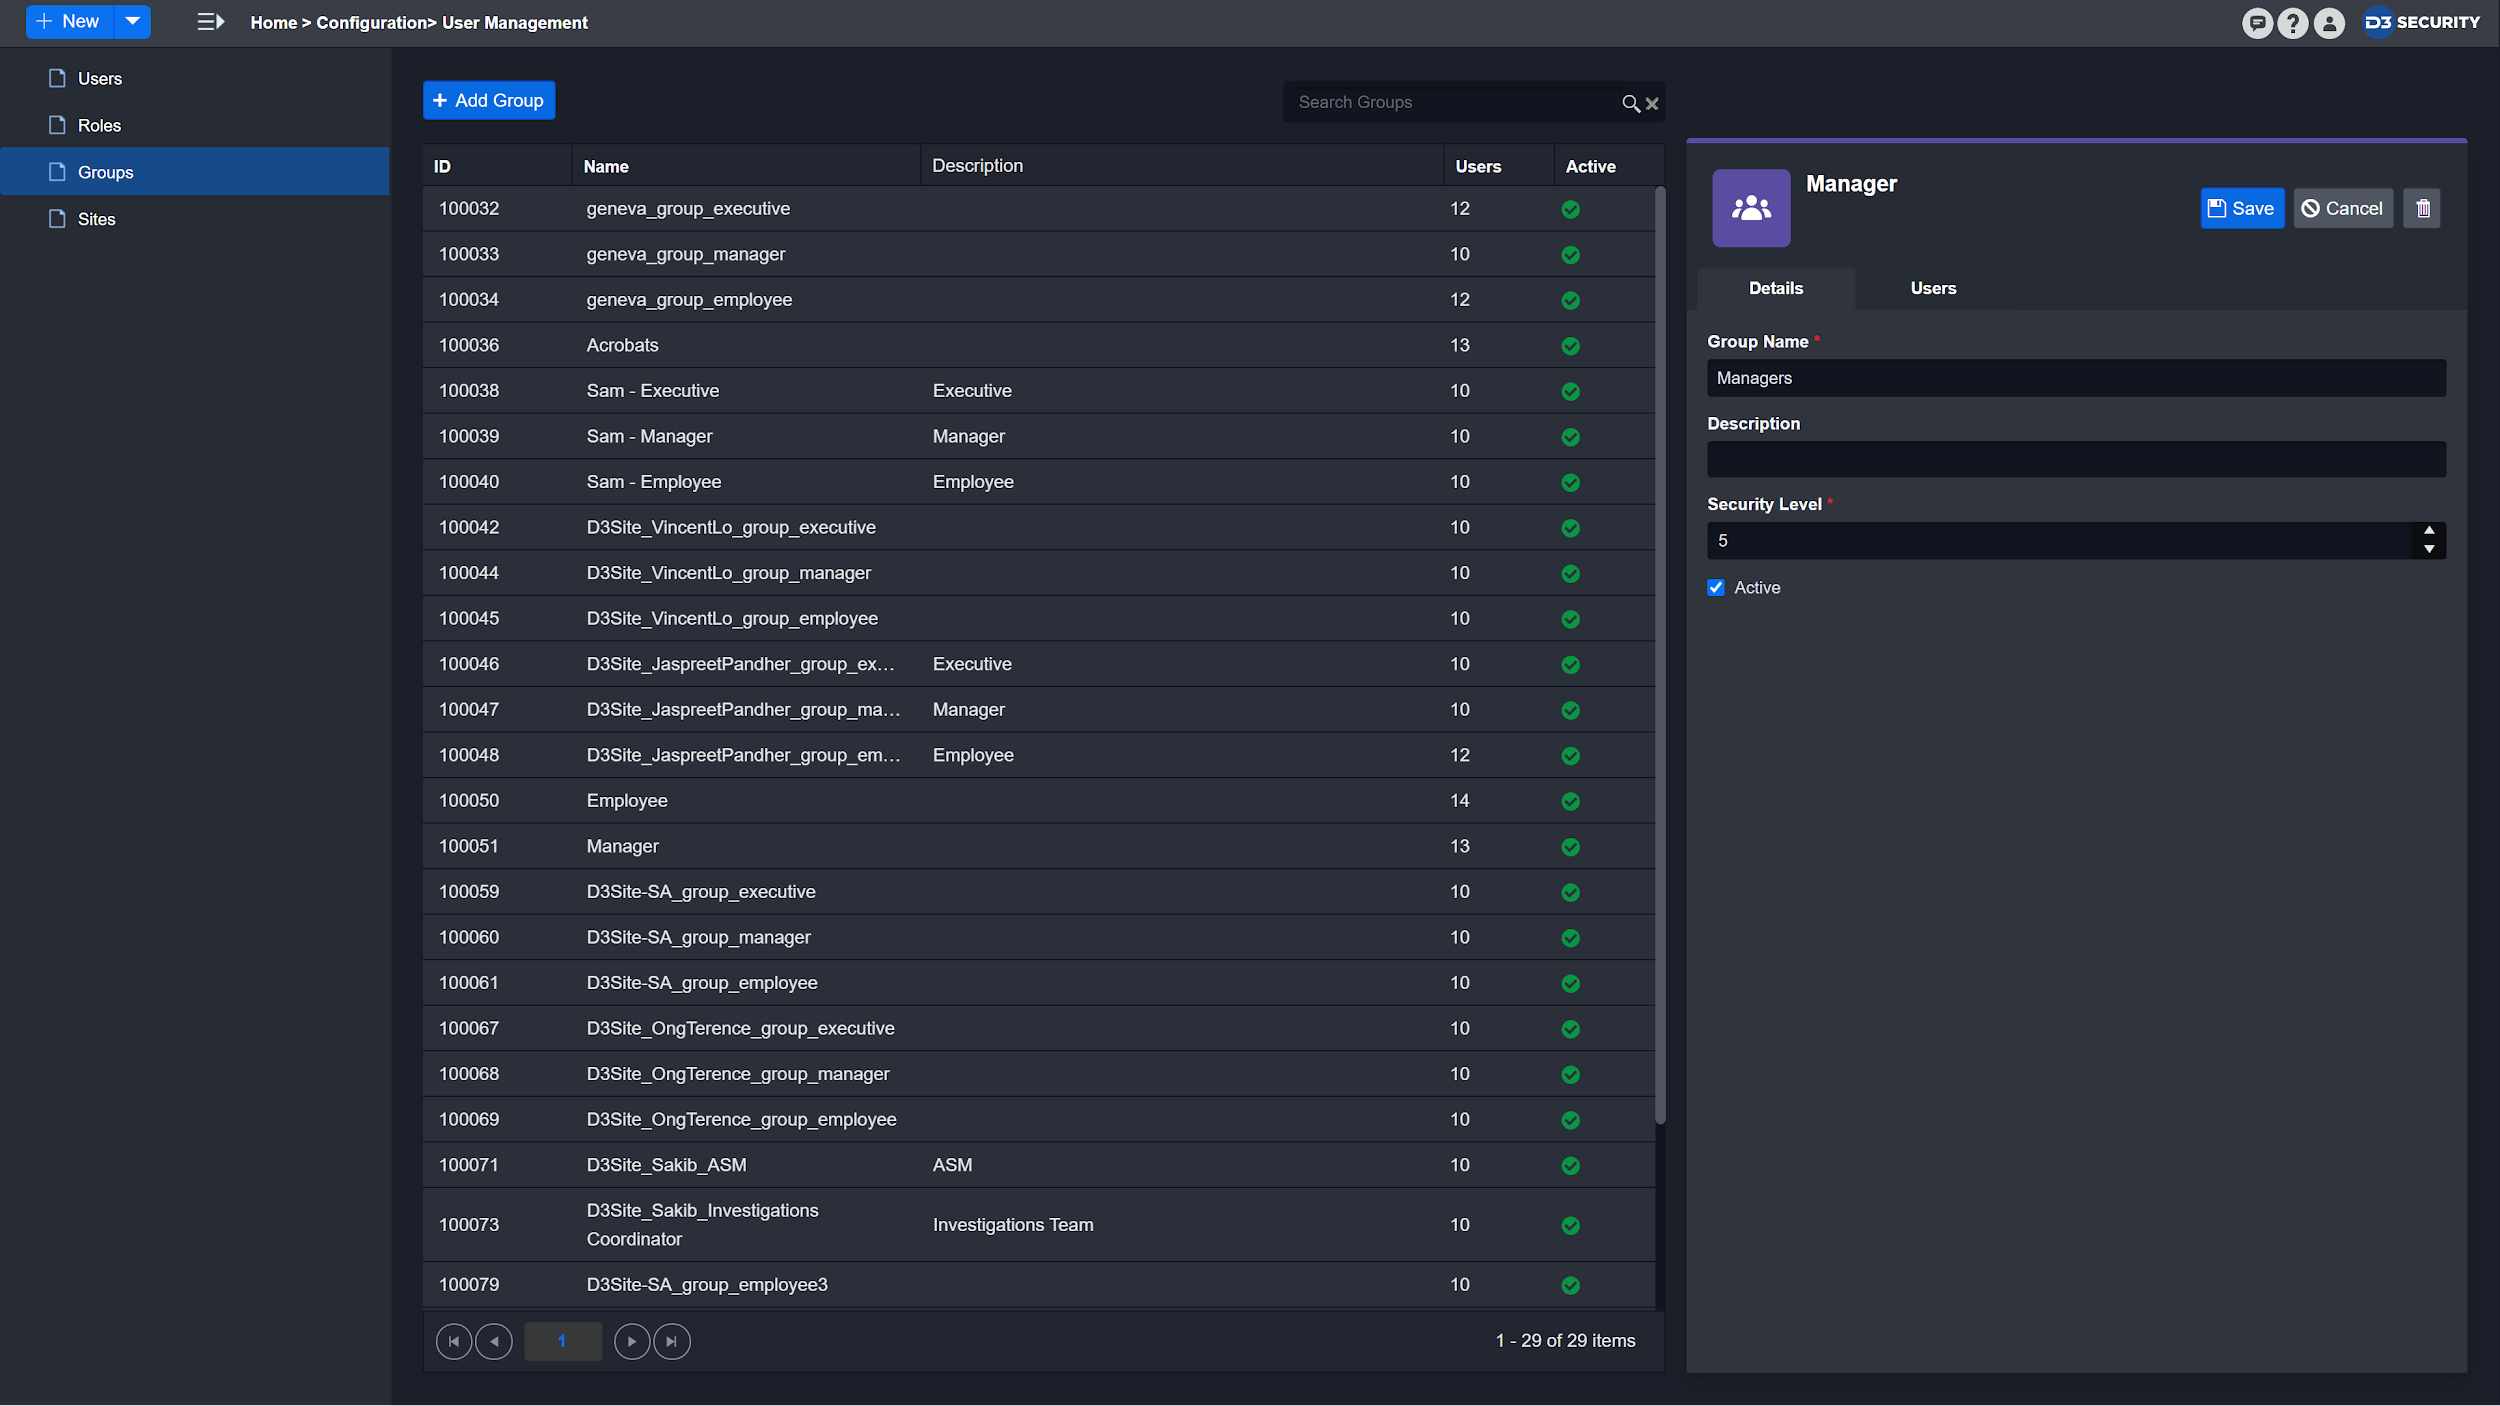
Group Security Levels
Reader Note
Group Security Levels are only applicable if your D3 SOAR has Case Management module
This ranking mechanism helps prevent unauthorized access or browsing of sensitive information within the Case Management module.
The highest security level that can be assigned to a Group is 1 and the lowest security level is 10. If all else is equal in access control policy between two Users:
Users with a lower group security level cannot view content and forms generated by Users with a higher Group security level.
Users can only view content created by other Users of equal or lower ranking security levels.
To resolve conflicting security levels created from multiple group memberships, the system will take the higher security level value from those memberships.
Example - User A is a member of Group X (security level of 5) and Group Y (security level of 8). The system will interpret their effective security level as 8.
Managing Group Membership
Users can be members of multiple Groups. You can also assign Users to multiple Groups in bulk.
Select a Group from the Groups List.
Navigate to the Users tab beside the Details tab.
Click on the Add or Remove Users button. The Add or Remove Users modal will appear.
.png?inst-v=4d6f00ea-d563-42d6-b8c7-1a4ea4284139)
Use the centre right and left arrow buttons to add or remove Users between the list boxes.
The left panel shows all the Users who aren't assigned the selected Group.
The right panel shows Users who are currently assigned the selected Group.
Note: Hold the CTRL key to select multiple Users from either list.
Click Done to confirm Users.
Roles
Each user in the D3 platform must be assigned a single Role. This Role determines the user's access to different areas of the platform; as such, Roles are integral to an organization's access control policy. You can create and edit custom Roles, and its corresponding access privileges to reflect the hierarchy of a SOC team or organization.
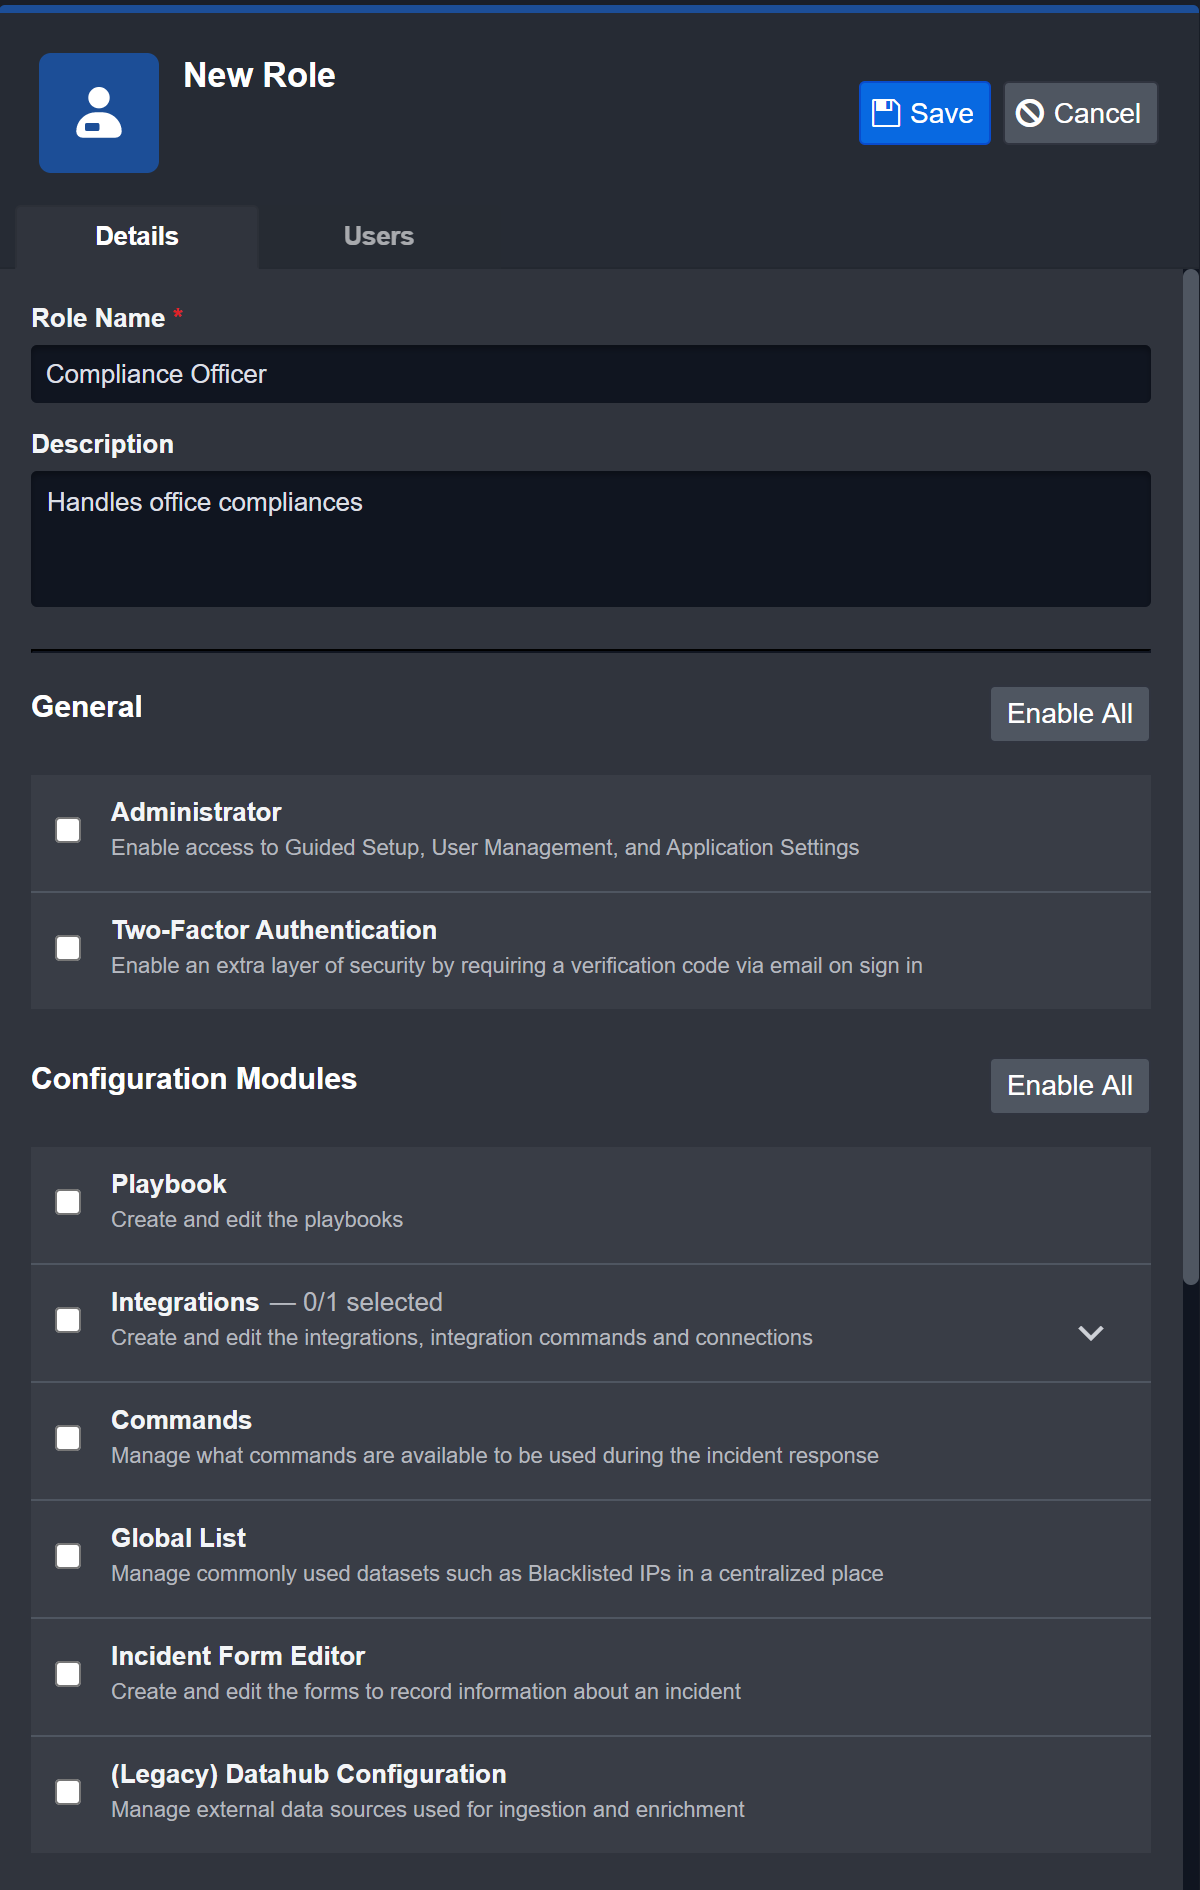
Adding a New Role
Click on the + Add Role button from the Global Actions bar.
Enter Role Name.
E.g. - Compliance OfficerEnter Description of the new Role.
E.g. - Handles office compliancesSelect the Role Privileges for the new Role. For more information, please refer to the Role Privileges section below.
Selecting the parent checkbox option will automatically enable all nested options. You can then expand the parent option and deselect the individual nested options to customize specific functions for the Role.
Clicking Enable All will enable all the permissions for a module.
Click on Save.
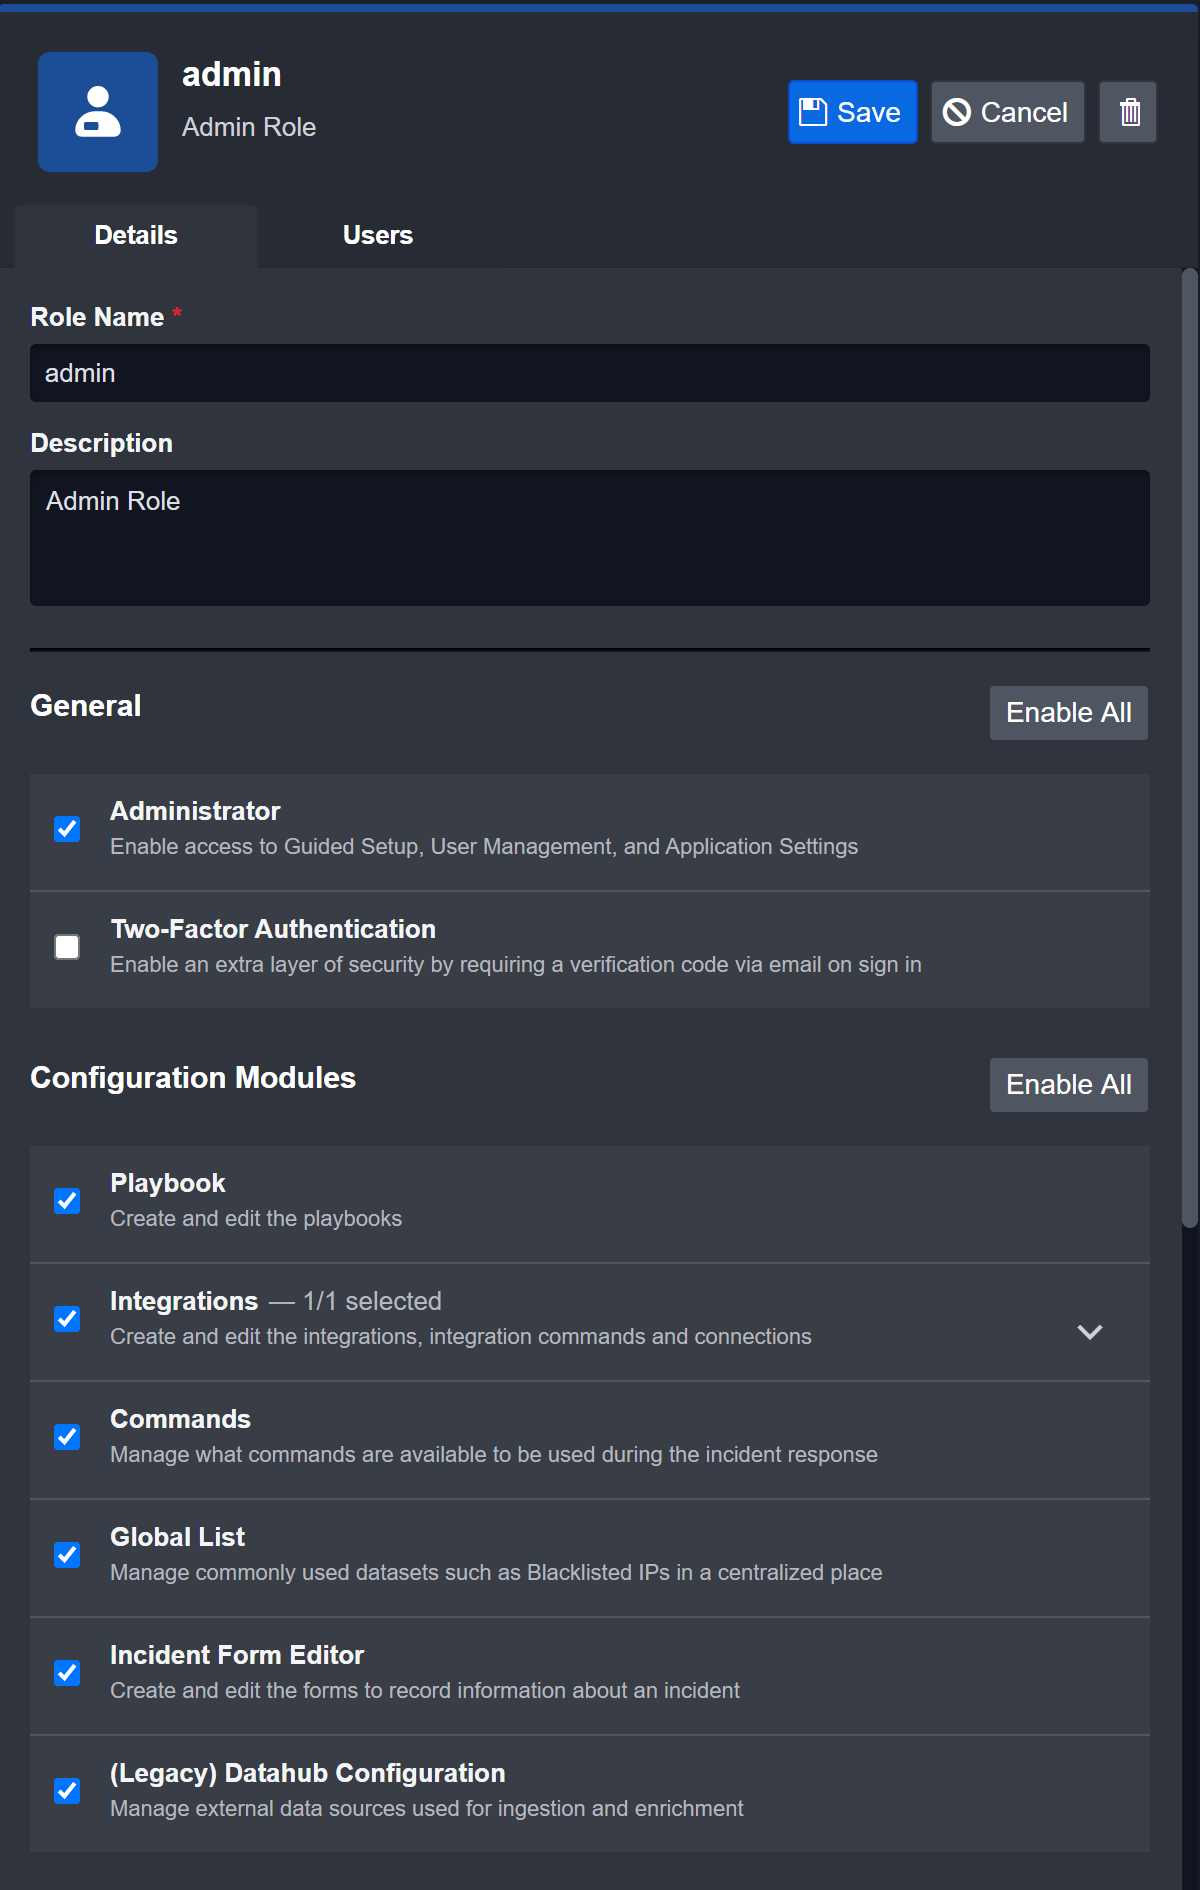
View and Update Role Details
Click on a Role from the Roles List. The Role’s Details Pane will open up on the right.
Update the Role Details as needed. The Save and Cancel buttons will appear on the top right corner.
Click Save to confirm changes.
Delete a Role
Click on the trash bin icon on the top right corner of the Details Pane. A pop-up will appear to re-confirm the deletion of this Role.
Click on Yes.
Reader Note
You must remove all users from a role before deleting the role.
Role Privileges
In the system, Roles are used to grant or deny access to specific functions. To effectively implement a Role, its access privileges must be carefully defined, and should reflect the corresponding job function.
You can also micromanage the Role privileges for specific workflows and features within each module (e.g. export Incident Reports, view closed Case, configure Playbook, etc.).
Role’s access privileges within the Roles Details cover the three major workspaces of D3:
General: access privileges for administrator permissions and two-factor authentication.
Configuration Modules: access privileges for Configuration modules such as the Playbook Editor, Integrations...
Operational Modules: access privileges for operational modules such as Monitor, Incident Workspace...
Users with Roles that have access privileges can conduct the following actions:
General | Description |
|---|---|
Administrator | Have access to the Guided Setup, Organization Management, and Application Settings. |
Two-Factor Authentication | Have an extra layer of security by being required to provide a verification code via email on sign in. |
Configuration Modules | Description |
|---|---|
Playbook | Create and edit Playbooks. |
Global List | Manage commonly used datasets (e.g. Blacklisted IPs) in a centralized place. |
Incident Form Editor | Create and edit Forms to record information about an Incident. |
Agent Management | Manage Agents for D3 Playbooks |
Operational Modules | Description |
|---|---|
Monitor | Analyze key events from across the organization using the MITRE ATT&CK framework. |
Investigation Dashboard | Review the Events, Incidents, and Tasks in a centralized view. Within the Investigation Dashboard module, you can customize access control for viewing and editing capabilities by enabling or disabling the following options. Enable Pending Task List Enable Wildcard Search Enable Triage Manage Ongoing Surveillances However, the investigation dashboard will always be enabled by default. |
Incident | View, edit, and create Incidents to respond to security threats in the organization. Within the Incident module, you can also configure the scope of viewing and editing permissions. For Scope of Viewable Records: View All Records: view/access all information within the system regardless of its ownership. View Group Records: view/access records belonging to users in their group(s). View One's Own Records Only: view/access user’s own records. For Scope of Editable Records: Same as Scope of Viewable Records: access control logic from the option selected in Scope of Viewable Records applies to record editing. Edit One's Own and Accessible Records: only able to edit records of the user's own creation or that are assigned to them. Edit Only Group and Accessible Records: only able to edit records belonging to users in their group(s). Edit All Accessible Records: able to edit all records within the system regardless of its ownership. |
Event Playbook Viewer | View Event Playbooks |
Reporting & Analytics | View, create, and share metrics and KPIs of the organization. |
Messaging | Send messages with other users on the platform. |
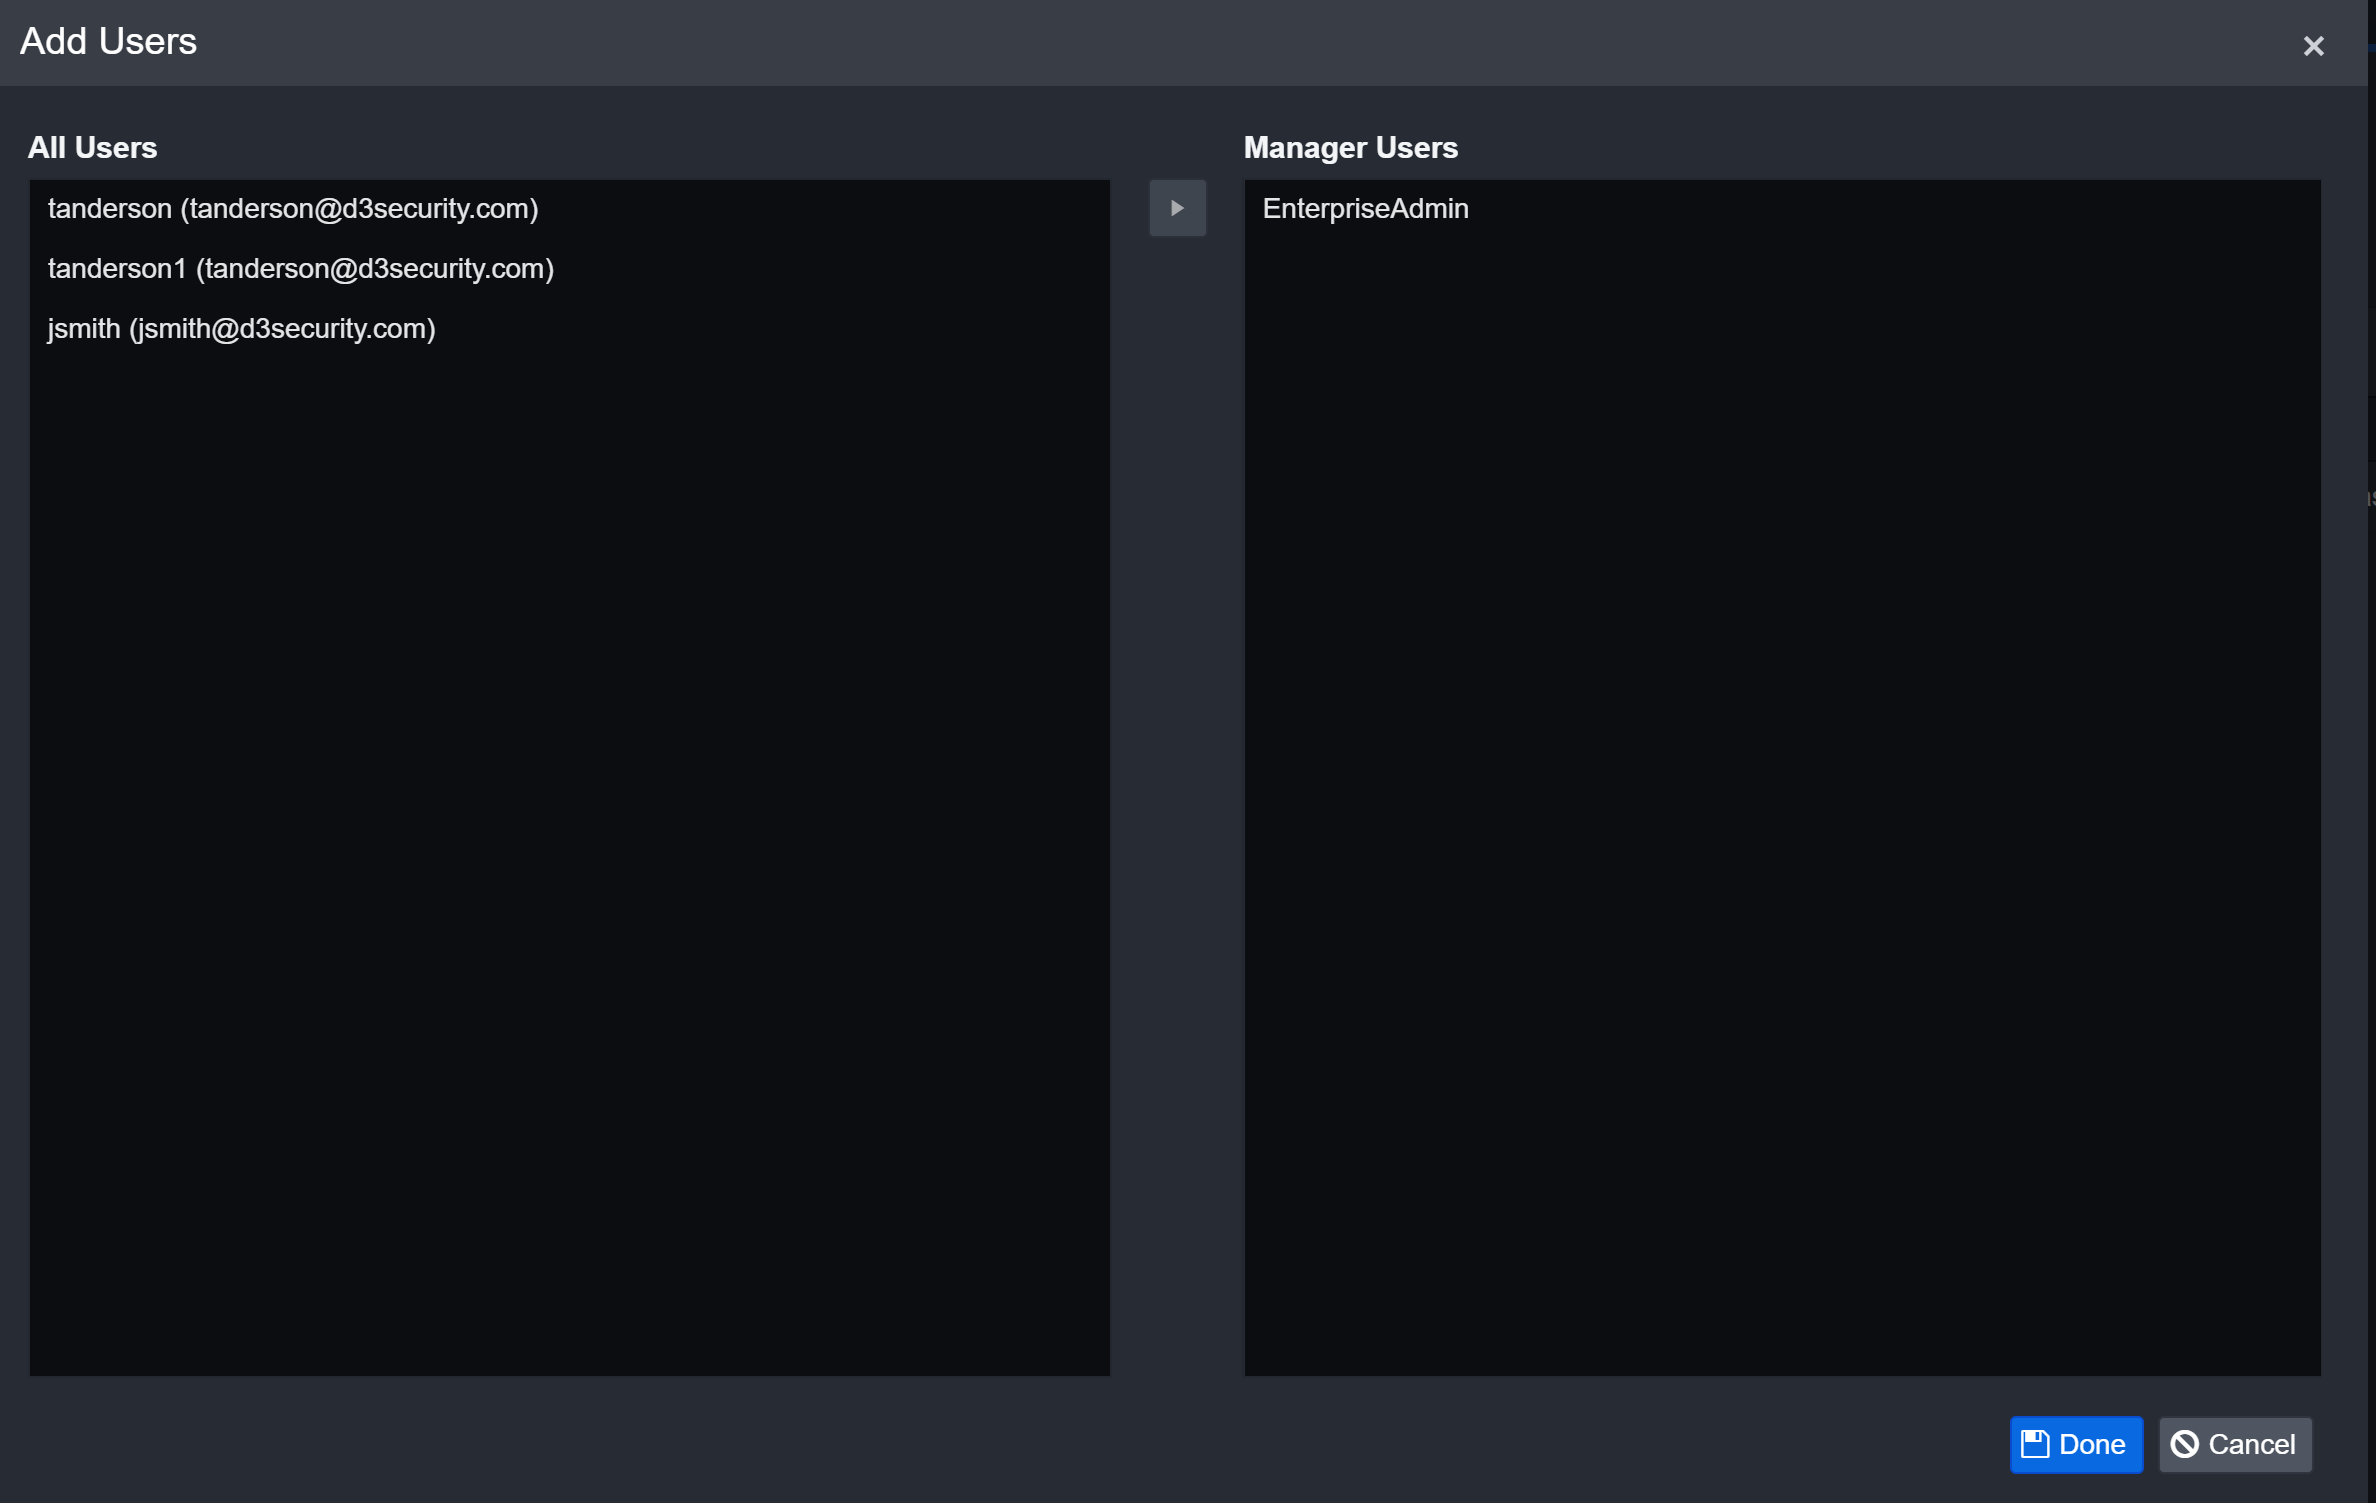
Managing Role Membership
Users are limited to one Role. You can view existing membership and/or assign a Role to multiple Users in bulk. To perform this function:
Select a Role from the Roles List.
Navigate to the Users tab in the Details Pane.
Click the Add Users button. The Add Users modal will appear.
.png?inst-v=4d6f00ea-d563-42d6-b8c7-1a4ea4284139)
Use the centre right and left arrow buttons to add or remove users between the list boxes. Hold the CTRL key to select multiple Users from either list.
Left panel: Users who aren't assigned the selected Role
Right panel: Users who are currently assigned the selected Role
Click Done to confirm Role assignment for Users.
Reader Note
If a User is previously assigned to another Role, the new Role will override the existing one.
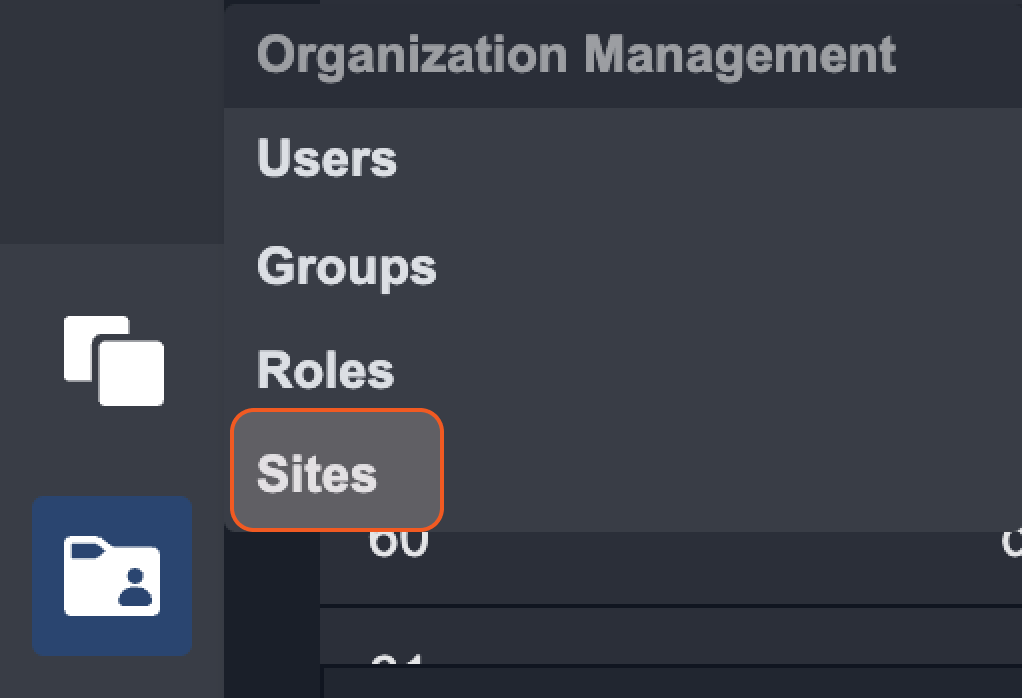
Sites
Sites are broadly used to describe the various departments which are separated by jurisdictions or different subsidiaries. A Site may contain many Groups and Users with a variety of Roles. With access control measures, you can determine what Site members can and/or cannot access on the SOAR platform.
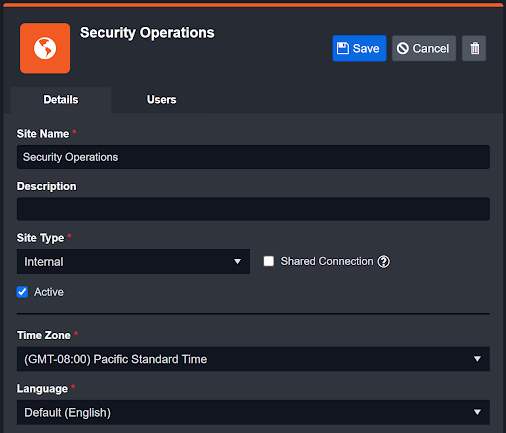
Adding a New Site
Click + Add Site from the Global Actions bar.
Enter Site Name
(Optional) Enter Description for the new Site.
Select Site Type.
Note: For more information, refer to the Internal Site vs. Client Site section.Select the “Recipient site for events from connections Shared to Internal Sites” checkbox to assign the Site as the Shared Connection Site.
Note: For more information, refer to the Shared Connection section below.Select a Time Zone from the drop-down list.
Select a Language for the Site.
Click on Save.
.png?inst-v=4d6f00ea-d563-42d6-b8c7-1a4ea4284139)
View and Update Site Details
Click on a Site from the Sites List. The Site Details will open in the right panel.
Update the Site Details as needed. The Save and Cancel buttons will appear on the top right corner once changes have been made.
Click on Save.
Deactivate a Site
Click on a Site from the Sites List. The selected Site Details will appear on the right.
Deselect the Active checkbox.
Click on Save.
Delete a Site
Click on the trash bin icon on the top right corner of the Details Pane. A pop-up will appear to re-confirm the deletion of this Site.
Click on Yes.
Internal Site vs Client Site
D3 SOAR incorporates a multi-tenancy architecture that is designed to support two key business cases: managed security service providers (MSSP) and large organizations.
Client Sites | Internal Sites |
|---|---|
Each client has a separate Client Site, all coexisting on one D3 platform. These Client Sites are all separated, and have no data sharing with one another to maintain the privacy of their data and work operations. | Internal Sites are utilized by large organizations and centralized SOC teams that manage multiple Internal Sites based on the different jurisdictions and subsidiaries. Users that are members of these Internal Sites can conduct cross-site data sharing between these Sites. |
Reader Note
Newly added Sites will by default be categorized as an Internal Site unless it is changed to a Client Site from the dropdown within the Details Pane.
Recipient site for events from connections Shared to Internal Sites
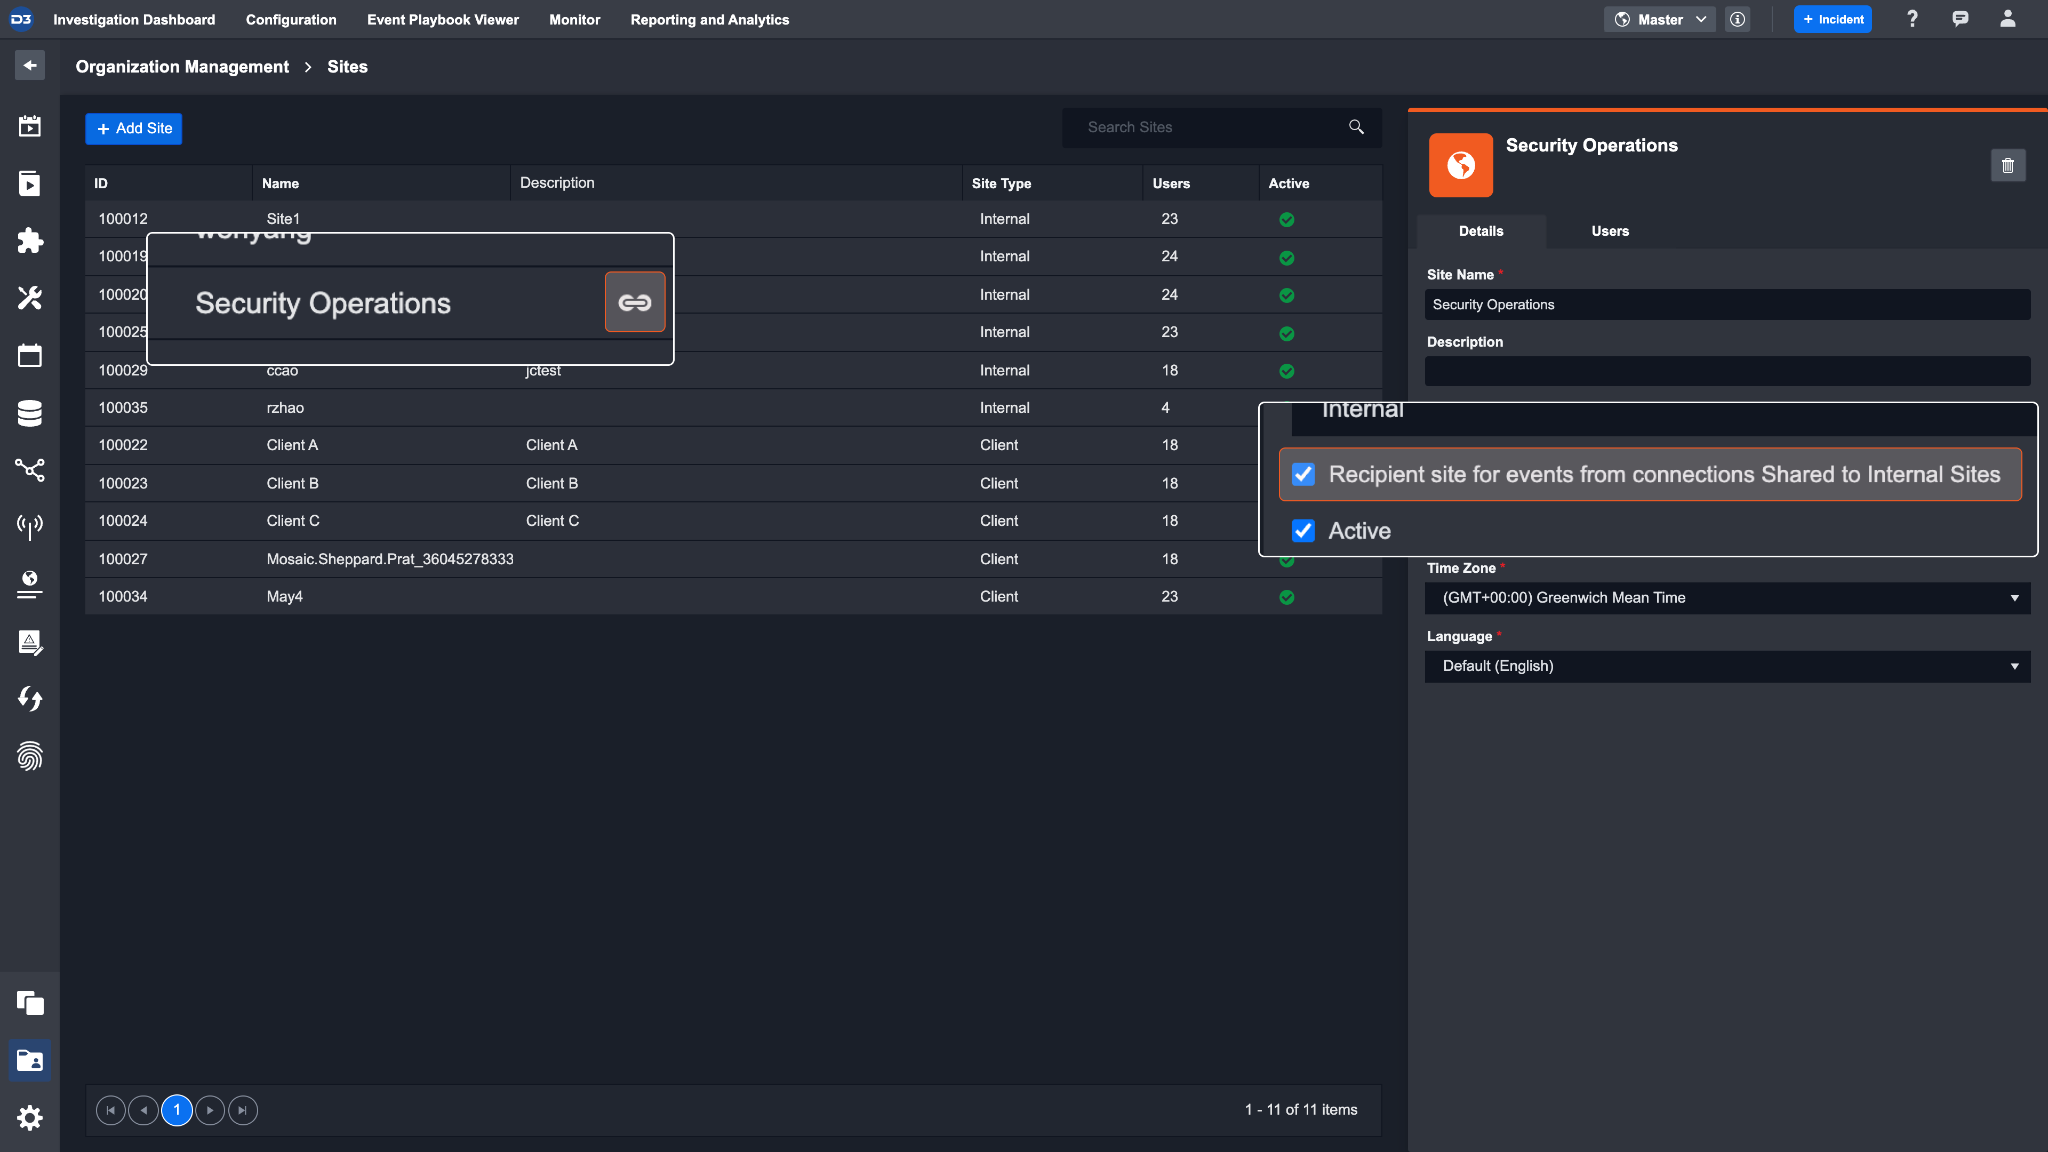
When you use a connection that is Shared to internal sites to fetch an event, you will need to enable the Recipient site for events from connections Shared to Internal Sites checkbox in one of your sites. This is to specify which site the fetched event should belong in. In simpler terms, this checkbox allows you to choose a specific site to capture all the events that come through a connection that is shared to internal sites. The site with this checkbox enabled is marked with the link icon.
Only one site can have this checkbox enabled at any given time.
Managing Site Membership
Sites play an important role in regulating access to information in larger deployments of the SOAR platform. Each User must be a member of at least one Site in order to access the application. Similarly, each record (e.g. Incident Report) is permanently associated with the active Site upon creation.
Select a Site from the Sites List.
Navigate to the Users in the Details Pane.
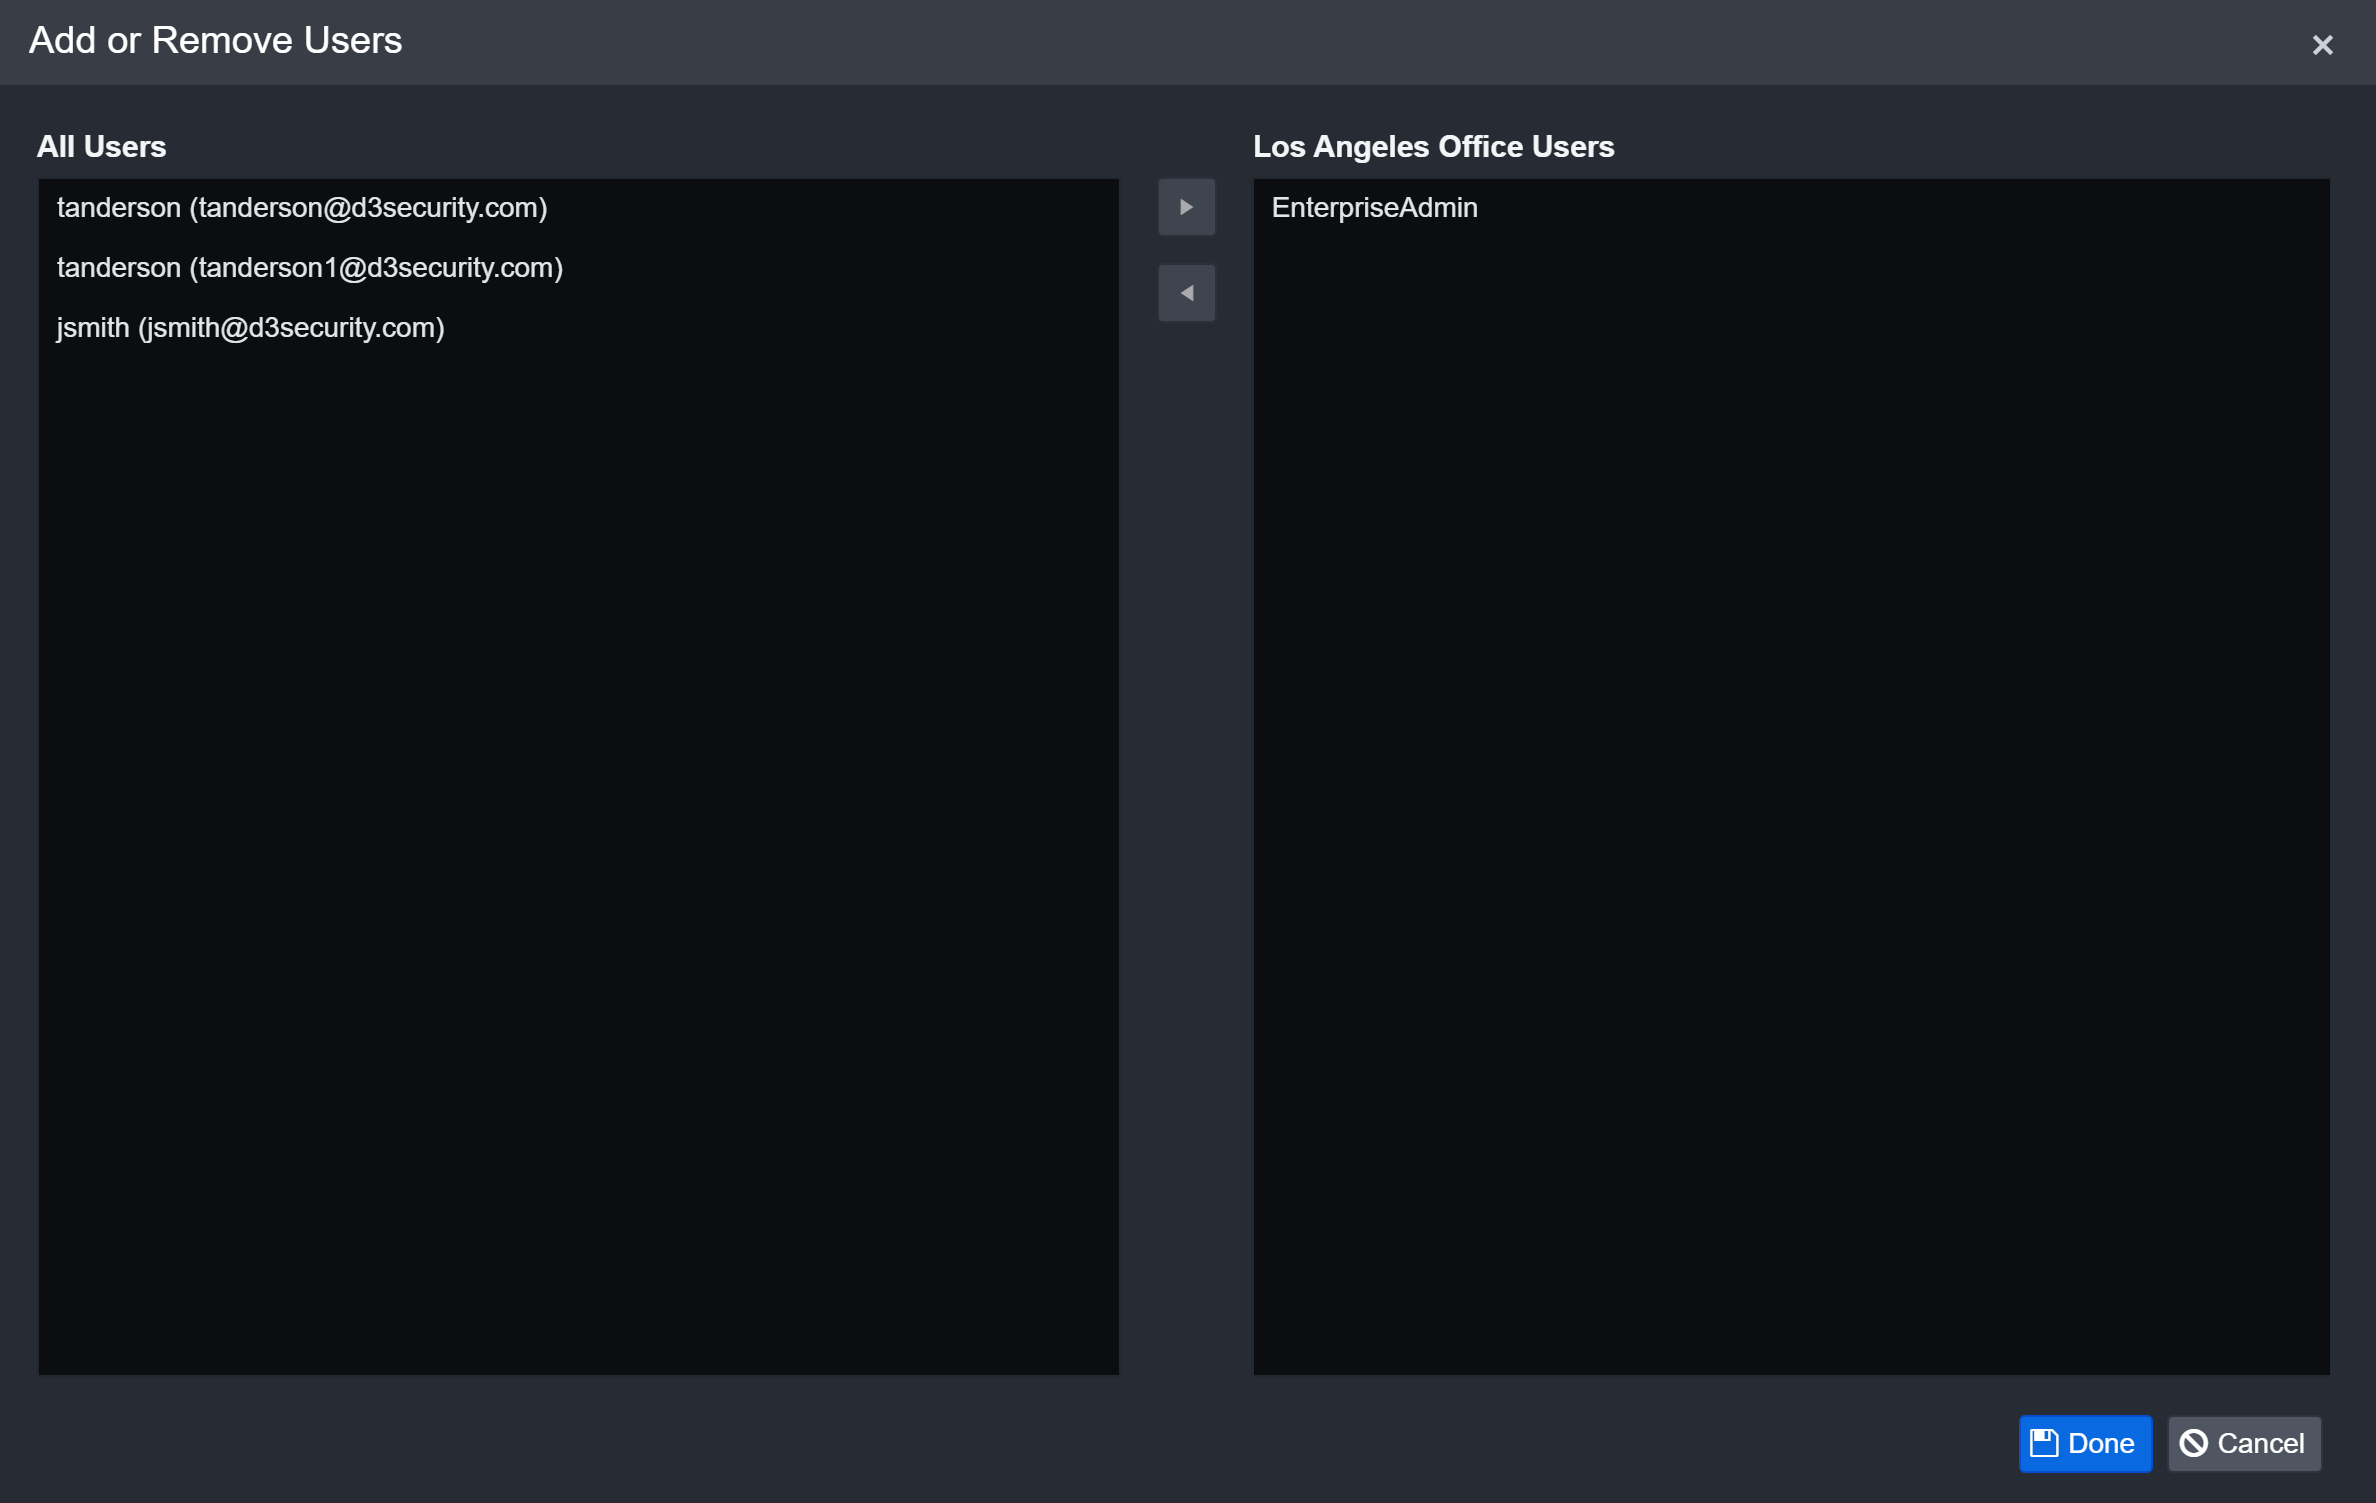
Click on the Add or Remove Users button. The Add or Remove Users modal will appear.
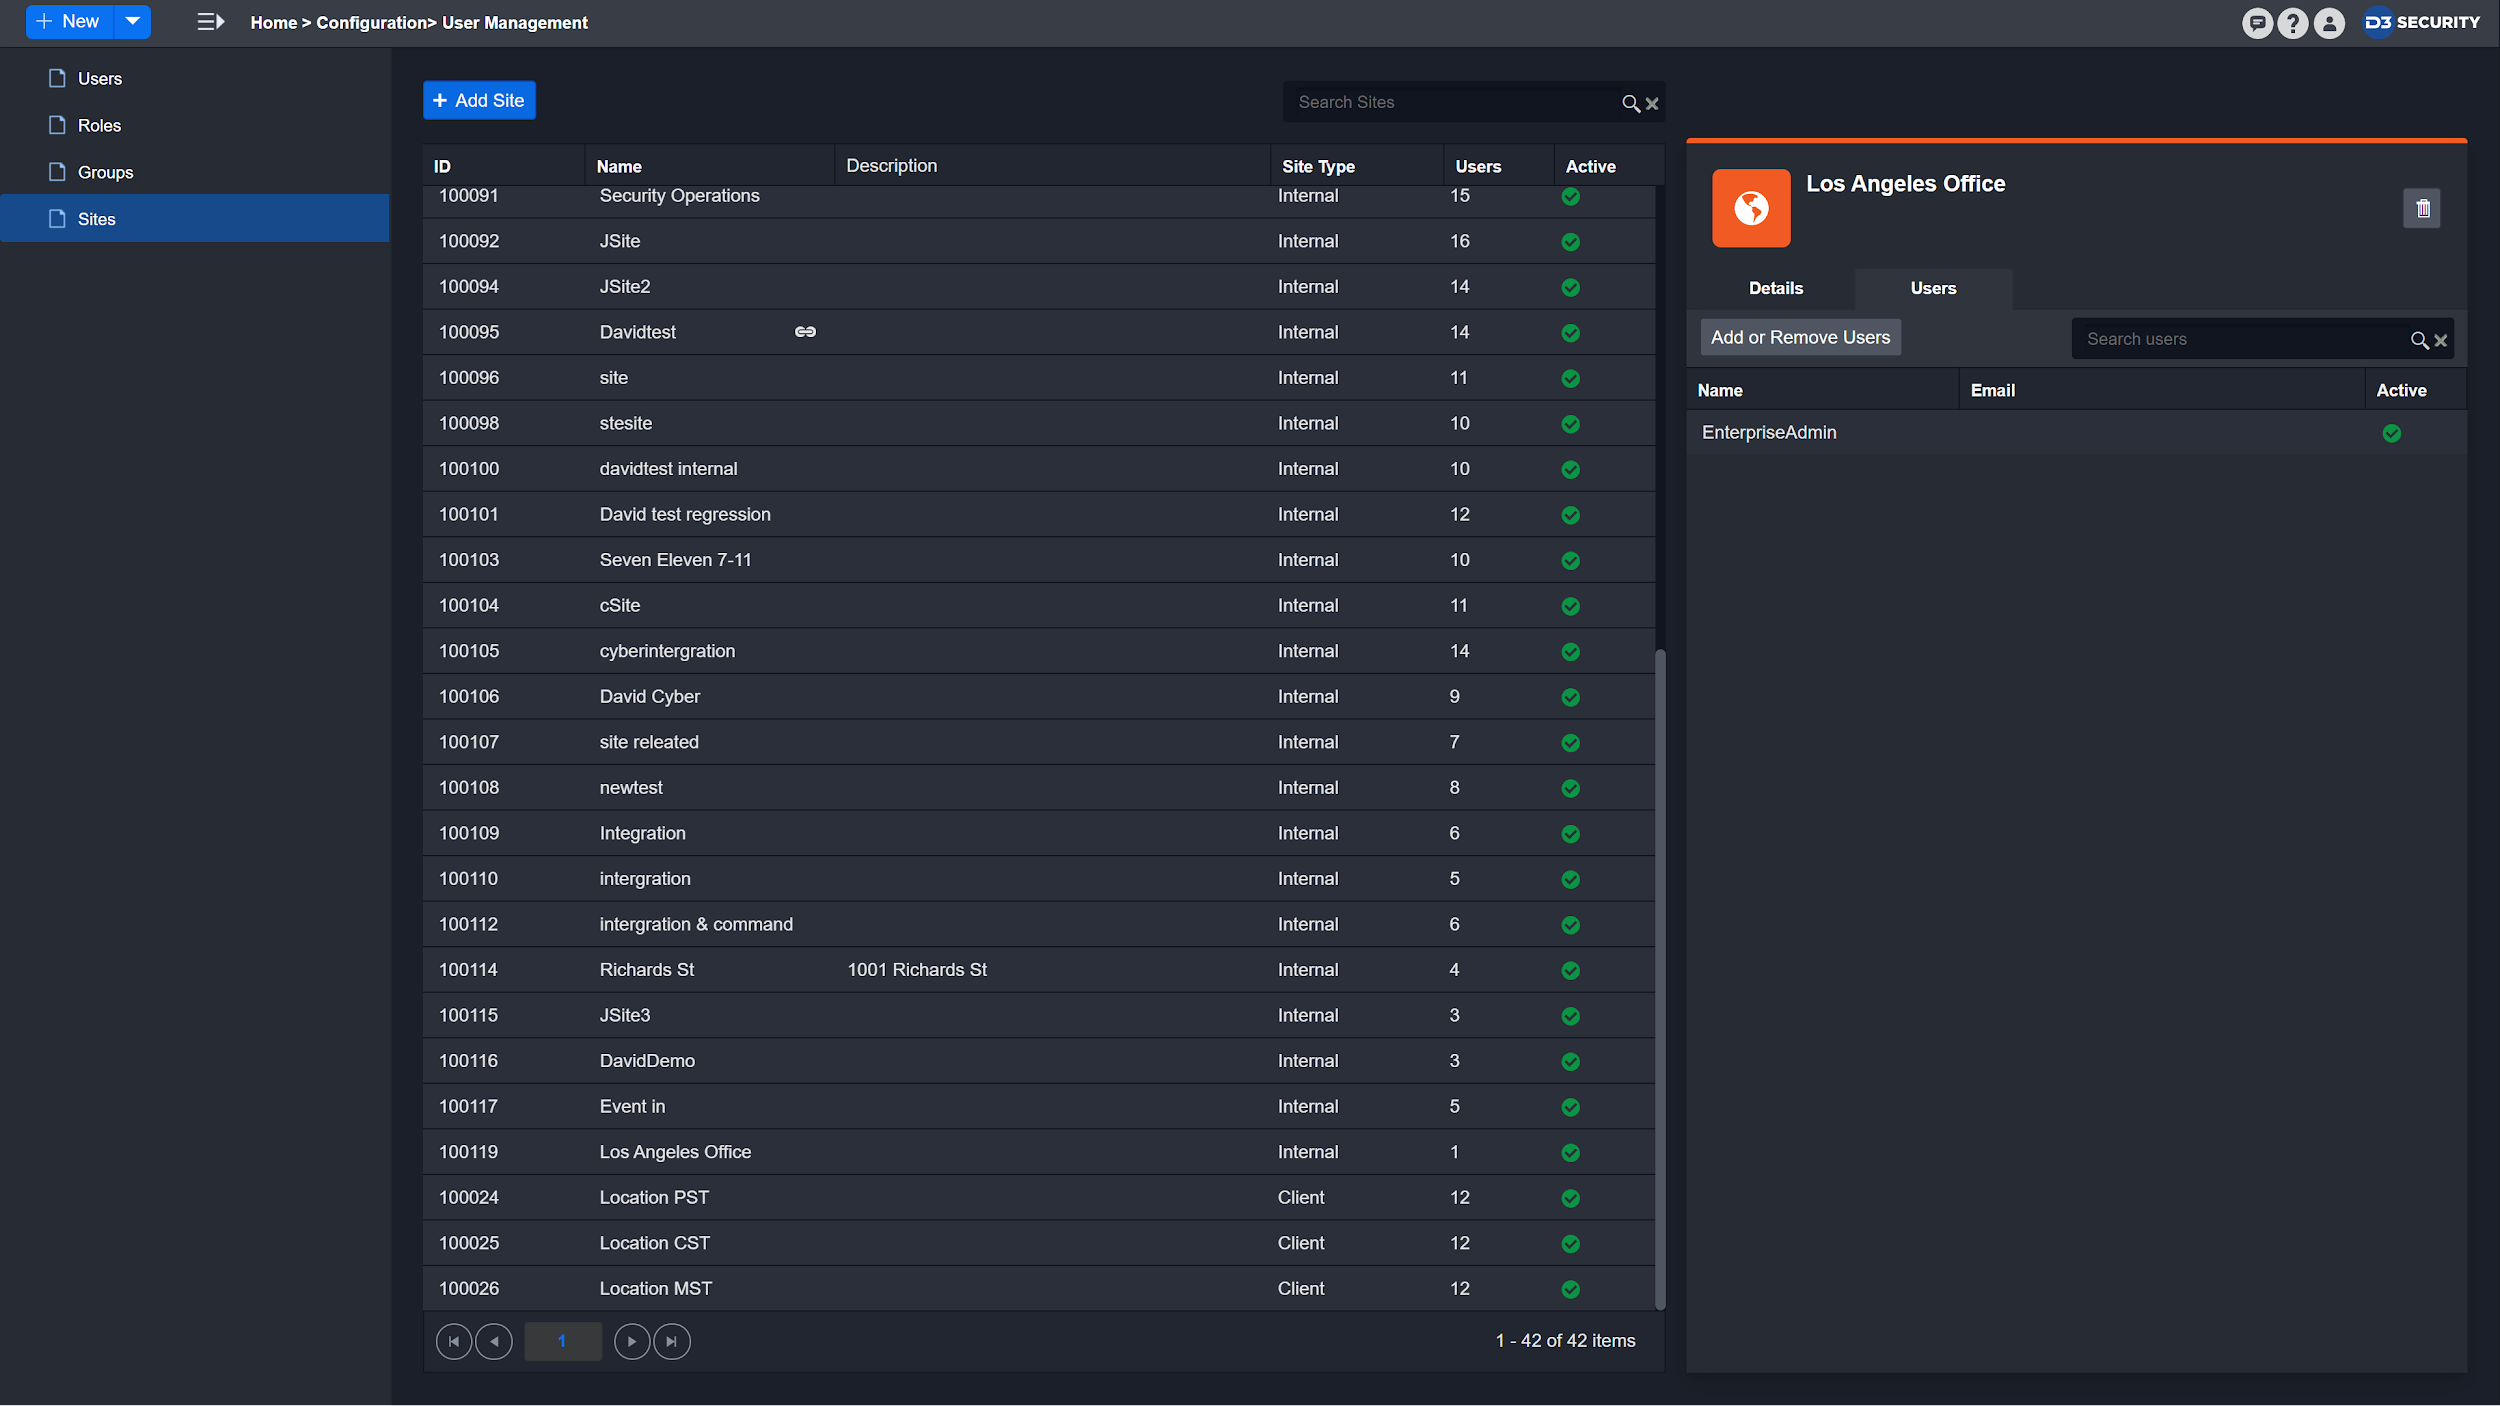
Use the centre right and left arrow buttons to add or remove Users between the list boxes. Hold the CTRL key to select multiple Users from either list.
The left panel shows all the Users who aren't assigned to the selected Site.
The right panel shows Users who are currently assigned to the selected Site.
Click Done to confirm Users.