Last Updated: October 26, 2026
A stage task begins a phase where all tasks up to the next stage or leaf node form a unit of investigation—updated in the incident workspace. It marks transition points, reducing the need to sift through multiple tasks when tracing playbook execution or editing workflow.

Stage tasks in branching workflows (2.1–2.4 in the diagram below) ensure clear organization and structured tracking, reducing task overlook and enabling efficient playbook management and communication across teams.
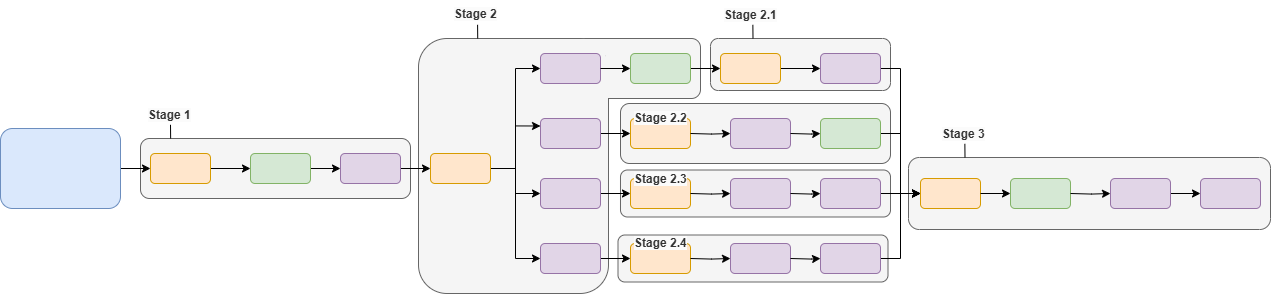
Example - Tracking the Investigation Stage
Objective
Tracking the execution of a live multi-stage playbook in the incident workspace as stages progress and complete.
Tip: you can also generate this playbook with AI. See Generating with AI.
-
Build the following playbook.

READER NOTE *
-
Ensure all stage tasks are configured to auto-run (Auto Run selected).
-
Configure the first data formatter task as non-auto-run (Auto Run cleared).
-
Configure the second data formatter task to auto-run (Auto Run selected).
-
Select Go Live.
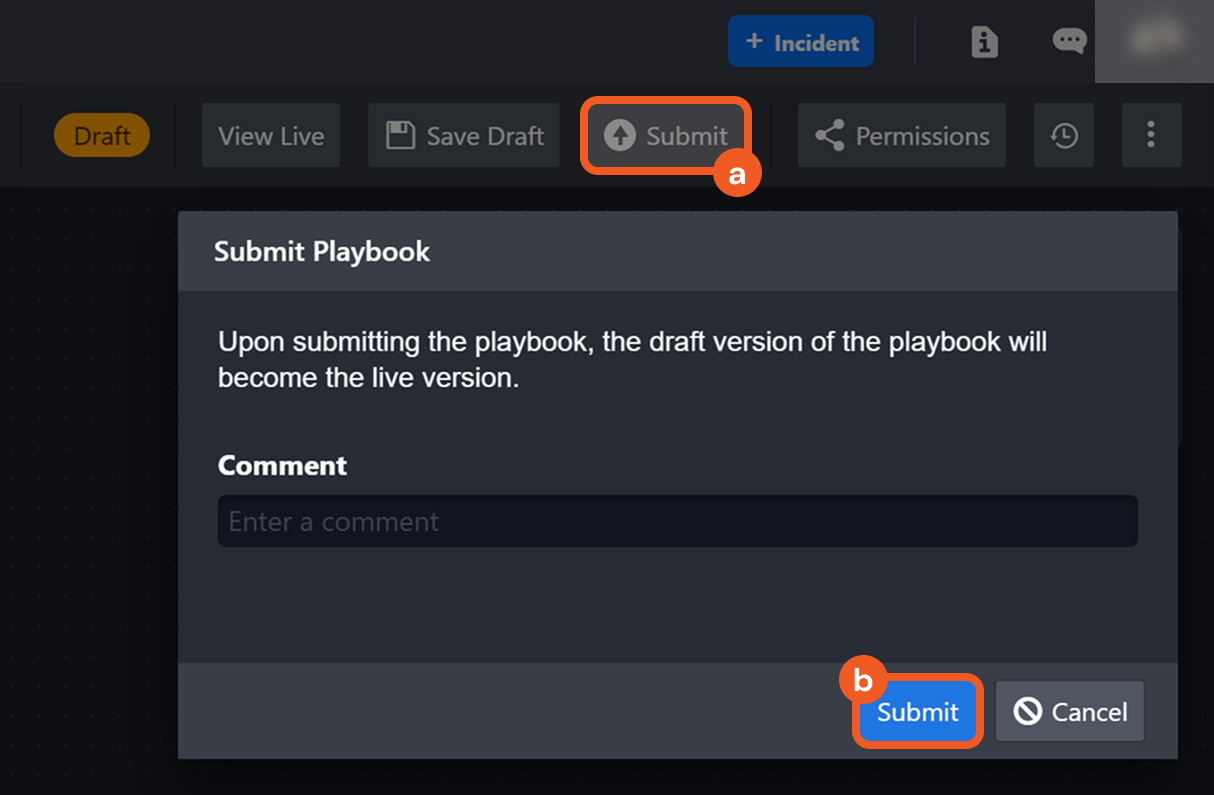
-
In the Manage Site Access and Go Live window, move the relevant sites to Sites with Access, then select Confirm & Go Live.
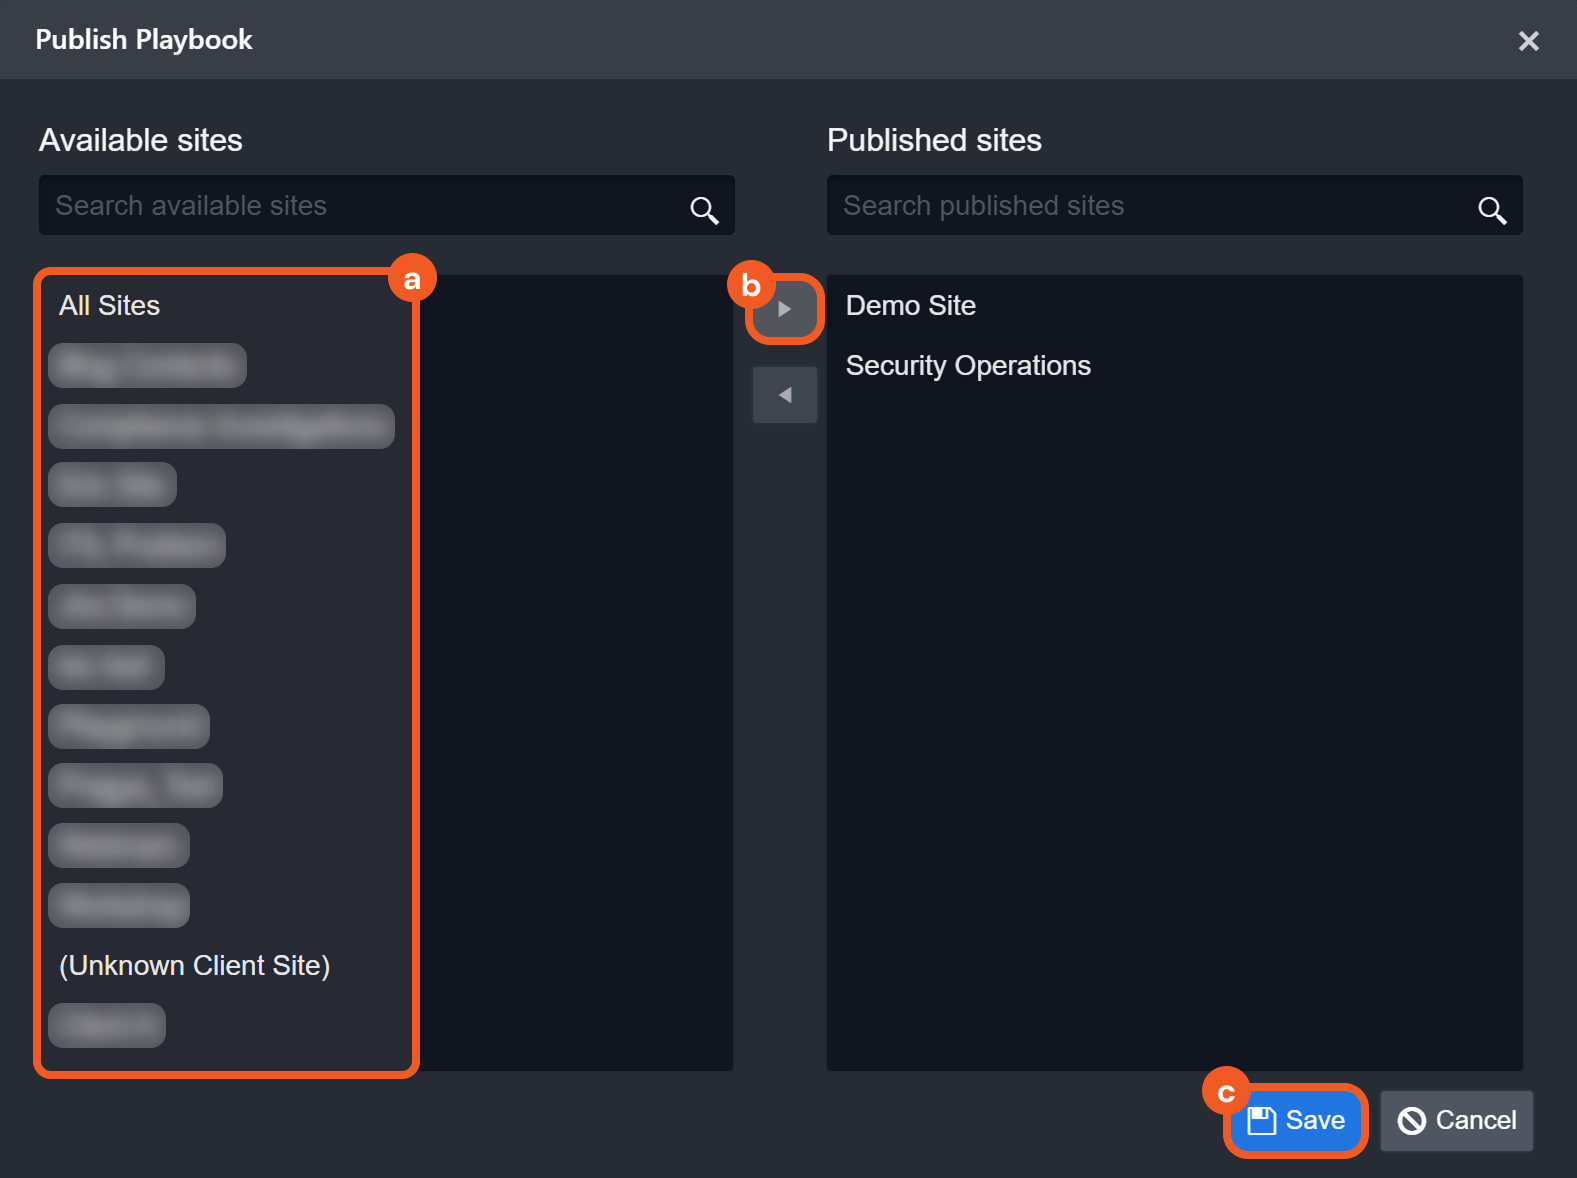
-
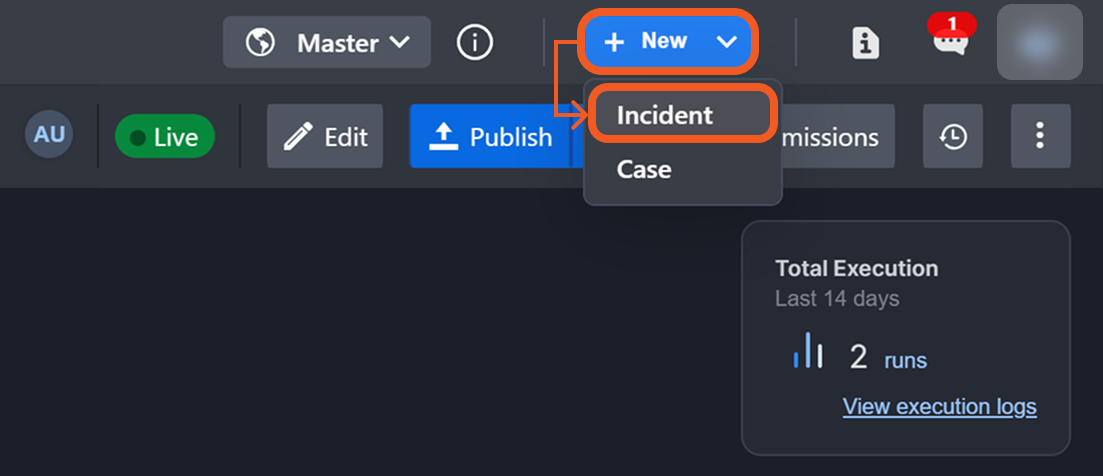
Select New Incident in the header to create an incident.
-
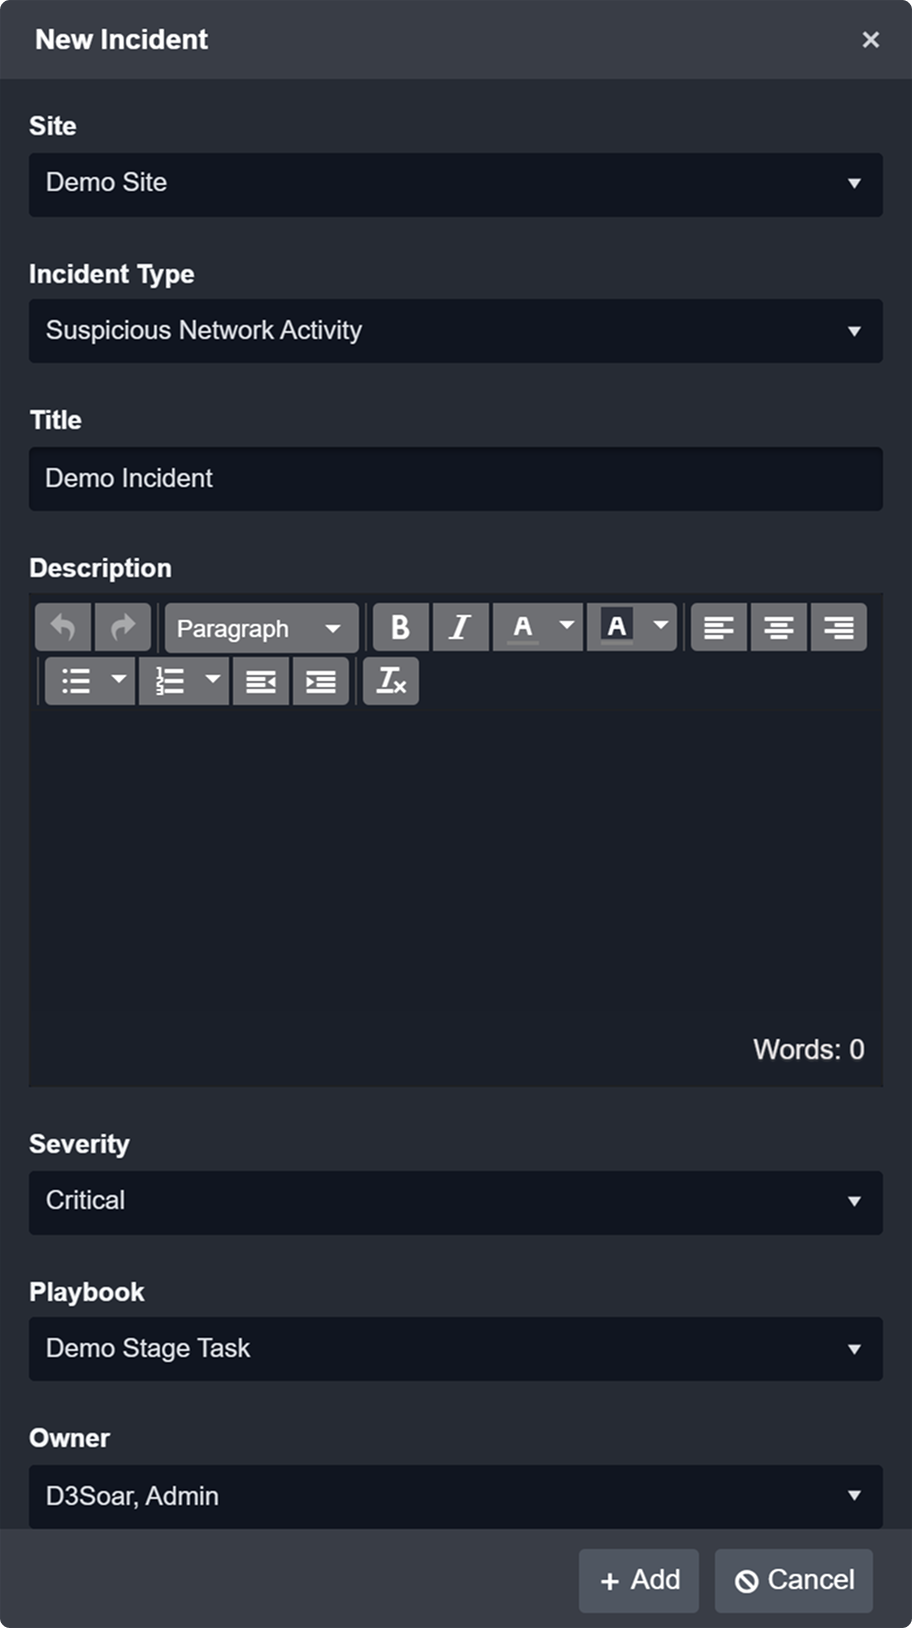
In the New Incident window, choose the live playbook in Playbook, then select + Add.
-
Navigate to the incident workspace of the manually created incident.
-
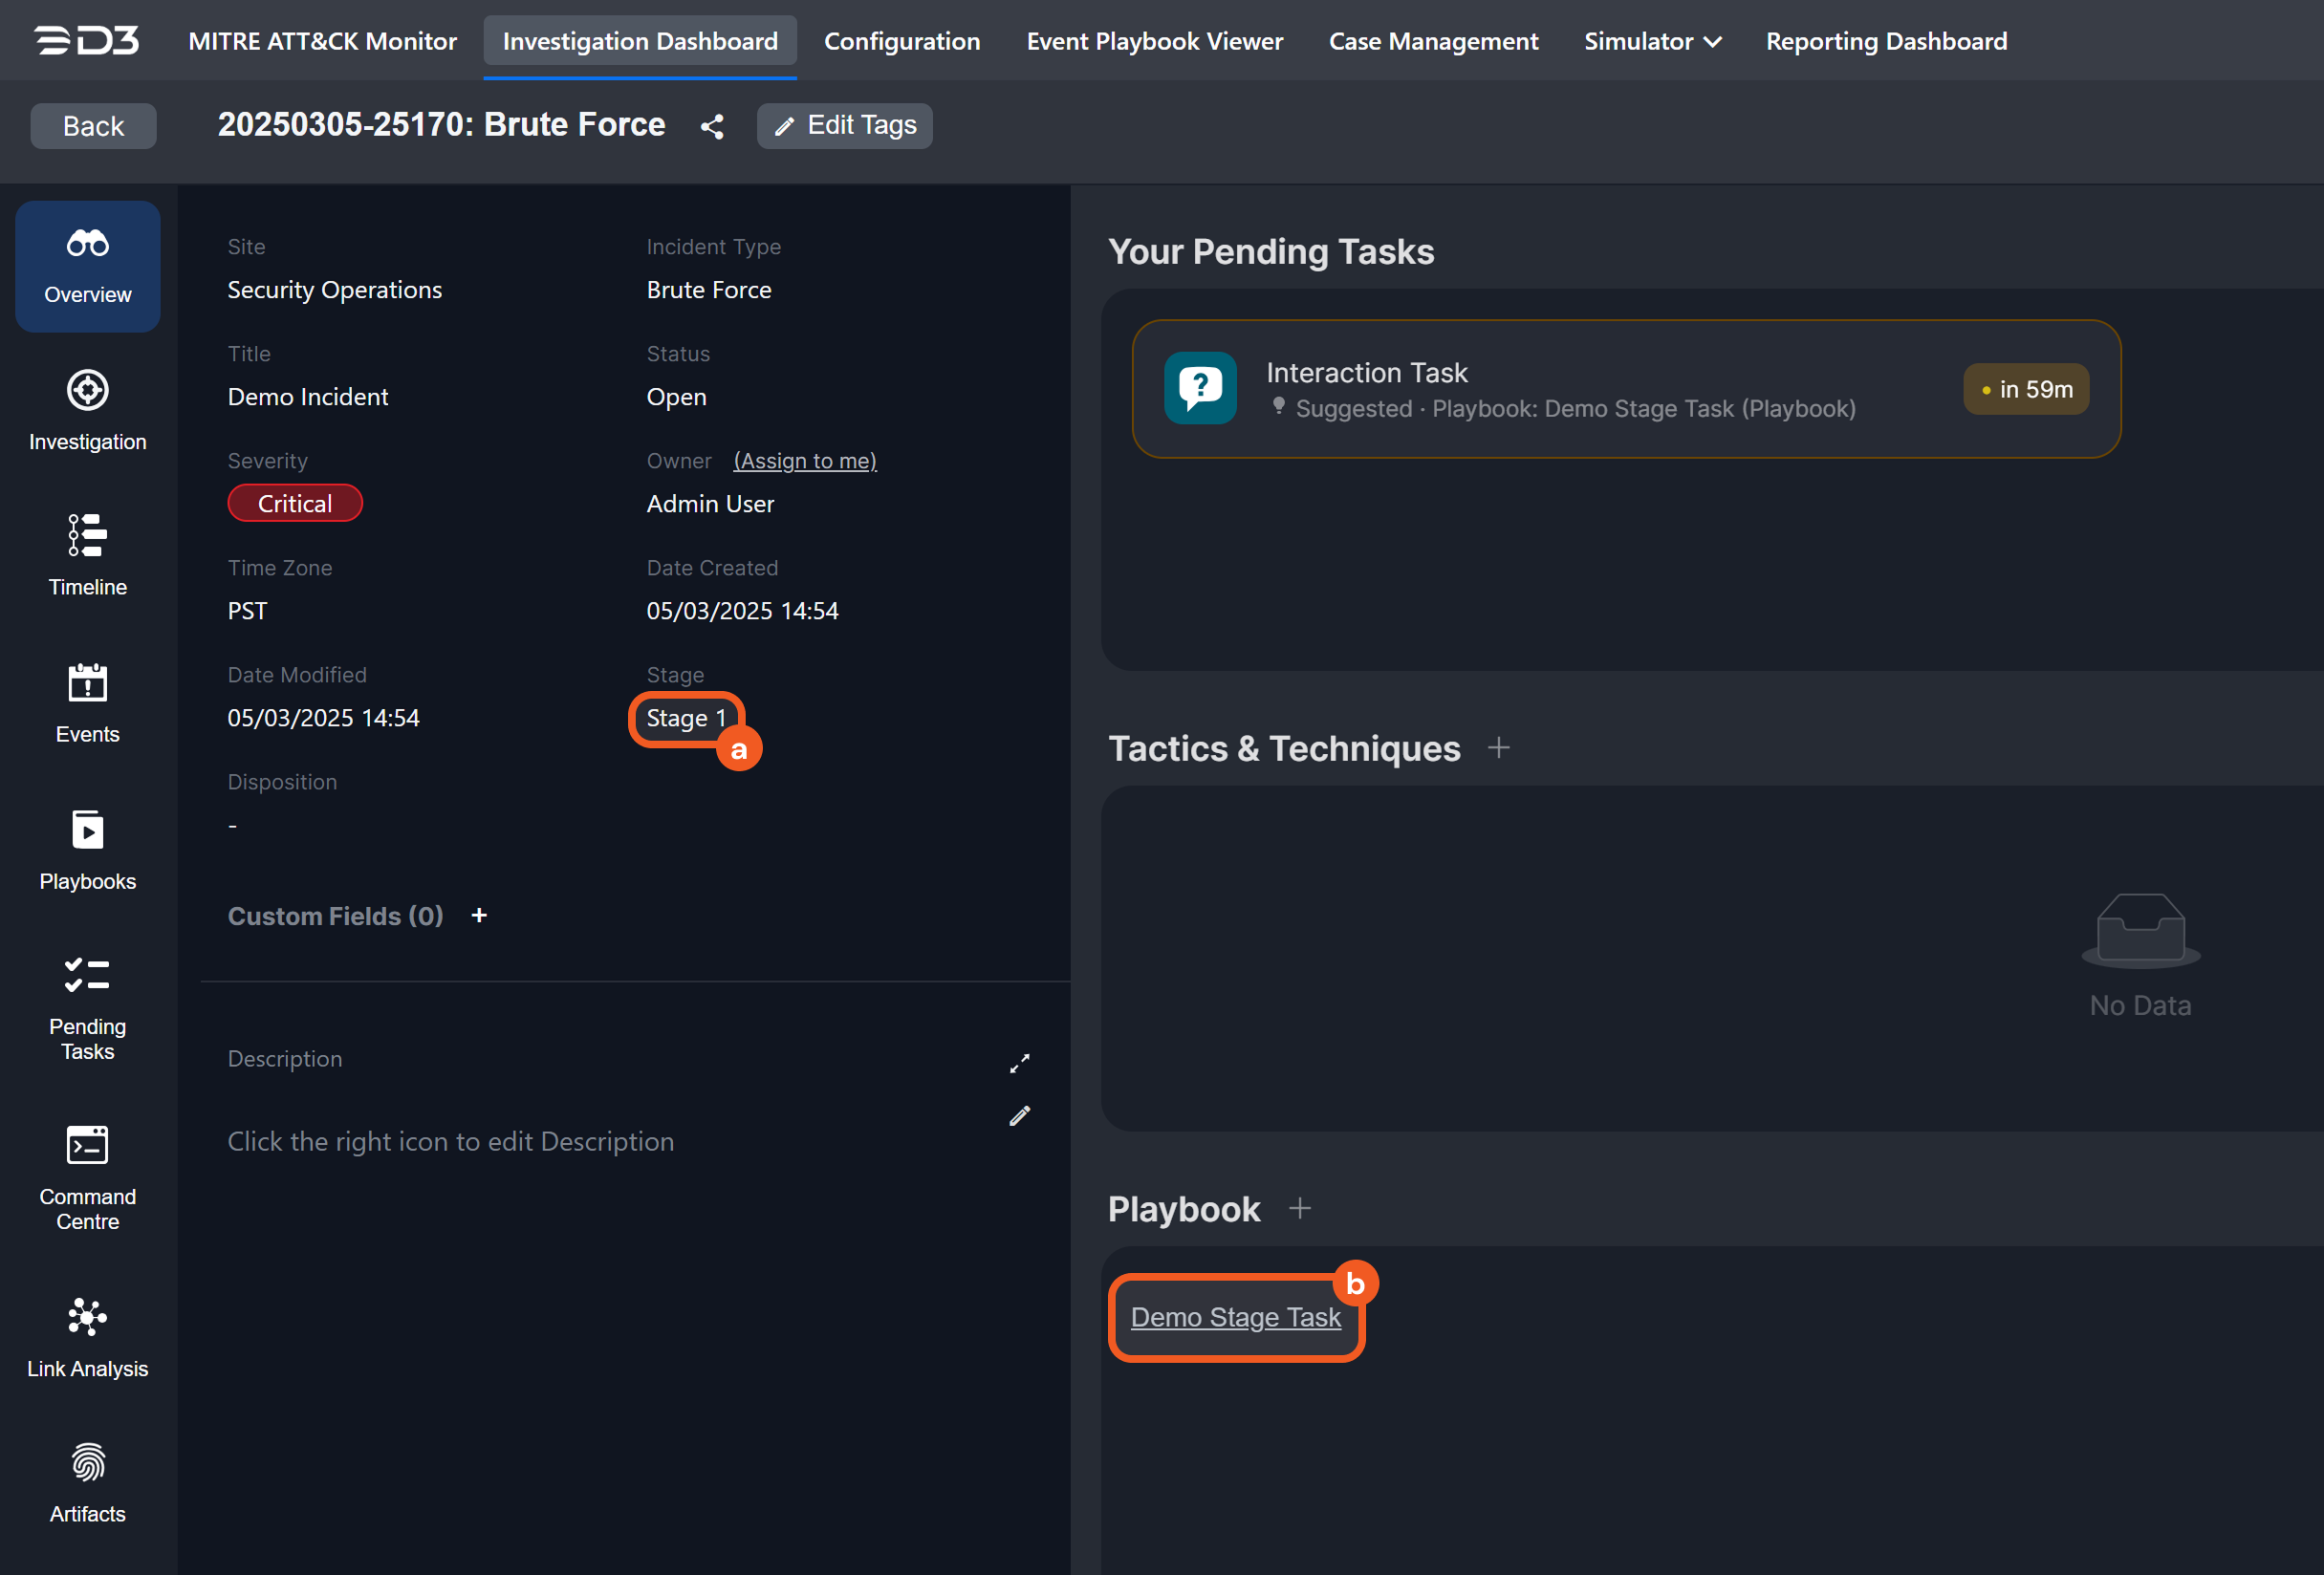
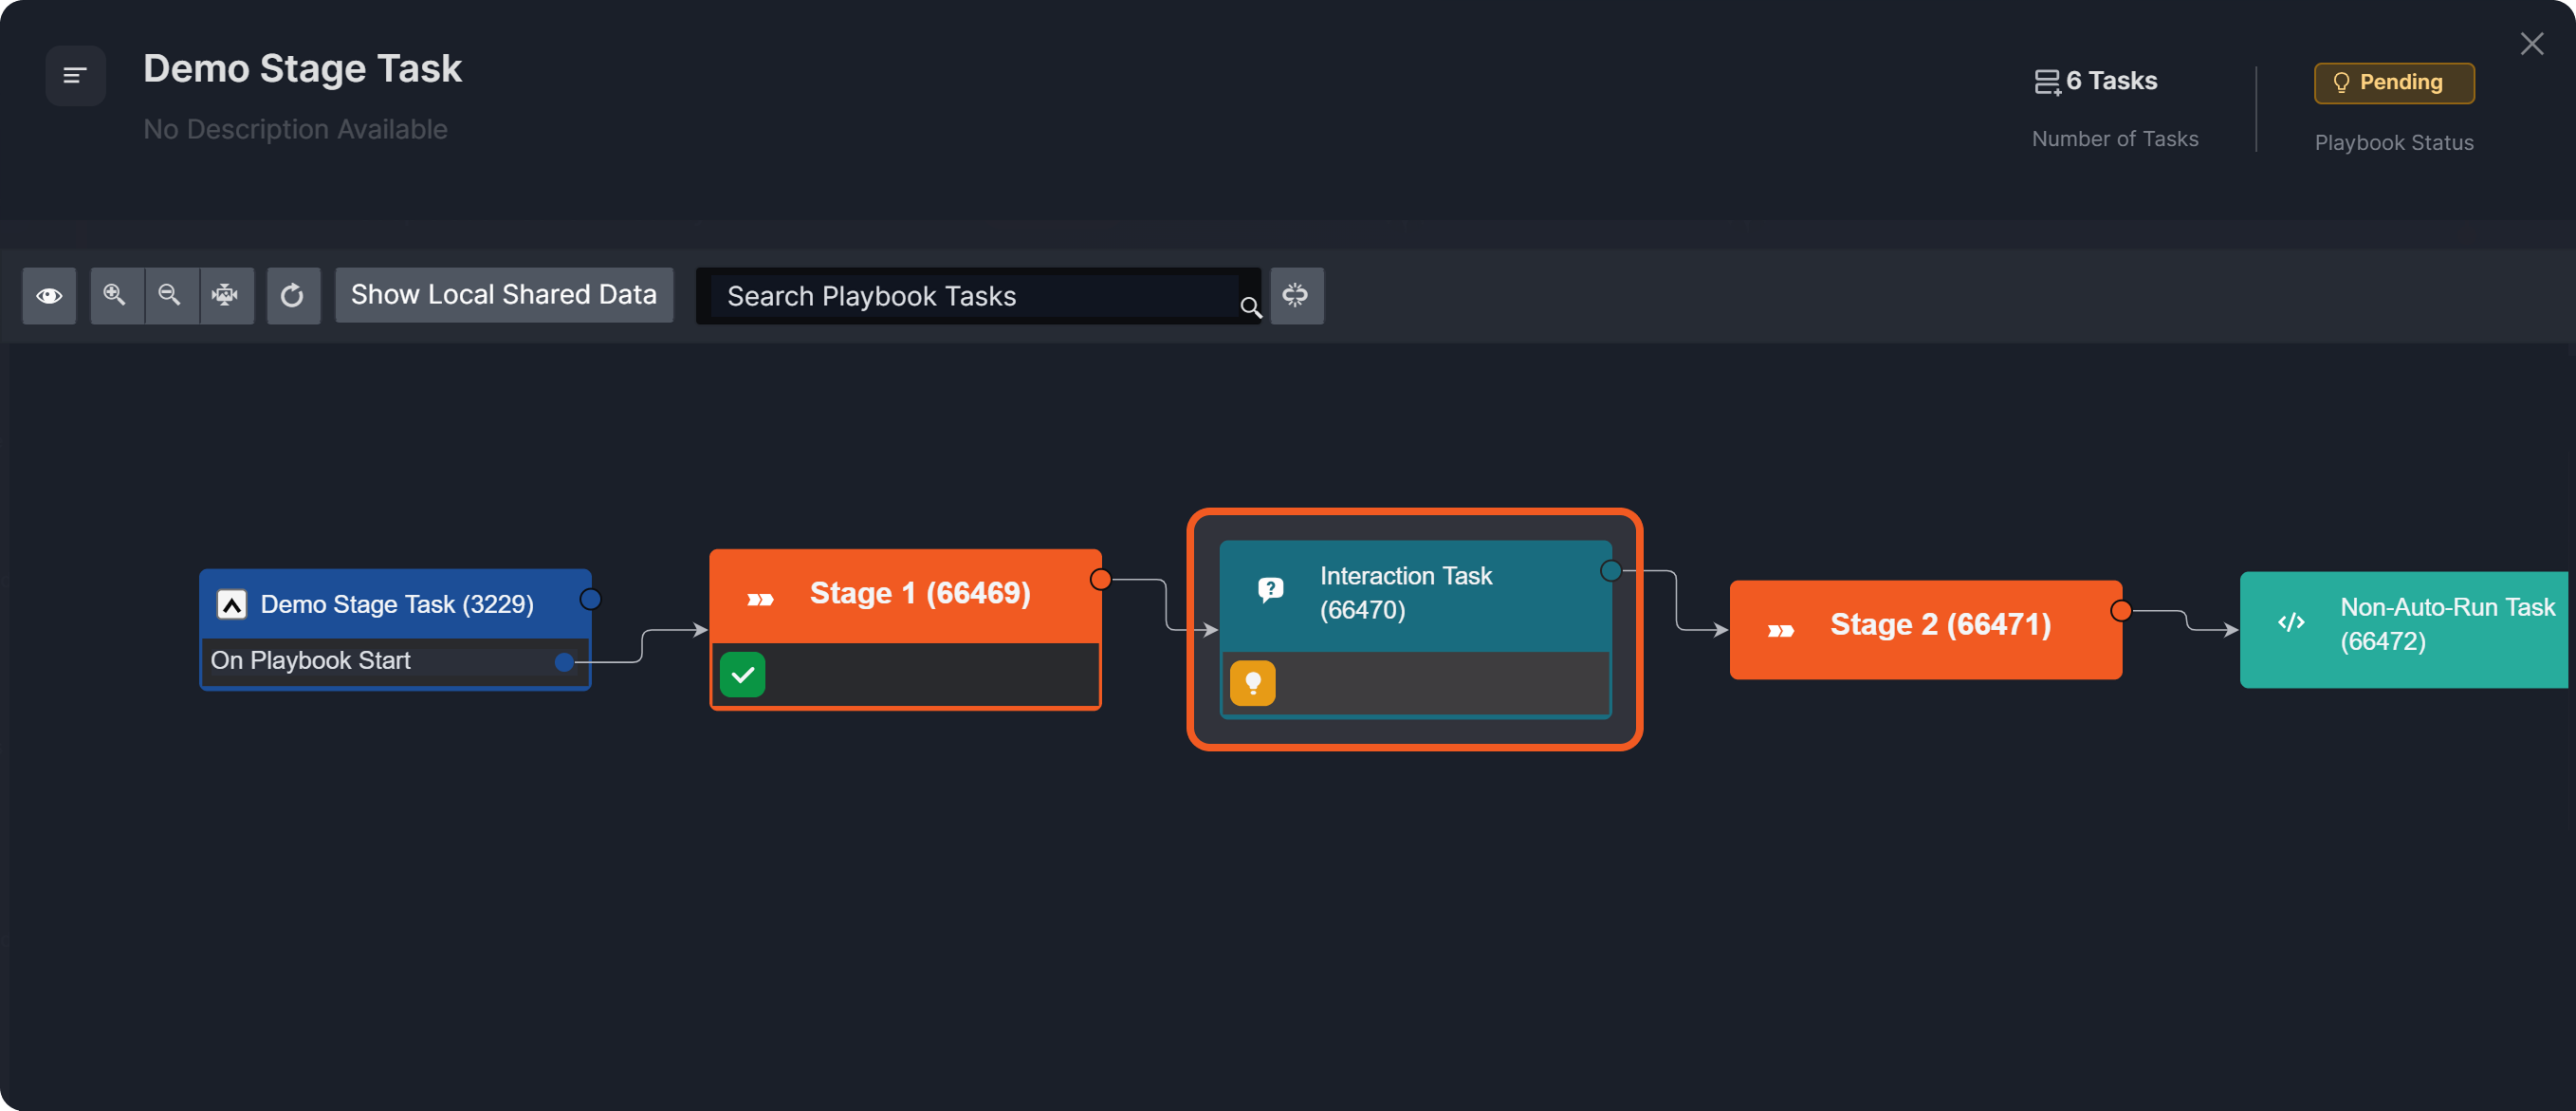
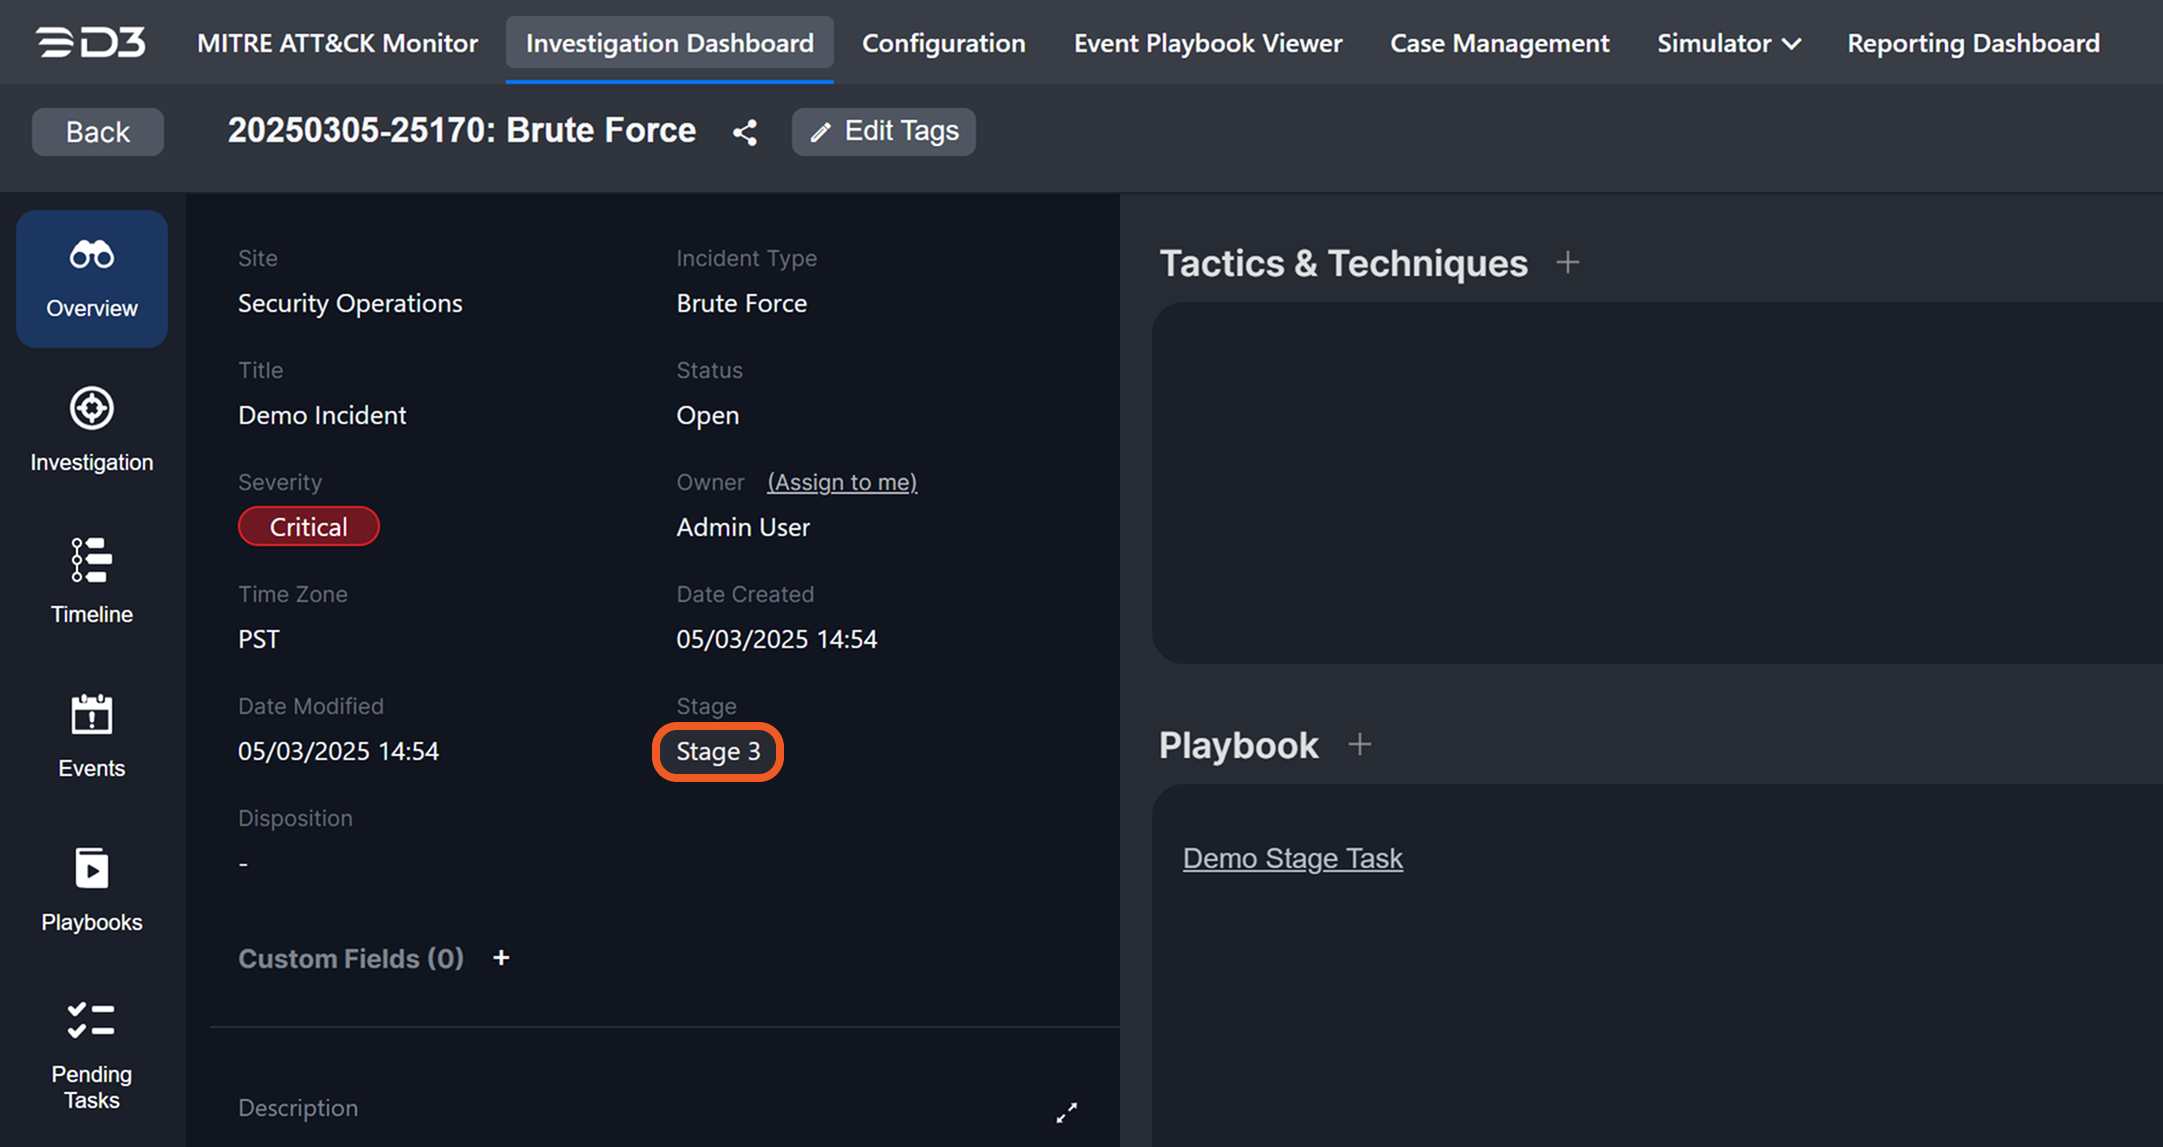
Observe the current investigation stage of this incident, then open the running playbook.
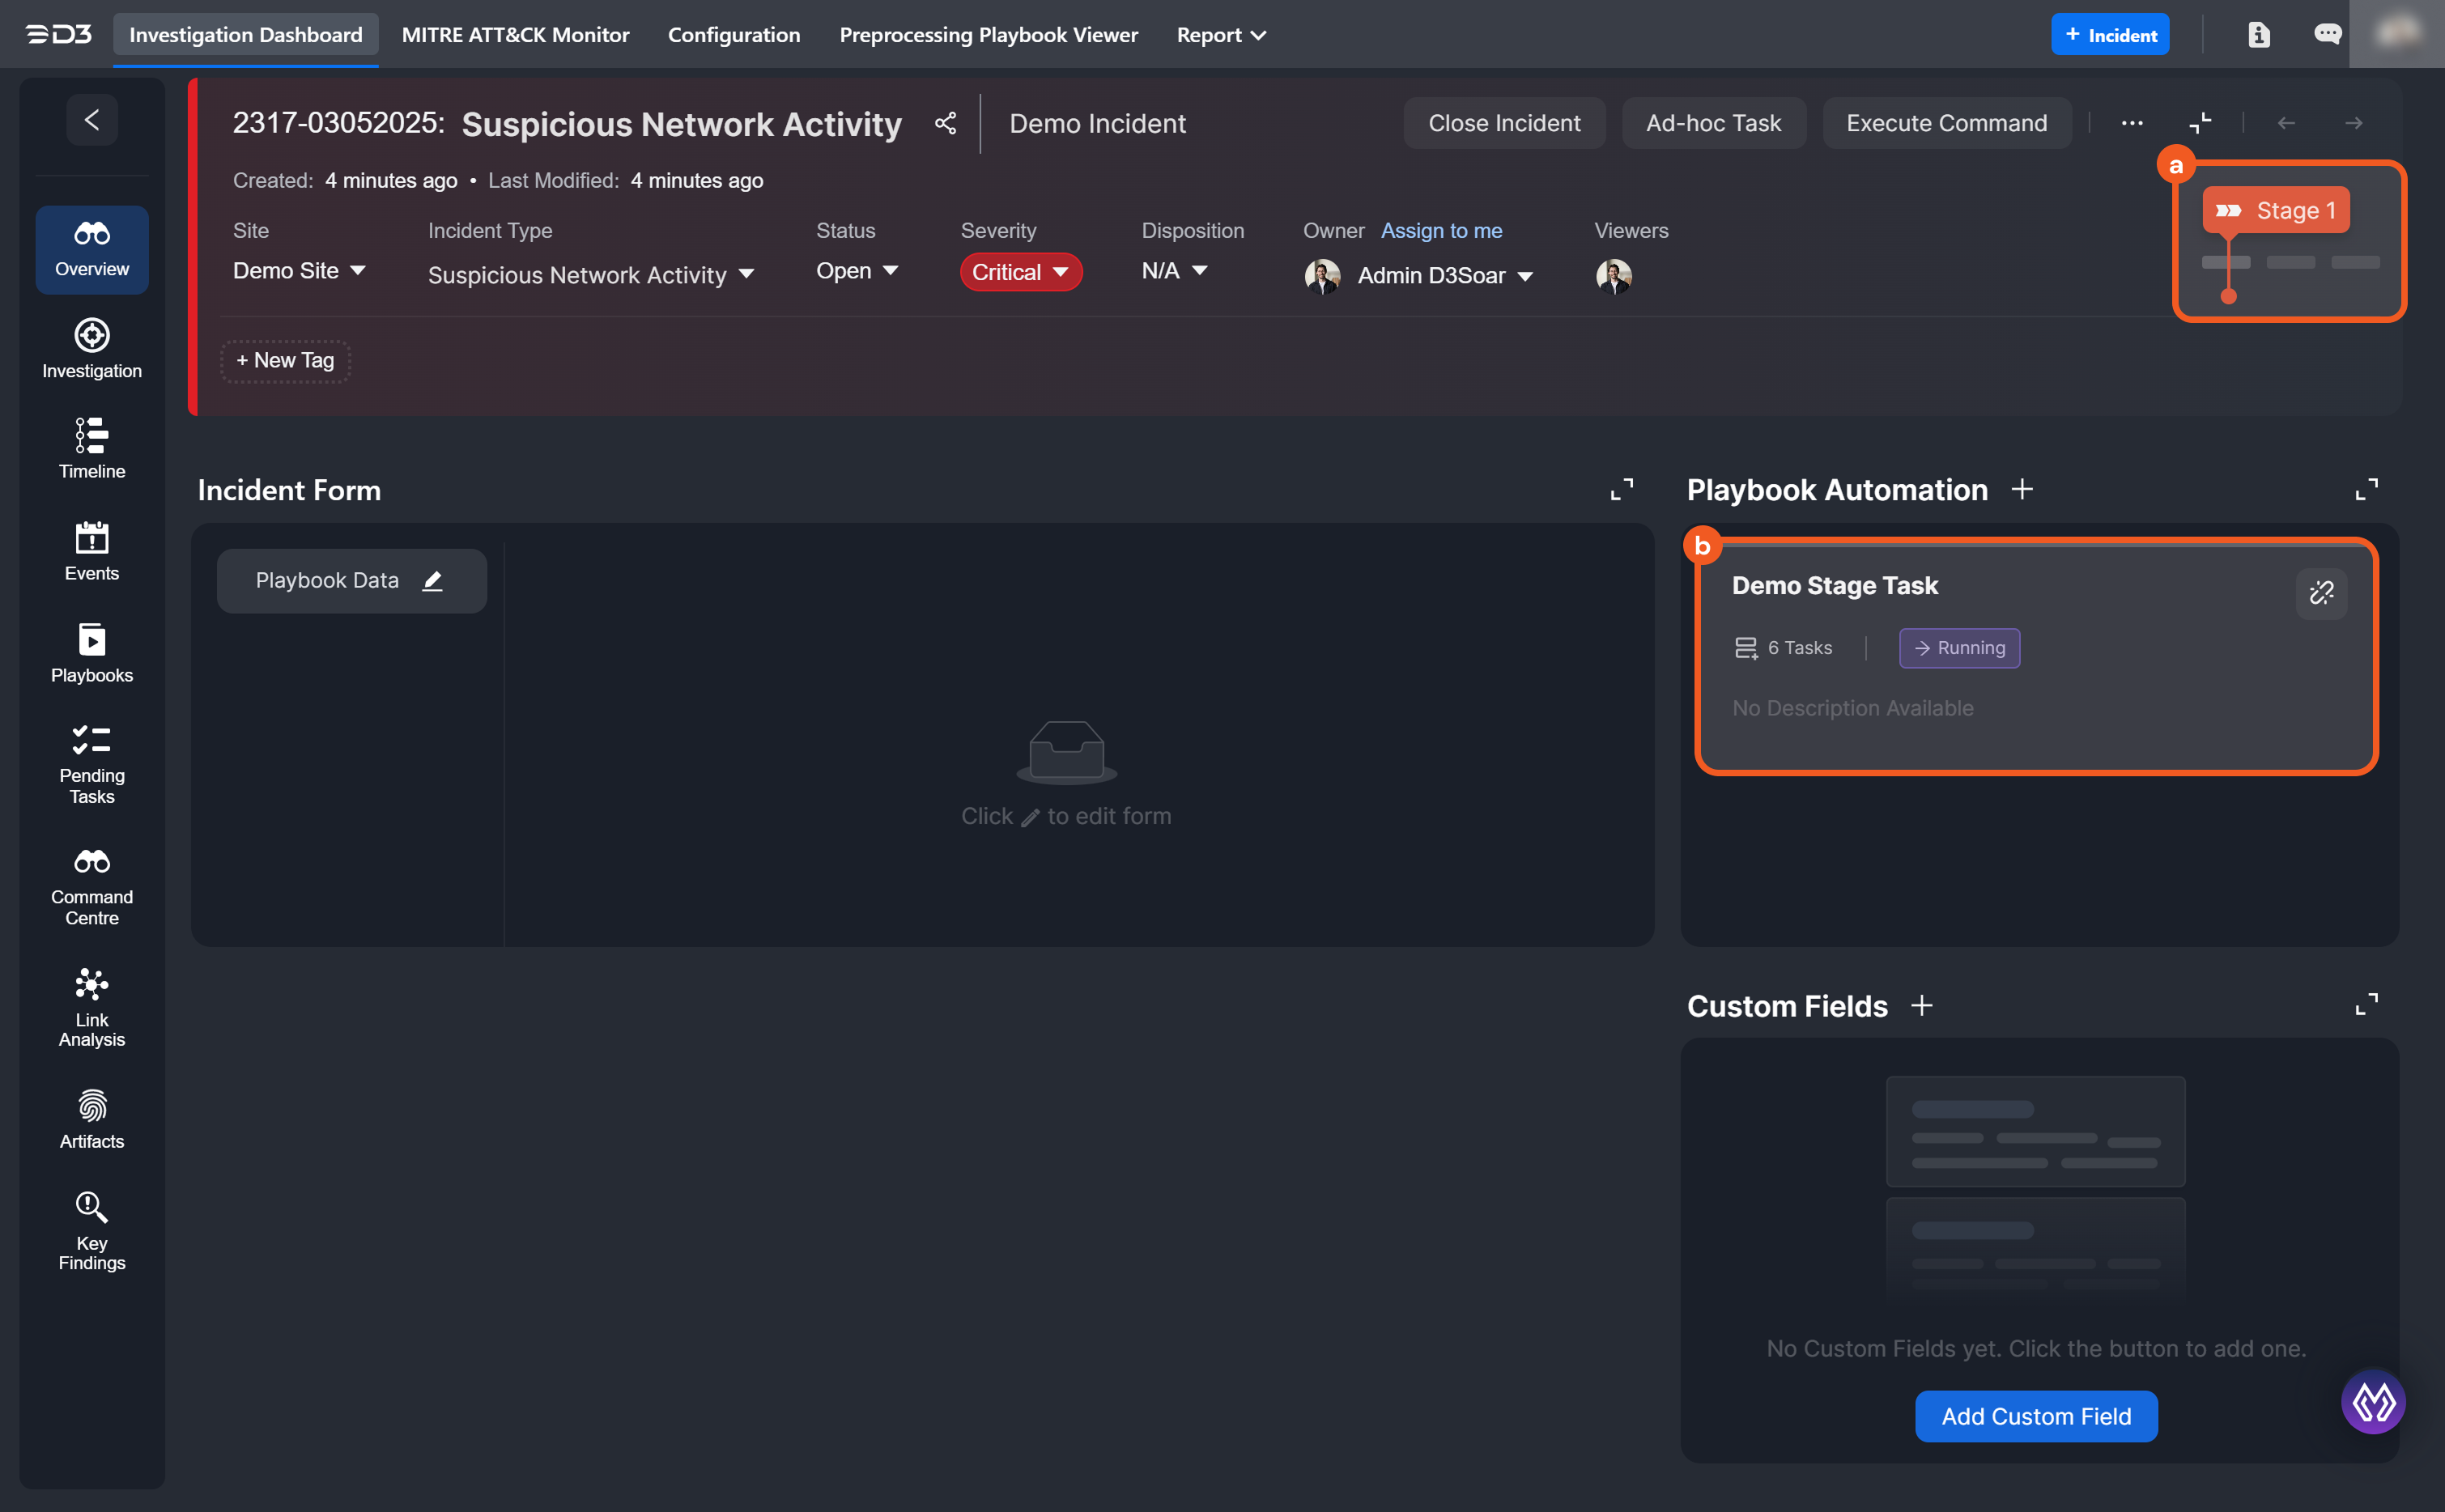
Incident Workspace UI in Earlier D3 Versions
-
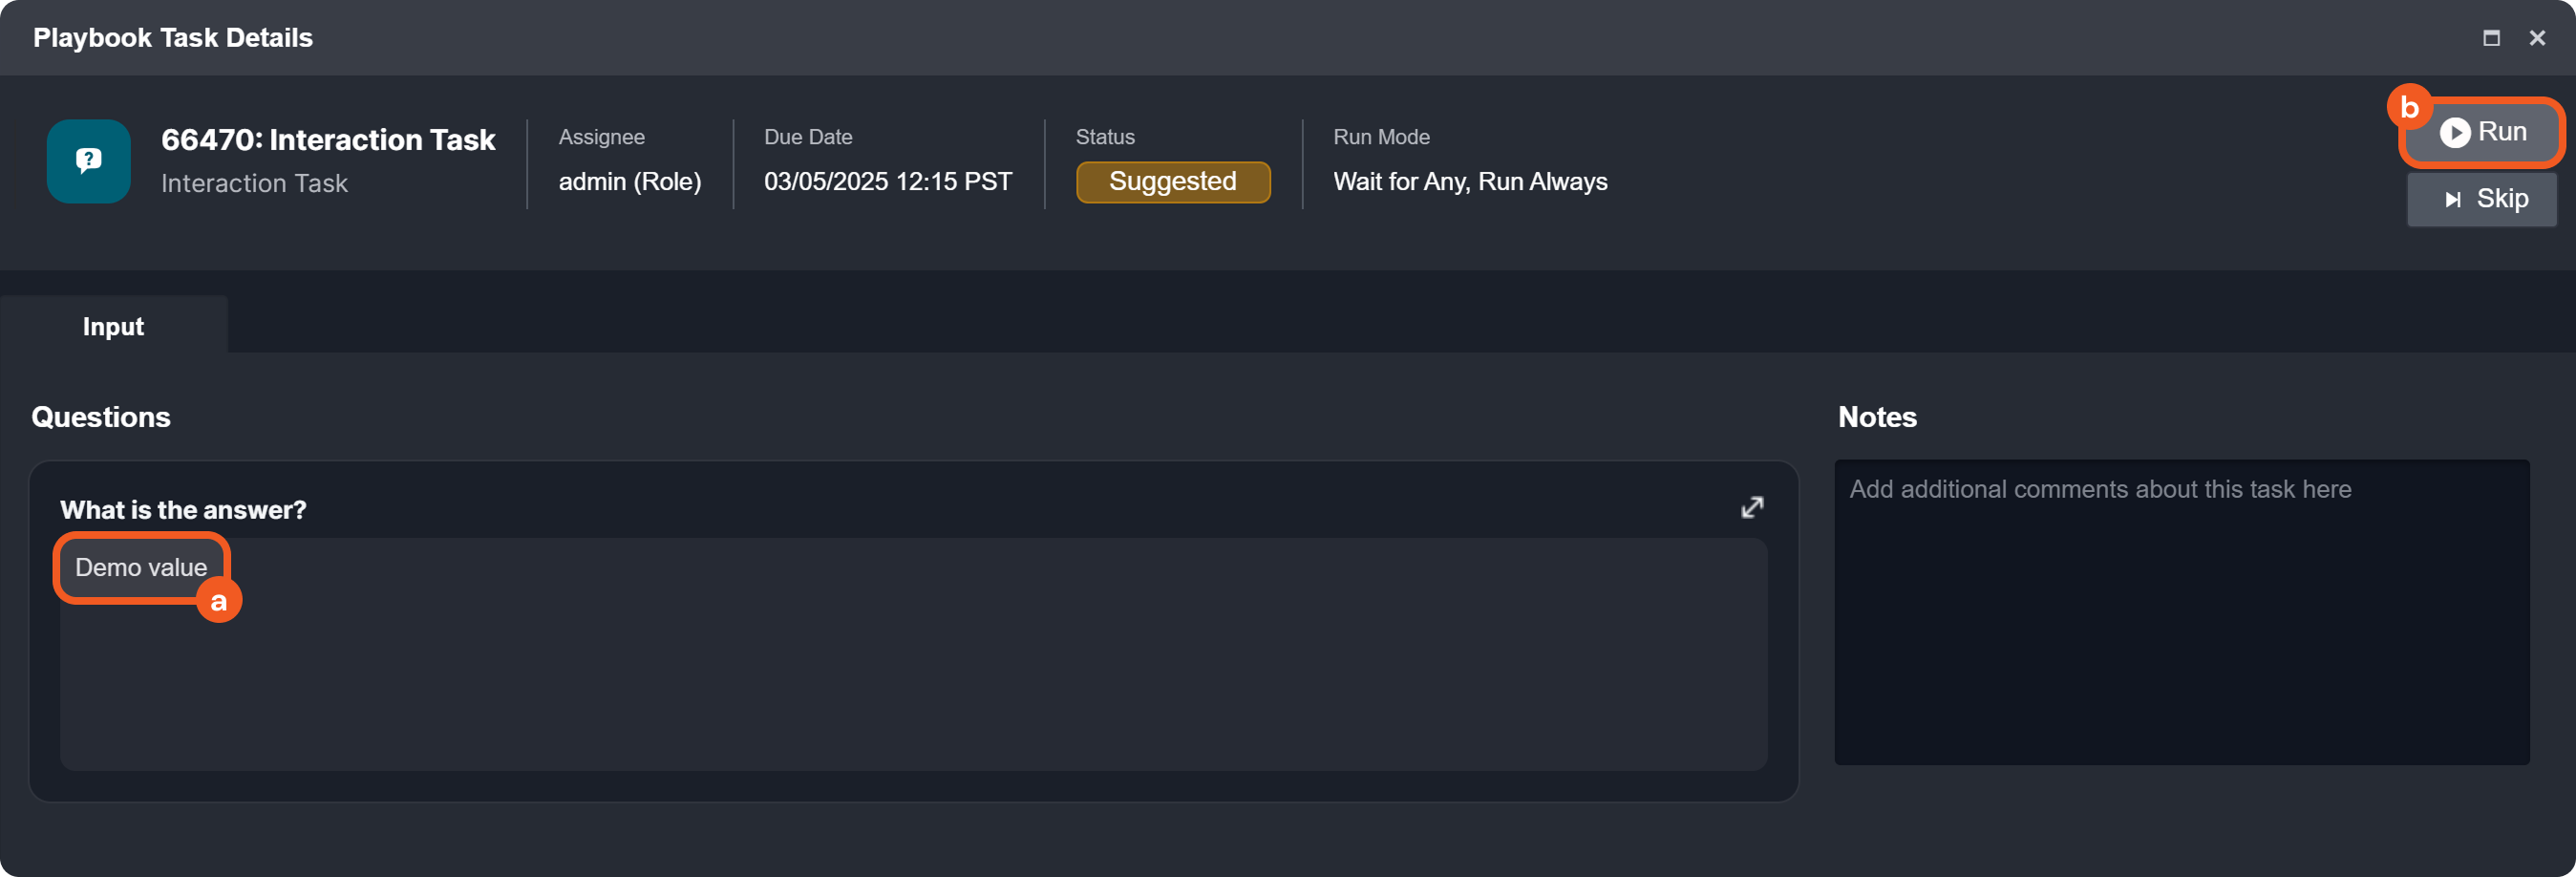
Click on the pending interaction task.
-
Provide an input, then click on the 10.2.0.134_BetaPreview_VSOC_LifeServer.aspx_div=dashboard&Open=Other&t2=08b859c192aa477b646ed6674d44ec4fc61cc62429bafabfde553a46b91faa0a (13) 1-20250305-230558.png button.
-
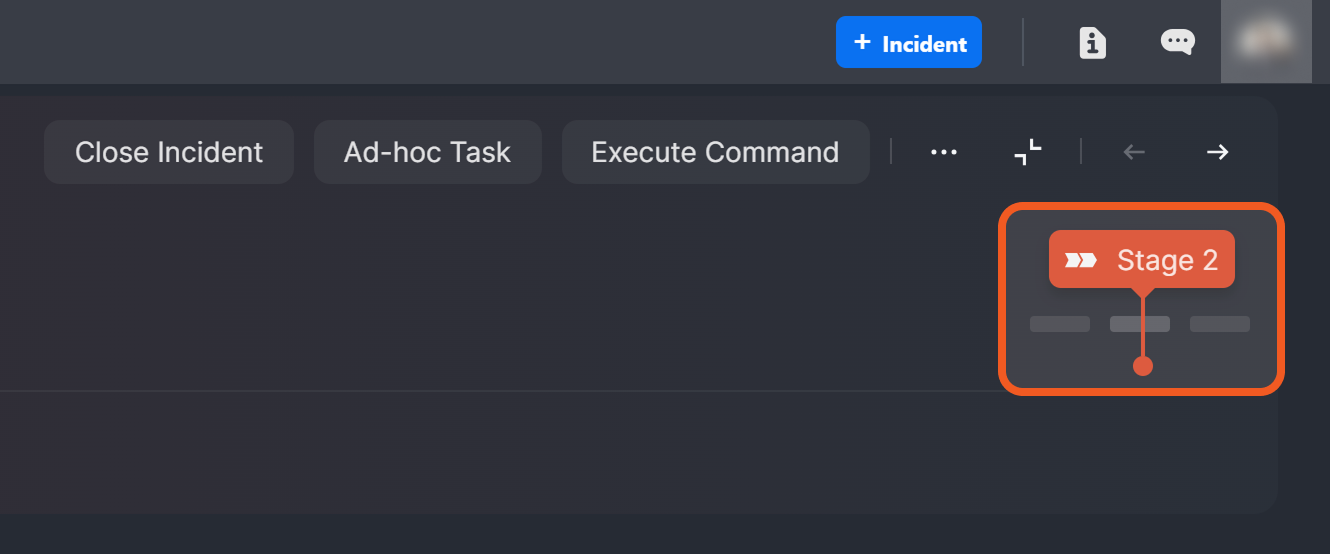
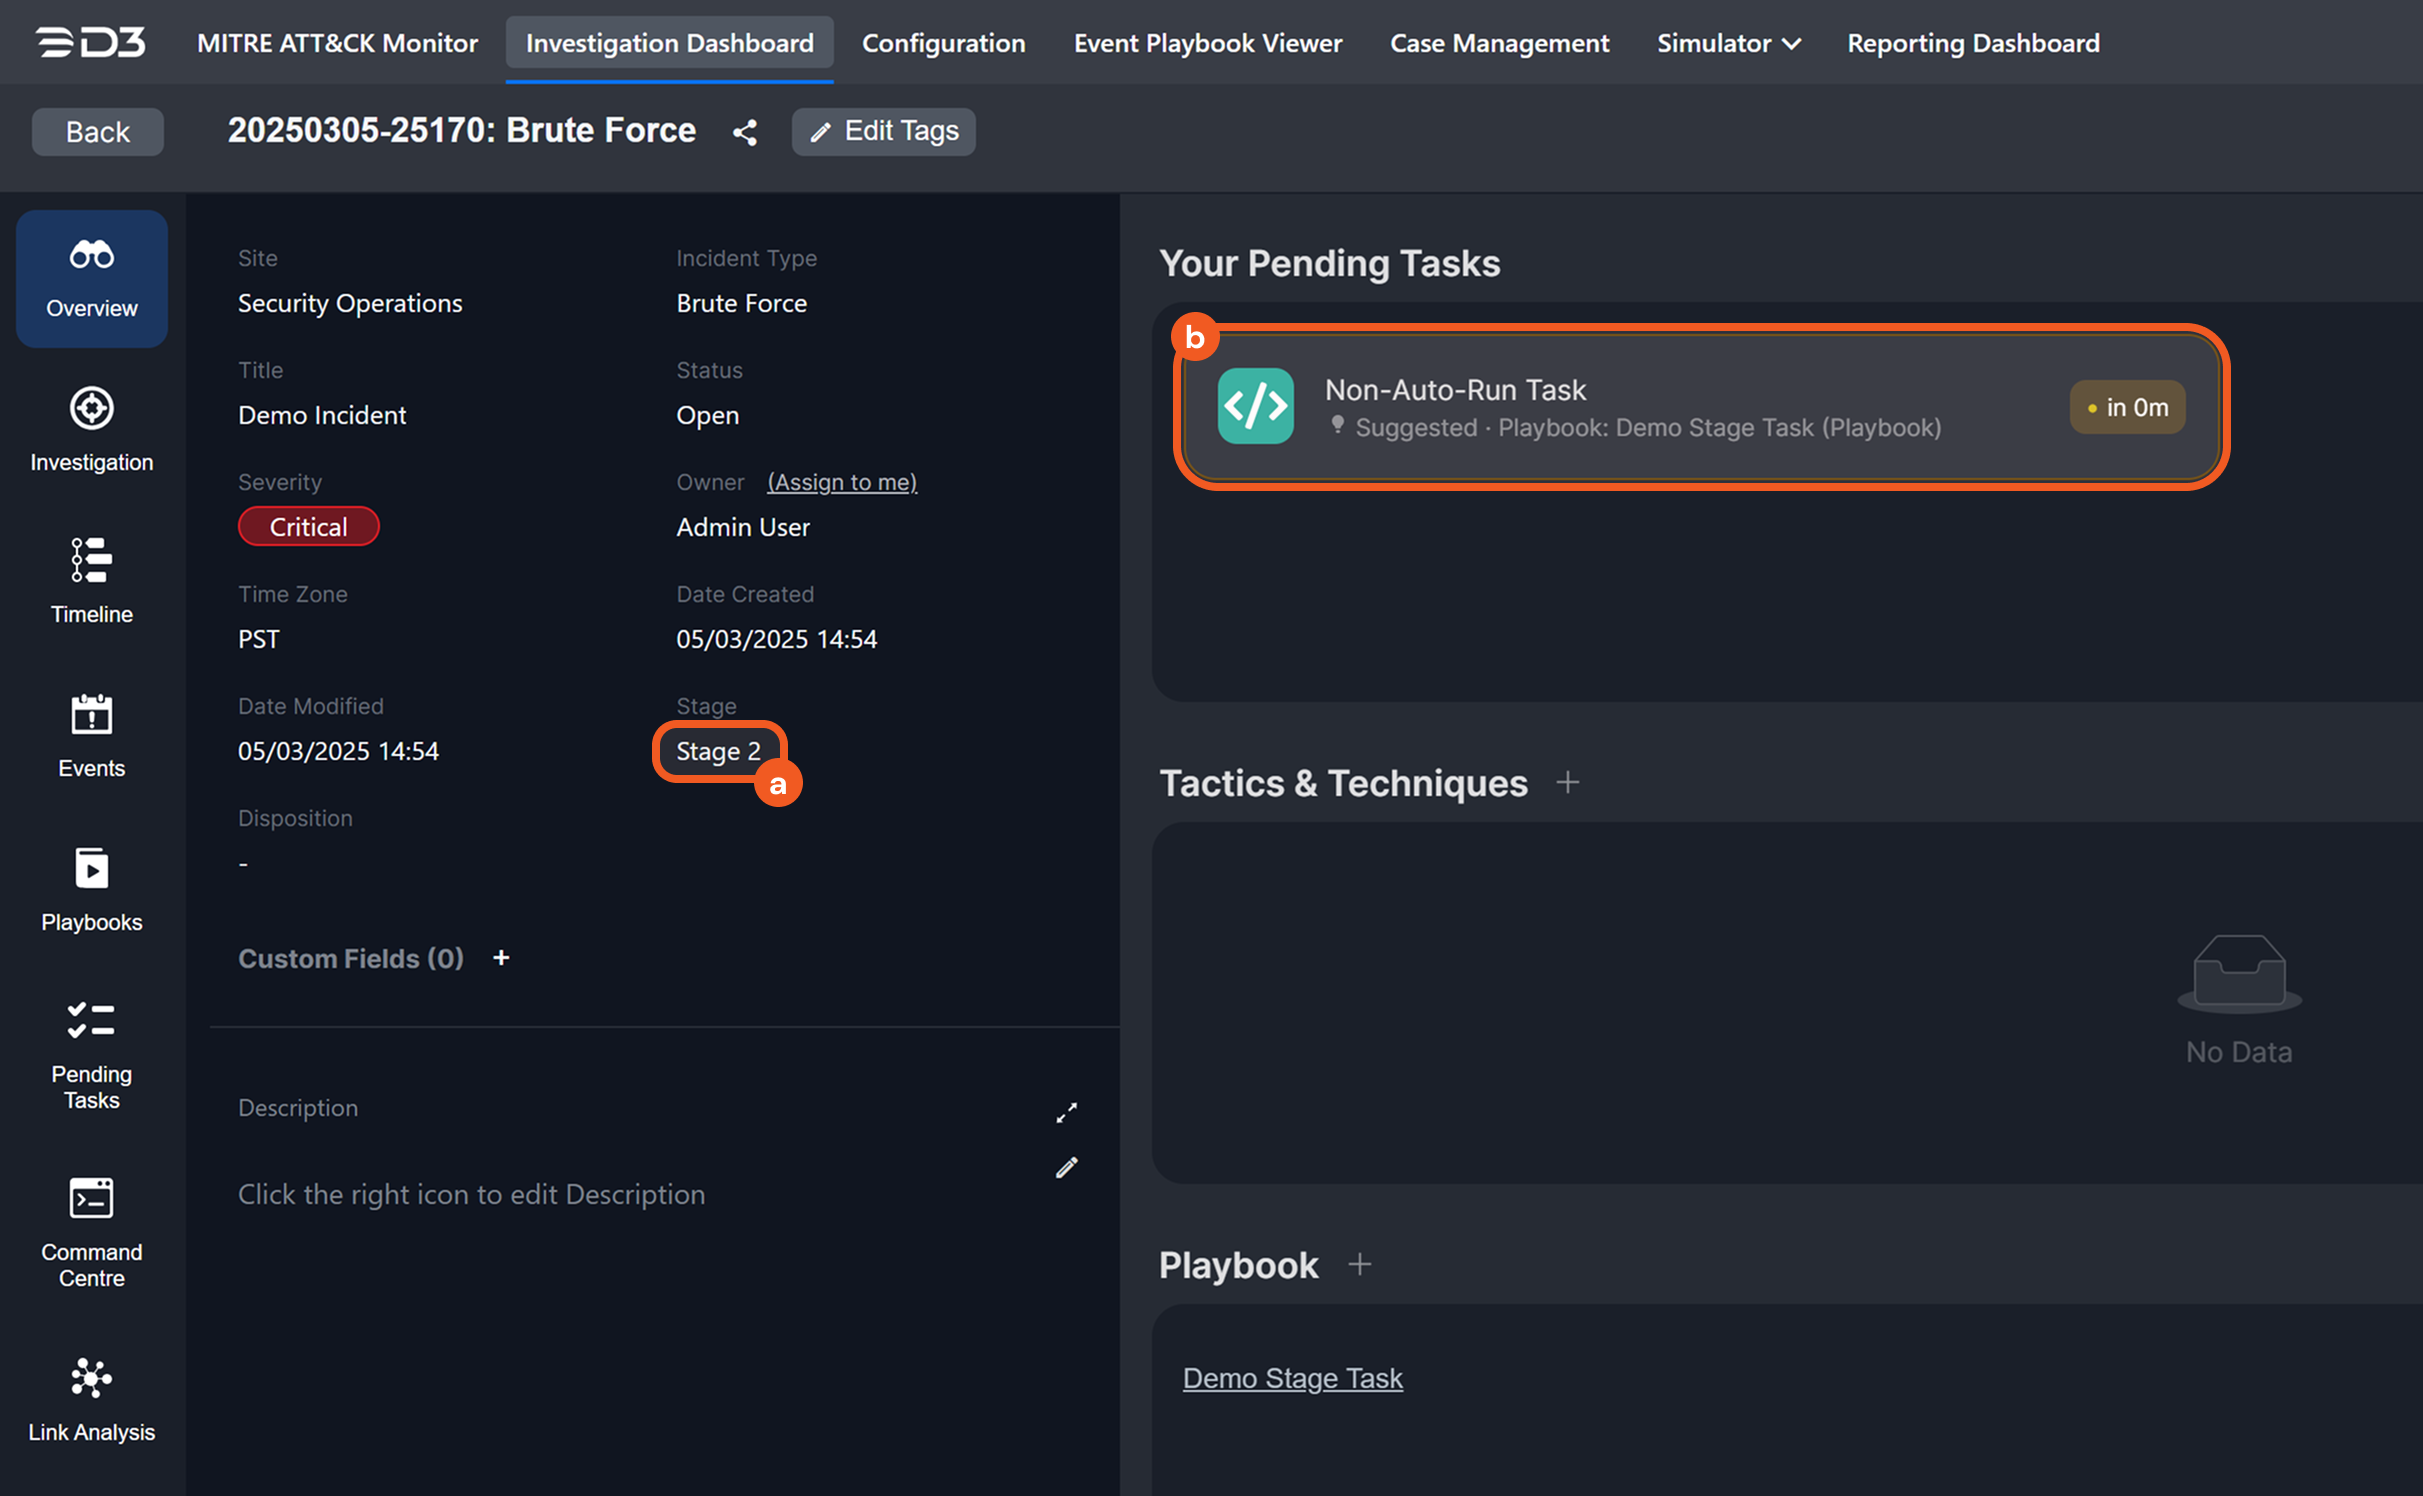
Observe the change in investigation stage, then return to the running playbook.
Incident Workspace UI in Earlier D3 vSOC Versions
-
Click on the pending data formatter task.
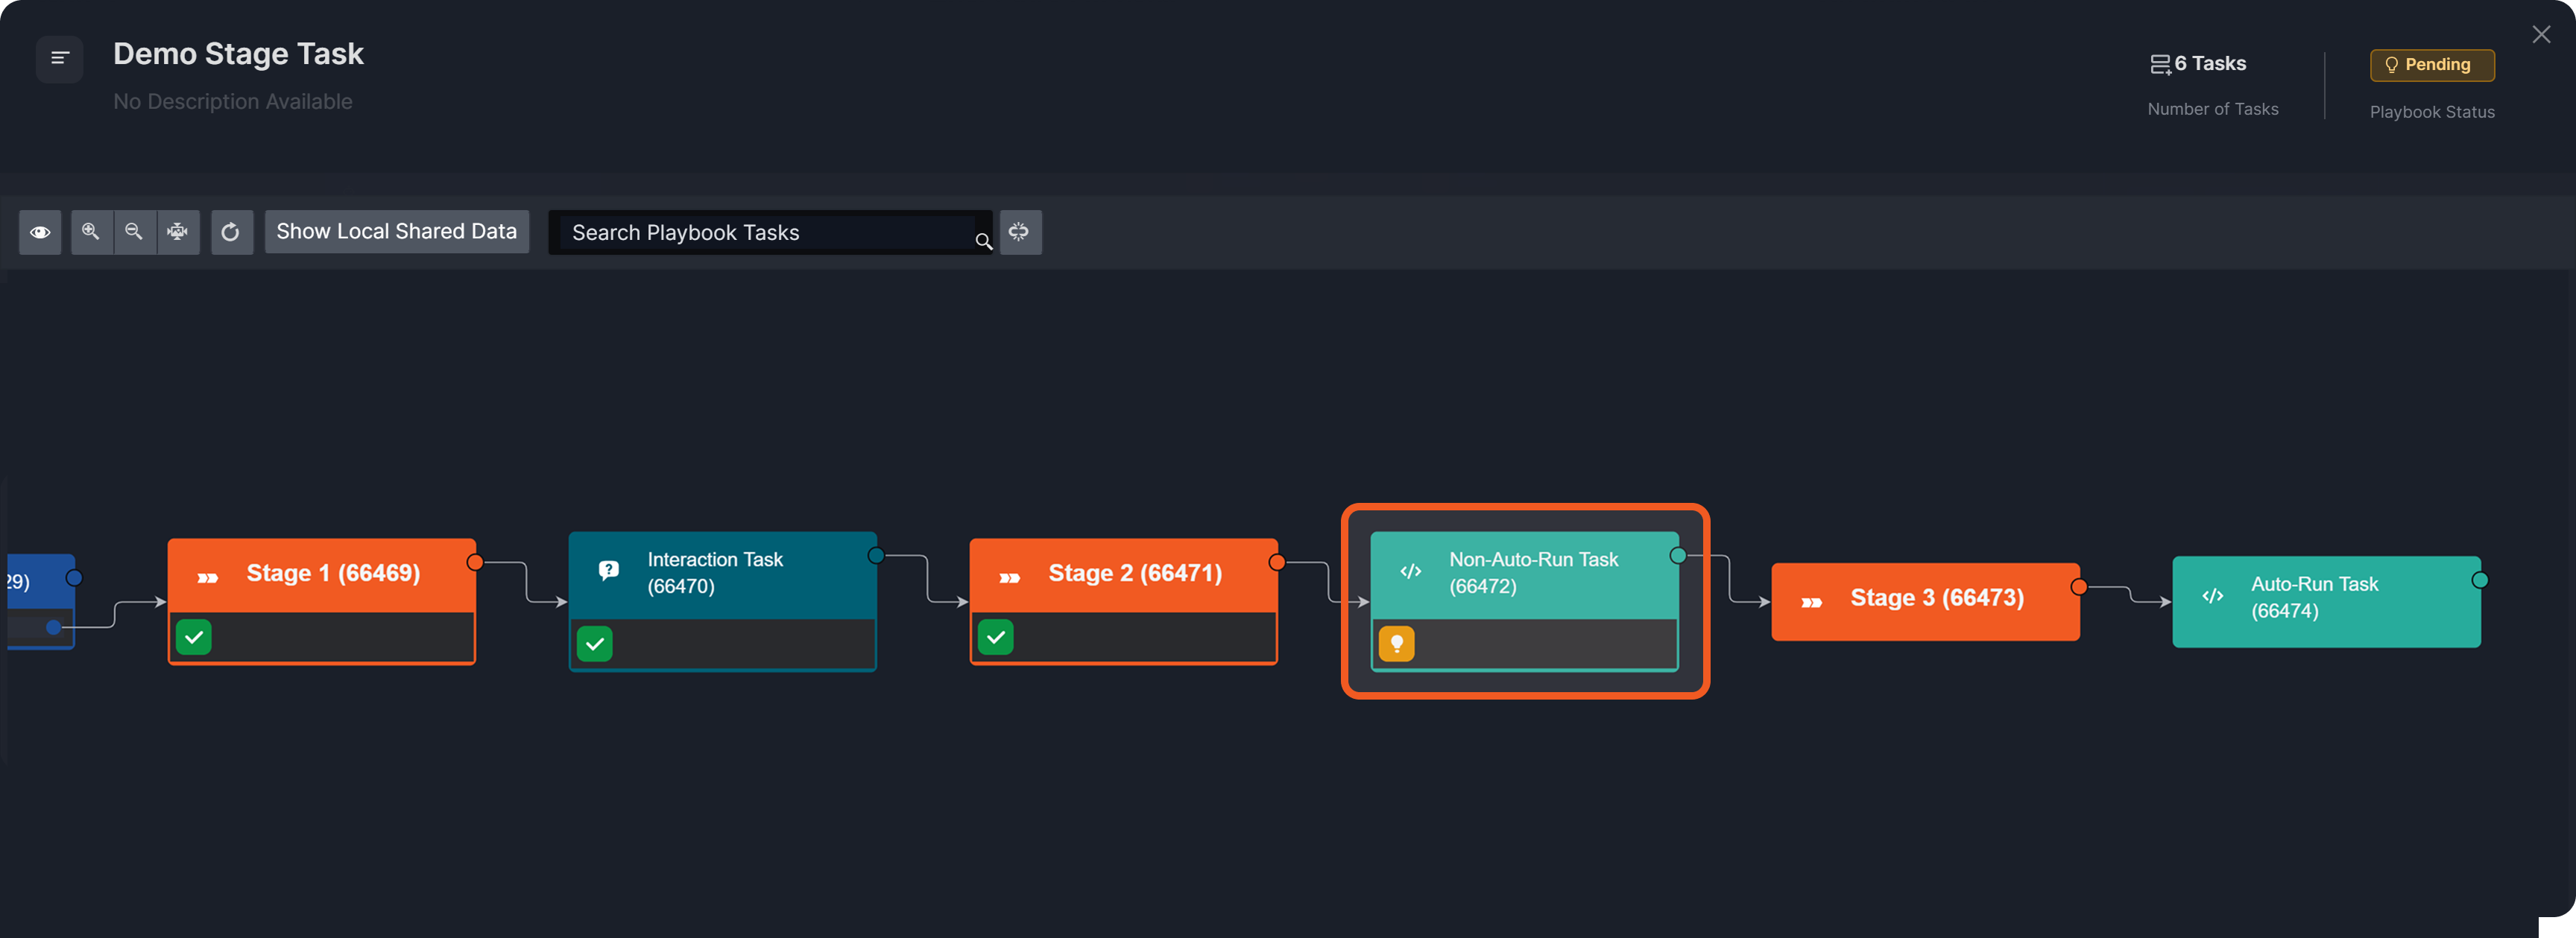
-
Click on the 10.2.0.134_BetaPreview_VSOC_LifeServer.aspx_div=dashboard&Open=Other&t2=08b859c192aa477b646ed6674d44ec4fc61cc62429bafabfde553a46b91faa0a (13) 1-20250305-230558.pngbutton.
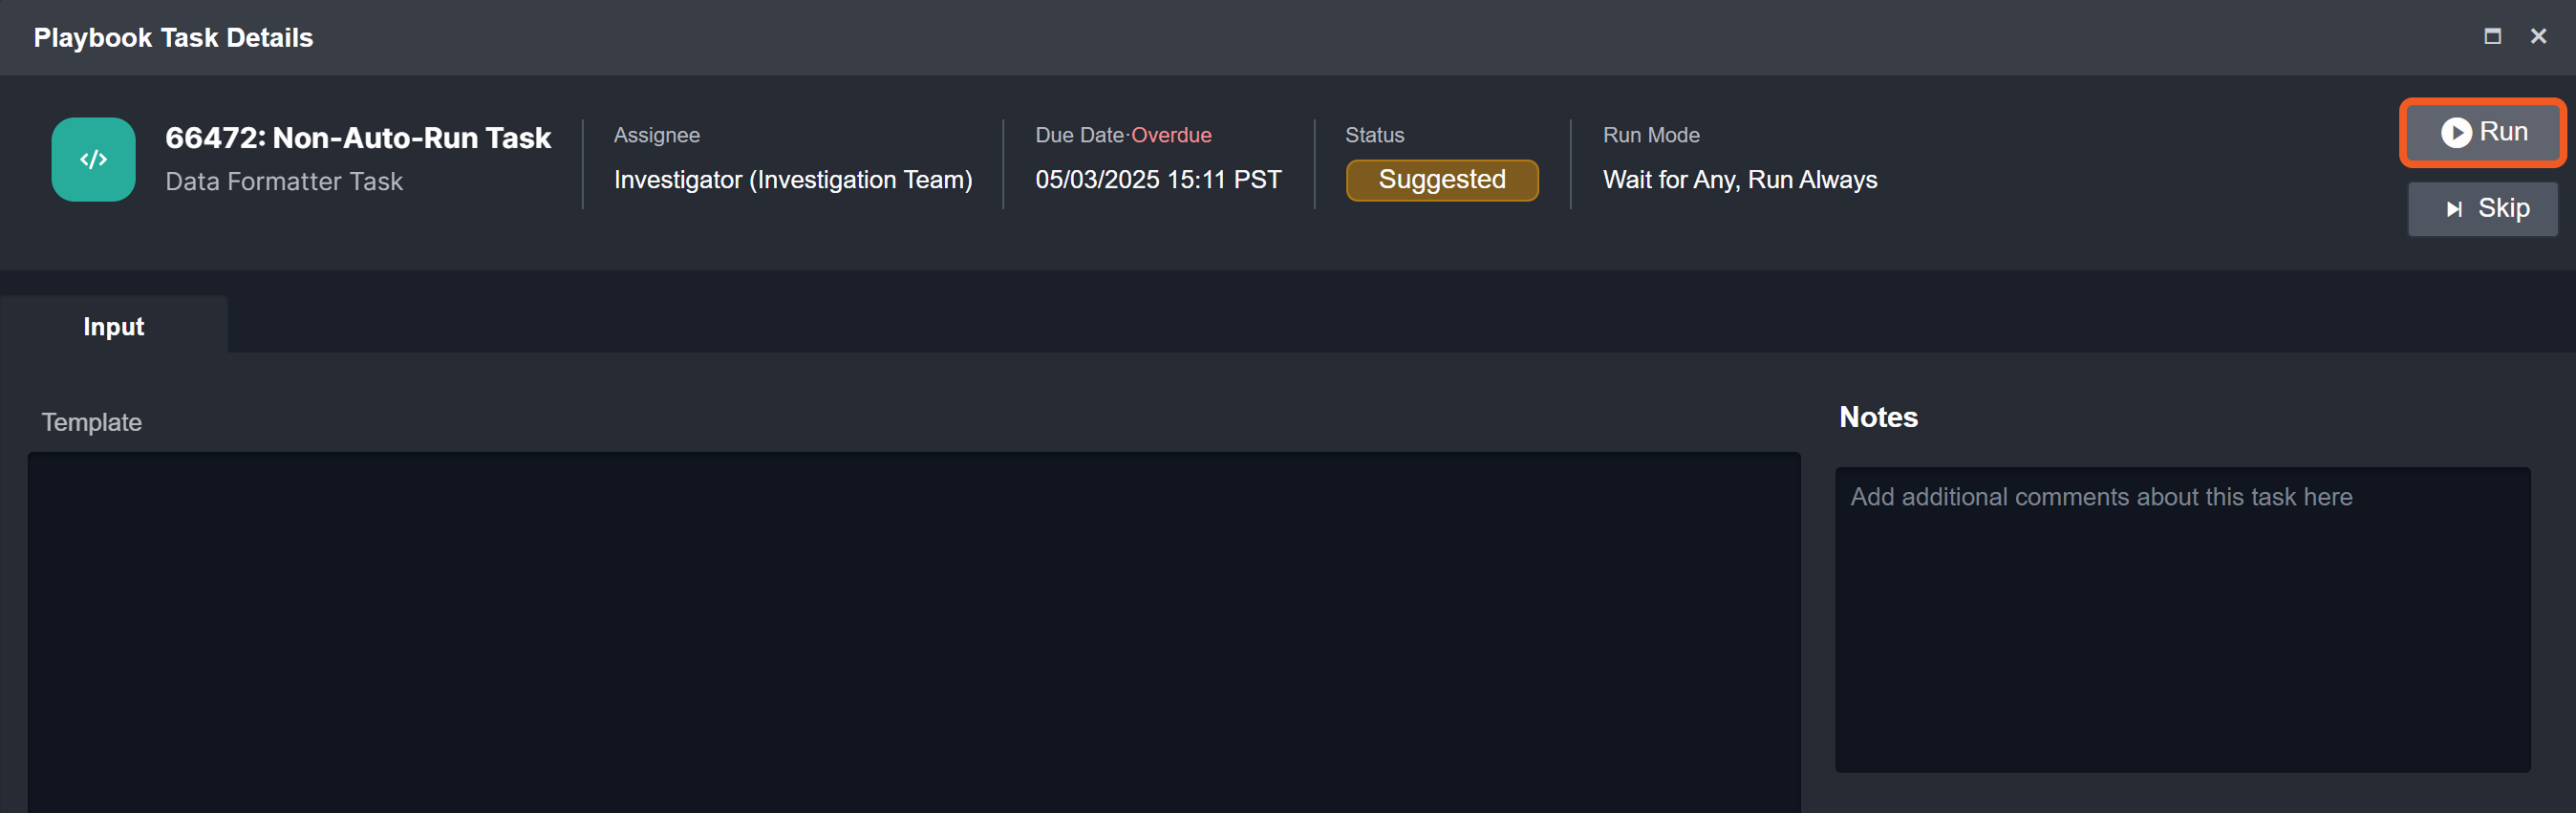
-
Verify that all tasks have run to completion.
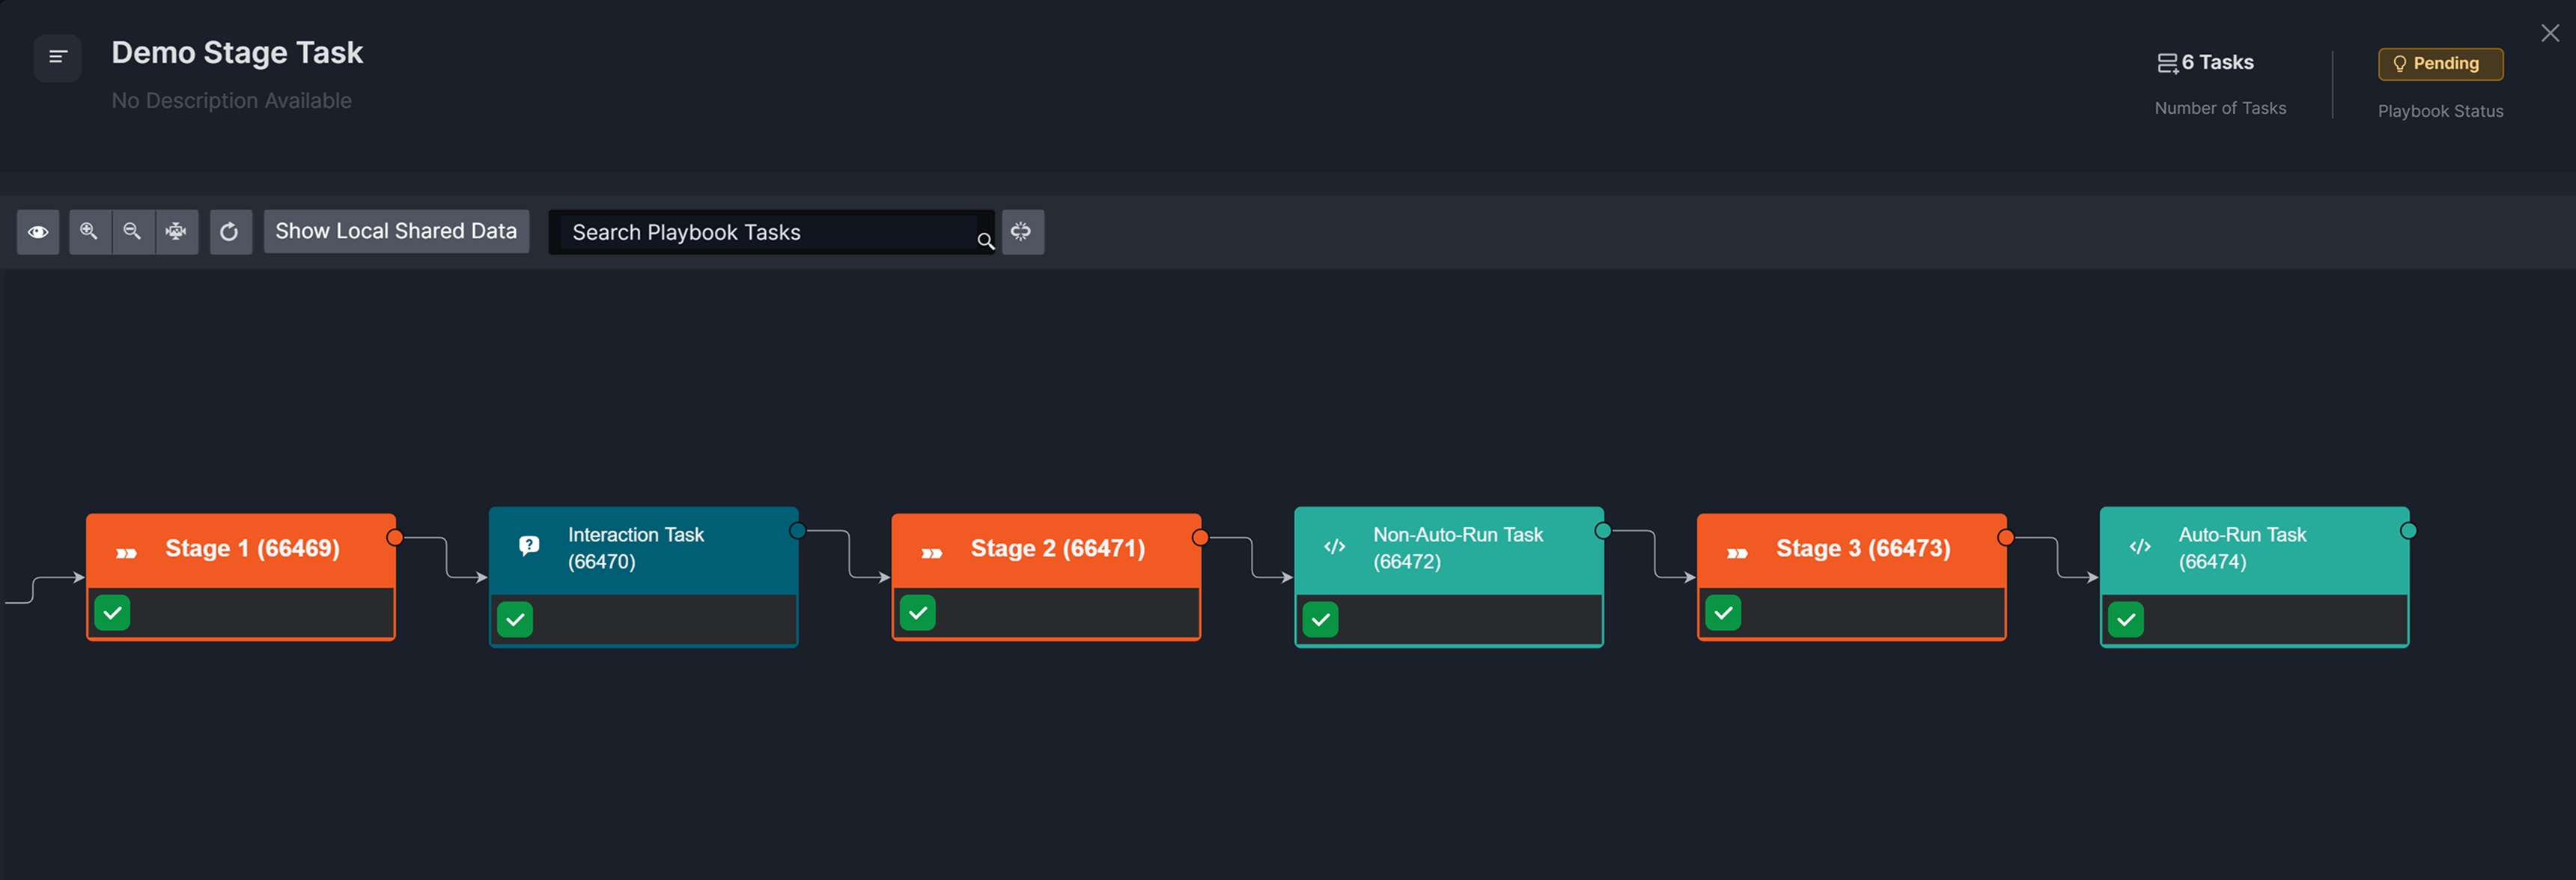
-
Observe the change in investigation stage.
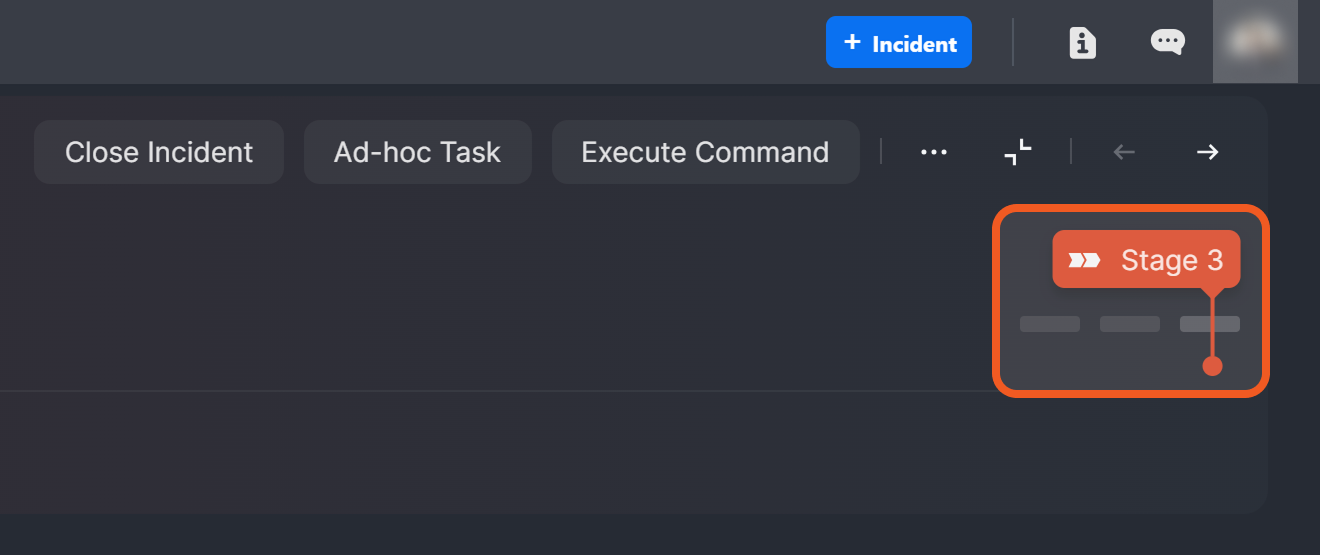
Incident Workspace UI in Earlier D3 vSOC Versions

Assigning Investigation Units
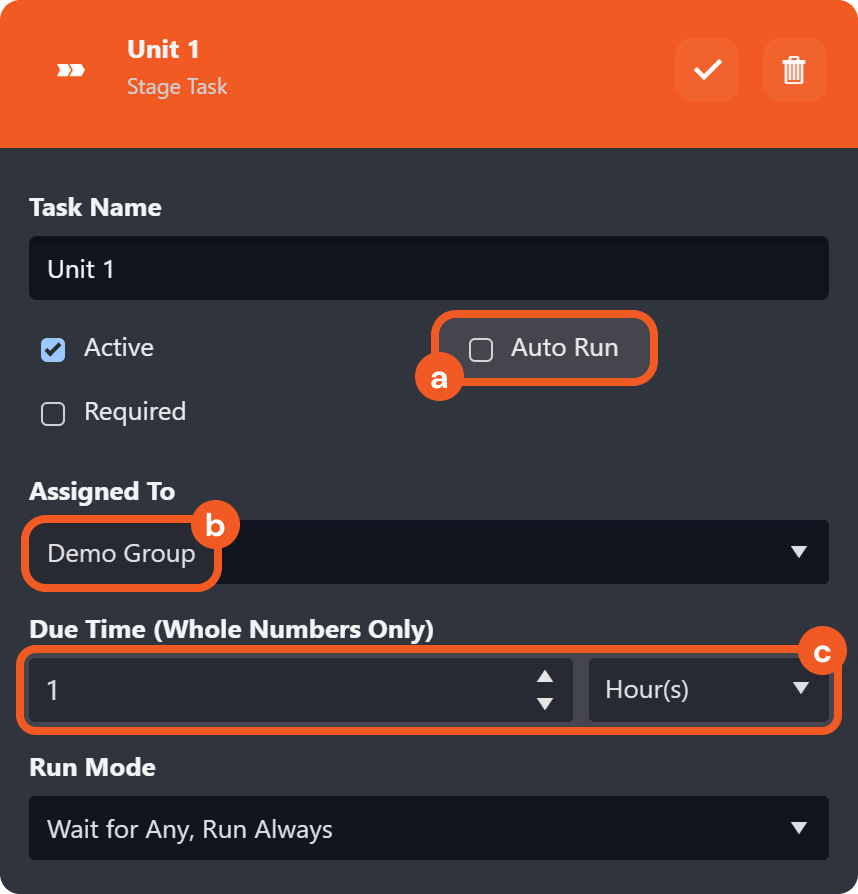
Non-auto-run stage tasks can be configured to require an assignee to initiate the corresponding investigation unit, with assignment based on username, role, or group. A due time may also be set to ensure compliance with SLA or business requirements.
In 
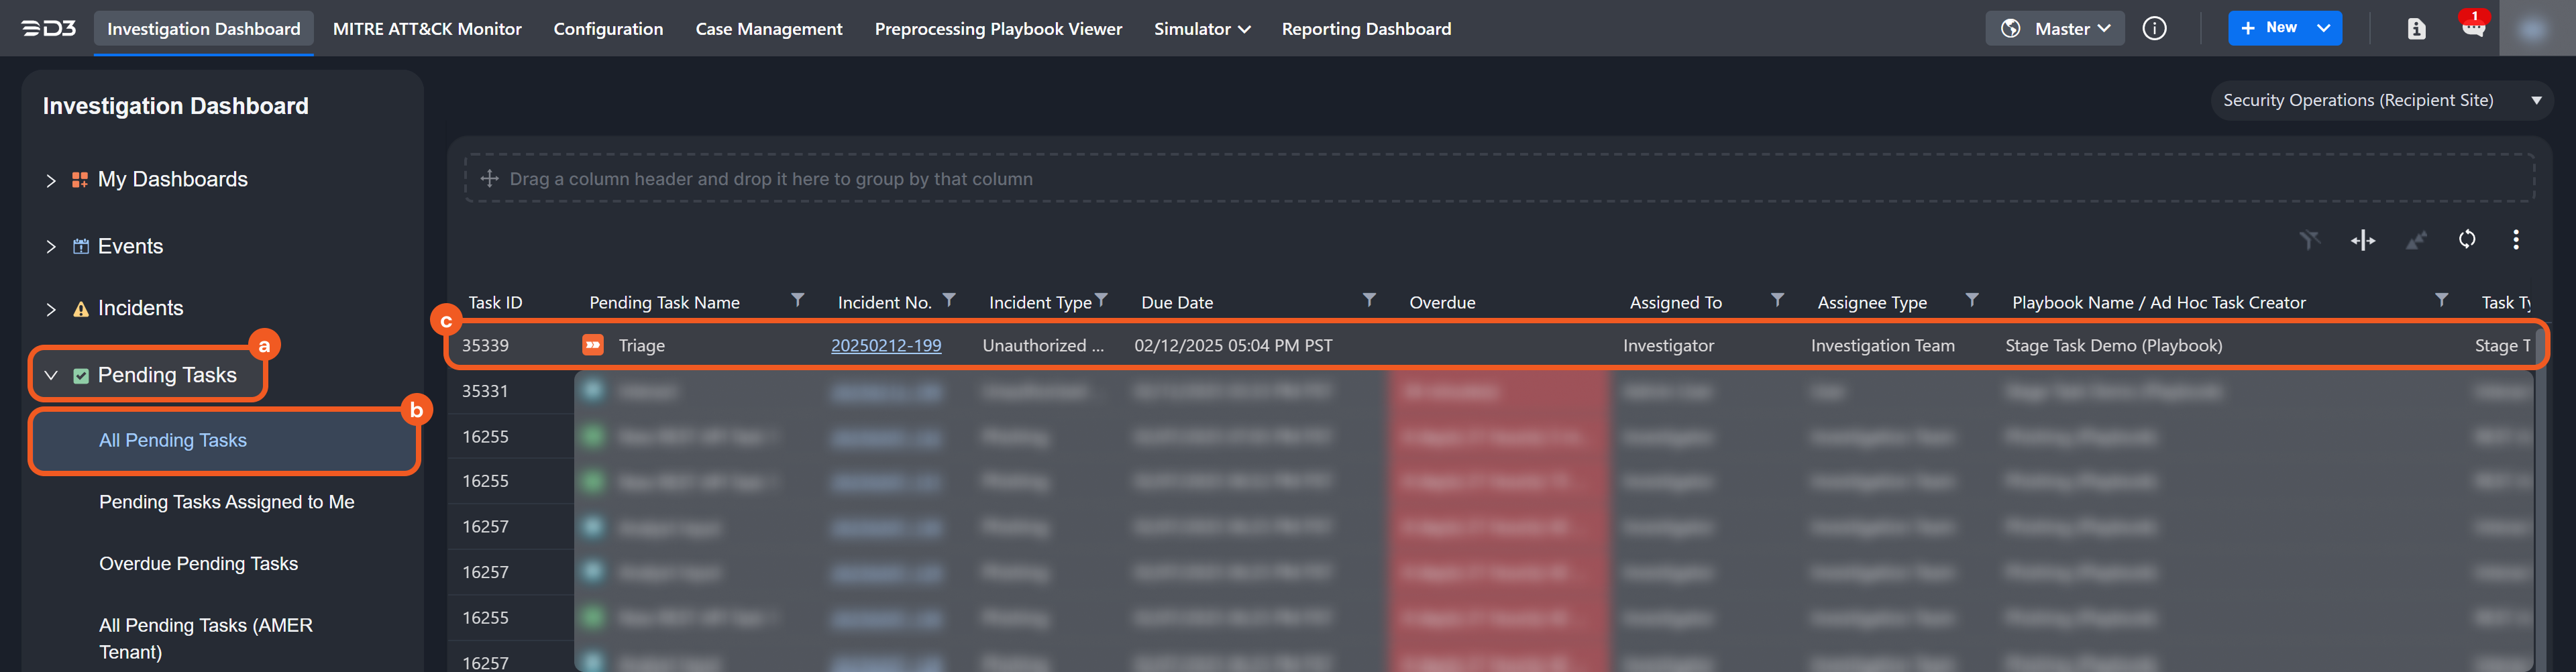
Stage Tasks as Pending Tasks
Investigation Dashboard
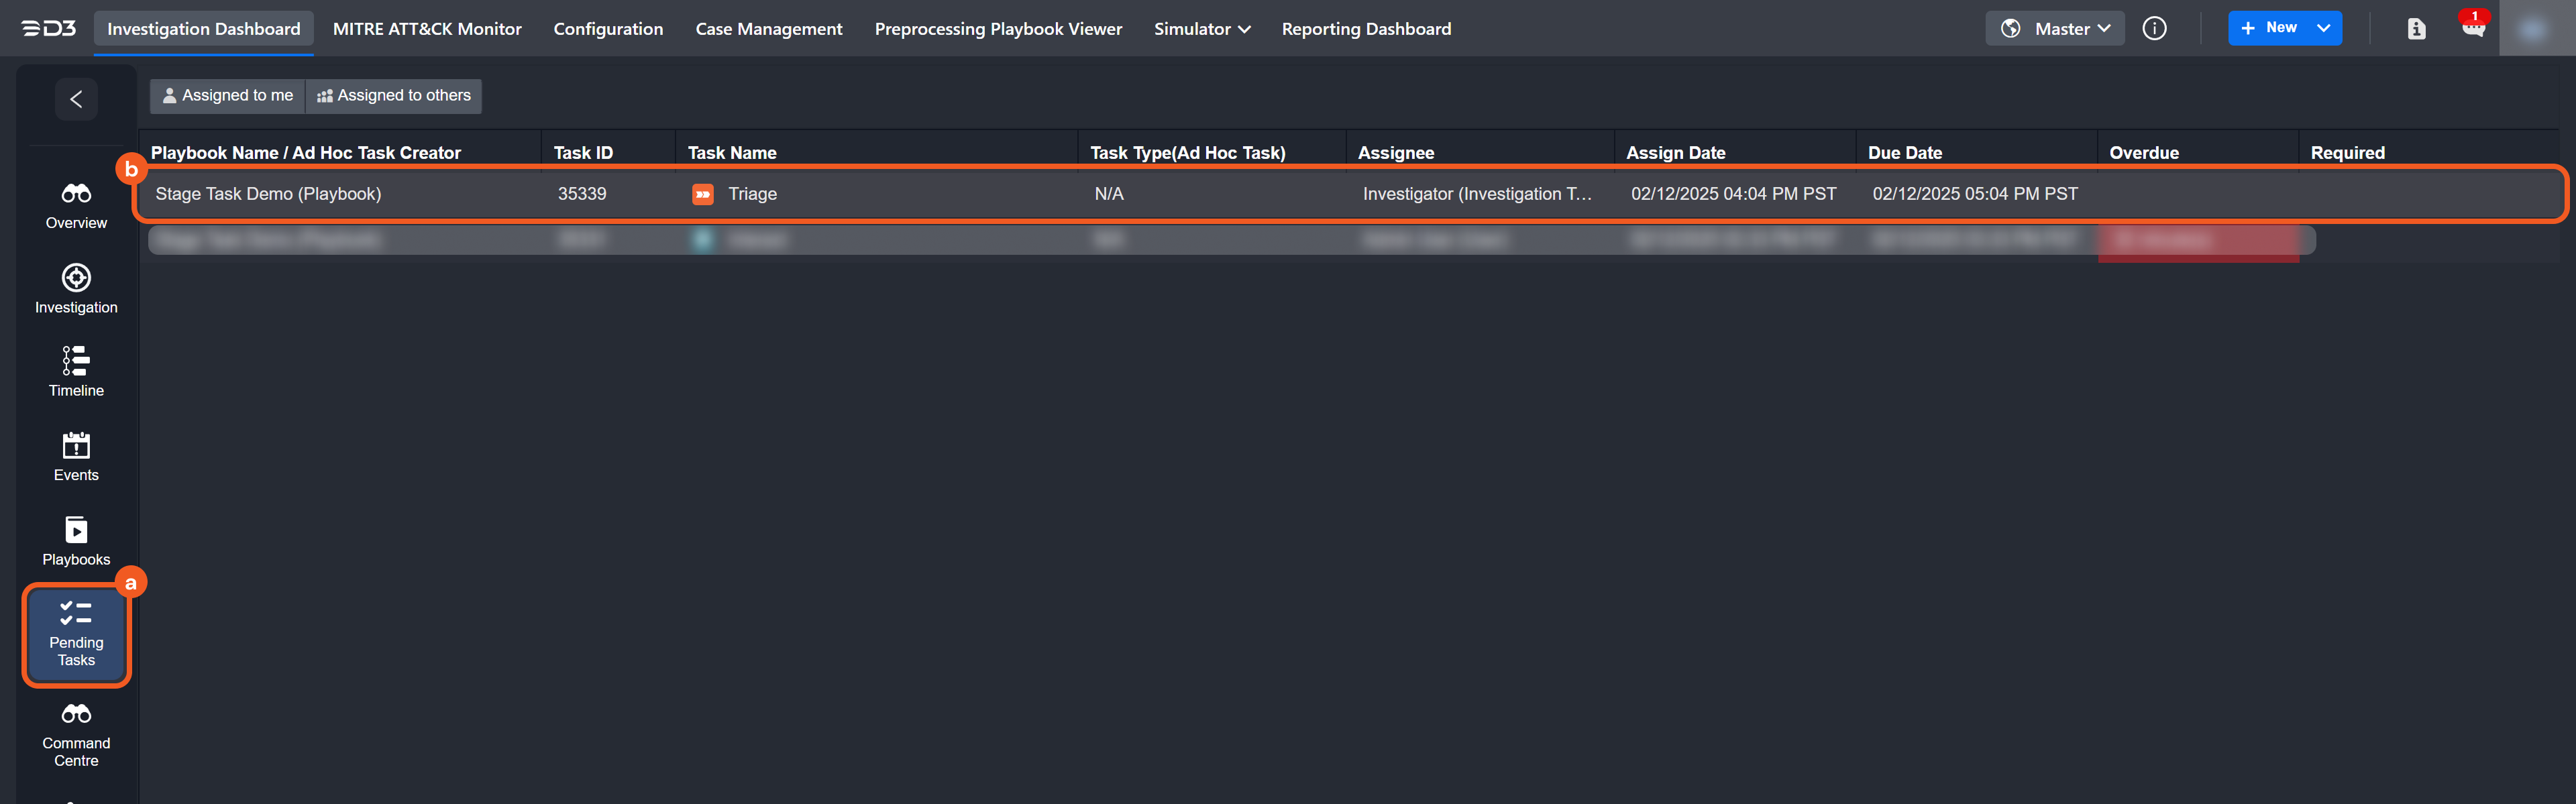
Incident Workspace
Example 1 - Kick-Starting an Investigation Unit
objective
Understanding the impact of assigning an assignee by role.
-
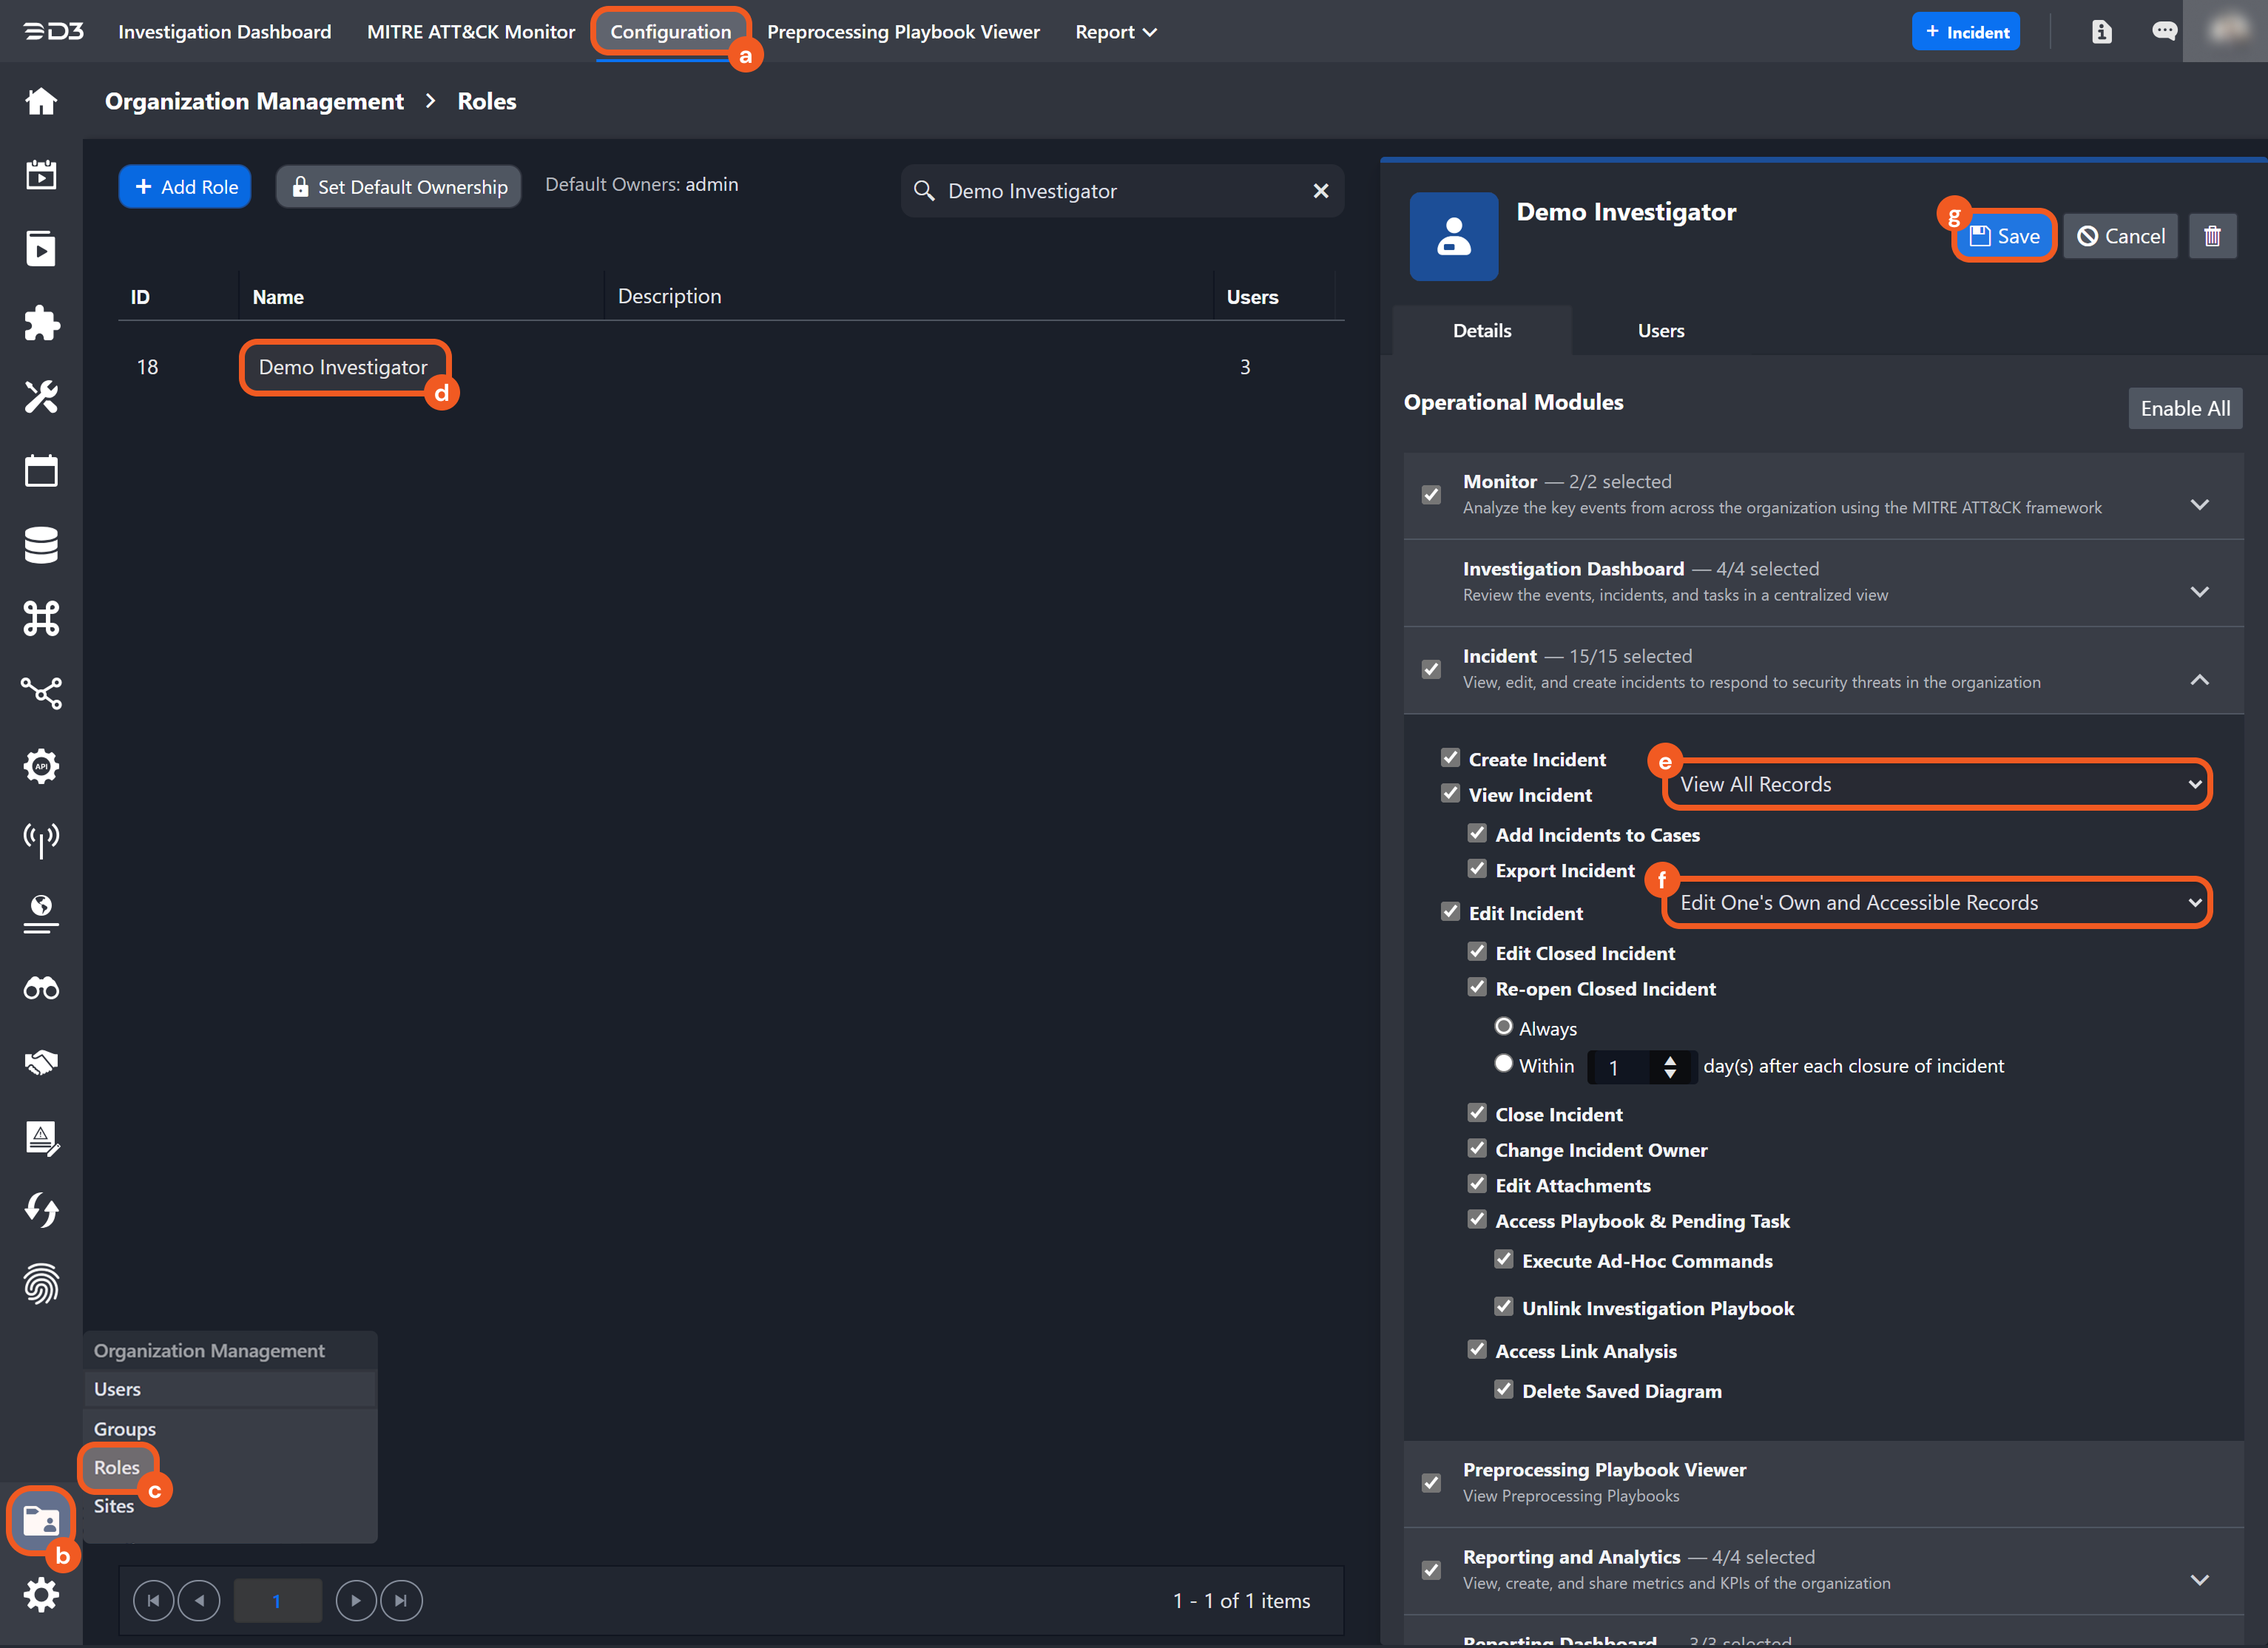
Ensure a Demo Investigator role is created and configured to be able to edit accessible records.
-
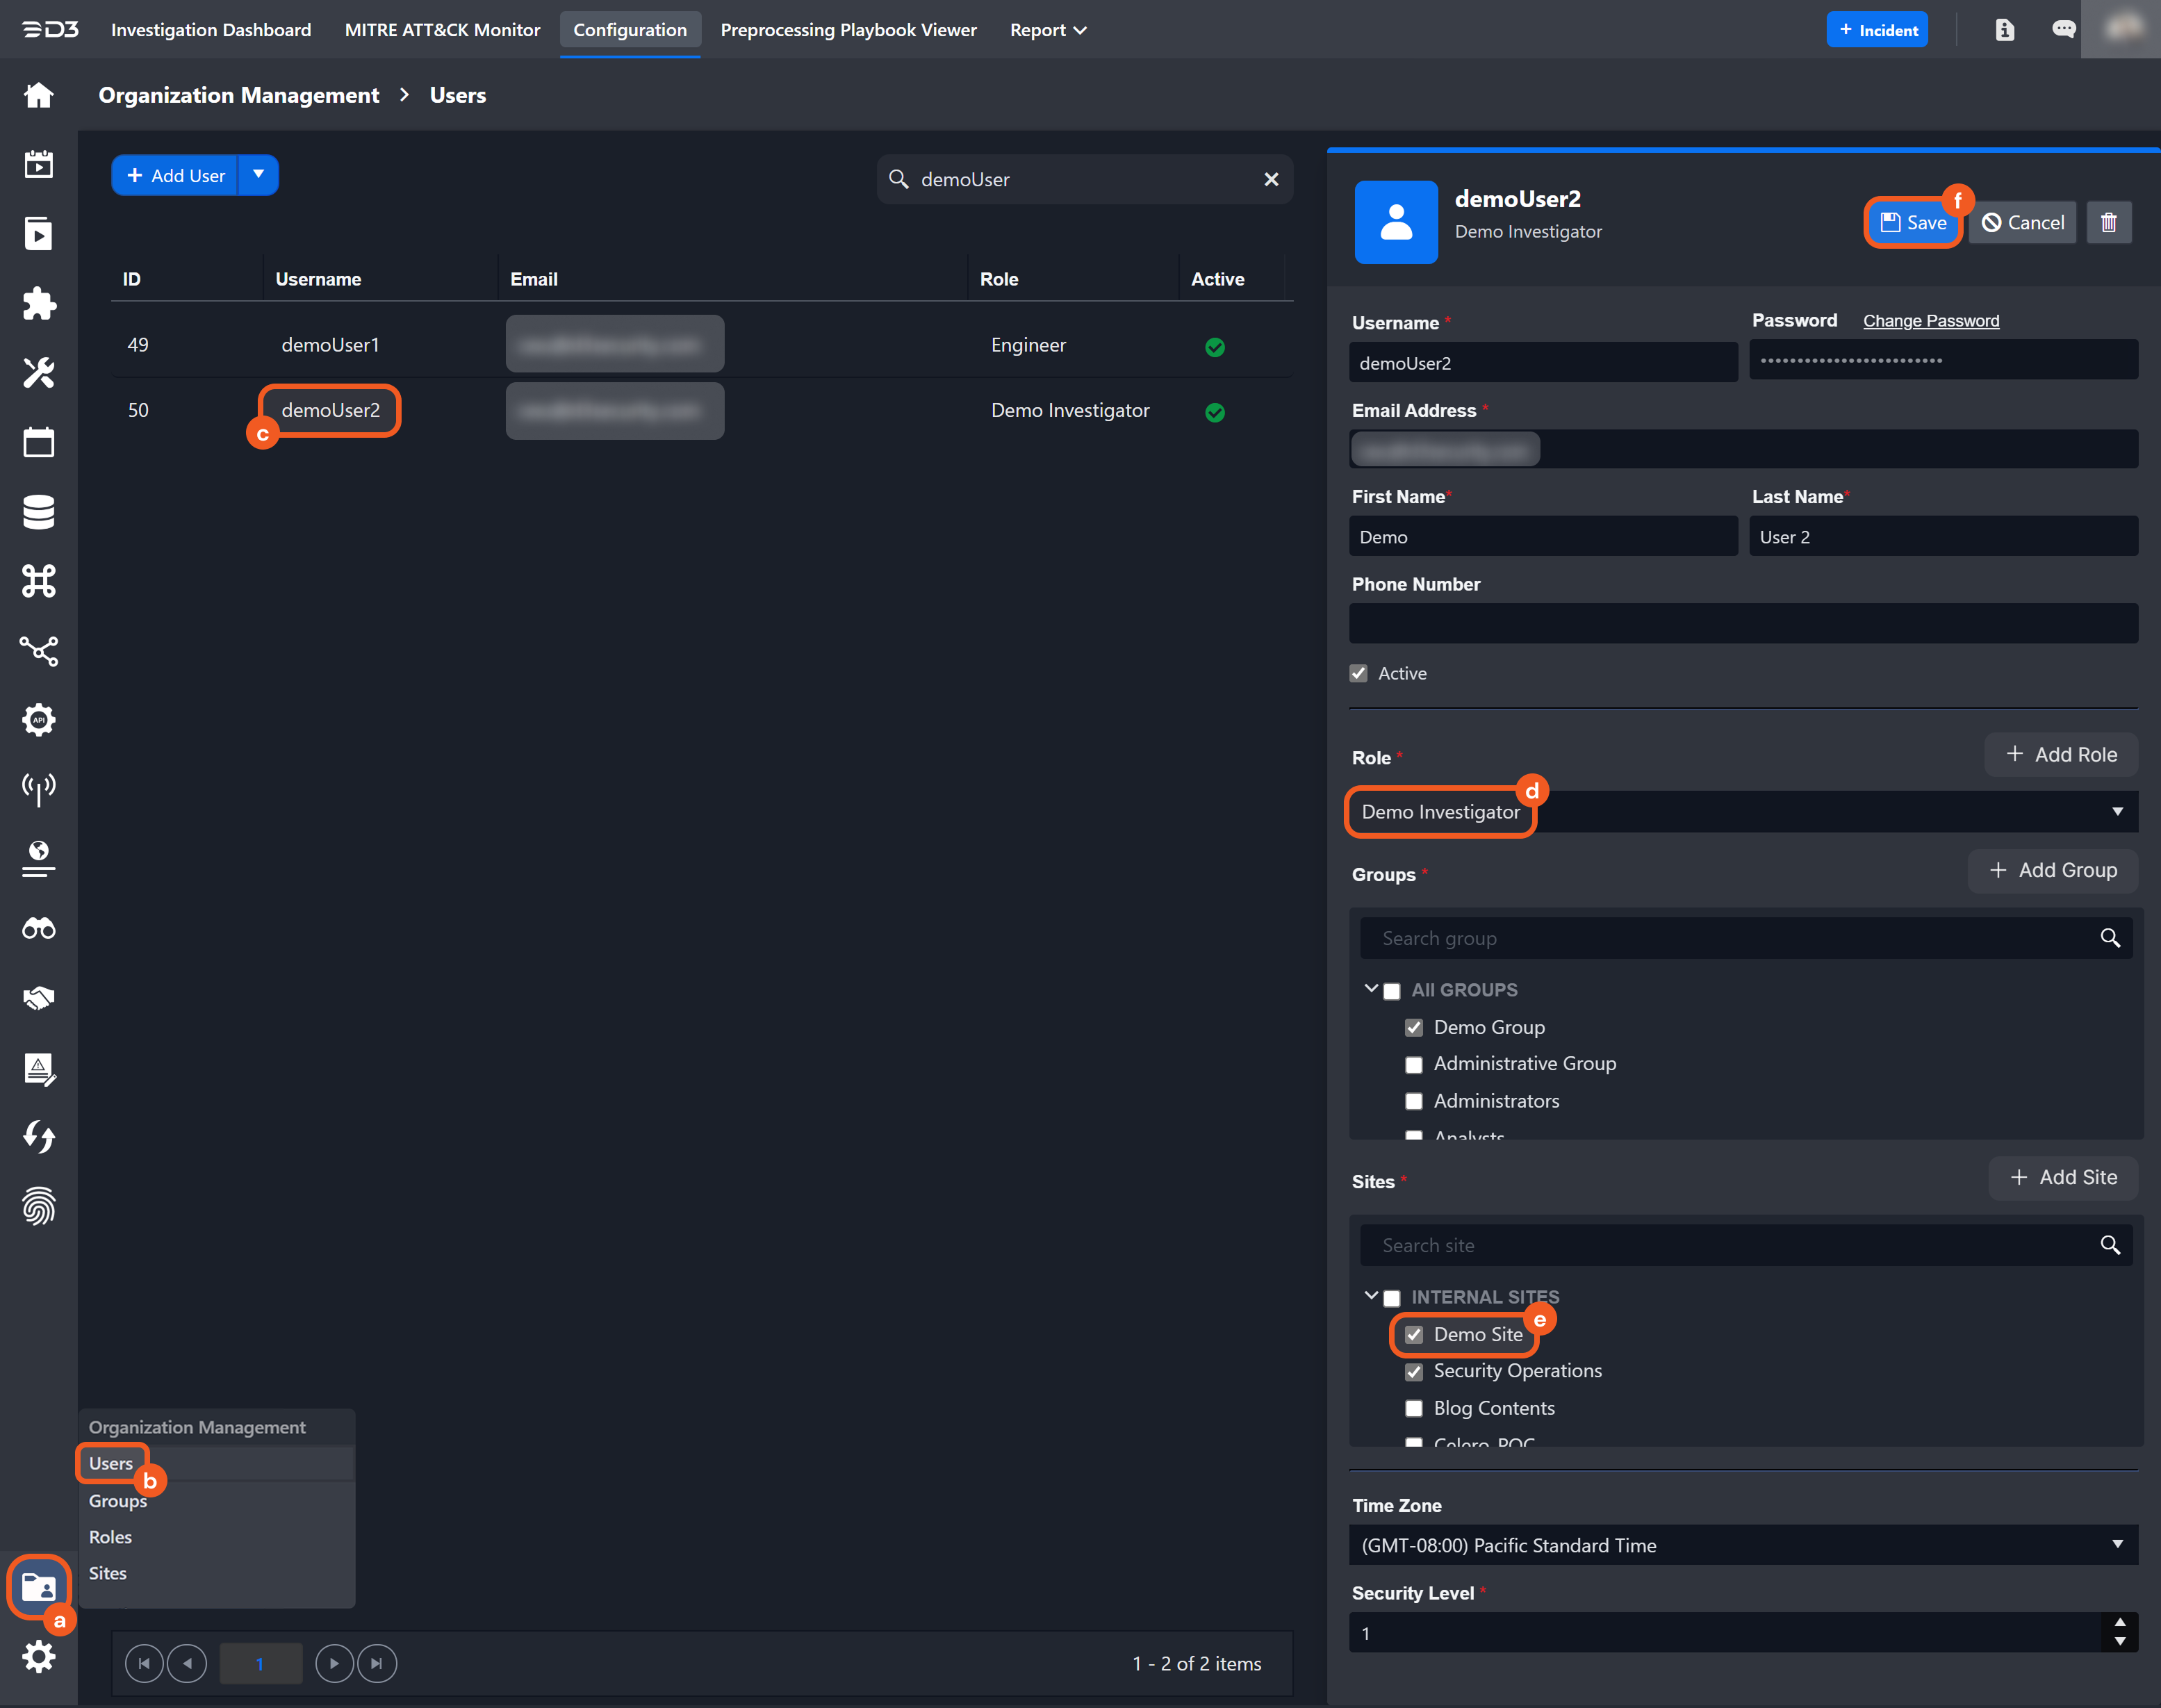
Ensure that at least one user is assigned the Demo Investigator role.
-
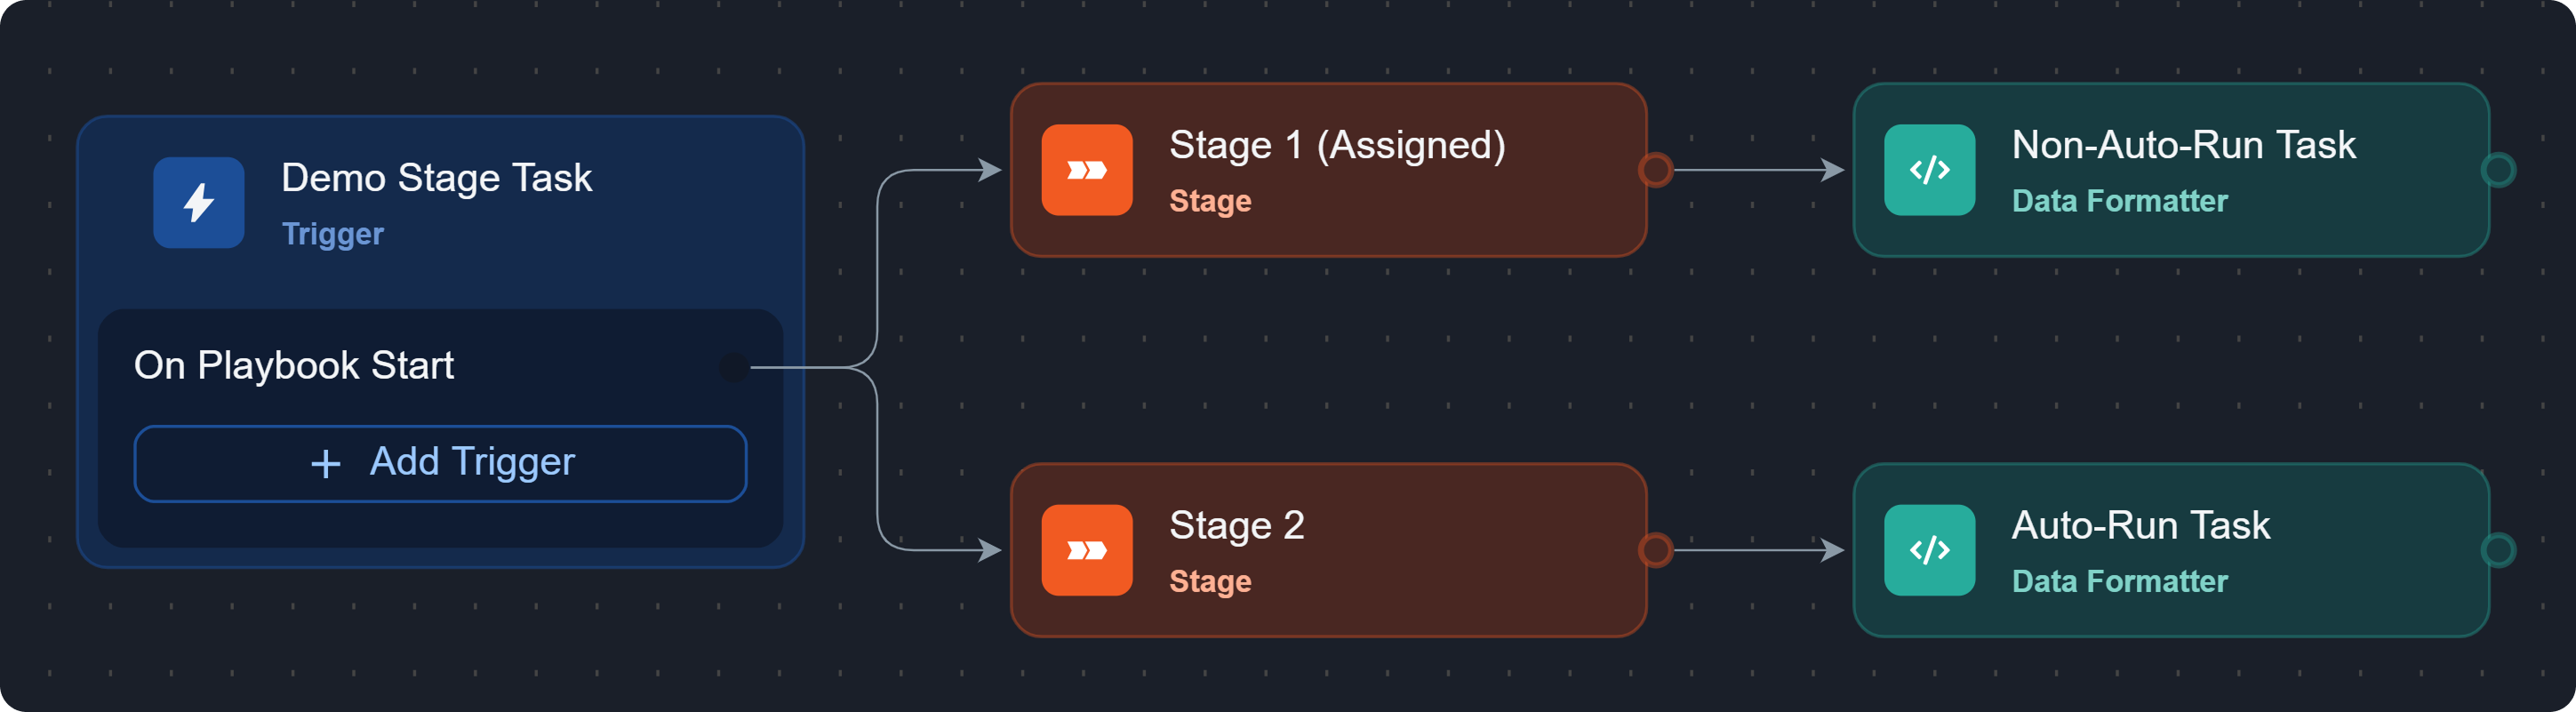
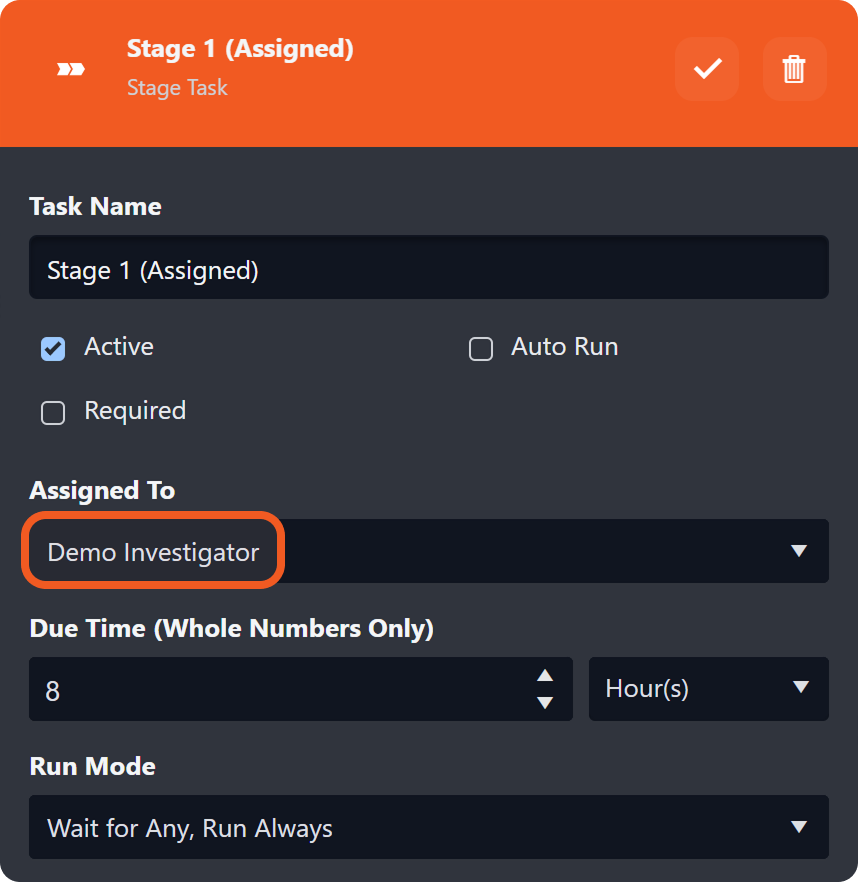
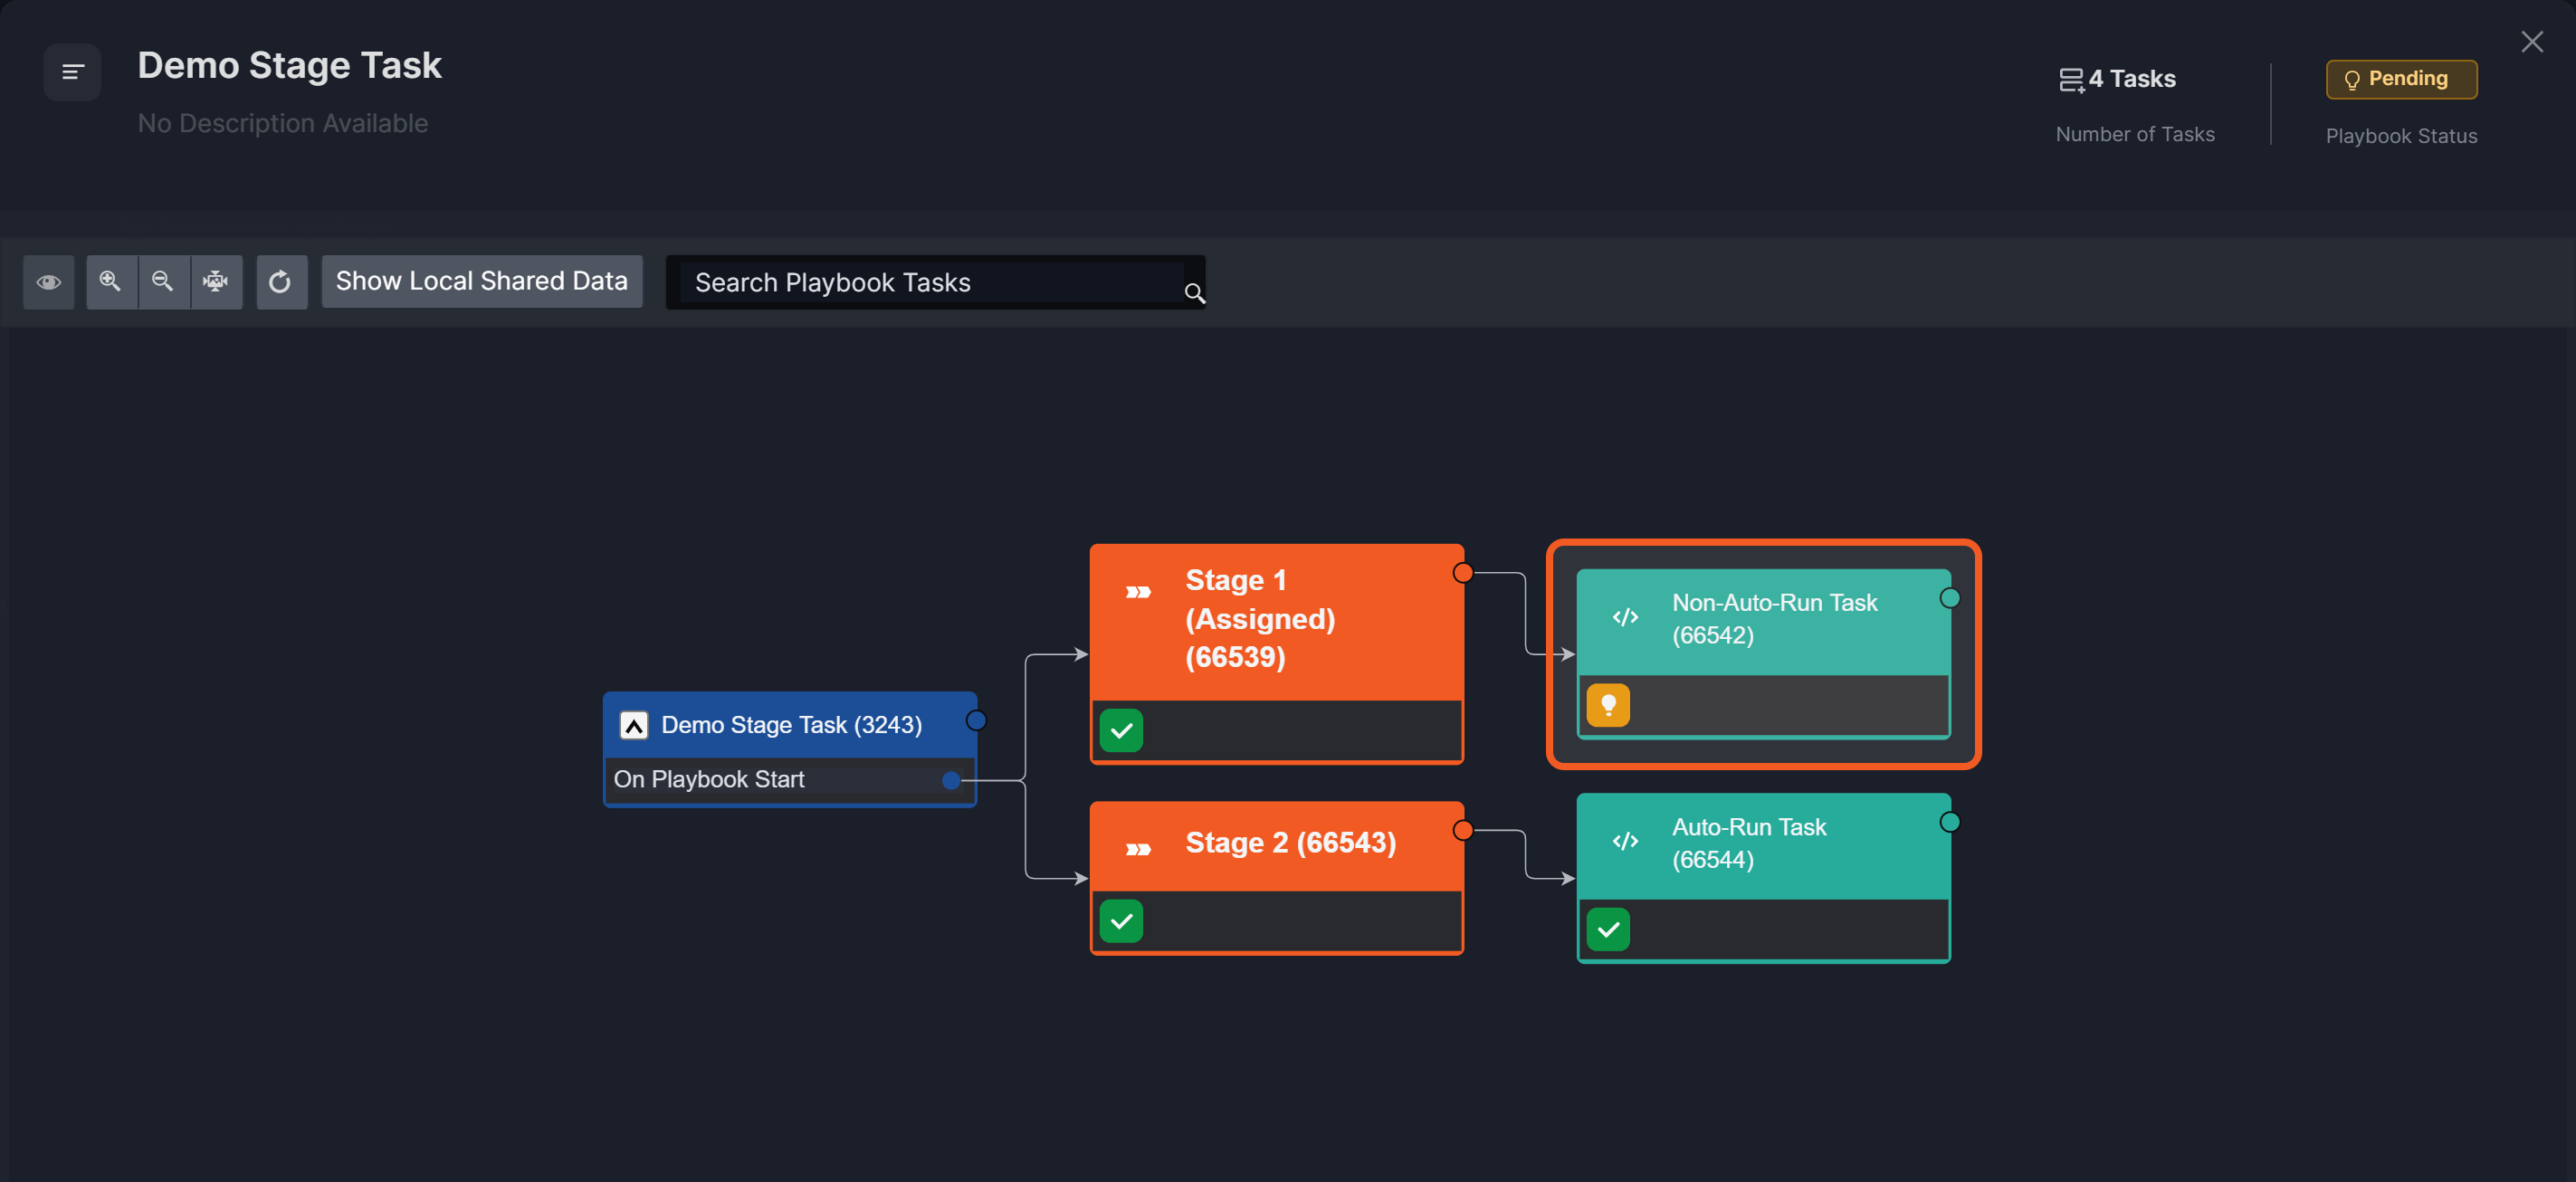
Create the following investigation playbook, assigning the Stage 1 (Assigned) task to users with the Demo Investigator role.
READER NOTE *
-
Configure all tasks in the top execution stream to non-auto-run (Auto Run cleared).
-
Configure all tasks in the bottom execution stream to auto-run (Auto Run selected).
-
Select Go Live.
-
In the Manage Site Access and Go Live window, move the relevant sites to Sites with Access, then select Confirm & Go Live.
-
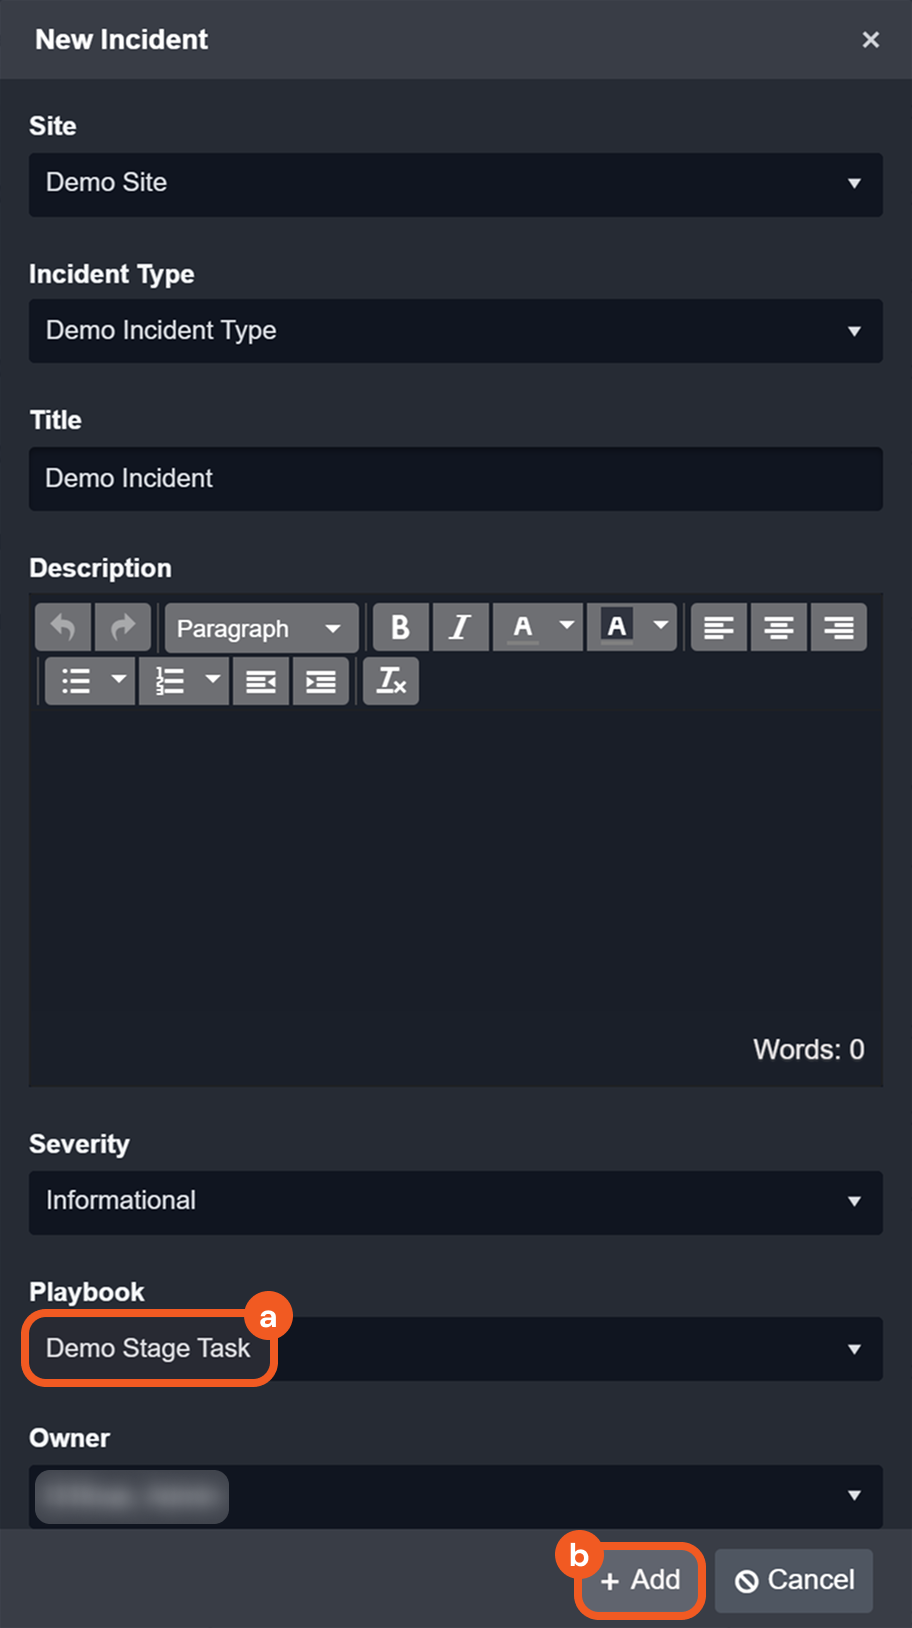
Select New Incident in the header, choose the live playbook in Playbook, then select + Add.
-
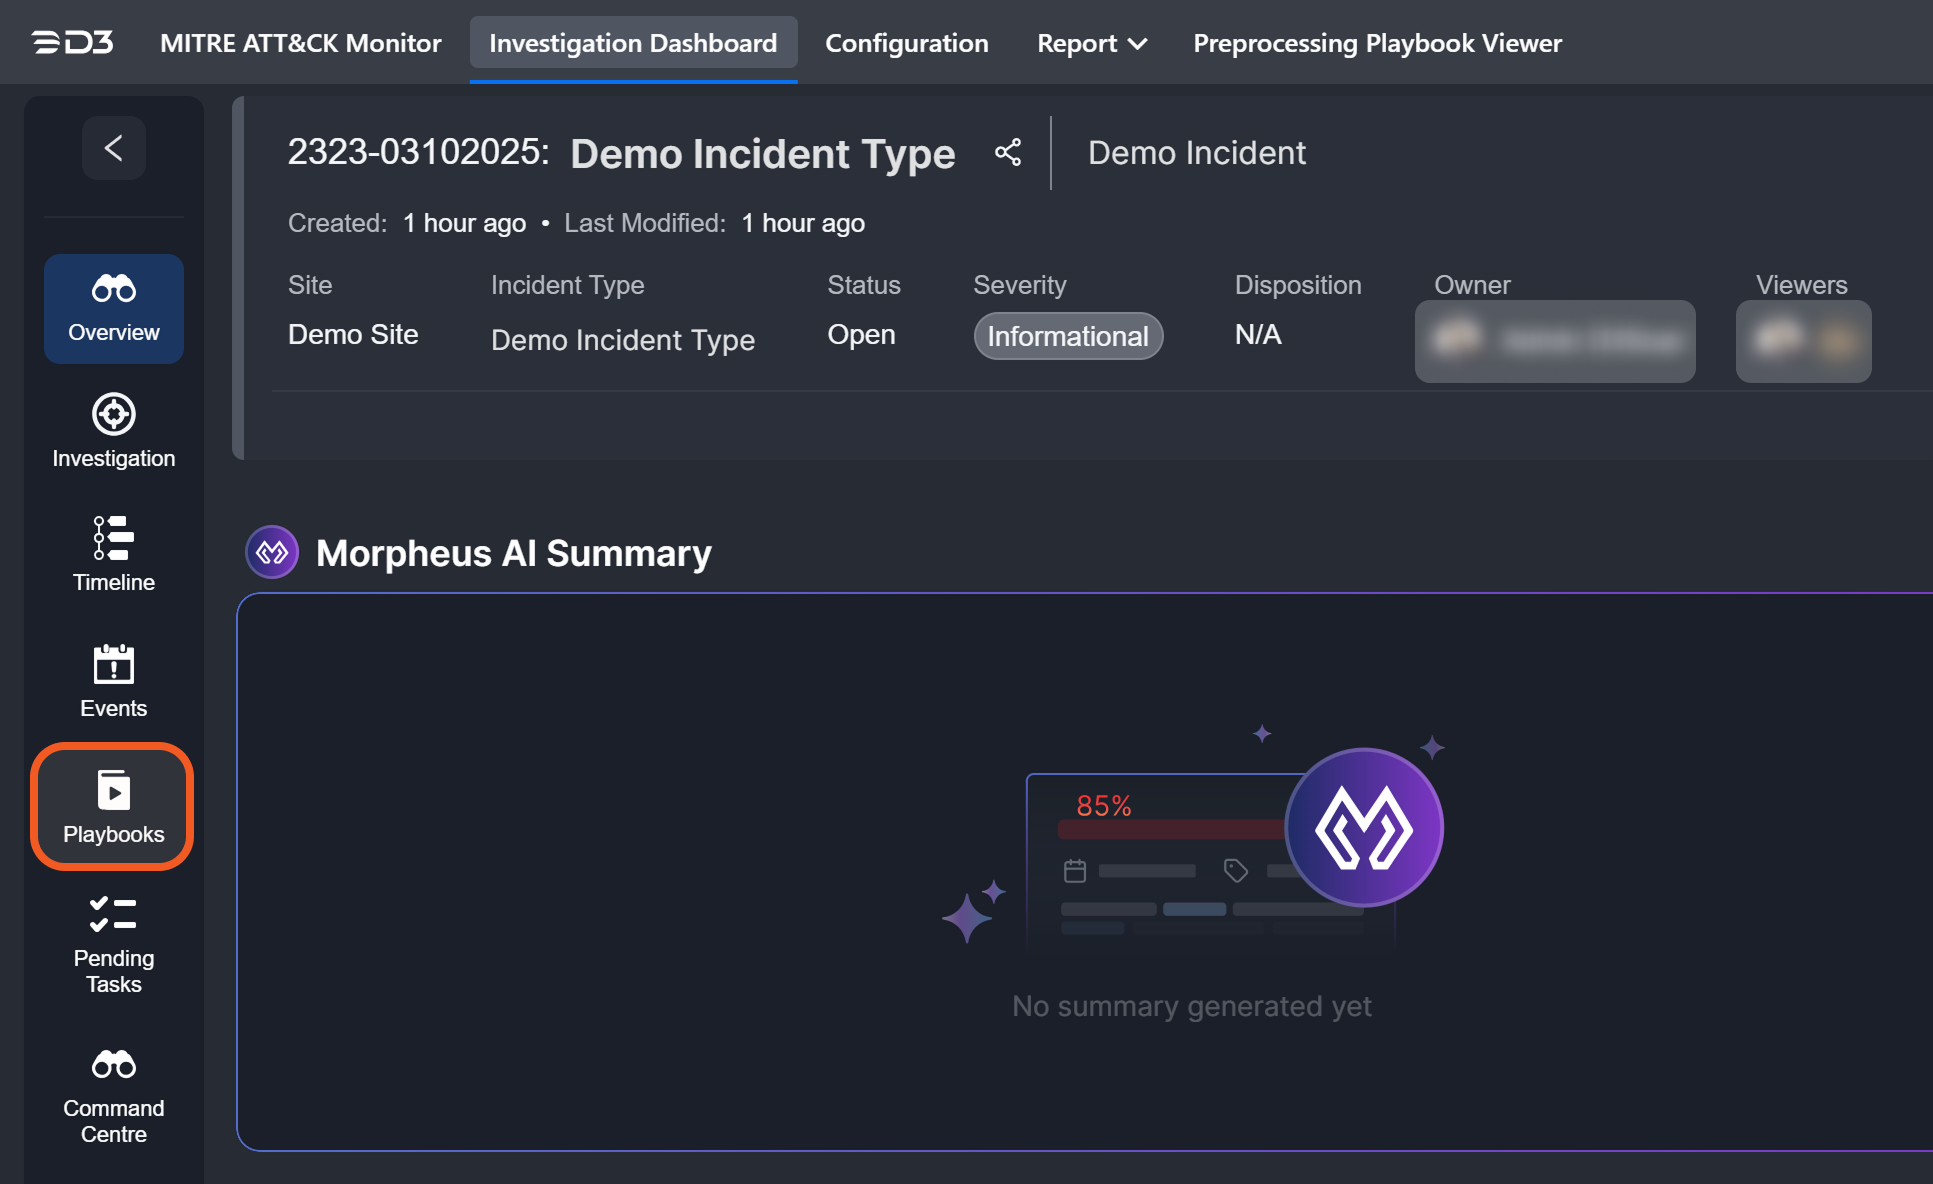
Navigate to the Playbooks sub-module within the incident workspace.
-
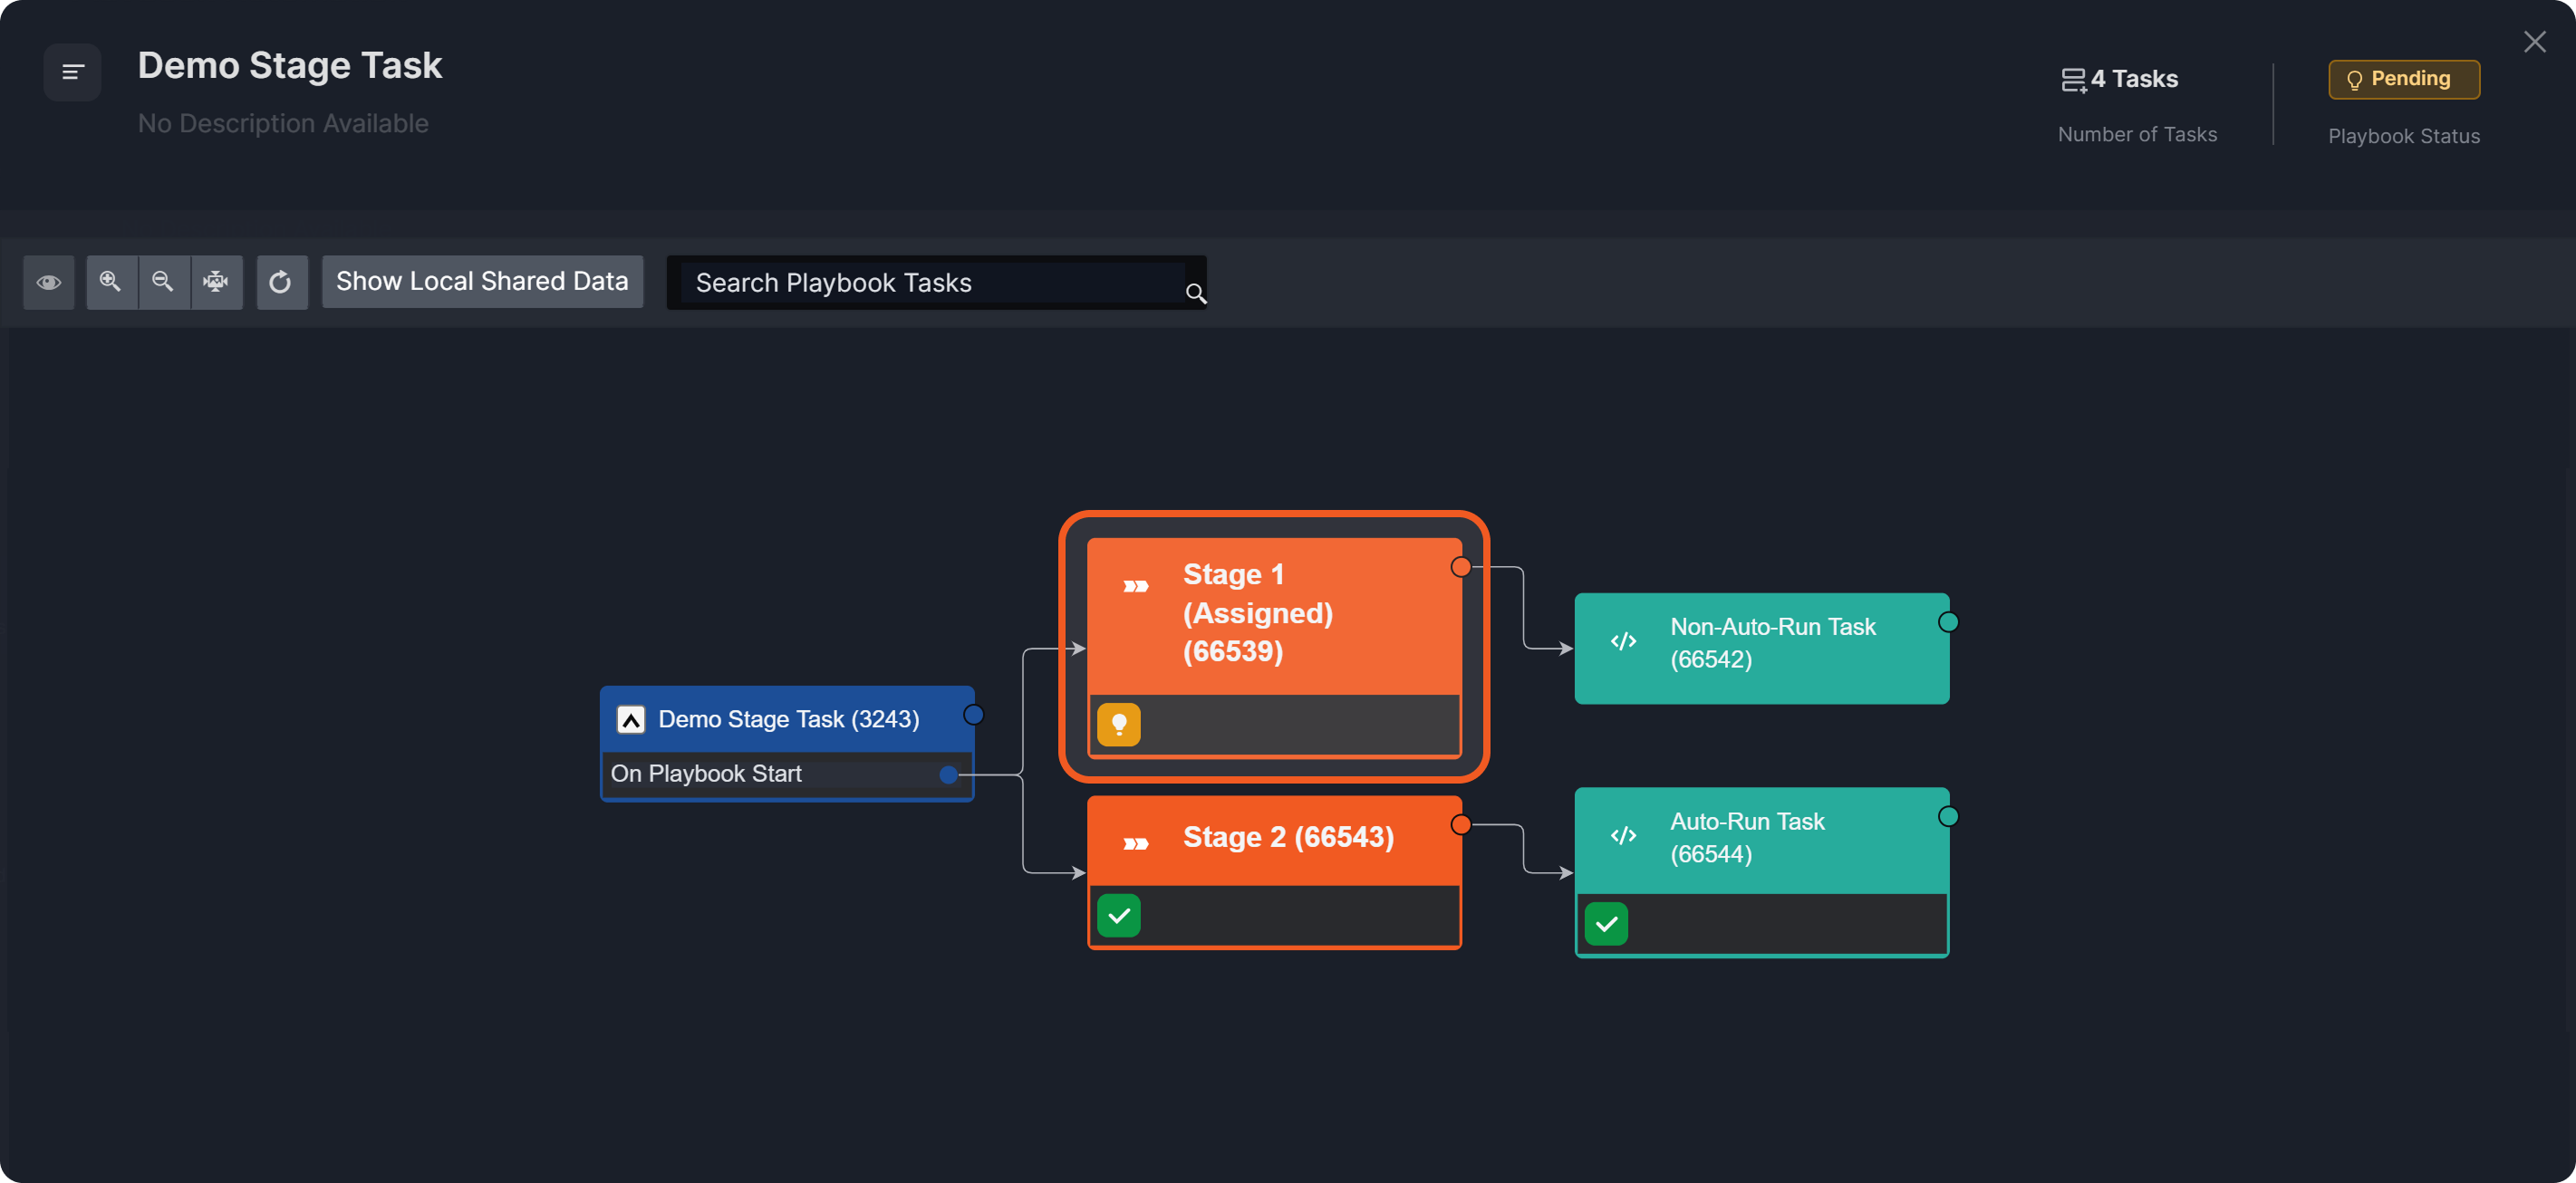
Click on the pending Stage 1 (Assigned) task.
-
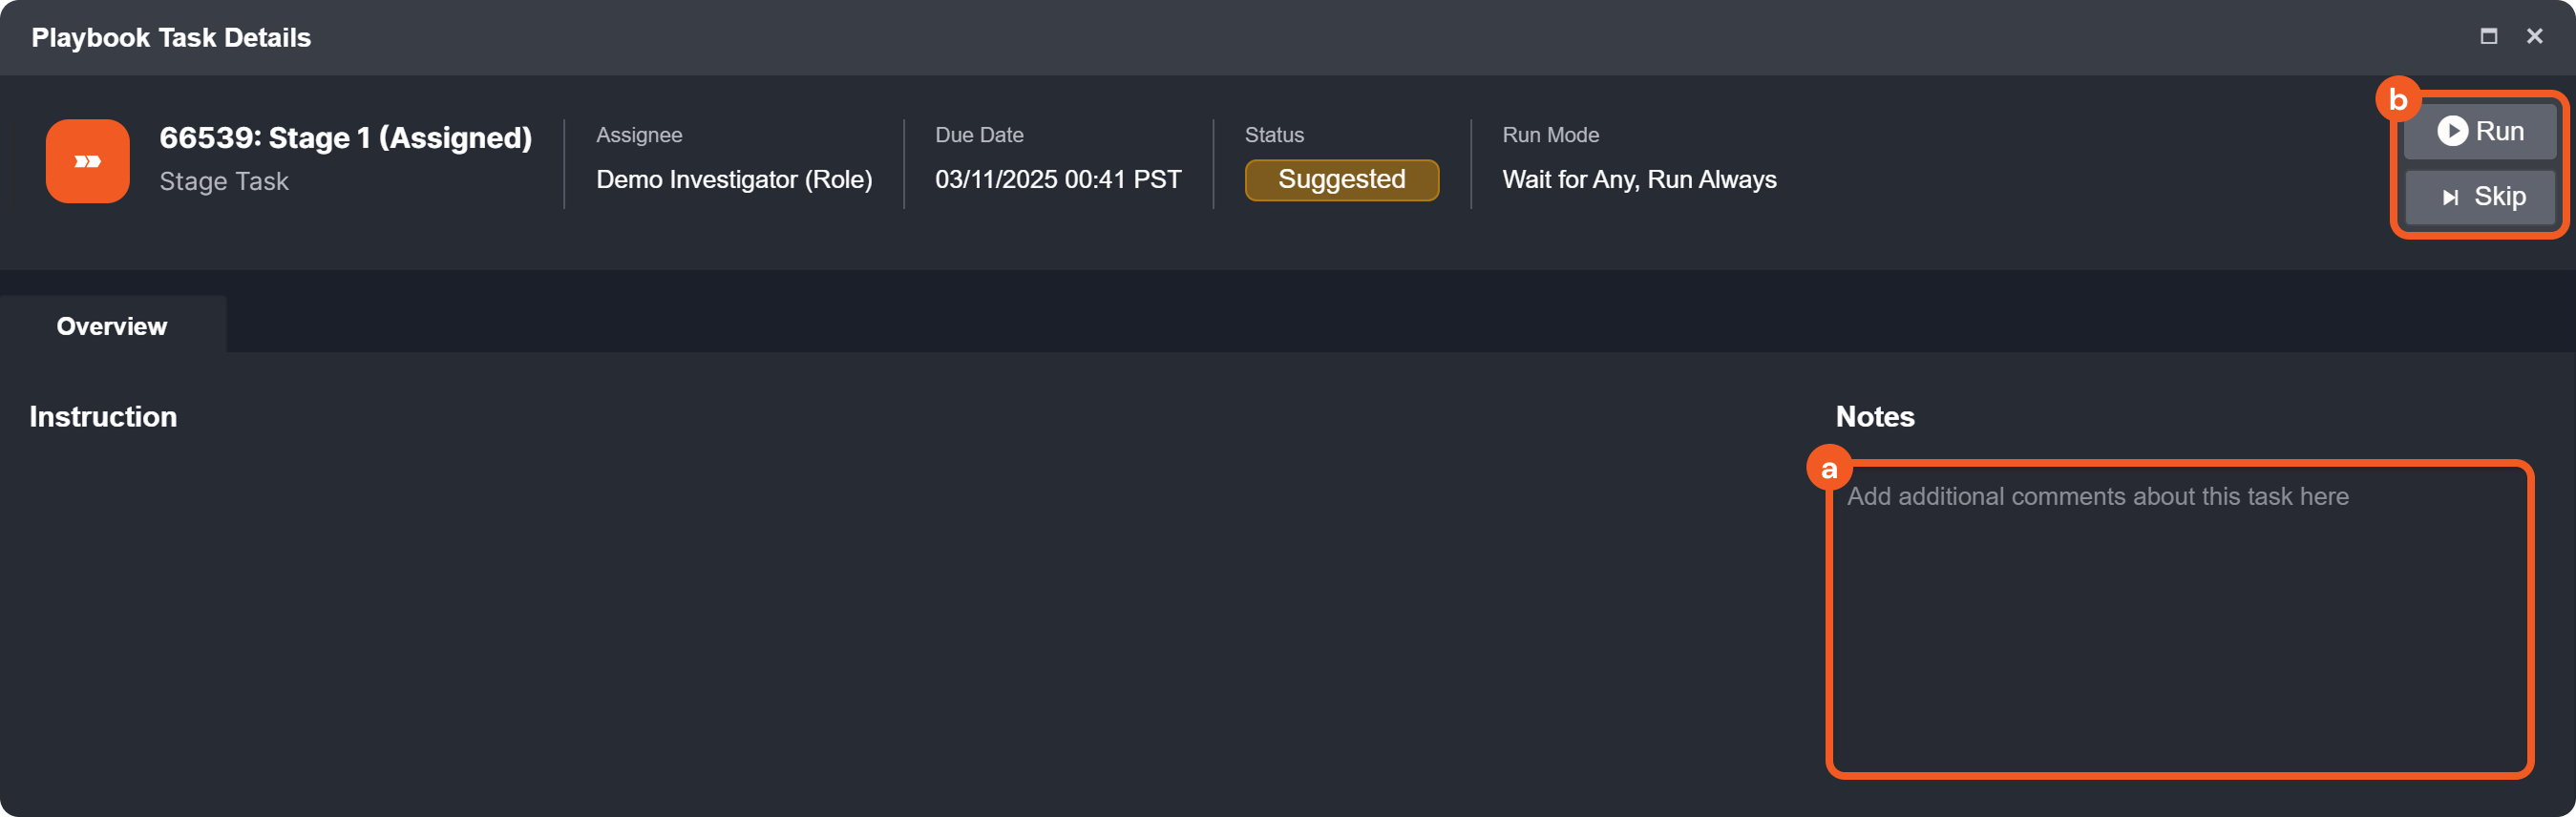
View Based on Assignment:
-
Assignees
-
Non-Assignees (with the same role)
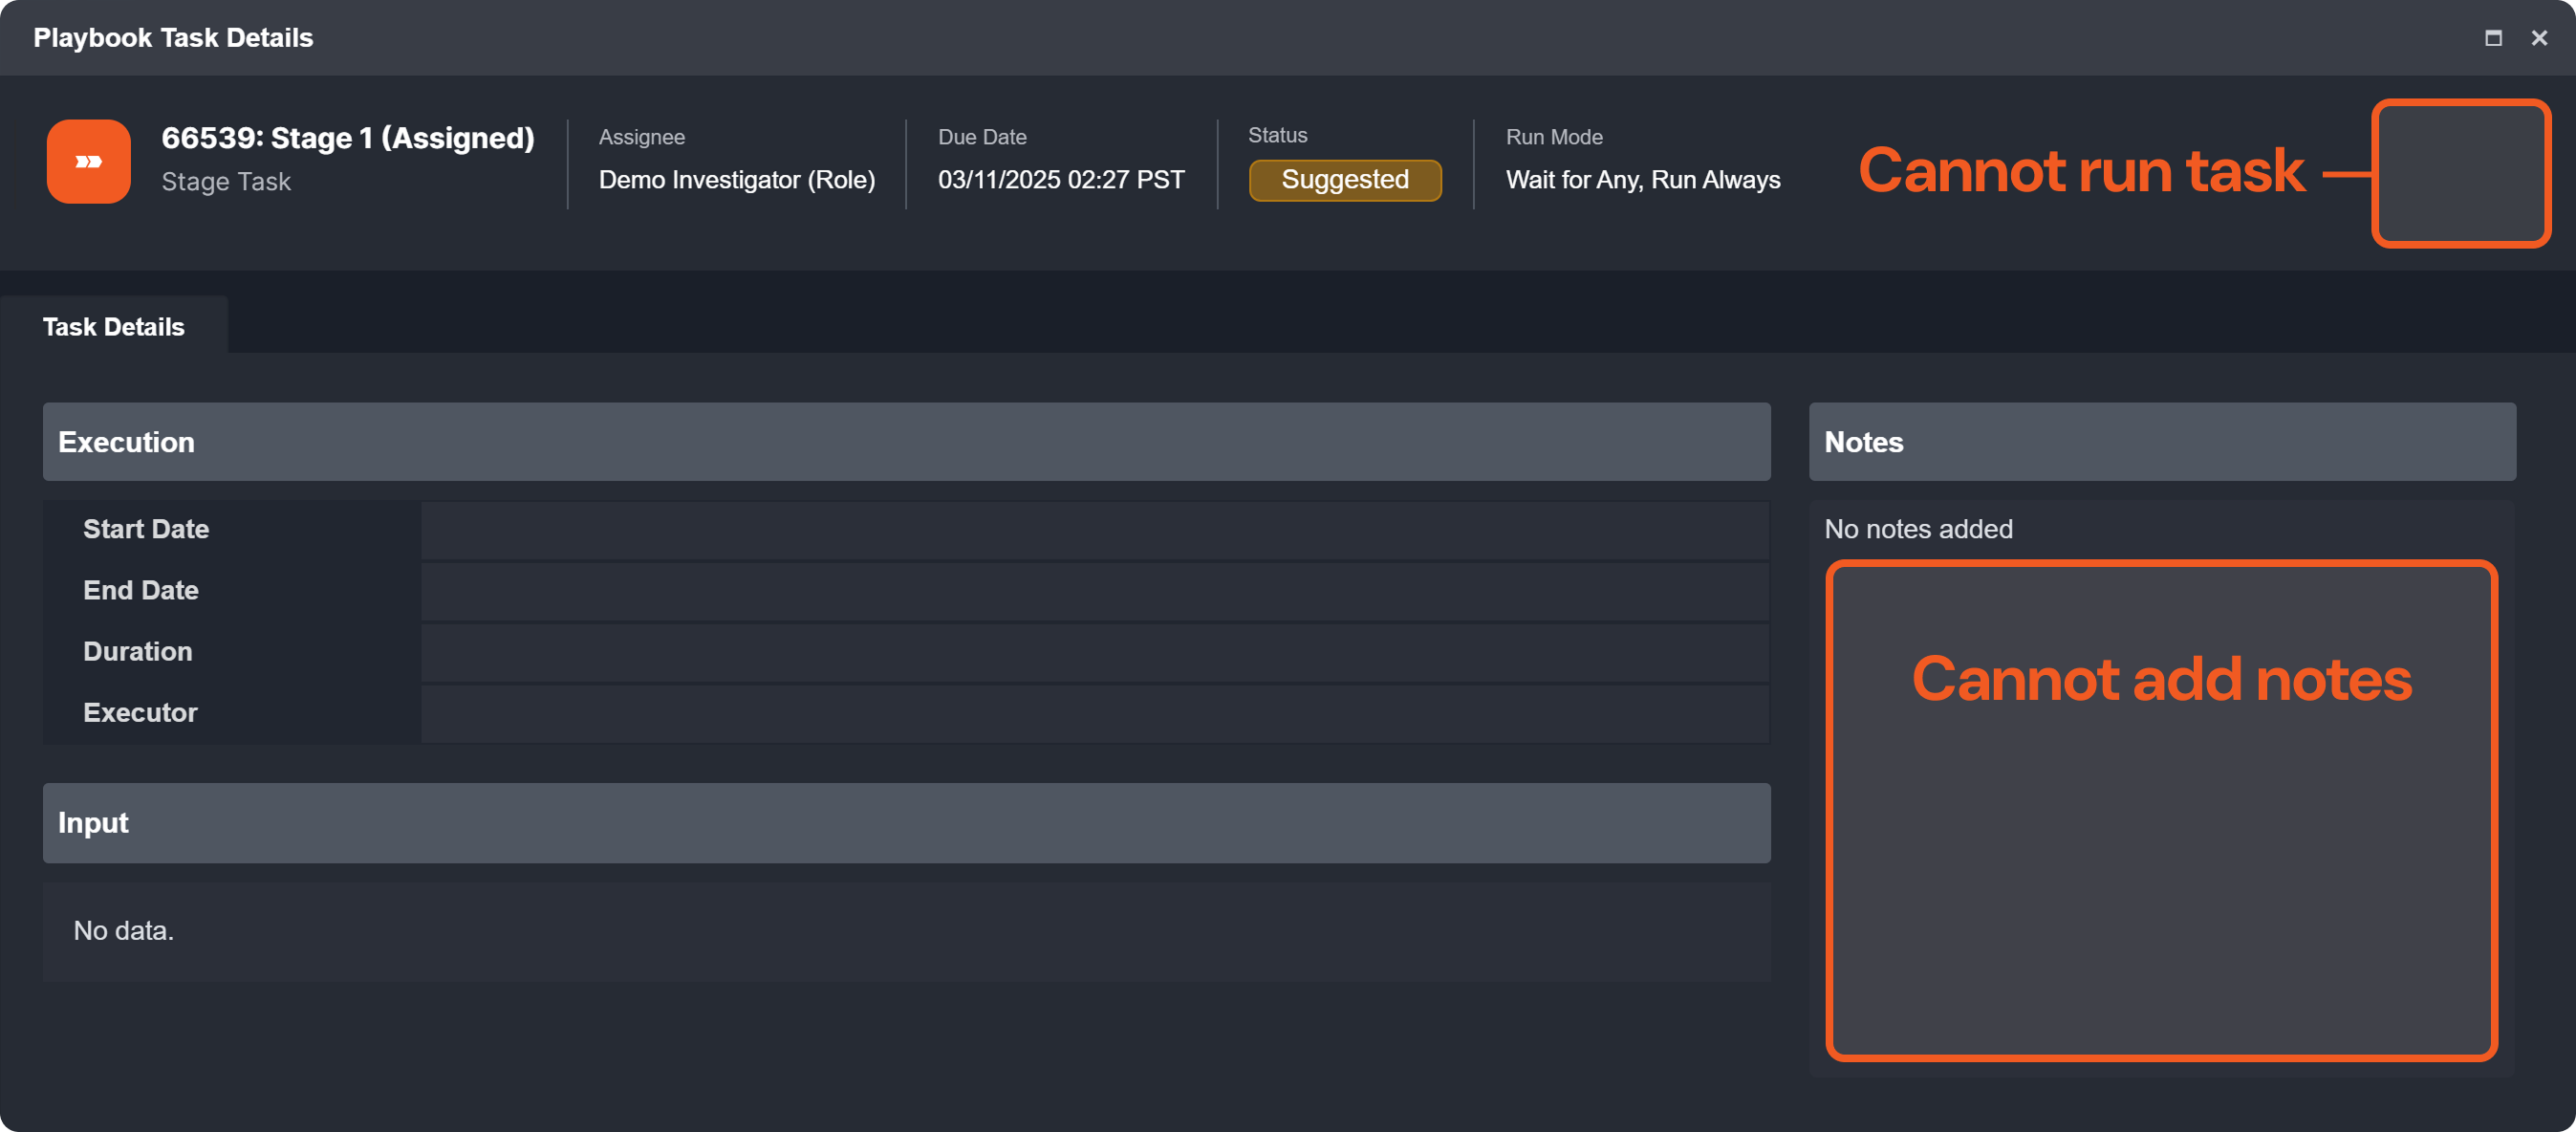
-
-
Assignees can now track workflow progress, monitor execution, provide required inputs, document outcomes, and take actions per SOC or business requirements.
Example 2 - Building and Testing a Playbook for IP Reputation Analysis
scenario An analyst is building a playbook to check IP reputation, using stage tasks to organize workflow and ensure an email is sent only after the preceding stage task executes.

Here is how they built the playbook:
-
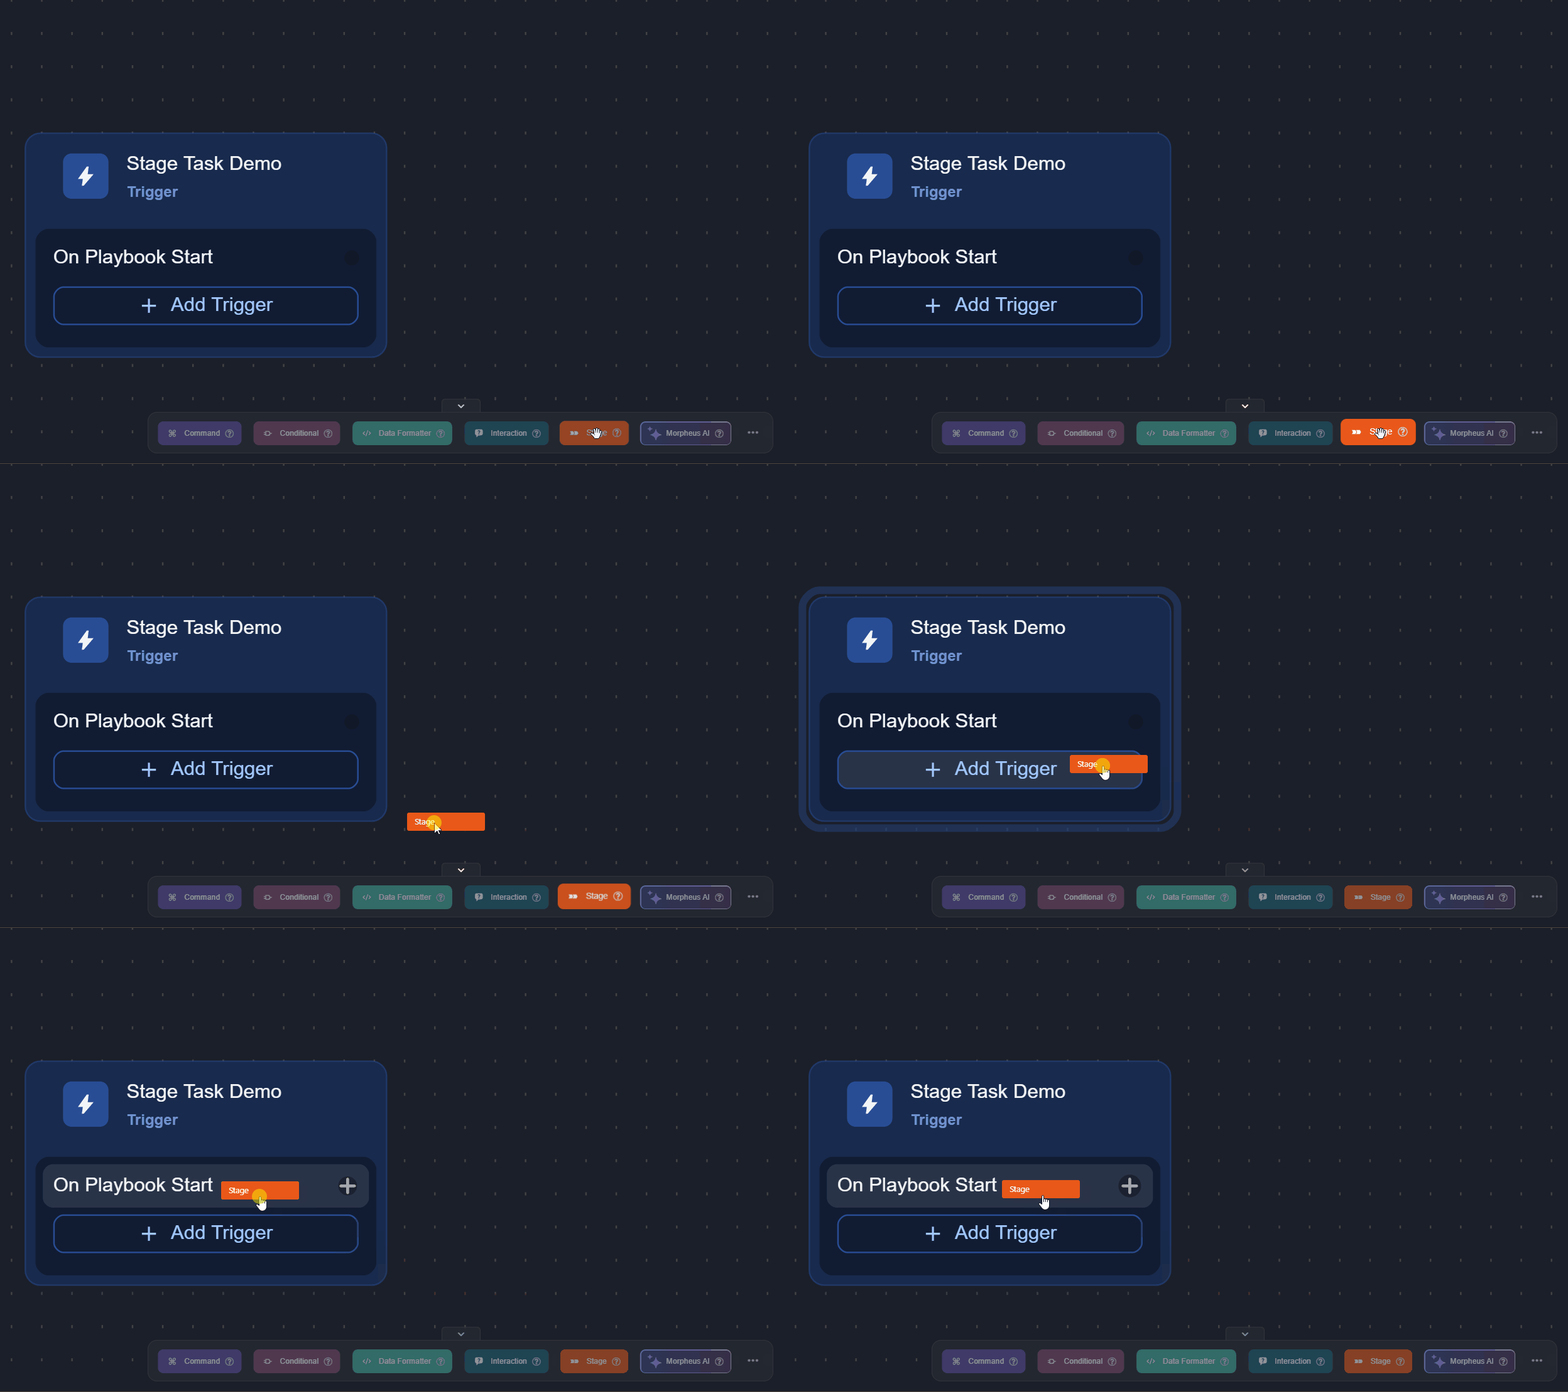
Add a stage task to the On Playbook Start trigger to mark the beginning of the IP analysis.
-
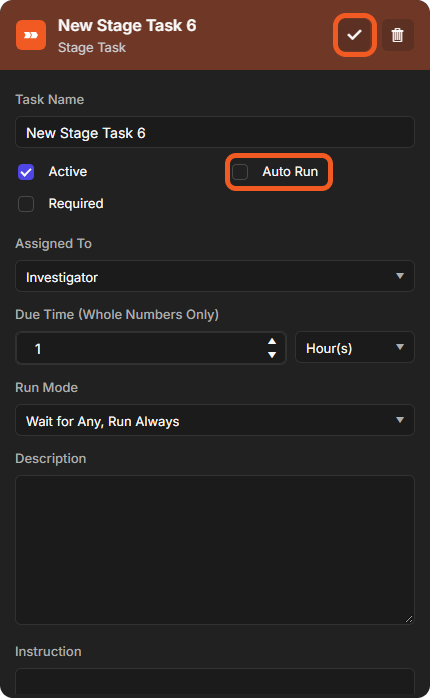
Name the task Begin IP Analysis, select Auto Run, then select the check mark to save.
-
Add a command task that can check the reputation of IP addresses (e.g., the Check IP Reputation command from VirusTotal v3) to the stage task, and configure it.
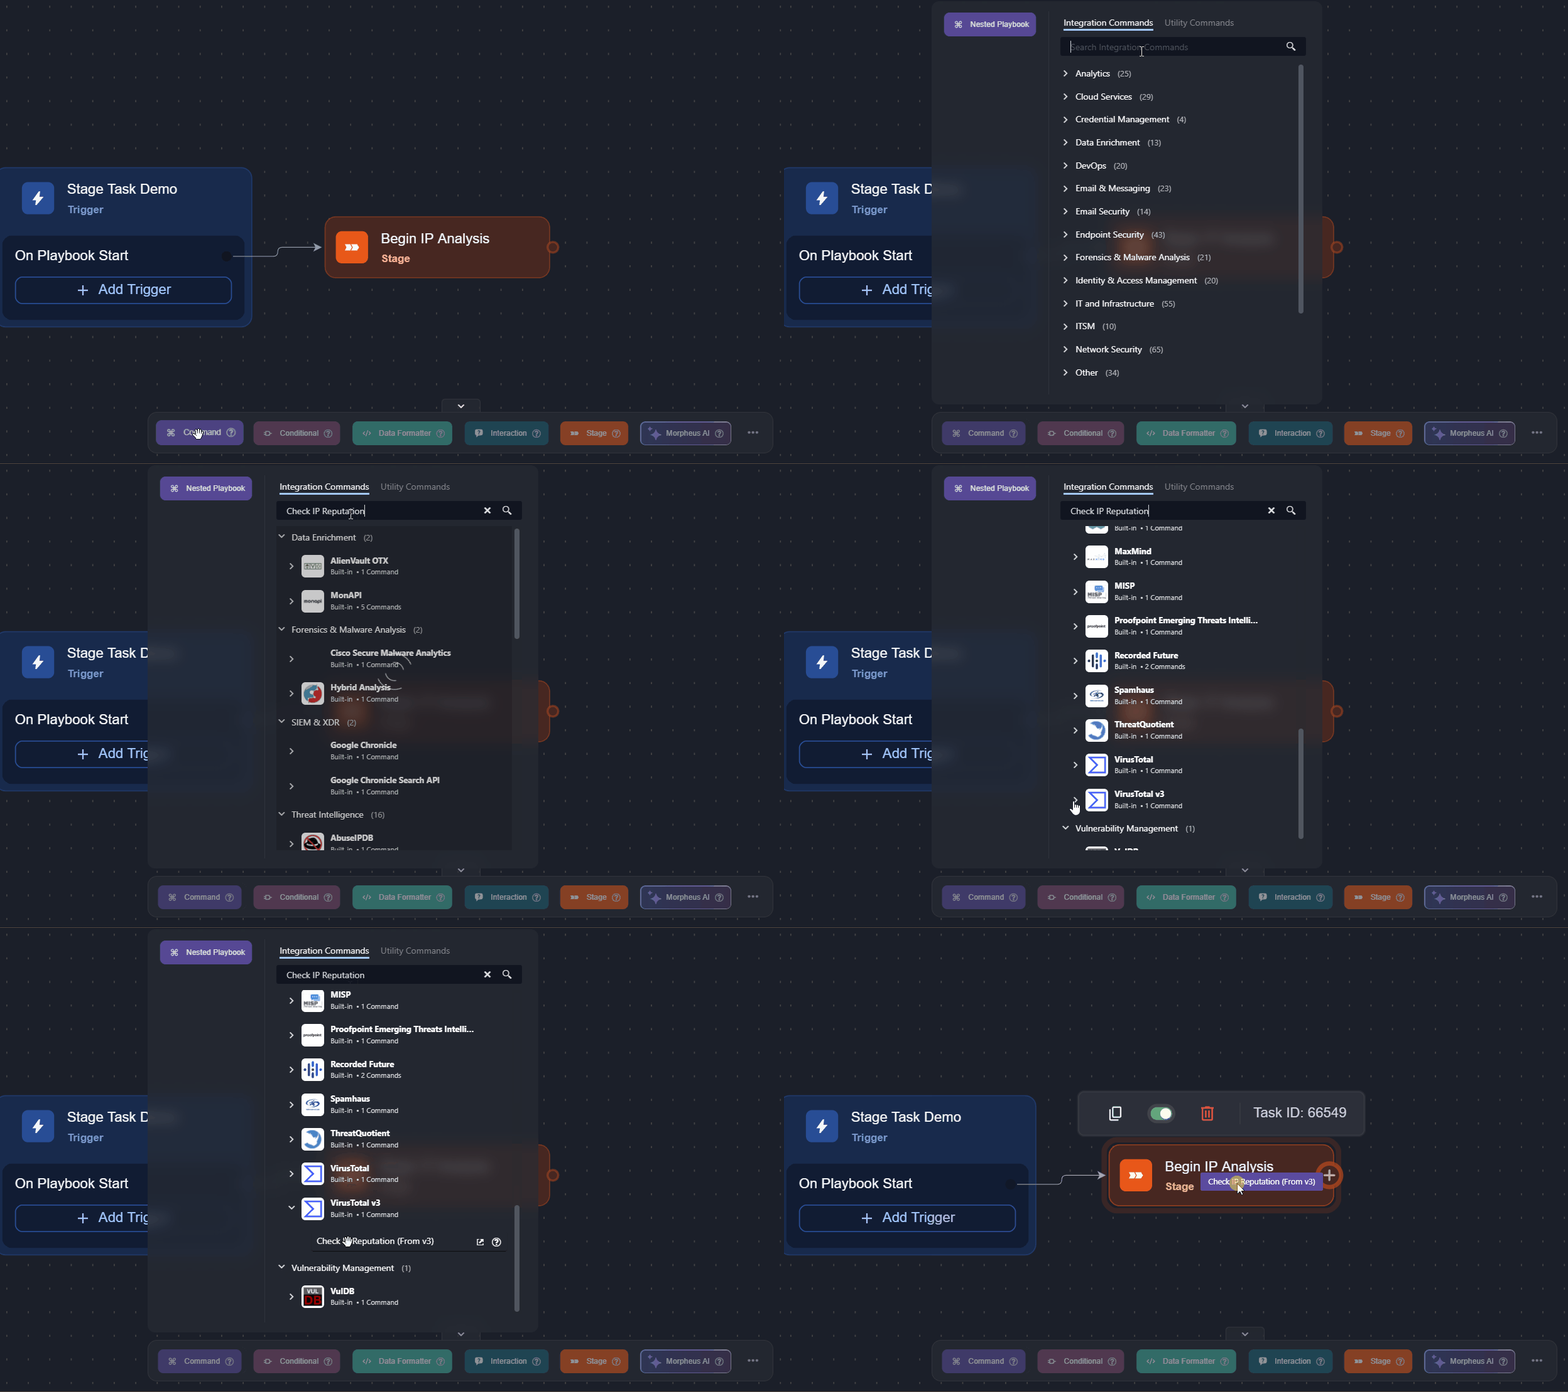
-
Add a stage task to the previous task to control the workflow progression.
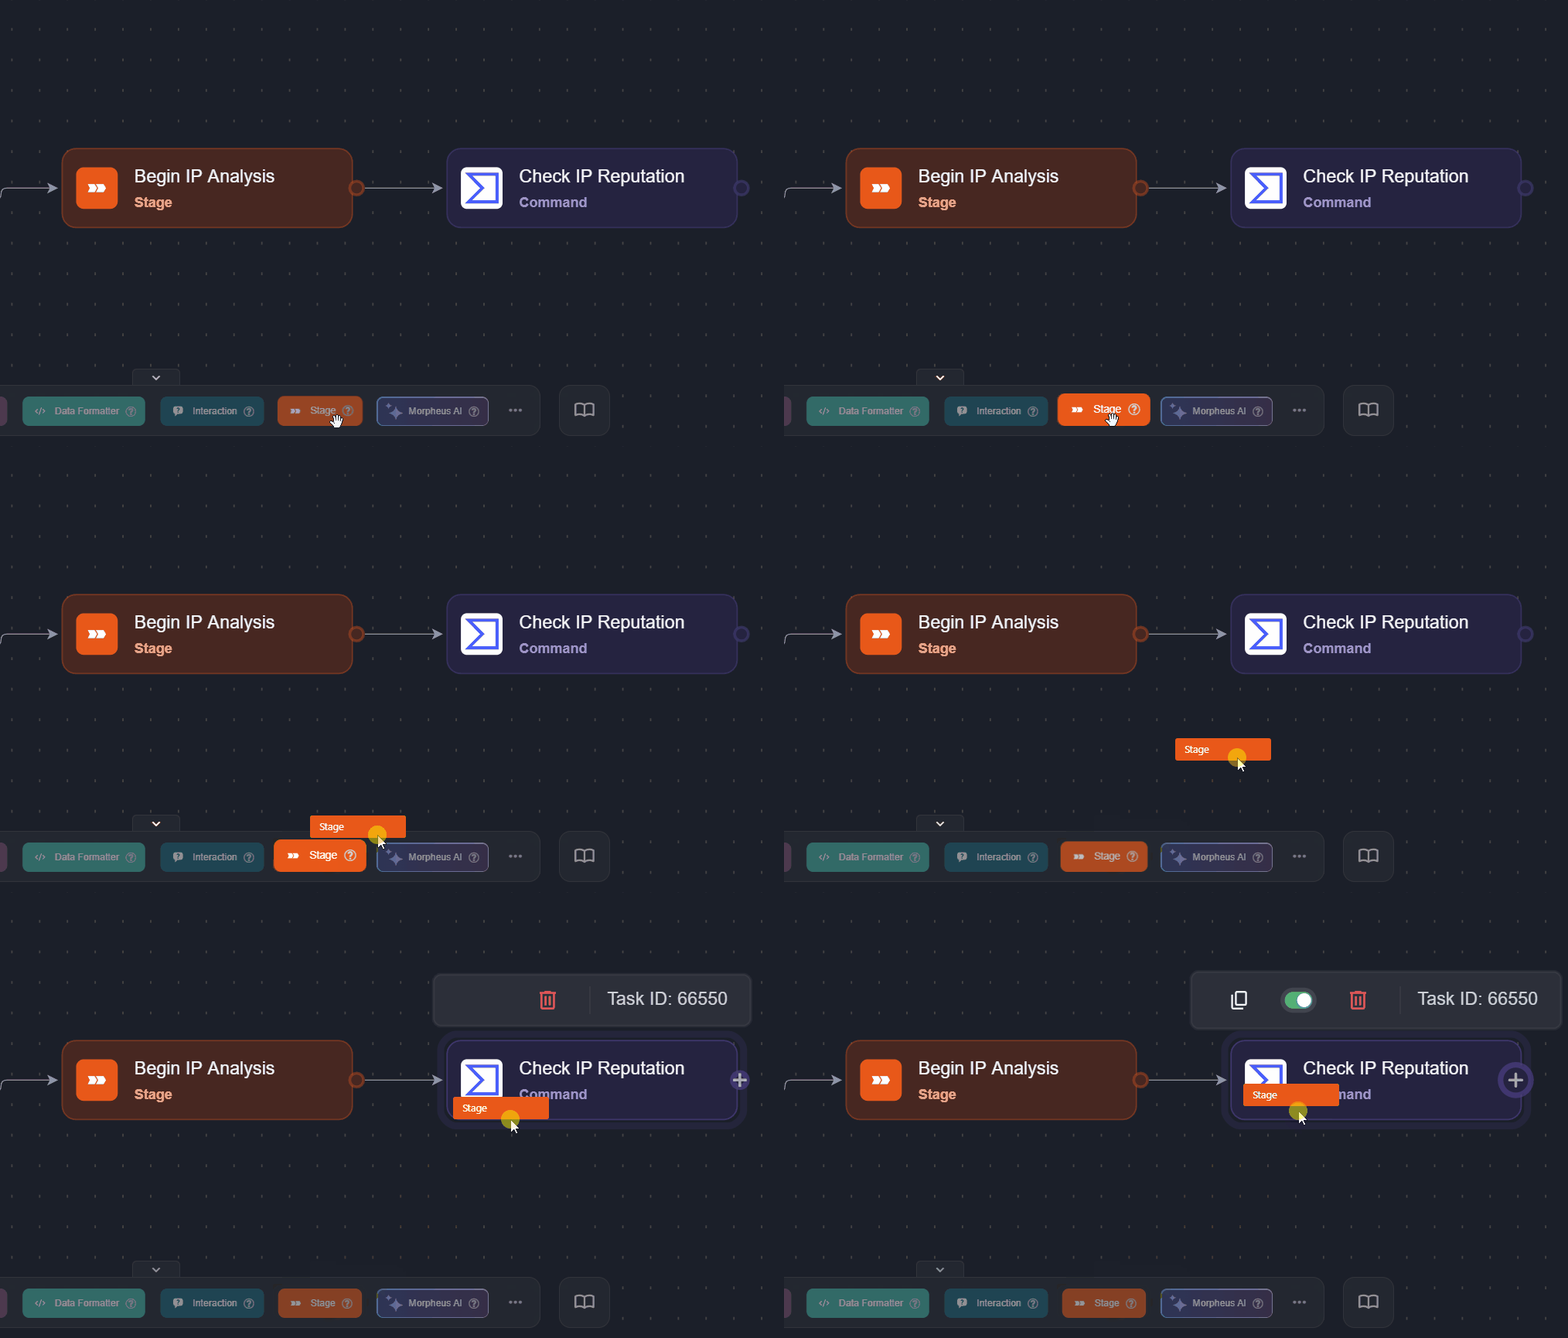
-
Name the task Triage, choose who it is assigned to in Assigned To, and set the Due Time (Whole Numbers Only).
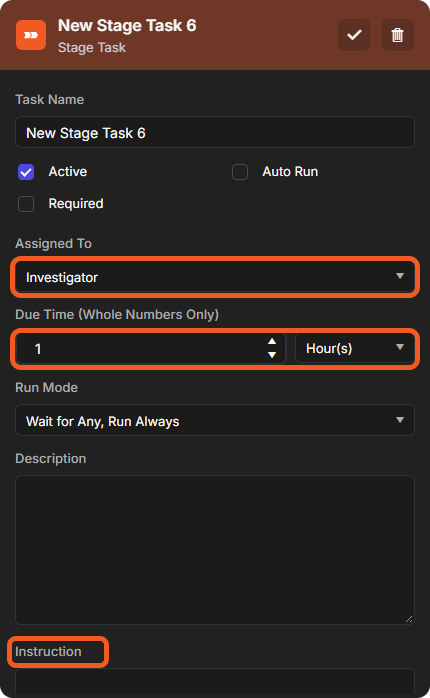
-
(Optional) Add an instruction for the assignee in Instruction, then select the check mark to save the task.
-
Add the Send Email utility command task to the previous task, and configure it.
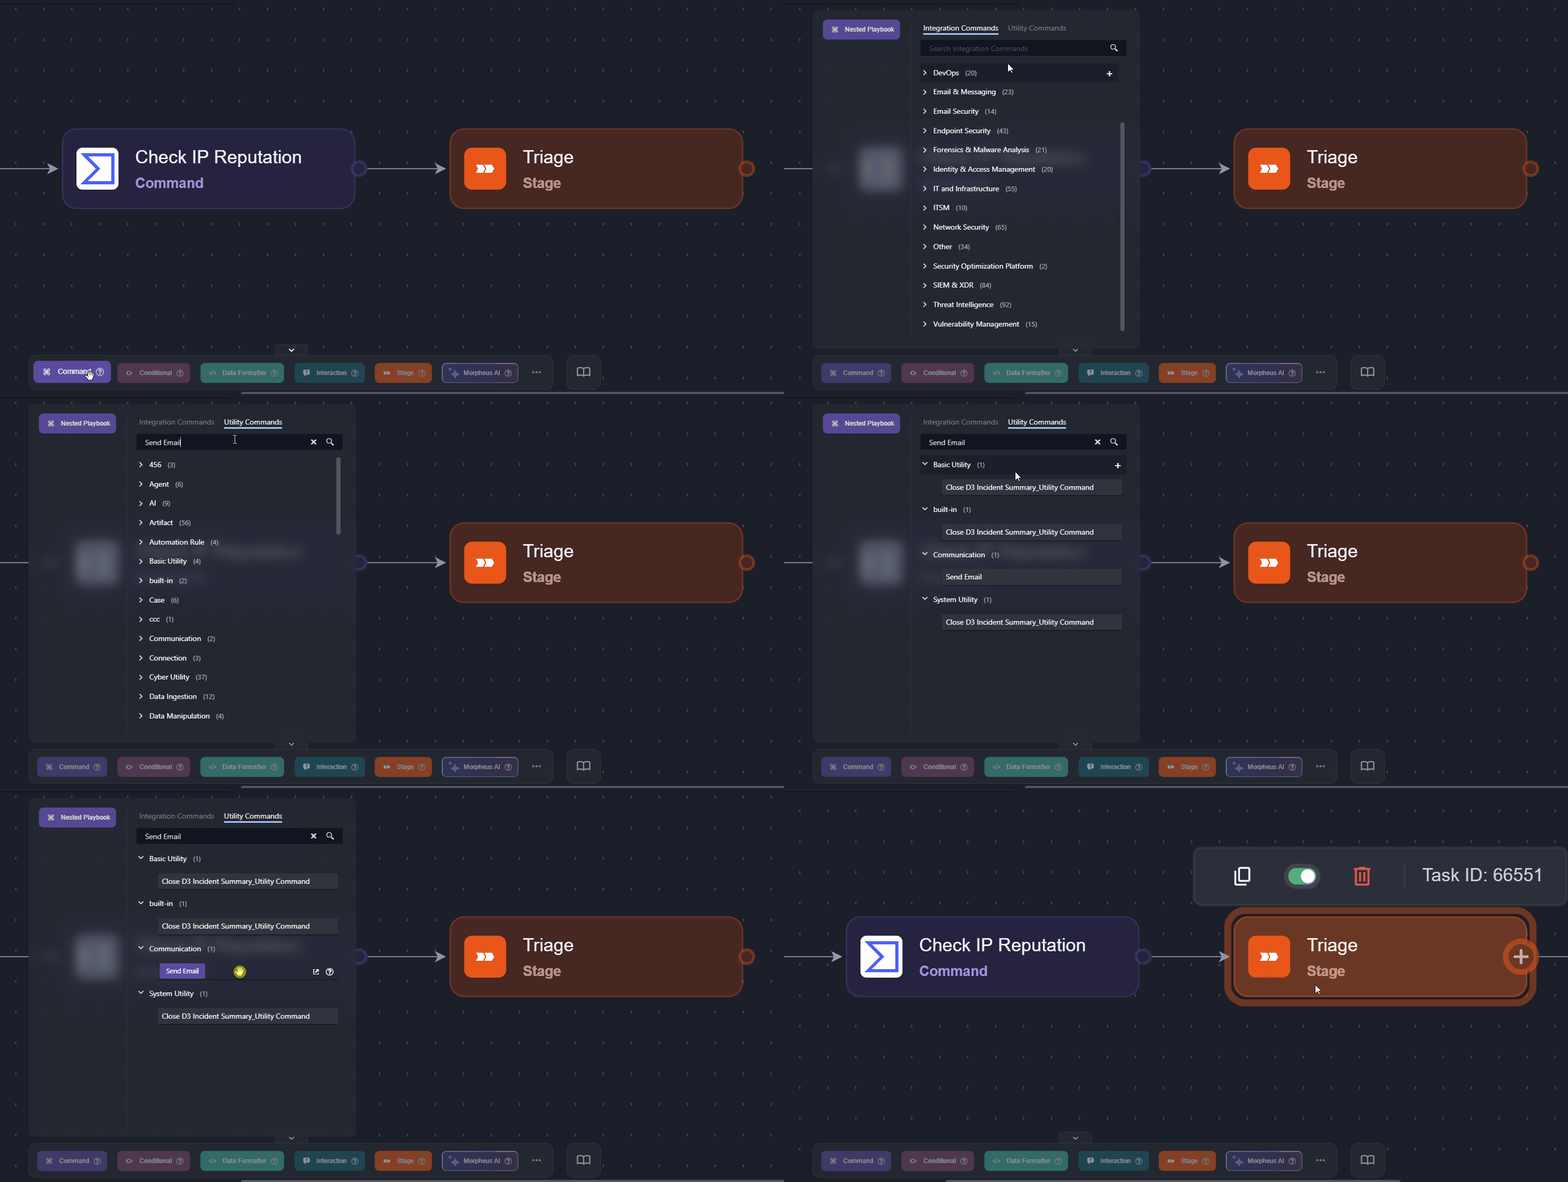
-
Select Go Live.
-
In the Manage Site Access and Go Live window, move the relevant sites to Sites with Access, then select Confirm & Go Live.
-
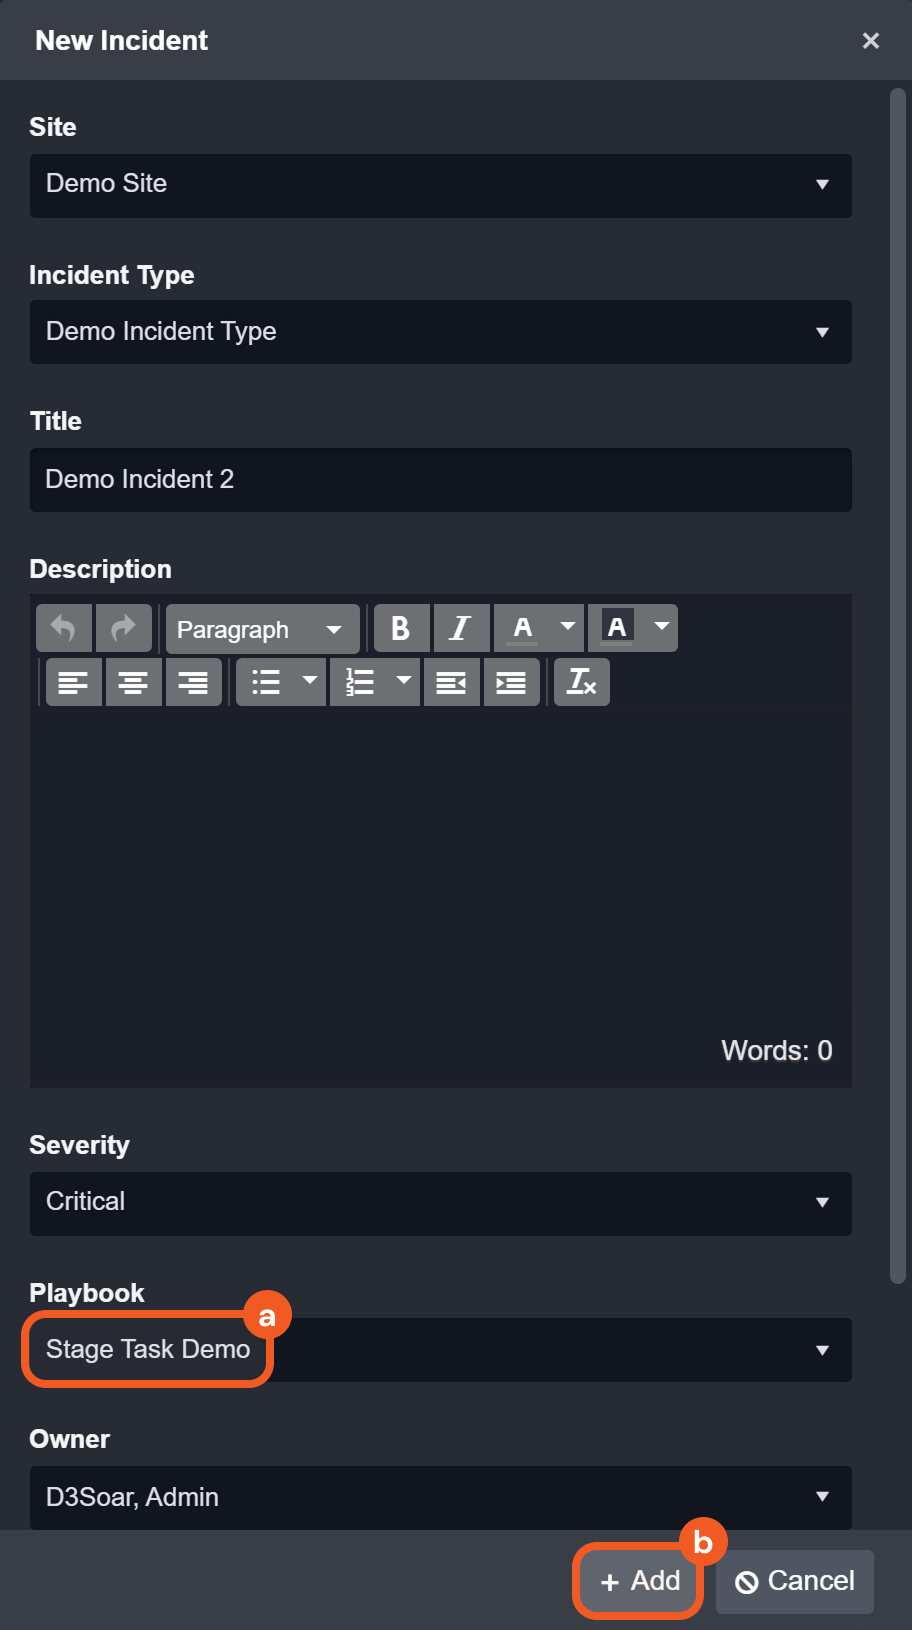
Select New Incident in the header, choose the live playbook in Playbook, then select + Add.
-
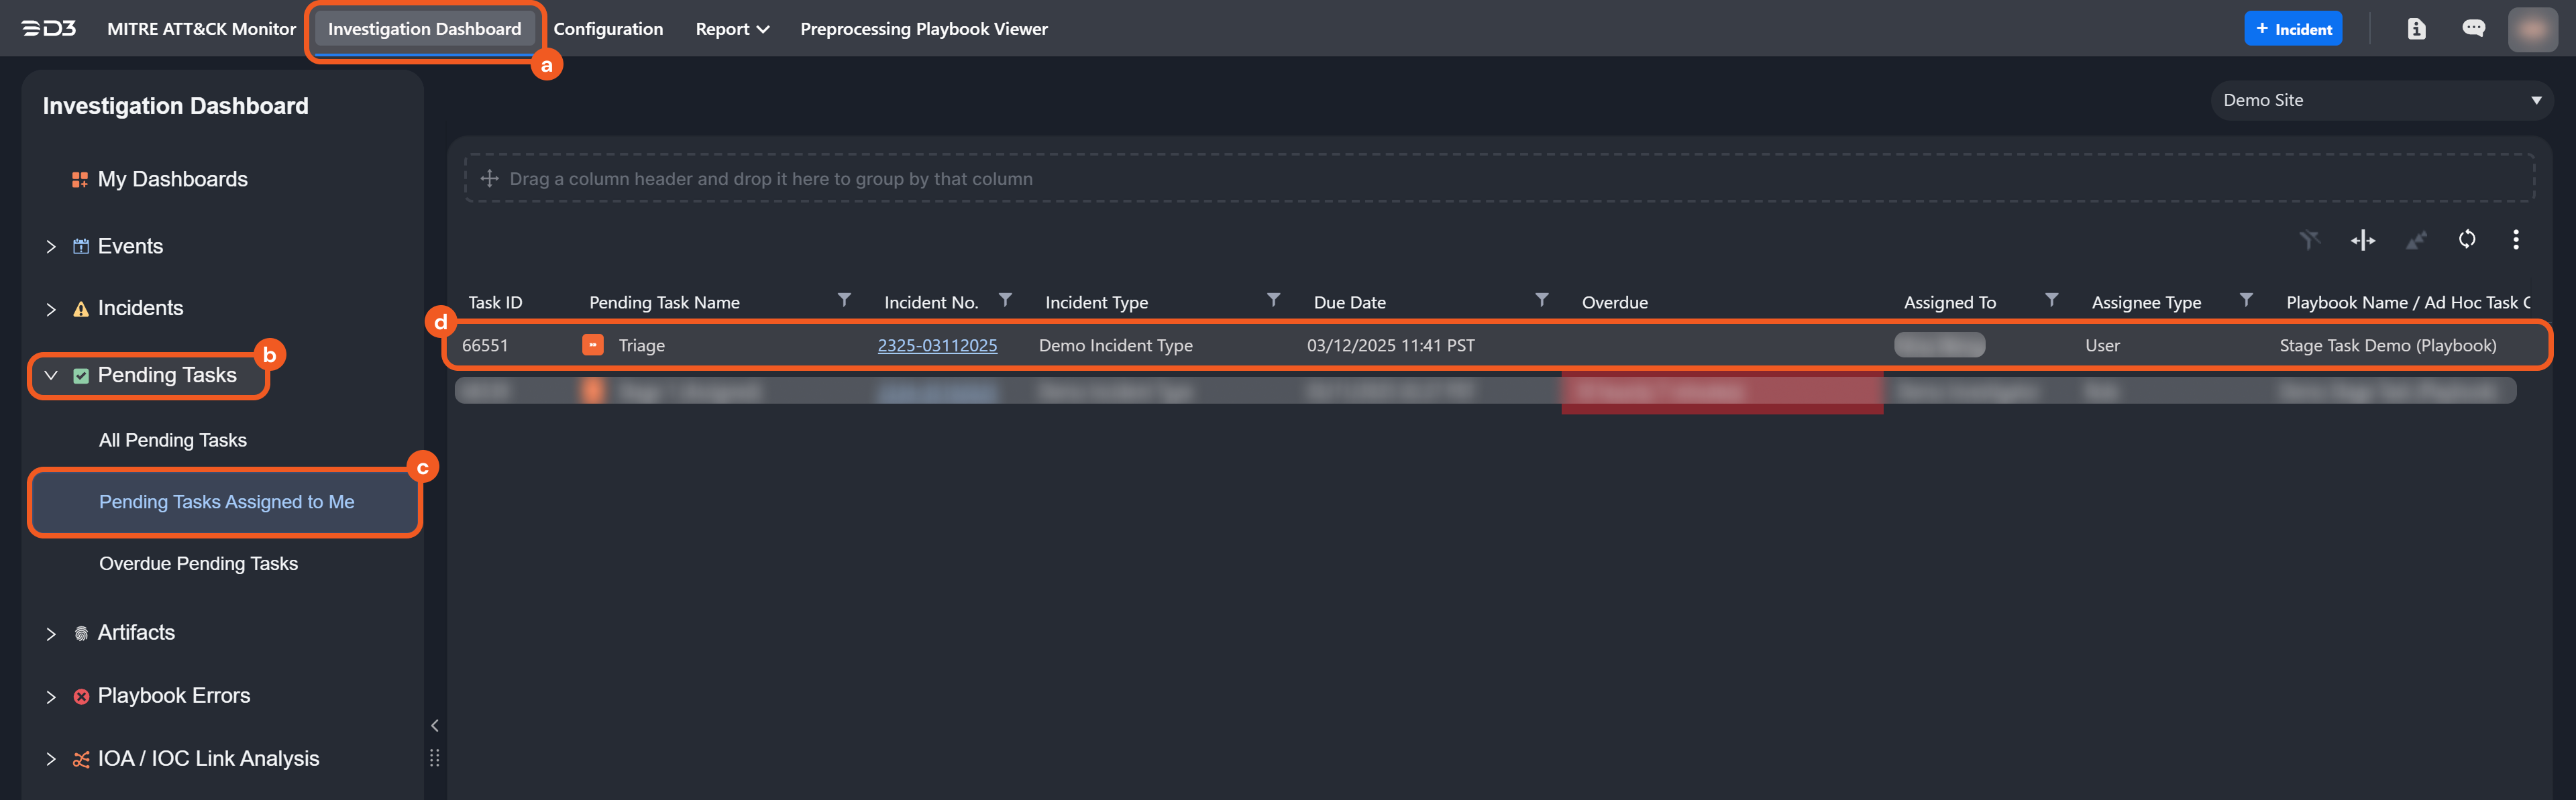
Ask the assigned investigator to click the assigned stage task on their Pending Tasks page (sidebar Pending Tasks; the view list at the top starts on All Pending Tasks).
-
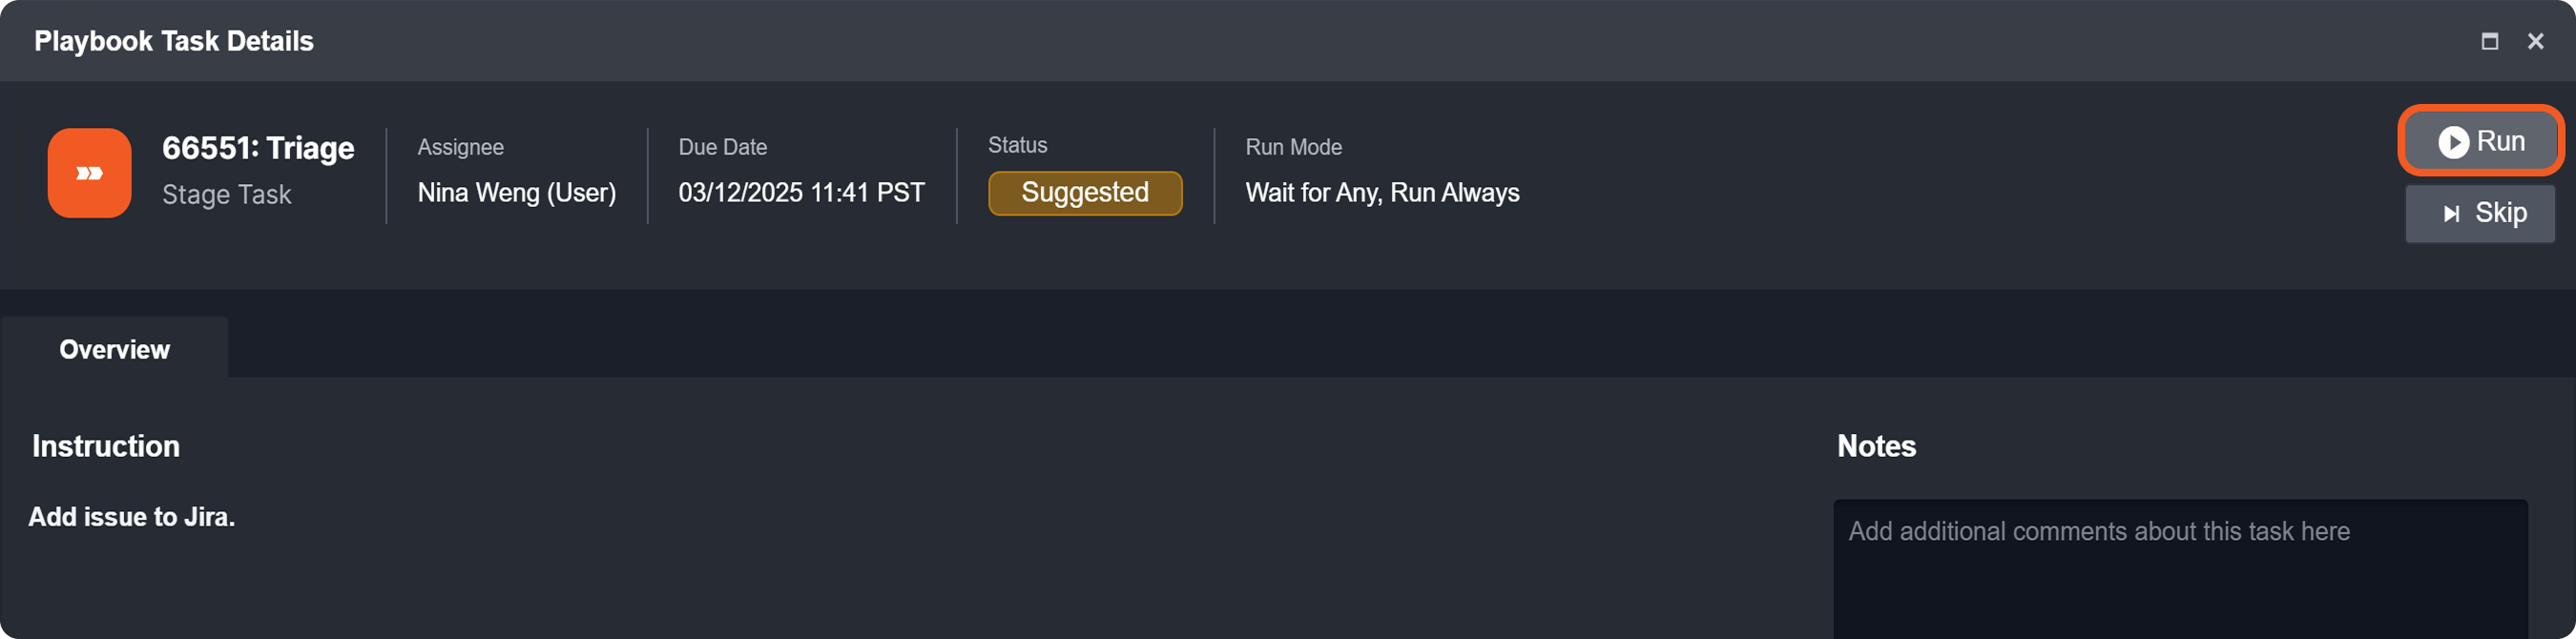
Ask the investigator to click the Run button after performing the task stated in the Instruction section to move along the playbook execution.
RESULT
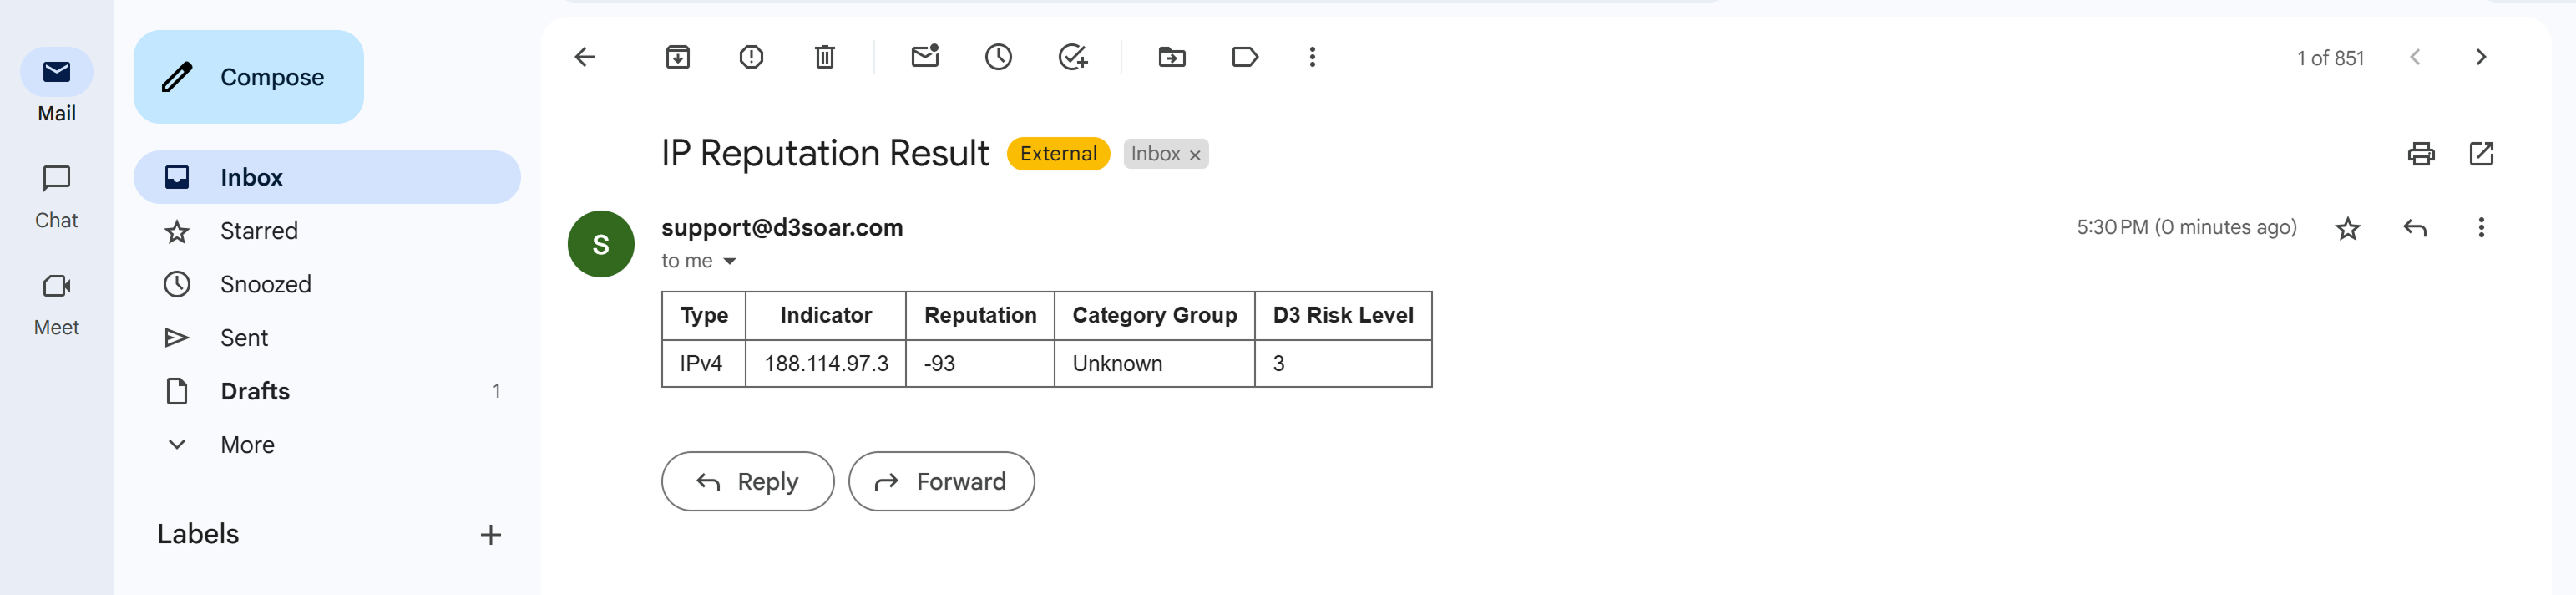
Executing the Triage task enabled the subsequent Send Email task to run. The recipient will receive the email sent by the command task, as shown in the image below.