
last updated: may 7, 2025
PREREQUISITE
The Enable Custom View permission must be selected.
Procedures
Creating a Simple Custom View
-
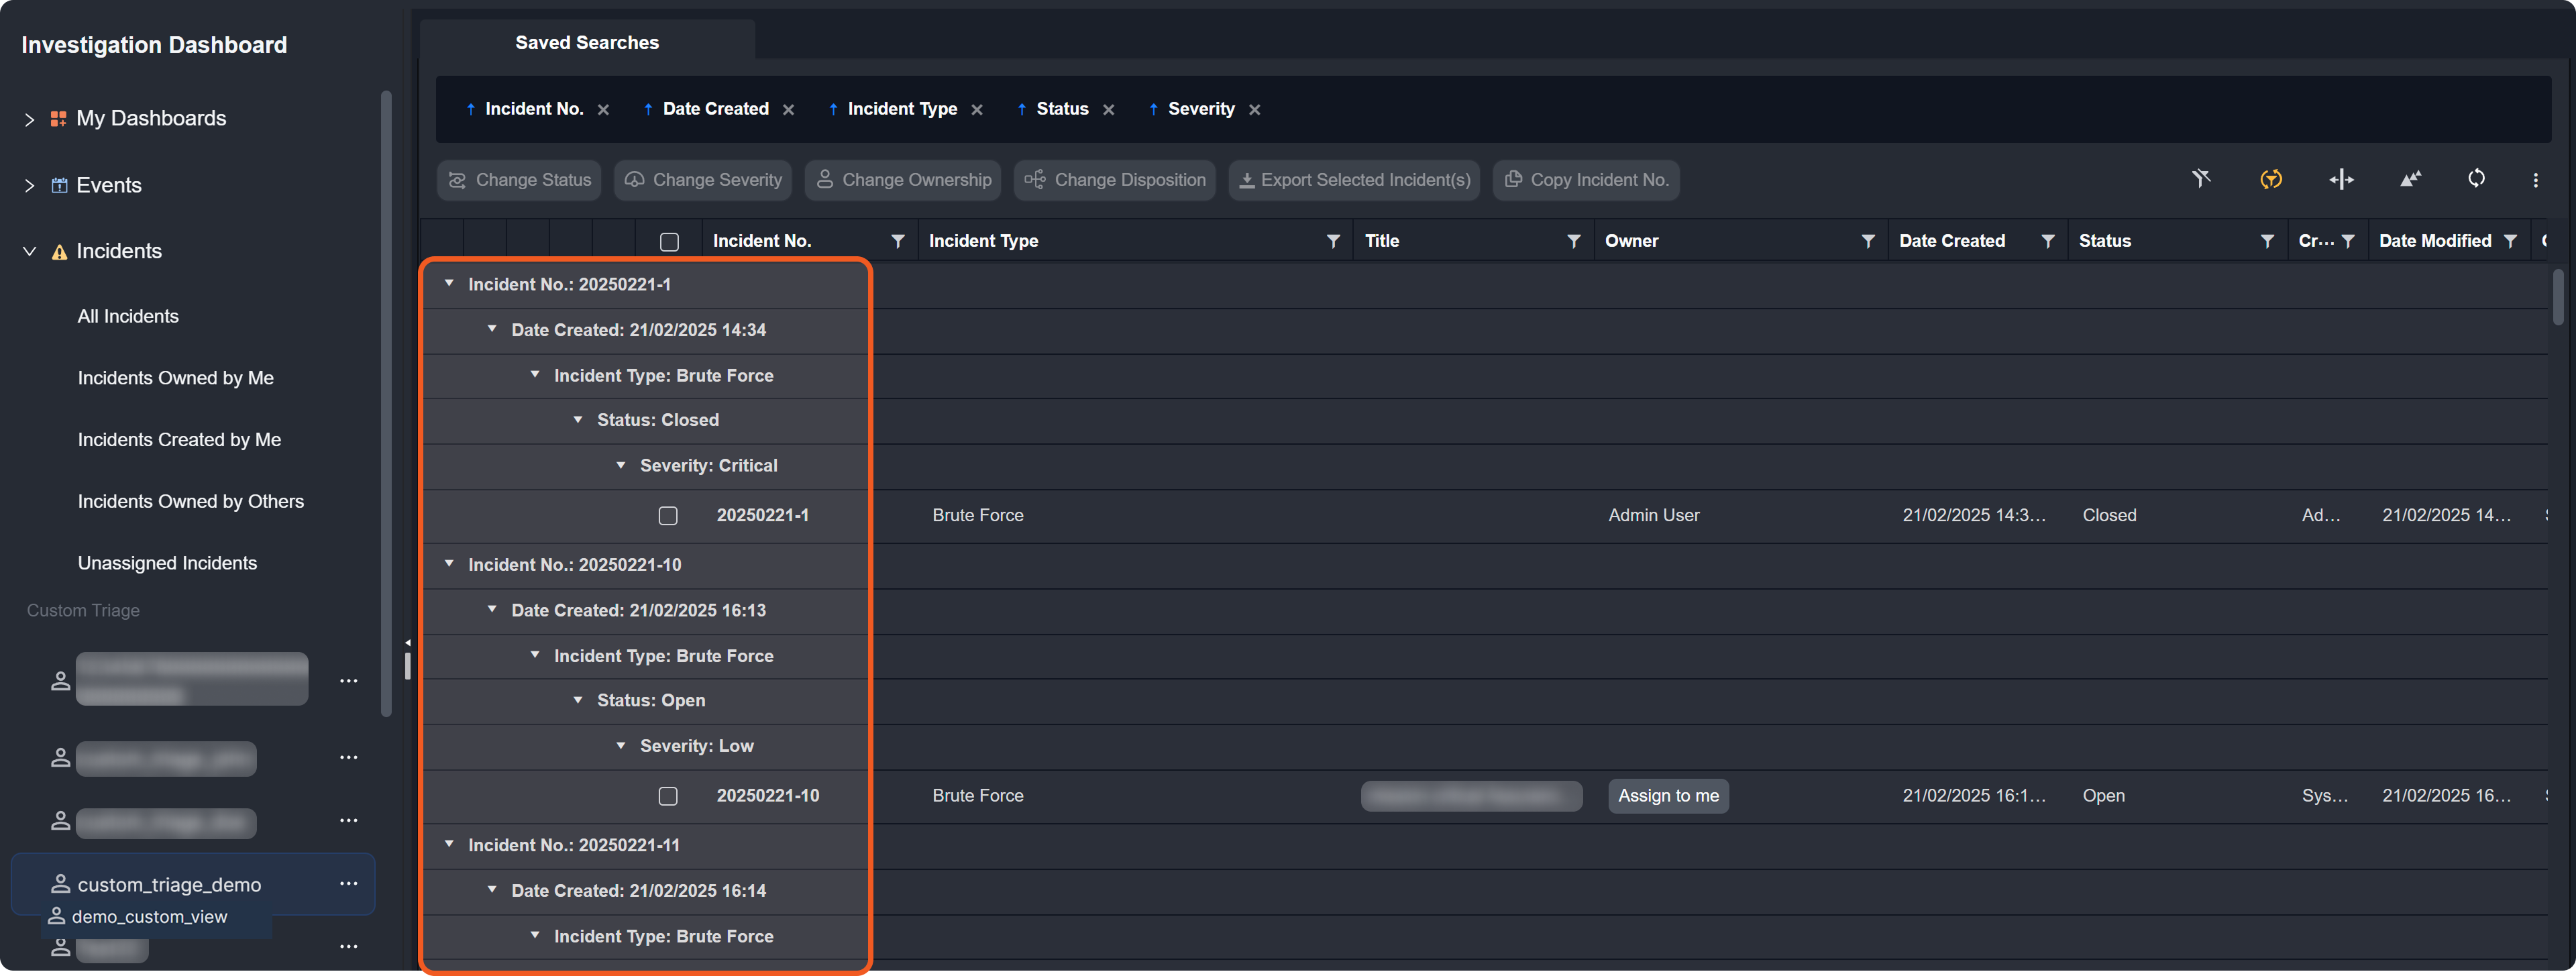
Drag the table's column headers into the Saved Searches field to define groupings.

-
Observe the number of groupings reflected in a hierarchical structure, aligned with the order in which the attributes are positioned within the Saved Searches field.
.png?cb=5e455e56f0cde98a03cc6002206f123f)
-
Click on the 10.2.0.134_16_8_main_release_VSOC_LifeServer.aspx_div=dashboard&Open=Other&t2=7ac77d05c08b289fc4a72684343498d9c97bcbeb4869e2e25f82767db9909bd4 1-20241122-015709.png button next to the Incidents accordion.
.png?cb=936b427f6936b6ff1e6c0d4ca09d6045)
-
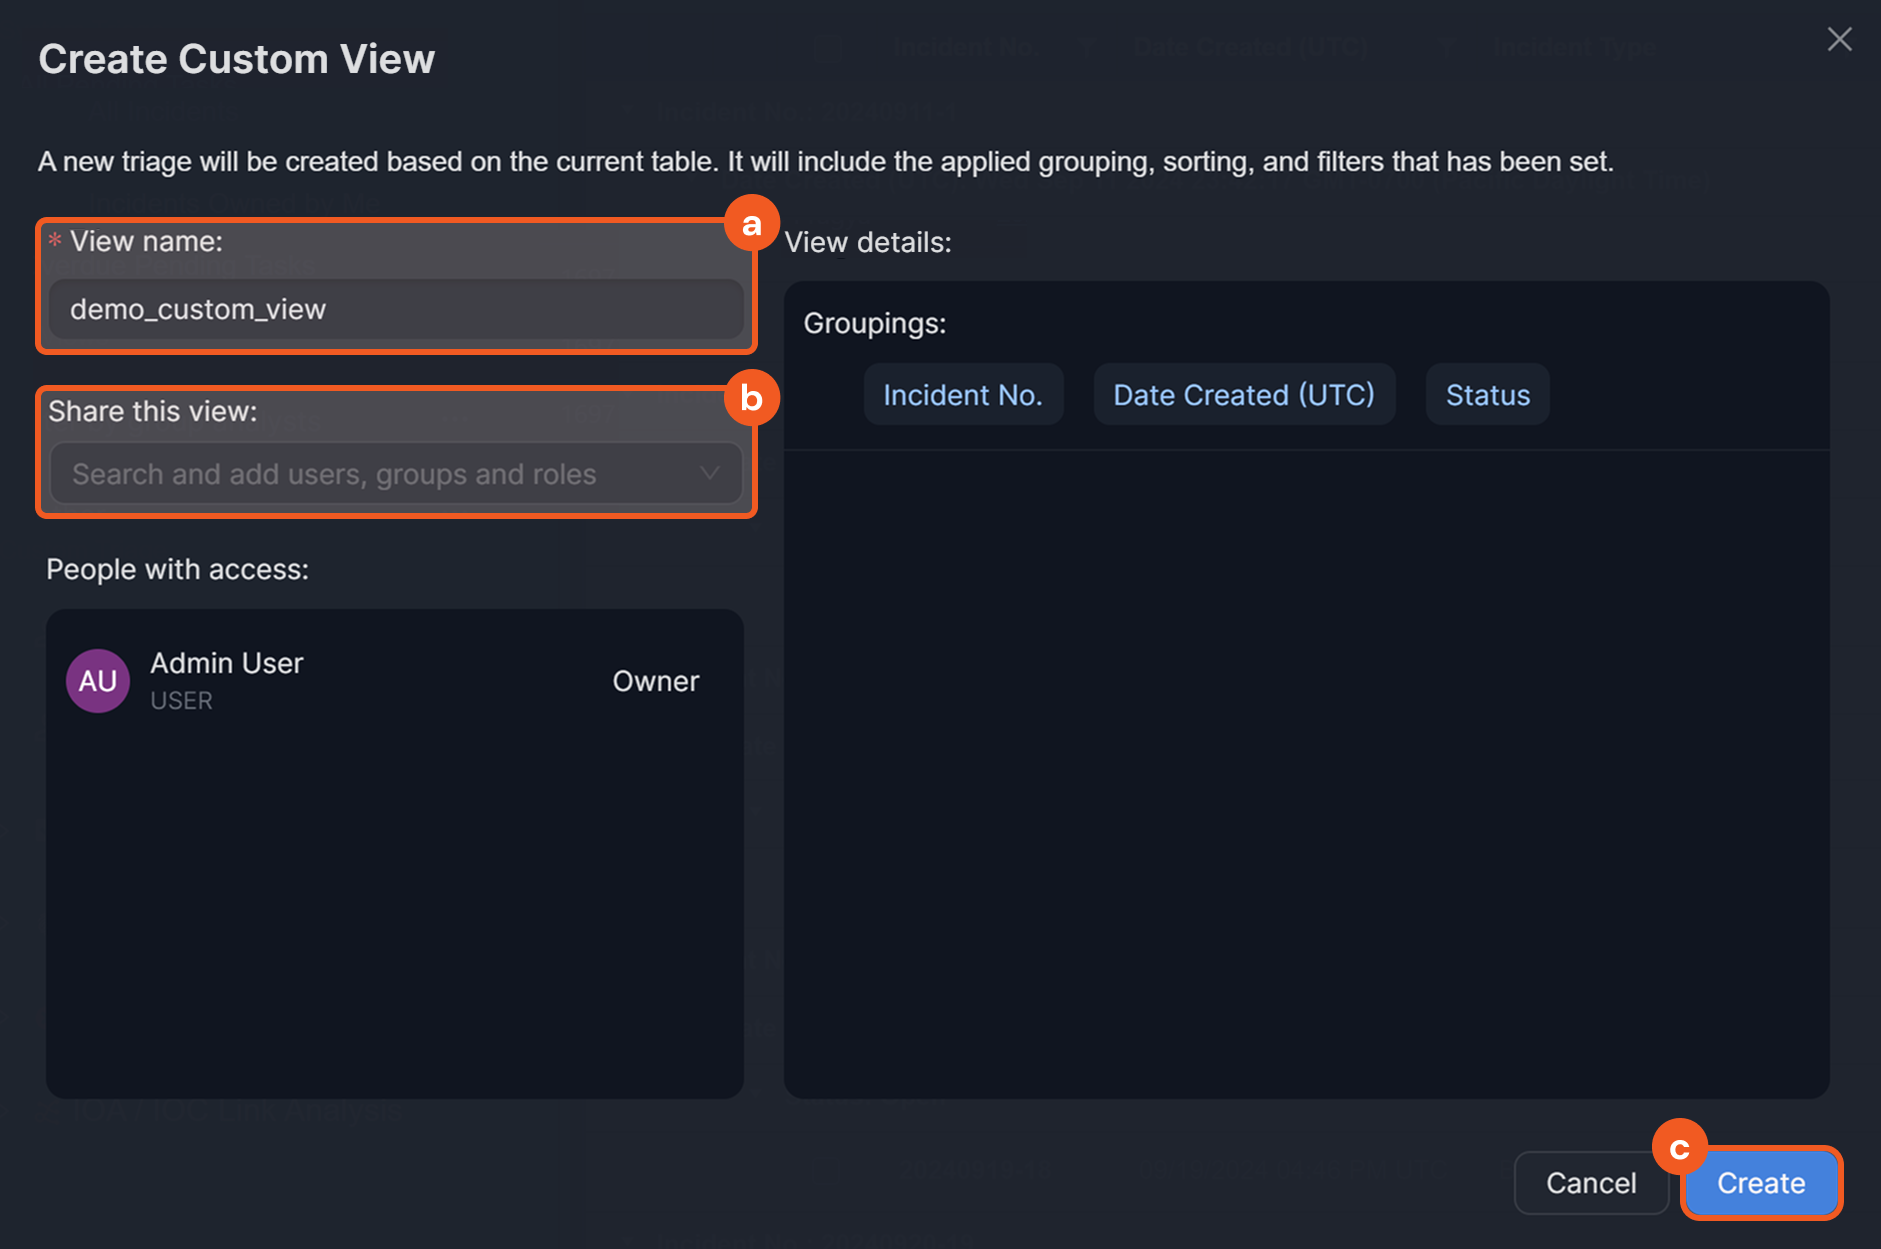
Create the custom view.
-
Input a unique custom view name.
-
(Optional) Grants access to this custom view for other users, groups, or roles.
-
Click on the Create button.
-
-
Click the newly created the custom view to view it.
%202-20250428-211845.png?cb=fc330ff101272d90e43aefaa1394f9c4)
RESULT
Users can now return to this custom view from any other view.
Creating a Custom View with Predefined Sort Orders and Filters
Users can further customize their views by sorting data in ascending or descending order by table headers and applying filters.
Sorting Using Table Headers
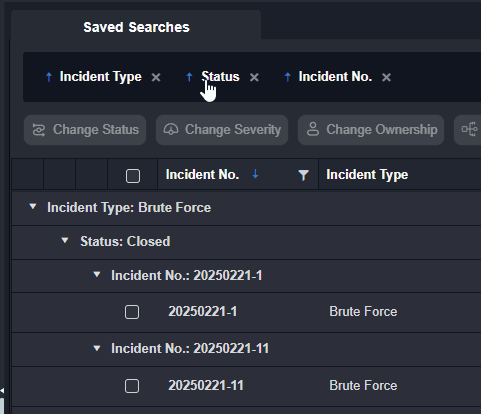
Clicking on incident attributes within the table headers adjusts the sorting of data based on the selected header, making it the primary sorting reference. The ![]()
![]()
![]()
To sort the table by a different column, click the Incident No. header until no arrow appears, then click another attribute.
If users drag a header into the Saved Searches field while sorting is applied, a Column Sorting section will appear in the Edit View popup, reflecting the applied sorting in either ascending or descending order.
-20250429-010902.png?cb=8e75a28f2a54928b311dfb750cbf8d6c)
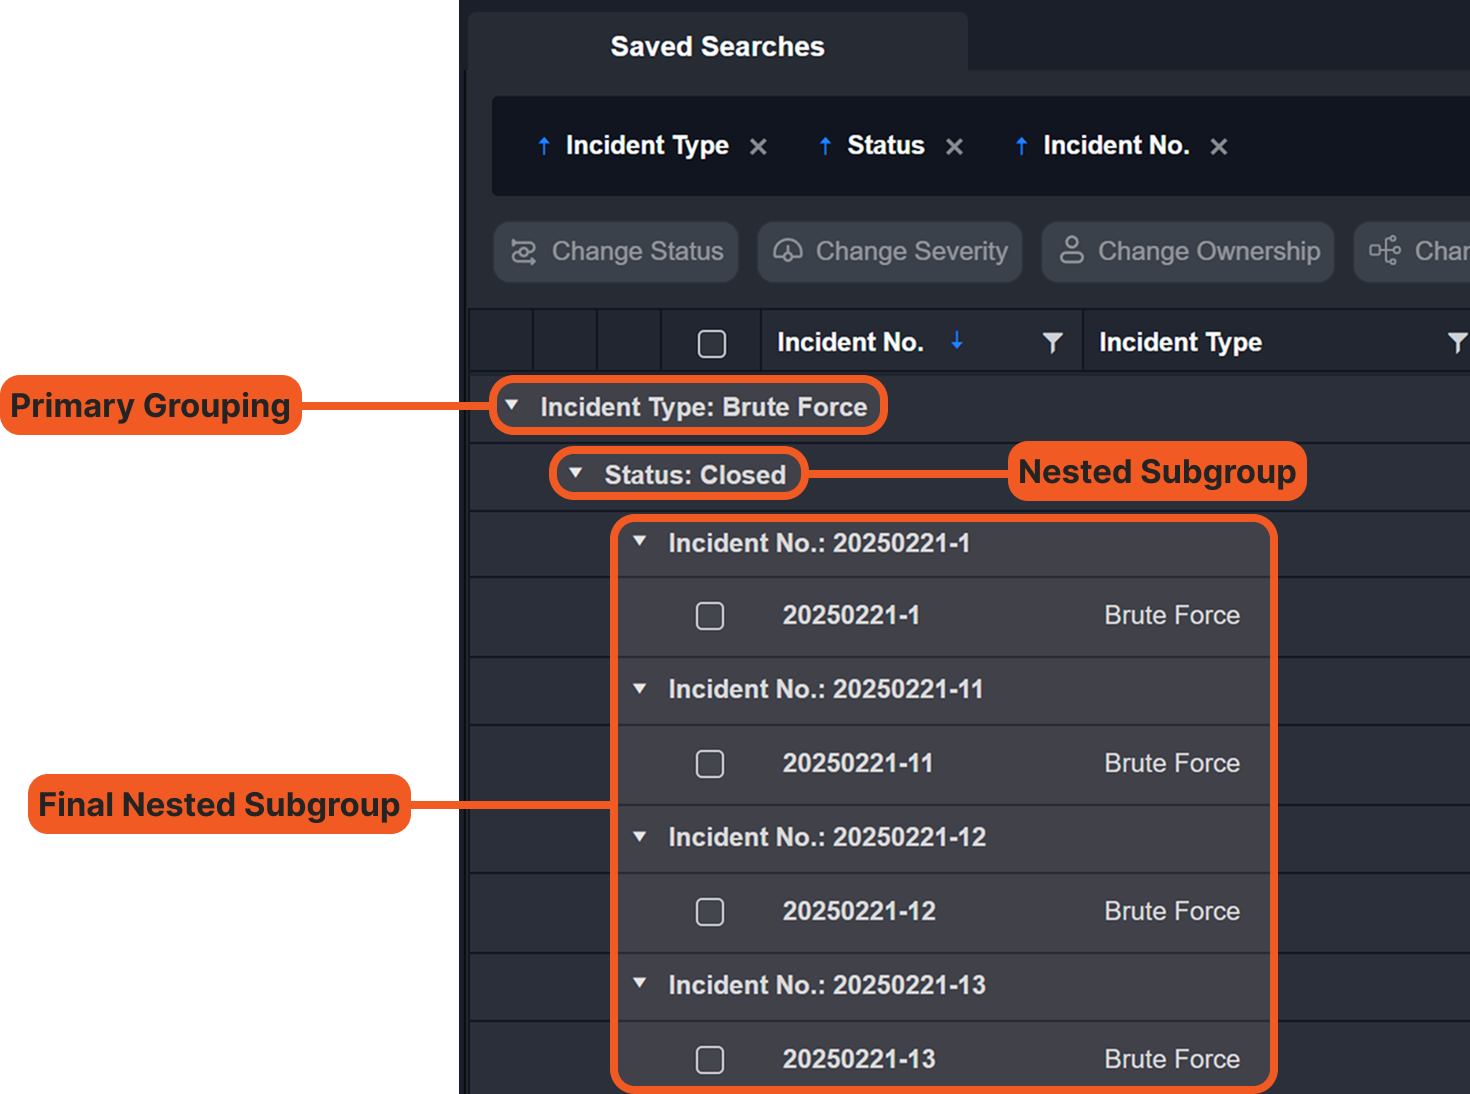
Ordering Headers in the Saved Searches Field
The order of headers in the Saved Searches field determines how incidents are grouped and sorted in the table.
-
The leftmost header serves as the primary grouping.
-
Each subsequent header to the right creates nested subgroups.
-
The rightmost header defines the most specific sorting level within the final subgroup.
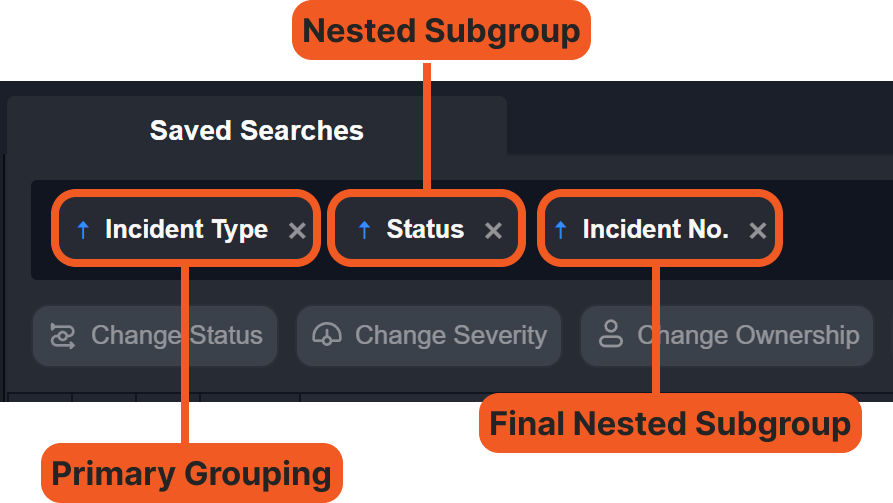
For example, if Incident Type is placed first, Status second, and Incident No. third, incidents will be grouped by Incident Type (e.g., all "Data Breach" incidents together), then further organized by Status within each type (e.g., "Open" vs. "Closed" Data Breach incidents), and finally sorted by Incident No. within each status group.
Users can modify the sorting structure by dragging headers into different positions within the Saved Searches field, ensuring the data is displayed in a way that best supports their triaging needs.
If a table header can contain repeatable values—such as Incident Type or Status (i.e., there can be many phishing-type and "Open" incidents)—users can change the sorting direction of incidents within each group (accordion) by clicking its attribute in the Saved Searches field.
Applying a Filter
Users can click the 
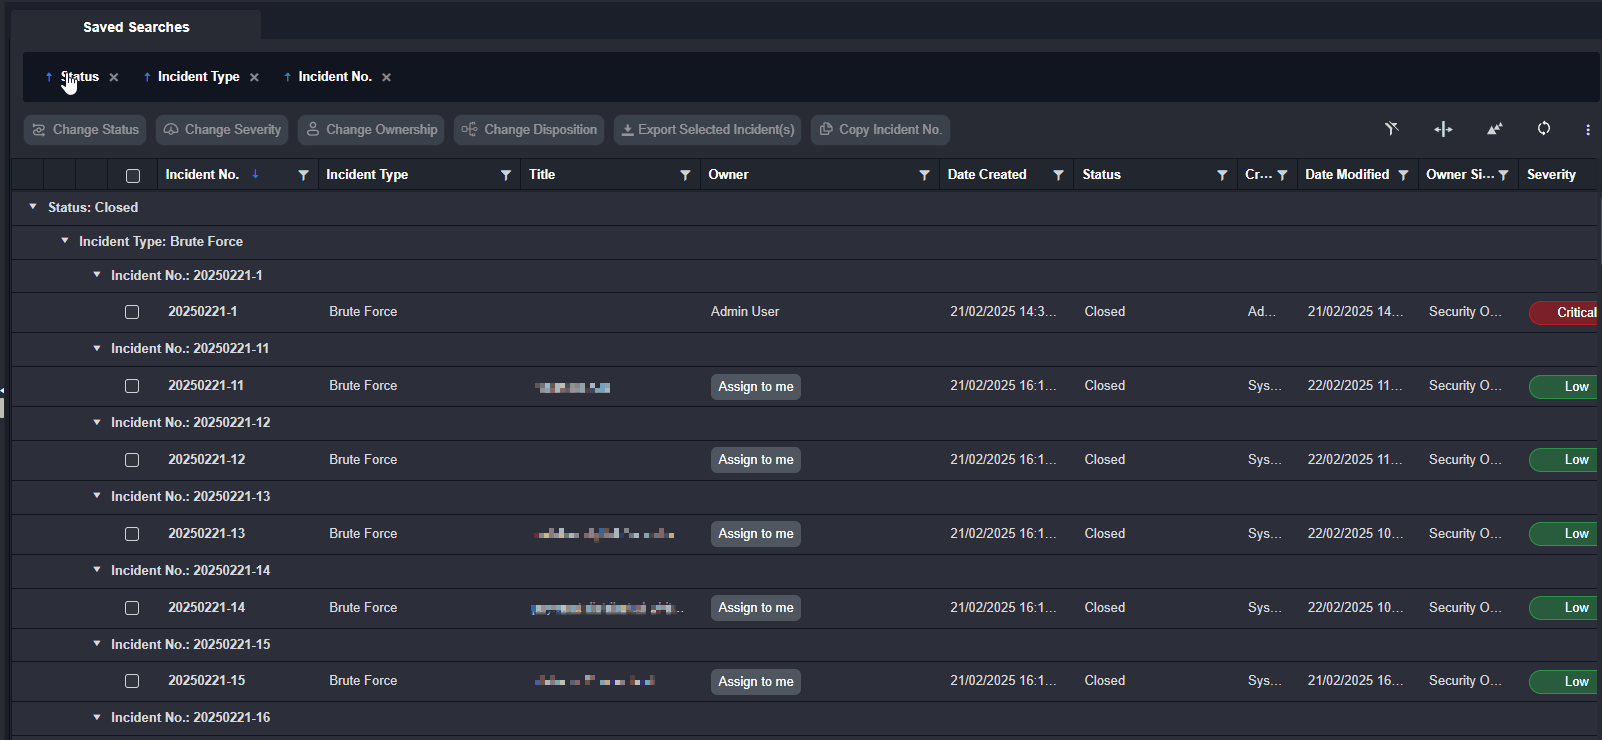
Use Case: Creating a Custom View Filtered by Data Breach Incident Type and Sorted by Incident Number
Users can save a custom view with a predefined table header sorting order and filters in the following steps:
-
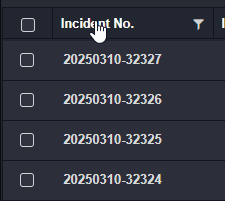
Click an incident attribute in the table header to modify its sorting order (e.g., Incident No.).
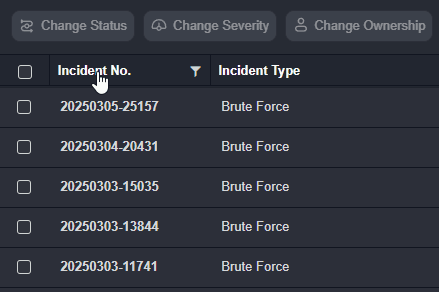
In this example, the Incident No. column is currently sorted in descending order, with numbers decreasing sequentially.
.png?cb=f6f3ef210398084c5e1ed42046cfe11c)
-
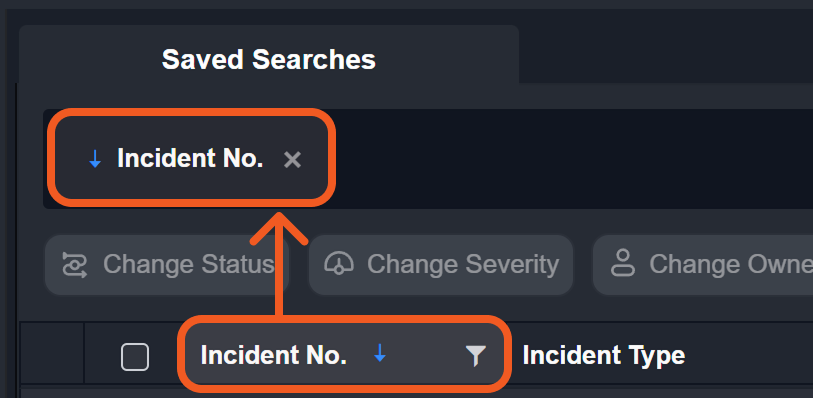
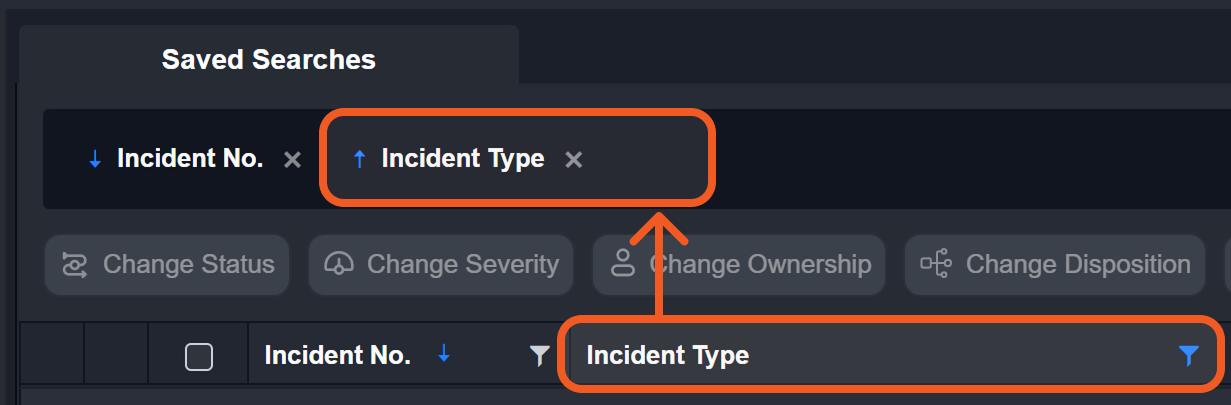
Drag the Incident No. column header, sorted in descending order, into the Saved Searches field.
-
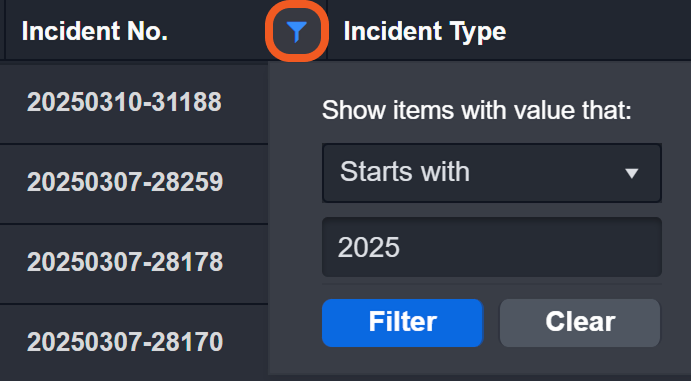
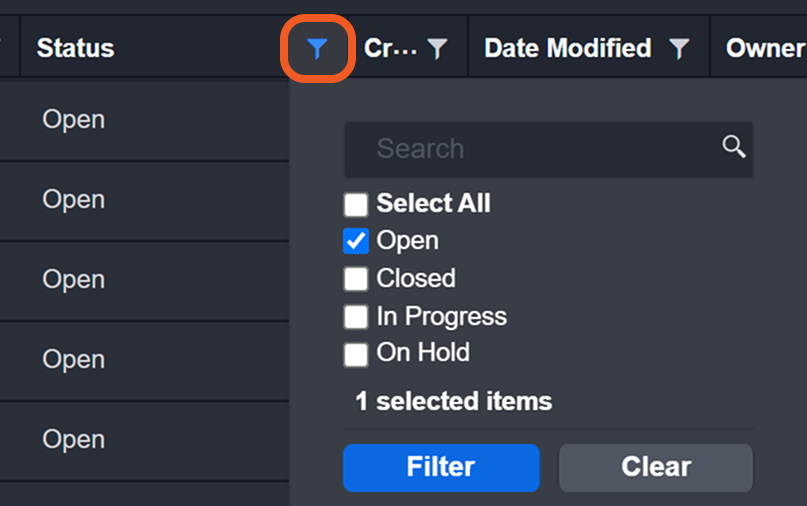
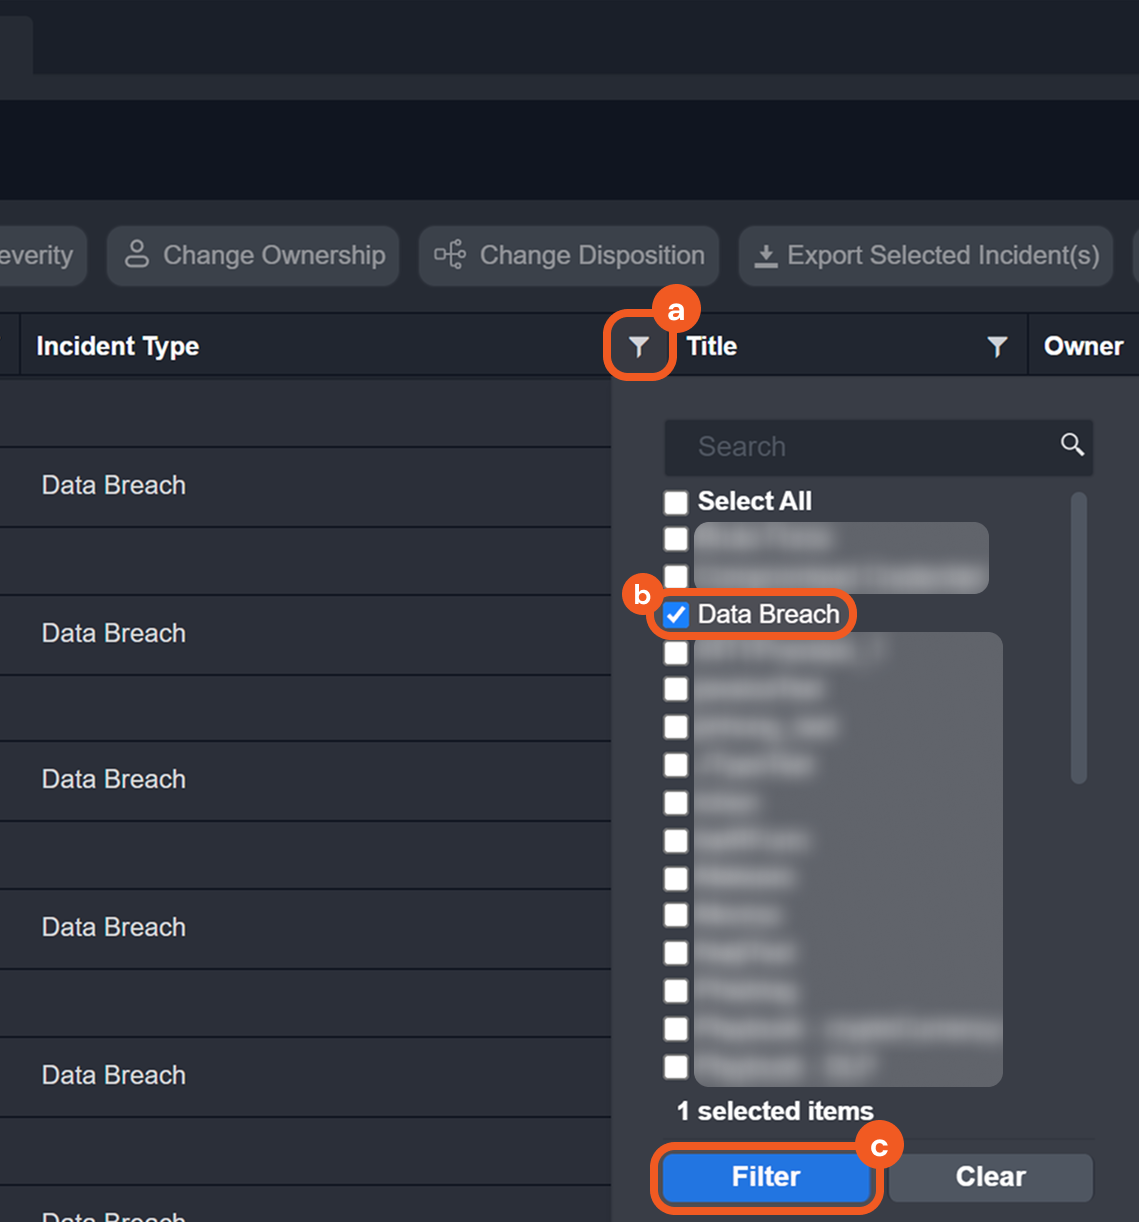
Filter a column by a specified value.
-
Click the
-
Select a value to filter by.
-
Click the Filter button.
-
-
Drag the filtered column header (e.g., Incident Type) into the Saved Searches field.
-
Click on the

-
Create the custom view.
-20250428-215747.png?cb=2cd9ea1bbbf450c3dc13772317e04a8b)
-
Input a unique custom view name.
-
(Optional) Grants access to this custom view for other users, groups, or roles.
-
Review the view details.
-
Click on the Create button.
-
-
Click the newly created the custom view to view it.
%202%20(1)-20250428-215821.png?cb=73e96fb63c5bdb01ec10f5cee8c775e3)
RESULT
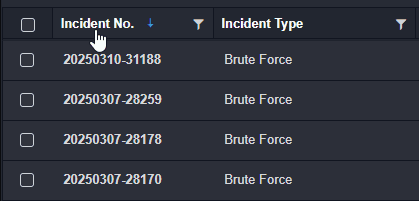
The table data is organized by grouping Incident No. first in descending order, then by Incident Type in descending order, with a filter applied to show only Data Breach incidents.
-20250428-220812.png?cb=95e03ae48601200c3617be10c5816881)