Playbook Control Flow
LAST UPDATED: MAR 21, 2025
Task execution is guided by the control flow, which dictates how playbook automation progress, branch, repeat, or pause until certain conditions are met. In D3 playbooks, control flows are represented by unidirectional arrows.
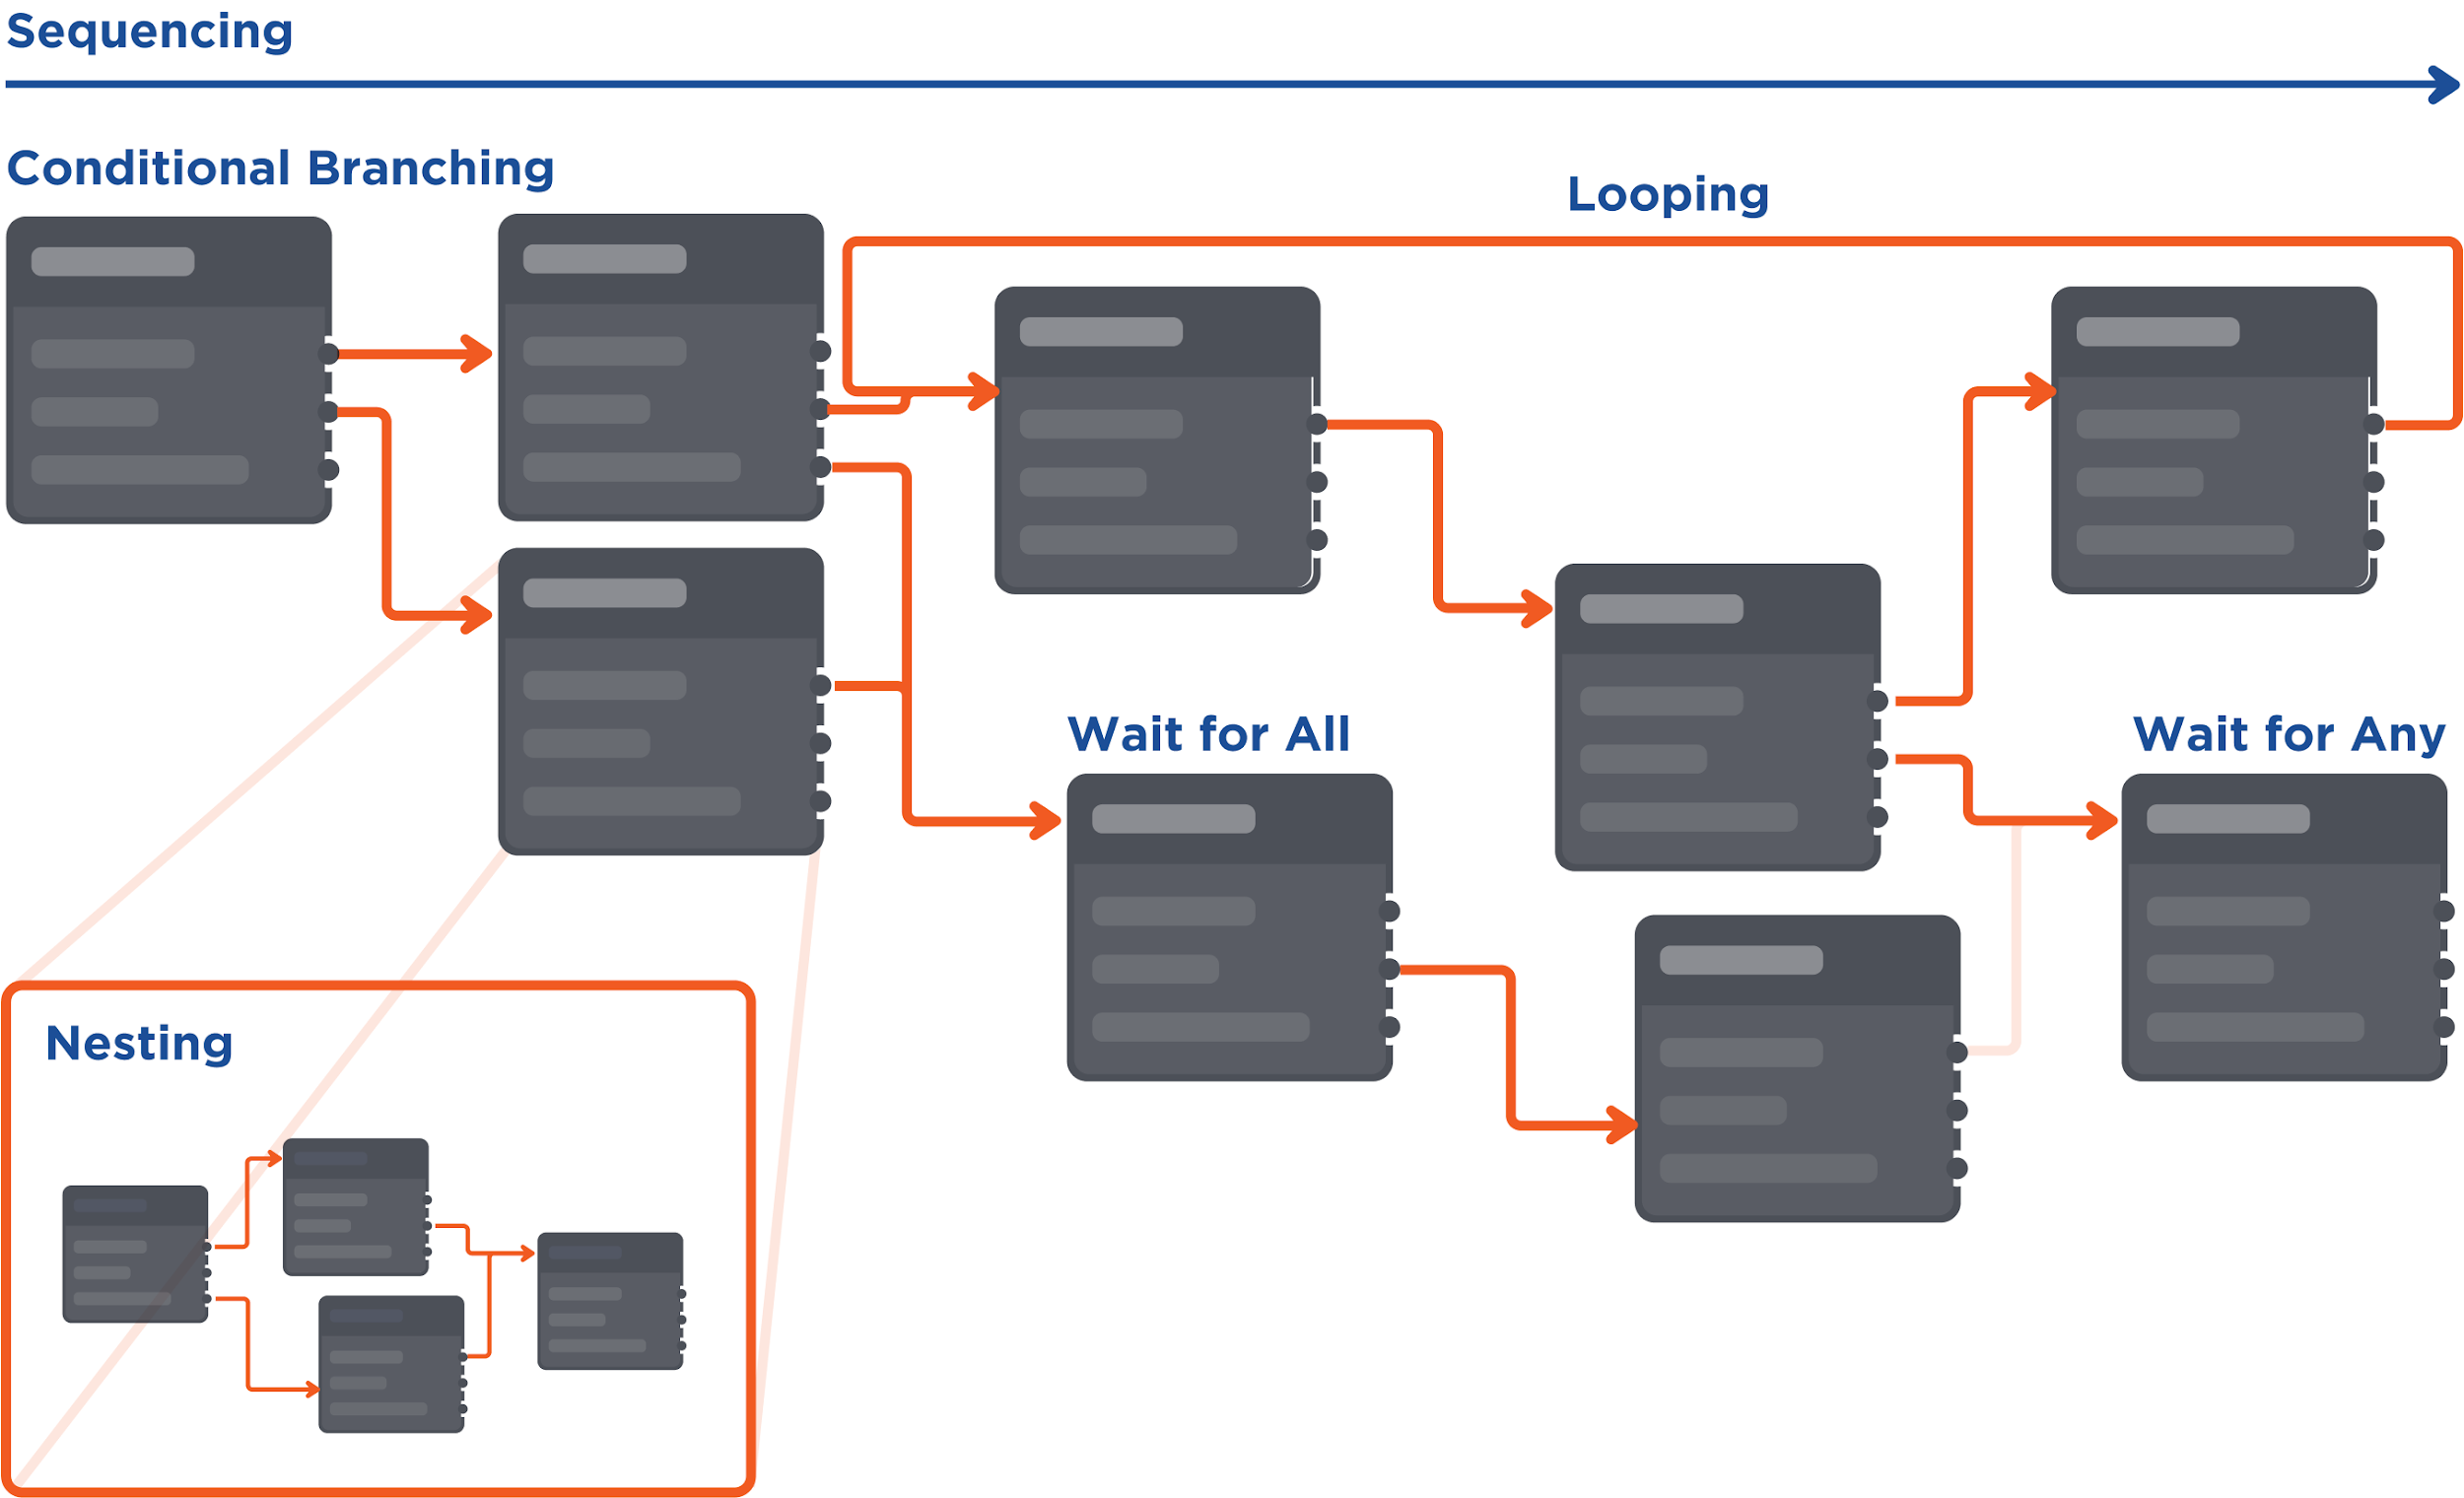
Control Flow Types
There are seven types of task control flows:
Sequencing: Tasks are executed from left to right.

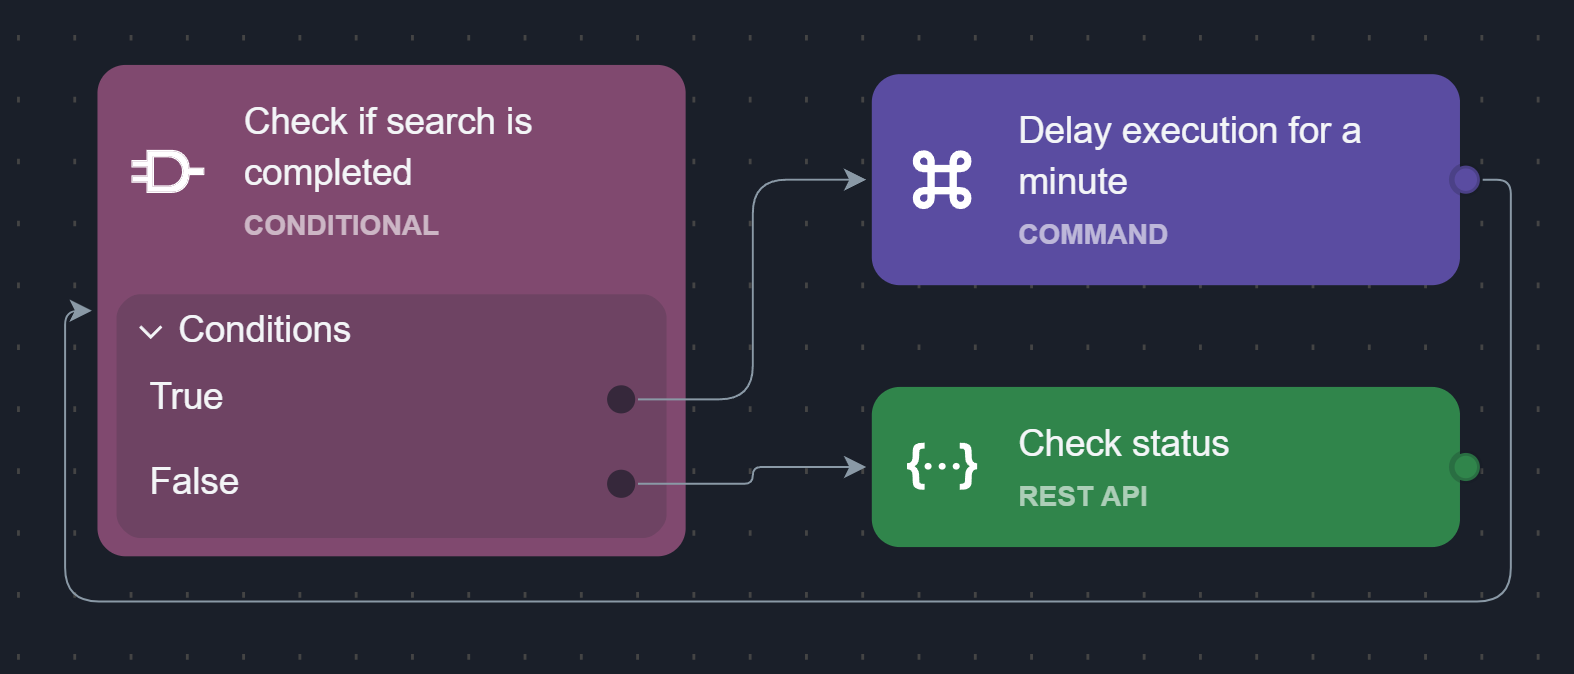
Conditional Branching: A conditional task can separate into multiple paths.
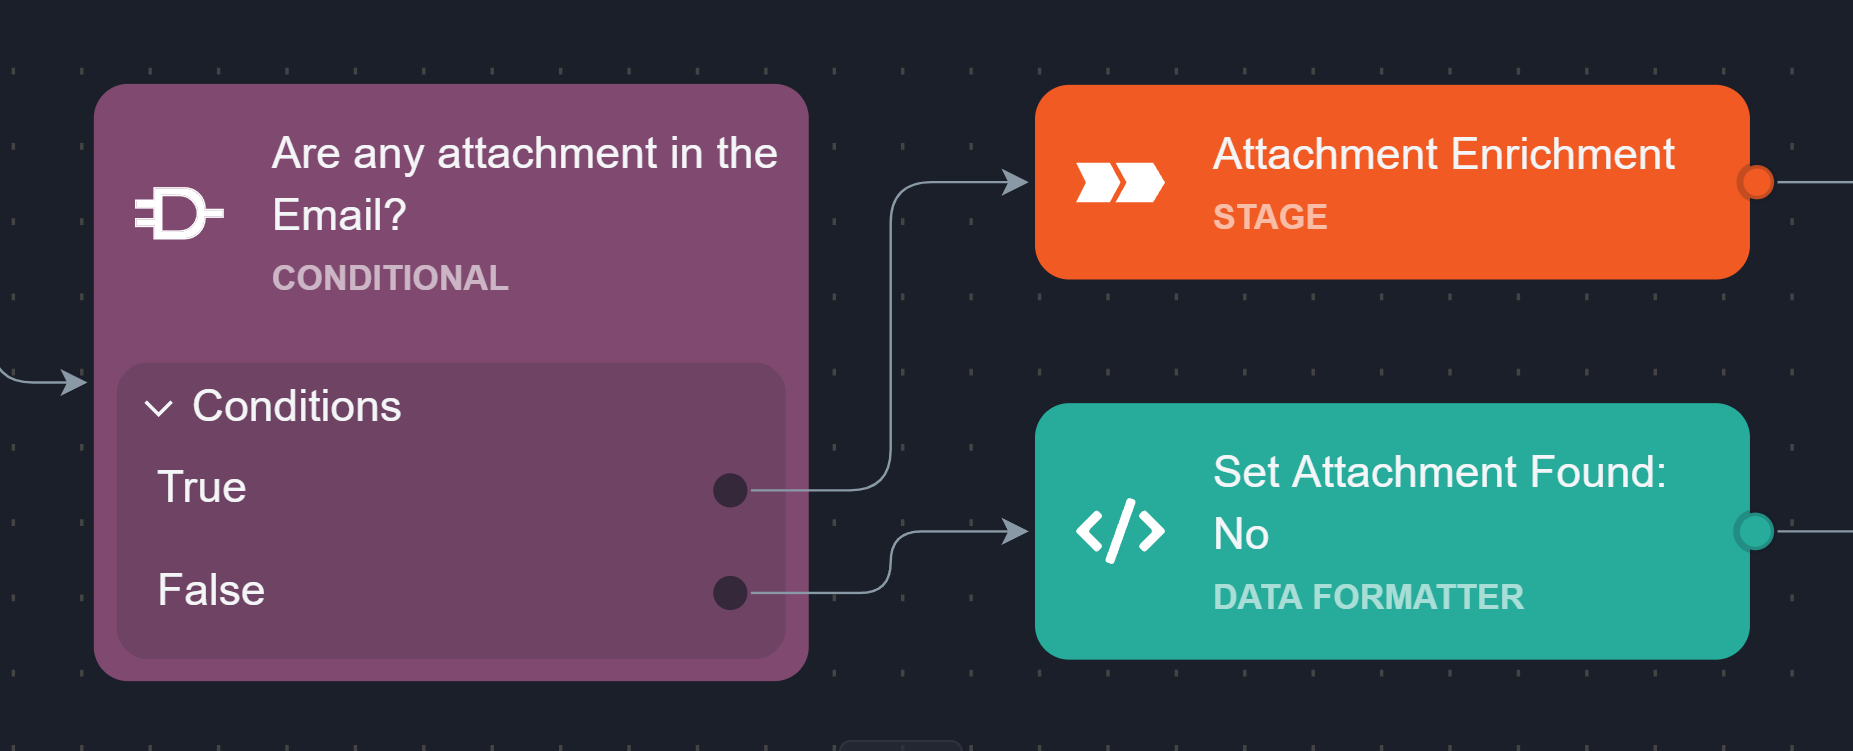
Looping: A branching option from a conditional task can be linked back to a preceding task to create a loop that runs until a condition is met. A limit can be set for the number of loops that can be run in a Playbook to avoid infinite loops.
Wait for All: Tasks from different branches can be connected and converged into one single task. A task set to run as Wait for All will only run when all preceding tasks connected to it have finished running.
.png?inst-v=9d5c883f-2a14-4fb1-ad0d-a8ff2107ecd1)
Wait for Any, Run Always: The task will execute each time any one of the preceding tasks finishes.
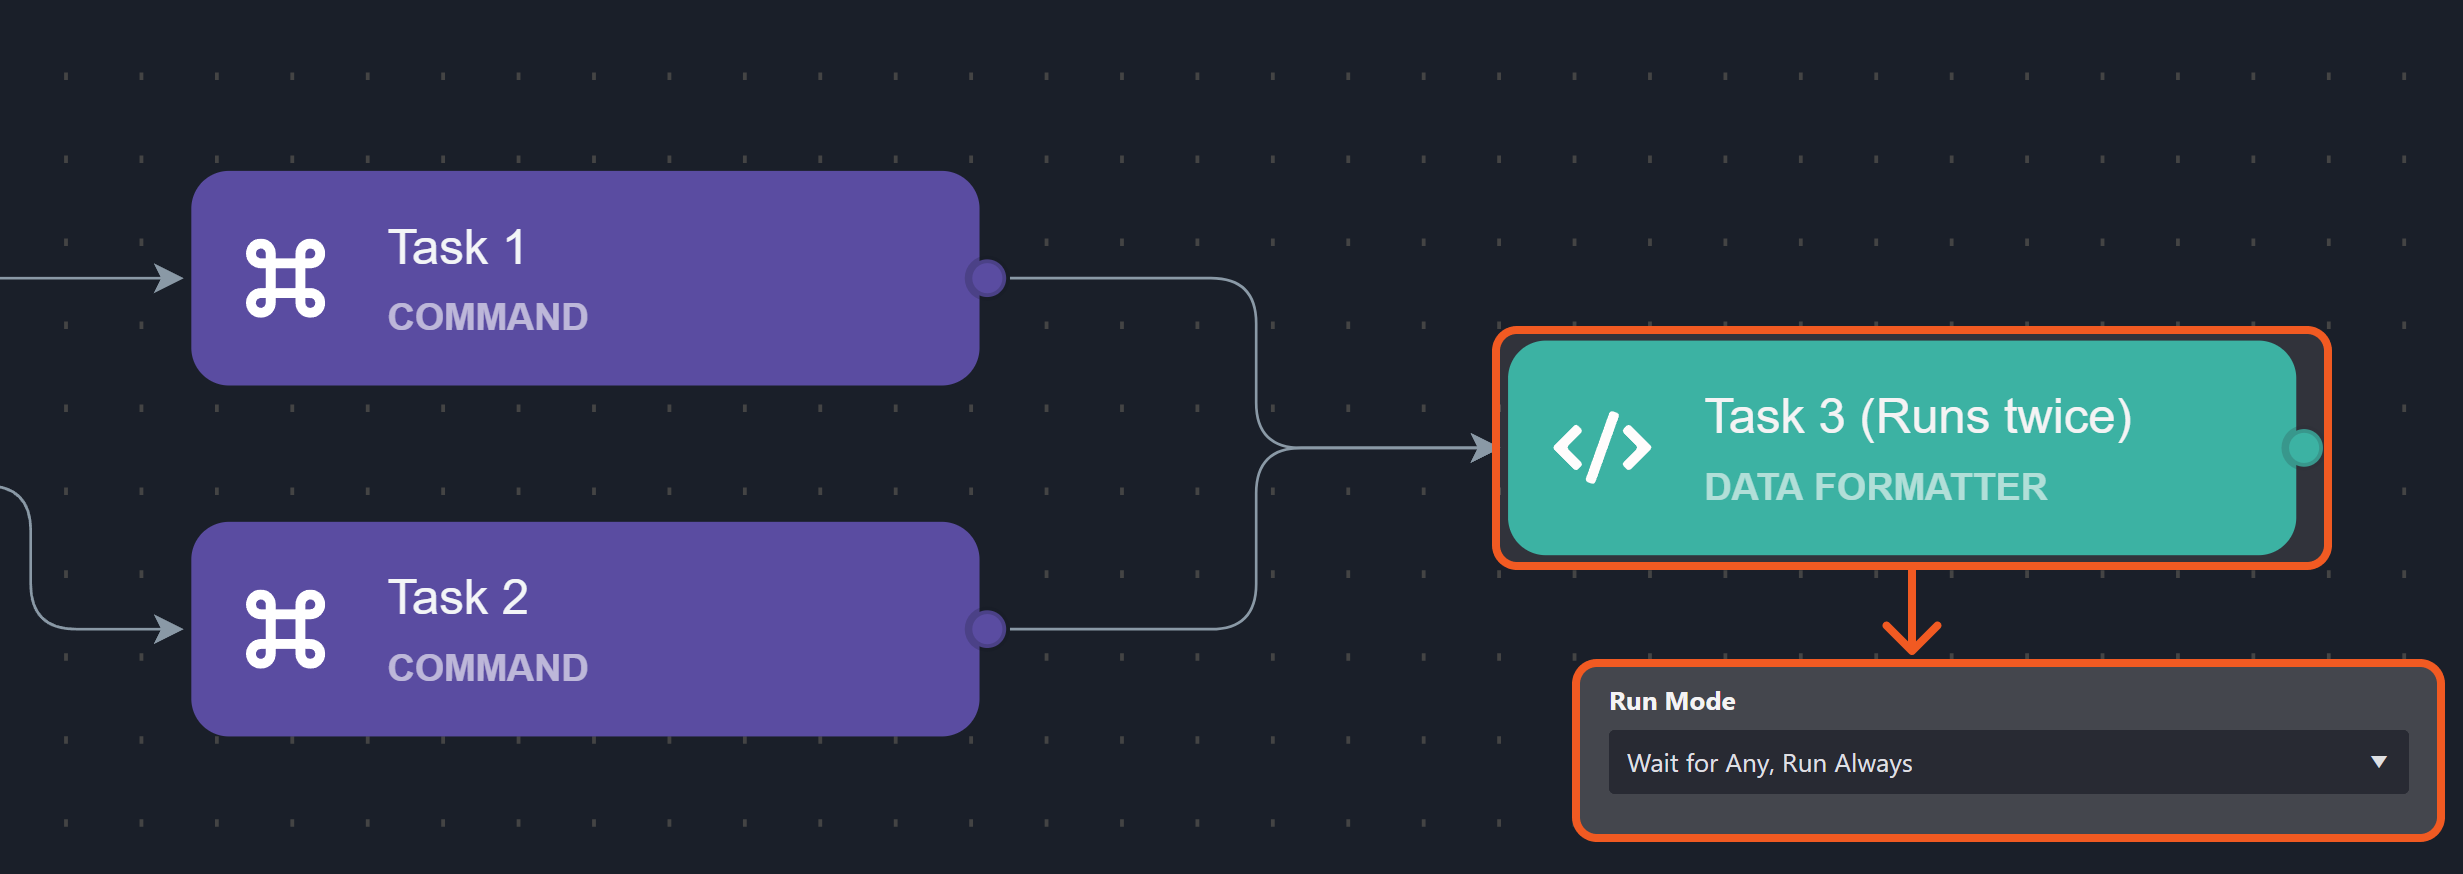
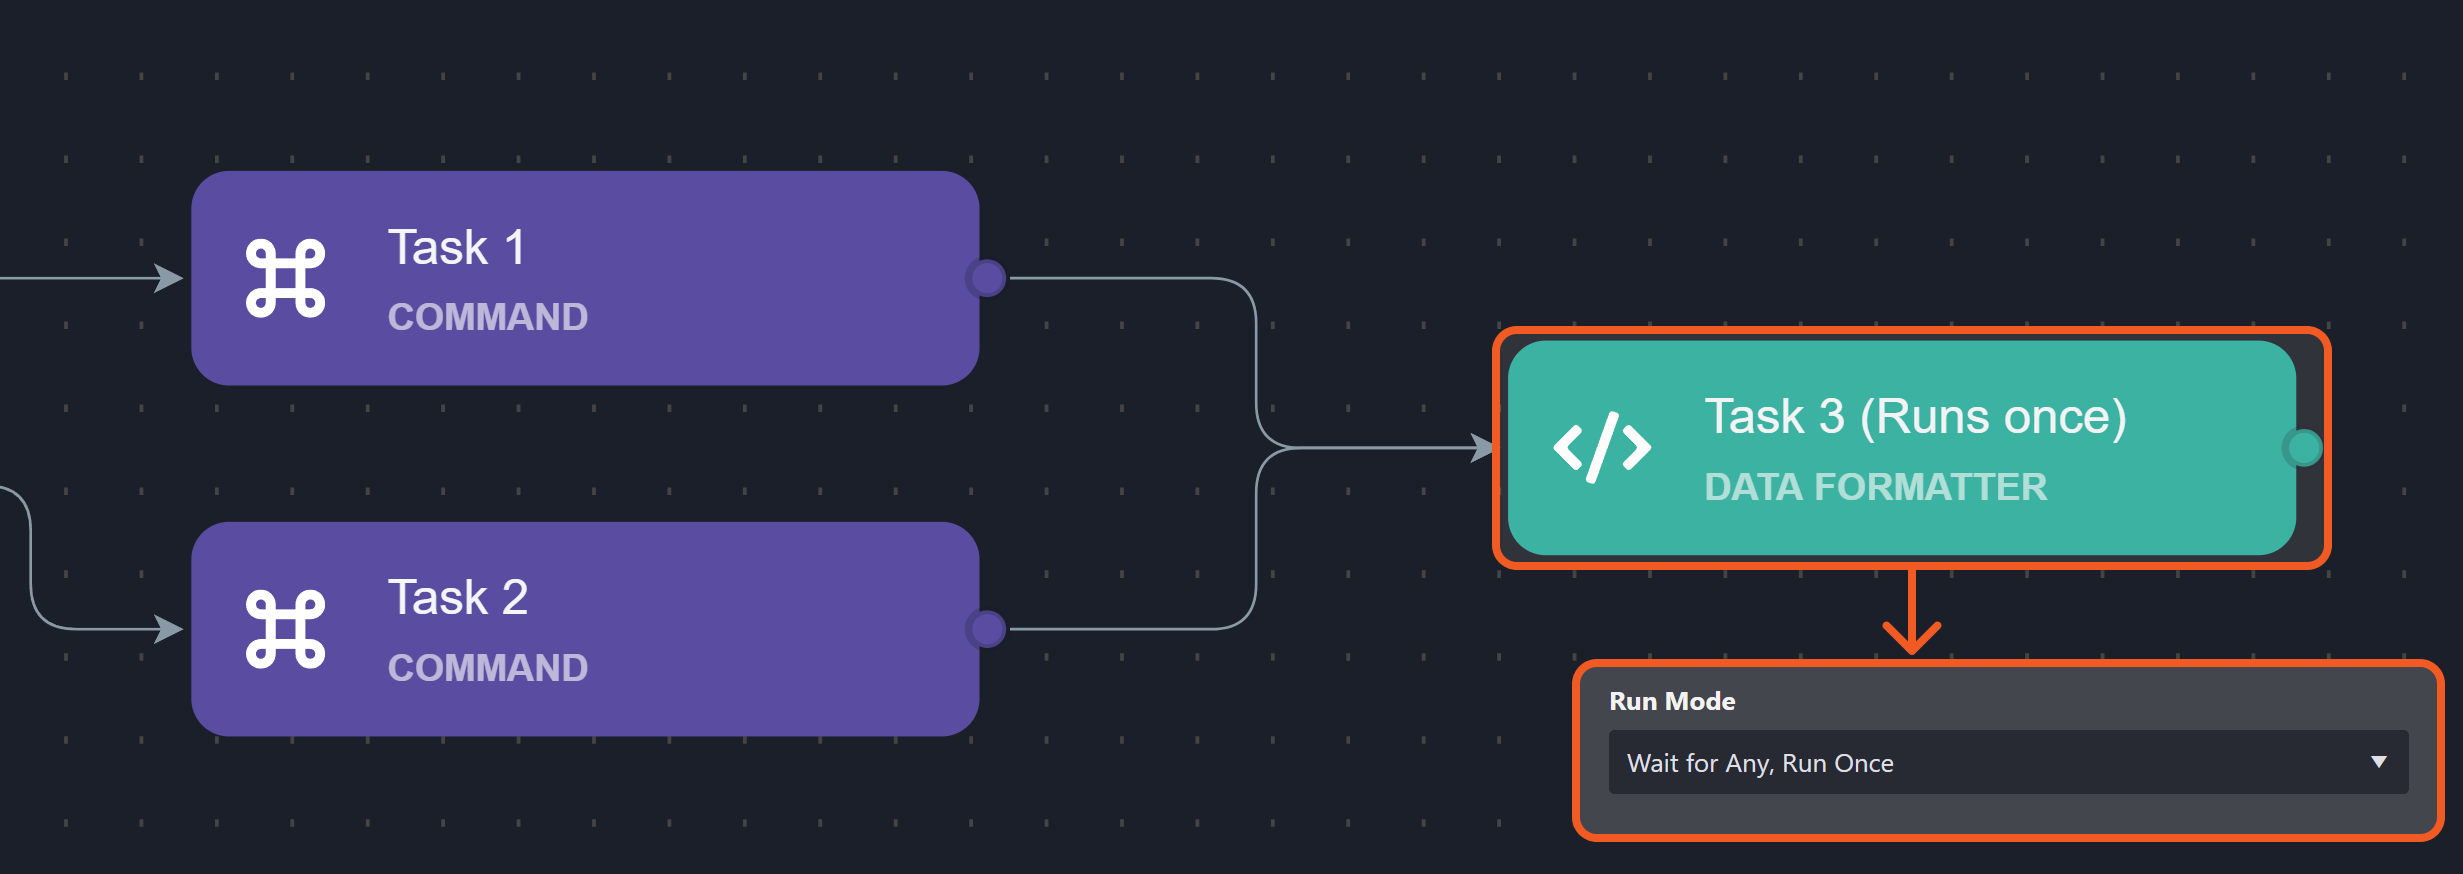
Task 3 here will run twice because it is preceded by two tasks.
Wait for Any, Run Once: The task will execute only once when any one of the preceding tasks finishes, regardless of how many tasks are linked to it.
Nesting: A command that uses the Codeless Playbook Implementation method can be reused as a nested command task in another playbook to organize and divide large playbooks into smaller, more manageable commands.
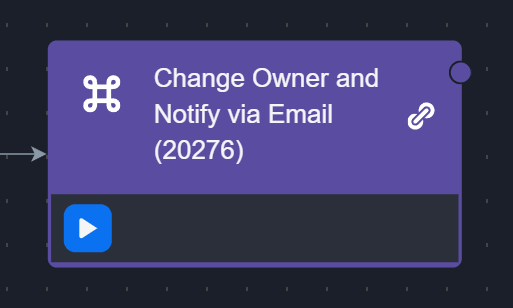
Nested playbooks are differentiated from normal command tasks by the link icon that appears on the task node. Click this icon
 to access the nested playbook tasks.
Editing a Control Flow
By default, dragging a task onto another task or a trigger creates a sequencing control flow. However, users can modify this flow by dragging the .png?inst-v=9d5c883f-2a14-4fb1-ad0d-a8ff2107ecd1) (Add new task) button to another task or trigger and deleting the control flow arrows as necessary.
(Add new task) button to another task or trigger and deleting the control flow arrows as necessary.
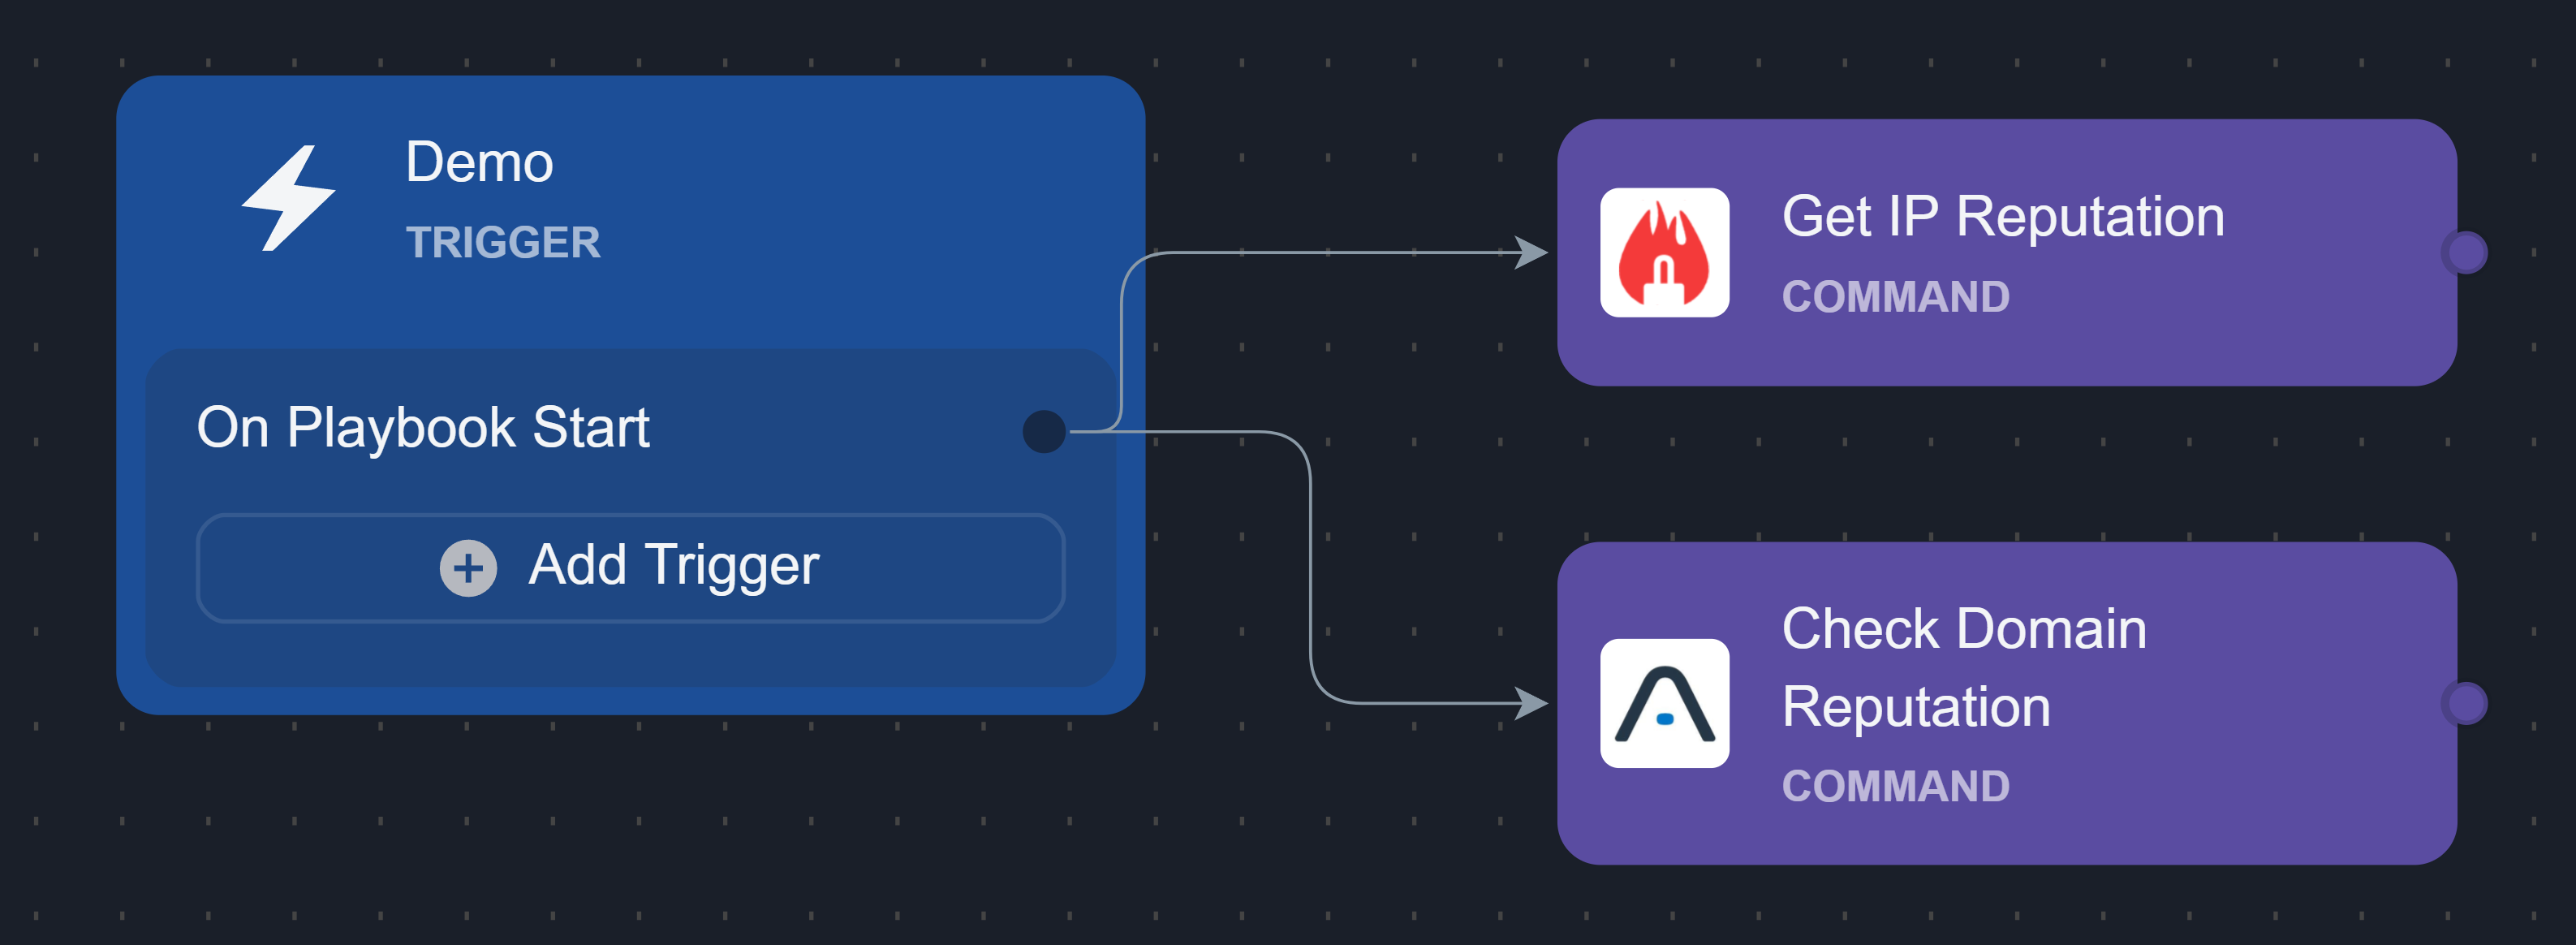
For instance, users can configure the Check Domain Reputation task to run simultaneously with the Get IP Reputation task by following these steps:
Drag the
.png?inst-v=9d5c883f-2a14-4fb1-ad0d-a8ff2107ecd1) (Add new task) button from the On Playbook Start trigger to the Check Domain Reputation task.
(Add new task) button from the On Playbook Start trigger to the Check Domain Reputation task.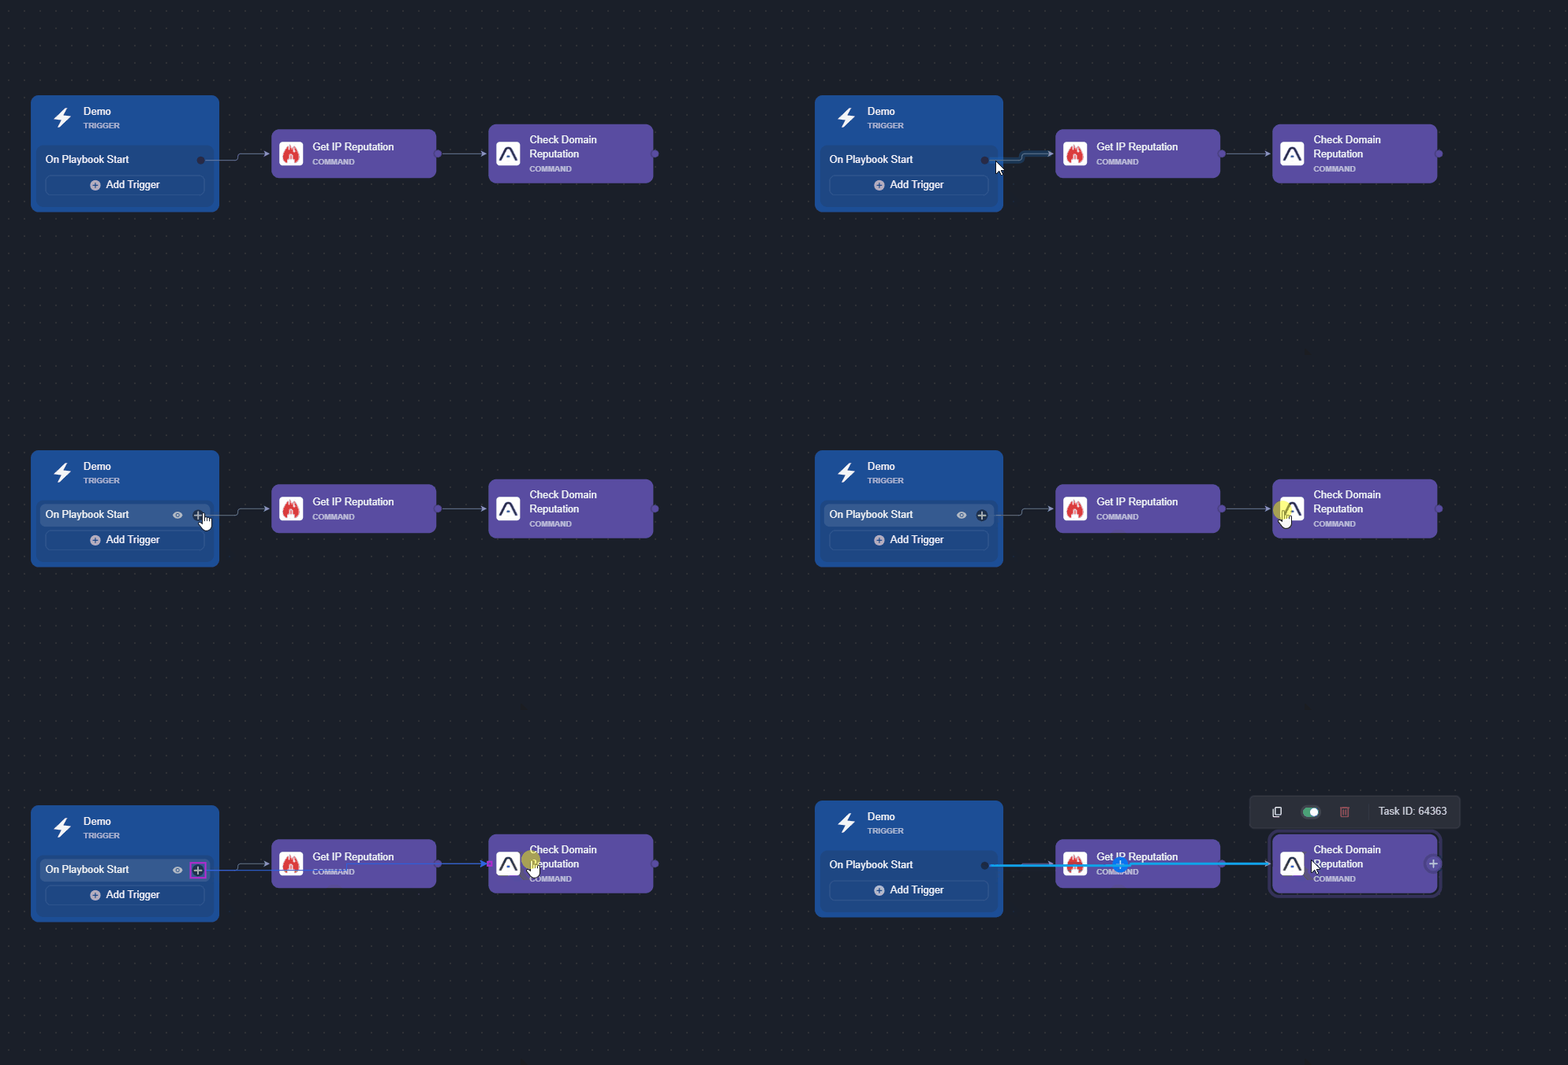
Click the arrow connecting the two tasks, then click on the
 icon to delete it.
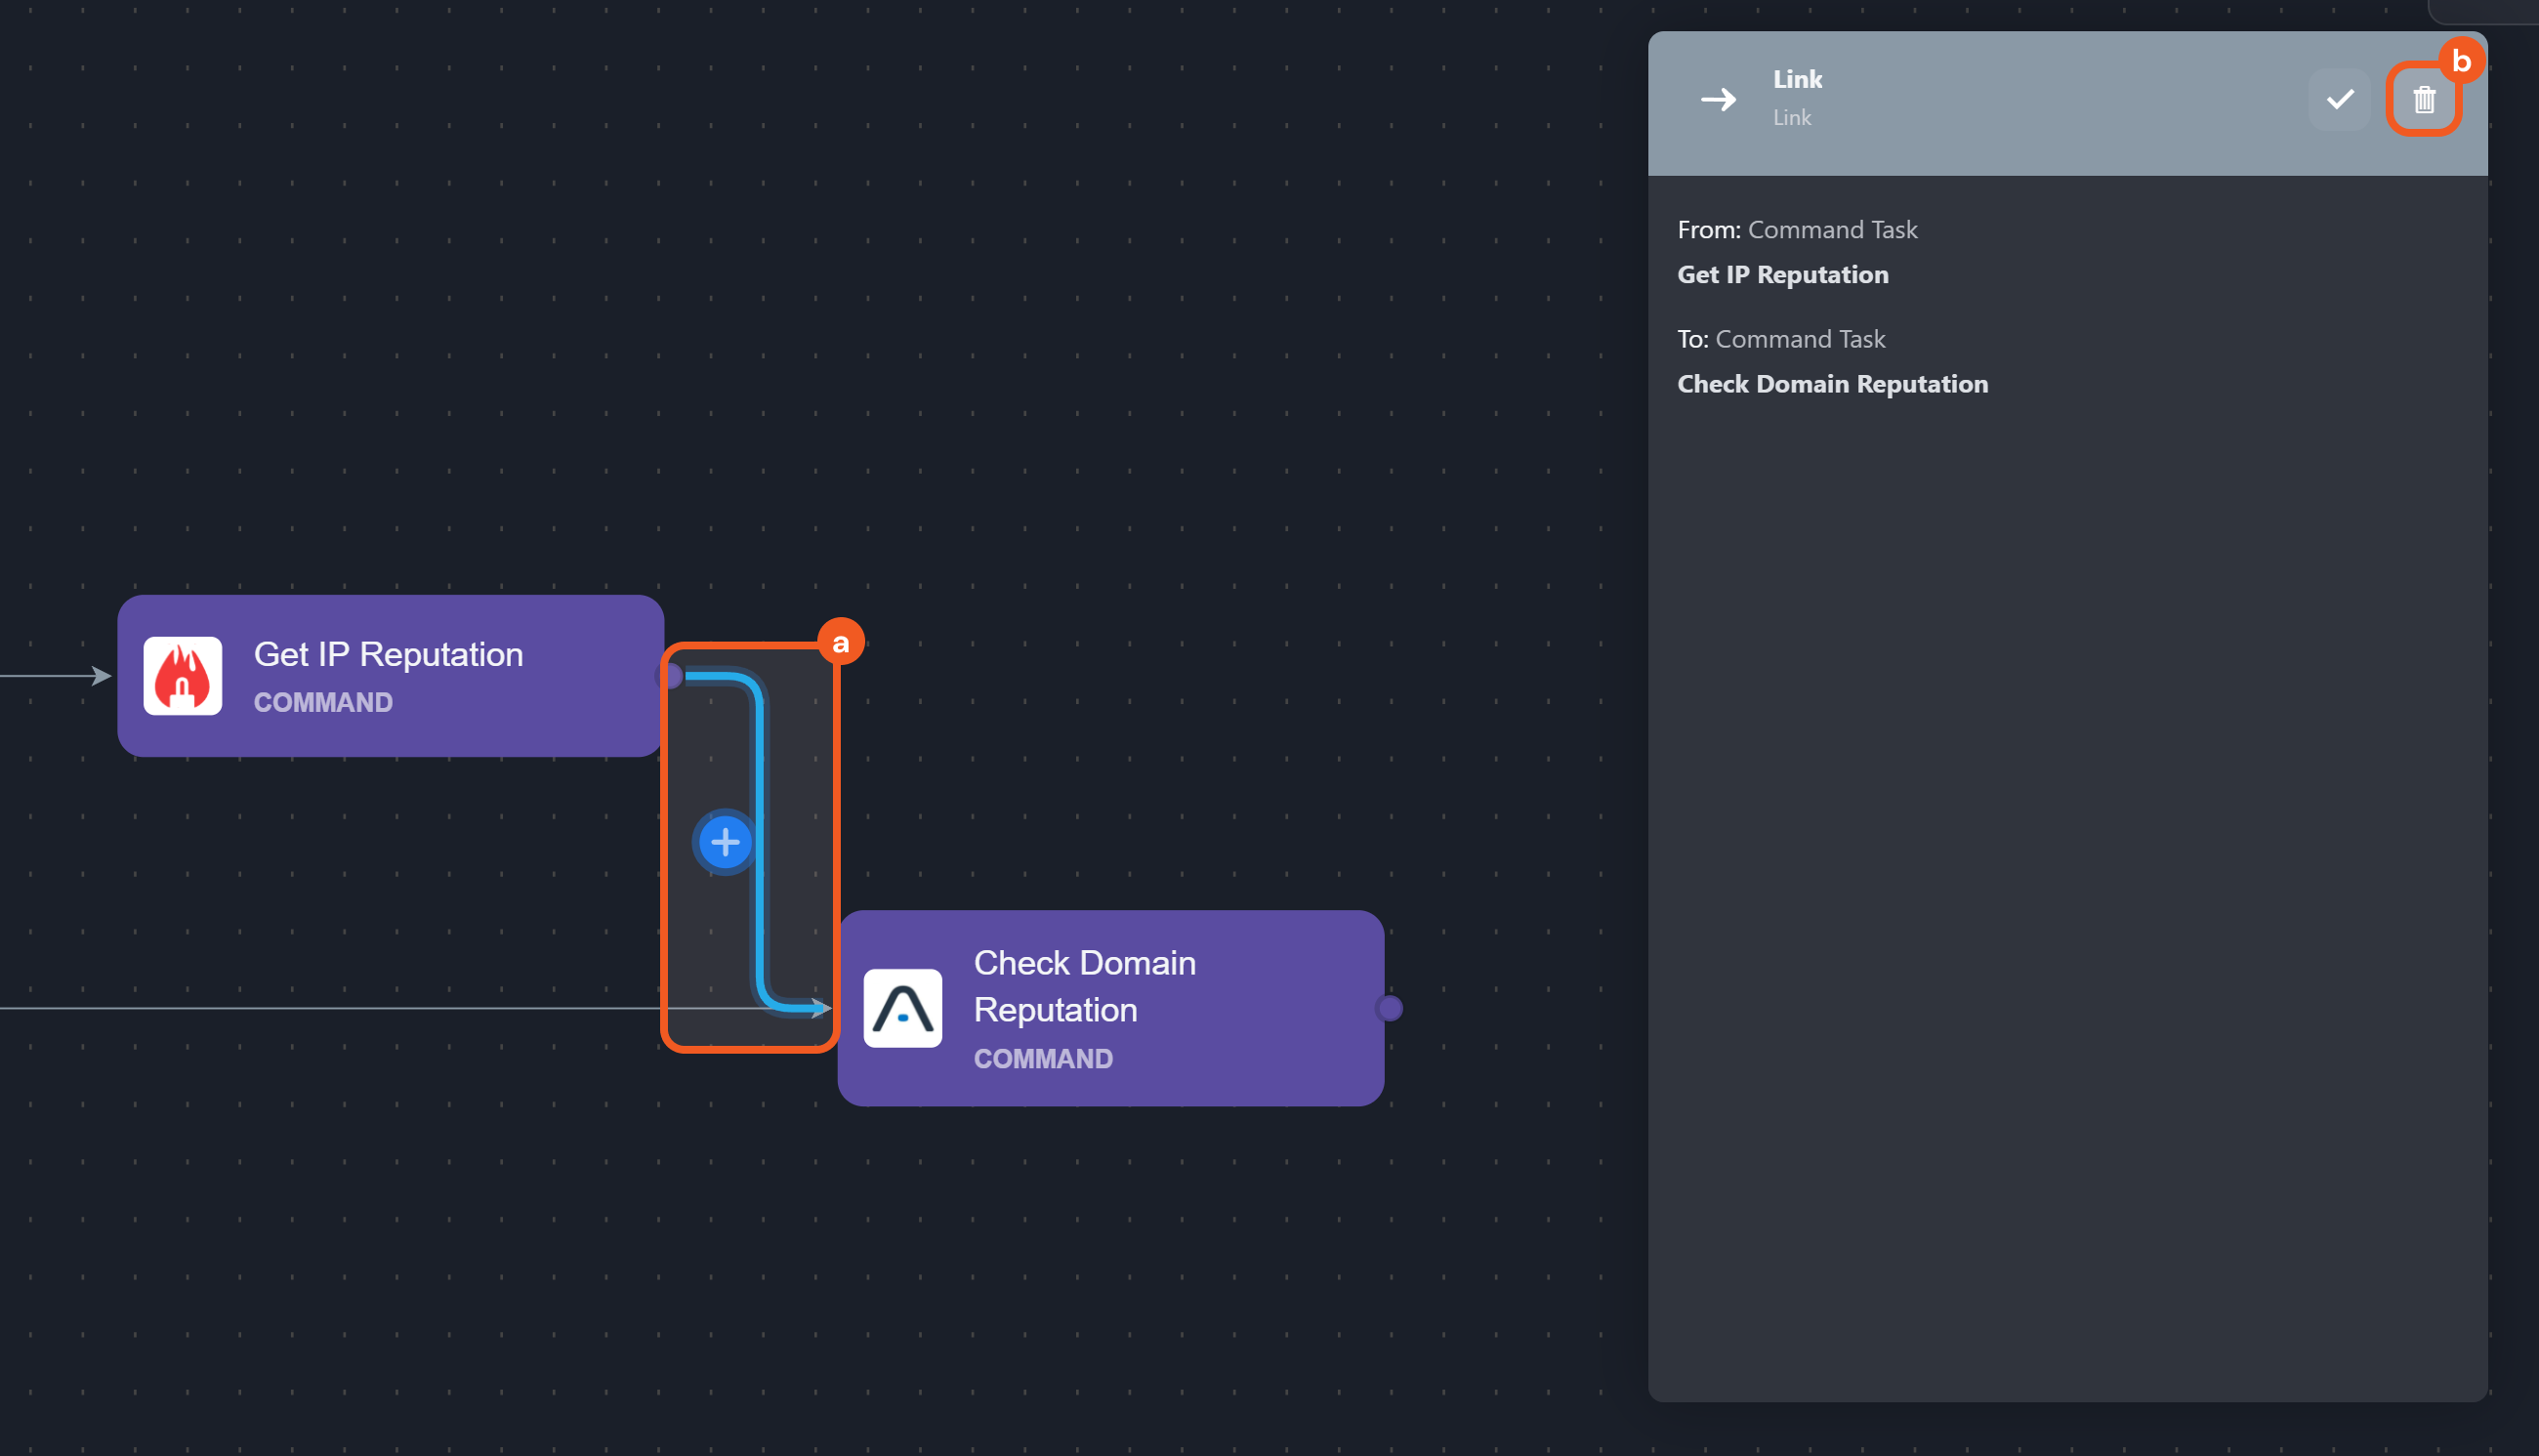
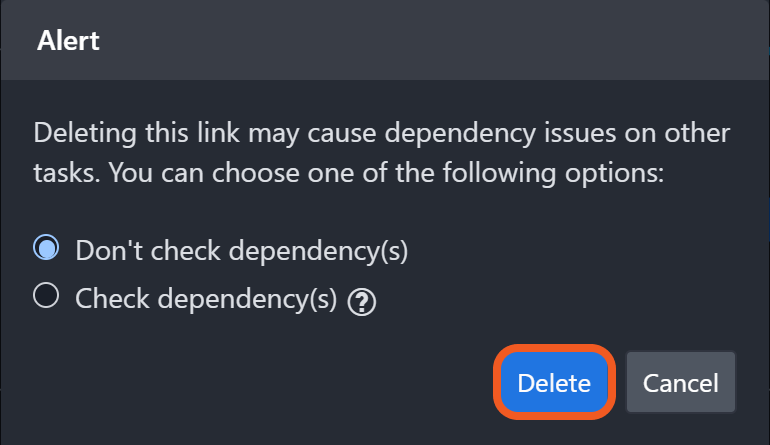
Confirm the deletion by clicking on the Delete button.
(Optional) Click on the
 (Organize Nodes) button in the secondary action bar to arrange the nodes for improved readability.
RESULT
The Check Domain Reputation task and the Get IP Reputation task are now configured to run simultaneously.
Task Run Options
-20250208-010625.png?inst-v=9d5c883f-2a14-4fb1-ad0d-a8ff2107ecd1)
Each task offers configurable options that define its execution behavior, independent of control flow. Users can configure multiple settings, including whether the task should auto-run when triggered, remain active, be marked as required, or, if resource-intensive, operate in long-run mode to optimize performance.
1. Active
Selecting this checkbox enables the task for use. All tasks should have this option checked by default. If not, ensure that this is checked so the task is executable.
2. Auto Run
Selecting this checkbox triggers the task to run automatically and hides the Assigned To and Due Time fields.
3. Required
Selecting this checkbox requires the assigned user or group to execute the task manually. Required Tasks will appear in the Pending Tasks tab within the incident workspace. This checkbox is hidden if Auto Run is enabled.
4. Long Run
The Long Run checkbox is available for Python-based commands. Selecting this checkbox helps improve performance by freeing tasks from resource pool limits. Without checking this, an ongoing task stops after 10 minutes of execution. When enabled, the time limit can be extended to 45 minutes. It is recommended to check the Long Run checkbox only for resource-intensive tasks.
