My First Custom Utility Command
LAST UPDATED: APRIL 15, 2025
-20250415-220633.png?inst-v=9d5c883f-2a14-4fb1-ad0d-a8ff2107ecd1)
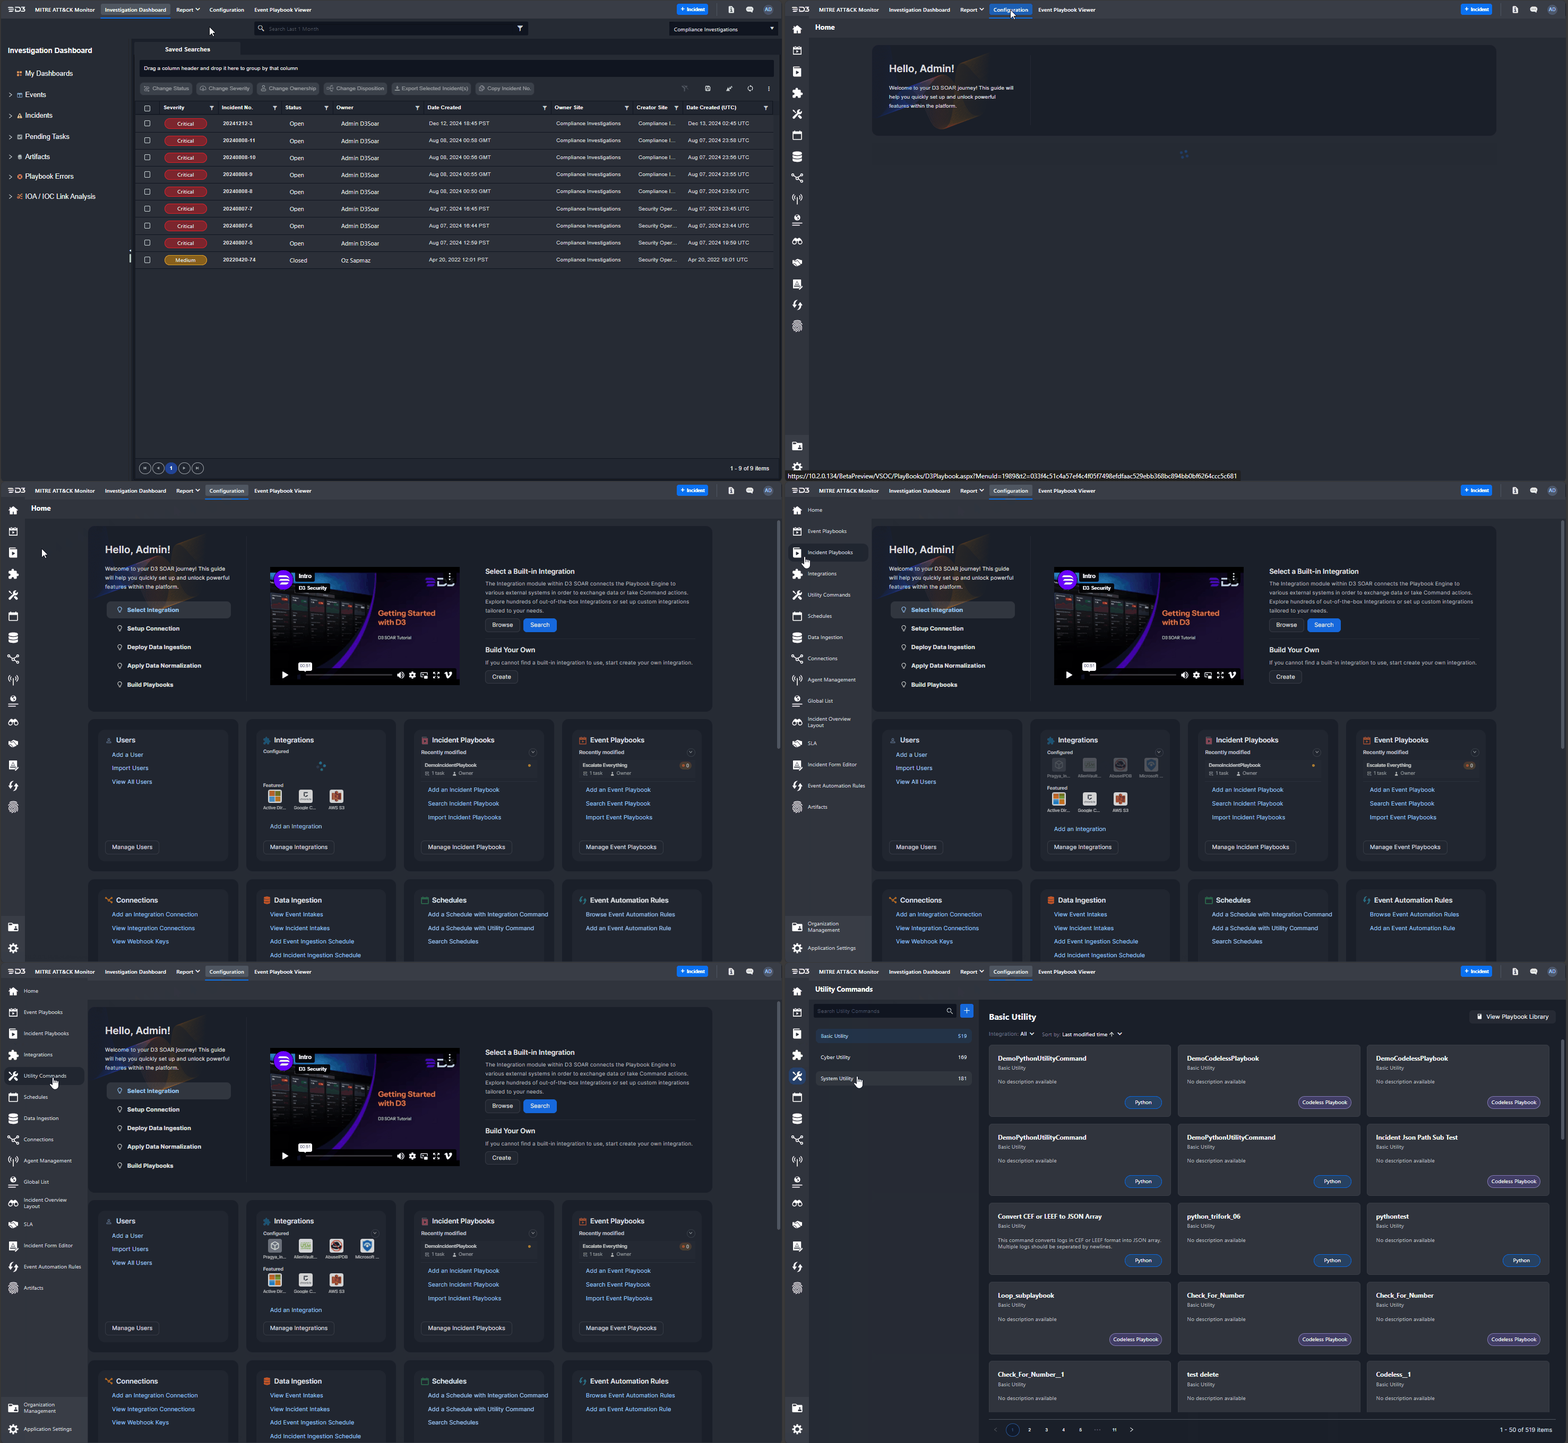
Navigate to the Utility Commands module.

Click on the Configuration navigation link.
Click on the
 menu option.
Click on the + button.
-20241213-163346.png?inst-v=9d5c883f-2a14-4fb1-ad0d-a8ff2107ecd1)
Add a Replace Spaces with Underscores in Top Level JSON Keys command.
-20241213-175122.png?inst-v=9d5c883f-2a14-4fb1-ad0d-a8ff2107ecd1)
Enter Replace Spaces with Underscores in Top Level JSON Keys in the first field.
Click on the + Add button.
READER NOTE *
The text below the command display name is its internal name, automatically generated from the user's input. This internal name is used as the command's Python function name.
Replace the auto-generated custom command stub function with the following code:
PYdef ReplaceSpacesWithUnderscoresInTopLevelJsonKeys(*args): """ Replaces spaces with underscores in the top-level keys of JSON objects within a JSON array. """ modified_array = [] # Initializes an empty list to store modified JSON objects json_array = args[0] # Retrieves the JSON array from the first argument resultData = "Successful" # Sets the initial result status to "Successful" returnData = "" # Initializes variables to store return data and error information error = "" try: for item in json_array: # Iterates over each JSON object in the input JSON array modified_item = {} # Creates an empty dictionary to store the modified JSON object for key, value in item.items(): # Iterates over each key-value pair in the JSON object modified_key = key.replace(" ", "_") # Replaces spaces with underscores in the key modified_item[modified_key] = value # Add the modified key and original value to the new JSON object modified_array.append(modified_item) # Append the modified JSON object to the result array returnData = modified_array # Set the return data to the modified array except Exception as e: error = e # Captures the error resultData = "Failed" # Updates the result status to Failed return pb.returnOutputModel(resultData, returnData, '', '', '', error) # Returns the output model with all the gathered information.
-20241213-175315.png?inst-v=9d5c883f-2a14-4fb1-ad0d-a8ff2107ecd1)
Add an Input JSON Array input parameter.
-20241213-181419.png?inst-v=9d5c883f-2a14-4fb1-ad0d-a8ff2107ecd1)
Navigate to the Overview tab.
Click on the Inputs tab.
Click on the + New Input Parameter button.
Input the parameter details, then click on the + Add button.
Set the Parameter Name to Inputjsonarray
Set the Display Name to Input JSON Array
Set the Parameter Type to JSON Array
Set the Is Required? field to Yes
Set the Description to A JSON array containing objects with key-value pairs. Keys may include spaces, which will be replaced with underscores.
Set the Sample Data to
JSON[ { "Employee ID": "CST-1001", "First Name": "Alex", "Last Name": "Johnson", "Job Title": "Cybersecurity Analyst", "Department": "Threat Intelligence", "Email": "alex.johnson@cybercorp.com", "Phone": "+1-555-0100" }, { "Employee ID": "CST-1002", "First Name": "Taylor", "Last Name": "Morgan", "Job Title": "Incident Response Manager", "Department": "Security Operations", "Email": "taylor.morgan@cybercorp.com", "Phone": "+1-555-0200" } ]
Verify that the Input JSON Array parameter has been added, then click on the
%201-20241213-182011.png?inst-v=9d5c883f-2a14-4fb1-ad0d-a8ff2107ecd1) button.
button.-20241213-181835.png?inst-v=9d5c883f-2a14-4fb1-ad0d-a8ff2107ecd1)
Test the command.
-20241213-184544.png?inst-v=9d5c883f-2a14-4fb1-ad0d-a8ff2107ecd1)
Click on the Test tab.
Ensure that a site is selected.
Paste in the JSON array from the sample data from step 6.
Click on the Test Command button.
Click on the Return Data tab in the popup to observe the modified keys.
RELATED ARTICLES
