Configuring an Incident Type: Incident Workspace
LAST UPDATED: JULY 15, 2025
Overview
The incident workspace builder allows users to create, design, and assign customized workspaces to specific roles and groups for each incident type using a drag-and-drop interface.
Working with Incident Workspace Layouts
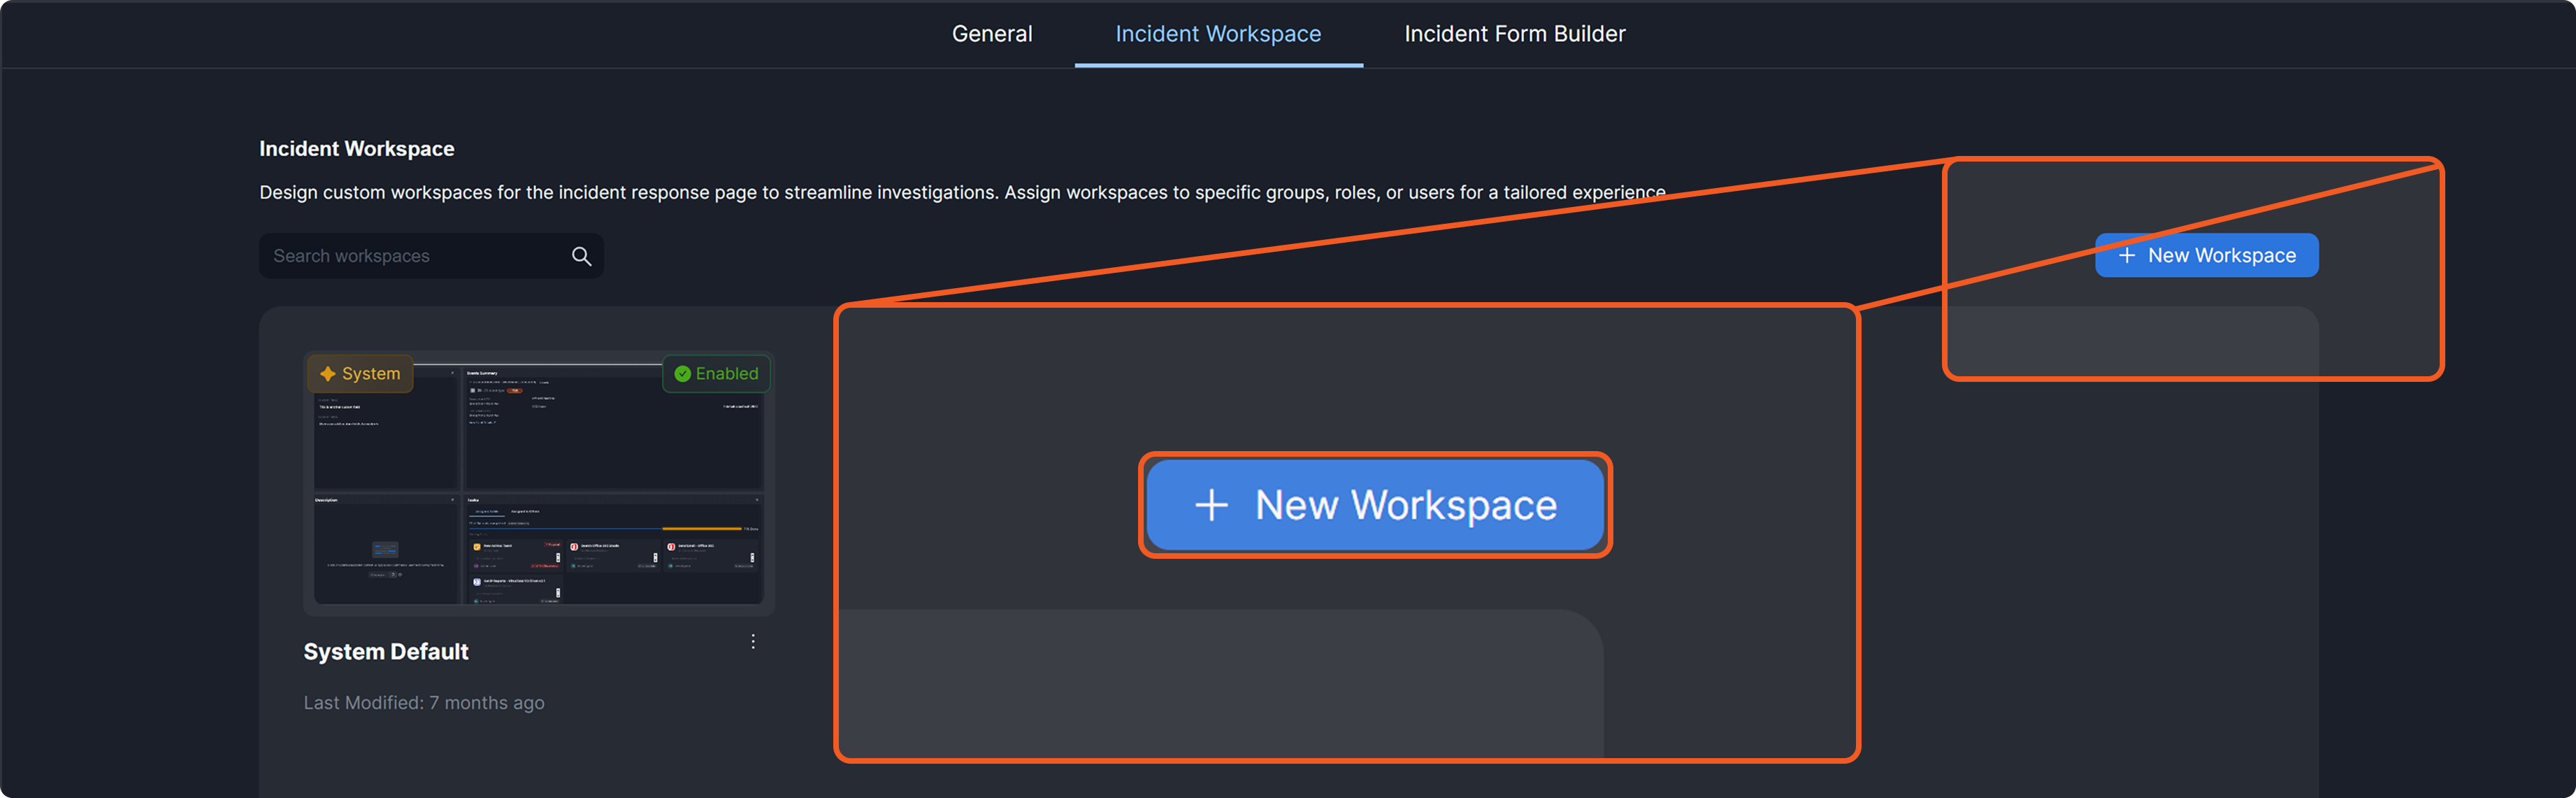
To view all incident workspace layouts for an incident type, navigate to the Incident Workspace tab.
.png?inst-v=e416ef0a-975f-4240-8b76-b2350608028d)
In this tab, users will see a System Default layout. This is the default layout for all incident types, automatically included when a new incident type is created. Incident types, roles, or groups without a designated workspace will use this default layout.
.png?inst-v=e416ef0a-975f-4240-8b76-b2350608028d)
.png?inst-v=e416ef0a-975f-4240-8b76-b2350608028d)
Users can modify the default layout by clicking the ![]() icon and selecting the Edit option. This action should be performed with caution, as it applies to all incident types.
icon and selecting the Edit option. This action should be performed with caution, as it applies to all incident types.
Alternatively, users can add a new workspace by clicking the + New Workspace button.
Leveraging Widgets
Incident workspaces use widgets to display and capture information, which are draggable units that users interact with throughout the investigation process. To accommodate diverse investigative needs, workspaces can be customized using a variety of widgets.
.png?inst-v=e416ef0a-975f-4240-8b76-b2350608028d)
Users can add as many or as few widgets as needed, resize them, and rearrange their order within the layout to bring the most relevant information to the forefront, enhance the user experience, and accommodate different screen sizes.
For information on all available widgets, refer to Incident Workspace Widgets.
Adding a Widget
To add a widget, drag the desired widget from the right panel to the editor canvas.
Resizing a Widget
To resize a widget, hover the cursor over the widget's edge, then drag to adjust its height or width.
Rearranging a Widget
To rearrange a widget and change its position within the incident workspace, drag it to the desired location. Surrounding widgets will automatically adjust to accommodate the new placement.
Removing a Widget
To remove a widget from the layout, click the  button. The remaining widgets will automatically shift left to fill the empty space.
Assigning an Incident Workspace
To use a created incident workspace, users must assign it to one or more roles and groups. This setting can be configured under the Assign Workspace section on the Settings tab.
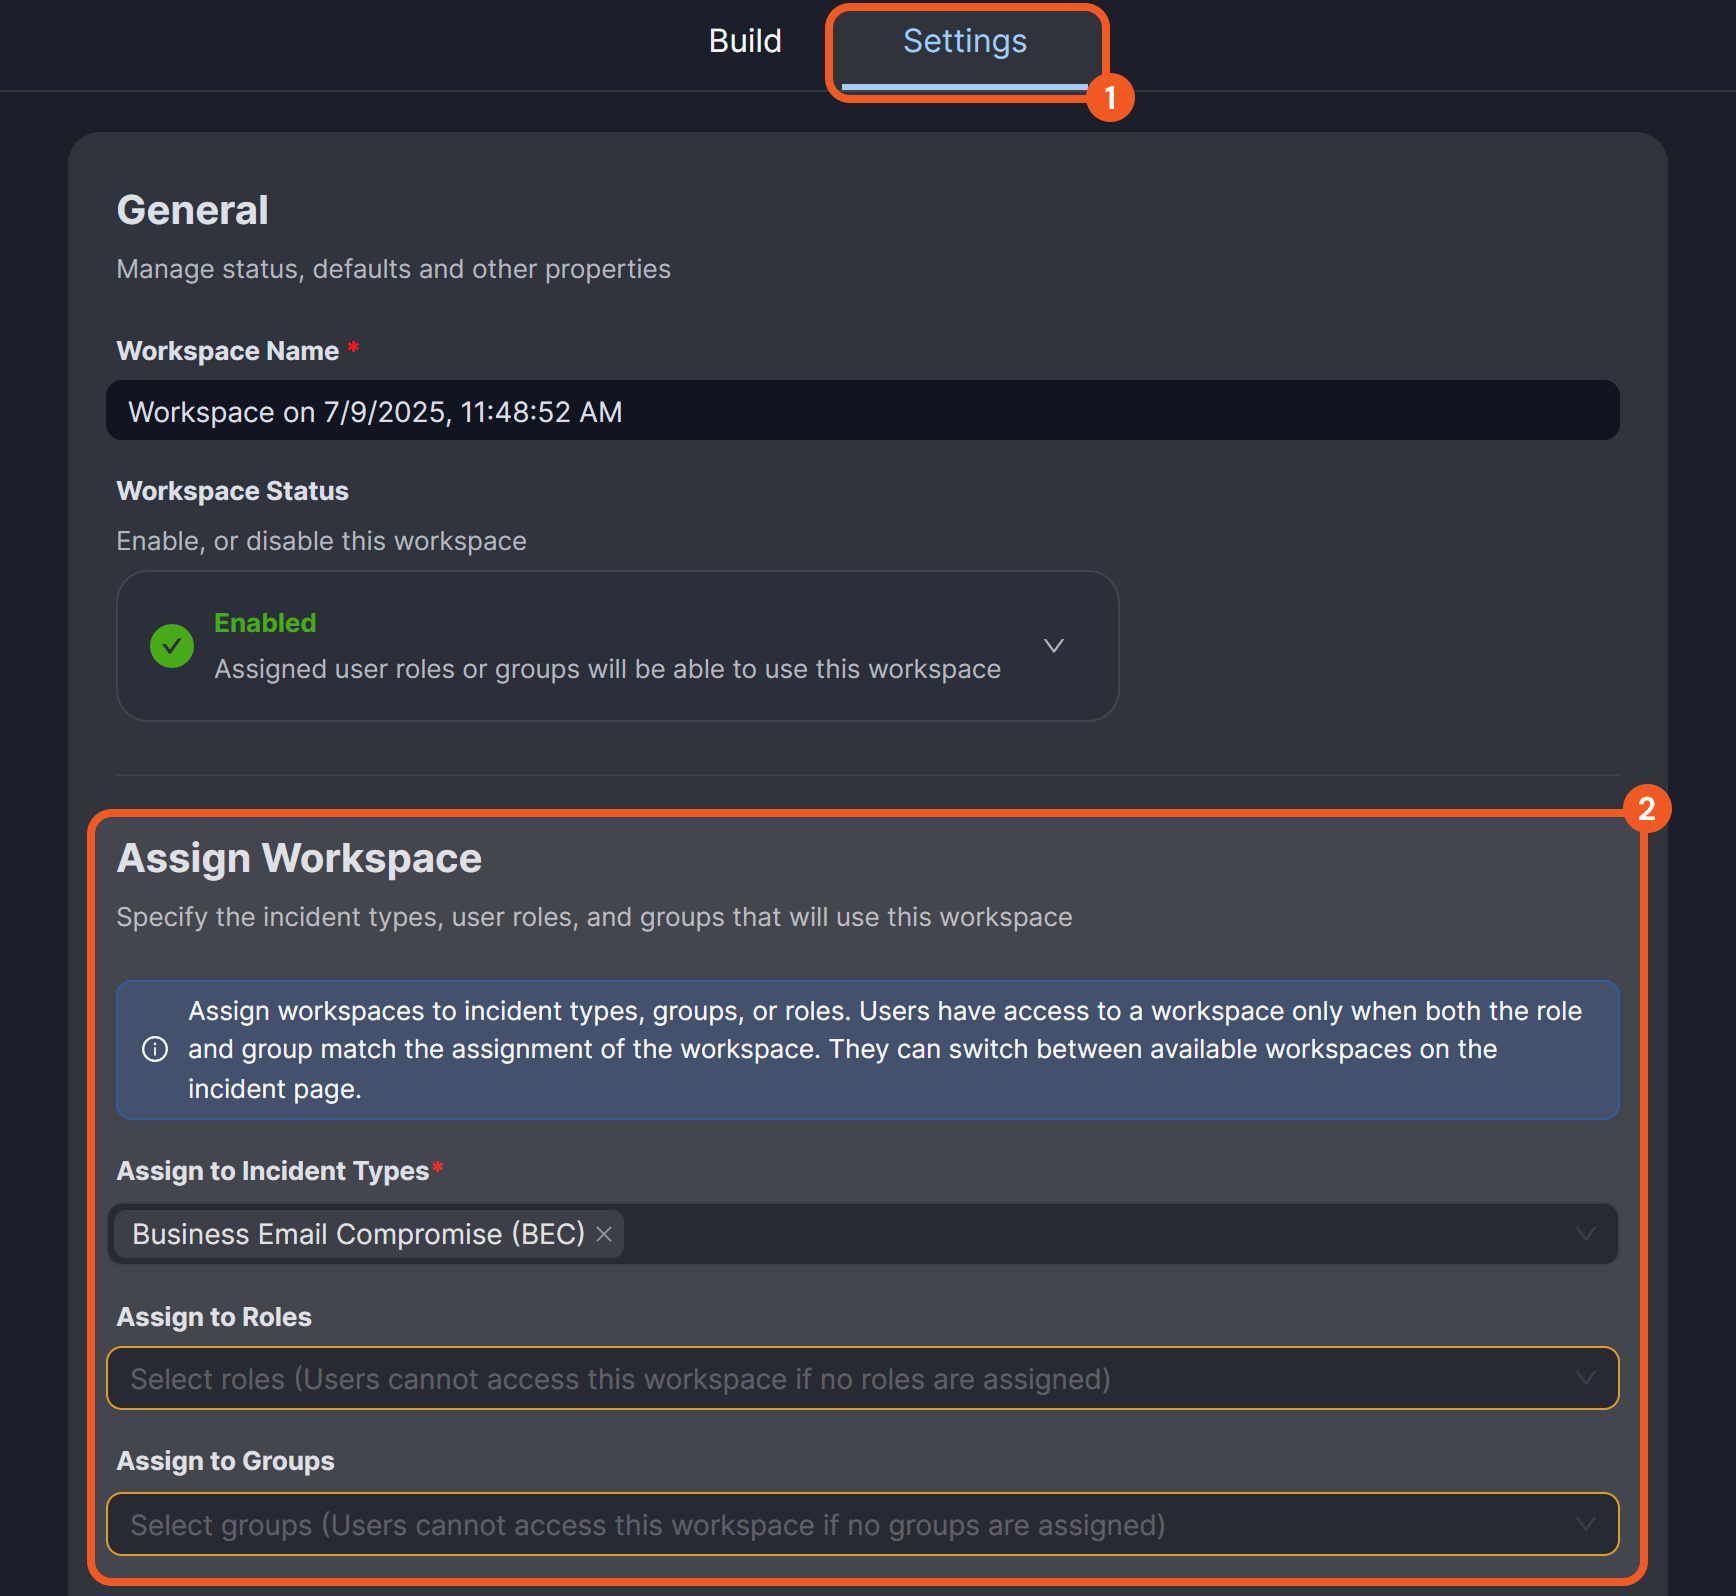
An incident workspace can be assigned under three scopes: incident type, roles, and groups. These scopes are not mutually exclusive and can be combined to provide highly granular access. Users will have access to a workspace only when their role and group match the workspace’s assigned scopes.
EXAMPLE 1 A workspace is assigned to Incident Type A, the Analyst role, and the SOC Team group.
Only Analysts in the SOC Team working on incidents typed as Incident Type A will have access to the workspace.
EXAMPLE 2 A workspace is assigned to Incident Type B, the Analyst role, and All Groups.
Any Analyst, regardless of group, working on incidents typed as Incident Type B will have access to the workspace.
EXAMPLE 3 A workspace is assigned to Incident Type C, All Roles, and the Managers group.
Any user in the Managers group, regardless of role, working on incidents typed as Incident Type C will have access to the workspace.
EXAMPLE 4 A workspace is assigned to Incident Type A and Incident Type B, All Roles, and All Groups.
Any user working on incidents typed as Incident Type A or Incident Type B will have access to the workspace.
WARNING
A workspace must be assigned to at least one role and one group for it to be accessible.
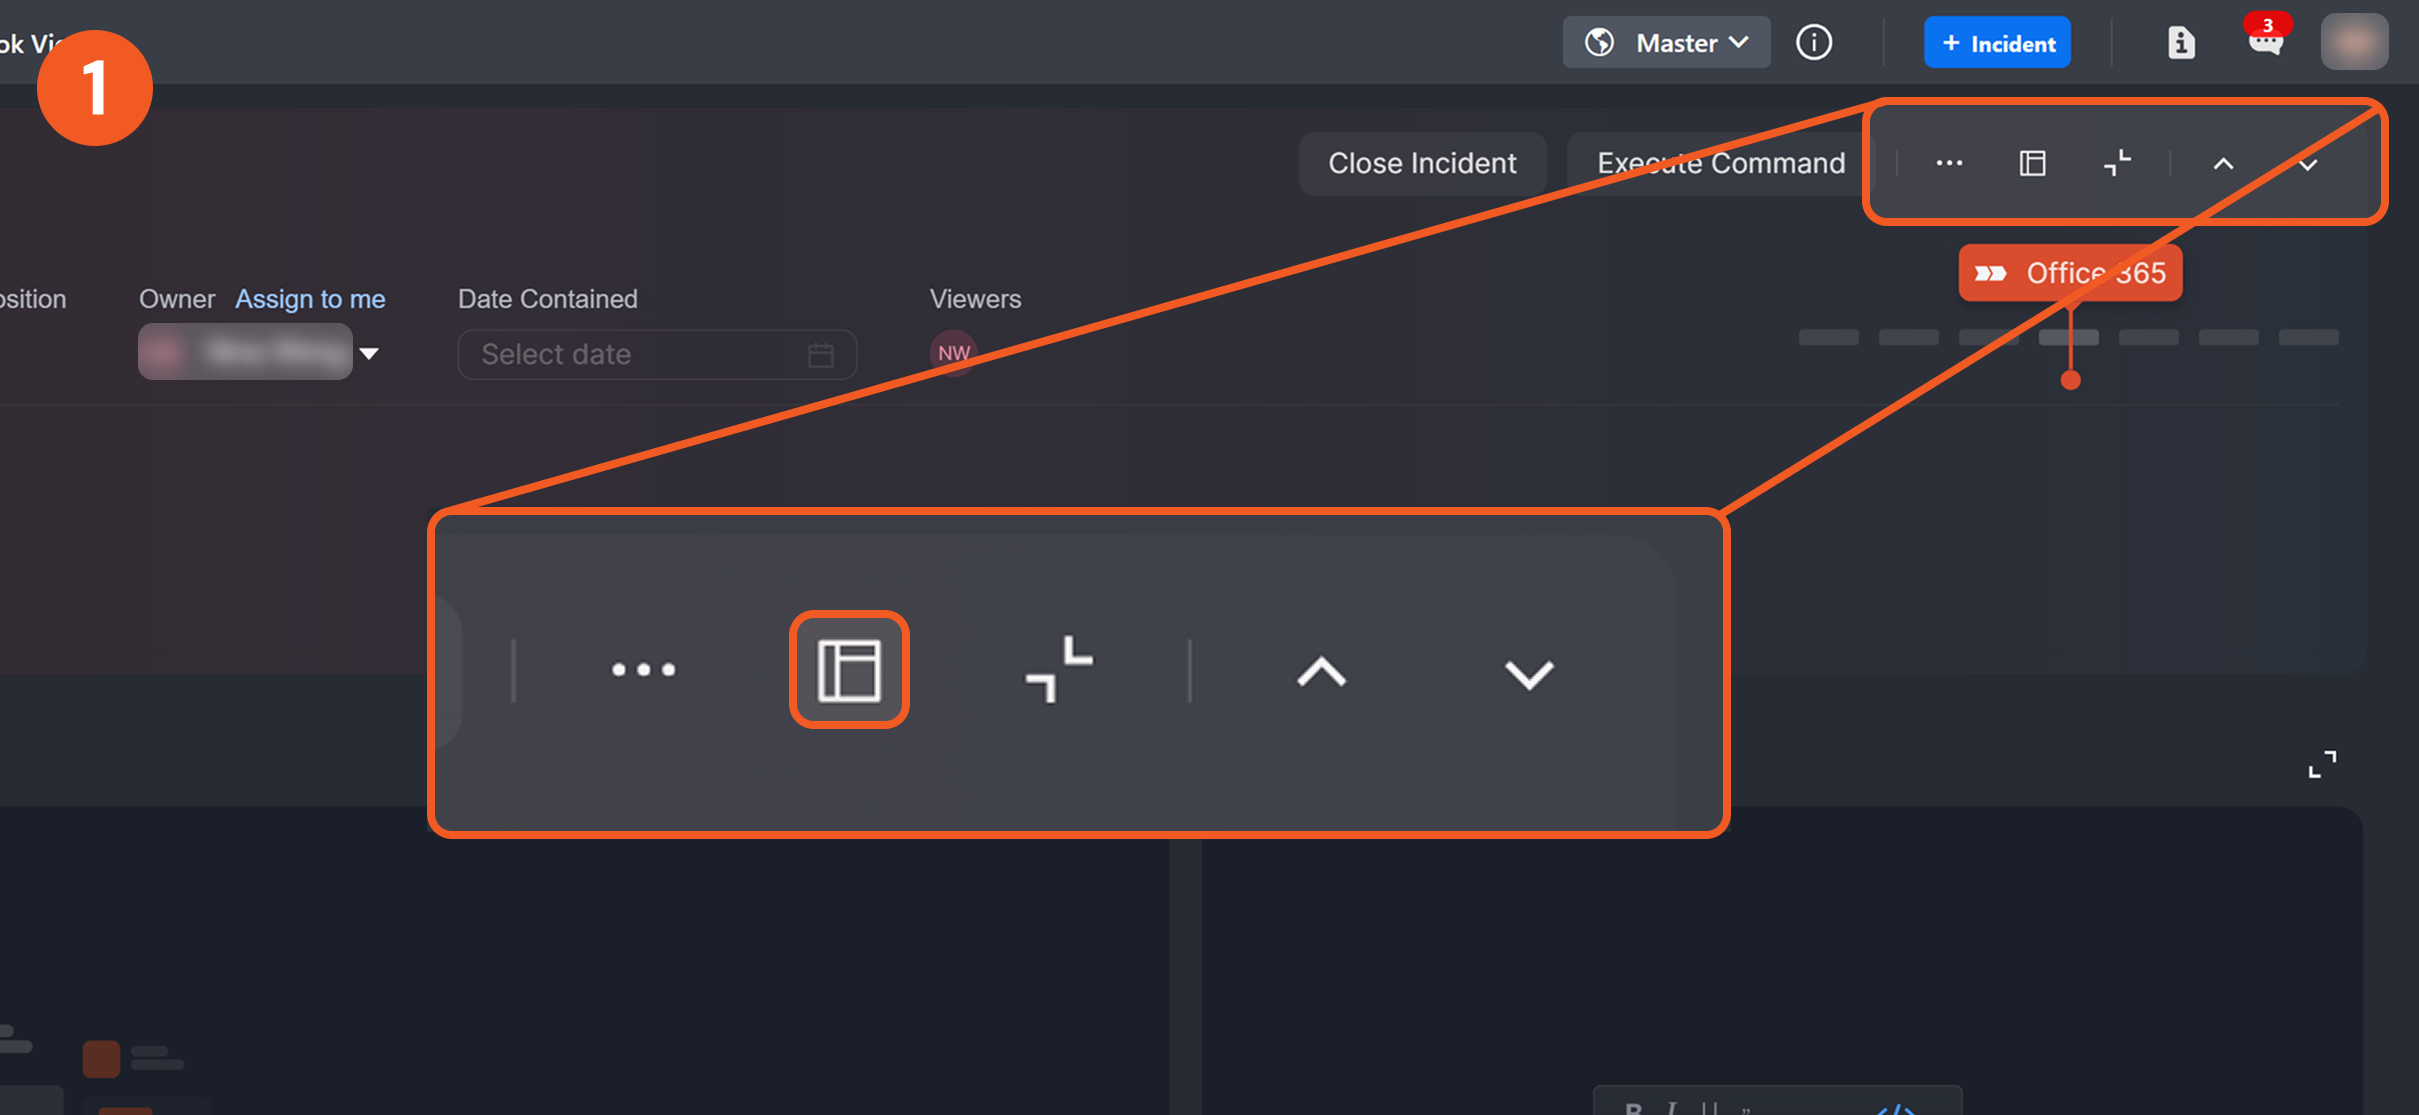
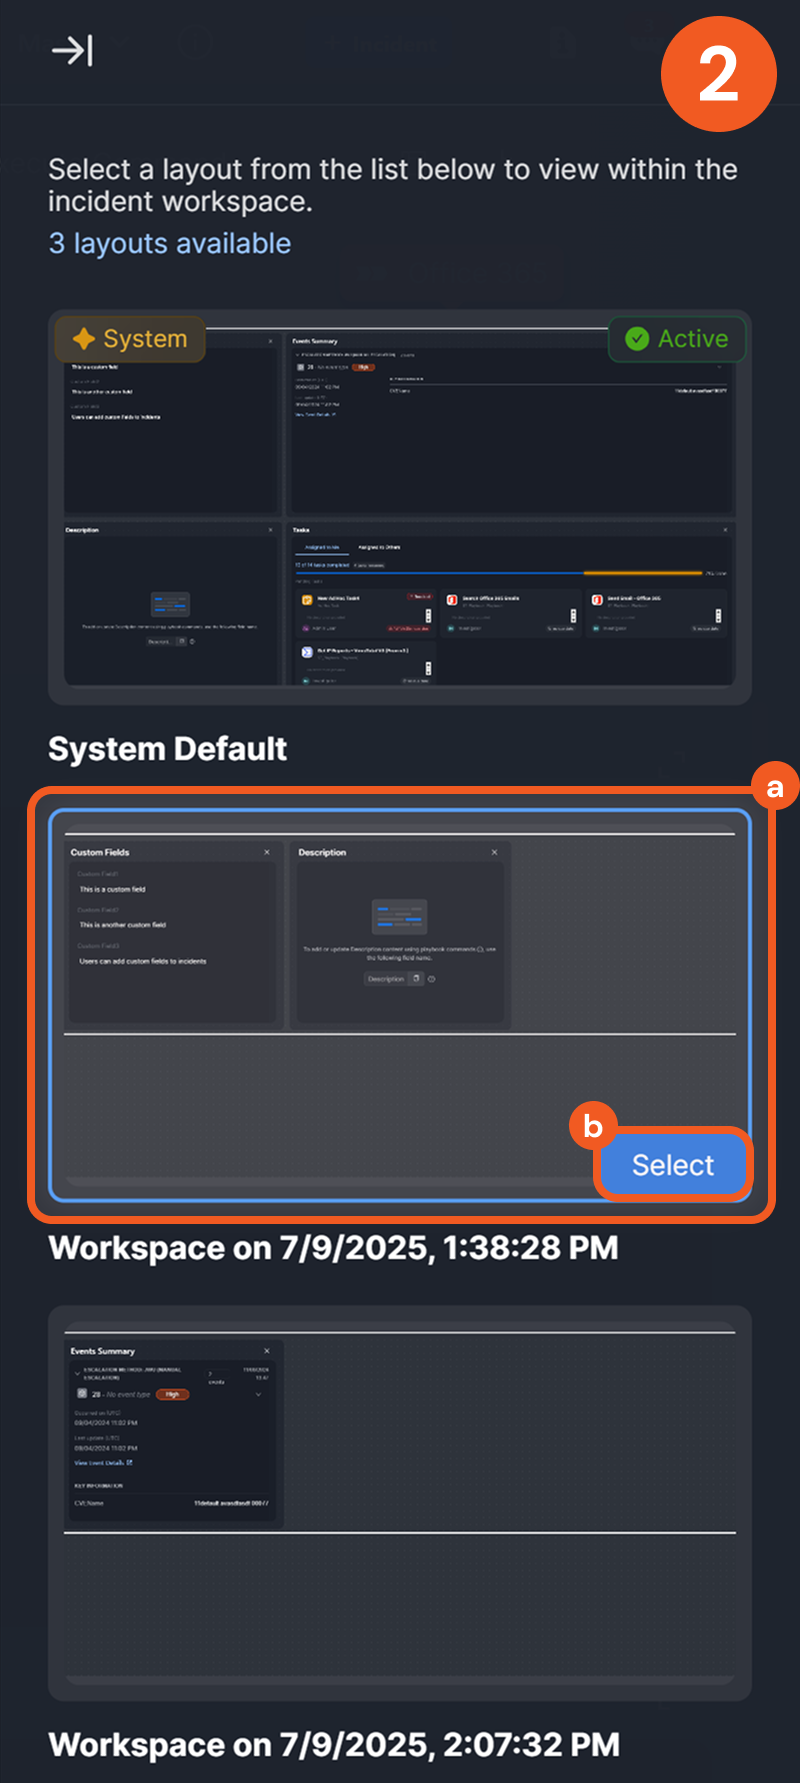
Switching the Incident Workspace Layout
After a new workspace is created and assigned, users with access can switch to it by clicking the  button within the incident workspace, then selecting the layout in the popover displayed on the right.