.png)
SAML Configuration for Microsoft Entra ID
LAST UPDATED: 06/15/2024
Overview
This guide walks you through configuring a custom SAML application within Microsoft Entra ID (formerly Azure Active Directory) and integrating it with D3 SOAR server. It guides reader through creating and setting up an enterprise application in Azure portal, configuring SAML for SSO, managing SAML signing certificates, and ensuring proper setup of configuration files.
Procedure
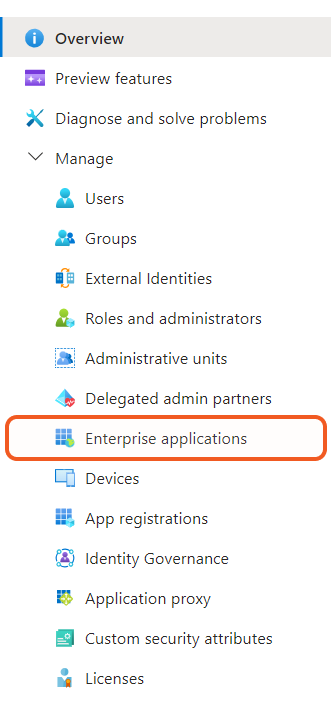
Create Your Own Enterprise Application
Navigate to the Azure portal login page at https://portal.azure.com/#home and log in to proceed.
Search for and select Azure Active Directory using the search bar.
-20240615-003948.png?inst-v=4d6f00ea-d563-42d6-b8c7-1a4ea4284139)
Click on Enterprise applications within the left sidebar.
Click on the + New Application button.
-20240615-004920.png?inst-v=4d6f00ea-d563-42d6-b8c7-1a4ea4284139)
Click on the + Create your own application button.
-20240615-004950.png?inst-v=4d6f00ea-d563-42d6-b8c7-1a4ea4284139)
Enter a name for your D3 enterprise application.
Select the Integrate any other application you don’t find in the gallery (Non-gallery) radio option.
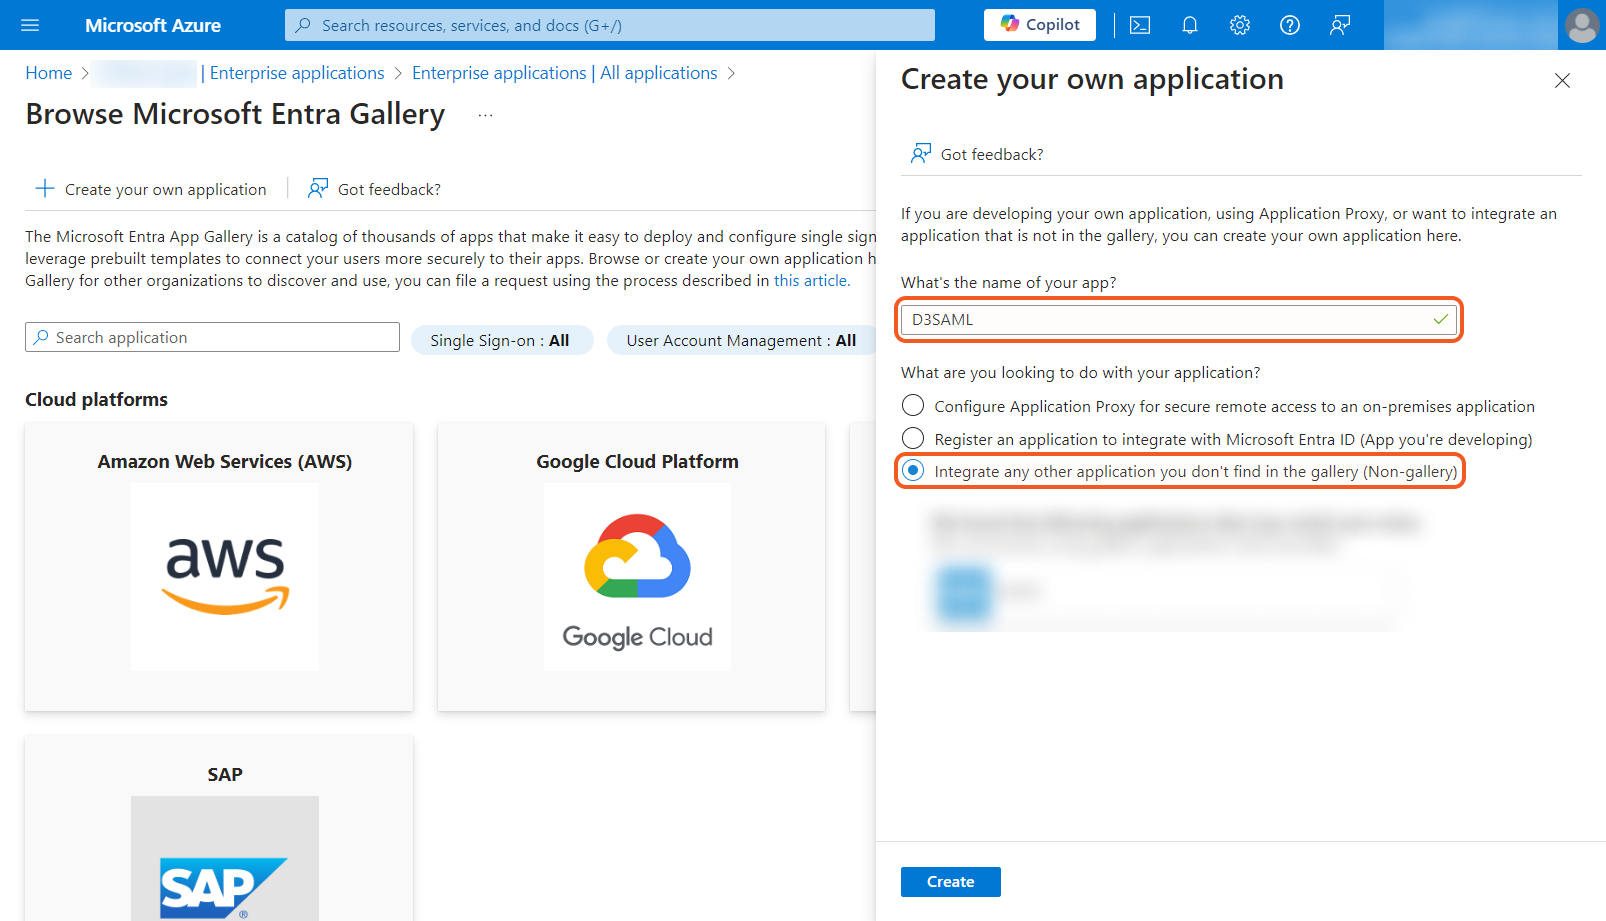
Click on the Create button.
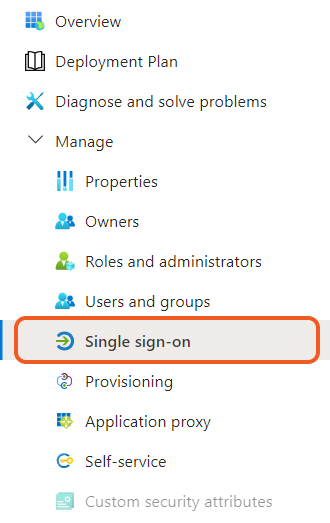
Click on the app you created, then navigate to Single sign-on in the menu.
Select the SAML option.
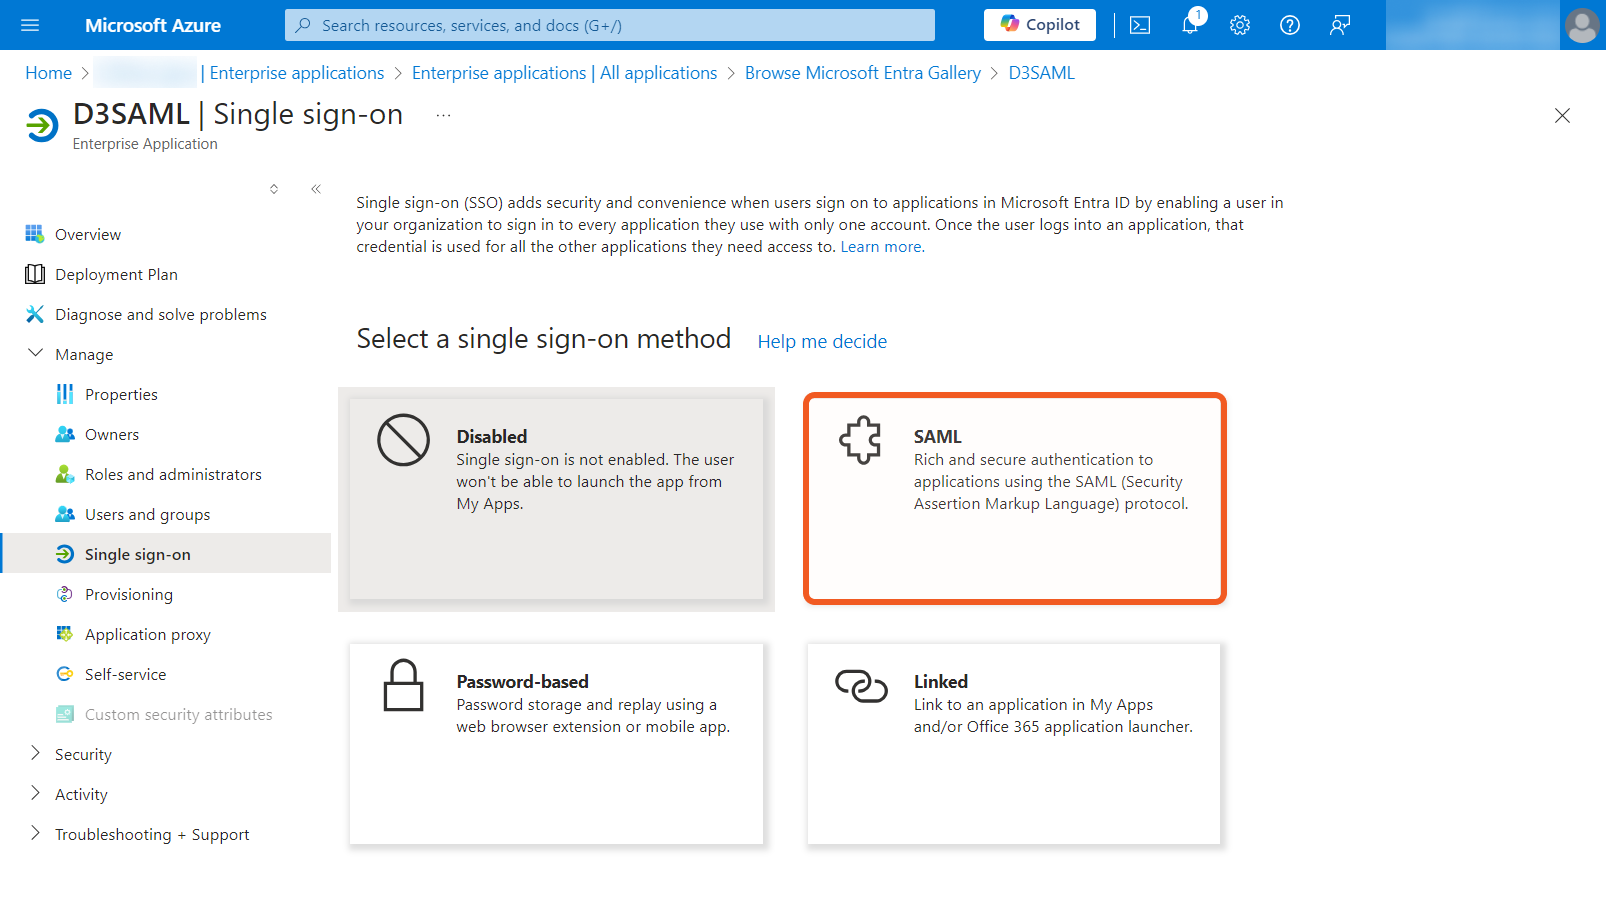
You will now see the following screen.
-20240617-172454.png?inst-v=4d6f00ea-d563-42d6-b8c7-1a4ea4284139)
Configure SAML in the Application
Click on the Edit button within the Basic SAML Configuration session.
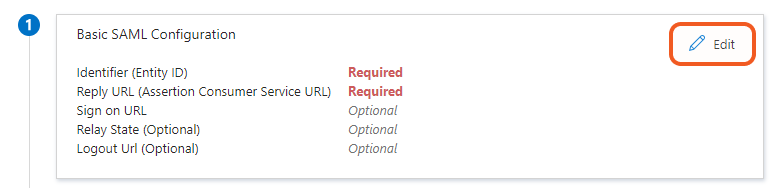
Click on the Add identifier and Add reply URL hyperlinks.

Enter your D3 SOAR URL into the Identifier (Entity ID) input field.
Enter your D3 SOAR URL with
/login.aspxappended into the Reply URL (Assertion Consumer Service URL) input field.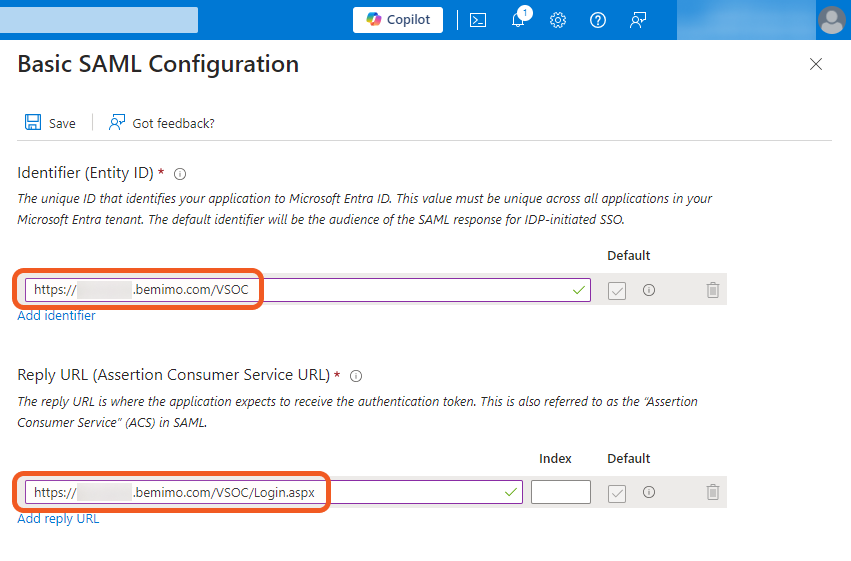
READER NOTE
Your D3 SOAR URL conforms to the format https://<YourD3Domain>/<path>/VSOC.
Ensure that the Default checkbox is ticked for both the identifier and reply URL. They will be automatically ticked if you have only one entry of identifier or reply URL.
The inclusion of
/login.aspxis mandatory. Failure to do so will result in the following error message and associated troubleshooting details in the Login to D3 via Entra ID.
-20240616-044937.png?inst-v=4d6f00ea-d563-42d6-b8c7-1a4ea4284139)
Click on the
 button.
 Click on the
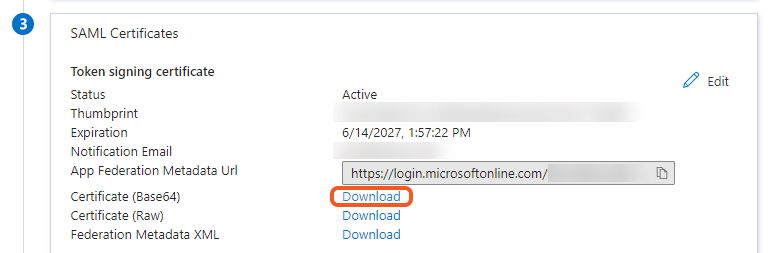
 button under the SAML Certificates section.
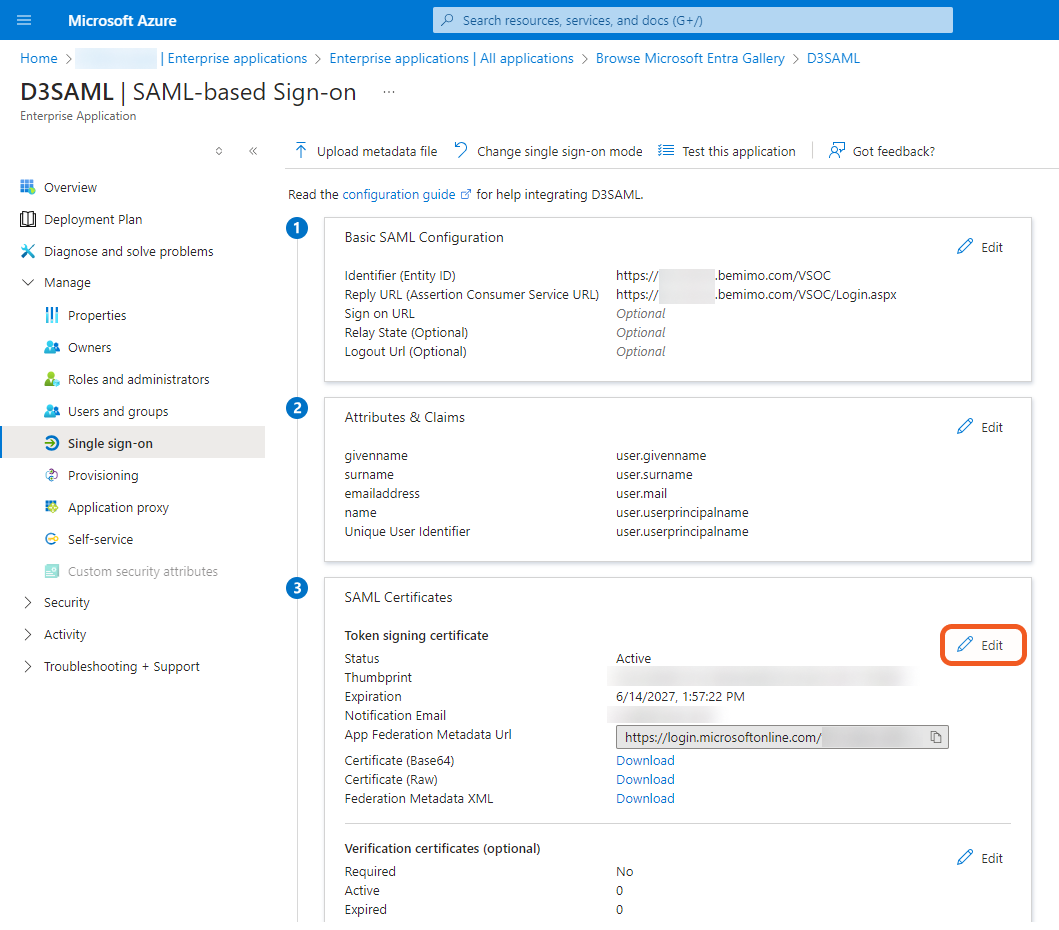
Select the Sign SAML response signing option.
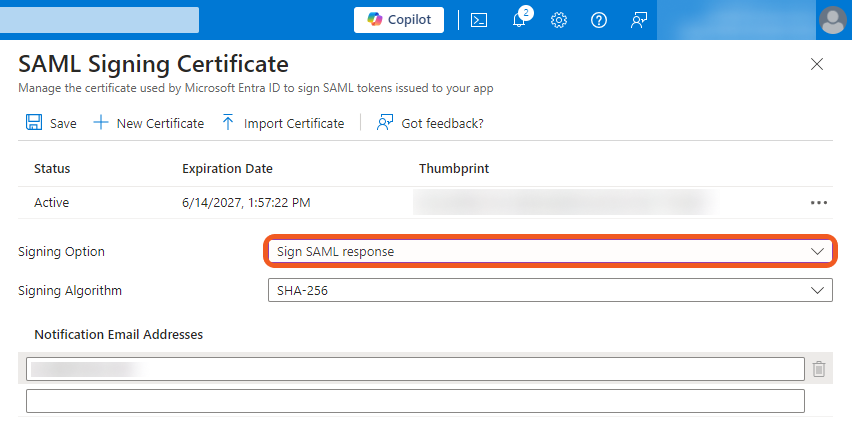
Click on the
button.Click on Download hyperlink for Certificate (Base64).
Create Users in Entra ID
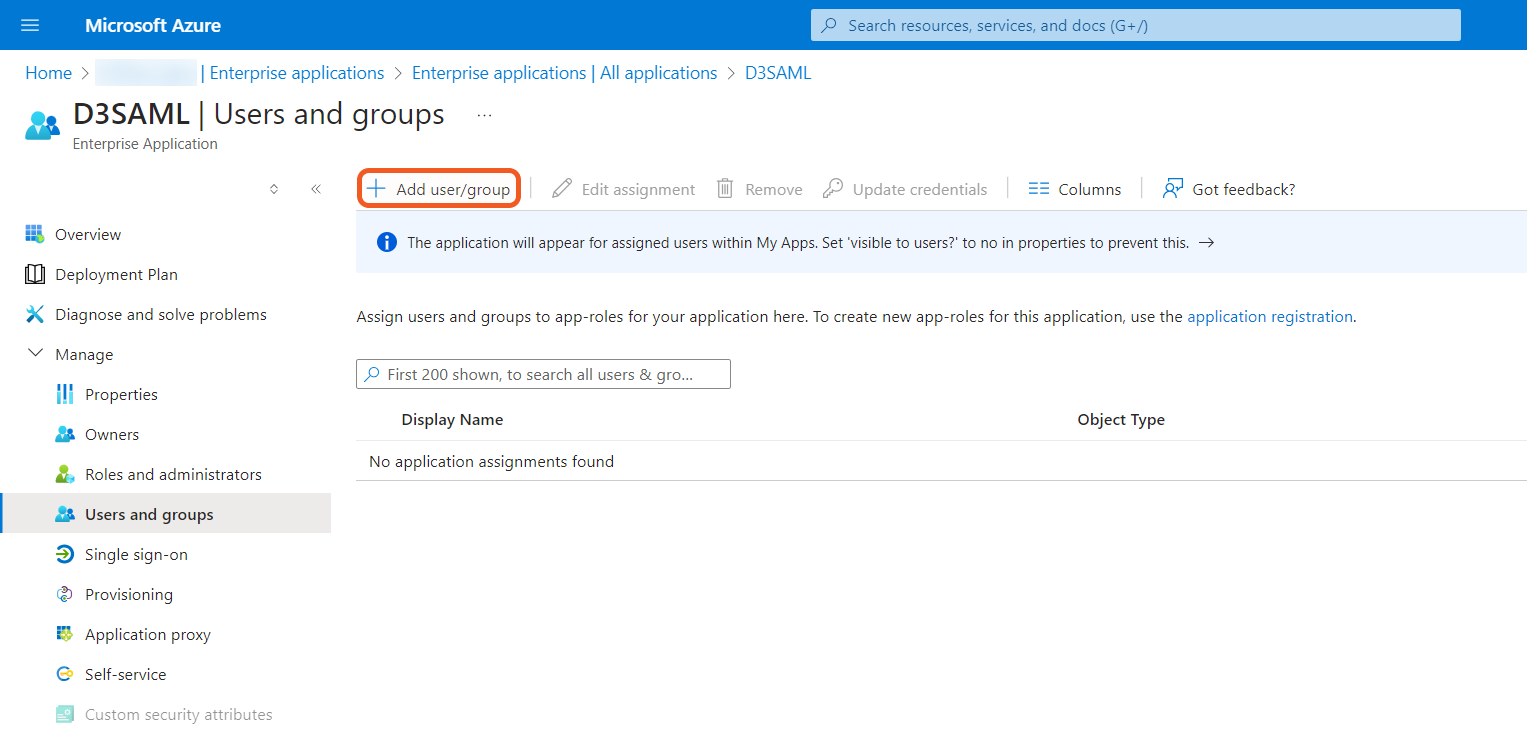
Click on Users and groups within the left sidebar.

2. Click on the + Add user/group button.
Click on the + New user dropdown menu, then click on the Create new user menu option.
-20240617-215637.png?inst-v=4d6f00ea-d563-42d6-b8c7-1a4ea4284139)
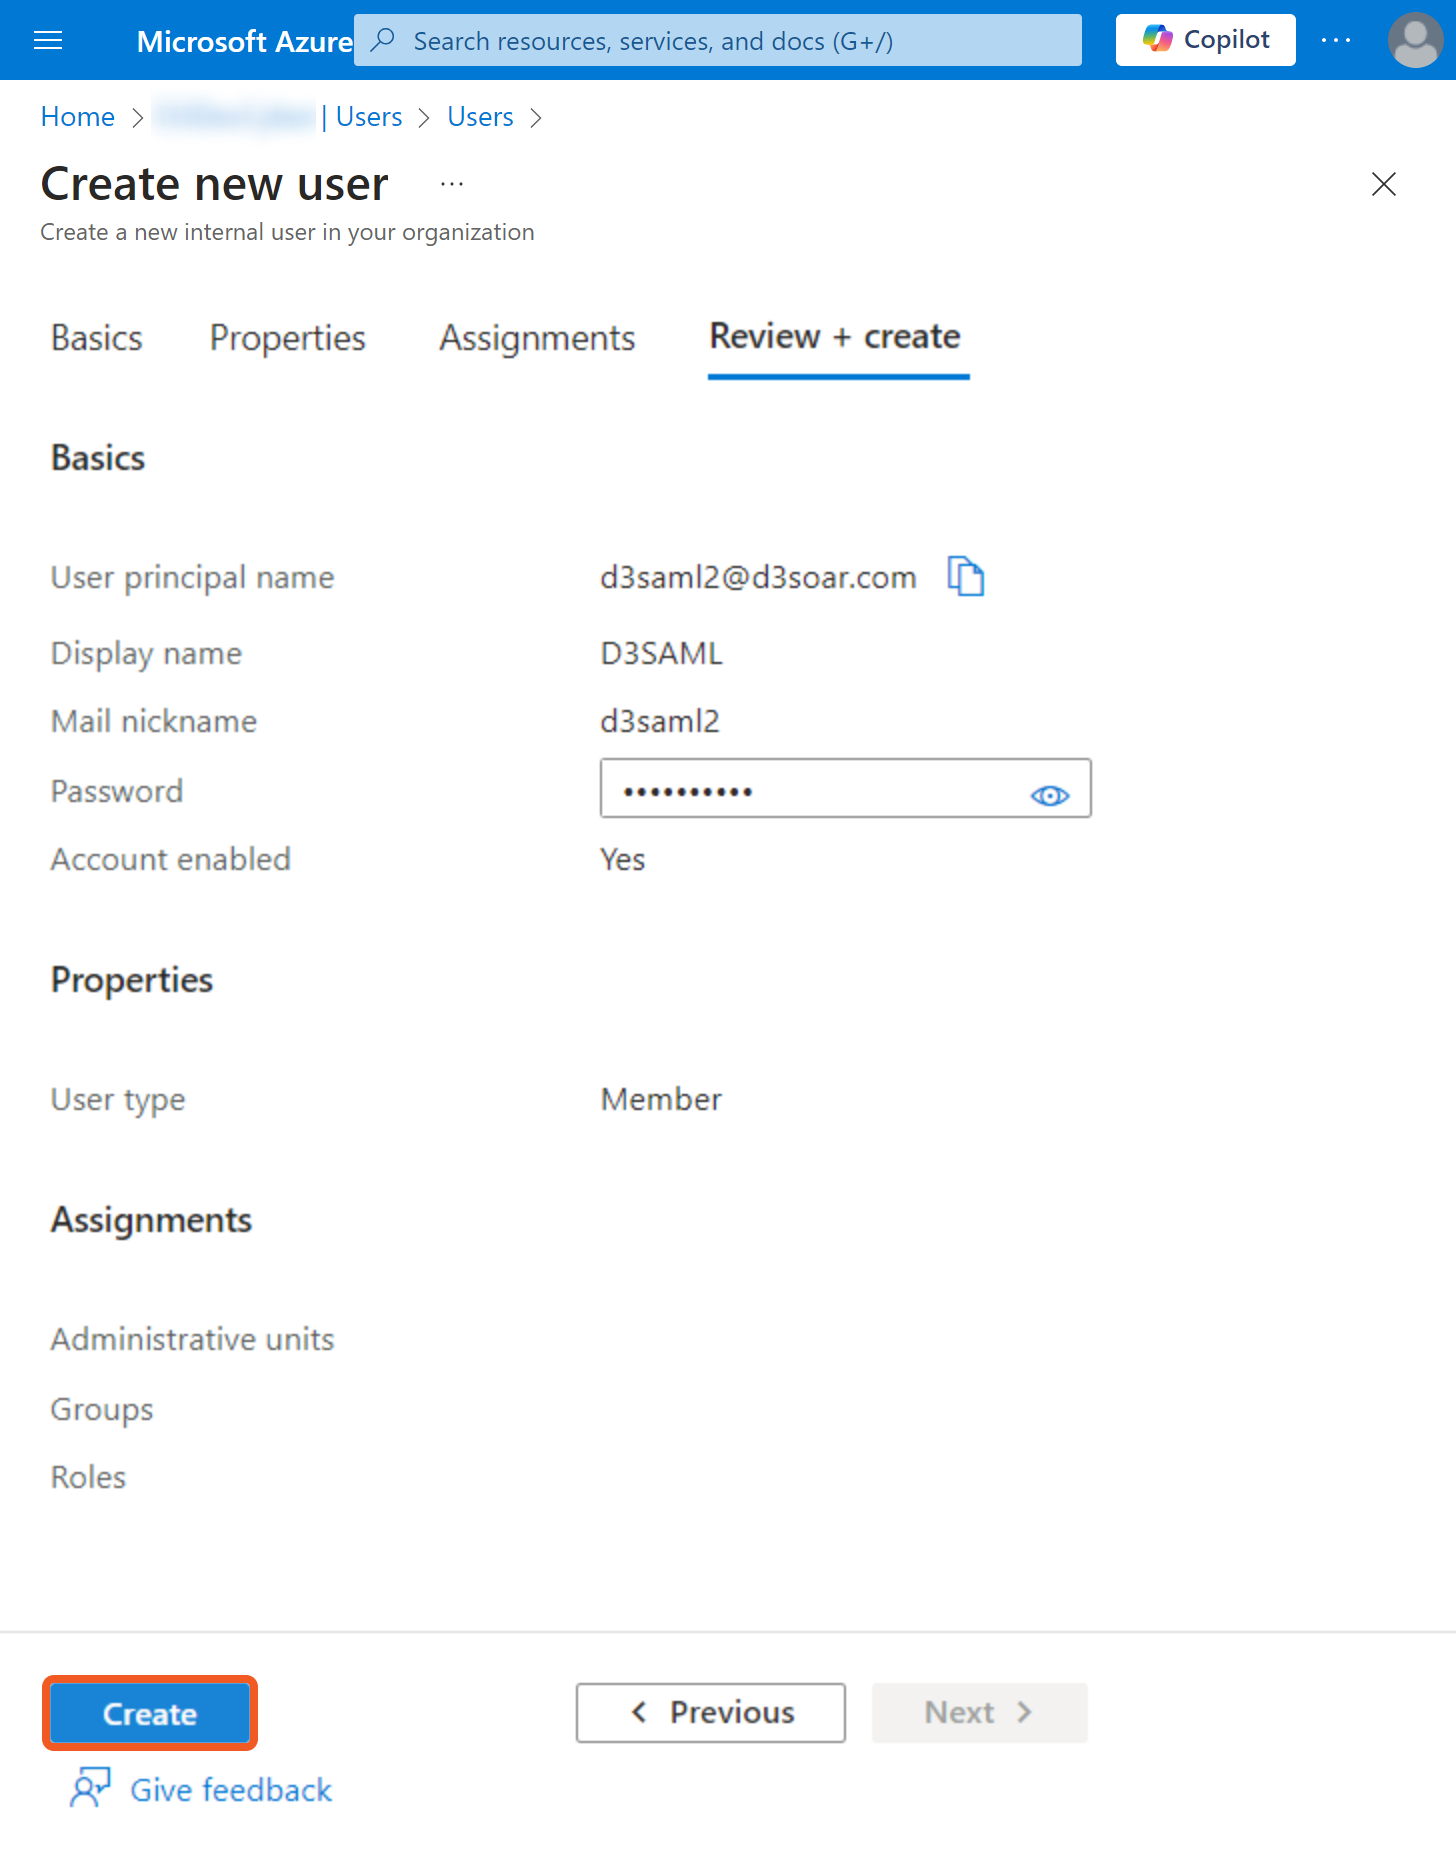
Enter all the input fields within the Identity form, then click on the Review + create button.
-20240617-220600.png?inst-v=4d6f00ea-d563-42d6-b8c7-1a4ea4284139)
Review your information, then click on the Create button.
Assign Entra ID User the SAML Integration
Click on Users and groups on the left hand side.
Check the checkbox(es) next to the user(s) to whom you wish to assign the SAML Integration.
Click on the Select button.
-20240617-221817.png?inst-v=4d6f00ea-d563-42d6-b8c7-1a4ea4284139)
Click on the
%20(1)%202-20240618-234313.png?inst-v=4d6f00ea-d563-42d6-b8c7-1a4ea4284139) button at the bottom left corner.
button at the bottom left corner.
READER NOTE
Before proceeding to the next section, ensure that you have:
Created D3 user accounts (Organization Management > Users > + Add Users). The SAMLEmailIDType configuration key in vSOC’s Application Settings > Web Config determines what your D3 username must be. Depending on its setting, your username could be either your full email address or the local part of your email. Refer to the FAQ section in the Authentication Configuration Guide for more details.
Assigned login methods to those D3 user accounts (Application Settings > Login Authentication > Users).
READER NOTE
To enable multiple users within your organization to access D3 vSOC, create an Entra ID user for each individual, and assign them the SAML Integration.
Login to D3 vSOC via Entra ID
Click on Properties within the left sidebar.
Click on the
 icon for the User access URL.
-20240618-182029.png?inst-v=4d6f00ea-d563-42d6-b8c7-1a4ea4284139)
READER NOTE
Ensure that you have set up your Login Authentication Certificate in vSOC before proceeding. The Target URL field of the Login Authentication Certificate is to be filled with the Entra ID User access URL. The content within the previously downloaded Certificate (Base64) goes into the Certificate field.
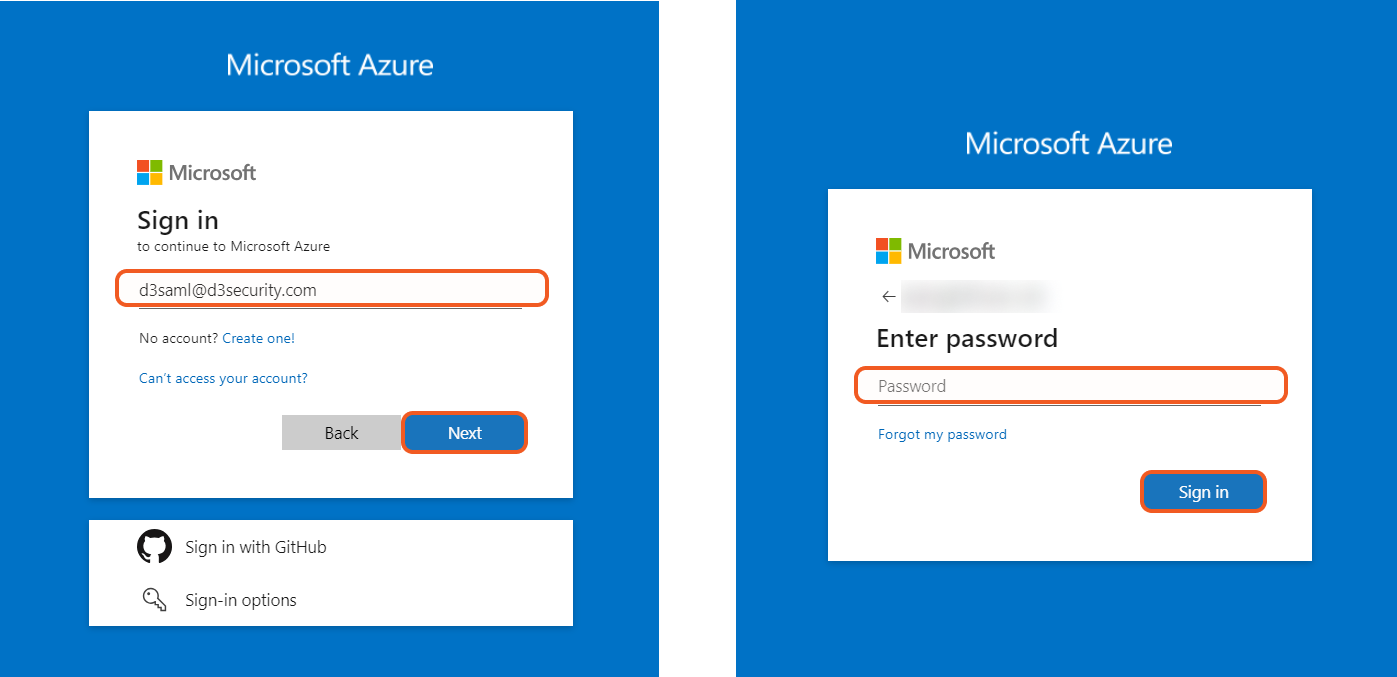
Paste the User access URL into a new browser tab and press the Enter.
Enter your Entra ID username, then click on the Next button.
Enter your Entra ID password, then click on the Sign in button.
After logging in to Entra ID successfully, you will be redirected to D3 vSOC.
If you choose to have D3 assist with the setup process, you have the option to send your SAML User access URL and Certificate (Base64) to D3.