SAML Configuration for Google Admin
Overview
This guide offers detailed instructions for configuring a custom SAML application within the Google Admin dashboard. It outlines the steps to set up your SAML application, create Google Workspace user accounts, add these accounts to a group, enable the group to use your SAML application, verify SSO functionality, and address common troubleshooting issues.
Procedure
Setting Up Your Custom SAML Application
Login to your to https://admin.google.com, and ensure that your account has administrator rights.
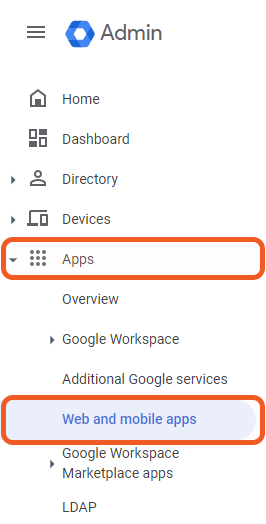
Navigate to Apps > Web and mobile apps.
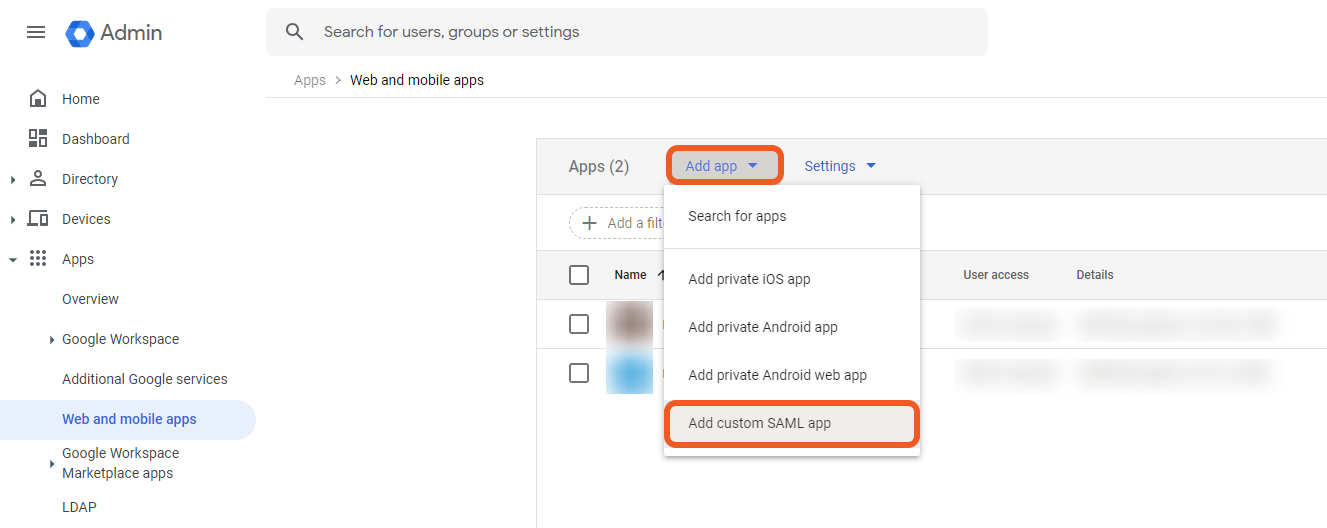
Click the Add App dropdown menu, then click the Add custom SAML app dropdown option.
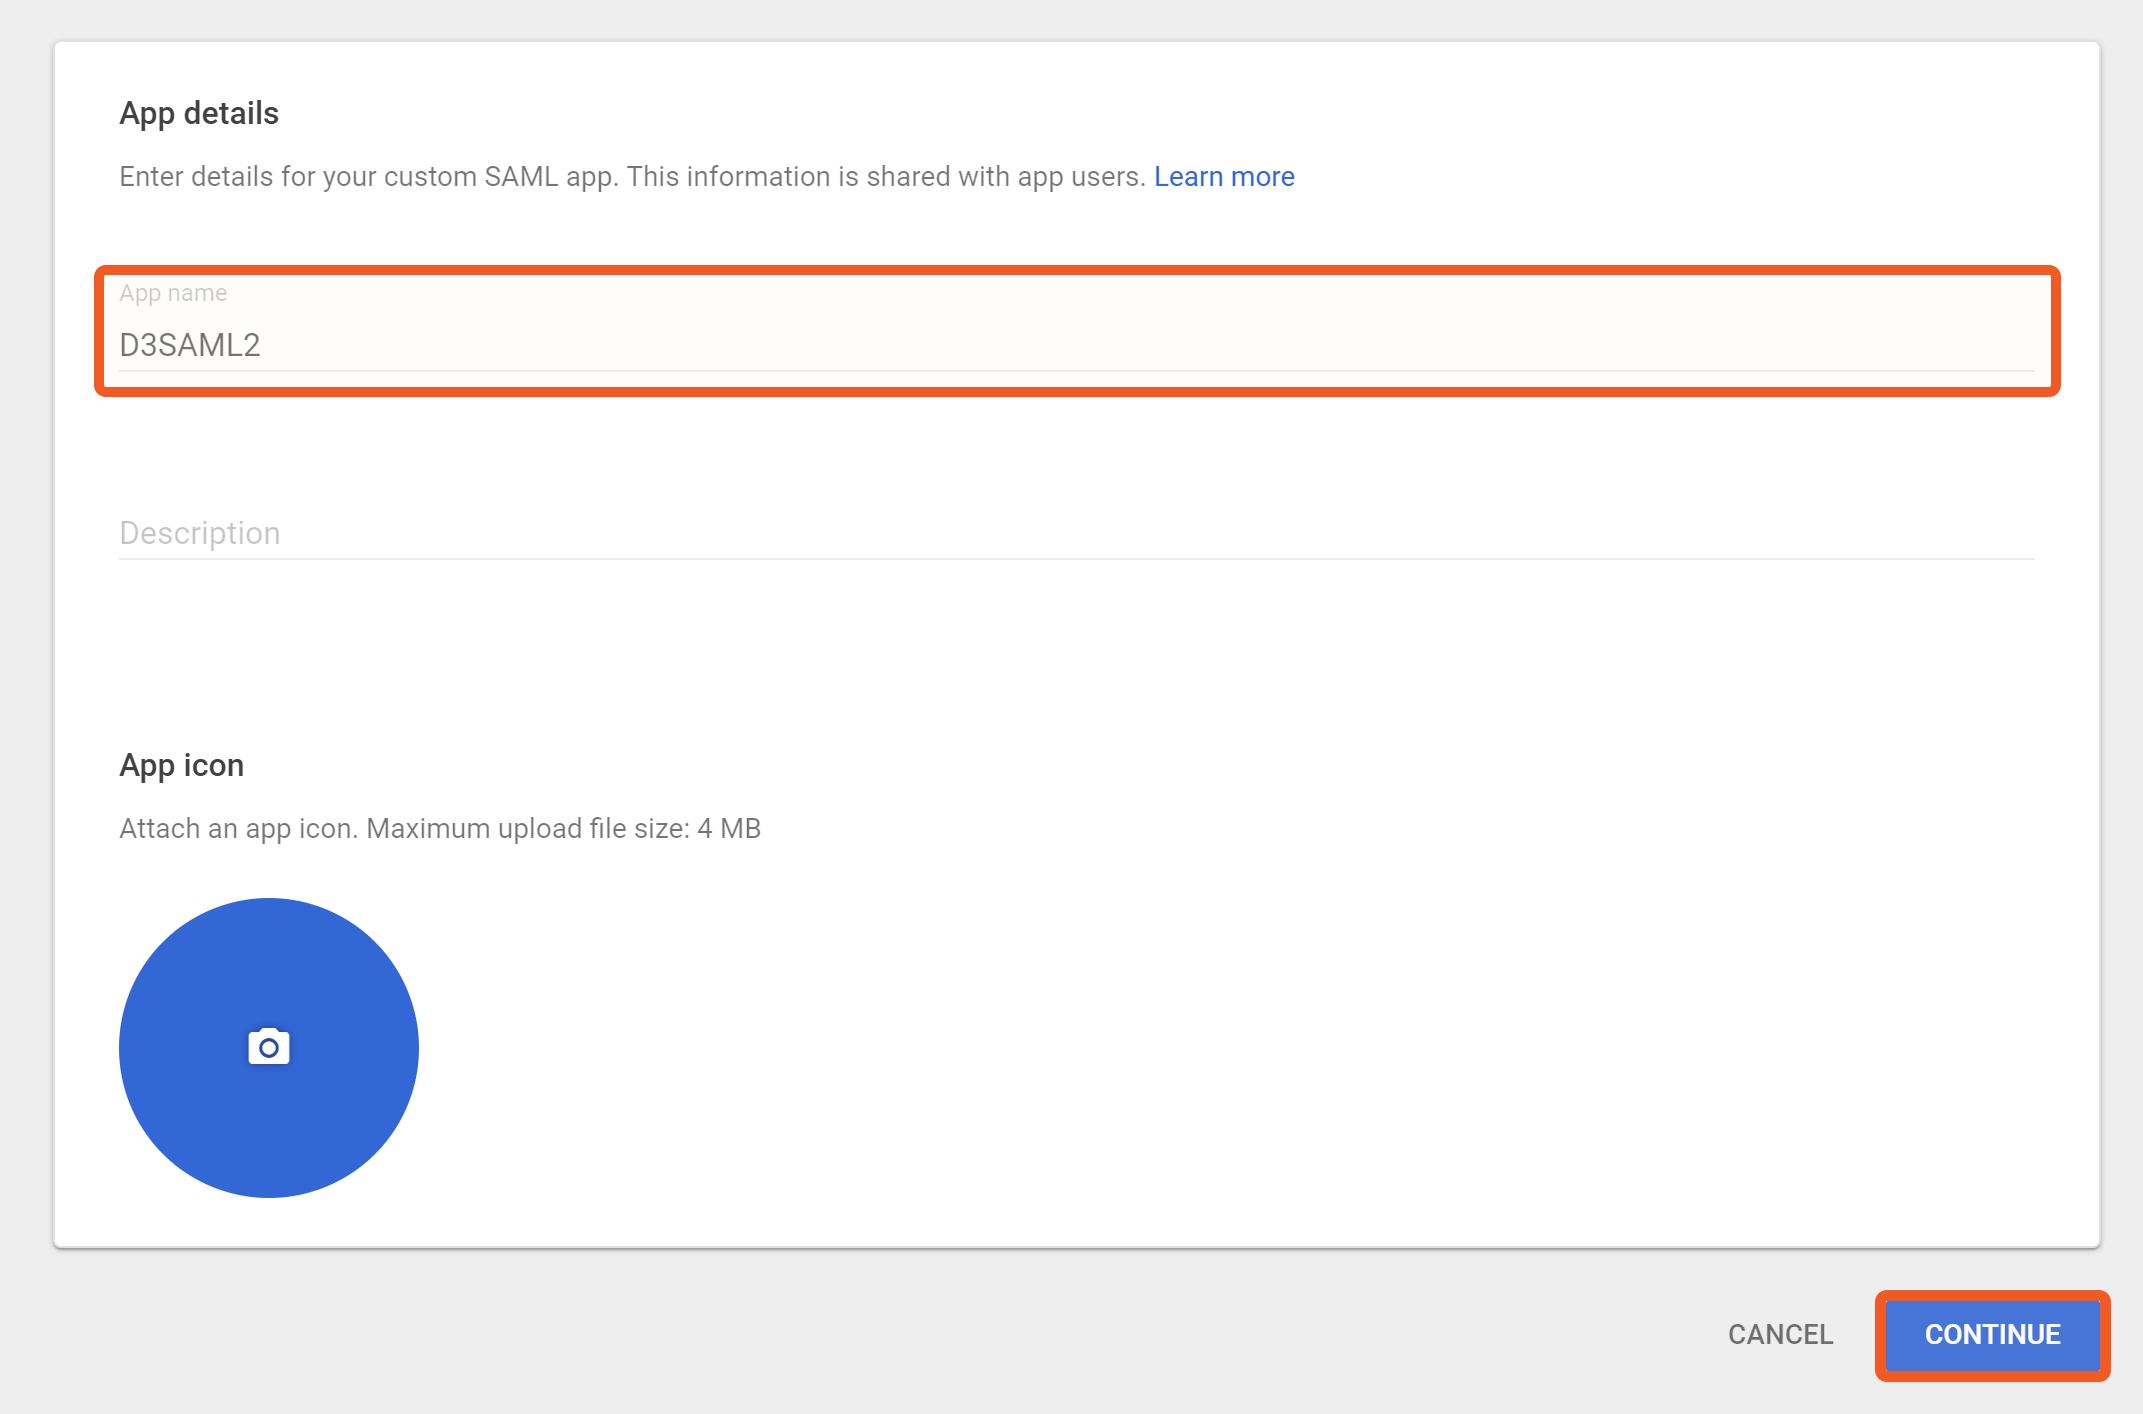
Input a name for your custom SAML application, then click on the CONTINUE button.
Click on the DOWNLOAD METADATA button, then click on the CONTINUE button.
-20240619-171636.png?inst-v=f0ae511a-7398-4e63-b935-74c903306443)
Enter your ACS URL and Entity ID into the corresponding fields, then click on the CONTINUE button.
-20240619-172326.png?inst-v=f0ae511a-7398-4e63-b935-74c903306443)
READER NOTE
The ACS URL must start with https://, and end with
/login.aspxBoth ACS URL and Entity ID starts with the format https://<YourD3Domain>/<path>/VSOC
Click on the FINISH button in the Attribute mapping stage.
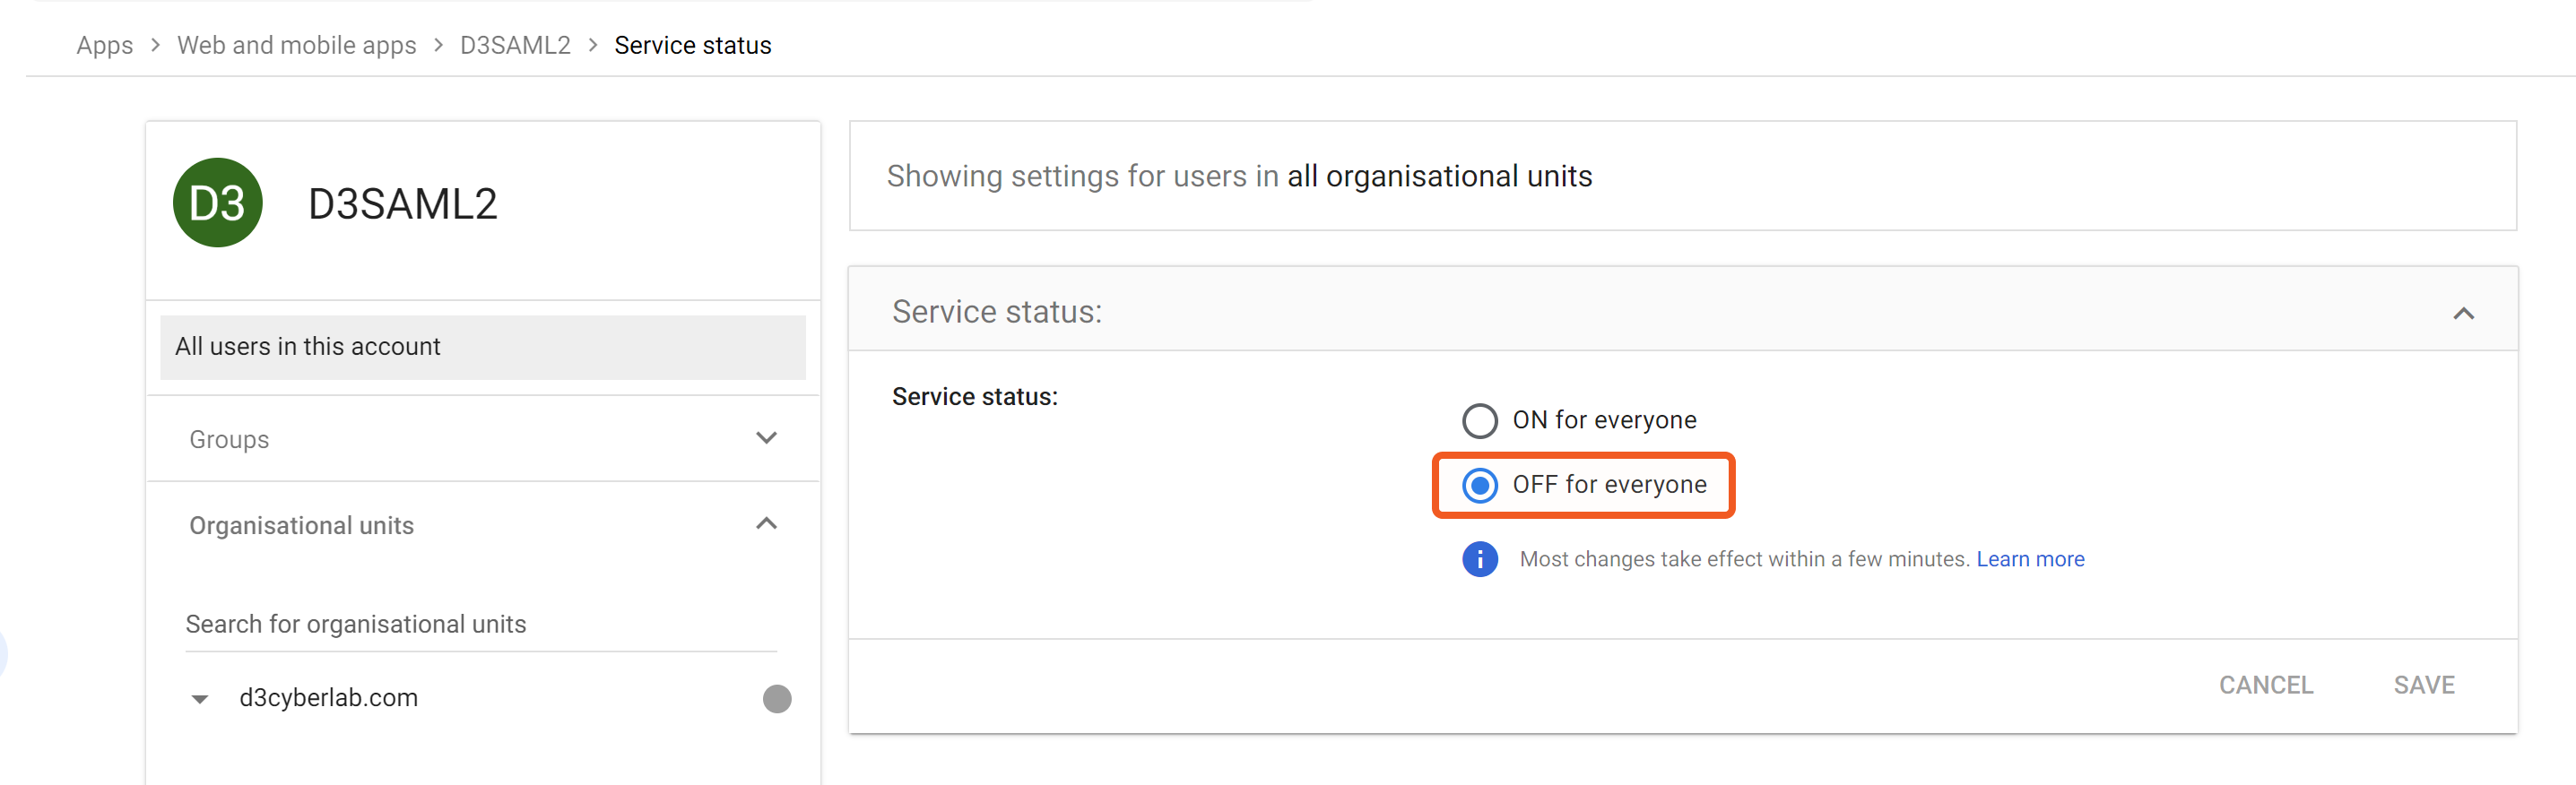
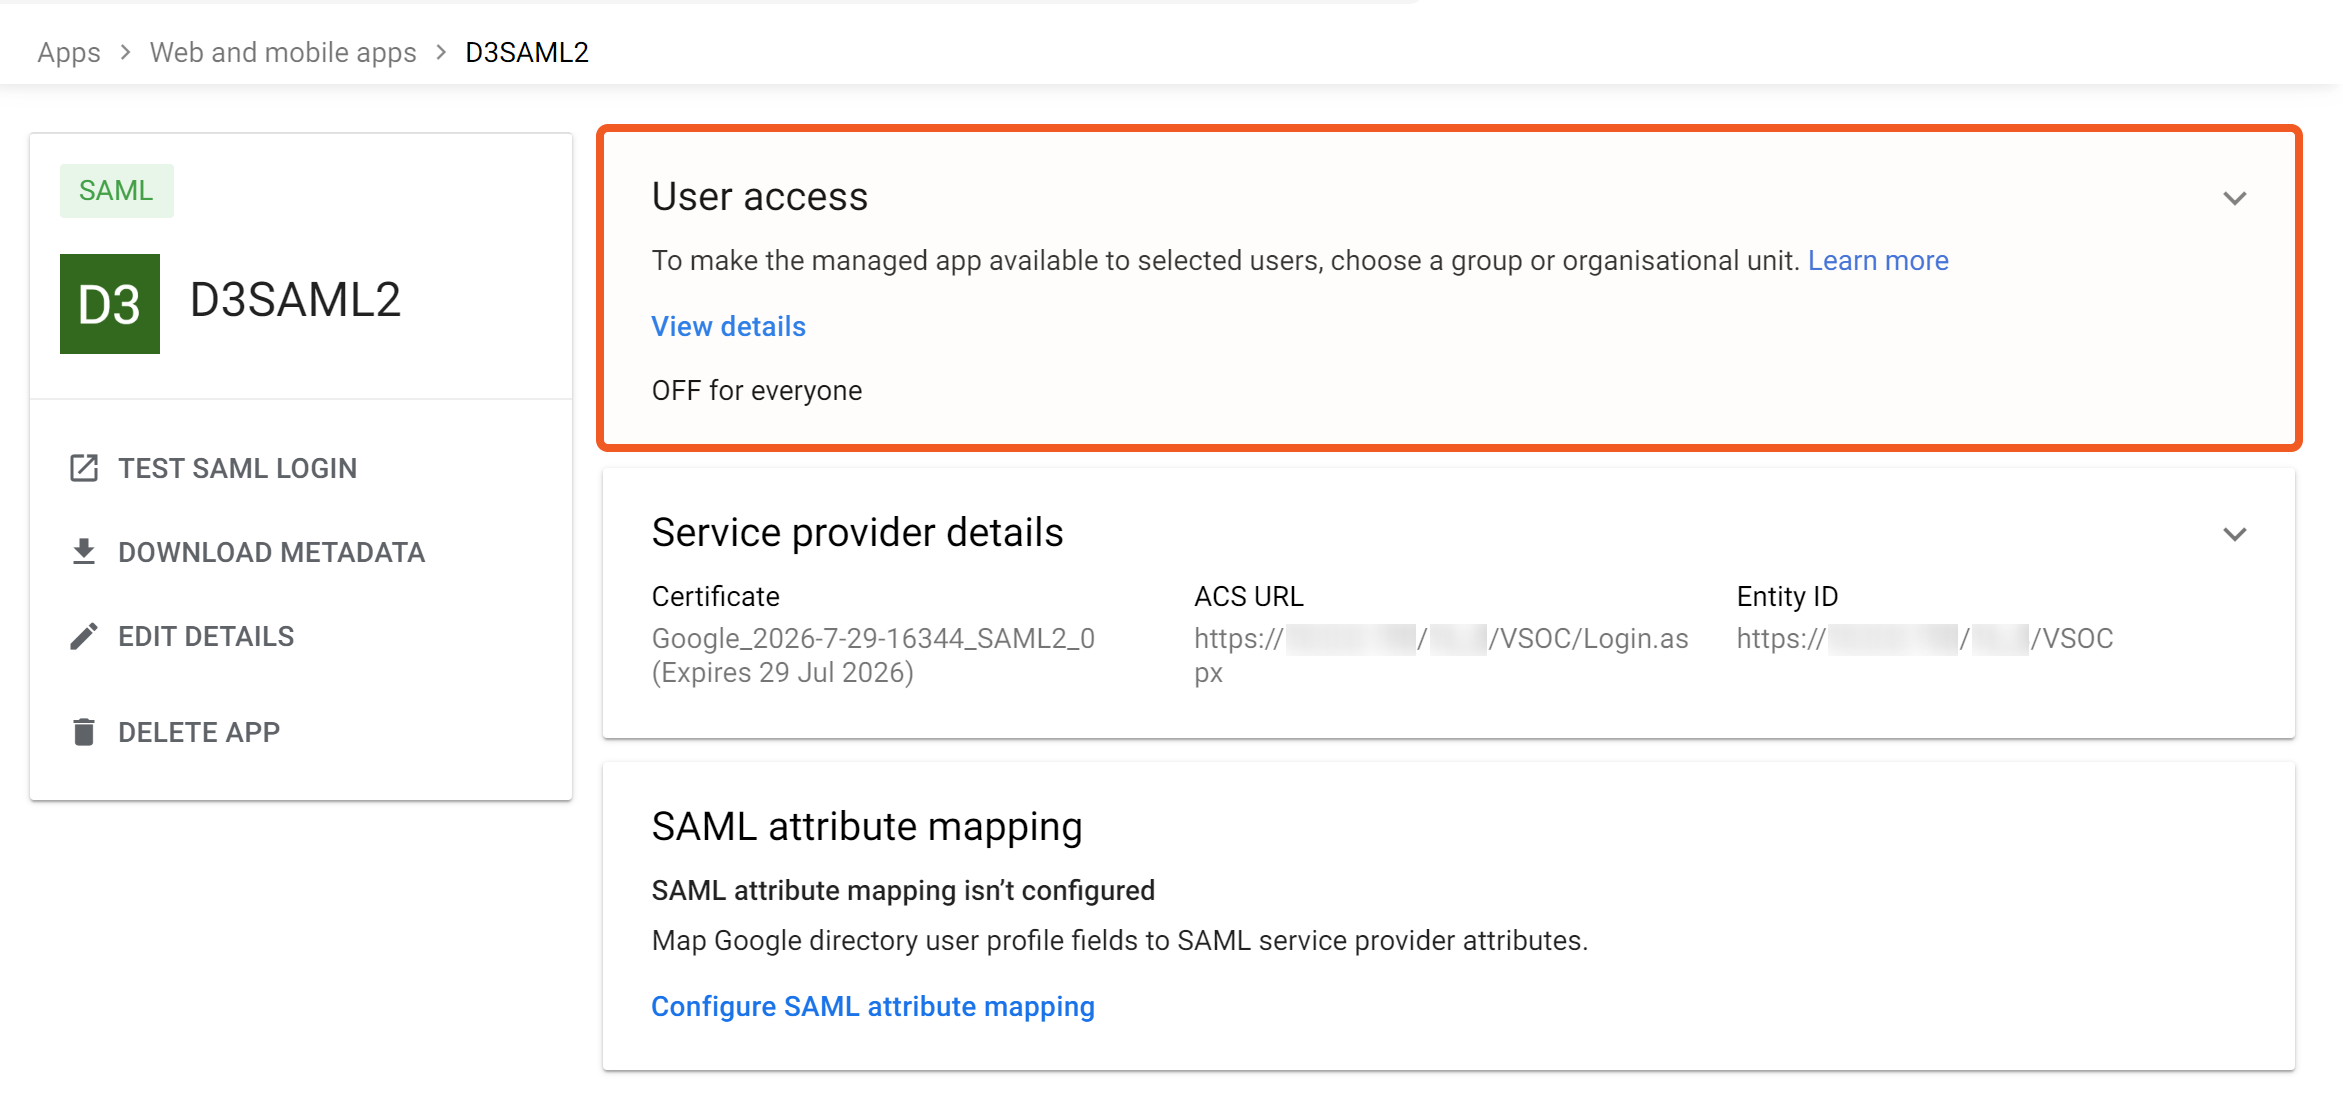
Ensure that the OFF for everyone settings is configured for User access.
-20240619-175053.png?inst-v=f0ae511a-7398-4e63-b935-74c903306443)
If it is not already set to OFF for everyone, click anywhere within the User access card. In the Service status page, select the OFF for everyone radio option, then click on the SAVE button.
Create Google Workspace Users
Navigate to Directory > Users, then click on the Add new user button.
-20240619-190050.png?inst-v=f0ae511a-7398-4e63-b935-74c903306443)
Enter in the required user information, then click on the ADD NEW USER button.
-20240619-190847.png?inst-v=f0ae511a-7398-4e63-b935-74c903306443)
Click on any of the following buttons based on your needs:
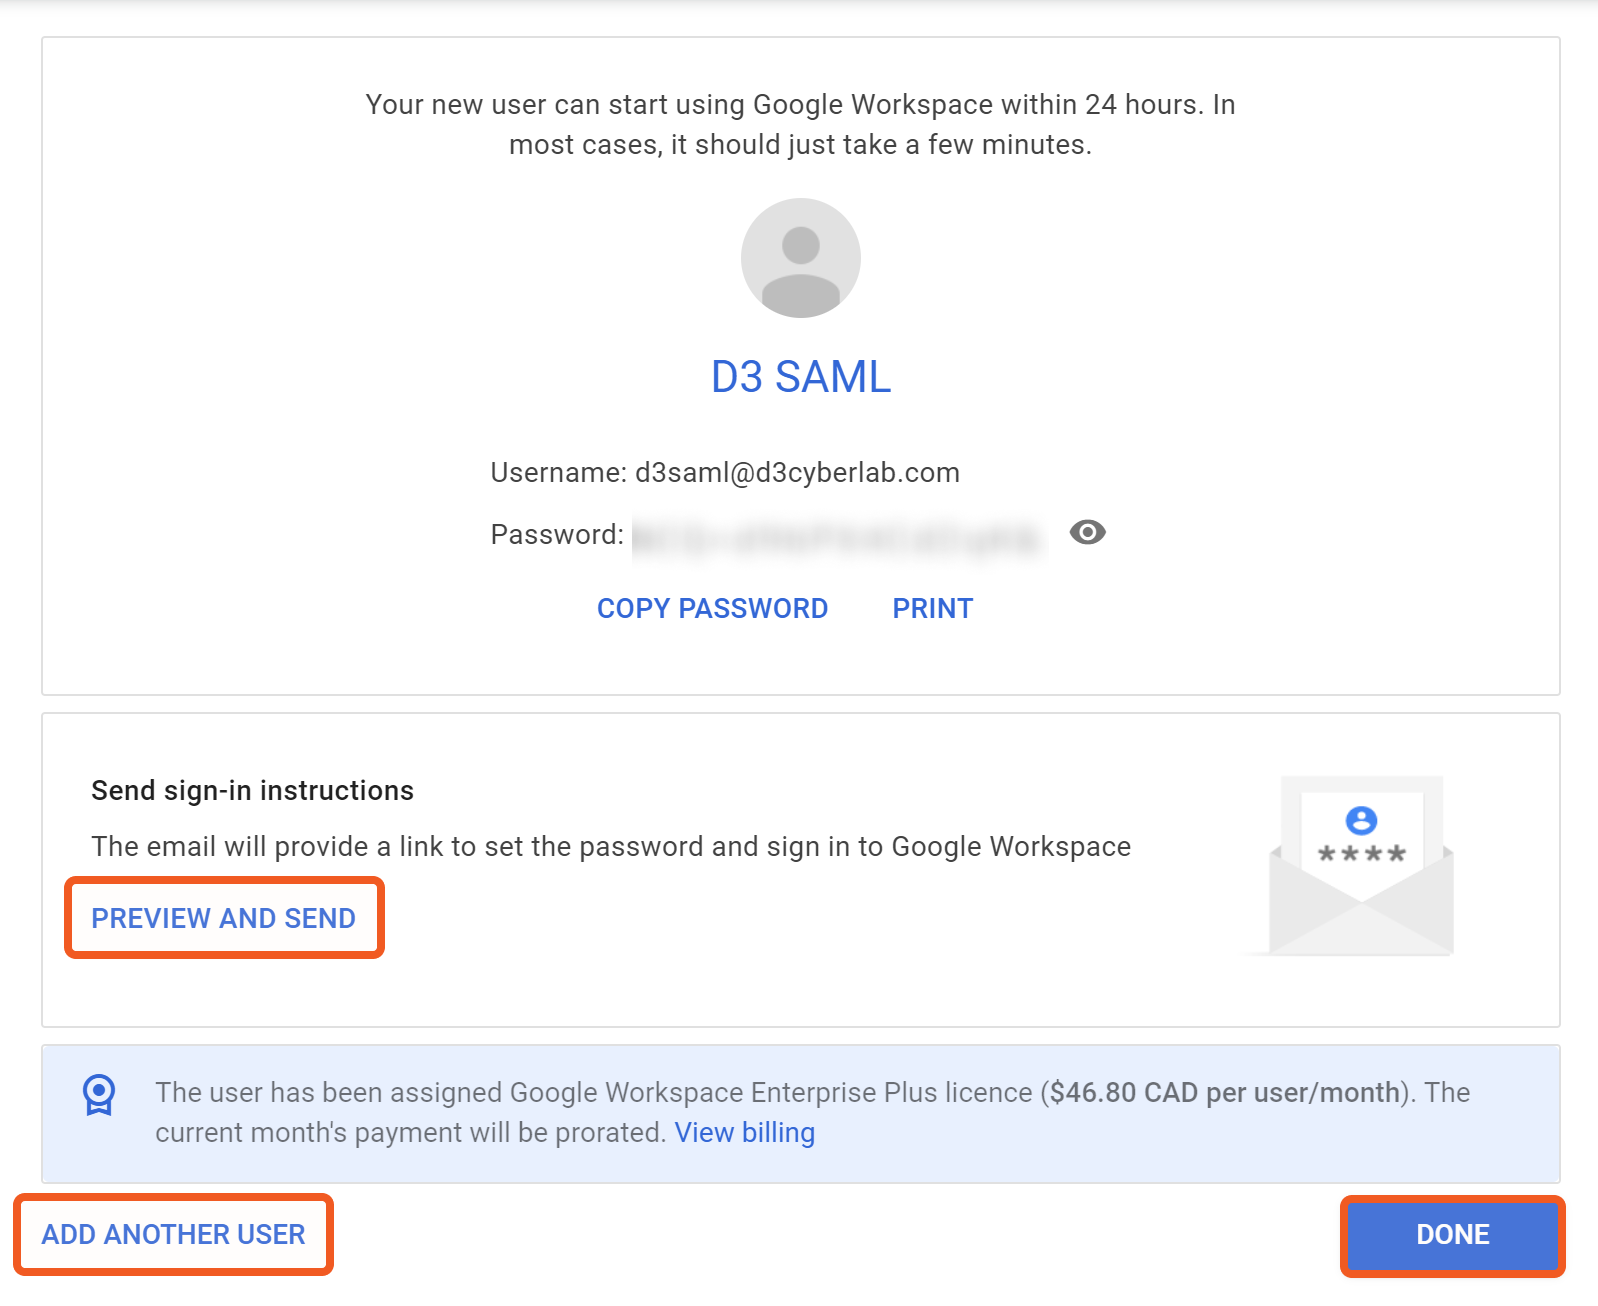
PREVIEW AND SEND to reset the user password
ADD ANOTHER USER to create another Google Workspace user
DONE to complete the process
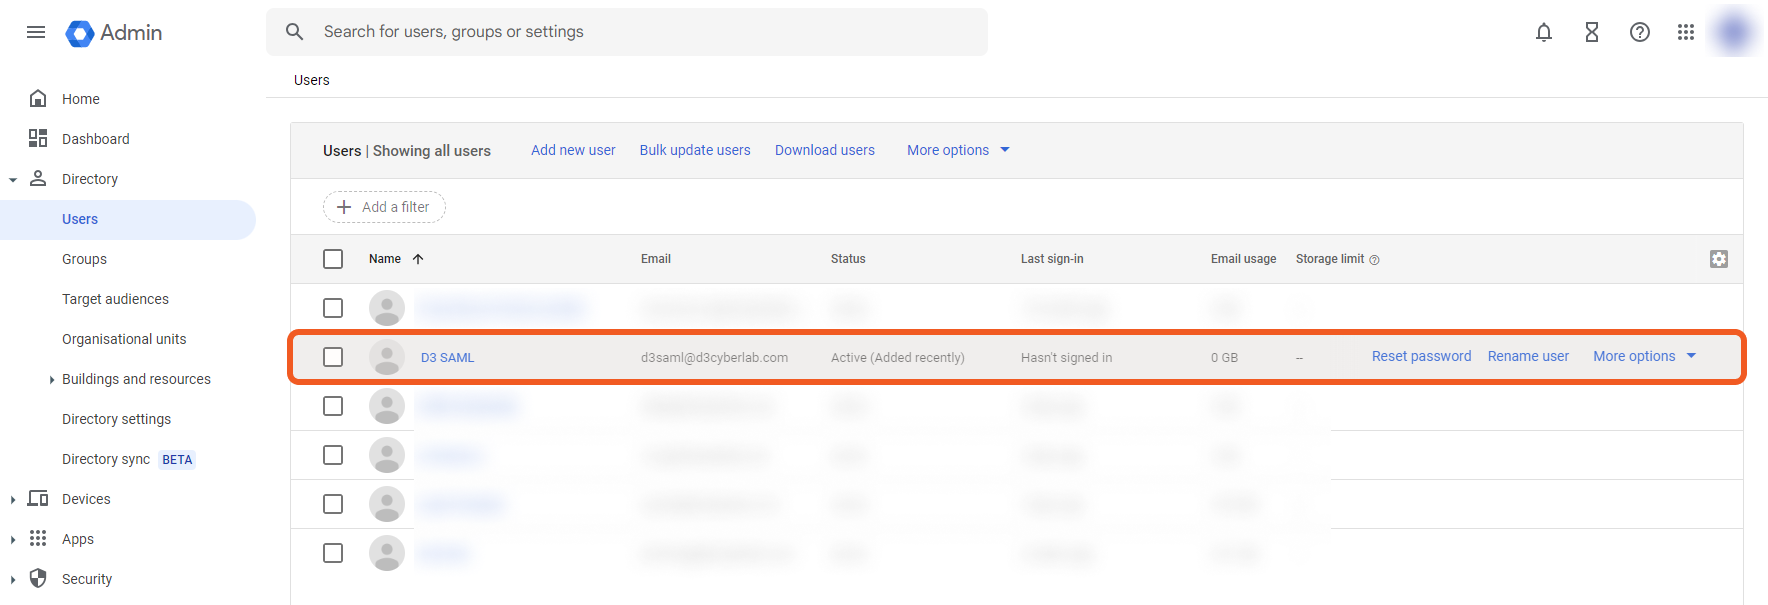
Your newly created Google Workspace user will now appear in the users table.
Creating a Group
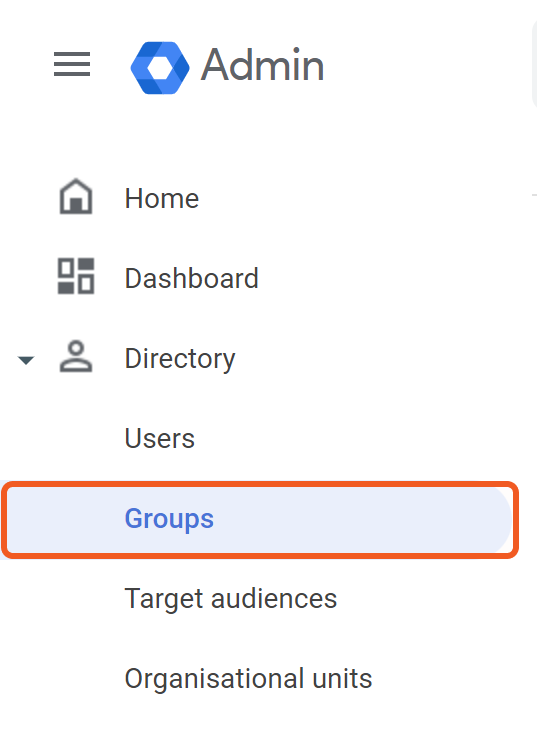
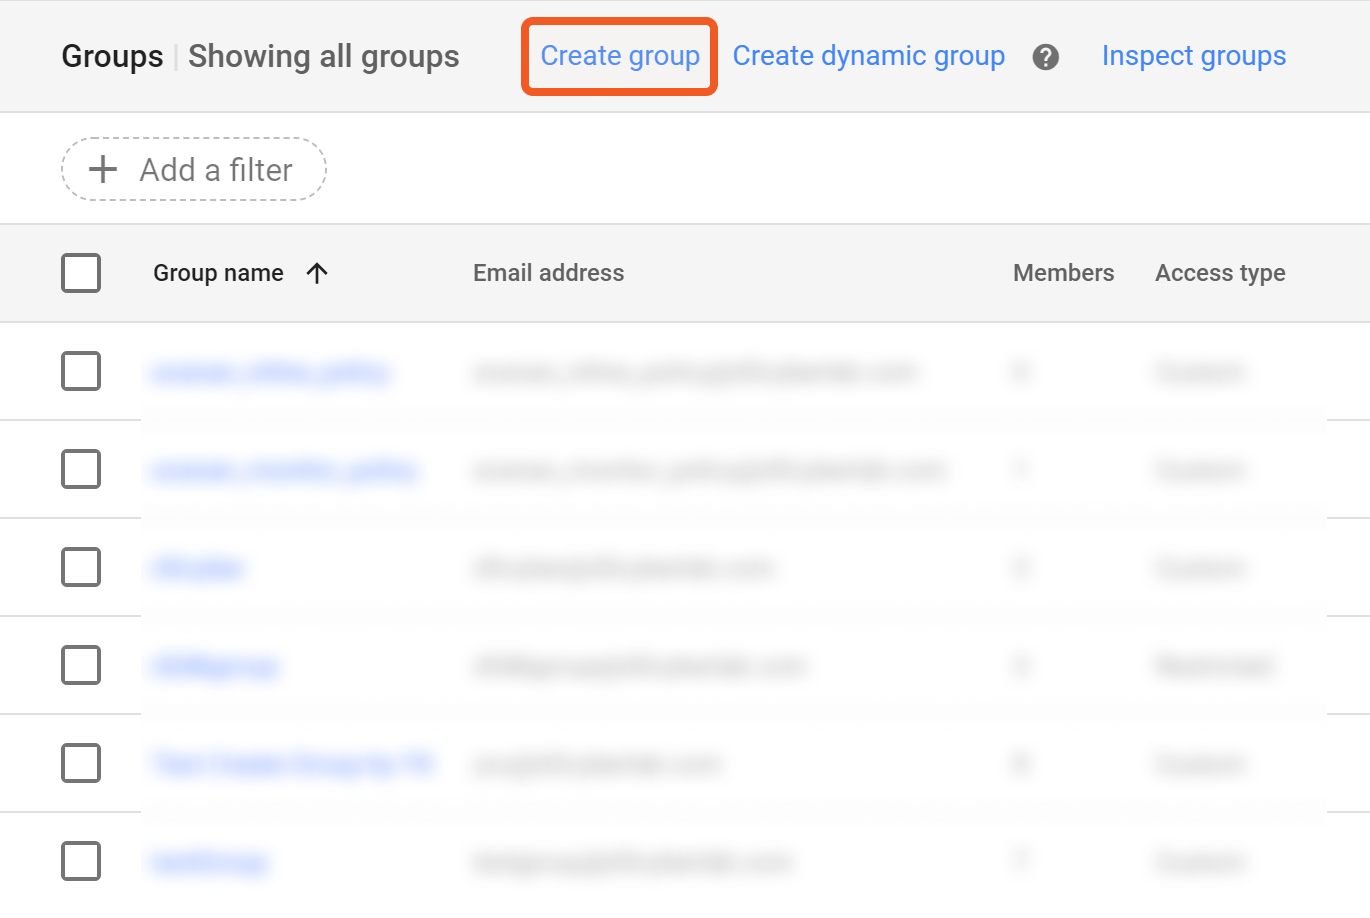
Navigate to Directory > Groups.
2. Click on the Create group hyperlink.
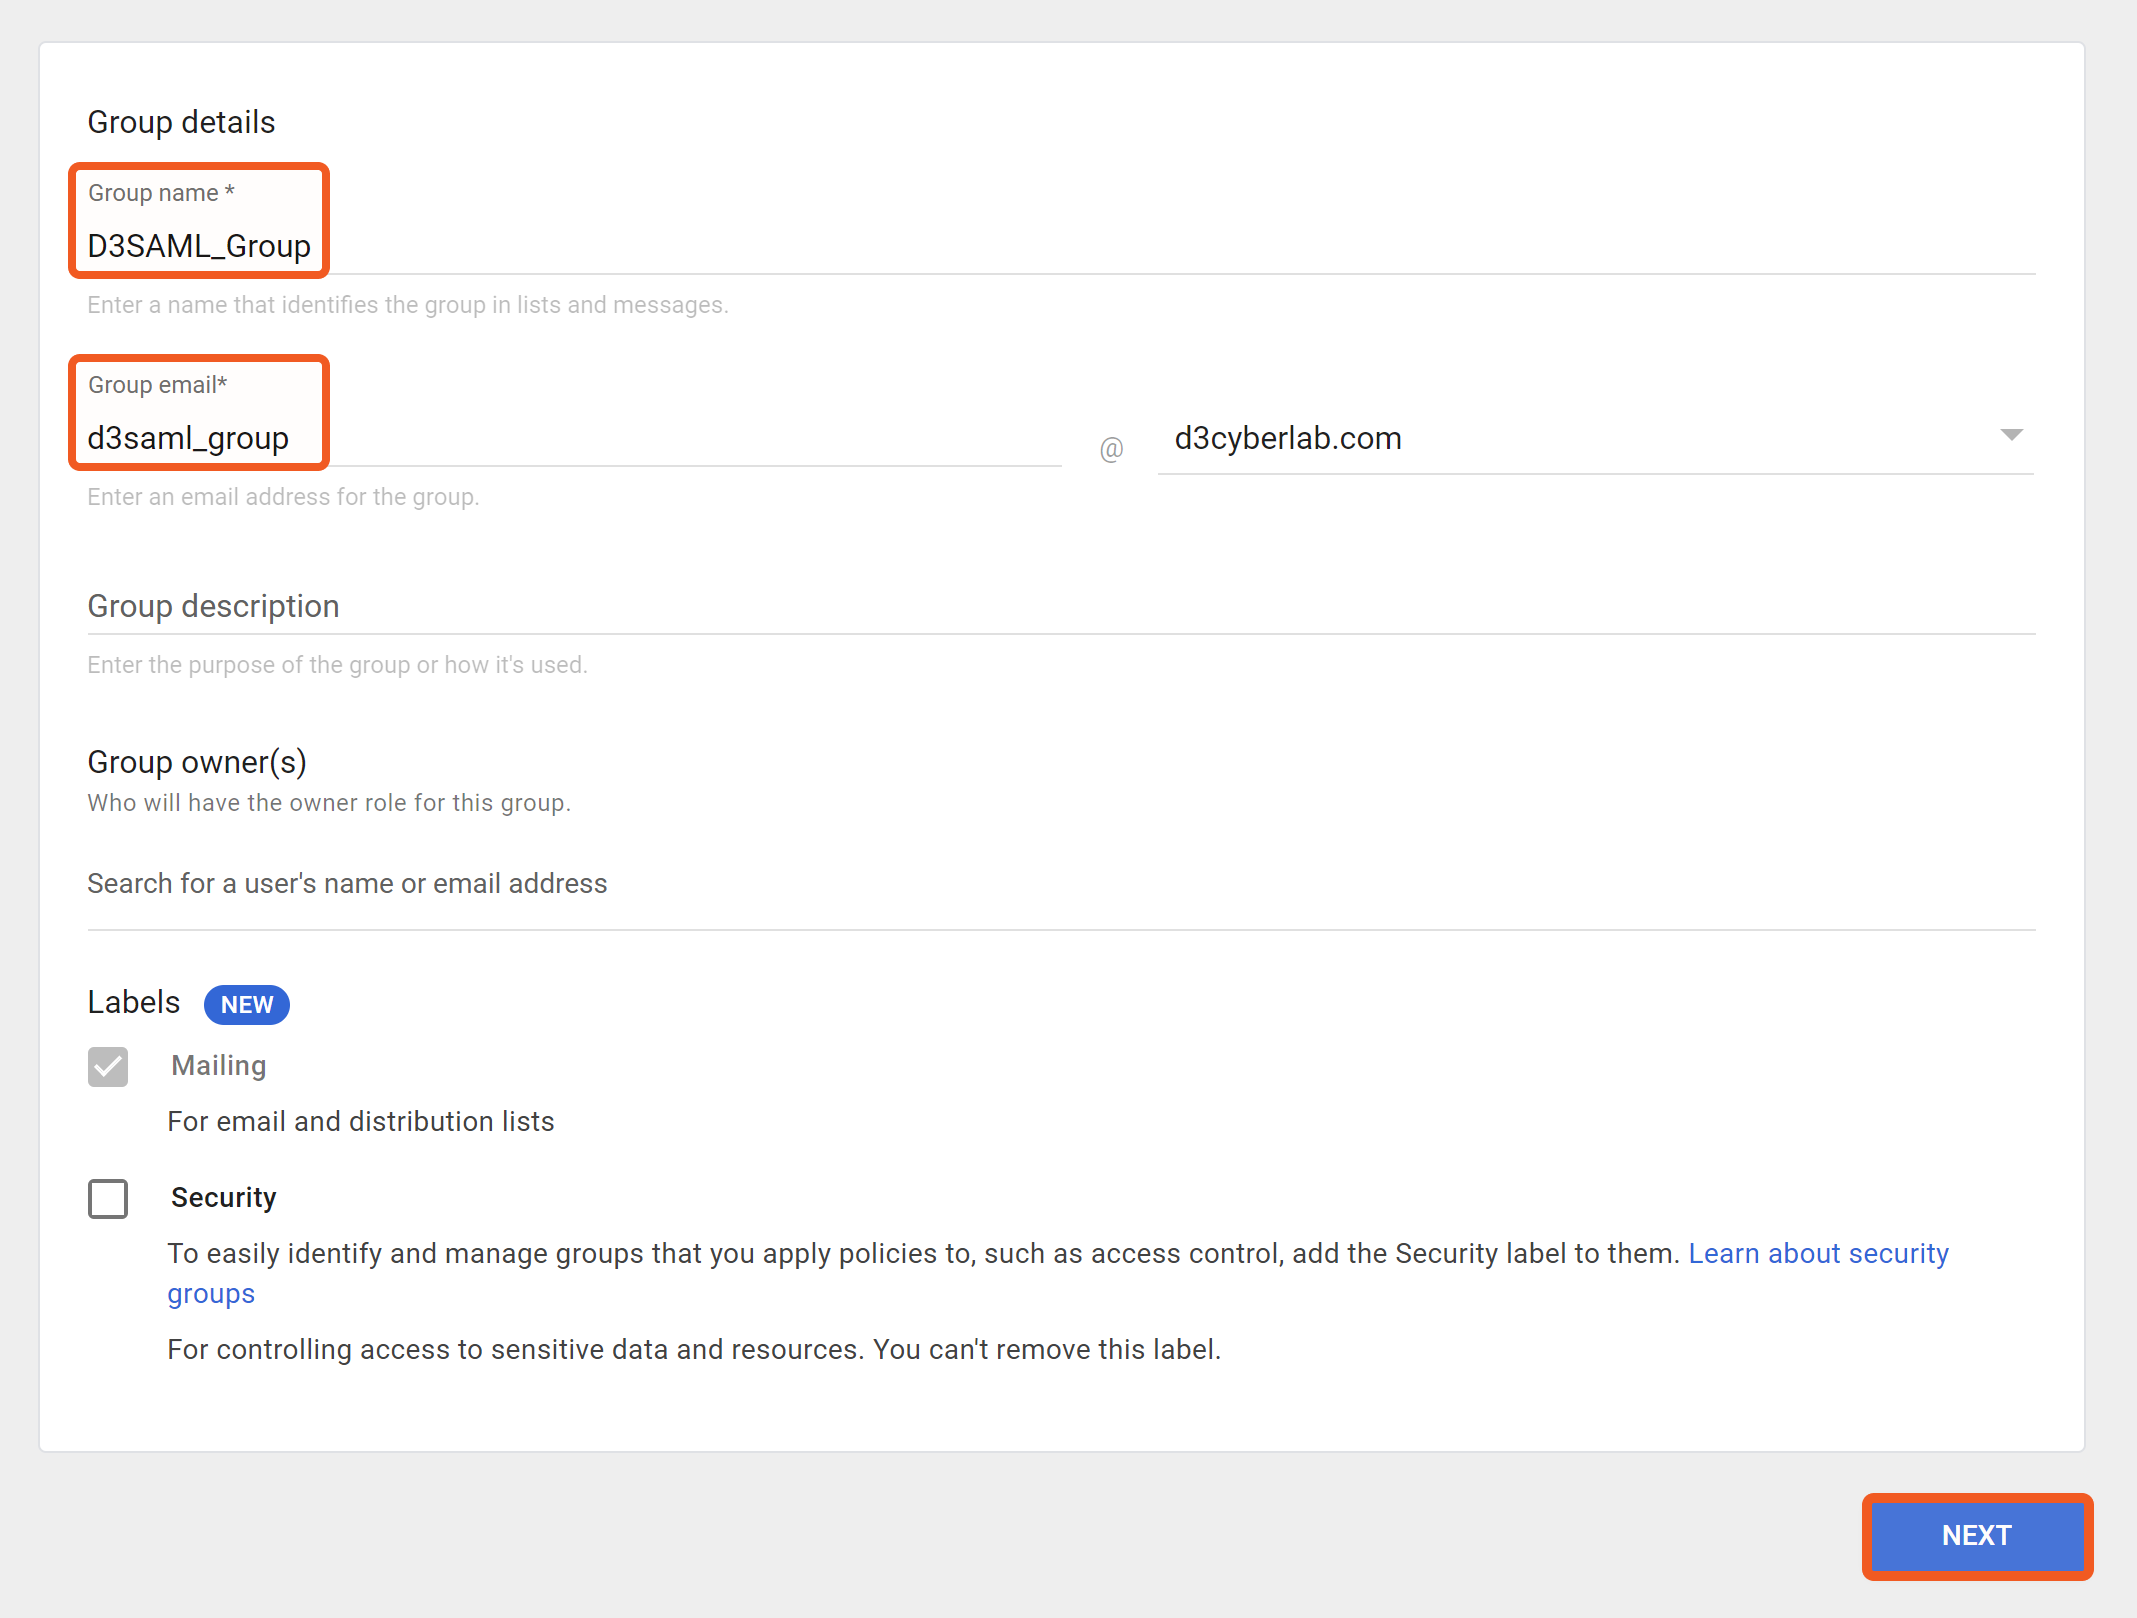
3. Enter the required fields, then click on the NEXT button.
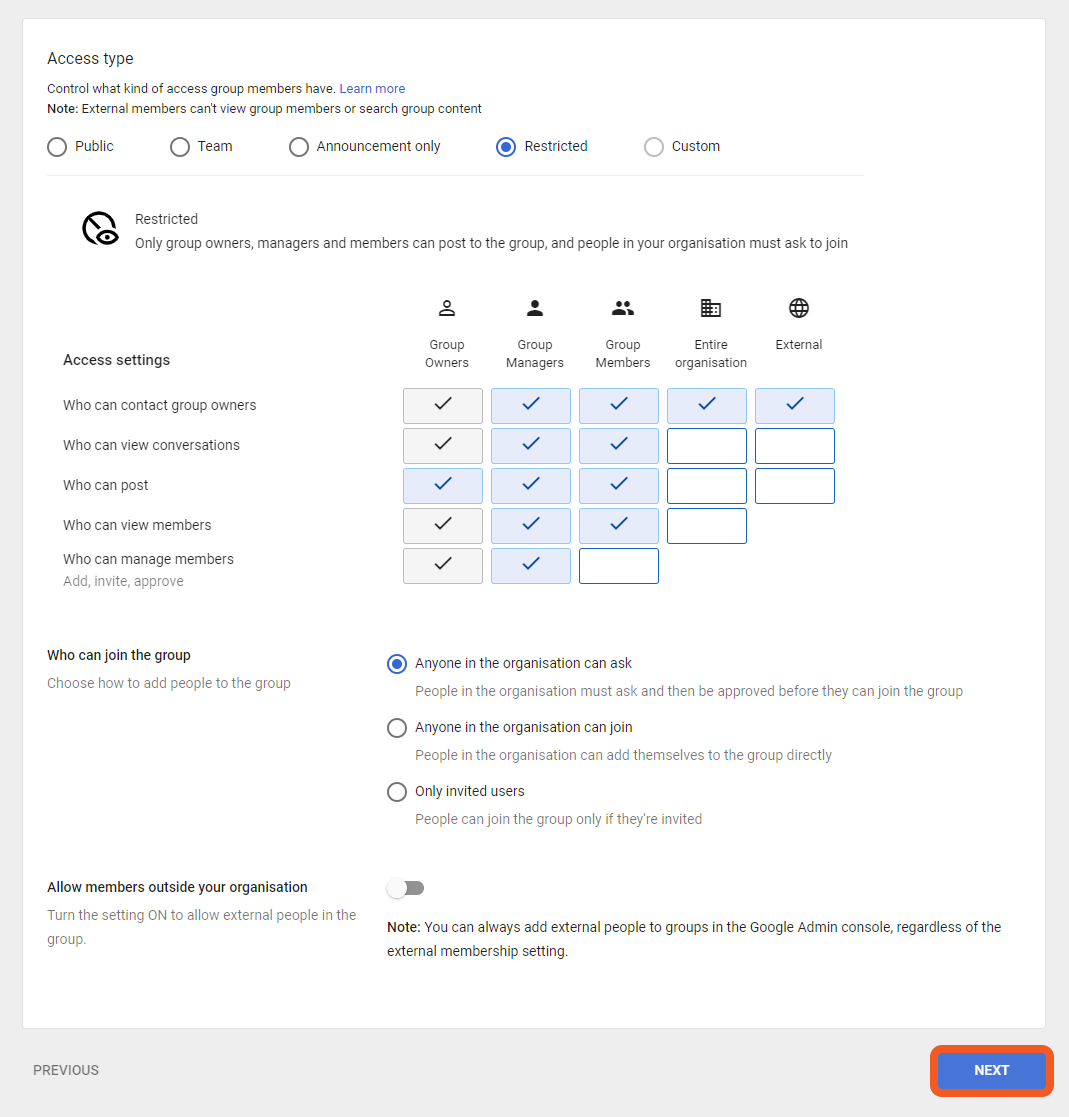
4. Customize your group settings, then click on the NEXT button.
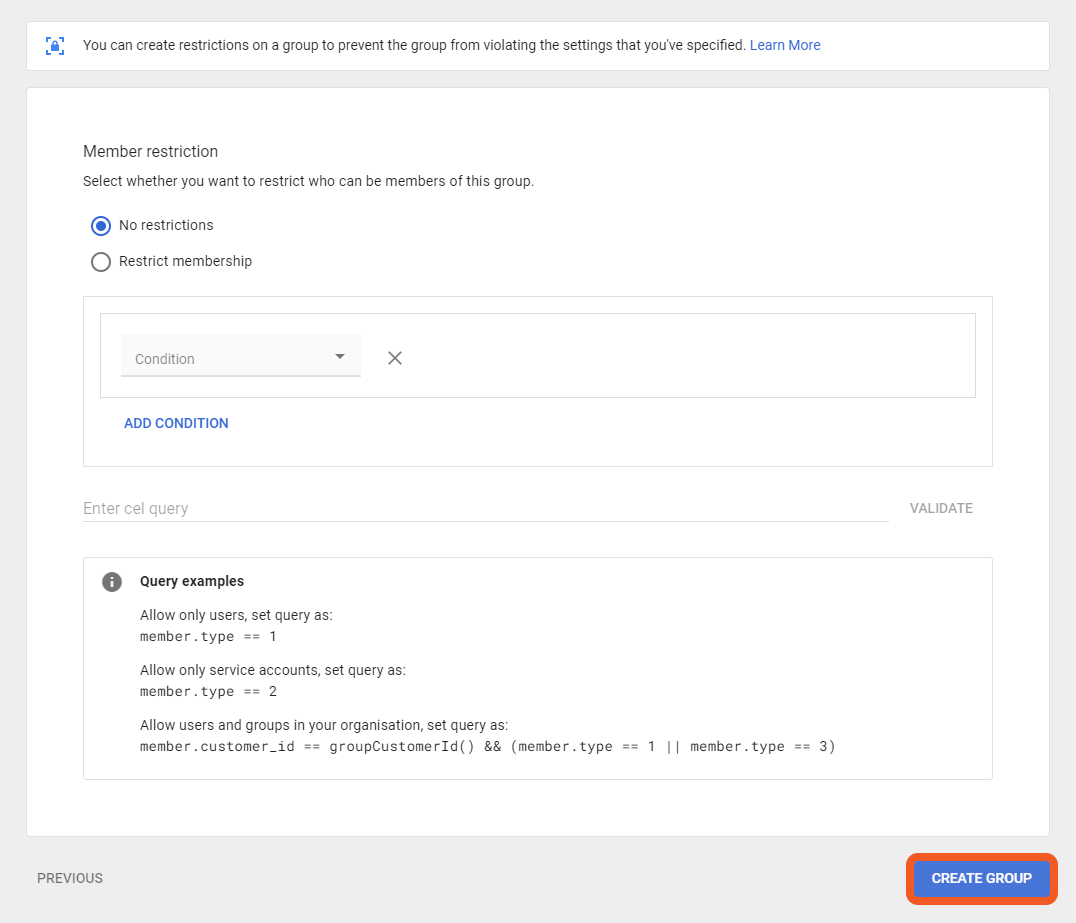
5. Click on the CREATE GROUP button.
6. Click either the Add members to <group name> hyperlink, or the DONE button.
-20240619-203459.png?inst-v=f0ae511a-7398-4e63-b935-74c903306443)
Adding a Google Workspace User into the Group
Click on the Add members hyperlink.
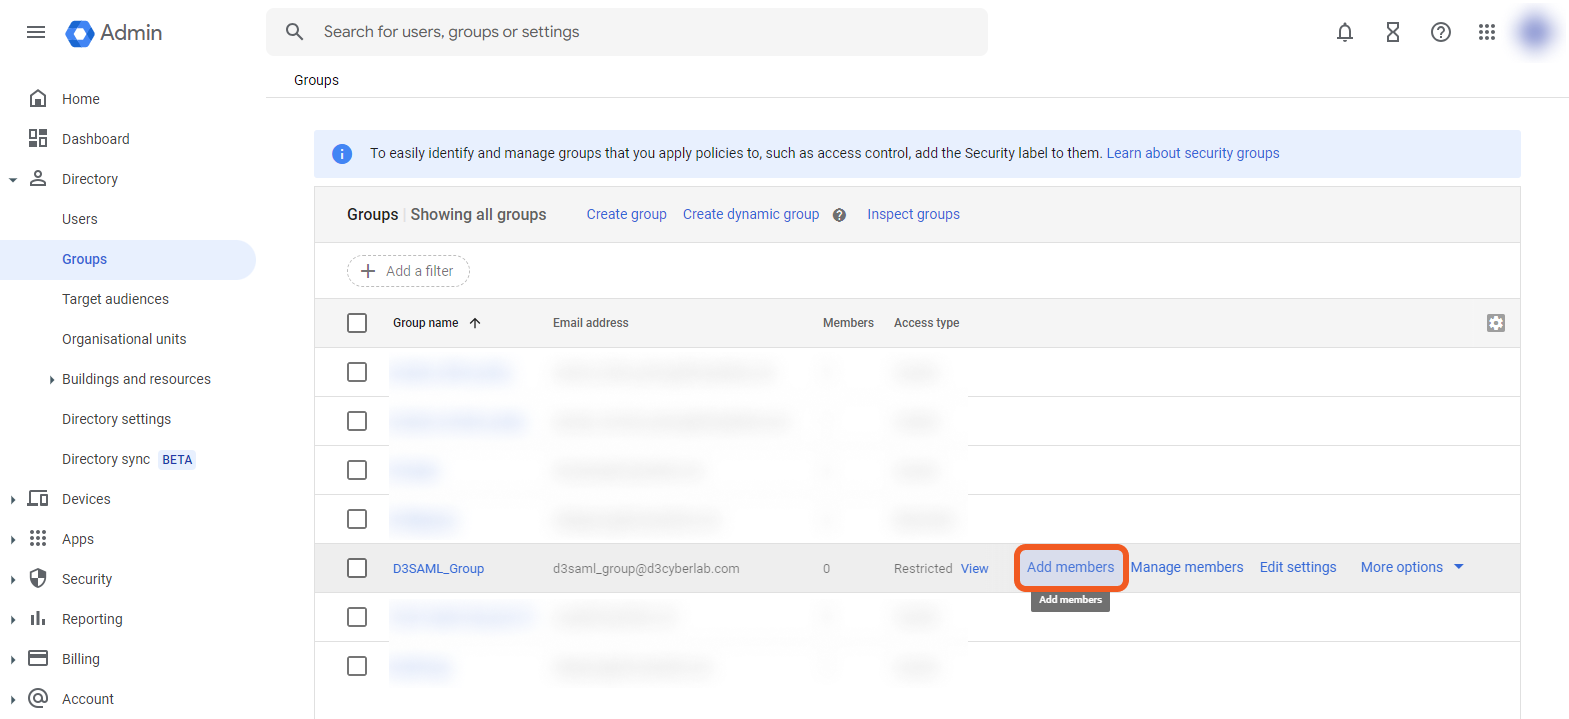
Add your your newly created user account(s), then click on the ADD TO GROUP button.
-20240619-205001.png?inst-v=f0ae511a-7398-4e63-b935-74c903306443)
An admin account, in addition, must be added.
READER NOTE
Ensure that all the users you intend to add to your group are displayed in pill form on the user interface, before you click the ADD TO GROUP button. The below image illustrates two pills.
-20240619-210051.png?inst-v=f0ae511a-7398-4e63-b935-74c903306443)
Verify that your user(s) have been added to your group.
Turning on the Service Status
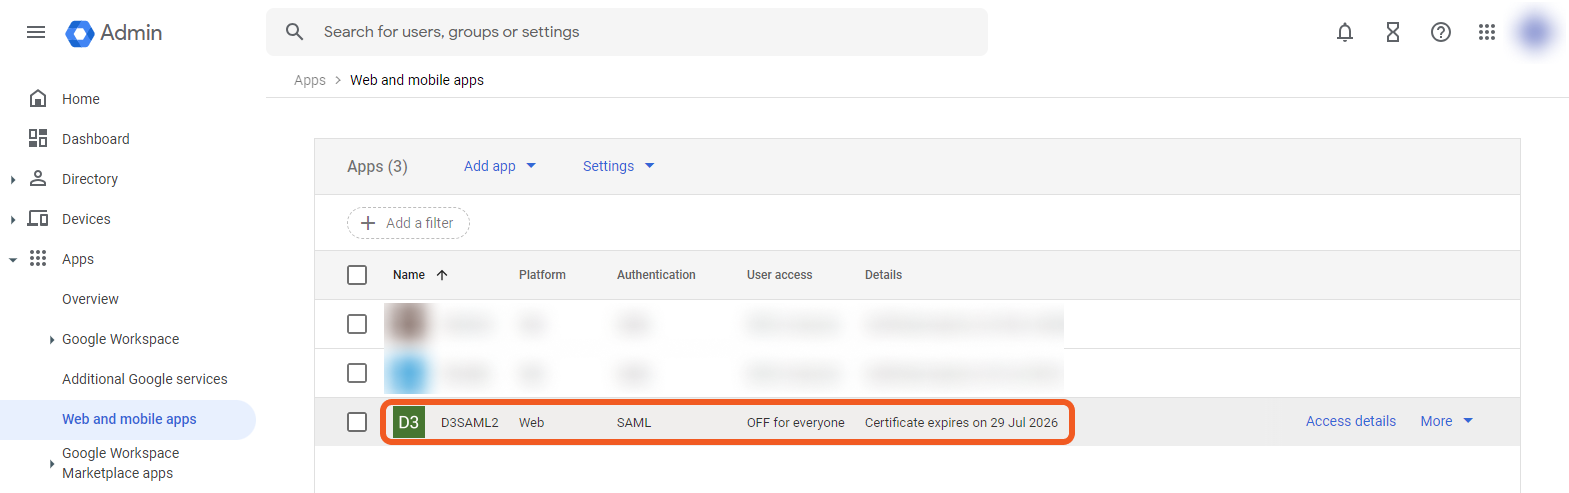
Re-navigate to Apps > Web and mobile apps.
Click on your SAML application.
Click on the User access card.
Click the Groups accordion, then click on your group created in the Creating a Group section.
Check the On checkbox, then click on the SAVE button.
-20240619-214556.png?inst-v=f0ae511a-7398-4e63-b935-74c903306443)
READER NOTE
Before proceeding to the next section, ensure that you have:
Created D3 user accounts (Organization Management > Users > + Add Users). The SAMLEmailIDType configuration key in vSOC’s Application Settings > Web Config determines what your D3 username must be. Depending on its setting, your username could be either your full email address or the local part of your email. Refer to the FAQ section in the Authentication Configuration Guide for more details.
Assigned login methods to those D3 user accounts (Application Settings > Login Authentication > Users).
READER NOTE
To enable multiple users within your organization to access D3 vSOC, create a Google Workspace user for each individual, and add them into the SSO enabled group.
READER NOTE
If you choose to have D3 assist with the setup process, you have the option to send your SAML setup certificate to D3.
If your organization decides to perform the setup independently follow the below steps:
Copy and paste
https://accounts.google.com/o/saml2/initsso?idpid=<identity provider Id>&spid=<service provider Id>into D3 vSOC’s Target URL field (see the Login Authentication Configuration Guide for configuration details on the D3 vSOC side).The
identity provider Idcan be found by clicking on the DOWNLOAD METADATA button located at Apps > Web and mobile apps > YourApplicationName.-20240621-021432.png?inst-v=f0ae511a-7398-4e63-b935-74c903306443)
You can find the
service provider IDin your browser's URL bar at the same location.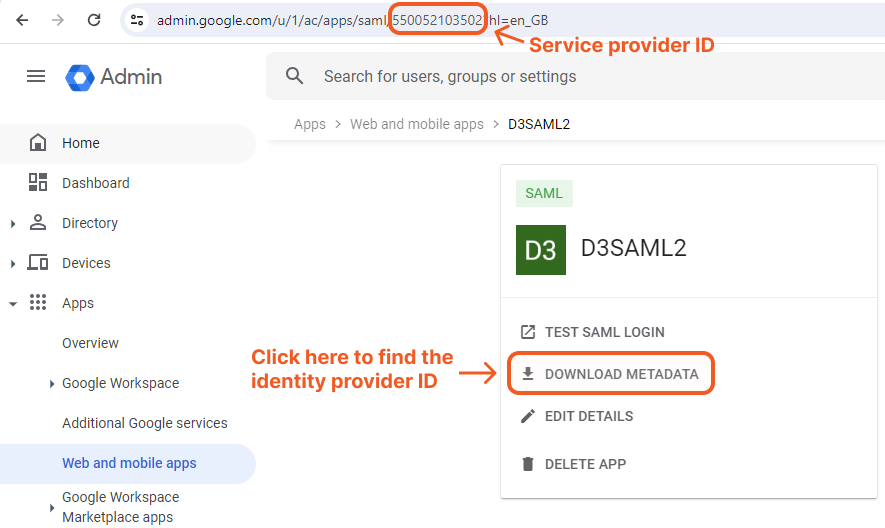
Copy and paste Google’s Certificate into into D3 vSOC’s Certificate field.
Input your ACS URL into D3 vSOC. It should conform to the following format: https://<YourD3Domain>/<path>/VSOC/login.aspx.
WARNING
Do not copy Google’s SSO URL into D3 vSOC’s Target URL field. You will have to synthesize a user access URL, as we will call it here.
When synthesizing the user access URL ensure that you do not accidentally delete the ampersand (&) character immediately before the
idpidquery parameter.This synthesizing the user access URL will look something like the following:
https://accounts.google.com/o/saml2/initsso?idpid=C027n7bzh&spid=550052103502
Verify SSO Functionality with Your SAML App
TODO
Ensure that you have completed all steps in the Login Authentication Configuration Guide before proceeding to the following steps.
Click on the TEST SAML LOGIN menu item within the vertical menu on the left hand side.
-20240619-215049.png?inst-v=f0ae511a-7398-4e63-b935-74c903306443)
Input your login credentials, then click on the Next buttons.
-20240619-220422.png?inst-v=f0ae511a-7398-4e63-b935-74c903306443)
READER NOTE
If your app does not open in a separate tab, use the details provided the resulting SAML error messages to update your IdP settings. Then, retry the SAML login.
After logging in to Google successfully, you will be redirected to D3 vSOC.

FAQs
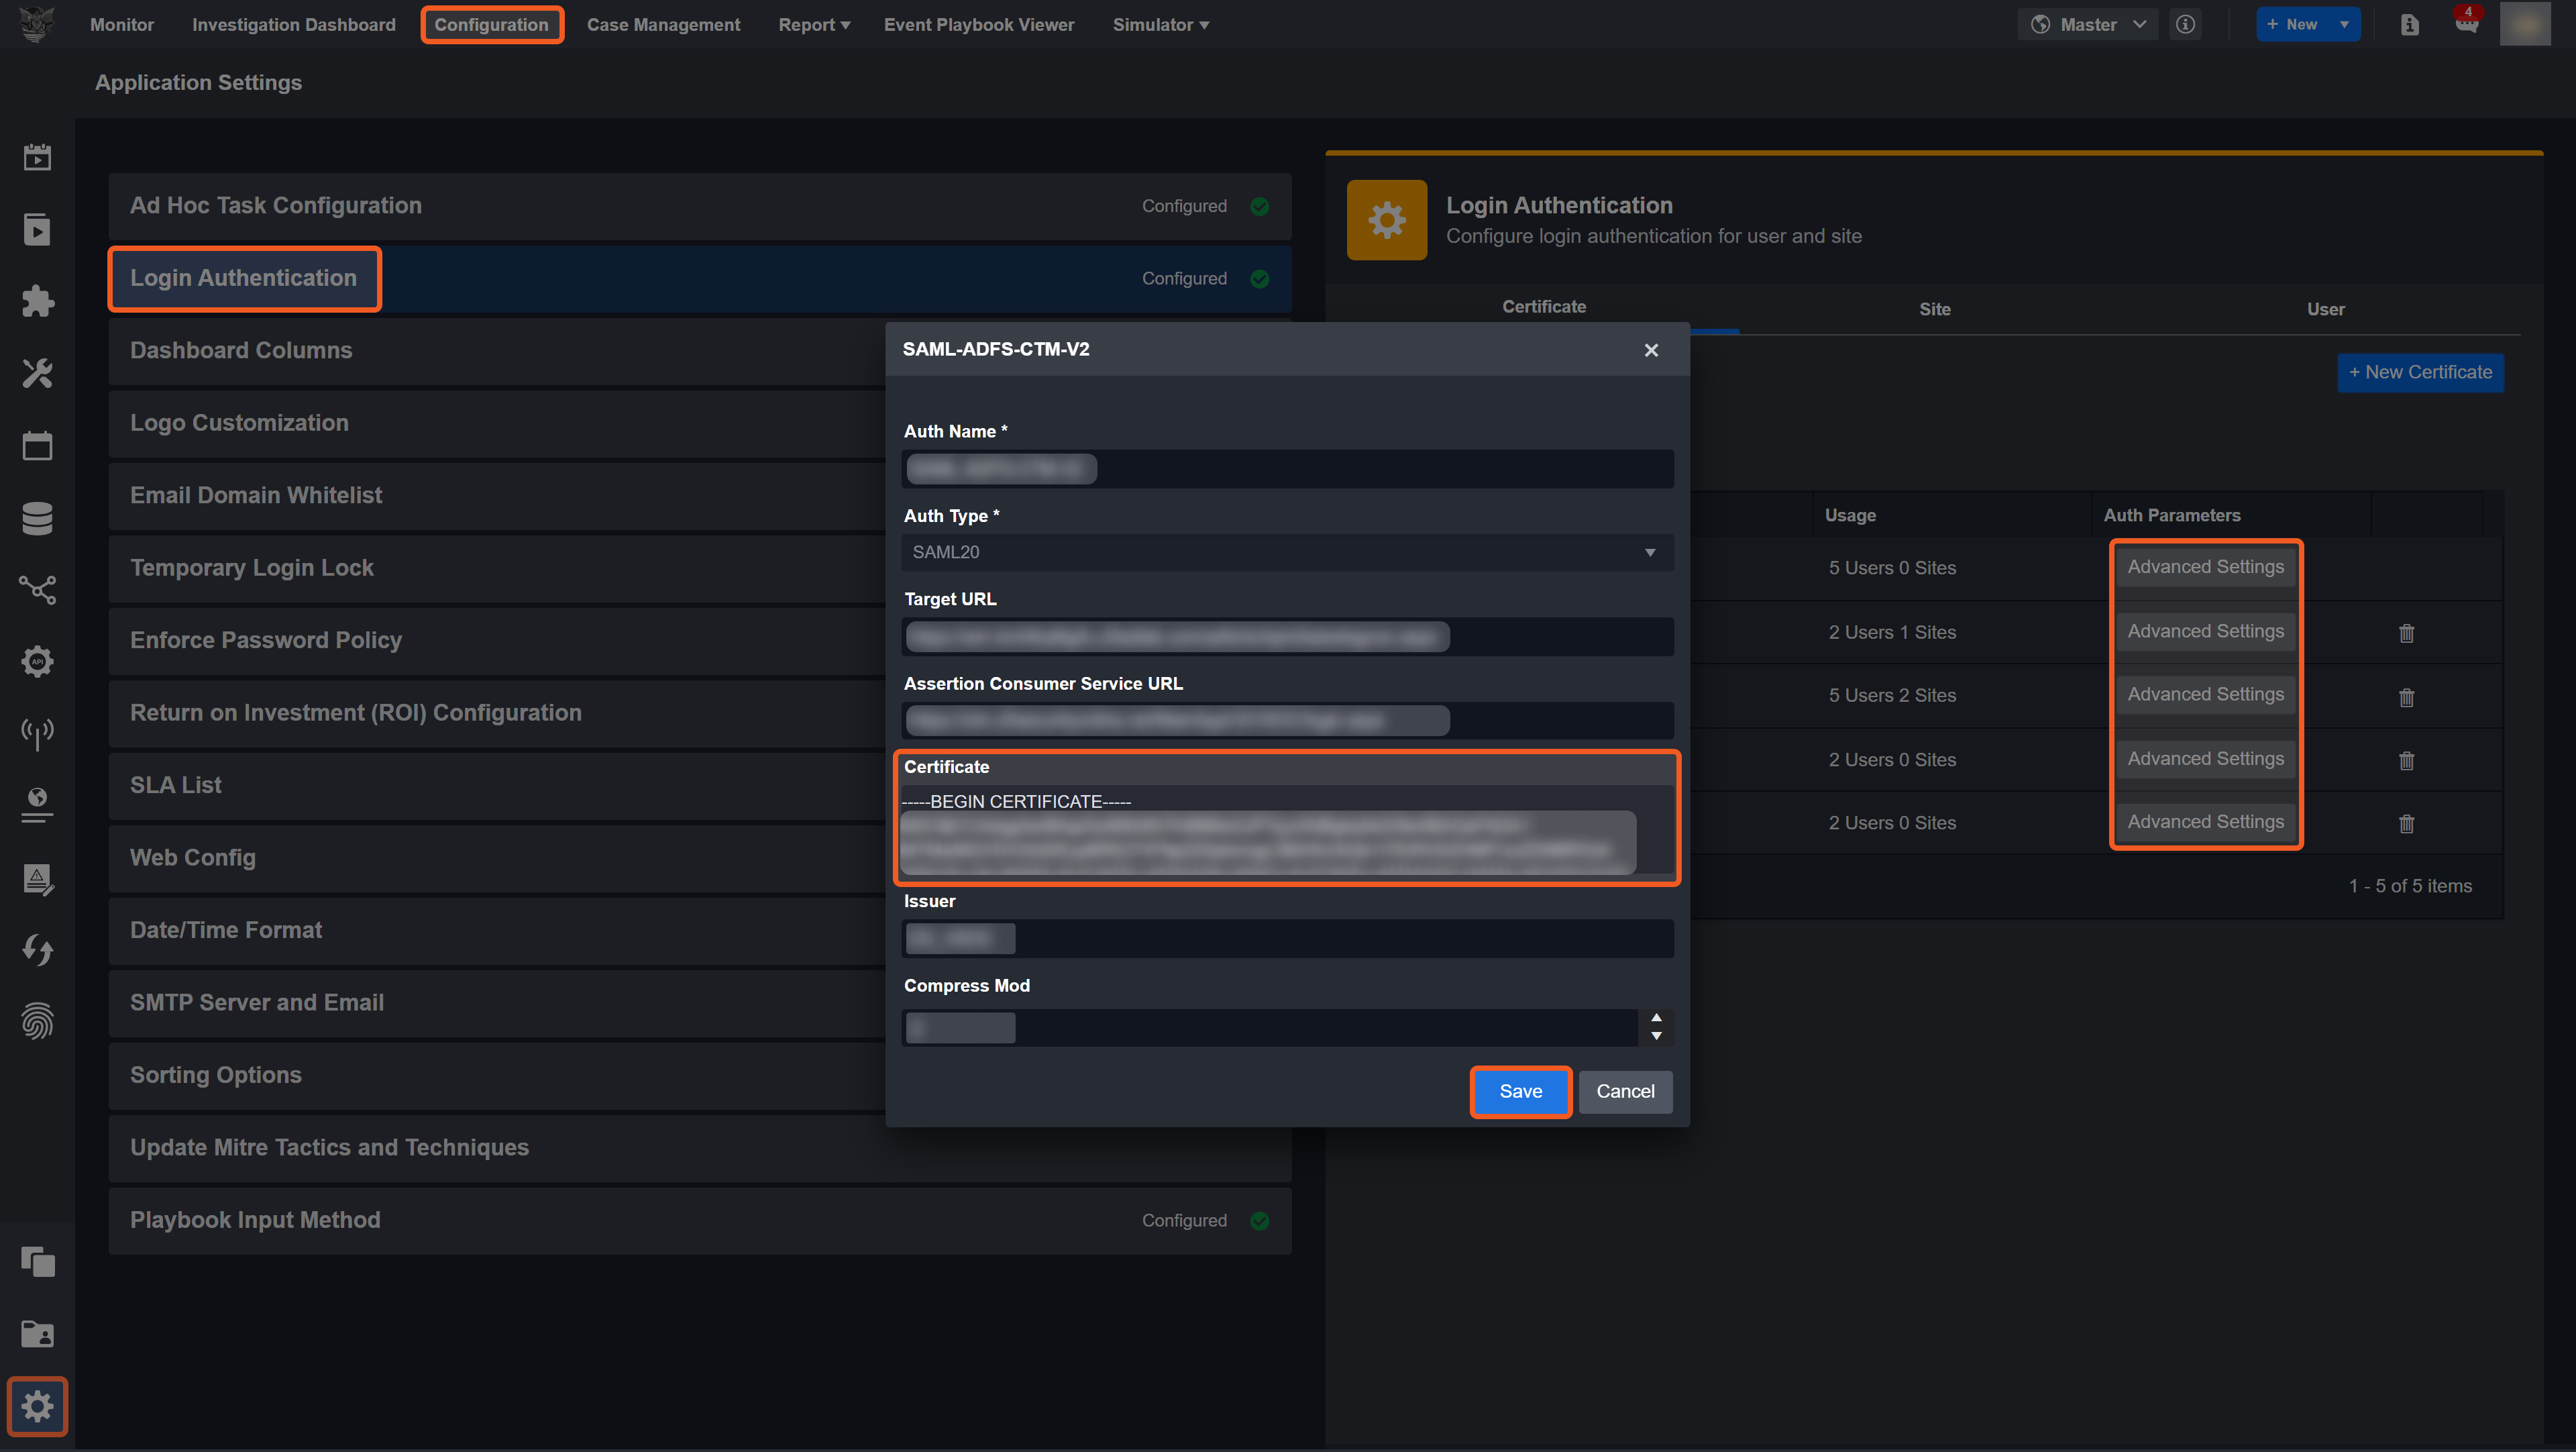
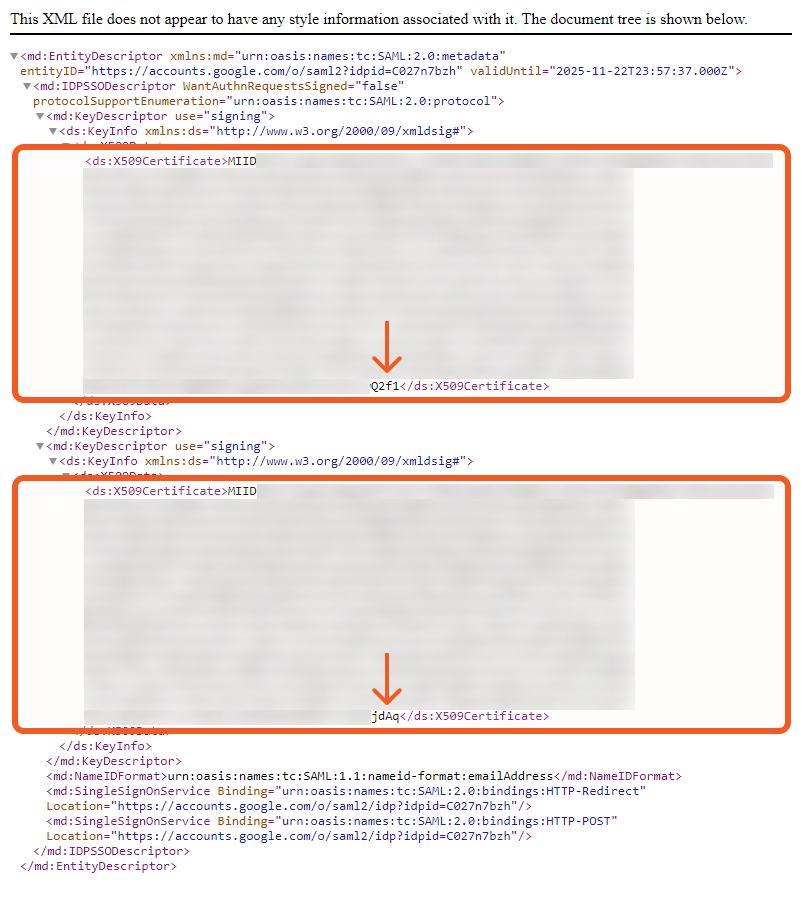
In your downloaded IdP metadata file (step 5 of the Setting Up Your Custom SAML Application section), you will find two ds:X509Certificate tags, each containing the value of your X.509 certificate. As shown in the image below, although the certificate may start with the same couple of alphanumeric characters, they end differently. If pasting one of these X.509 certificates into your D3 Login Authentication certificate configuration field (Configuration > Application Settings > Login Authentication > Certificate > Advanced Settings) does not work, try saving and using the other one.
Alternatively, simply copy the certificate from the UI shown in step 5 of the Setting Up Your Custom SAML Application section into your D3 Login Authentication certificate configuration field.