.png)
Quick Actions
LAST UPDATED: JAN 21, 2025
Quick actions are interactive buttons within the Overview module of the incident workspace, located beneath the incident header panel. They execute specific D3 integration or utility commands with customized parameters.
-20241224-222747.png?inst-v=260ff065-eacd-4502-b259-6f48de11932a)
These incident-specific features—created with unique incident numbers—eliminate the need to manually search for commands using the Execute Command button. Quick actions can be managed via using the following utility commands:
Add Quick Actions to the Incident Overview: To create new quick actions.
Delete Quick Actions to the Incident Overview: To remove existing quick actions.
Update Quick Actions to the Incident Overview: To modify existing quick actions.
Procedure for Adding Quick Actions
By default, no quick actions are available for use. Create your first quick actions by following the steps below:
Navigate to the Utility Commands module.
-20241224-223655.png?inst-v=260ff065-eacd-4502-b259-6f48de11932a)
Click on the Configuration navigation link.
Click on the Utility Commands icon.
Search and click into the system utility command Add Quick Actions to the Incident Overview.
.png?inst-v=260ff065-eacd-4502-b259-6f48de11932a)
Ensure that the Ad-hoc Command option is checked under Command Application Scope in the Settings tab.
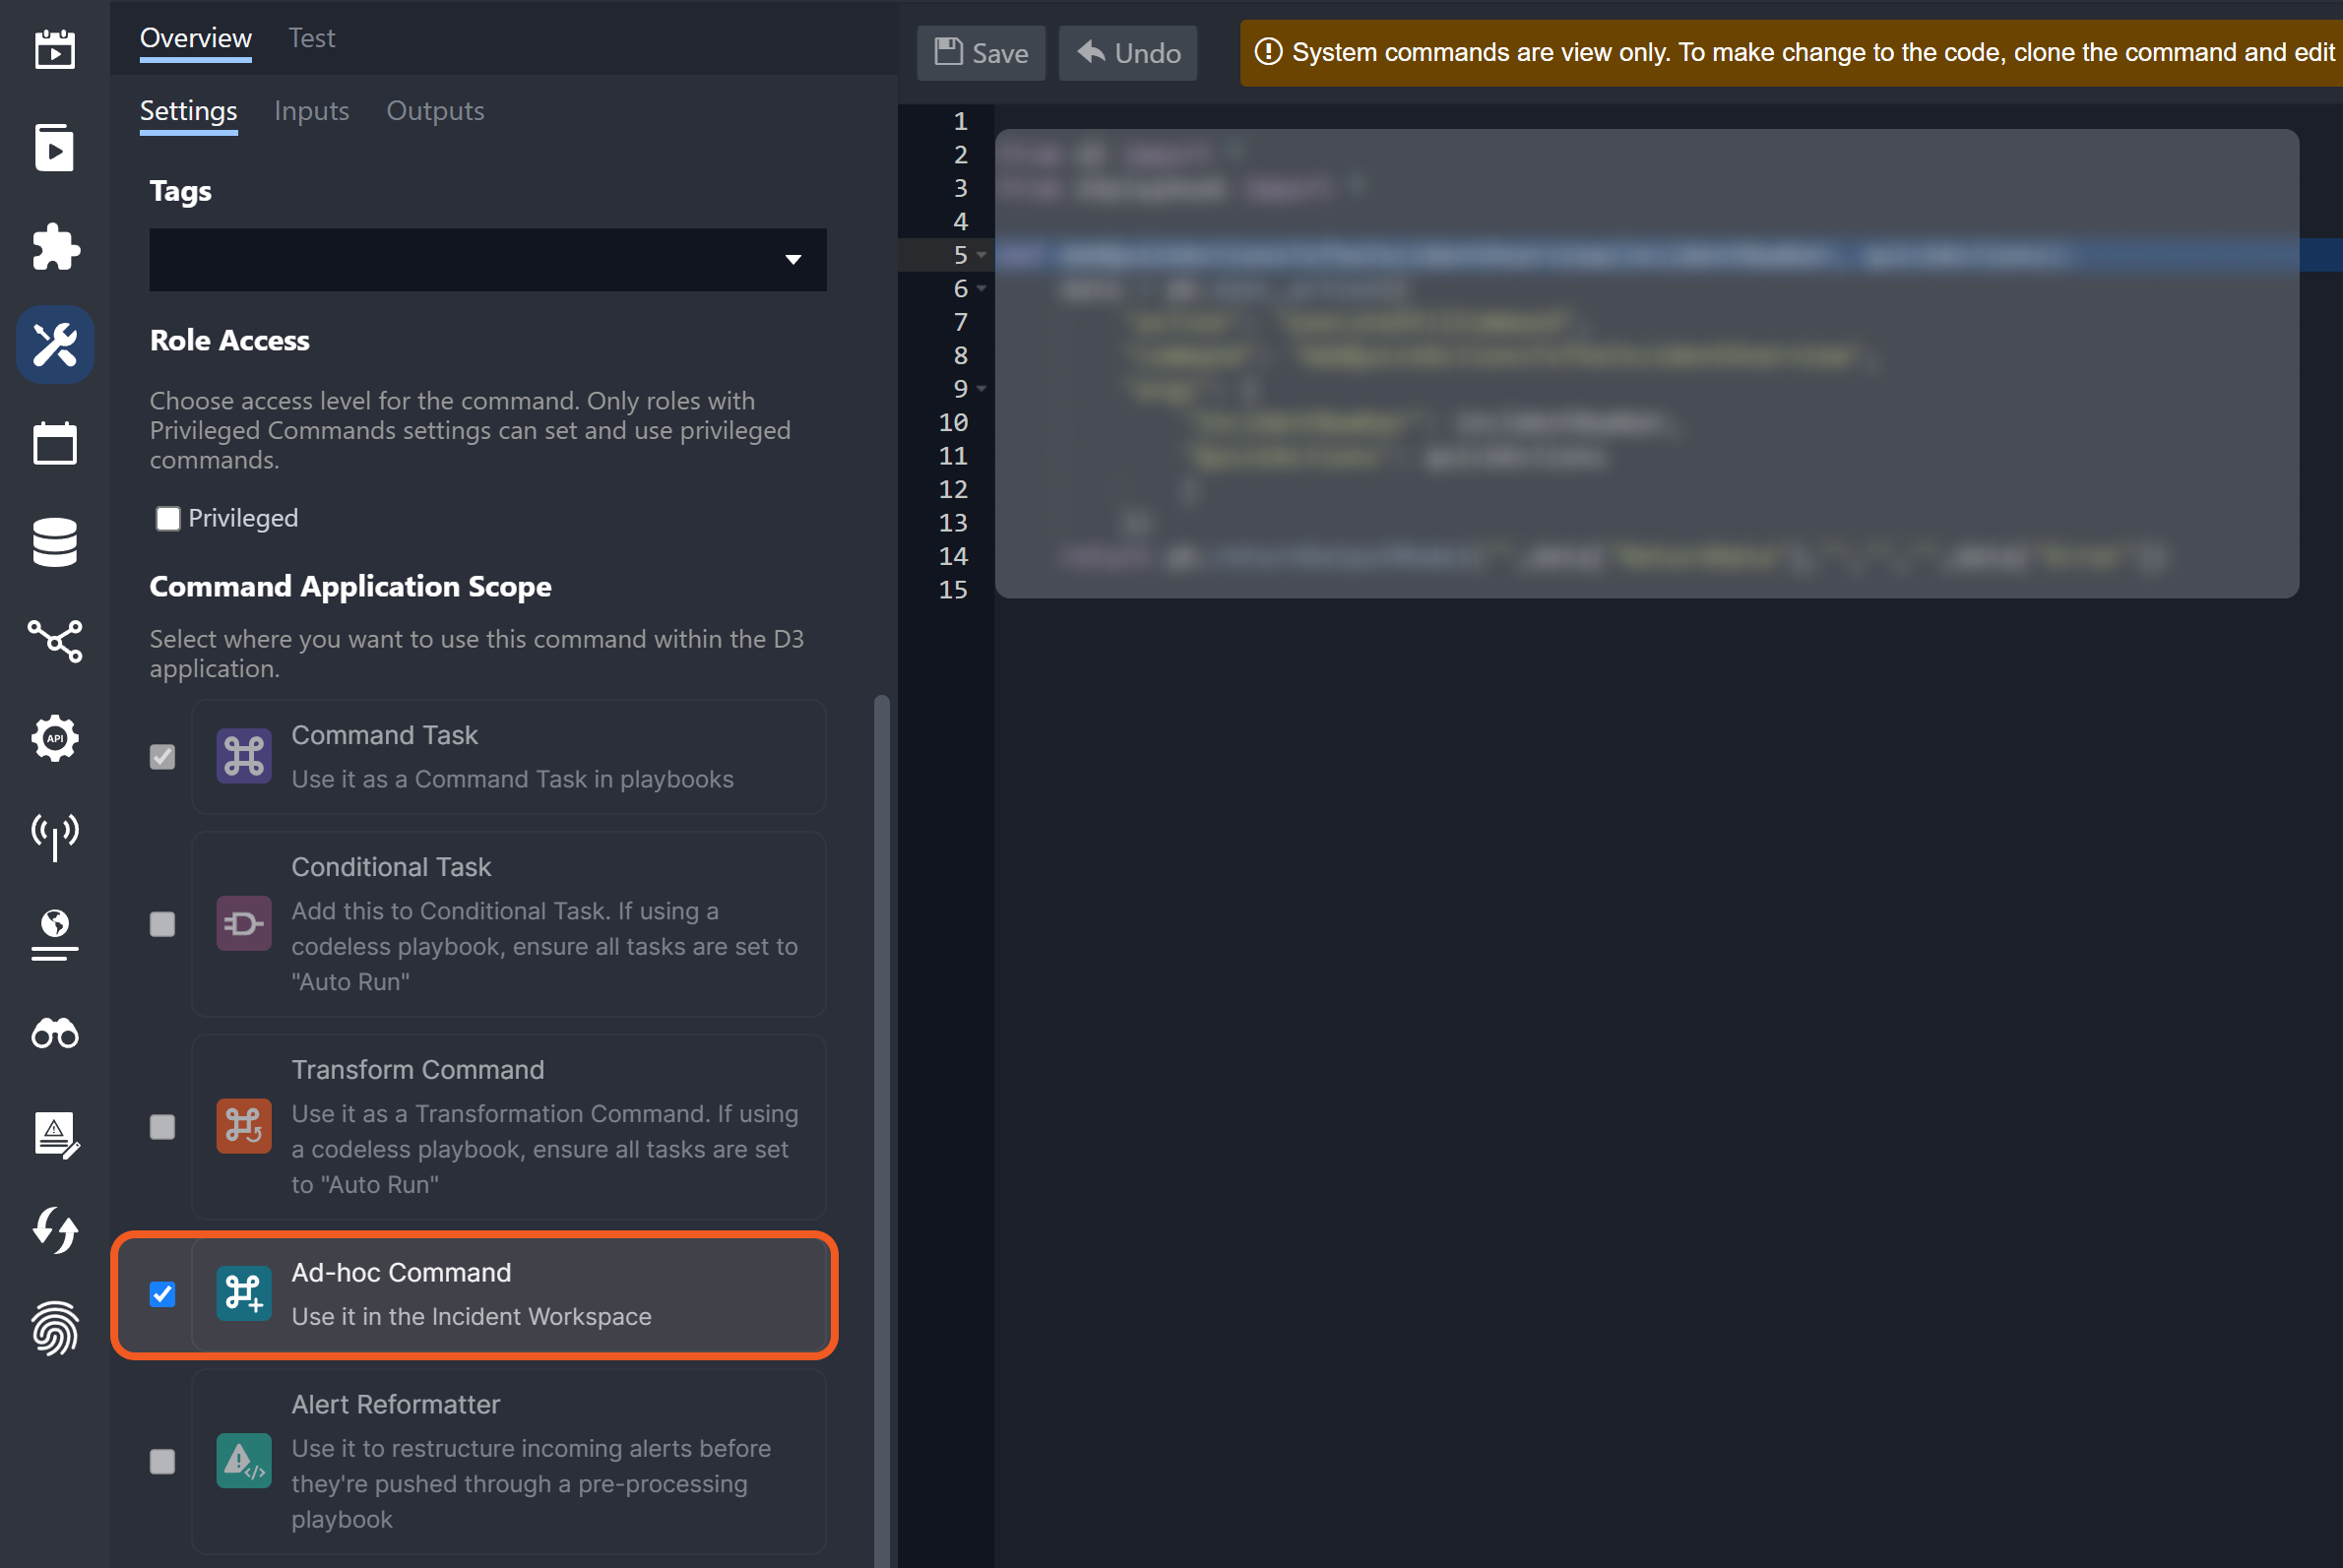
This option must be selected for any command users want to add as a quick action.
Add itself and the Delete Quick Actions to the Incident Overview command as quick actions.
-20241224-225345.png?inst-v=260ff065-eacd-4502-b259-6f48de11932a)
Enter a unique incident number.
Paste the following code snippet (replace the incident number) for the Quick actions parameter:
JSON[ { "ActionName": "Add quick action", "CommandName": "Add Quick Actions to the Incident Overview", "CommandParameters": { "Incident number": "20241220-94" } }, { "ActionName": "Delete quick action", "CommandName": "Delete Quick Actions to the Incident Overview", "CommandParameters": { "Incident number": "20241220-94" } } ]Click on the Test Command button to add the two quick actions.
Navigate to the incident through the Investigation Dashboard.
Click on the Add quick action button to add more quick actions.
-20241224-231204.png?inst-v=260ff065-eacd-4502-b259-6f48de11932a)
Add the desired quick action.
-20241225-000131.png?inst-v=260ff065-eacd-4502-b259-6f48de11932a)
(Optional) Click the View Sample Data button to review the format for the “Quick actions” input parameter.
Input the JSON array containing the
ActionName,CommandNameandCommandParametersfields for each object corresponding to a chosen command.Click on the Run Command button, then close the popup.
The following are examples of arbitrarily chosen commands that can be added as quick actions:
Send Email
Add to Global List
Click on the Add quick action button.
Paste the following code snippet (replace the incident number) for the Quick actions parameter:
JSON[ { "ActionName": "Send Email", "CommandName": "Send email" }, { "ActionName": "Add to global list", "CommandName": "Add to Global List" } ]Click on the Run Command button.
-20241225-004116.png?inst-v=260ff065-eacd-4502-b259-6f48de11932a)
Close the popup, then click on the Overview tab to refresh and view the newly added quick actions.
-20241225-004721.png?inst-v=260ff065-eacd-4502-b259-6f48de11932a)
Execution
%201-20241225-005313.png?inst-v=260ff065-eacd-4502-b259-6f48de11932a)
-20241225-005511.png?inst-v=260ff065-eacd-4502-b259-6f48de11932a)
-20241225-010528.png?inst-v=260ff065-eacd-4502-b259-6f48de11932a)
%201%20(1)-20241225-010703.png?inst-v=260ff065-eacd-4502-b259-6f48de11932a)