.png)
Incident Workspace
Overview
The Incident Workspace view provides a centralized space to respond to an incident, with tools to view and edit details that are integral to an investigation.
Key Summary
The Key Summary bar provides a high-level view of the incident. Within this bar, you can conduct the following actions:
Execute commands allows you to execute ad-hoc actions and run integration commands and utility commands.
+ Ad hoc Task to assign a to do task to a user.
Export a copy of the Incident Summary Report for post-incident review.
Left Menu
The Left Menu provides quick access to 10 workspaces for the investigation. A detailed walkthrough of each workspace will be provided below.
Features
Overview Tab
The Overview Tab provides you with a high-level overview of the incident. In this tab, you can make incident-specific changes such as editing Incident’s Key Fields, viewing related Event's Summary details, adding additional Tactics & Techniques, running multiple Playbooks and more. The sections below highlight the workflows you can conduct in the Overview Tab. In the Overview Tab, the Events Summary, Investigation Team, Linked Incidents, Files, Notes, and custom incident form sections are collapsible. Sections are collapsed by default if they contain no data.
Key Fields
The Key Fields section displays the details entered by an analyst or playbook during the event escalation or incident intake process. You have the flexibility to update most of the details in the Key Fields section if you have role access. To modify an editable field, click on it and select an option from the popup window.
Reader Note
Incident raw data is available if the incident is directly ingested into the system through a Fetch Incident command.
Custom Fields
Custom fields and values can be added to the Key Fields section in the Incident Workspace's Overview tab. This feature provides users with increased flexibility in the data structure of an incident's key fields.
Adding a Custom Field from the Incident Workspace
Navigate to the Key Fields section in the Incident Workspace. By default, this section contains a set of fields such as Site, Incident Type, and Severity. The Custom Fields section, located below these fields, allows analysts and investigators to add custom fields to organize and store additional incident information.
To add a custom field, click on the + button adjacent to Custom Fields.
An "Add Custom Field" window will appear prompting you to specify the custom field's name and value. After entering the desired field name and value, save the custom field by clicking the Save button.
Once saved, the custom field will display under the Custom Field section. To make edits, hover your cursor over the field value and click on it.
Related Utility Commands
The following utility commands can be utilized within playbooks to automate the process of populating key fields in the Overview tab. This automation is achieved by dynamically defining input parameters and incorporating output data from other integrated playbook tasks into the relevant fields.
Utility Command | Function |
Link Event To Incident | Searches for a pre-existing incident by applying a specific set of search conditions and updates the custom fields of the first identified incident meeting the search conditions. The event is also added to the same incident. If no matching incident is found, a new incident is created. |
Set Incident Fields | Adds or updates the custom key fields of an incident using a JSON object. |
Set Incident Fields in Bulk | Adds or updates the custom key fields of multiple incidents using a JSON object. |
Create Incident (Event Playbook Only) | Creates an incident from an event in an event playbook and initializes the incident's fields. This means that both static and custom fields are populated with relevant information related to the event. |
Update Identical Event (Event Playbook Only, On Event Ingestion Trigger Required) | Updates the identical event data via an event playbook if there is an original event from the same data source and site that matches the search conditions. If the "Incident Fields" parameter is configured, the incident fields of the incidents directly related to the original event will be updated. |
Assigning Additional Playbooks to an Incident
When an Incident is initially created or escalated from an Event, you will be prompted to select a Playbook from the dropdown list. If you need more automated or orchestrated workflows to supplement the investigation, you can assign additional Playbooks to the Incident.
The Overview tab will display the Playbook(s) currently assigned to the Incident under the Playbook header.
Click on the "+" icon next to the Playbook header to open the “add” popup window.
From the popup window, select a new Playbook to add to the Incident.
The selected Playbook will appear in this list of playbooks and the Playbooks tab. It will start running once it is added.
Reader Note
You can apply Role-based access privileges in the User Management module to restrict certain Roles from viewing any Playbook-related information in the Incidents Workspace.
Tactics & Techniques in Incidents
In the new Tactic & Technique table, you can manually add and/or remove Tactics, Techniques and Procedures (TTP) to an Incident.
Using these TTP labels, you can categorize incoming Incidents and Events that happen to your organization based on the MITRE ATT&CK framework. This categorization helps the ingested data to be visualized in the Monitor Workspace, where you can have a high-level overview of the organization’s security status.
Features | Tactic & Technique Table |
1. This table displays all Tactics & Techniques of the current Incident, related Incidents, and related Events. If the current Incident was escalated from an Event, that Event’s TTP will also be displayed in this table. 2. TTP details are accessible via clicking on the highlighted title. 3. Each Tactic & Technique has a Source Tag to indicate whether they belong to an Incident or an Event.  Tactics & Techniques with the incident tag are removable from the Incident Workspace.  Tactics & Techniques with the event tag are unremovable from the Incident Workspace, and can only be added/removed in the Event Details. Reader Note In Event Details, if you add/remove Tactics & Techniques of a related Event, it will be added/removed from this table in the Incident Workspace. The converse cannot happen. |
To manually label Tactics & Techniques for Incidents
Click on the "+" icon next to the Tactics & Techniques header to open the “add” popup window.
Choose a tactic from the dropdown.
Select a technique from the list and click the add button.
Events Summary
The Events Summary section serves as a brief overview of an incident's source events. The section is organized by batches based on the method of escalation (i.e., automation rule, incident playbook, event playbook, manual, and fetch incident). The summary also provides a direct link to the source event for quick access.
Each event from a particular batch reveals additional details such as severity, time of occurrence, and the last updated time. All selected fields from field mapping are displayed with the option to view their respective historic values and timestamp.You can choose to display additional fields by enabling the "Show in Incident Summary" option in the corresponding integration's event field mapping settings.
Reader Note
The "Event Summary" section displays all mapped fields by default, and will be renamed to "Key Information" if you opt to display only selected fields in the corresponding integration's event field mapping settings.
Your Pending Tasks
The Your Pending Tasks section provides an overview of your top six most urgent ad-hoc tasks and playbook tasks related to the selected incident. This section will only display tasks assigned to you.
The tasks are organized based on their due dates. From left to right, these tasks are colour-coded based on urgency, with red indicating the tasks past their due dates, followed by yellow for tasks due within one hour. Tasks without a coloured stripe are those with deadlines further in the future or no deadline.
Tasks with a required tag must be completed before an incident can be closed, while suggested playbook tasks need your input to run or skip the task.
You can access the associated task details and take action by clicking on the pending task’s card. To access a complete list of pending tasks, click All Pending Tasks at the top right corner of the Your Pending Tasks section, which will direct you to the Pending Tasks tab in the incident workspace.
Reader Note
The "Your Pending Tasks" section will only appear if the selected incident has ad-hoc tasks or playbook tasks that require manual input from you.
Incident Investigation Team
You can build different sizes of investigation teams to correspond to the complexity of an Incident. When building your team and adding investigators, you can set Incident-specific and Stage-based access controls. This ensures clear boundaries of responsibilities within an investigation.
Any analyst with access privileges to view/edit Incidents can be selected and added as an investigator by following the steps below:
Click on the "+" icon next to the Investigation Team header.
Search for a User in the search bar. You can select all by pressing Ctrl + A on your keyboard.
For each Incident Stage, select the appropriate access level: Editable or Read-only. Clicking the All radio button for either option will apply the same access to all Incident Stages. If you want to remove the access, click on the cancel icon.
Click + Add to add the investigators with corresponding access.
Repeat the above steps to add more investigators with different levels of access.
Notes
The notes section is a space for you and your team members to record notes quickly. These notes can be used as important information or details to reference during or after an investigation. They are sorted chronologically by the most recently added.
There are two types of notes: Incident note and playbook task notes.
Incident Notes
Incident notes can be added manually or by running Set Incident Notes and Set Incident Notes HTML commands.
To add incident notes manually:
Click the "+" icon next to the Notes header.
Add in your notes and click + Add to save.
Reader Note
You can also paste (Ctrl + V) images into an Incident’s Notes, Descriptions, and Conclusions to add extra information to your investigation.
Notes that are added via commands will appear with the system icon.

Playbook Task Notes
Notes in this section can be added when you click into a playbook task. It will open the playbook task details window and there will be a prompt to add notes, such as important findings from the task.
To add a playbook task note:
Navigate to the Playbooks tab in the Incident Workspace.
Click on the status of a relevant playbook task. This will open the playbook task details window.
Click the edit button in the notes section on the right-hand side to add your note.
Click Save to confirm.
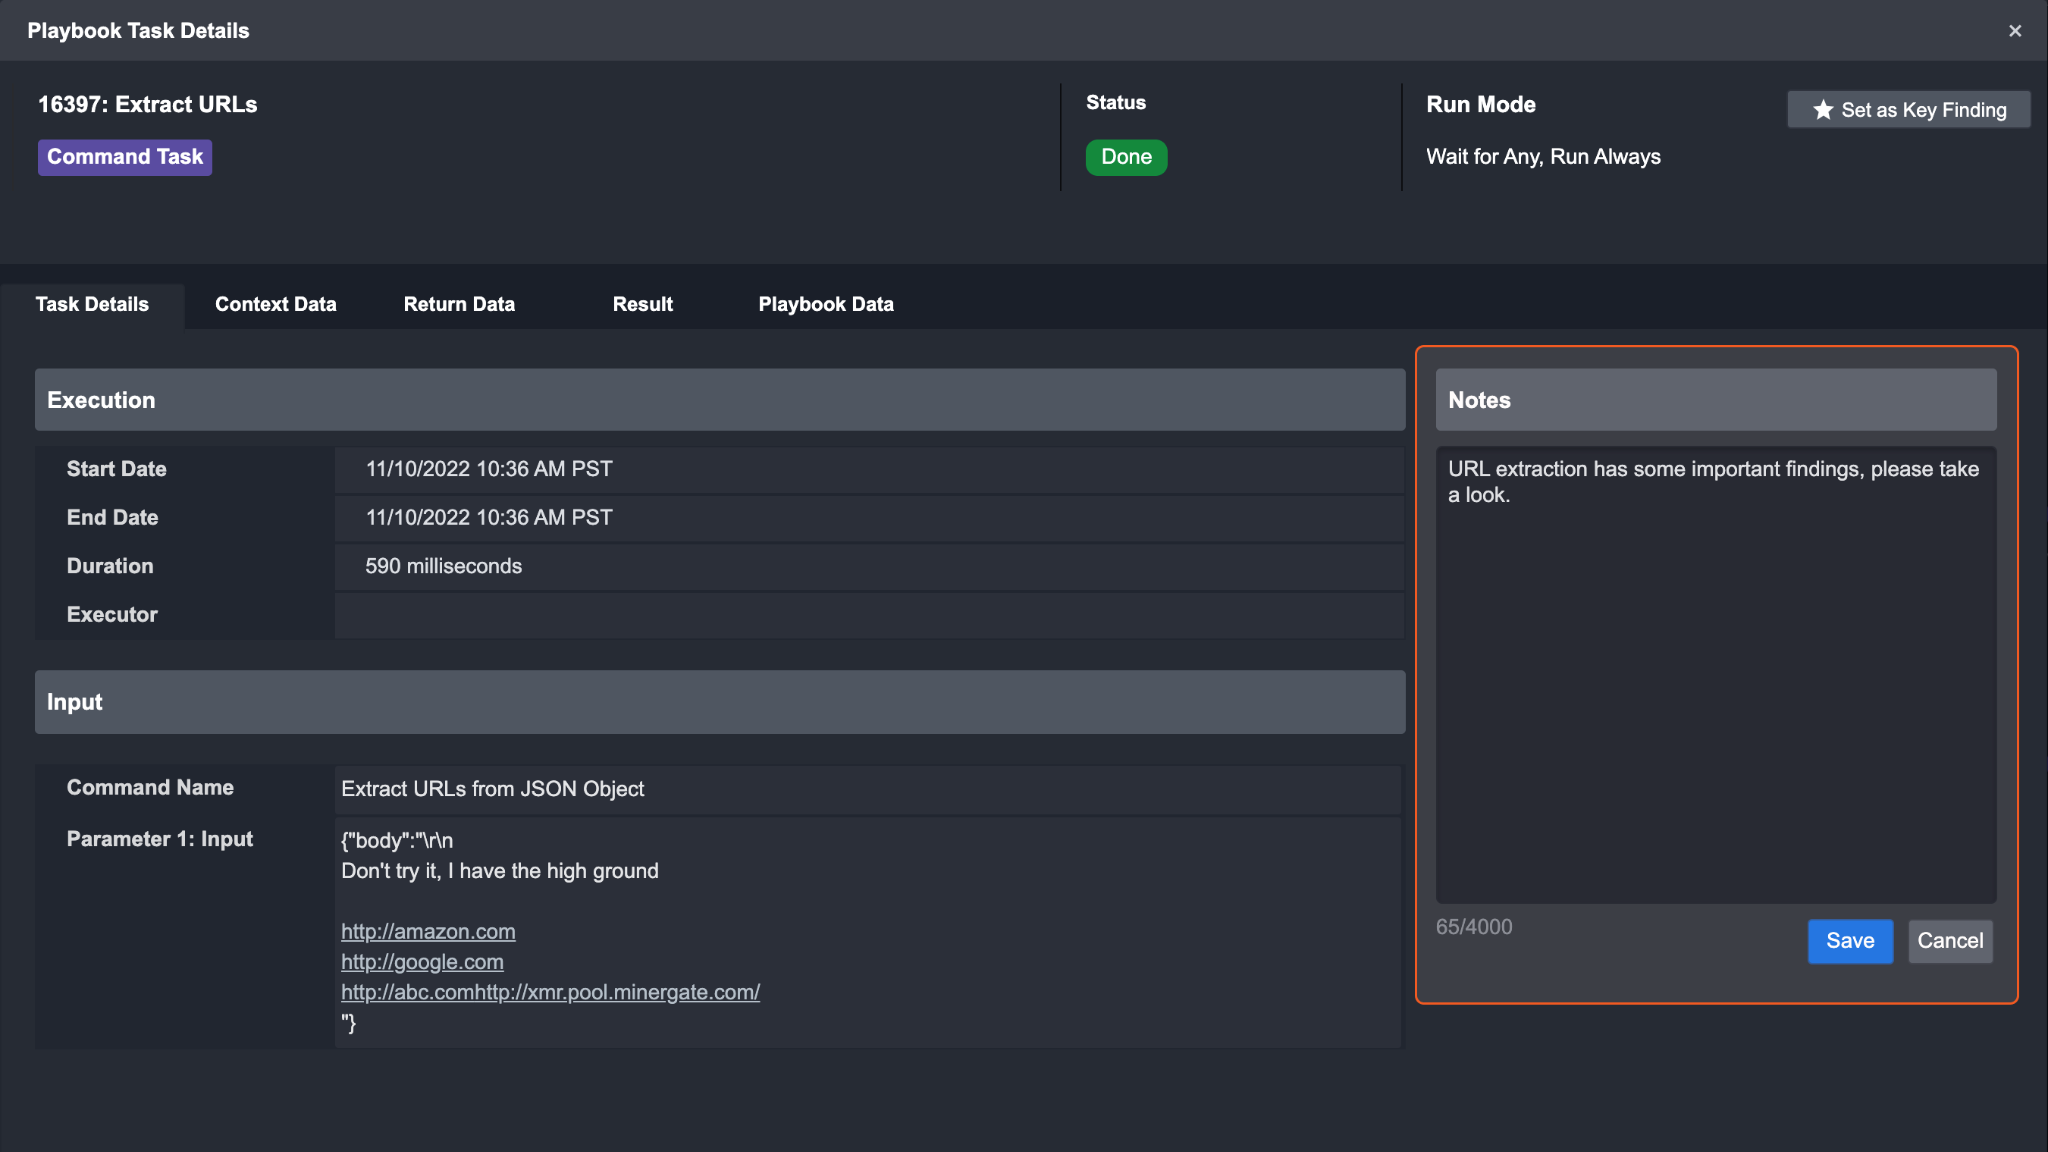
Result: your note will appear in the playbook task notes section.

Linked Incidents
During the Incident response process, you can link other related Incidents to your investigation. This can provide further insight on potentially larger organized attacks.
To link Incidents:
Click on the "+" icon next to the Linked Incidents header.
Type in the keywords relevant to your Incident to search.
Example: Brute ForceSelect the Incident you wish to link then click + Add.
Reader Note
After clicking on a linked incident, a path of viewed incidents will be displayed above the Key Fields section. You can easily navigate between previously viewed linked incidents.
Incident Attachments/Files
You can also attach various important files to your Incident such as PDFs, images, etc.
To attach files:
Click on the "+" icon next to the Files header to open the upload file pop-up window.
After selecting the files you want to upload from your local drive, click + Add to add them as attachments.
Reader Note
There are restrictions on certain file types for security reasons. Prohibited file extensions include .dll, .exe, .com, .msi, .bat, .aspx, .ashx, .bin, .msp, .rar, .zip, .jar, .cmd, .vbs, .js, and .inf.
Custom Sections in Incidents
The custom sections in the incident workspace are the user-defined sections created in the Incident Form Editor. The name of the form corresponds to an incident type in D3 SOAR, and each incident type has its own set of sections. For more information on how to create, edit, and delete an incident form, please refer to Incident Form Editor.
Create an Ad Hoc Task
Inside of the Incident Workspace, you can create an Ad Hoc task for that incident, outside of the playbook. The ad hoc task allows the user freedom to name the task, categorize by task type, add task details, assign a user and due date.
For example, the ad hoc task allows a tier 3 analyst to assign a tier 1 security analyst to perform an action on the incident for investigation. This allows for SOC teams to divide up resources and communicate task needs between different security personnel regarding an incident.
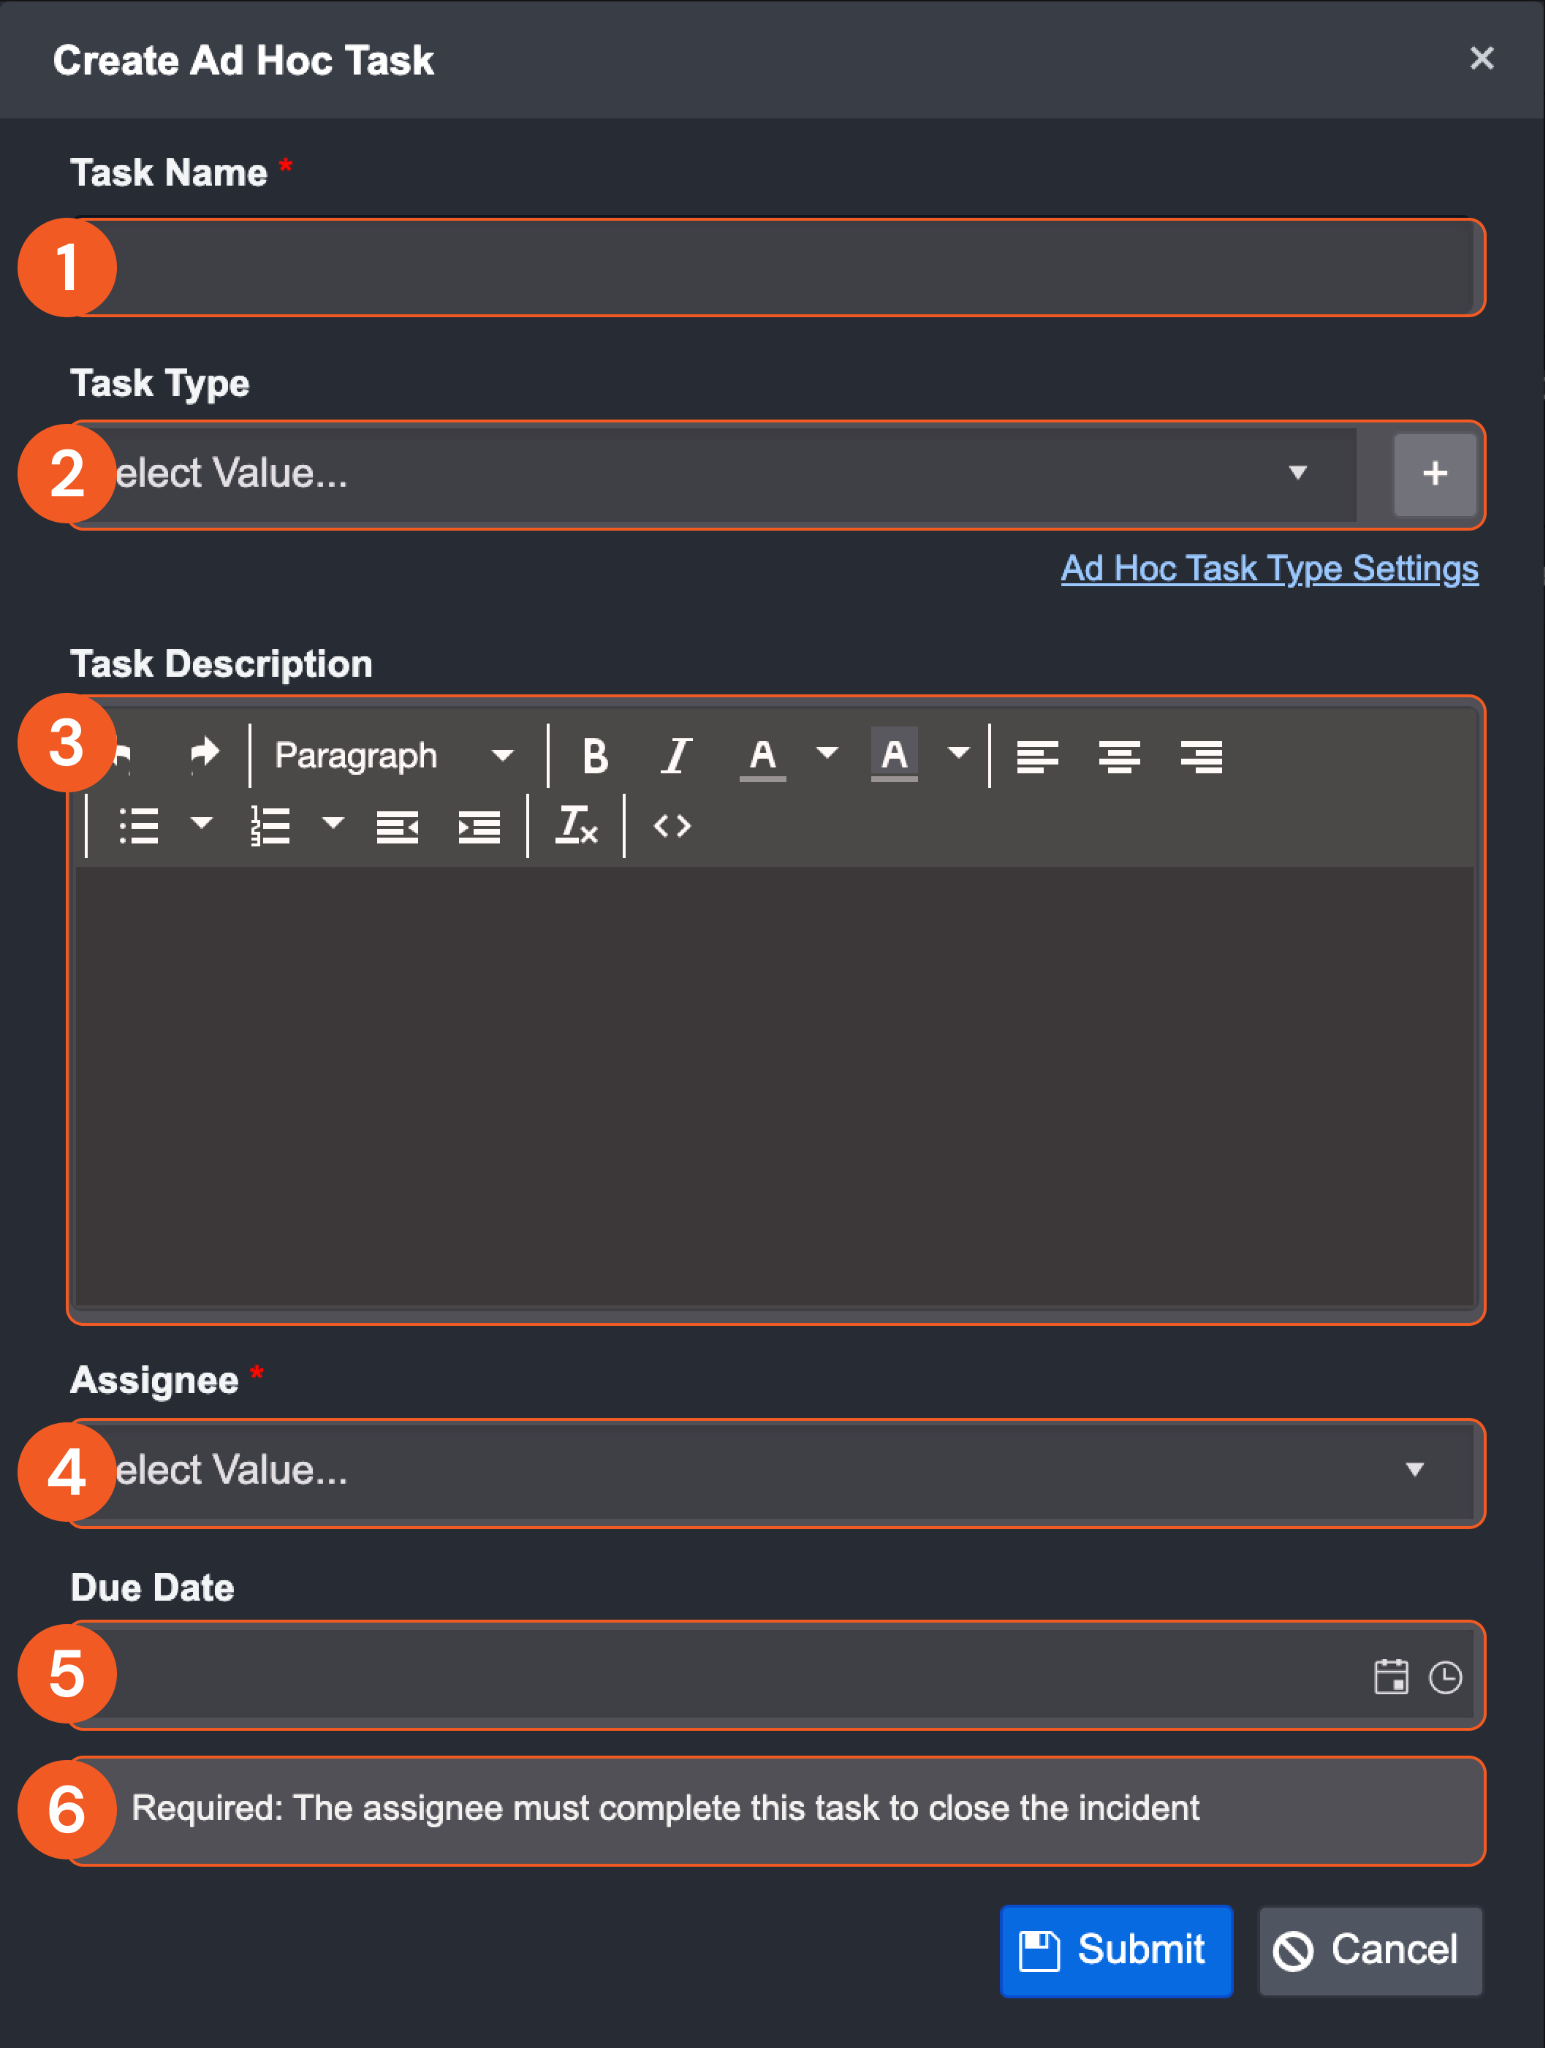
Task Name—Give your task a relevant name
Task Type—Categorize the task into a relevant type. You can quick-add a new task type with the + button or view and edit a list of existing task types. Additional task types can be configured inside of Application Settings.
Task Description—Give your task details about what is to be done or performed. This text input box supports HTML.
Assignee—Assign your task to a user you wish to perform this task.
Due Date—Give the task a due date if applicable.
Required—Check this box to make the task required upon closing the incident.
Reader Note
In order to assign a user to this task, that user must have access to the incident workspace and this specific incident
Once the ad hoc task is created, it will be displayed in the Pending Tasks and Command Centre, detailed below in the Pending tasks and Command centre sections.
Investigation Tab
The Investigation Tab provides analysts a centralized location to input and manage investigation information for a corresponding incident.
It includes four main sections: Summary, Findings, Remediations & Mitigations, and Recommendations. Each section is populated through a JSON-defined data table or HTML, making it easy for analysts to enter investigation details, such as notes, findings, or recommendations. The Findings section is further broken down into five subsections: Initial Findings, Data Enrichments, Data Correlations, Indicators of Attack (IOA), and Indicators of Compromise (IOC).
Utility commands are available to be used as command tasks in playbooks, triggering workflows that could automatically populate the Investigation Tab with data collected from previous tasks. This automation feature saves time and ensures that critical information is captured quickly and accurately. Refer to this document Populating the Investigation Tab using Utility Commands to learn how to format the utility commands.
Summary
The "Summary" section within the "Investigation Tab" can be used to provide a concise overview of the incident being investigated. It allows analysts to capture essential details and high-level information about the incident and serves as a snapshot of the incident's key characteristics and helps stakeholders quickly understand the nature and scope of the incident. In this section, you can include a single HTML rich text object.
Reader Note
Please note that only one HTML rich text object is allowed per incident, and data tables are not currently supported.
Findings
The Findings section within the Investigation Tab serves as a repository for documenting and categorizing significant discoveries and observations made during the investigation of an incident. It enables analysts to record initial findings, data enrichments, data correlations, indicators of attack (IOA), and indicators of compromise (IOC), providing a comprehensive overview of the investigation progress and valuable insights gathered along the way.
In this section, you can add JSON-defined data tables or HTML rich text objects by clicking +. When adding data tables or objects, you can assign them to one of five categories of information.
Grouped View
In the grouped view, the input information is organized into categories that pertain to the incident investigation: Initial Findings, Data Enrichments, Data Correlations, Indicators of Attack (IOA), and Indicators of Compromise (IOC). This provides a categorized presentation of the information for easy reference and analysis.
Timeline View
In the timeline view, the input information is arranged based on the time of the first finding. This perspective offers analysts a chronological overview of the investigation progress and insights gained, allowing them to grasp the sequence of events in a chronological manner.
Remediations & Mitigations
The Remediations & Mitigations section within the Investigation Tab is used to document the recommended actions or measures to address and mitigate the identified issues or vulnerabilities related to the incident. This section can serve as a guide for incident response teams or relevant stakeholders to implement effective remediation and mitigation measures based on the findings and insights obtained during the investigation.
In this section, you can add JSON-defined data tables or HTML rich text objects by clicking +.
Recommendations
The Recommendations section within the Investigation Tab is used to provide suggestions or advice based on the findings and analysis of the incident. It allows analysts to propose specific actions, improvements, or changes to prevent future incidents, enhance security measures, or strengthen existing protocols.
In this section, you can add JSON-defined data tables or HTML rich text objects by clicking +.
Timeline Tab
The timeline feature within the incident workspace allows you to add investigation details and order them chronologically to visualize the lifecycle of the incident. You may add details from the command centre or related events and incidents, or create your own custom supplementary notes.
Adding items from the command center
Navigate to the command center in the investigation dashboard
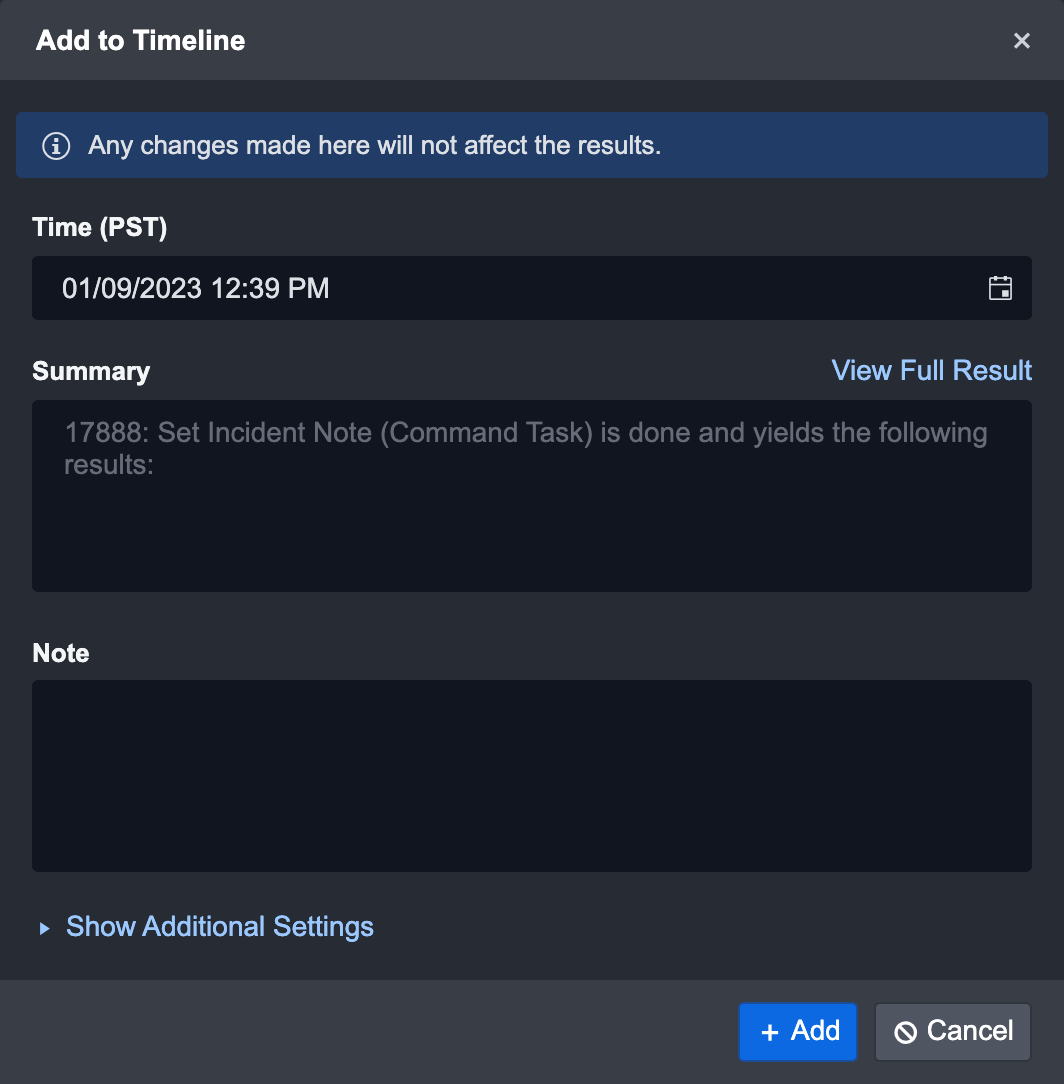
Look for an item that may be important to the investigation (such as a task result) and click + Add to Timeline
A window will appear to allow you to review the details of the item you wish to add to the timeline.
The default time assigned to this item will be the current time, not the time of execution. This can be manually adjusted as needed.
Click + Add to add the item.
Result
The item you have added will appear in the timeline tab.
Adding items manually
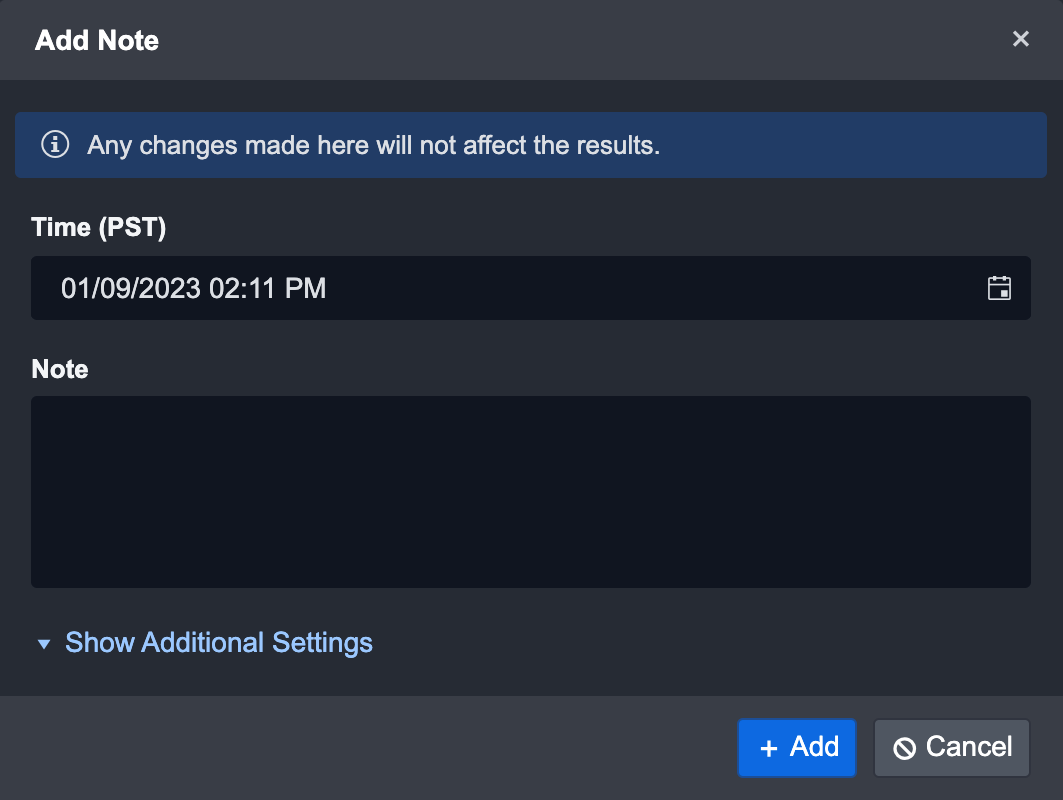
Navigate to the top right corner of the timeline tab and click + Add Note
Fill in the details of the note you wish to add to the timeline.
By default, the time will be the current time. You may change this as needed.
Click + Add to add the note.
Result
Your note will be added to the end of the timeline.
Events Tab
The Events tab provides a comprehensive list of all the relevant events for the incident, which can be sorted and filtered to suit your needs.
By default, the Group by event batches toggle is turned on. This means the events are organized by batches based on the method of escalation.
The Include events after incident creation is also turned on by default, which displays all events that are added to the incident after the incident was created.
Clicking on any event will display its details in a pop-up window.
Playbooks Tab
The Playbook tab provides an overview of what Playbooks and Playbook Tasks have been added to the Incident, as well as their individual runtime statuses. This visualization provides an understanding of the linkages between different Playbook Tasks; from this view, you can choose to take actions directly on specific pending Tasks.
All Playbooks that have been added to the incident will appear under the playbook tab on the left panel. You can click on each playbook to view the status of its underlying Tasks.
If a playbook contains a nested Command, you can access it by clicking on the expand link icon on the left of the parent playbook.
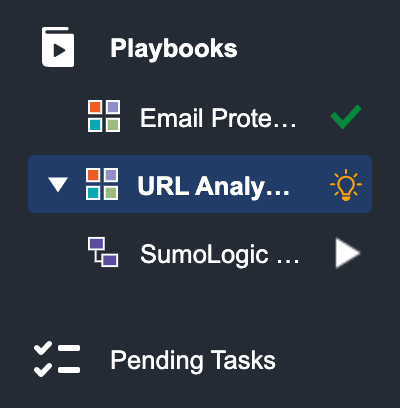
The icon on the right of the playbooks’ title indicates the status of each individual playbook:

The Playbook contains tasks that require manual response from the user in order for the playbook to continue running.

The Playbook is running.

All Tasks within the Playbook have been executed and completed.
At the bottom of each Playbook Task card, its status is indicated by different icons. They will be explained in turn in the following table.
Task Status | Description |
|---|---|
 Run | This status is only available when you are testing a playbook. This allows you to test individual tasks to check if they’ve been configured correctly without the data from prerequisite tasks. |
 Queued | This status means the task is in a queue and waiting for its turn to run. |
 Done | The green checkmark means the task was successfully run. |
 Required  Suggested | Required tasks are represented by an asterisk and suggested tasks have a light bulb. Both of these statuses are referred to as a Pending Task. Required Tasks require your manual response, whereas this action is optional for Suggested Tasks. |
 Running | When you see this icon, it means the Task flow is currently being executed. |
 Skipped | The Suggested Task has been skipped, instead of being executed. |
 Error | This icon indicates that an error has occurred while the Task was running. You can rerun these Tasks after correcting the error. |
 Rerun | The icon appears when the task has been rerun. |
 Wait For Reply | This status appears when the Task is a nested Playbook and there are additional Tasks to be completed within this Task before it is updated as Done. |
You can click on each individual Playbook Task to view its task details. Within the pop-up window, the top panel highlights the Task Type, Assignee, Due Date, Status, Run Mode and action buttons of the Playbook Task. If not run, the first tab within this window presents the Input tab. You can review the contextual data in the Input tab, and update the input fields before running or skipping the Playbook Action. To run the task, click on the done button.
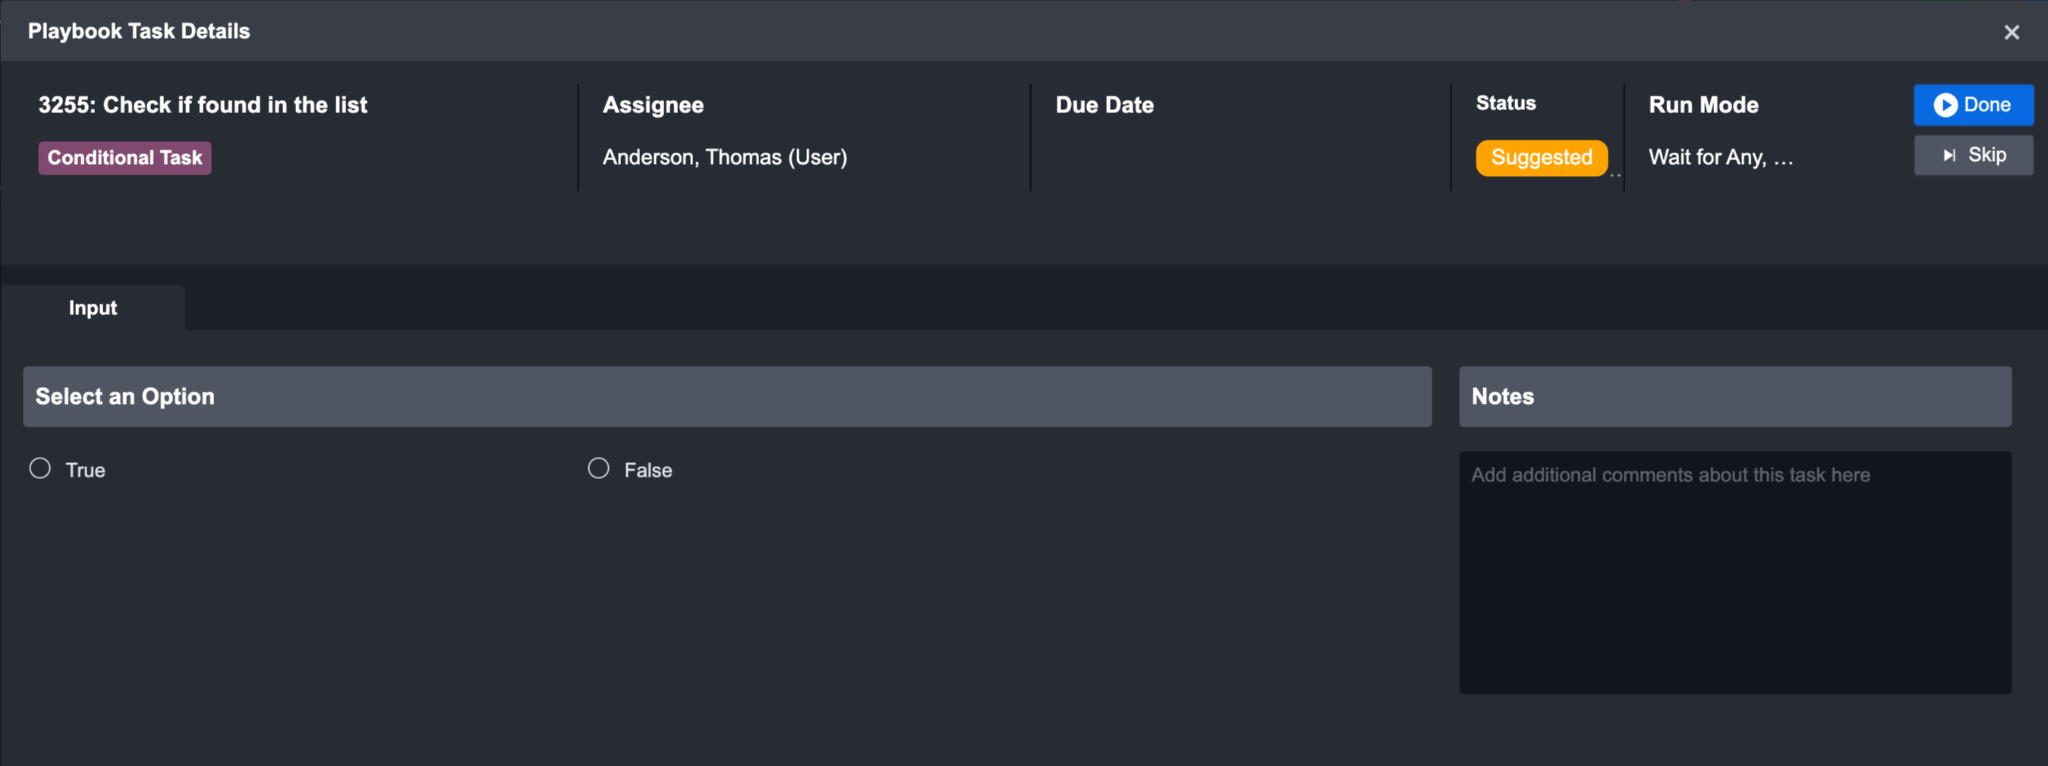
However, you will not see the action buttons if you don’t have permission to the task. To be able to run or skip a pending task, you must first have role access to playbooks and pending tasks (this is controlled by your administrator). Next, you must be one of the following: the owner of the incident, the direct assignee of the task in the Playbook Task configuration, or the assigned investigator of the incident.
When you choose to skip a task, you can skip to the next task in the flow without having to run the previous task.
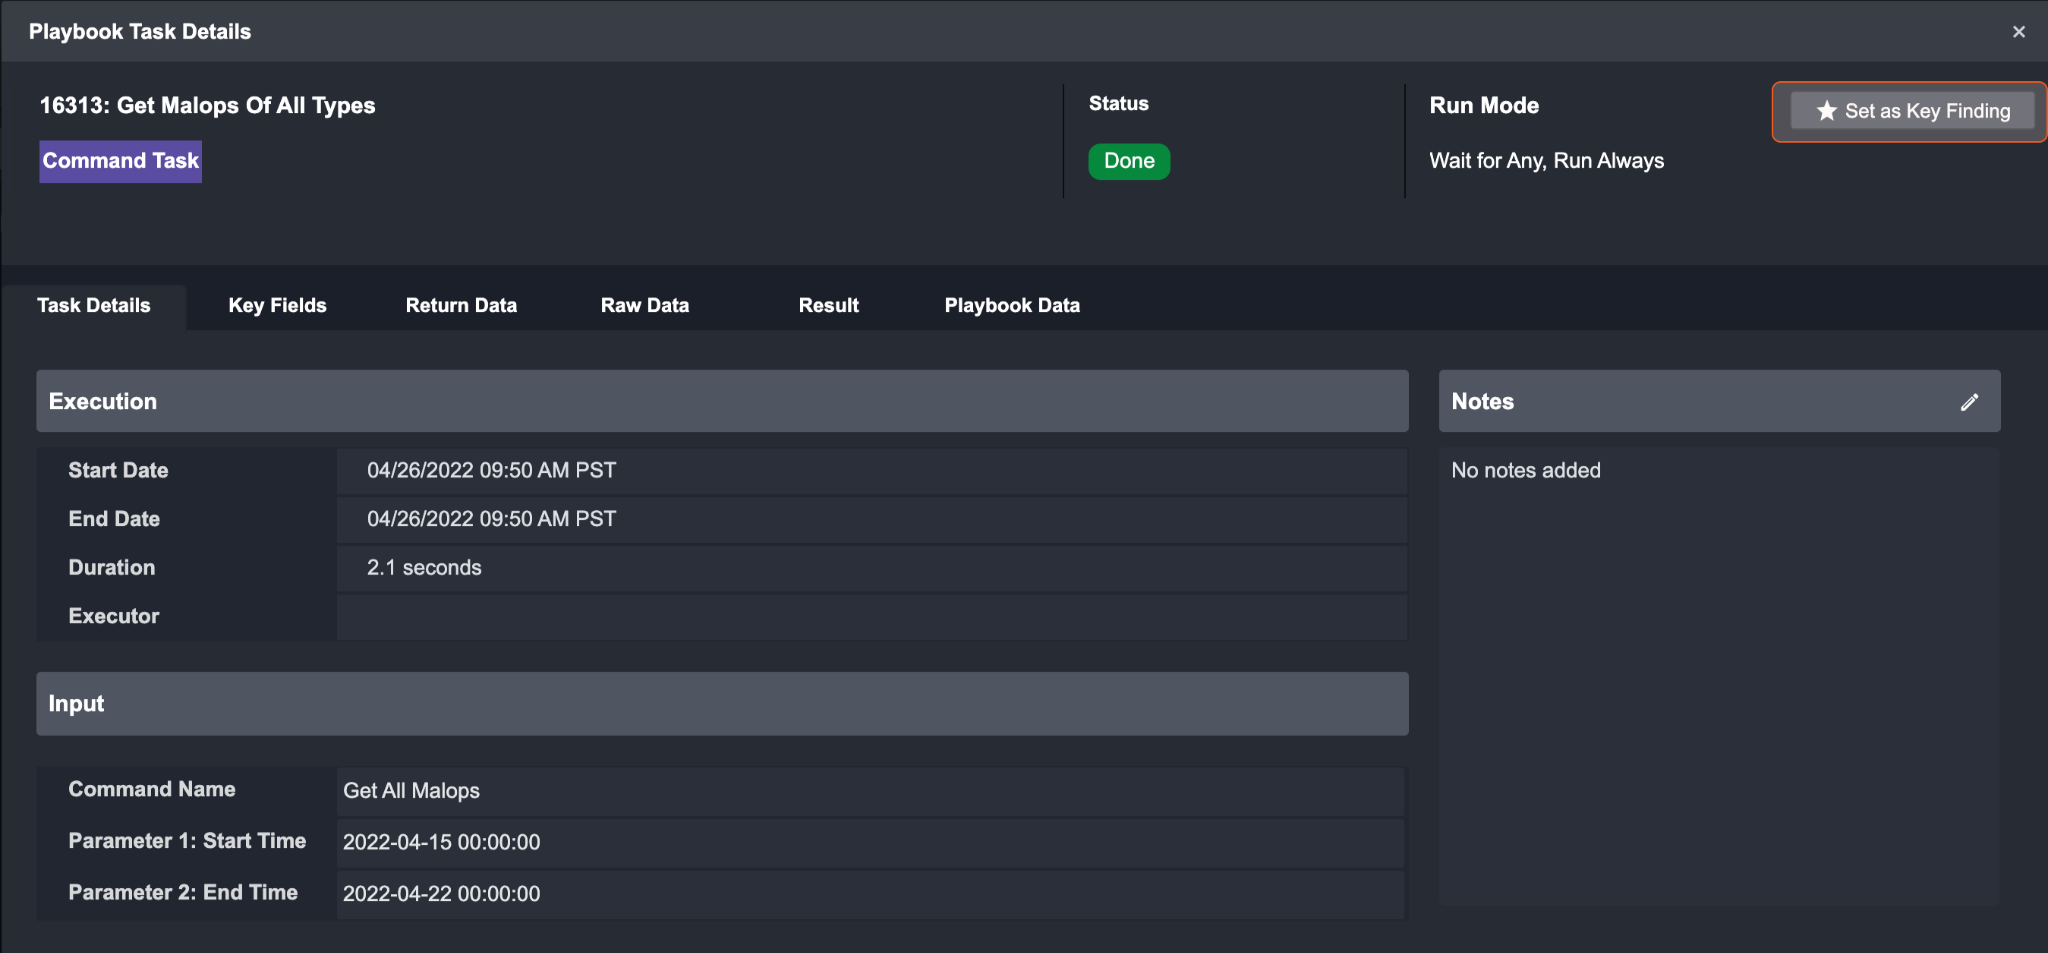
After a Task has successfully run, additional tabs such as Task Details, Key Fields, Context Data, Return Data, Raw Data and Result will be available in the Playbook Task Details window. The information presented in these tabs will vary depending on the Task Type selected.
Reader Note
You can set a task result as Key Finding if it’s deemed important. All marked tasks appear in the Key Playbook Tasks under the Key Findings tab in Incident Workspace.
Get Latest Playbook
When a task has stopped due to an error, you may want to identify the problem in the playbook and remediate it. In the case an event playbook has been updated after it has run, you will notice a button appear next to the search bar. Clicking this button will replace and re-run the playbook on this event, updating task statuses.
Pending Tasks Tab
The Pending Tasks tab shows suggested and required Tasks available for the selected Incident. This list also highlights Tasks which are overdue and require immediate action. You can toggle between lists of tasks assigned to you and tasks assigned to others. More information about executing the selected Playbook Task is described in the playbook documentation.
Examples of Pending Playbook tasks:
Block URL(s) | As a Tier 2/3 Analyst, you can make an initial decision to block the URL(s). If approval is needed, an Interaction Task can be added to be sent to the Lead Analyst for the final approval. |
|---|---|
Block External IPs | You can make an initial decision to block the IP(s). If approval is needed, an Interaction Task can be added to be sent to the Lead Analyst for the final approval. |
Quarantine Host | You can decide to quarantine the host(s). The request will be sent to the client’s service provider (i.e. McAfee NSM). |
Reimage Host | You can decide to reimage host(s). D3 can be integrated into an IT ticketing service like ServiceNow for tasks that require IT administrators to be involved. |
Find Affected User(s) | You can provide the list of affected uses to the IT Administrator to have their credentials changed. |
Find Affect Email(s) | You can review the list of affected emails and decide whether or not to block the email address. The requests will be sent to the client’s email provider (e.g. Microsoft Exchange Server). |
Send Email Notification | The system will send an automatic email notification to leaders from other departments if D3 is able to determine that that phishing email is part of a larger campaign. |
A pending task may also be an ad hoc task. This is one that was created within the incident workspace and needs to be addressed by a user. You can view this by clicking into the task to view, respond, or complete the task by clicking done.
Command Centre
Command Centre provides you with a chronological list of all the key activities and serves as an audit trail of all Playbook Tasks and ad-hoc Command actions that have been performed on the incident.
Command Centre will show the following items:
Ad Hoc Tasks | It includes Ad Hoc Tasks - Task Creation History and Ad Hoc Tasks. Ad Hoc Tasks - Task Creation History represents an incomplete task, with its creation details, task name, type, description, assignee, creator, and the related incident number. Ad Hoc Tasks indicate a completed task with additional information (e.g. Task Response, Executor, Action and Done Date). |
|---|---|
Artifact Action Results | All results of artifact action after executing a command successfully. |
Changes of Incident Field | All the historical changes of Incident fields (e.g. changes of investigation team members in the incident form section) are captured in the Command Centre. |
Command-Line Results | All results of command-line action through Execute a Command will be available in the Command Centre. |
Messages | Instantly message and communicate history between investigation team members to collaborate on the same Incident. |
Other User Actions | Any other actions such as adding new artifacts, attaching files or recording notes. |
System Notifications | All overdue Playbook Tasks. |
Task Results | When Playbook Tasks run and finish based on the pre-configured workflows, all the Playbook Task results are sequentially yielded and chronologically presented. |
Key Finding Actions | History to show which item has been set as key findings. |
From this view, you can choose to take various actions on specific items where necessary:

View Task Details: you can open up a Playbook Task result window in order to view the Task result details from the Command Centre.
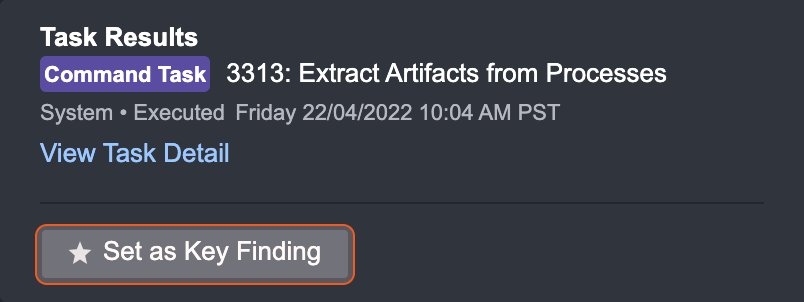
Set Task as Key Finding: you can view Tasks results and mark the results as key findings for the current Incident. All marked tasks will be displayed in theKey Findings tab, under Key Playbook Tasks.
Download Files: An Incident Report will be generated when running a Generate Incident Summary Report command. The report can be exported and downloaded as files for reporting and operational purposes.
To set a result as a key finding:
Click on the Set as Key Finding button.
You can also set it as key findings inside the Playbook Task Detail window.

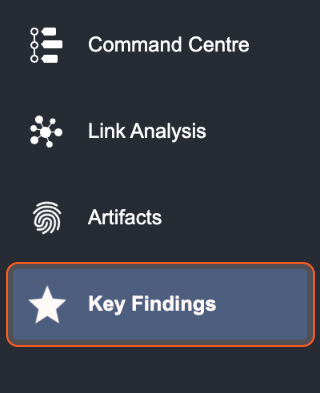
Navigate to Key Findings to find all key findings.
To unset a key finding:
Click on the Unset as Key Finding button.
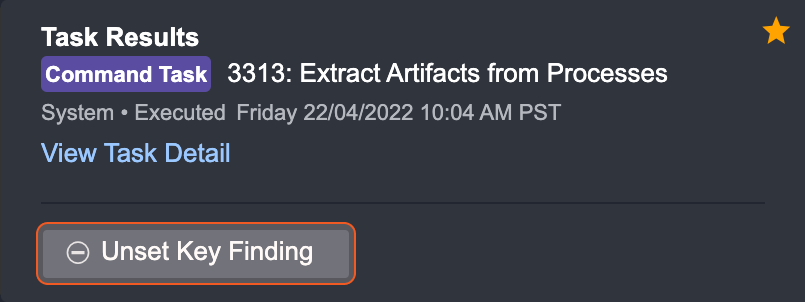
You can also hover over the Added as Key Finding button in a task details window to Unset this key finding.

Link Analysis Tab
The Link Analysis tab visualizes the cyber attack in a mind map format. This format visualizes the relationships between Events, Incidents, Artifacts as well as indicators of attack (IOAs) and indicators of compromise (IOC) without having to rely on a linear text report. Double-clicking on an element in the mind map may provide further details relating to that element.
User-friendly features have also been incorporated in this tab to simplify how information is presented. You can easily identify specific attacks using these features:
Attributes to Group Objects are attributes to visually categorize objects.
Example: Bad Reputation, Internal Endpoint, High Risk External Endpoint, High Risk URL, High Risk Event, etc.Timeline Scroll limits the information displayed during a period of time for more granular investigation. This scroll is located at the bottom of the tab.
Artifacts with Bad Reputation are visually highlighted in red for you to easily identify risks.
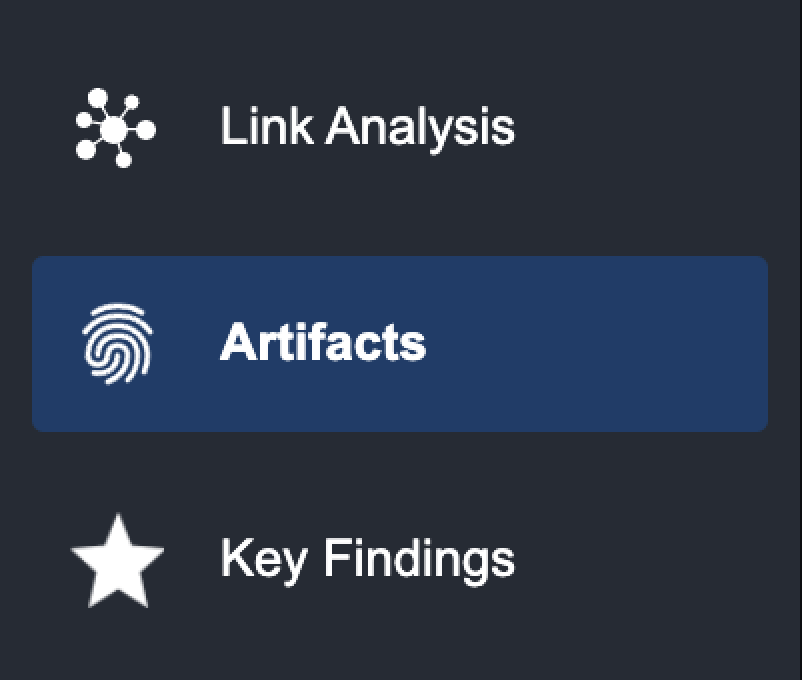
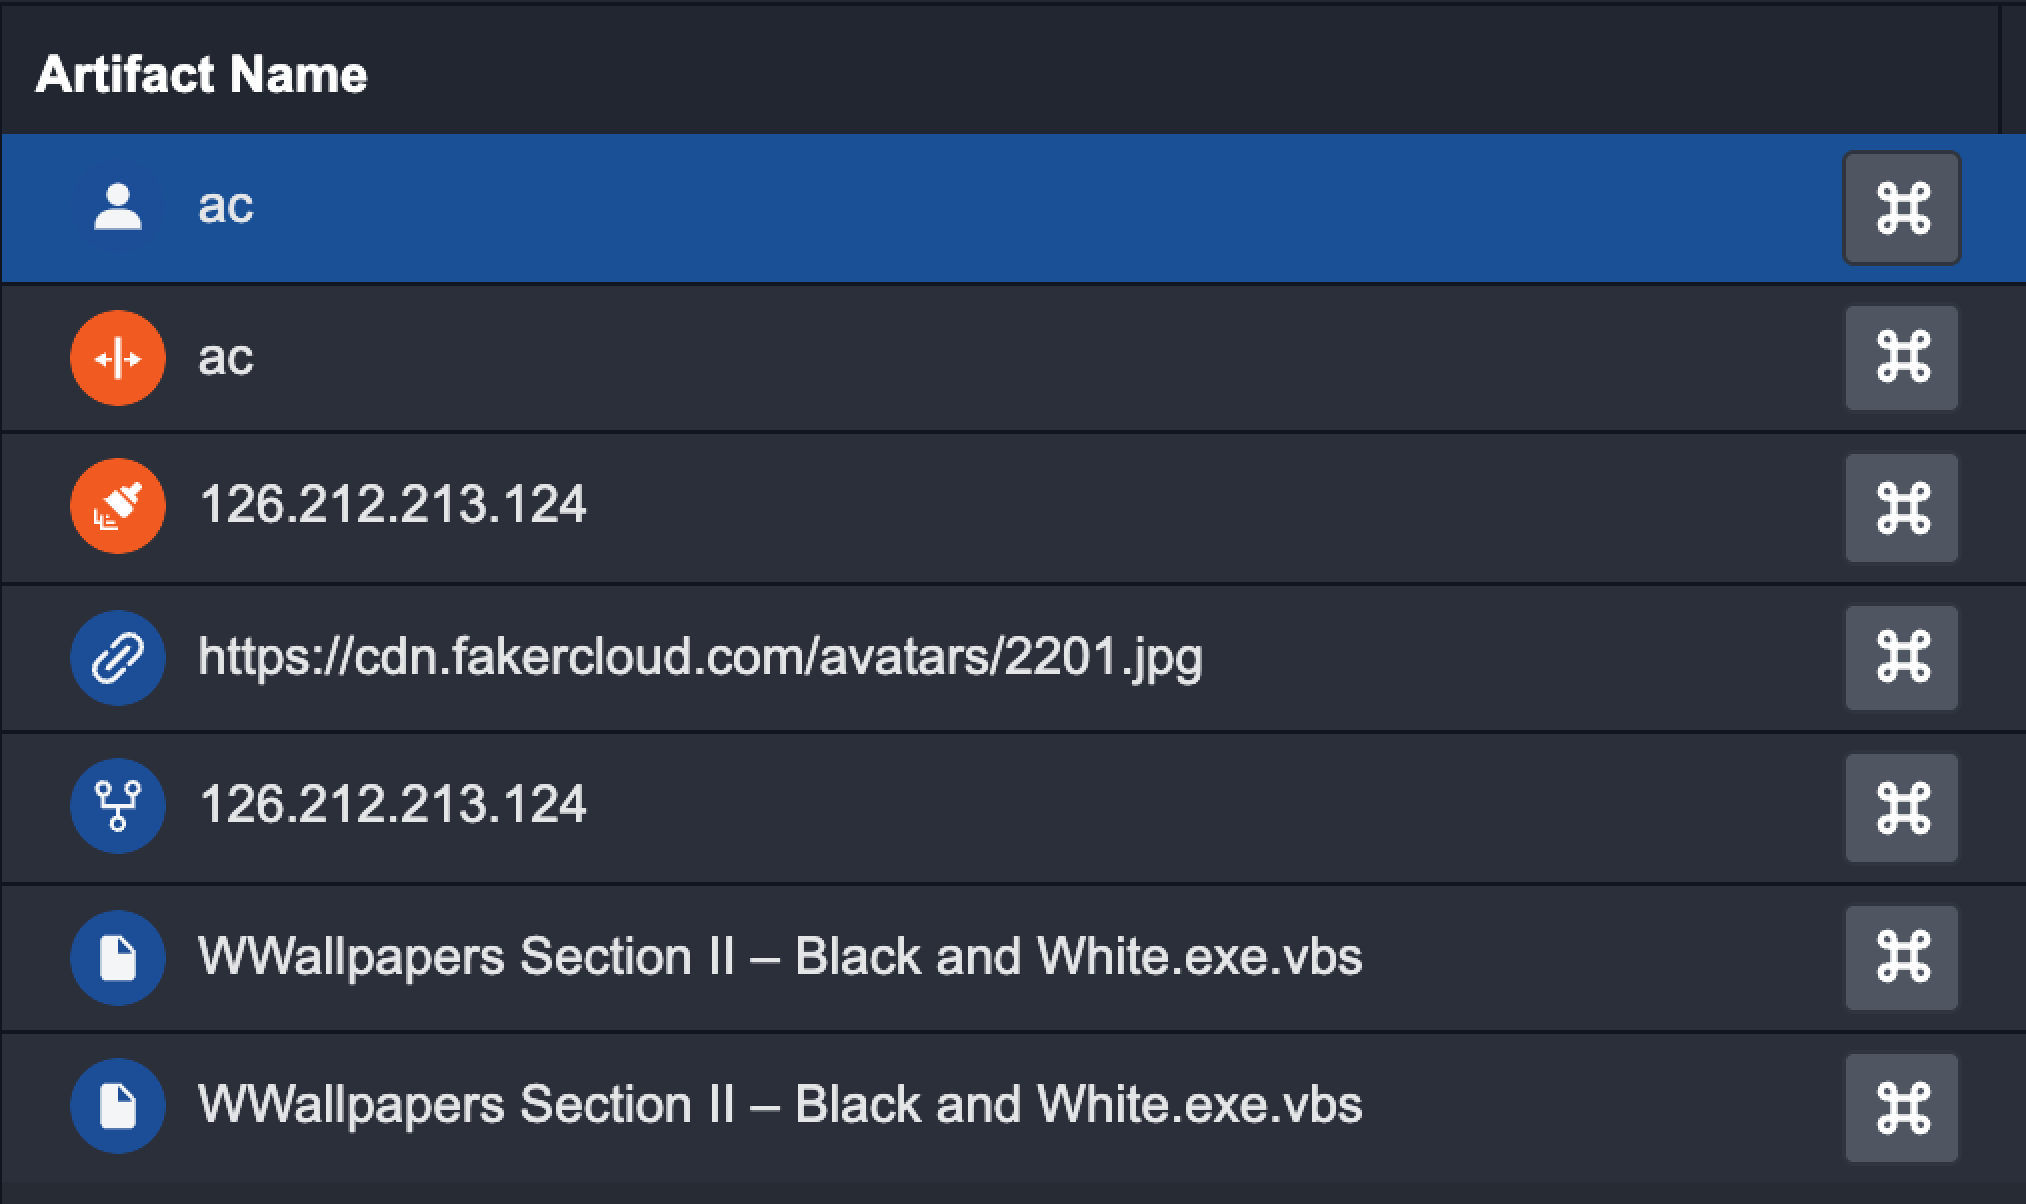
Artifacts
The Artifacts tab shows all the Artifacts that have been extracted for the current Incident. This view helps you quickly identify Artifacts with a large number of associated Events, which could be indicative of unusual and suspicious activities.
As part of the Artifact analysis process, you can conduct the following:
Set additional Artifacts not initially extracted.
Take action using the Artifact details to enrich data for threat, capability and other assessments.
Manually Add Artifacts to an Incident
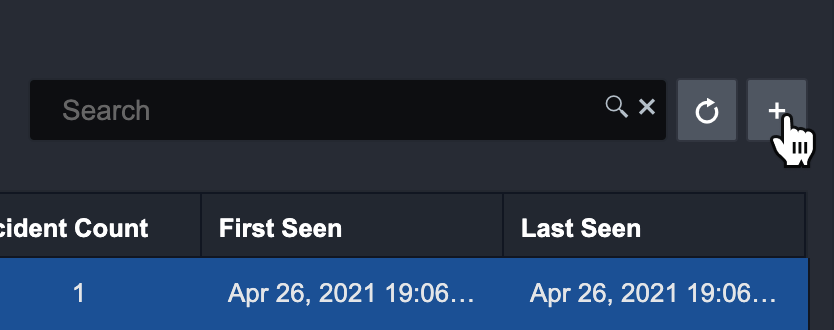
By clicking on the + button located in the top right corner of the artifact page, you can manually create and set artifacts to an Incident. You can use this to build relationships between different Incidents and Artifacts. The new artifact window allows you to manually add a new artifact. You can switch between the editor mode or raw mode by clicking on the toggle.
To manually add artifacts to an Incident:
Click the Artifacts tab on the left menu.

Click on the + button.
Click on the dropdown and select the relevant Artifact Type.
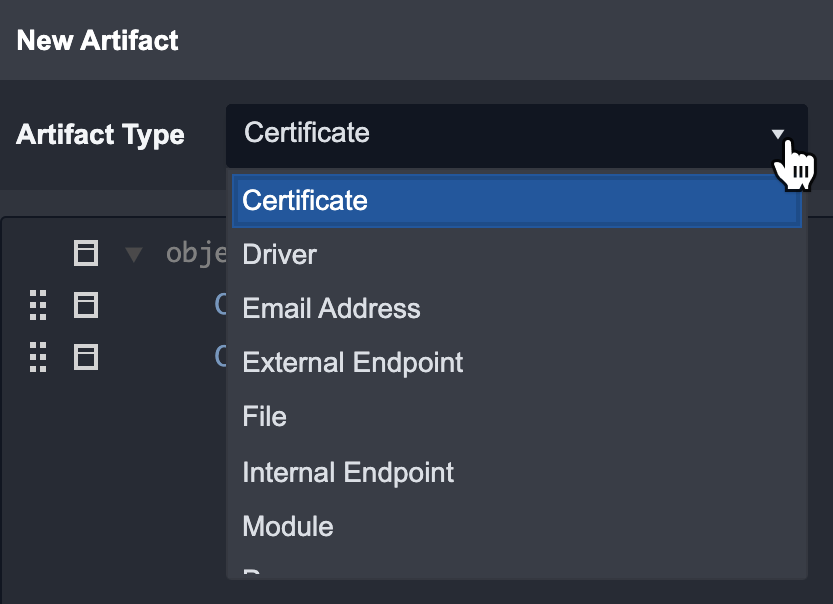
Fill in the details of the Artifact.
Click on Save to add the Artifact to the Incident.
Reader Note
In Artifact Details, you can edit the artifact information or delete the artifact. You can also Execute a Command using the Artifact data.
Batch upload artifacts
Additionally, you can batch upload several artifacts that relate to a specific incident by clicking on batch upload.
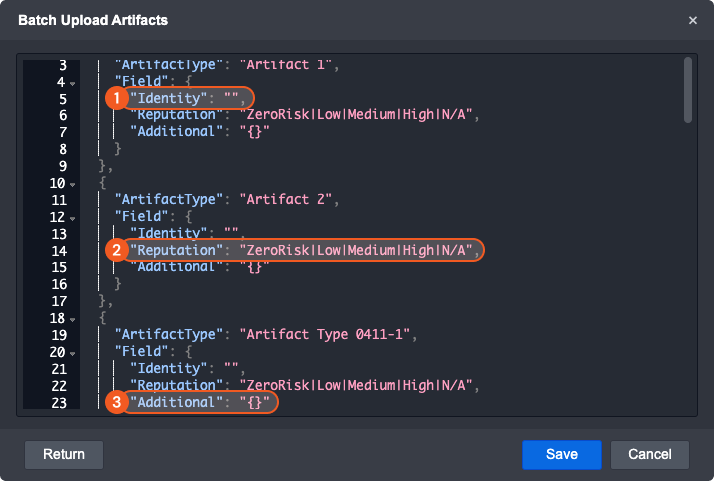
Batch upload will generate a template for each artifact type that exists. Delete any non-relevant artifact type sections and duplicate any as needed.
Fill in the artifact’s identity parameter with a String that describes it
Pick the artifact’s reputation and remove unnecessary text
Add any supplemental information about the artifact in the under additional key. Please note that additional information should be formatted as a JSON object.
A successful batch upload may look like this:
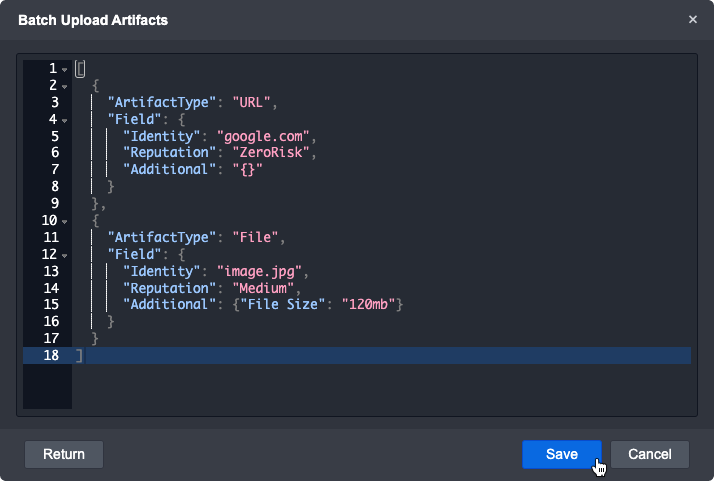
Click on Save to upload these artifacts.
Reader Note
Built-in artifact types may have different JSON structures than as above. Fill in the parameters as needed to batch upload them.
If an error occurs, make sure to check that the JSON is in the correct format and that the parameters are the right data type.
Taking Action on Artifacts
As part of the investigative process, you can directly execute commands on an artifact.
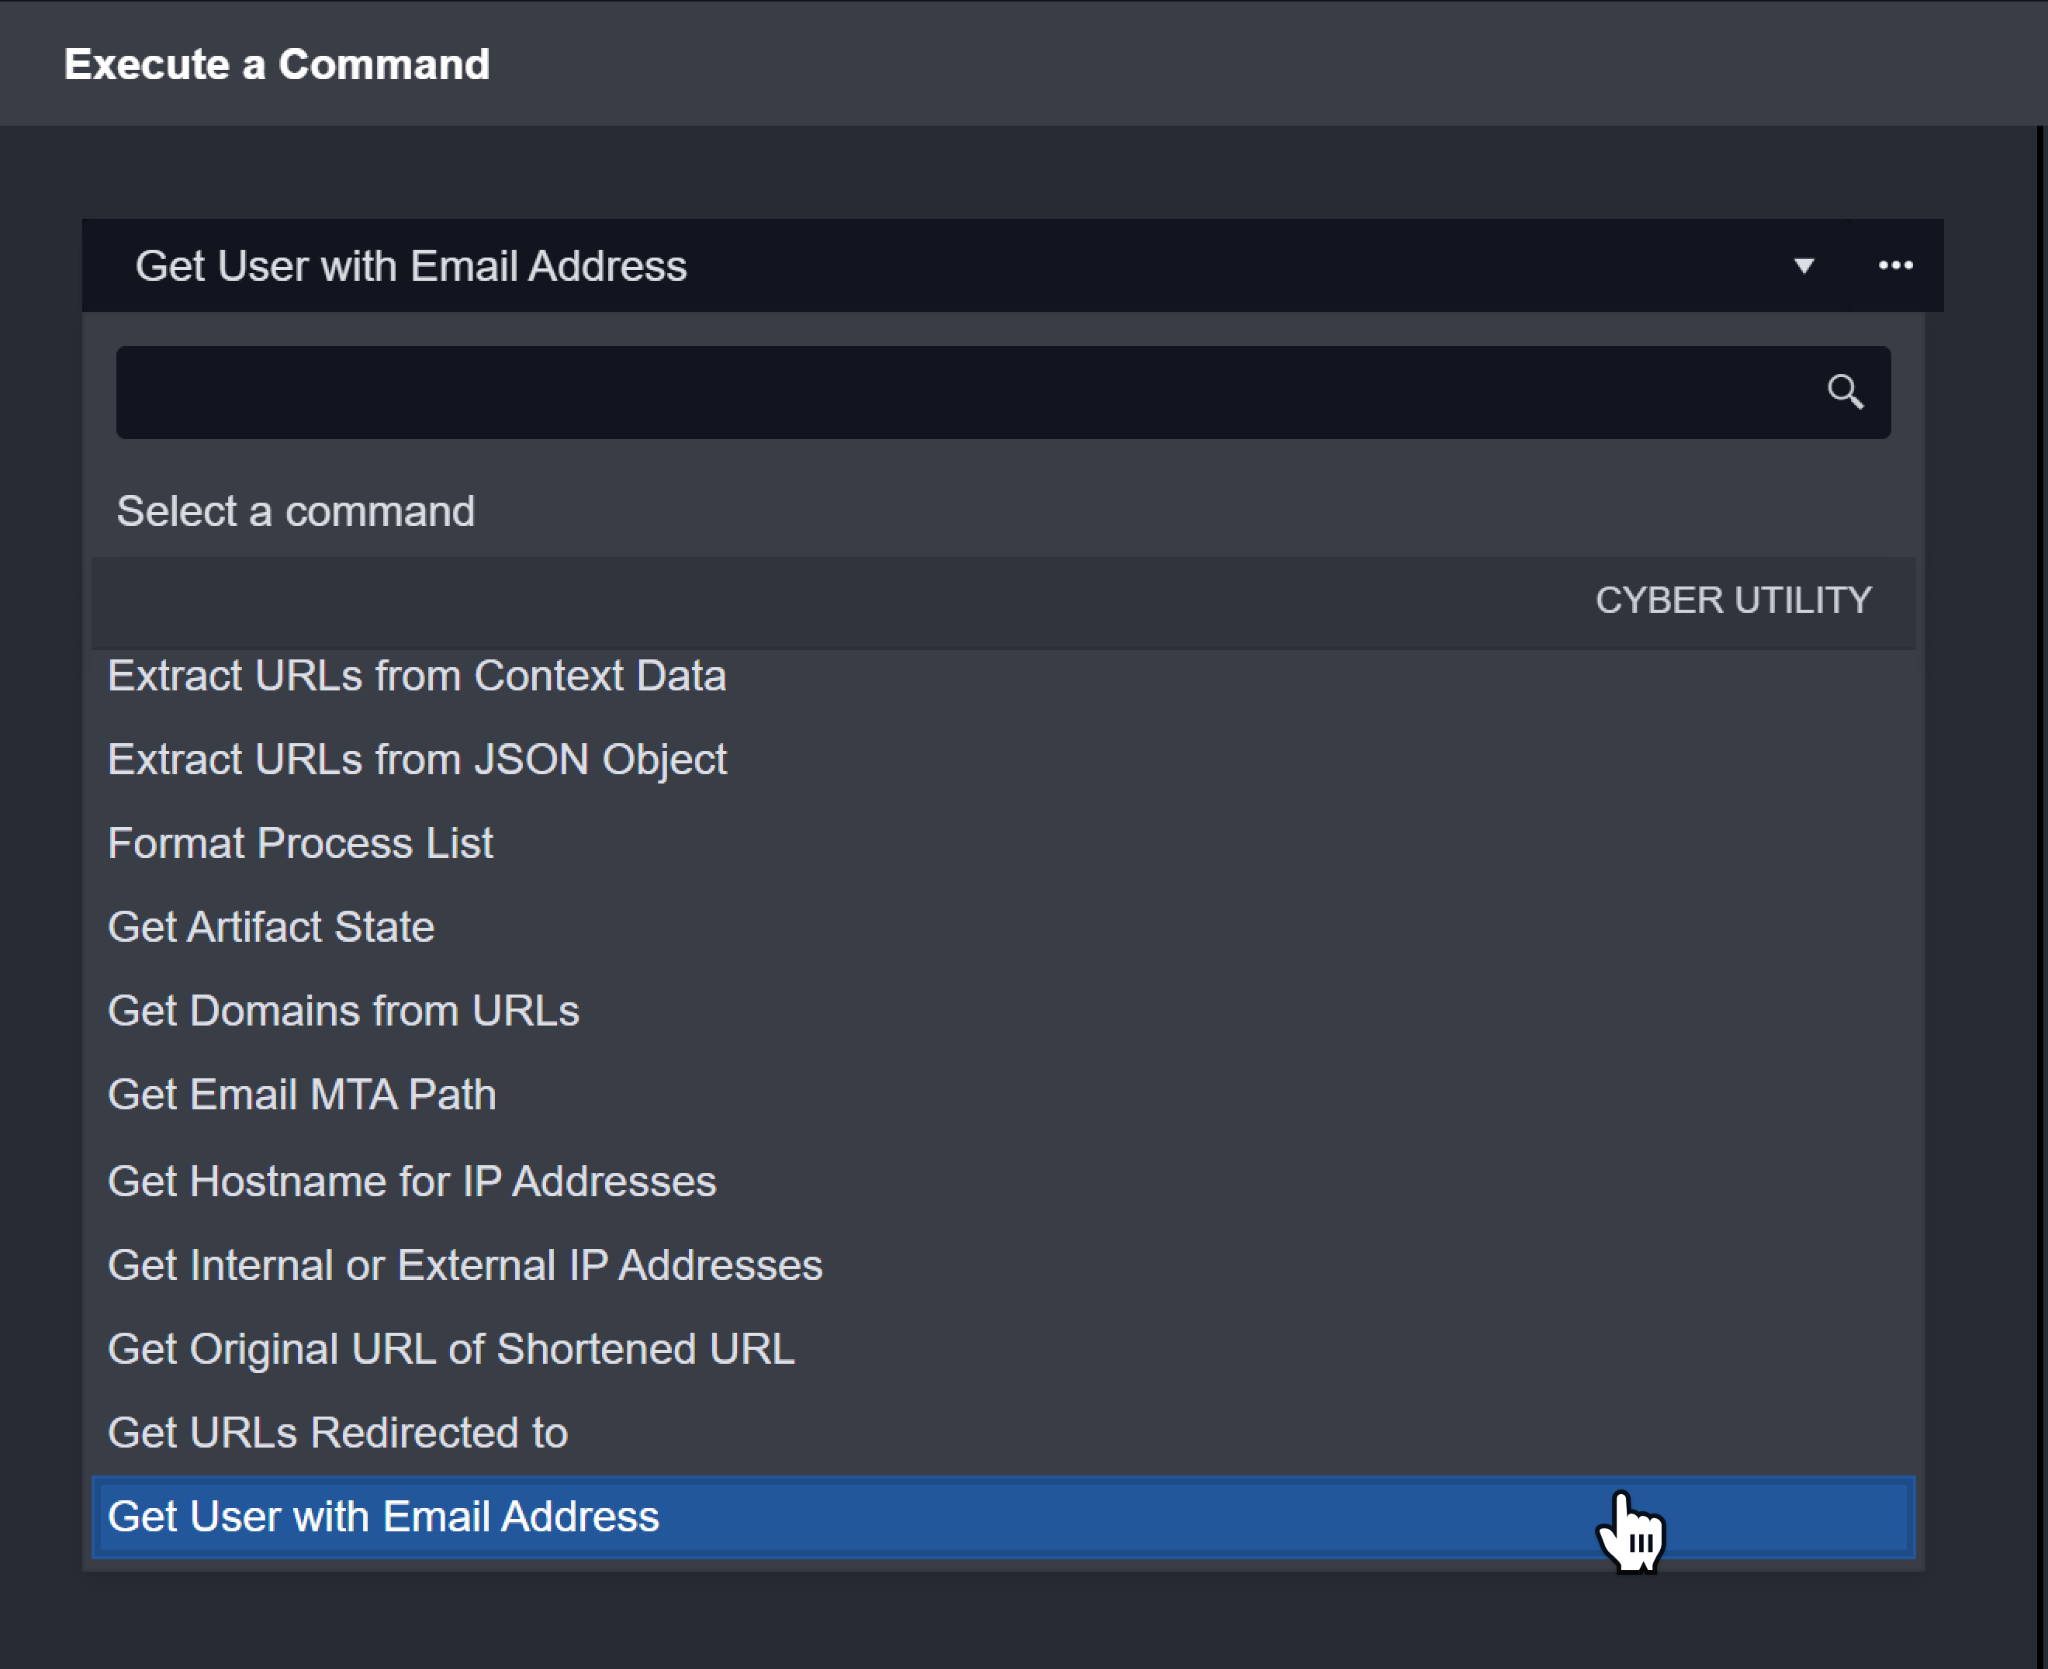
To Execute Commands on an Artifact
Click the Artifacts tab on the left menu.
Click on the Execute Command button.
Reader Note
You can also click on the Execute Command button within the Artifact Details window.
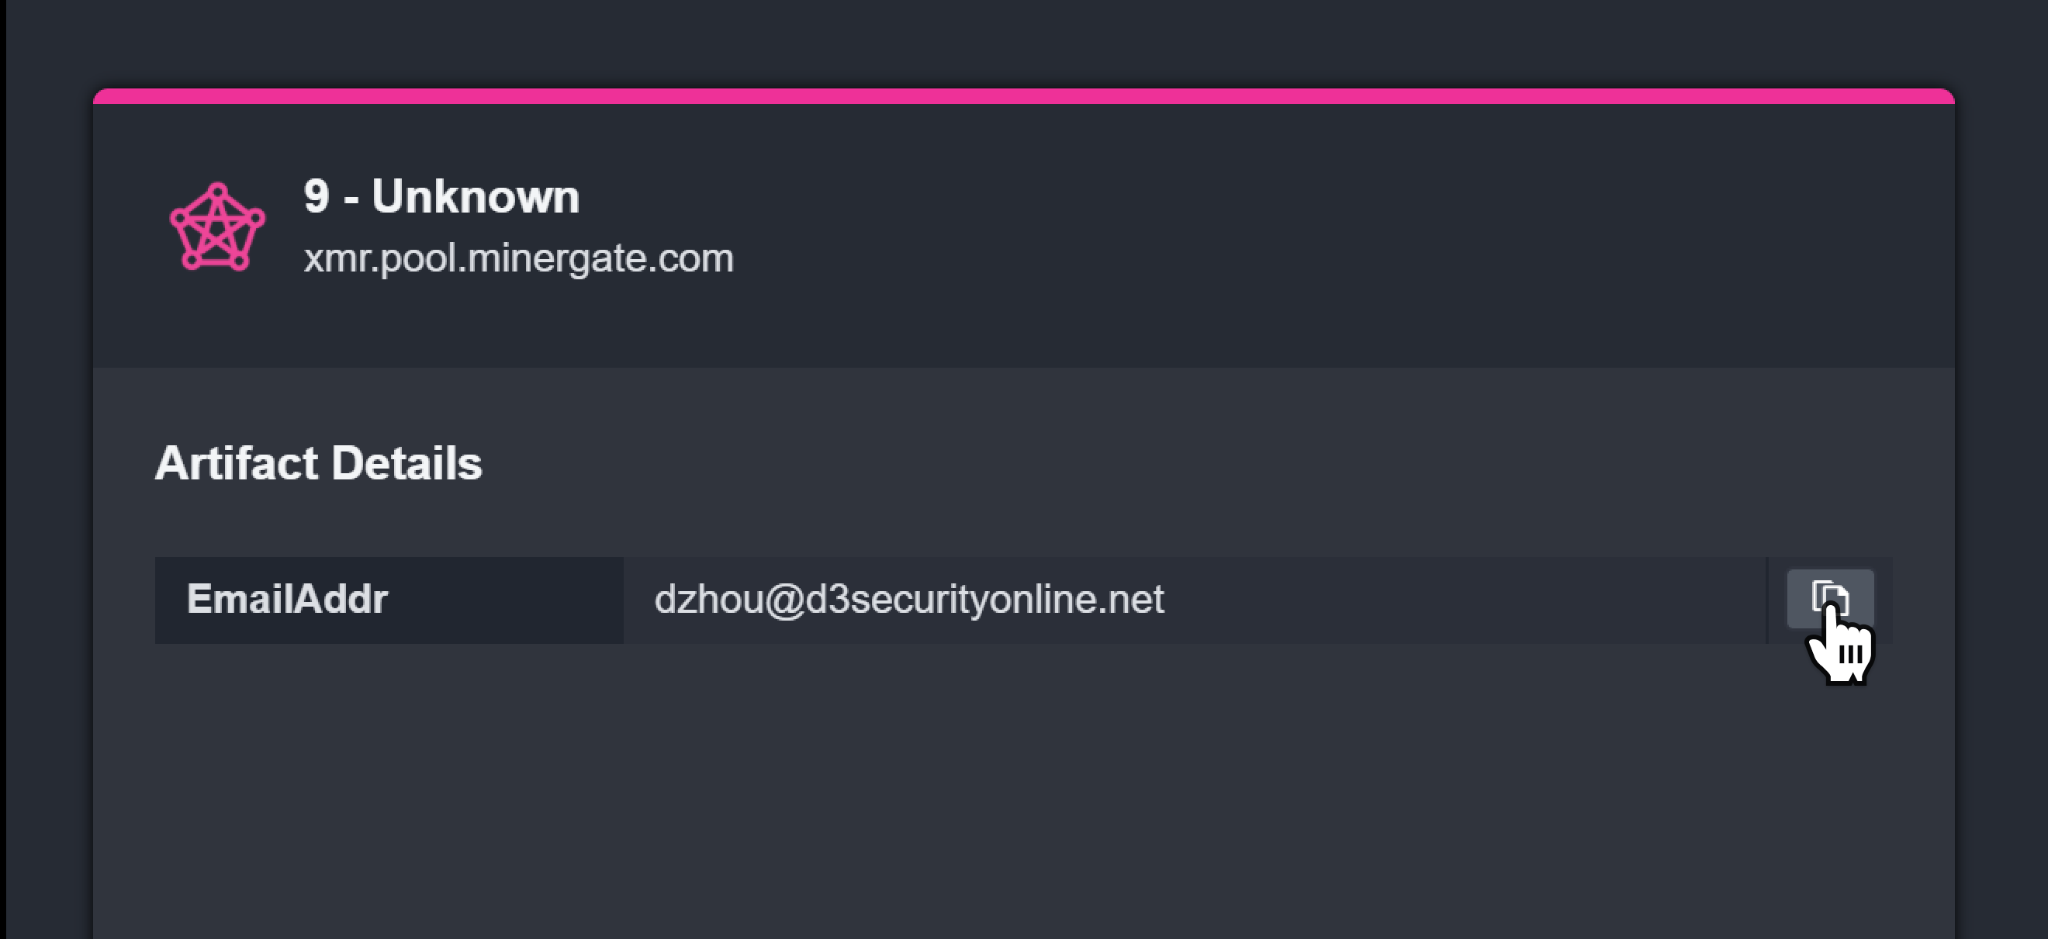
Select the desired Command.
Example: Email Address
Copy the Artifact Details needed for your Input Parameters.
Example: dzhou@d3securityonline.net
Paste it in the corresponding Input Parameters.

Click on Run.
Result
The results will be displayed in the Command Centre.
Key Findings
The Key Findings tab displays all relevant information about Artifacts, Tactic, Technique and Playbook Tasks. You can manually add an item to this list by clicking on Set as Key Finding on that item in the command centre.
Artifacts with Bad Reputation - Artifacts with a bad reputation (Low, Medium, High) at the time of ingestion will automatically be added to this list.
Technique Patterns - This table summarizes the technique search strings used to tag an event with a certain tactic and technique.
Tactics & Techniques - This table summarizes the Tactics & Techniques found in the events and the incident.
Key Playbook Tasks - Any Playbook Tasks set as a key finding will be displayed here
Incident Messaging
Incident messaging is used for SOC analysts to communicate with their colleagues about an incident's investigation. For MSSPs, incident messaging is used in conjunction with the MSSP client access portal to enhance the communication and collaboration between MSSP users and their clients. Highlighted features include:
Mentioning and Direct Messaging: You can use the mention functionality to send direct messages to other users within the D3 SOAR platform or to clients through the MSSP client access portal. For MSSPs, this ensures that clients only receive messages relevant to them, minimizing the exposure of sensitive information to unauthorized individuals. Clients are restricted from mentioning other users, ensuring that communication remains within the intended audience.
Requesting Approval: Approval messages can be sent to SOC managers or MSSP clients to request approval for specific actions. For MSSPs, this feature allows them to seek client input on actions that require their involvement. The client can respond directly from the messaging center, streamlining the approval process and promoting efficient collaboration.
Slack Integration: The messaging platform supports the forwarding of messages to Slack, enabling users to consolidate their incident investigation communication in one location. This feature allows for seamless transitioning between platforms without the risk of losing any critical information. Plans are underway to integrate with other messaging services in future versions of D3 SOAR.
Accessing Incident Messaging
The incident messaging feature is conveniently accessible through a persistent bar located at the bottom of the incident workspace user interface. This messaging bar remains visible regardless of the user's location within the incident workspace, ensuring easy access at all times. By simply clicking on the messaging bar, you can reveal and view any messages that have been sent within the specific incident's workspace.
Using @Mentions
If you want to send a direct message to someone, type the "@" symbol to reveal a list of users to message. When you use the "@" symbol to mention someone, the message will only be visible to them.
Sending Request Approvals
Clicking on the "Request Approval" button lets you send an approval request to a colleague in a SOC team or a client user. This action will automatically generate the message string "{{Request Approval}}" in the message bar, indicating that the message is an approval request. You can direct the message to a particular individual using an @mention, ensuring that only the designated person can approve or deny the request.
On the approver's side, they will have the option to accept or reject the approval message. When they make their decision, it will be tagged under the approval message along with their username and the timestamp of the approval. This helps provide a clear record of the approval process.
Setting Up the Slack Integration for Message Forwarding
To configure message forwarding to Slack, you need to set up a Slack integration connection and provide your authentication credentials as usual. If you have not set up an integration connection for Slack, you can do so by navigating to Configuration > Integrations > Slack > + Connection. Refer to the Slack integration document if you require more information.
Ensure that the option to "Allow messages to also be sent to Slack through this connection" is enabled. This will reveal the "Specify the receiving Slack channel name" field, where you can specify the name of the Slack channel you want to forward messages. It's important to note that the channel must be accessible by the authenticated API connection.
If everything is set up correctly, you will see the "Sent to third-party integration(s)" label under sent and received messages in incident messaging.
Reader Note
Message forwarding settings are set up on a per connection basis, allowing the configured settings to be accessible for the connection's' shared sites. You have the flexibility to configure multiple Slack connections and set up multiple message forwarding settings. Please note that this functionality is not supported by the MSSP client access portal.