Populating the Investigation Tab using Utility Commands
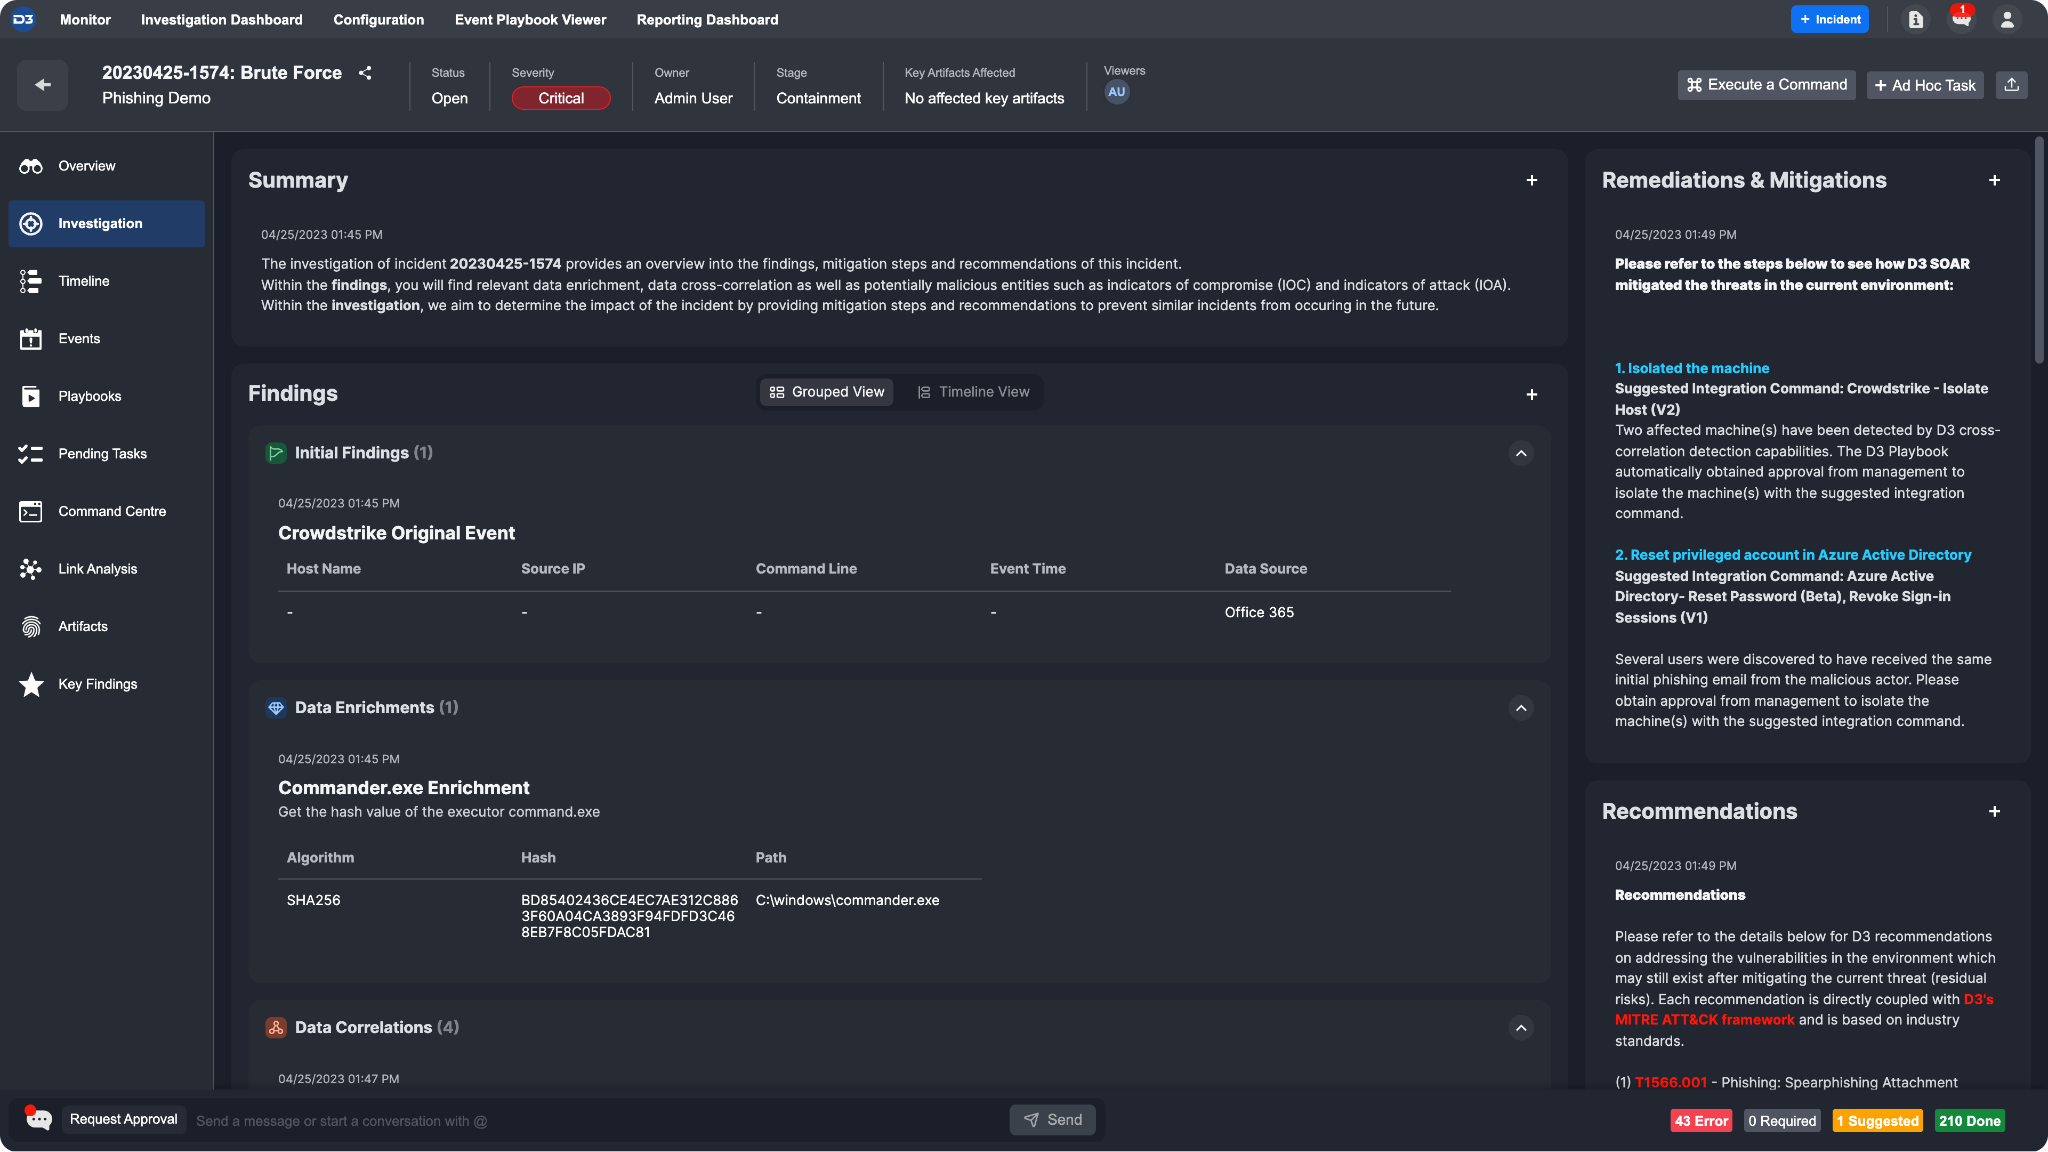
The Investigation Tab in the Incident Workspace allows analysts to enter and organize investigation details for a particular incident. This document will provide details about the utility commands that can be used in automated playbook workflows to populate the Investigation Tab with information. This automation feature saves time for SOCs who have a standardized process of recording certain investigation details.
Related Utility Commands
The following utility commands can be used to populate different data in the Investigation Tab. Both commands require input parameters to specify the site and incident number of the incident you want to populate, as well as the section of the Investigation Tab to modify. In addition, both commands have a parameter called "Investigation Detail in JSON," which requires a JSON input to define the data. More information is provided in the sections below defining the JSON objects for these commands.
Utility Command | Function |
|---|---|
Add Investigation Table Content | Adds data tables defined in JSON format to the relevant incident workspace. You can use this utility command to populate any of the sections in the Investigation tab, as well as highlight important key details. |
Add Investigation Details | Adds investigation details in HTML rich text to Summary, Remediations & Mitigations, Recommendations or Findings. If the selected option for the "Investigation Section" parameter is set to Findings: IOA (Indicator of Attack) or Findings: IOC (Indicator of Compromise), you can also populate link analysis with IOAs and IOCs. This information will be reflected in the IOA/IOC Link Analysis module under the Investigation Dashboard, Investigation tab and link analysis in the relevant incident workspace. |
Add Investigation Table Content
If you are inputting data tables into the sections, you must define a JSON object with a certain structure. The JSON object structure must consist of two main components:
"Fields" - A list of objects, where each object represents a field in the table. Each field object has two properties:
"Title" - A string representing the display name of the field.
"Name" - A string representing the name of the field.
"Data" - A list of objects, where each object represents a record in the table. Each record object has properties corresponding to each field in the table. The property names in each record object correspond to the field names defined in the "Fields" list.
Reader Note
In addition to the two required keys, there are three optional keys to define the JSON: "Title", "Description", and "Highlight". The "Title" and "Description" fields add text strings as the title and description for the table.
The "Highlight" key is an array that contains one or more objects, each defined with the following key-value pairs:
"Text":The single string element to colour."IsBold": A boolean key determining if the specified text is displayed in bold format."Color": The hex code of the color that to use for the text.
Sample JSON Input
An example JSON object used to define a data table is as follows:
{
    "Title": "Sample Datatable",
    "Description": "An example to add a table to investigation tab of an incident.",
    "Fields": [
        {
            "Title": "Name",
            "Name": "name"
        },
        {
            "Title": "Age",
            "Name": "age"
        },
        {
            "Title": "Address",
            "Name": "address"
        },
        {
            "Title": "Date",
            "Name": "date"
        }
    ],
    "Data": [
        {
            "name": "John Brown",
            "age": 18,
            "address": "New York No. 1 Lake Park",
            "date": "2016-10-03"
        },
        {
            "name": "Jim Green",
            "age": 24,
            "address": "London No. 1 Lake Park",
            "date": "2016-10-01"
        },
        {
            "name": "Joe Black",
            "age": 30,
            "address": "Sydney No. 1 Lake Park",
            "date": "2016-10-02"
        },
        {
            "name": "Jon Snow",
            "age": 26,
            "address": "Ottawa No. 2 Lake Park",
            "date": "2016-10-04"
        }
    ],
    "Highlight": [
        {
            "Text": [
                "John"
            ],
            "IsBold": true,
            "Color": "#42c765"
        }
    ]
}
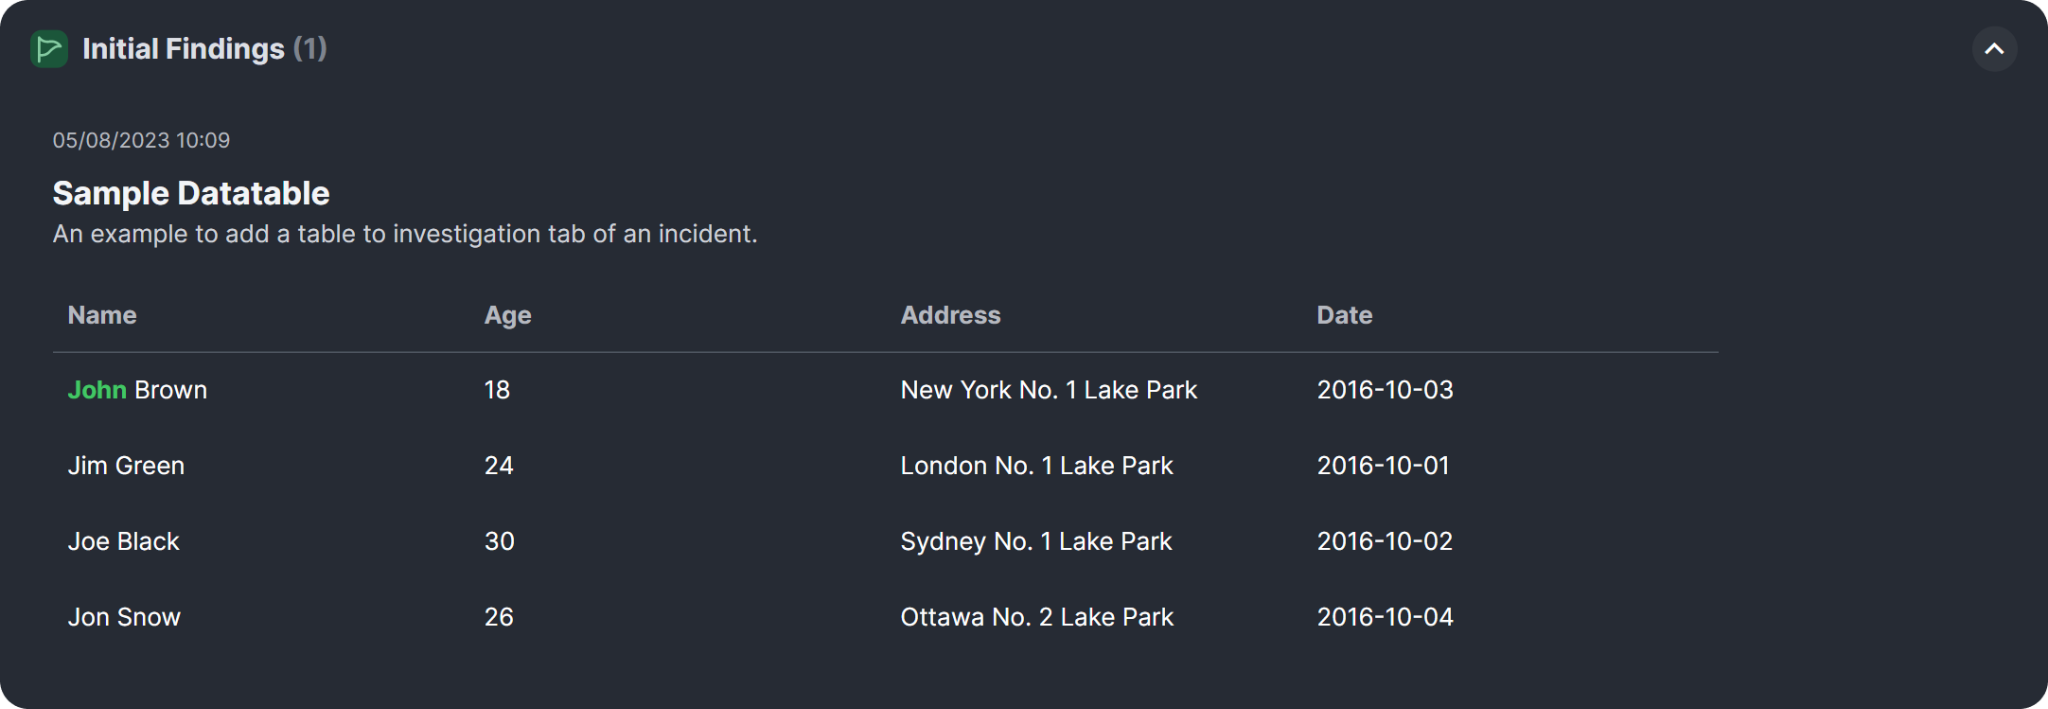
In this example, the table has three fields: "Name", "Age", and "Address". Each data record has four properties: "name", "age", "address", and "date", where "name", "age", and "address" correspond to the field names defined in the "Fields" list, and "date" is an additional property specific to each data record. The "Highlight" array specifies a text colouring rule for the datatable where the text "John" is to be bolded and coloured to green.
The resulting table will look like this:
Integrating with an Incident Playbook (Example)
The Add Investigation Table Content command can be extremely useful for breaking down important details from findings into a readable table and highlighting important information.
From the task details, fill in the Incident Number parameter by selecting dynamic input and the JSON path below:
{{ $.PlaybookData.DataSource.incident.IncidentNo }}Then, select the Investigation Section you wish to populate. In this example, we will write our data enhancement details into Findings: Initial Findings.
In the Investigation Details in JSON input, we will fill it with the sample JSON format as specified above. The fields we want to see here are the device_id, timestamp, filename and cmdline. For the data, we specified a JSON path that uses the returned data within the playbook, grabbing all the fields available. The table will be created by mapping the key value from the JSON path that matches the `"Name" `fields.
{
    "Fields": [
        {
  "Title": "Device",
  "Name": "device_id"
},
        {
  "Title": "Time",
  "Name": "timestamp"
},
        {
  "Title": "File",
  "Name": "filename"
},
        {
  "Title": "Command",
  "Name": "cmdline"
}
    ],
    "Data": [{{PlaybookData | jsonpath('$.["Data Input"].returnData[*]')}}]
}
Finally, select the Editing Type parameter, whether you want to add or overwrite the specified section.
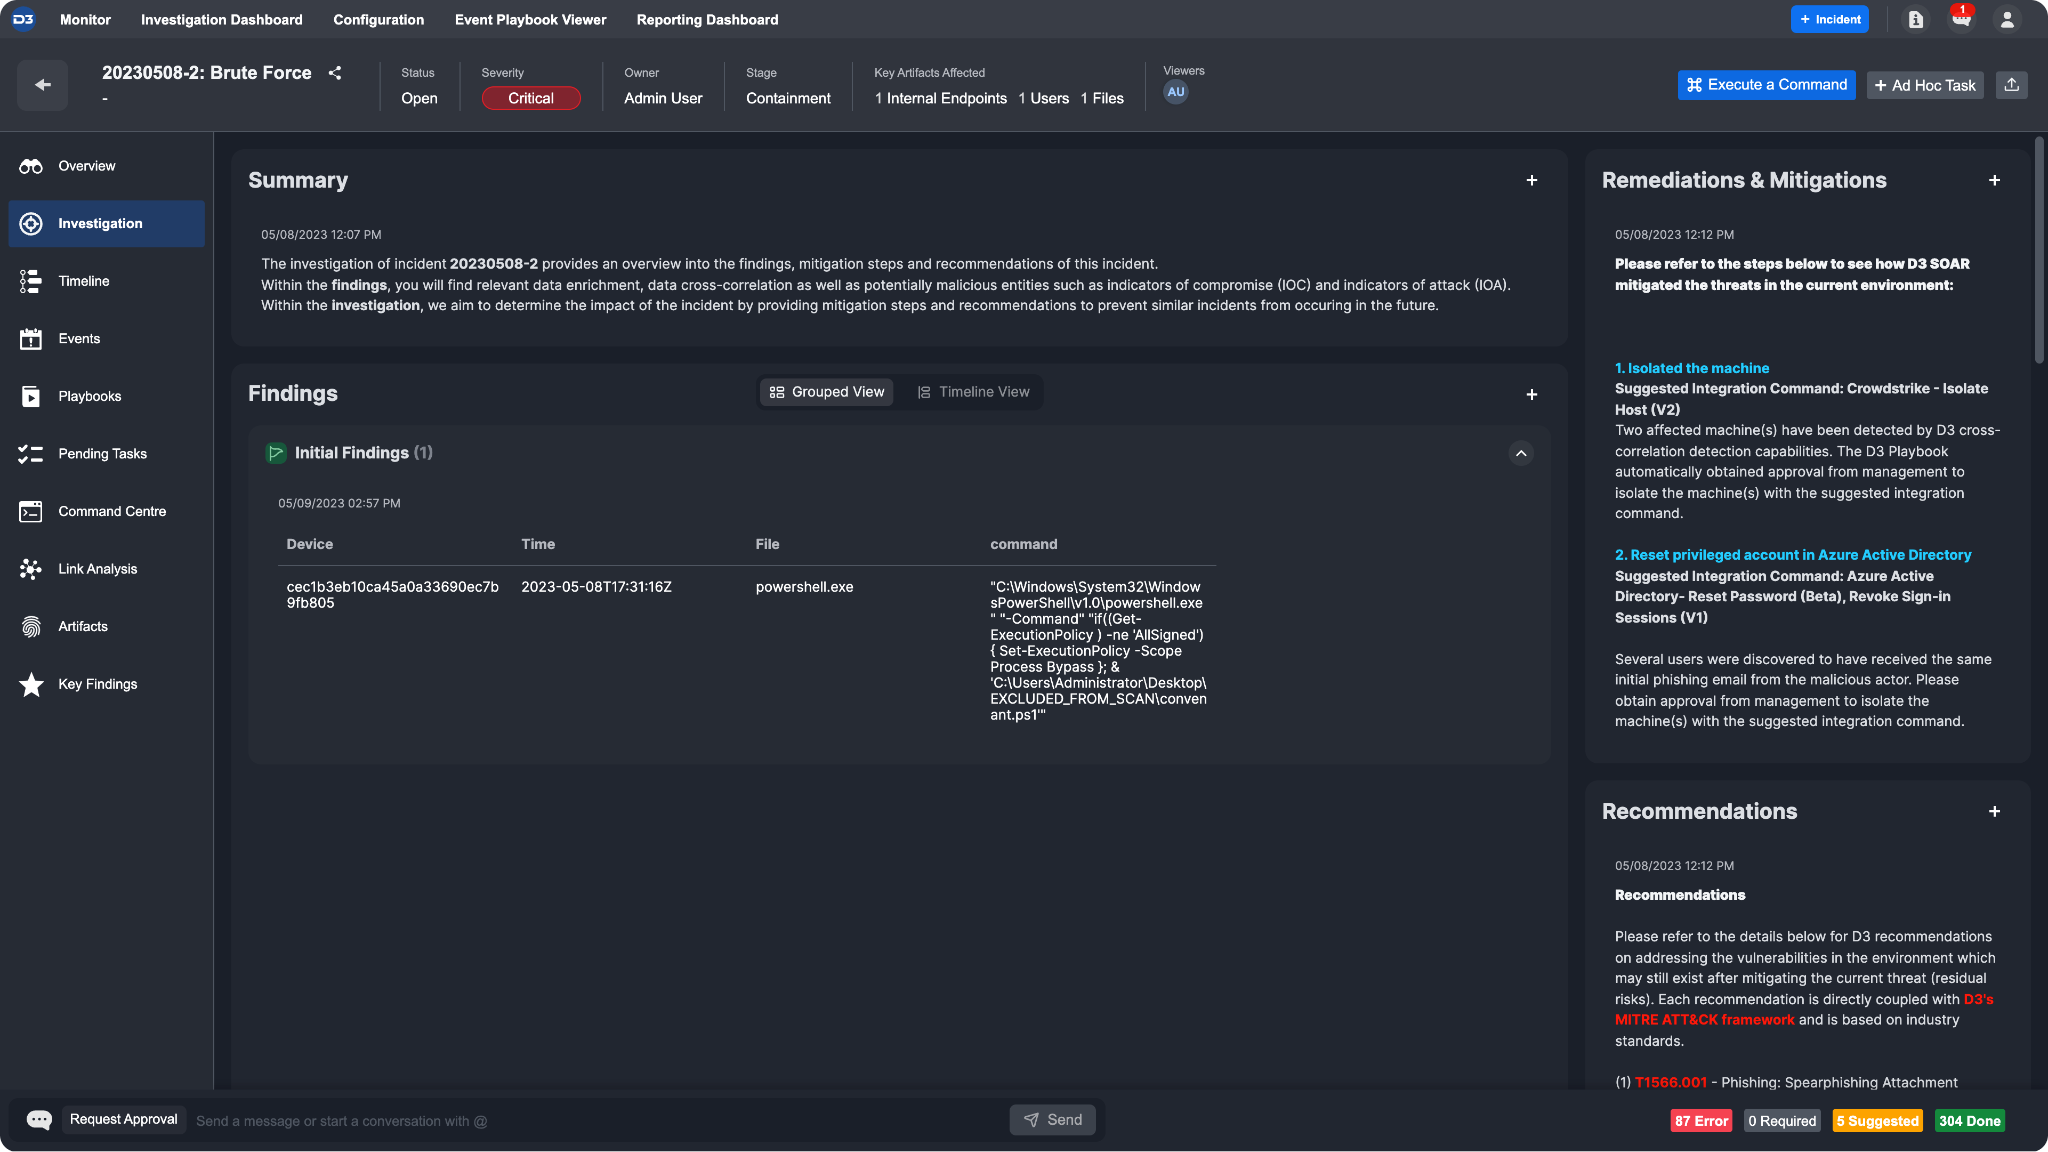
The final results of the data table you’ve created should be viewable within the Investigation tab.
Add Investigation Details
The Add Investigation Details utility command can be used to input HTML rich text to the Investigation Tab sections with the "Investigation Detail Content" input parameter. The section below provides more information on using the "Investigation Detail in JSON" to define IOA/IOC relationships displayed in the IOA/IOC Link Analysis module under the Investigation Dashboard.
Defining IOA/IOC Relationships
To define relationships between IOCs and IOAs, you need to select Findings: IOA (Indicator of Attack) or Findings: IOC (Indicator of Compromise) for the "Investigation Section" parameter and define the JSON object for the "Investigation Detail in JSON" parameter with the following structure:
{
  "Name": "",
  "Type": "",
  "DetectedUtcTime": "",
  "RelationData": [
    {
      "Type": "Relationship",
      "Direction": "",
      "Label": "",
      "Properties": "",
      "Start": {
        "Type": "Artifact",
        "Subtype": "",
        "Name": "",
        "Labels": "",
        "Properties": ""
      },
      "End": {
        "Type": "Artifact",
        "Subtype": "",
        "Name": "",
        "Labels": "",
        "Properties": ""
      }
    }
  ]
}"Name"represents the name of the entity."Type"indicates the entity type."DetectedUtcTime"indicates the UTC time when the entity was detected.
For the "RelationalData" key, each object in the array represents a relationship between two artifacts. This defines the artifact link info between the associated artifacts. The structure of each relationship object is as follows:
"Type"indicates the type of relationship. In this case, it is the static value of"Relationship"."Direction"indicates the direction of the relationship. The valid directions are"Forward","Backward", and"Bi-Directional"."Label"indicates the label of the relationship."Properties"contains additional properties of the relationship."Start"is an object that represents the starting artifact of the relationship. It contains several key-value pairs, including"Type"indicating the type of artifact,"Subtype"indicating the subtype of the artifact,"Name"indicating the name of the artifact,"Labels"which is an array of labels associated with the artifact, and"Properties"which contains additional properties of the artifact."End"is an object that represents the ending artifact of the relationship. It has the same structure as the "Start" object, representing the end artifact's type, subtype, name, labels, and properties.
Integrating with an Incident Playbook (Example)
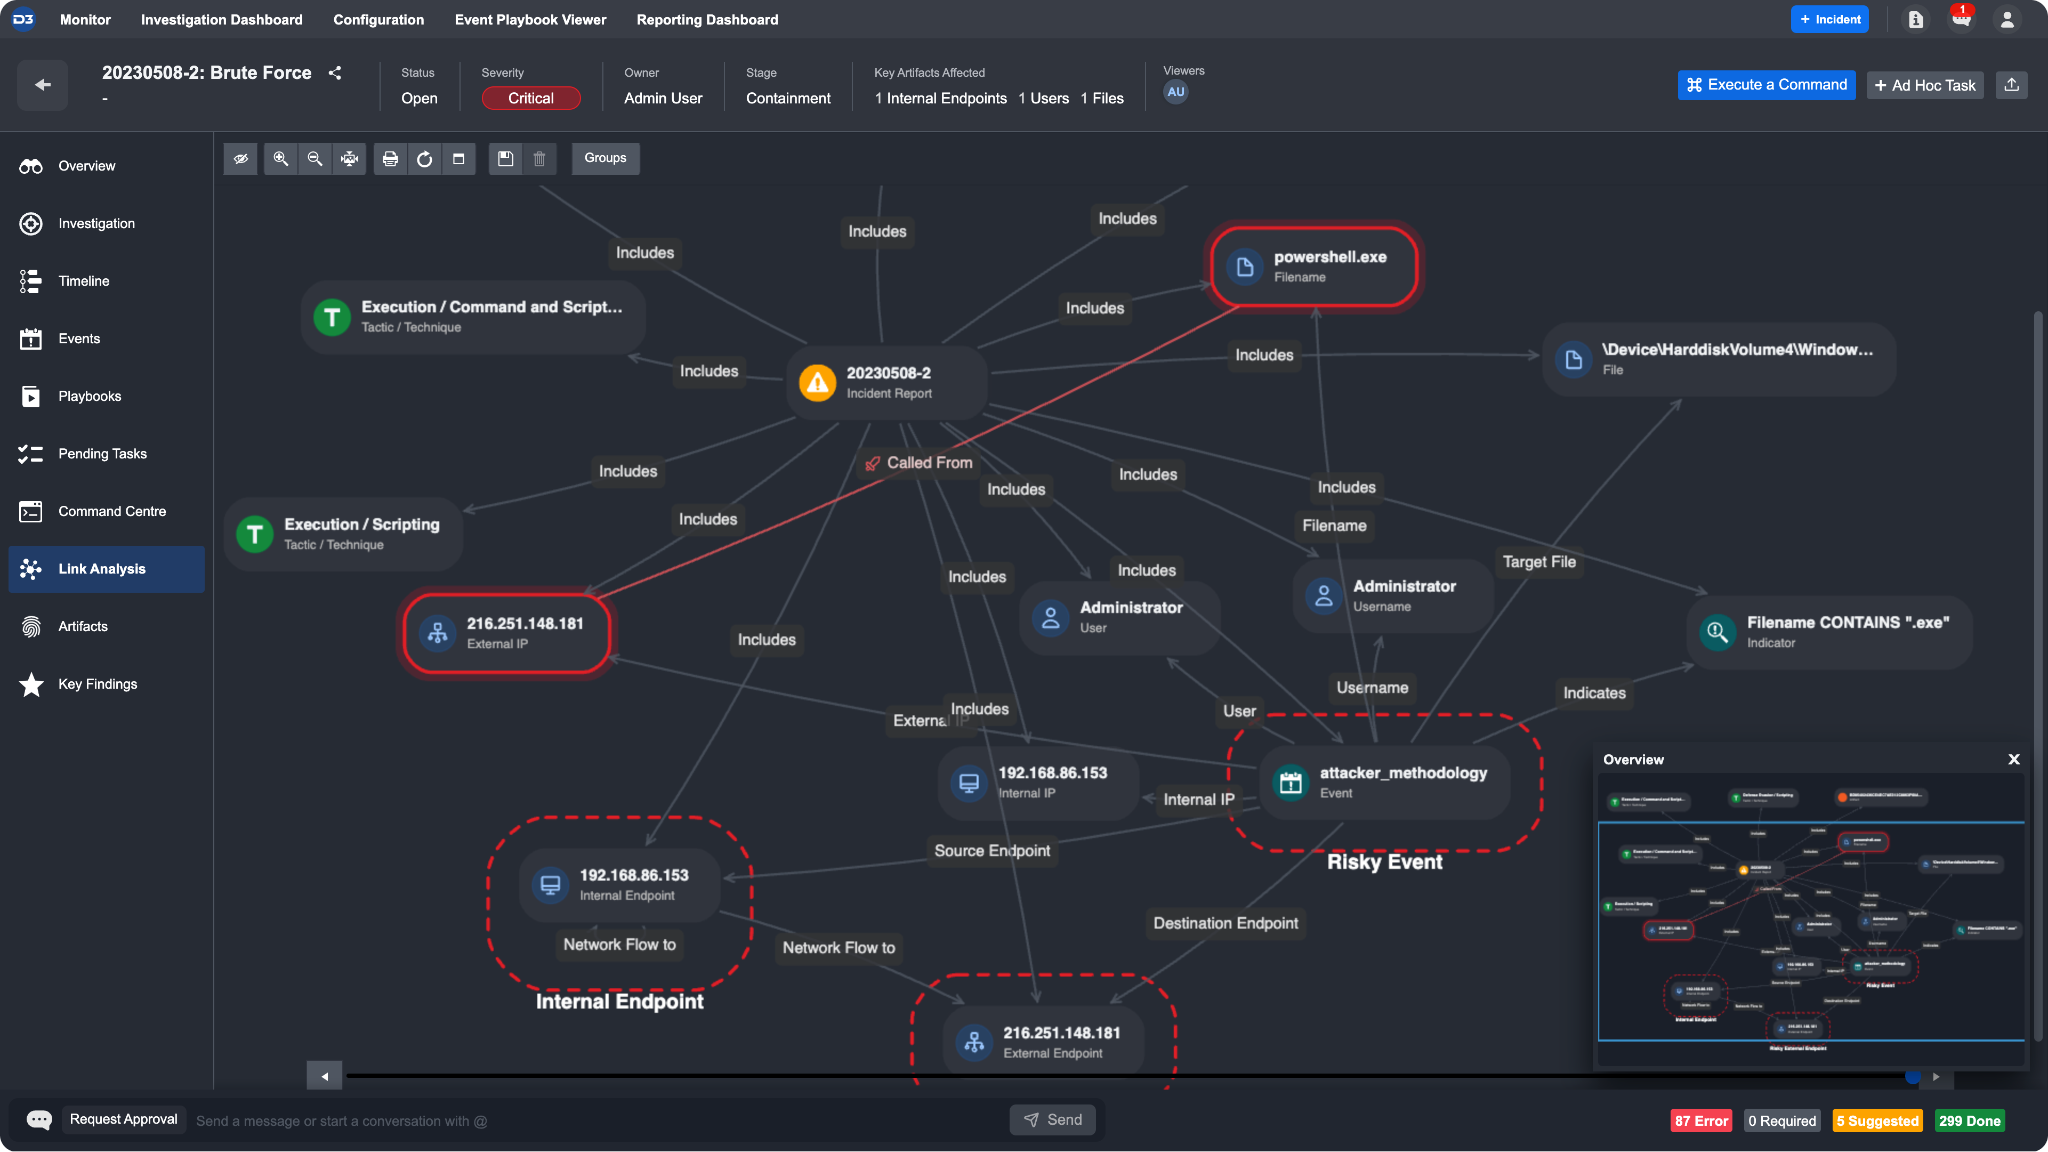
During an investigation, you may come across artifacts that act as Indicators of Attack or Compromise (IOA/IOC). These artifacts can be populated by connecting the playbook data to the "Add Investigation Details" command in order to populate link analysis and label the IOA/IOC finding within the Investigation tab.
In this example, we will demonstrate how to create a relationship between two IOAs.
Add the "Add Investigation Details" utility command as a playbook command task in your incident playbook.
From the task details, fill in the Incident Number parameter by selecting dynamic input and the JSON path below:
CODE{{ $.PlaybookData.DataSource.incident.IncidentNo }}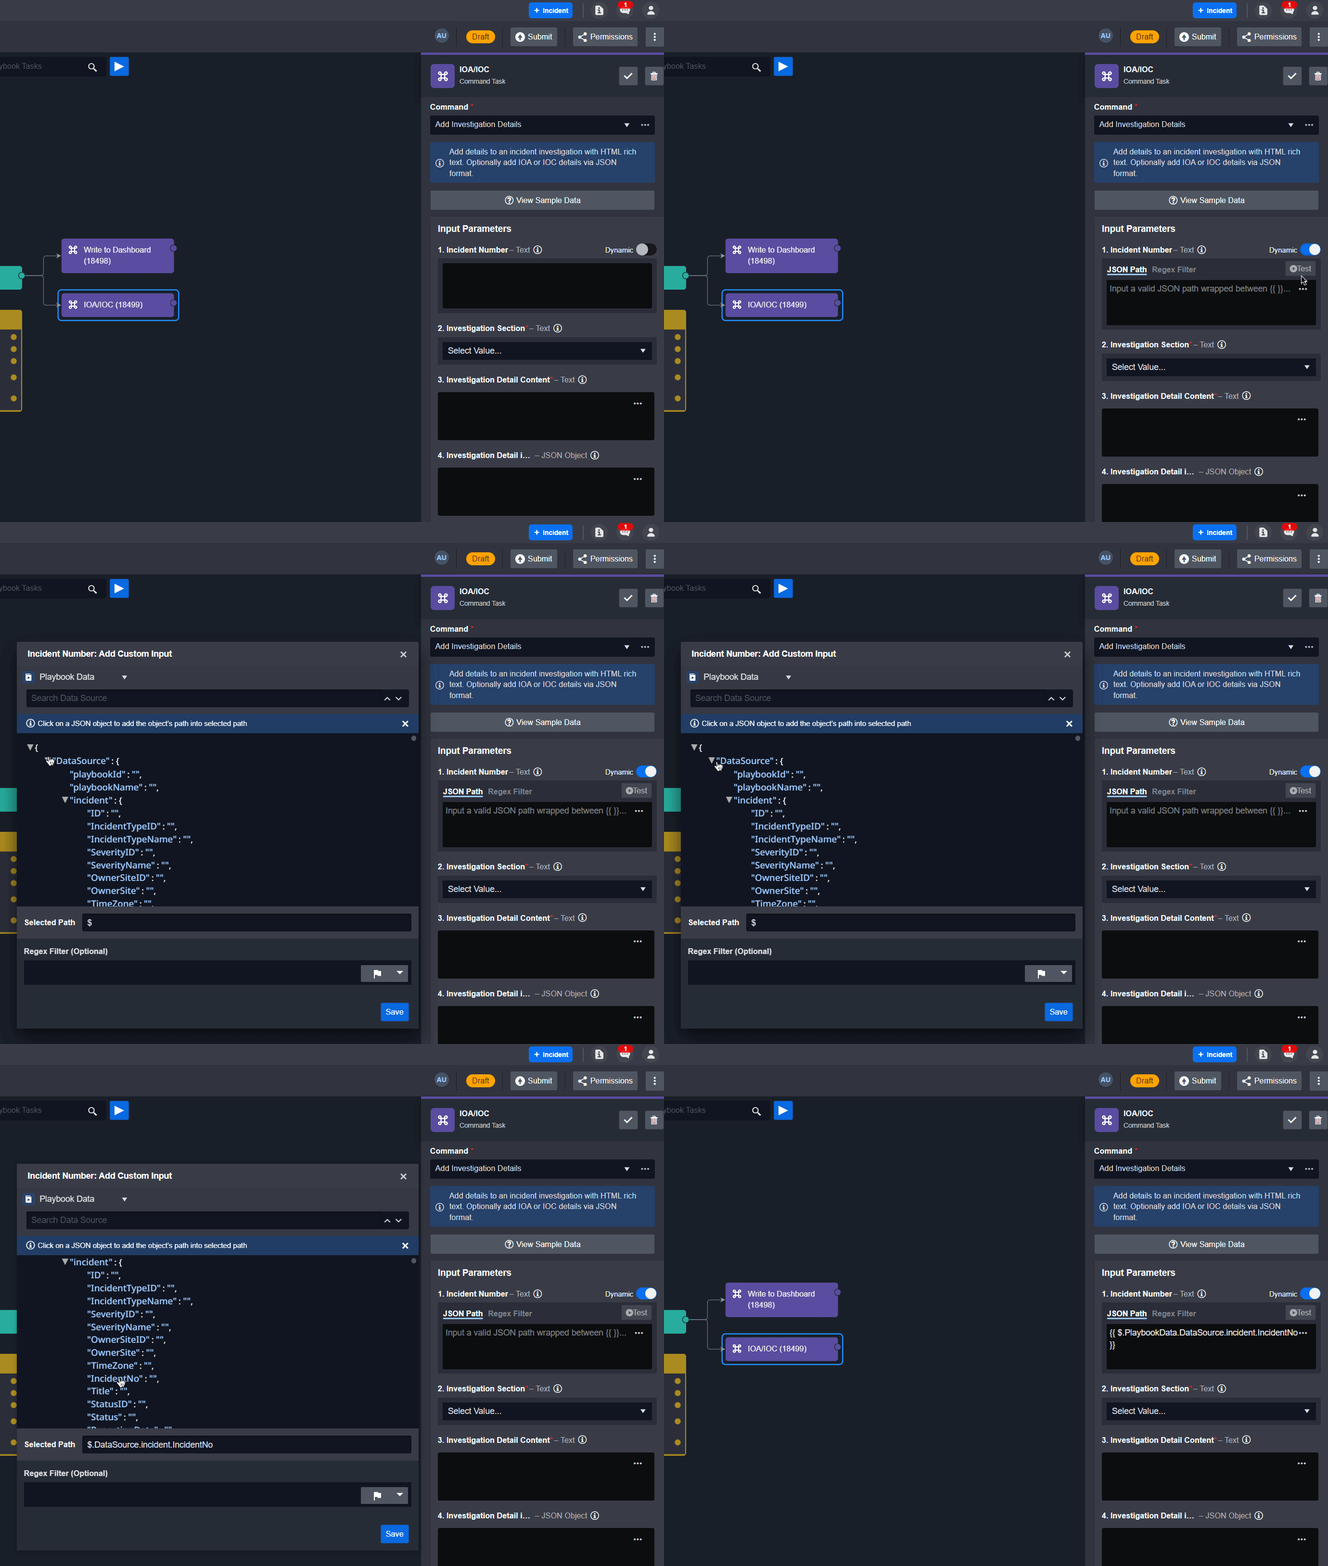
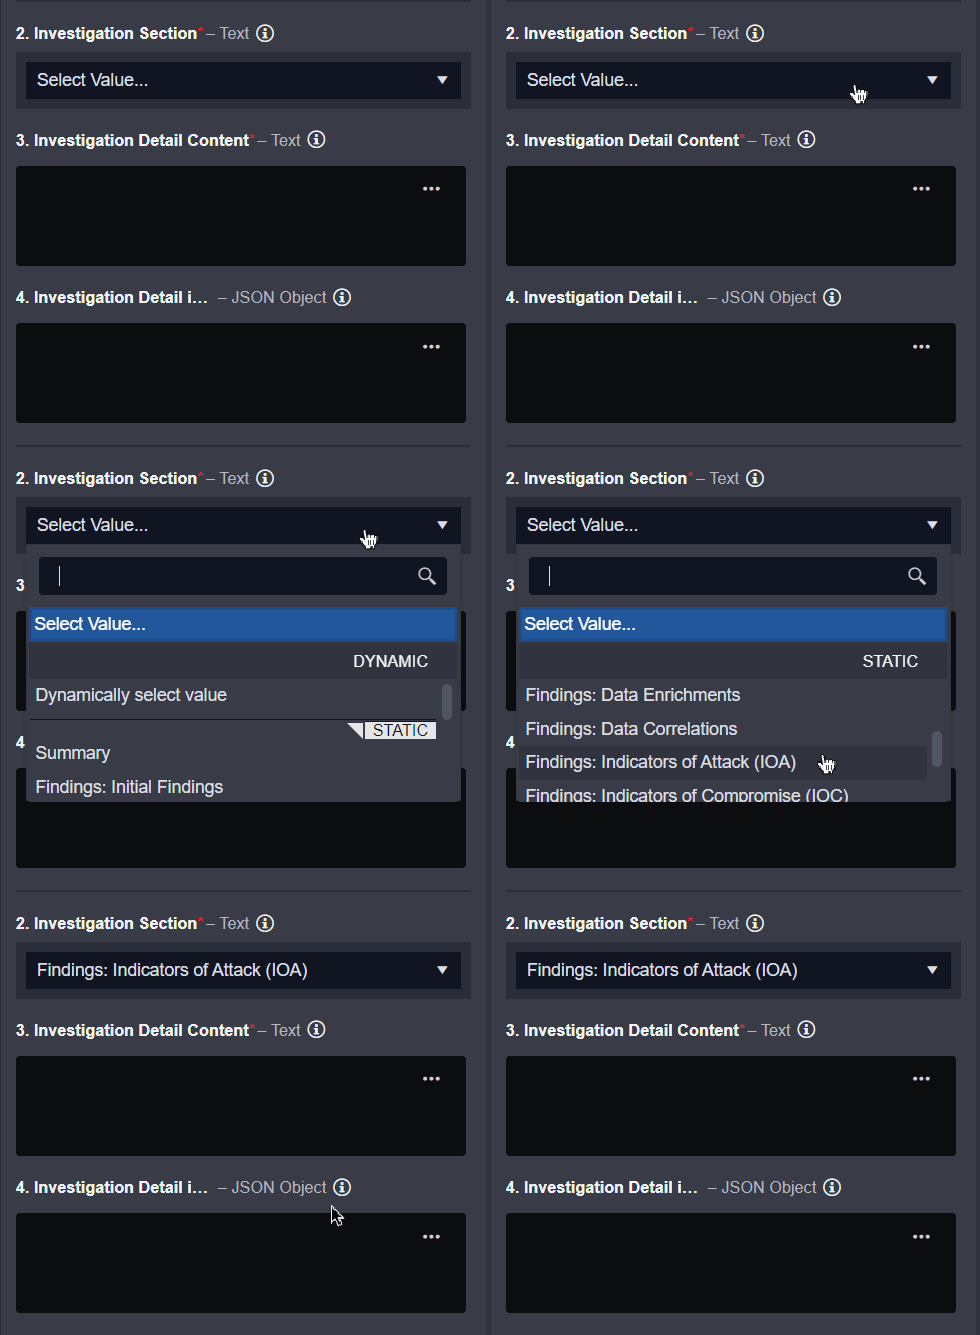
Select the Investigation Section you wish to populate. In this example, since we are creating an IOA and IOC relationship, we will write the results into Findings: Indicators of Attack (IOA).
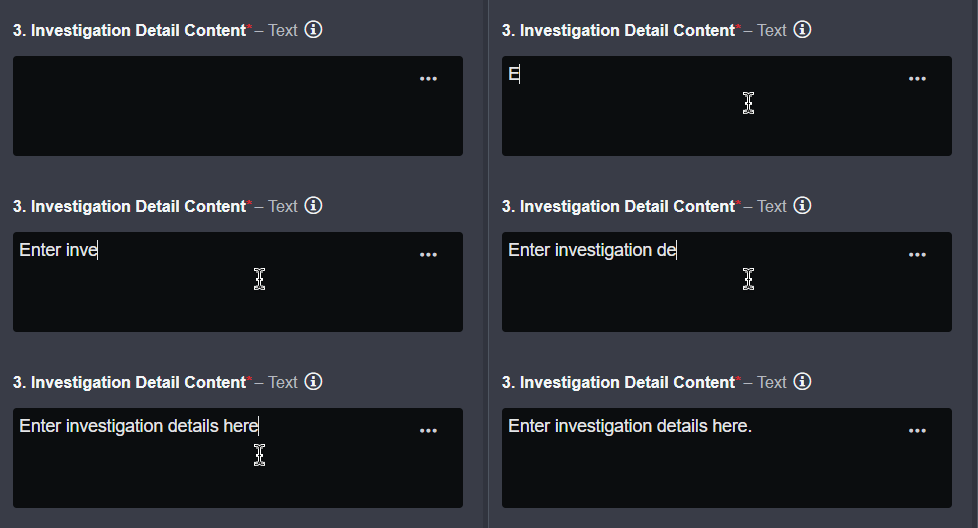
In the Investigation Detail Content parameter, you can add any piece of text or HTML you want to associate with this IOA. After the command runs, details in this input will be displayed in plain HTML in the Investigation tab, under Findings.
In order to create an IOA and/or IOC entity, you must fill the Investigation Detail in JSON field following the mentioned format. First, identify the artifact(s) you wish to label as an IOA. For this example, we will be specifying an IOA relationship between a File artifact and an External Endpoint.
Reader Note
To create an IOA or IOC, the associated artifact must already exist.
Enter the Jinja script below in the input to help identify the specific artifact types that we will create as an IOA. In the second and third lines, “value1'' and “value2” are paths that point to the artifacts found within the event that are considered as IOAs. The macro function is used to get the main JSON key of an object given the existence of a subkey value. Ultimately, it should set “subtype1” and “subtype2” as “Filename” and “ExternalIP”, respectively.
{% set path = PlaybookData | jsonpath('$.DataSource.incident.Artifacts[*]') %}
{% set value1 = PlaybookData | jsonpath('$.DataSource.incident.Artifacts[*].Filename[*].Identity') %}
{% set value2 = PlaybookData | jsonpath('$.DataSource.incident.Artifacts[*].ExternalIP[*].Identity')%}
{% macro getkey(jsonobject,value) -%}
{% set result = namespace(key = 0) %}
{% set keylist = path | list %}
{% set list = path.values()%}
{% for item in list %}
{% if item | jsonpath('$..Identity') == value %}
{% set result.key = loop.index0 %}
{% endif %}
{% endfor %}
{{keylist[result.key]}}
{%- endmacro -%}
{% set subtype1 = getkey(path,value1) | remove_substring("\n")%}
{% set subtype2 = getkey(path,value2) | remove_substring("\n")%}
Using the IOA/IOC JSON template above, populate the fields with the variables set above in the Jinja script, and pick JSON paths from the playbook data.
JSON{{{ "Name": "IOA Relationship", "Type": "Phishing email", "DetectedUtcTime": PlaybookData | jsonpath('$.DataSource.incident.ReportingDate'), "RelationData": [ { "Type": "Relationship", "Direction": "BiDirectional", "Label": "Called From", "Properties": { "property1":PlaybookData | jsonpath('$.["Data Input"].returnData[*].filename'), "property2": PlaybookData | jsonpath('$.DataSource.incident.Events[*].EventData.device.external_ip') }, "Start": { "Type": "Artifact", "Subtype": subtype1, "Name": PlaybookData | jsonpath('$.["Data Input"].returnData[*].filename'), "Properties": { "property1": PlaybookData | jsonpath('$.["Data Input"].returnData[*].filename'), "property2": PlaybookData | jsonpath('$.DataSource.incident.Events[*].EventData.device.external_ip') } }, "End": { "Type": "Artifact", "Subtype": subtype2, "Name": PlaybookData | jsonpath('$.DataSource.incident.Events[*].EventData.device.external_ip'), "Properties": { "property1": PlaybookData | jsonpath('$.DataSource.incident.Events[*].EventData.device.external_ip'), "property2": PlaybookData | jsonpath('$.["Data Input"].returnData[*].filename') } } }] }}}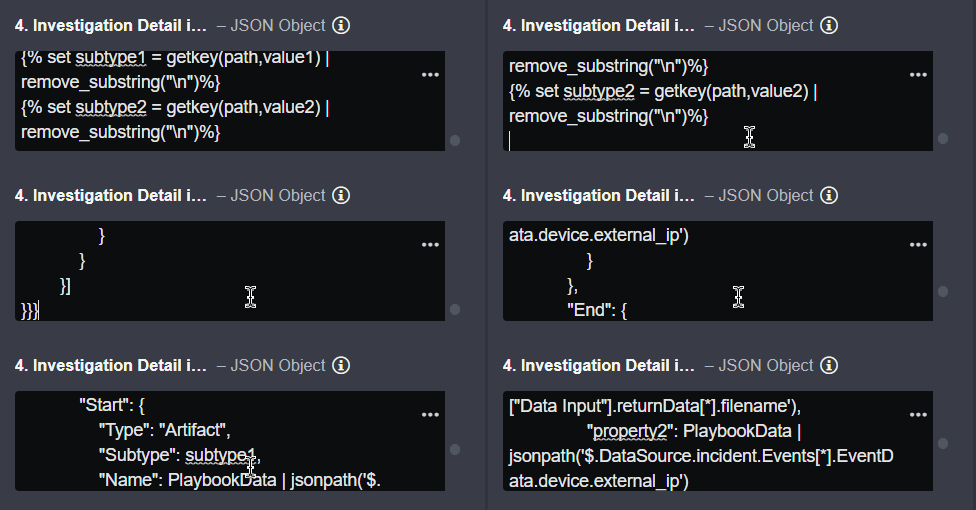
Reader Note
To generate playbook data paths, click on the ⋯ on the top right corner of the input, and then navigate to the Format Builder. Click through the JSON path you wish to use, and then click generate to create the Jinja.
Finally, select the Editing Type parameter to specify whether you want to add or overwrite the specified section. The IOAs created can be subsequently viewed in two locations:
The incident workspace link analysis:
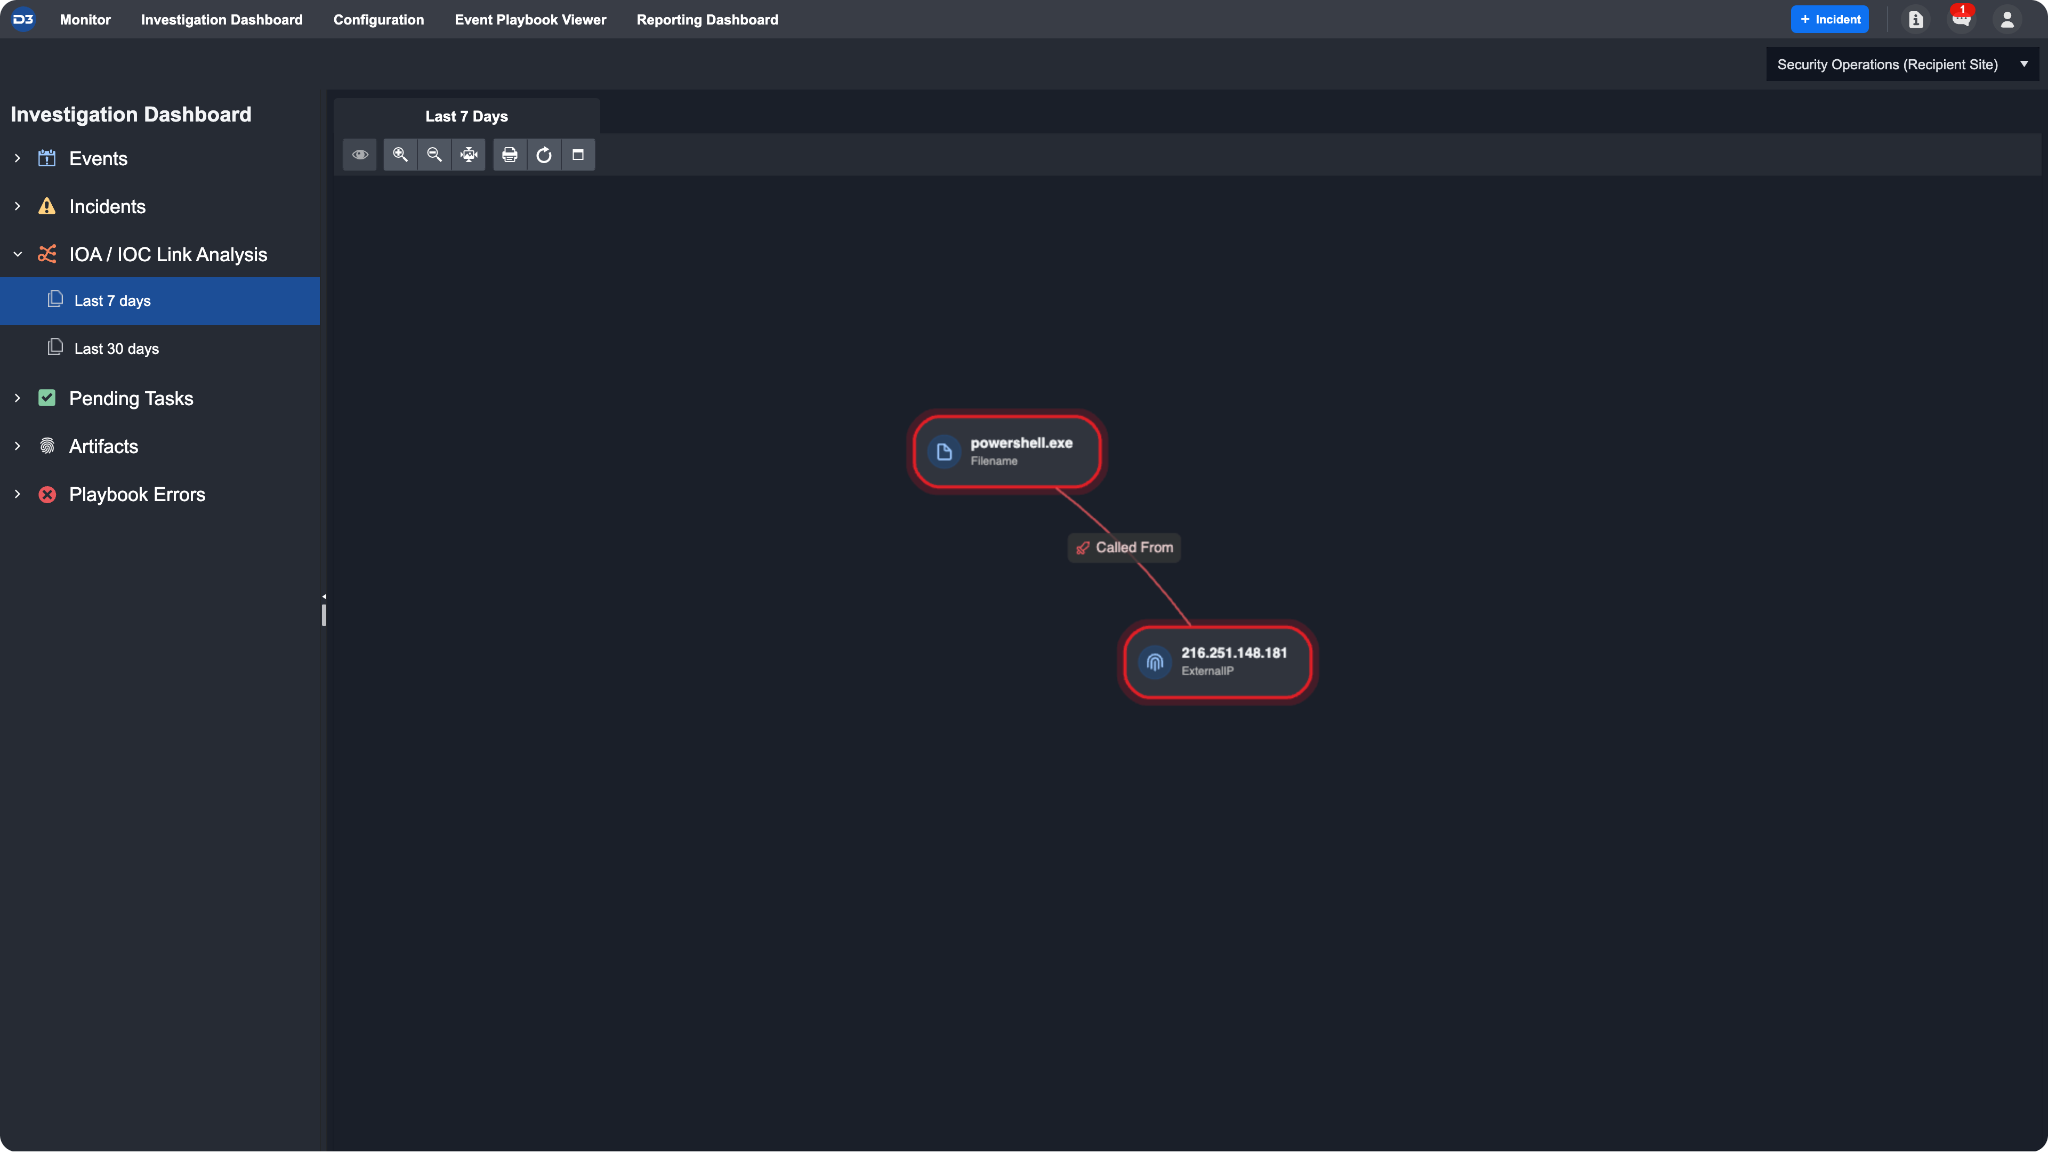
The investigation dashboard IOA/IOC link analysis:
