
Incident Form Editor
Overview
Incident forms are user-defined sections located in the incident workspace; each form belongs to a specific incident type. In the system, each incident form corresponds to an incident type. For example, if you create an incident form named “Unauthorized User Access”, there will be a corresponding incident type named “Unauthorized User Access” created. Incident Form Editor allows you to create custom forms for investigation.
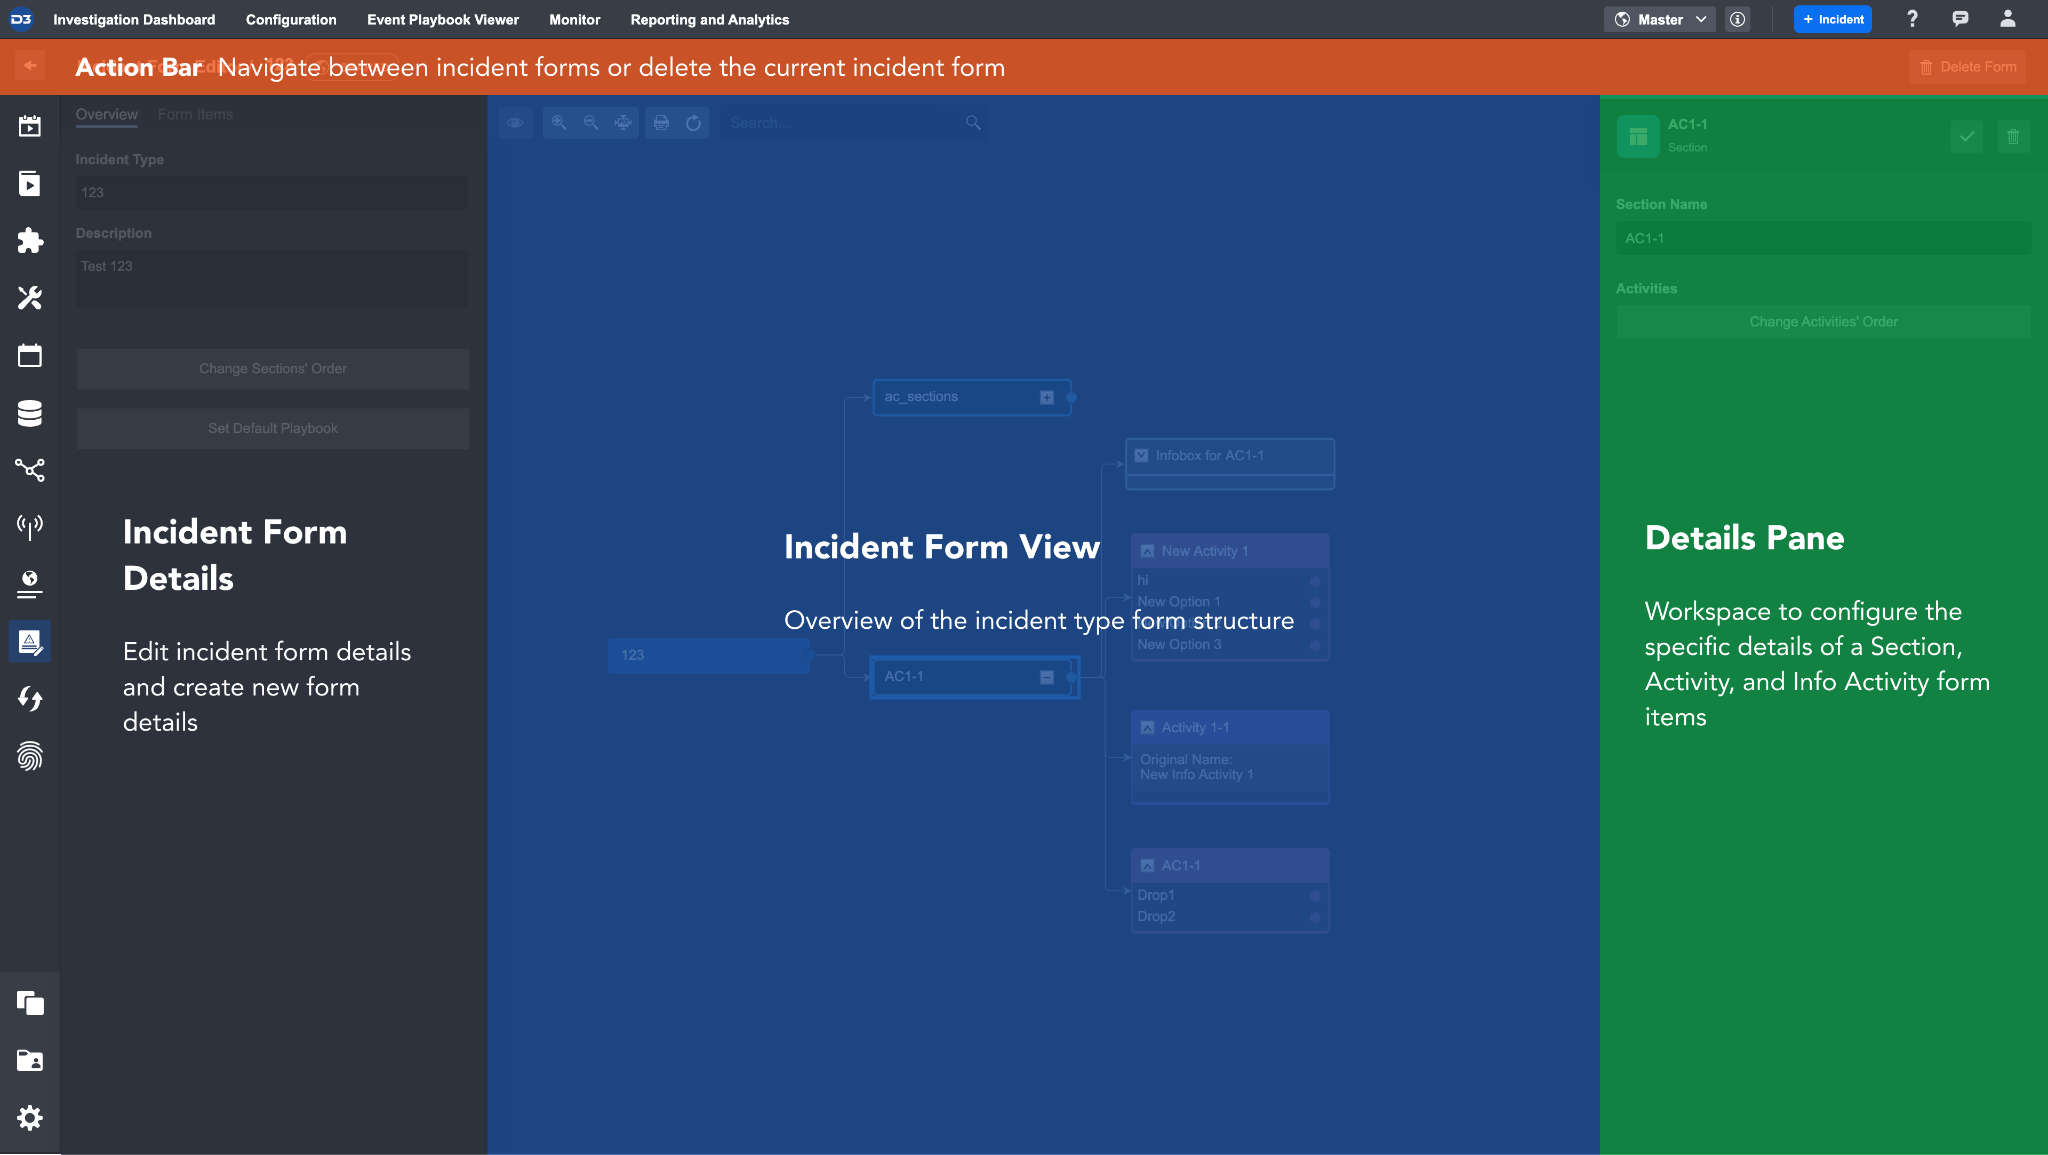
After clicking into a specific form, the Incident Form Editor’s interface includes the following sections:
Incident Form Details:
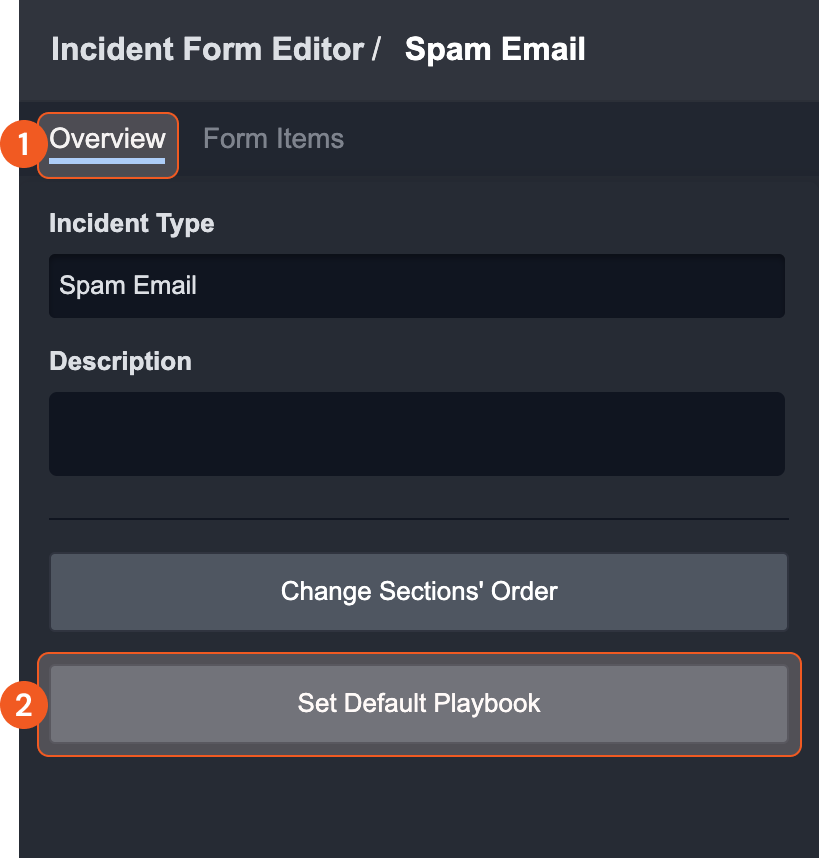
Overview: displays basic information (Name, Description, Incident Category…) of the selected Incident Form.
Form Items: provides tools to customize the Incident Form, with a list of ready-made Form Items which you can reuse to maximize efficiency.
Change Sections’ Order: customize the order of Form Item sections.
Set Default Playbook: select an existing playbook to be automatically applied to this Incident Type.
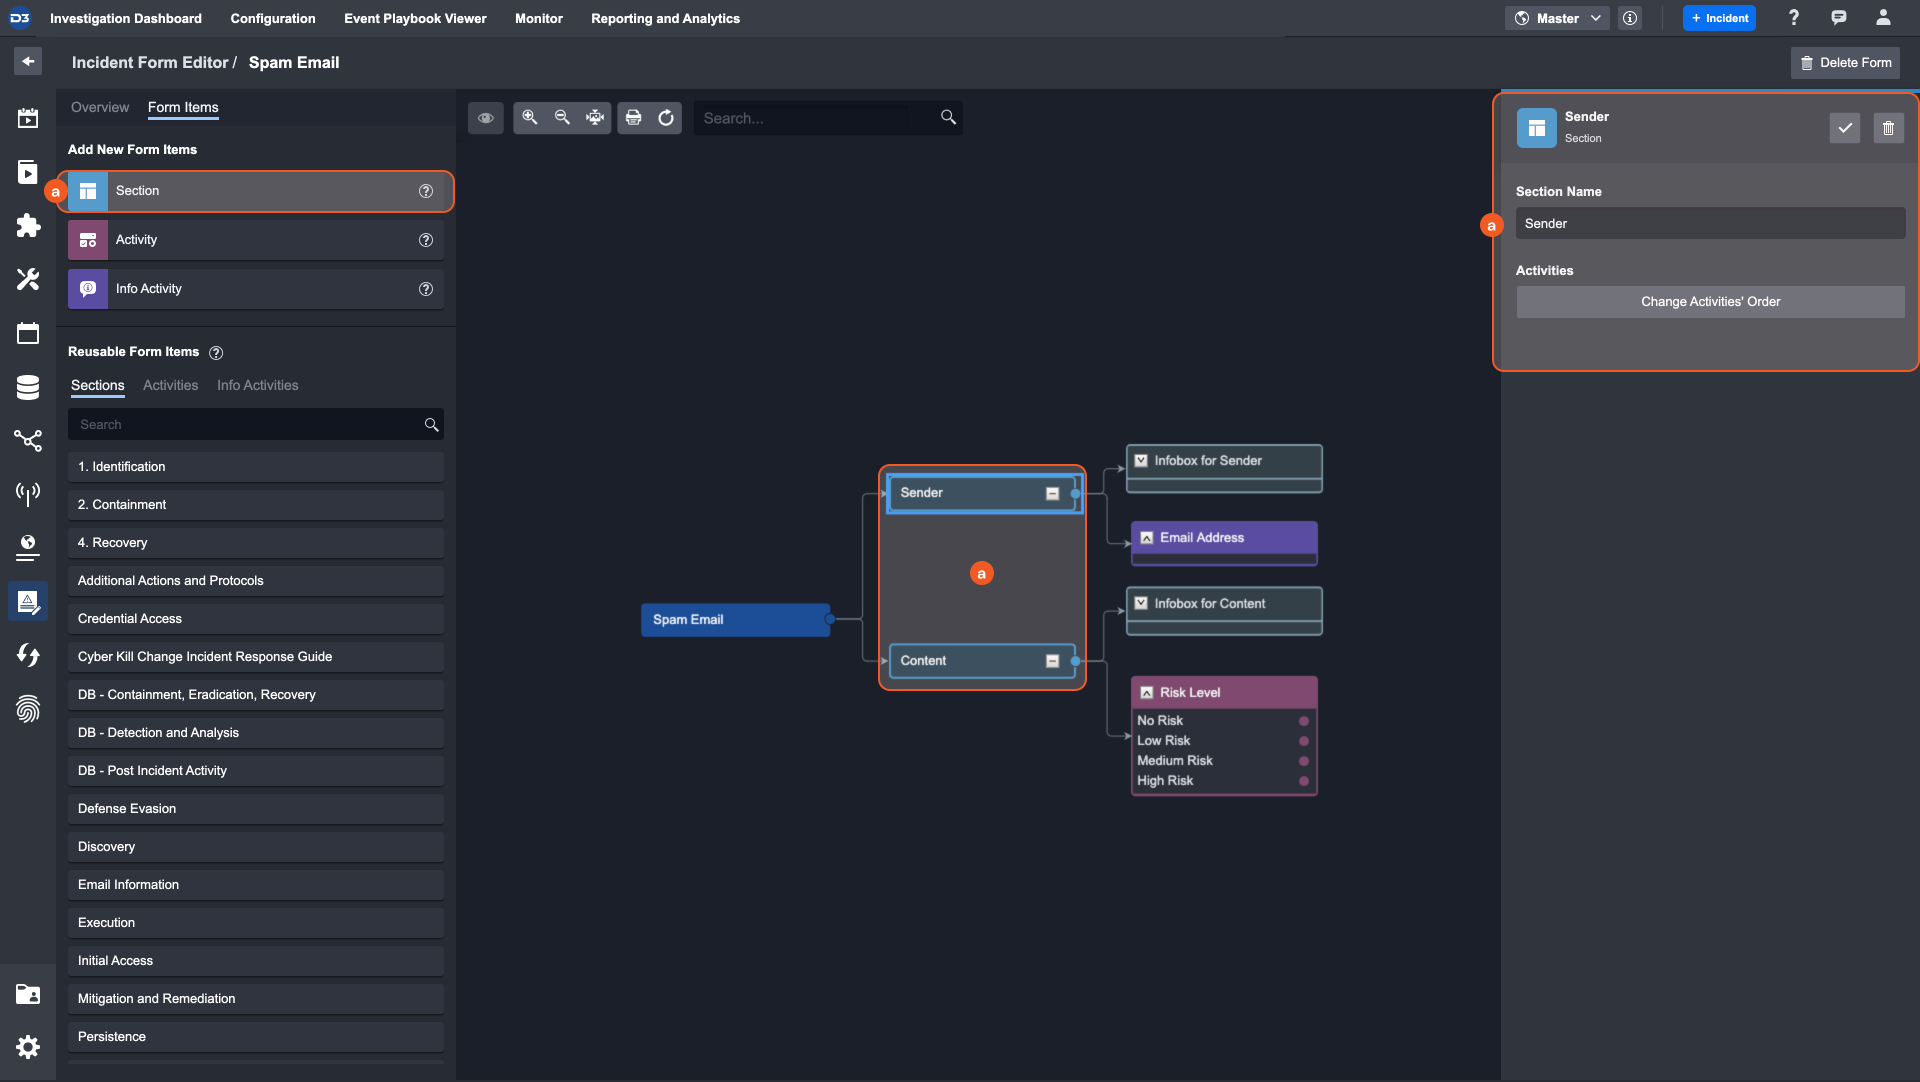
Incident Form View: The canvas area allows you to drag in and drop Form Items, and rearrange the flow and structure of your Form, similar to a playbook editor.
Details Pane: whenever an Item is selected, you can view and edit its details in this right side panel.
Incident Form Items
An Incident Form consists of the following Items:
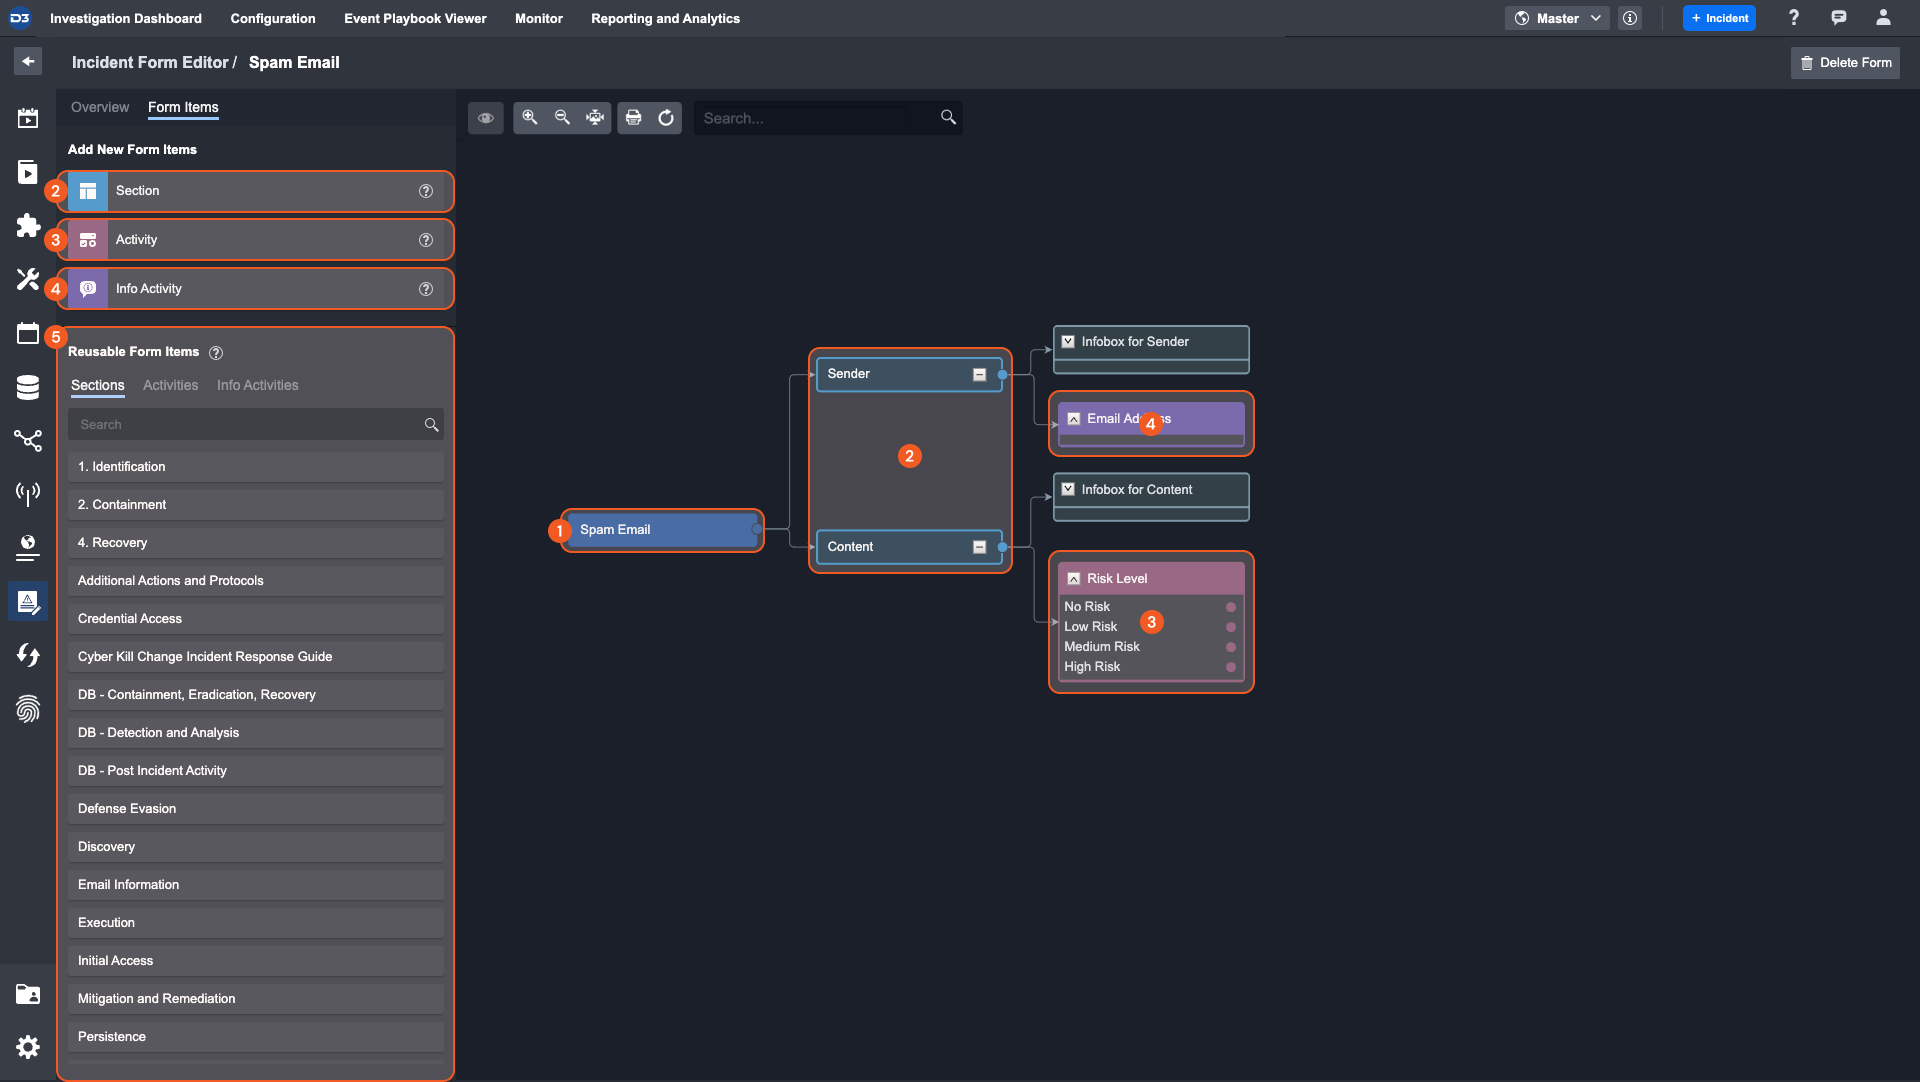
Root node—The starting point of all Incident Forms, and contains all other Form Items.
Section—The container for one or more Activity and Info Activities. This will become the label for an information field within an incident workspace. Sections automatically become reusable throughout other Incident Forms.
Activity—A collection of built-in form elements with selection options.
Example: checkbox, dropdown menu, radio box, etc.
The Activity must be created under a section. Each activity will allow you to configure its options. Additional activities can be connected to an activity option.
Info Activity—Is a:
Formatted input types or
Example: country list dropdown, calendar and time control, etc.Text-entry input types.
Example: email text box, phone number text box, numeric text box, JavaScript-enabled text field, etc.
Info Activity must also be connected to a section or an activity option.
Reusable Form Items—Any form item that is created can be easily accessed here for reuse.
Configuring Incident Forms with the Incident Form Editor
The purpose of configuring a custom incident form is to provide supplementary information about an incident in the Incident Workspace. Below is a simple guide on navigating the creation of a new incident form, but this can be expanded to other use cases, such as providing feedback from playbook tasks.
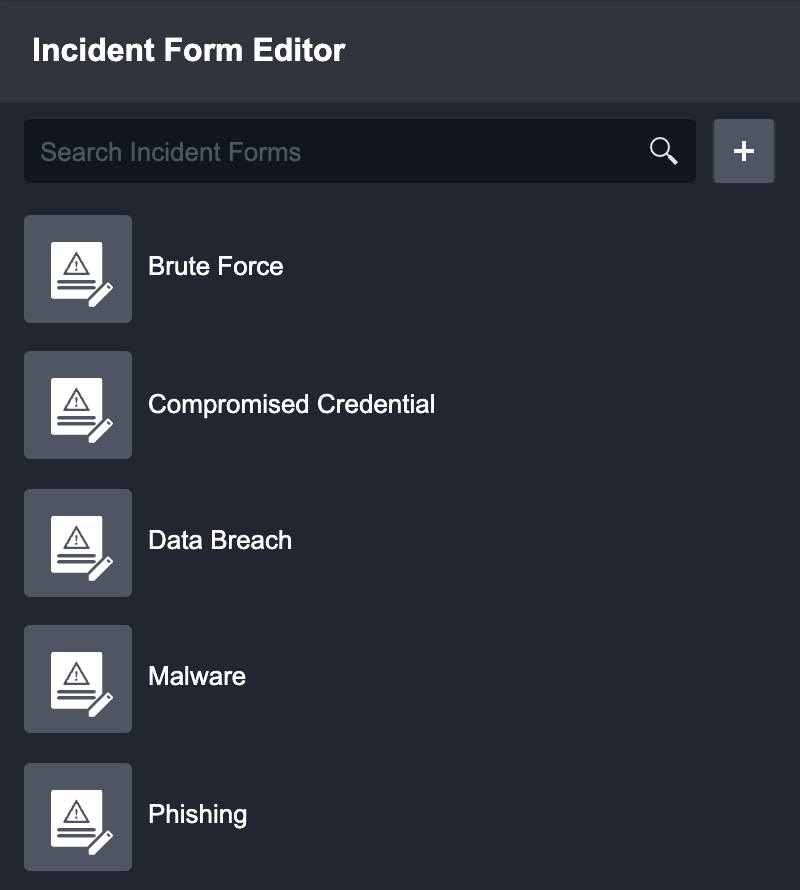
To Create a New Incident Form:
Click on the + icon. A pop-up modal will appear. Fill out the Incident Type Form Name in the modal. The Incident Form name will be used to determine Incident Type.
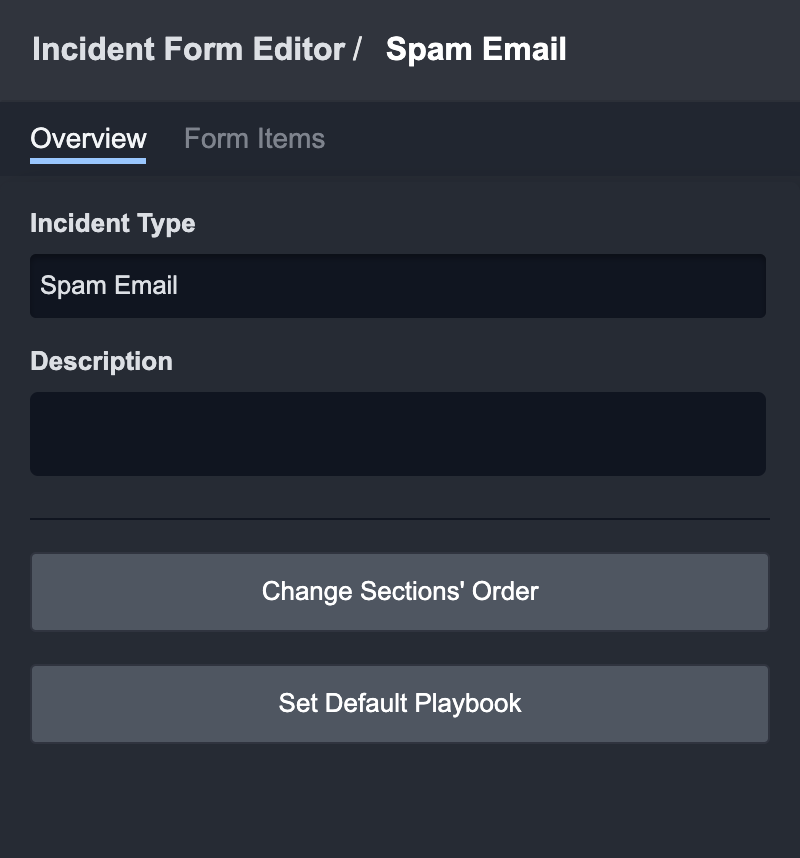
In the Overview tab, you can edit the Incident Type and provide a Description.
In the Form Items tab, drag-and-drop the relevant dynamic form components to the centre editing workspace.
Section - This will become a top-level category, with the label reflected in incident workspace. An incident type must have at least one section. Sections can be expanded or collapsed in view.
Activity - Activities can be connected to a section or an activity option. They are fields that can be configured eventually in incident workspace. Activity fields include selection fields such as: Dropdown, Checkbox, Radio Buttons.
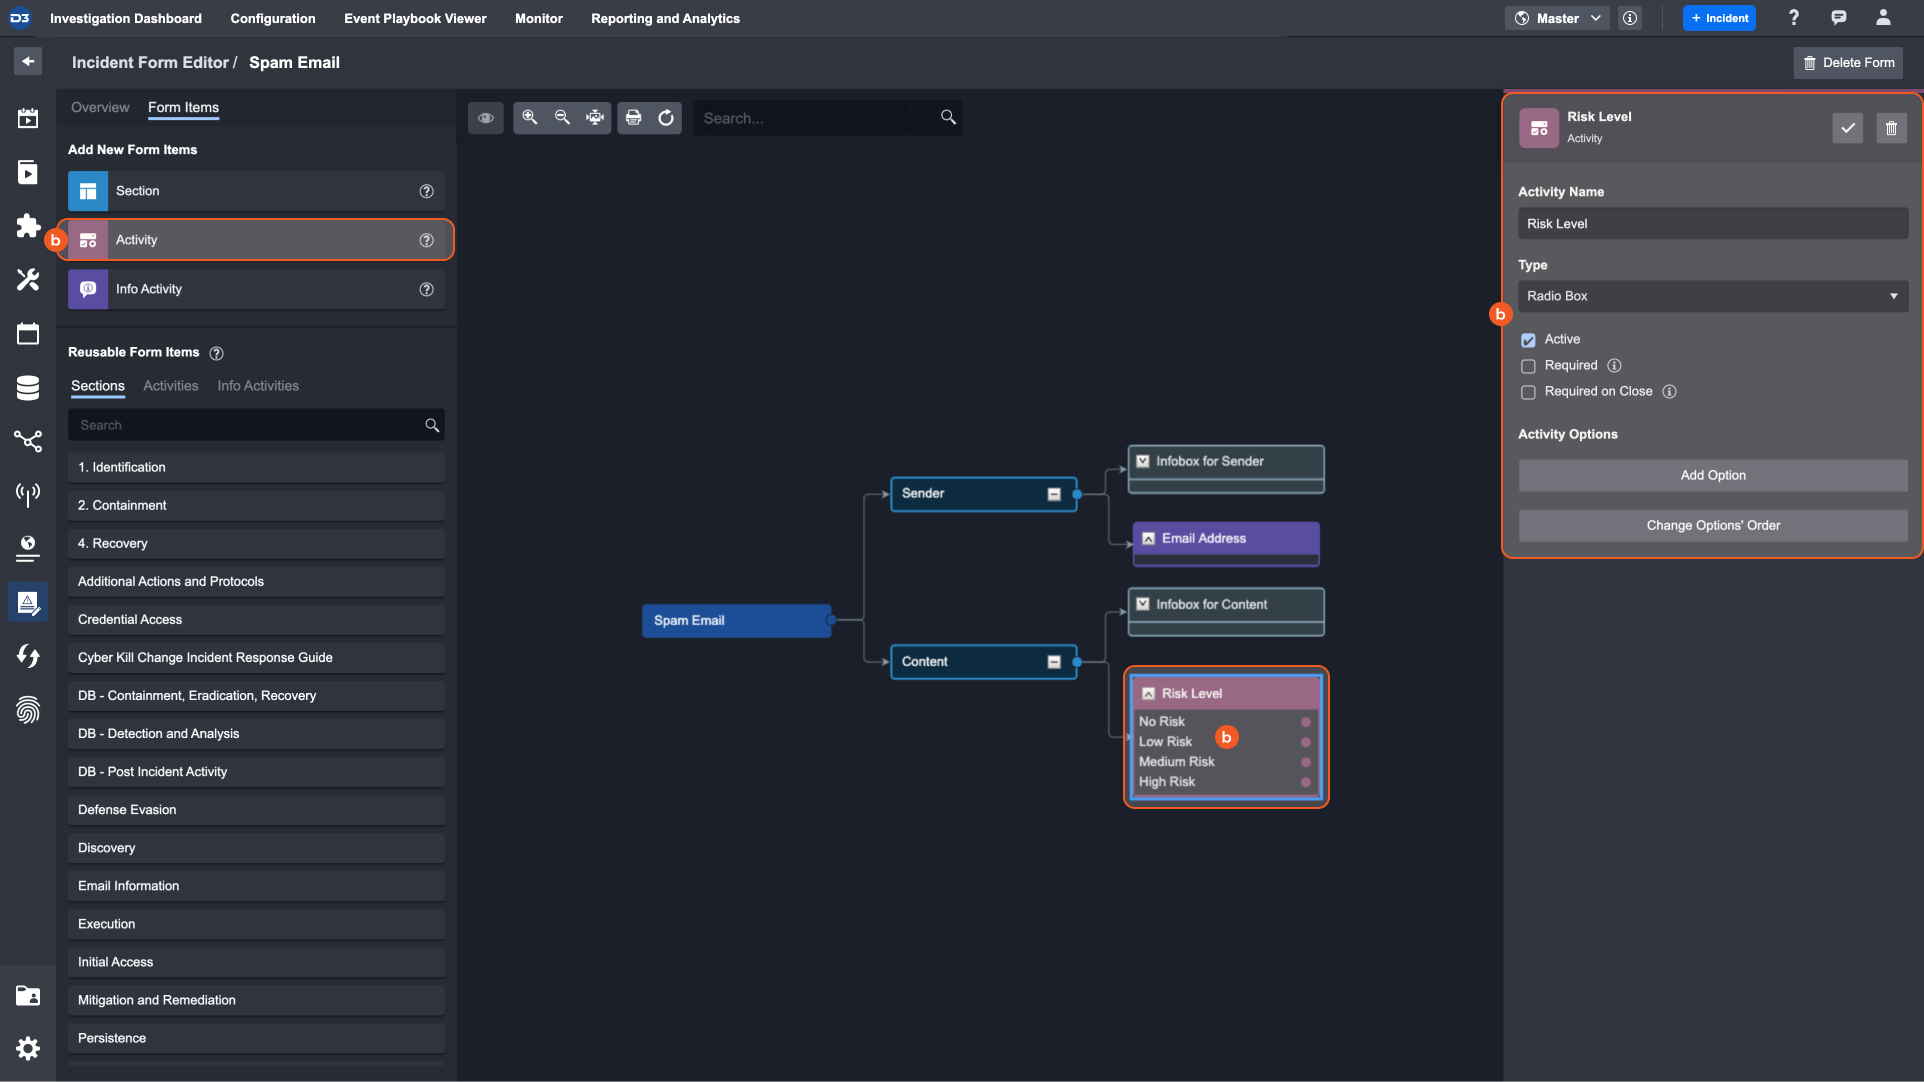
Enter the name of the activity, and select a field type. You can activate the activity, make it required or make it required on close.
For an activity, each option within a field is customizable by clicking Add Option.
For example, an activity could be a radio box to determine Risk Level, with a few options: No Risk, Low Risk, Medium Risk, or High Risk.
Info Activity - Info Activities can be connected to a section or an activity option. These are similar to an activity but provide fields that are either formatted inputs or text-inputs.

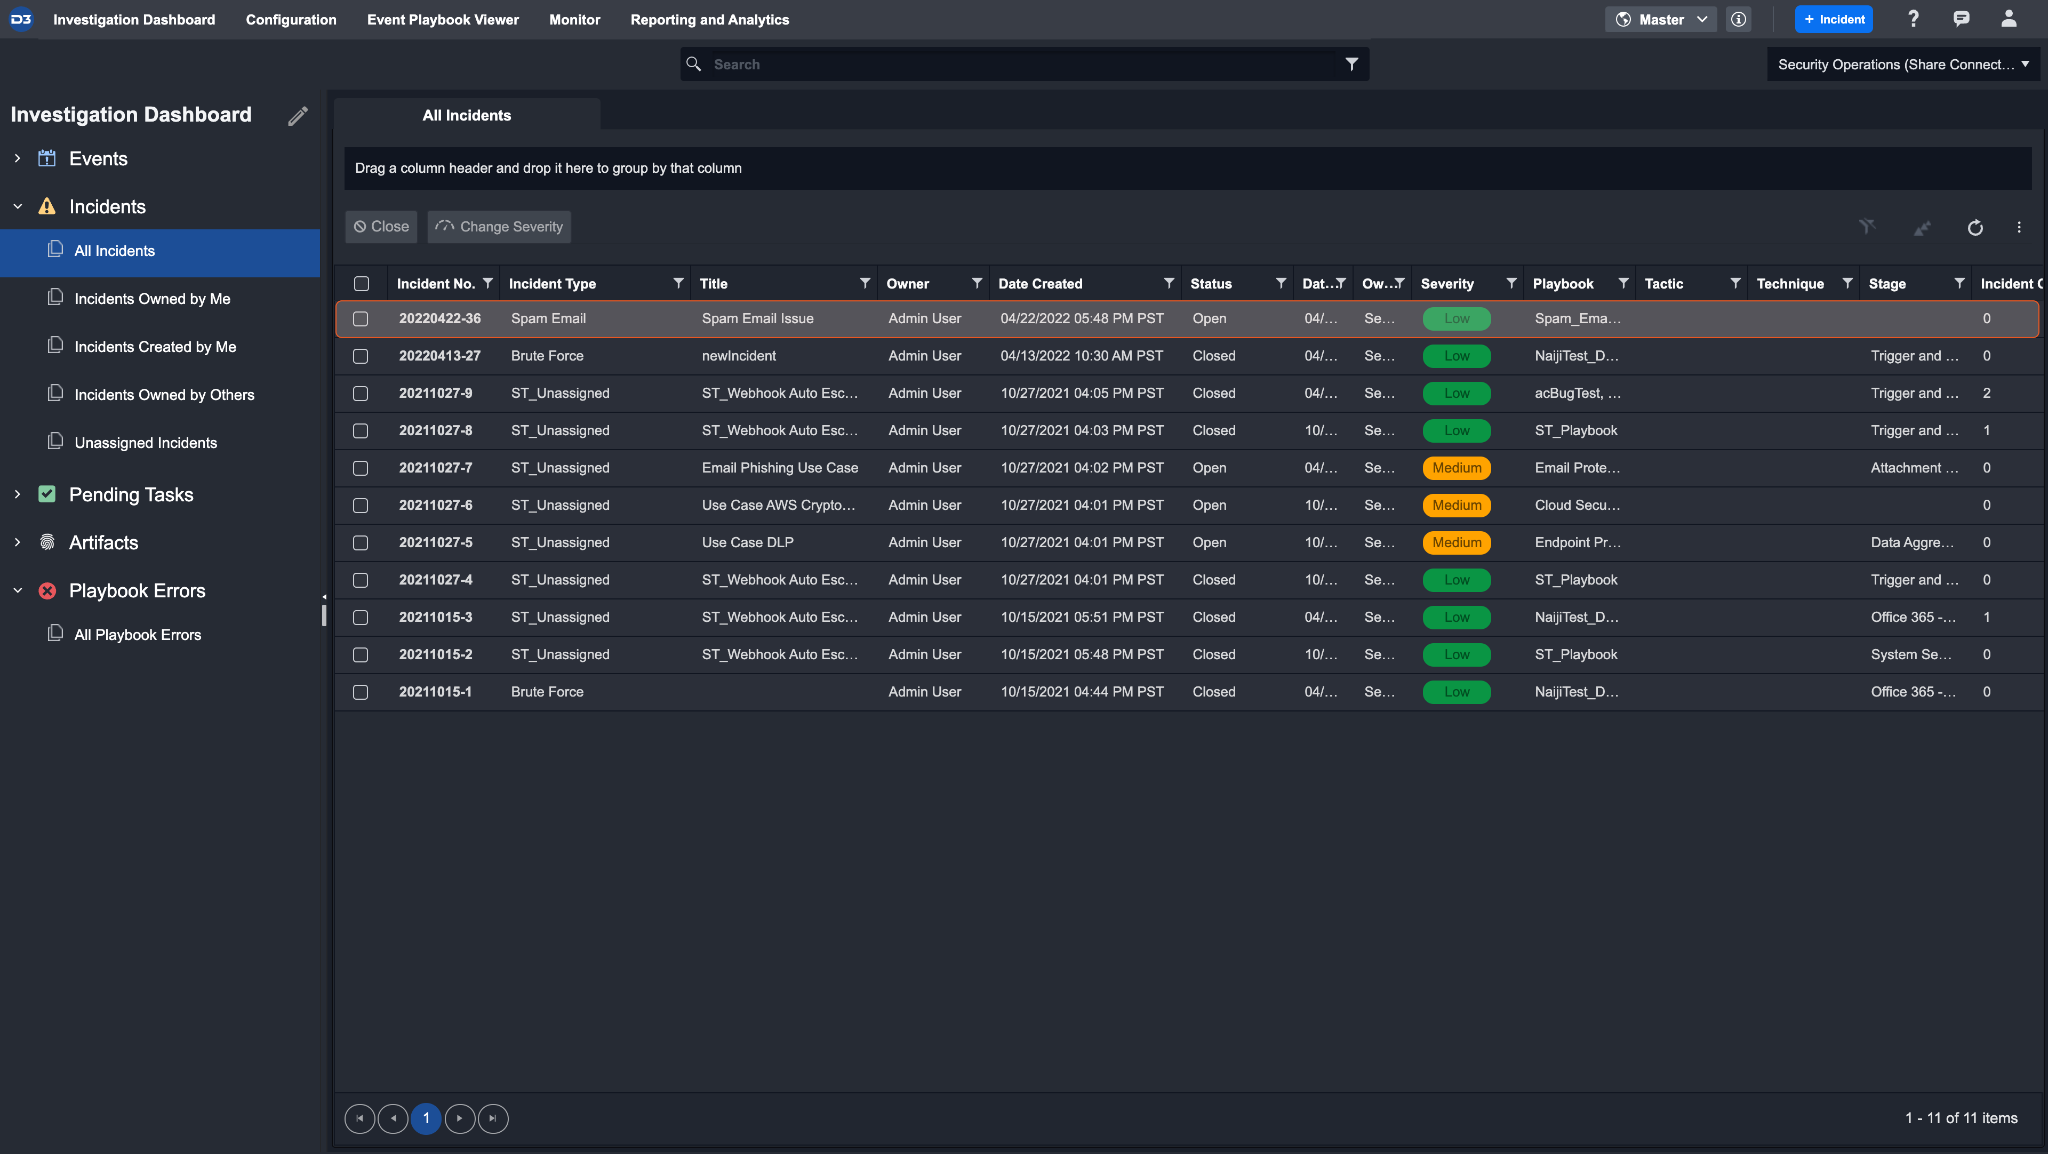
When an Incident is created, you can assign it to an incident type that was created with the Incident Form Editor.
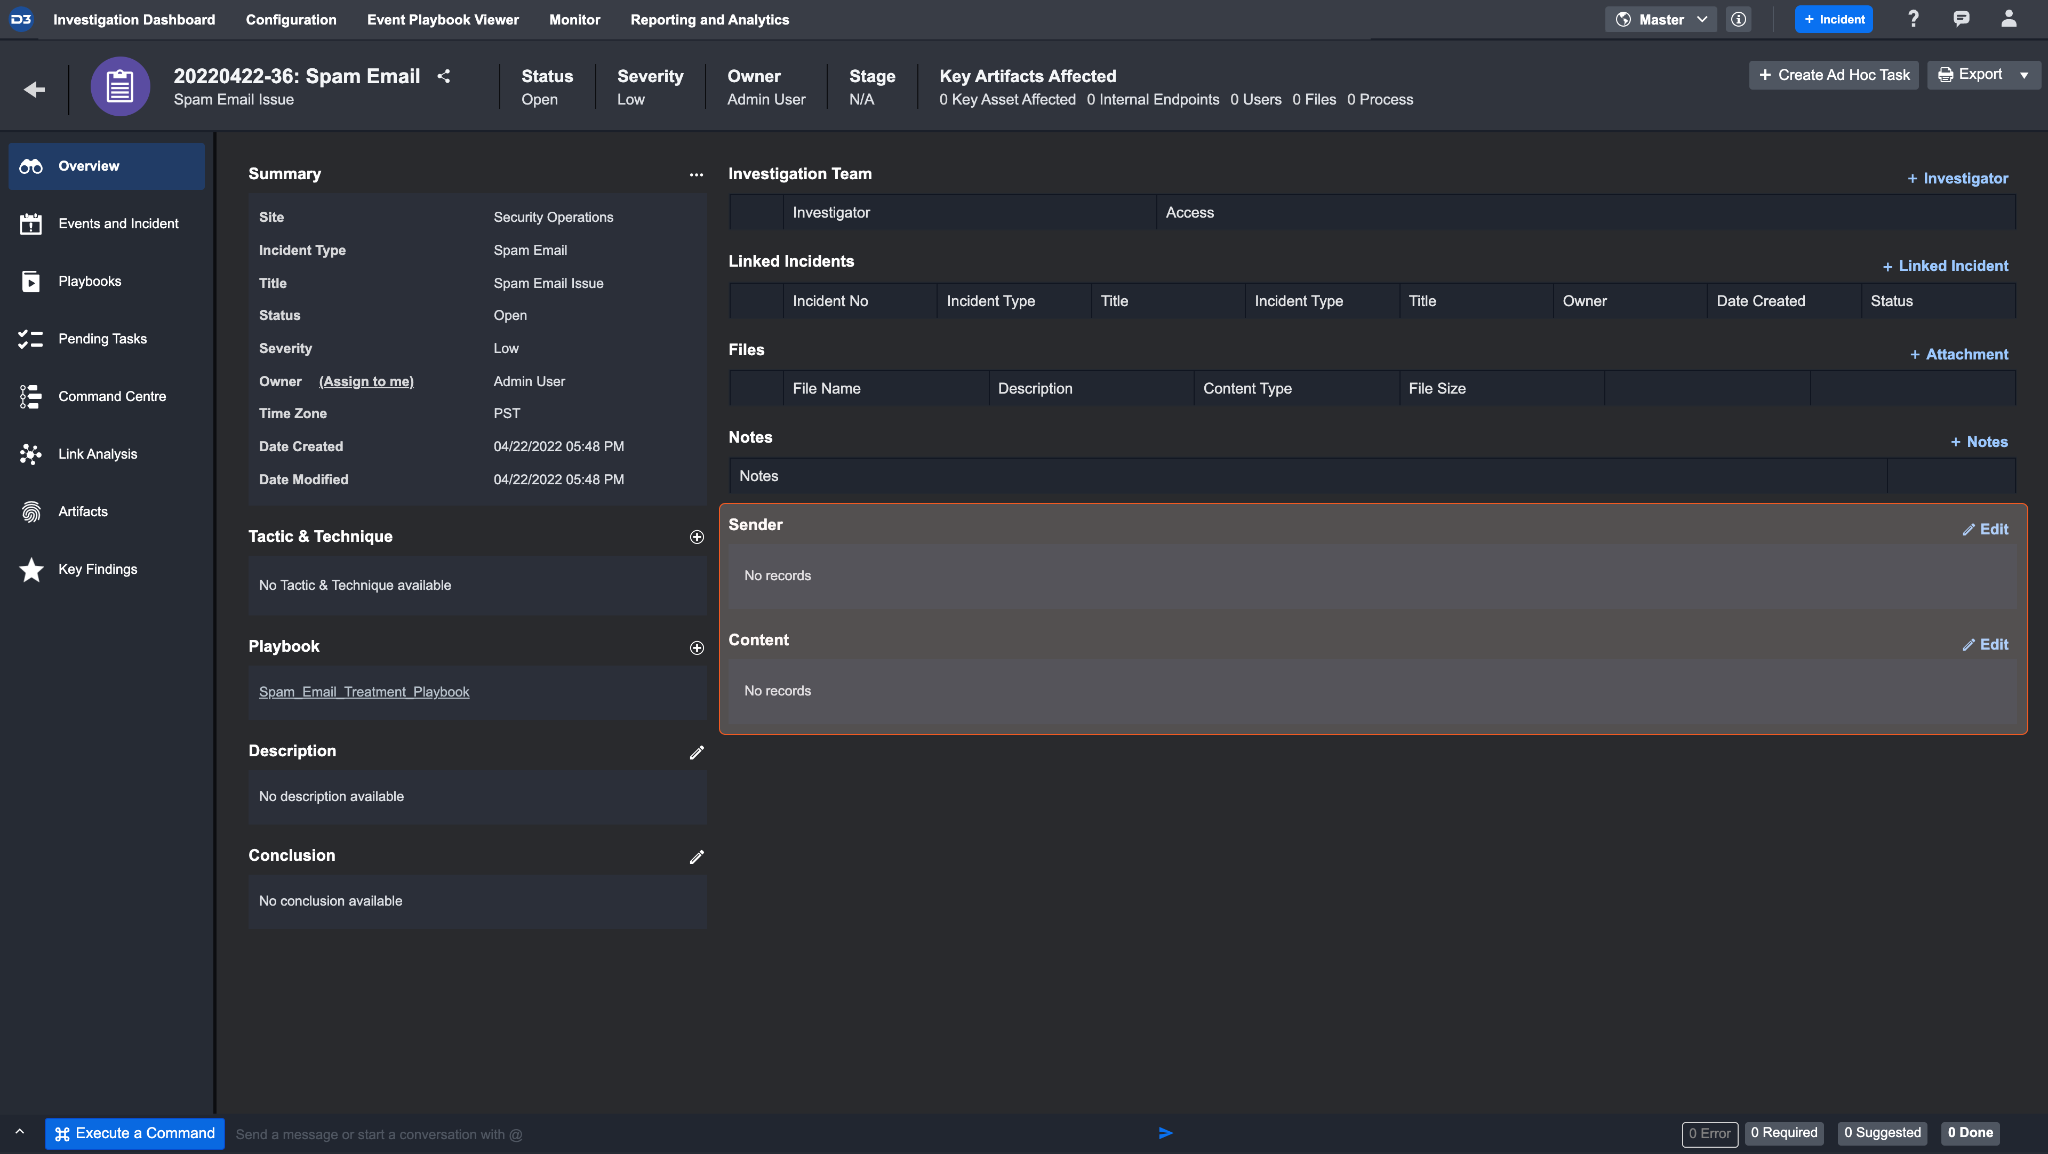
Within an Incident, you can see the sections you have created according to the incident type. Use the edit button to fill in the section according to the activities you chose.
To Set Default Playbook for an Incident Type
The Incident Form Editor allows you to set the Default Playbook of a certain Incident Type in a specific site. This means that any new incident created/ingested under this incident type will automatically run the selected playbook.
To set the default Playbook for a Site:
Navigate to the Overview tab of an Incident Form.
Click Set Default Playbook. This will open a pop-up modal for you to configure the settings.
Click Apply Default Playbook to set a new default Playbook for a Site.
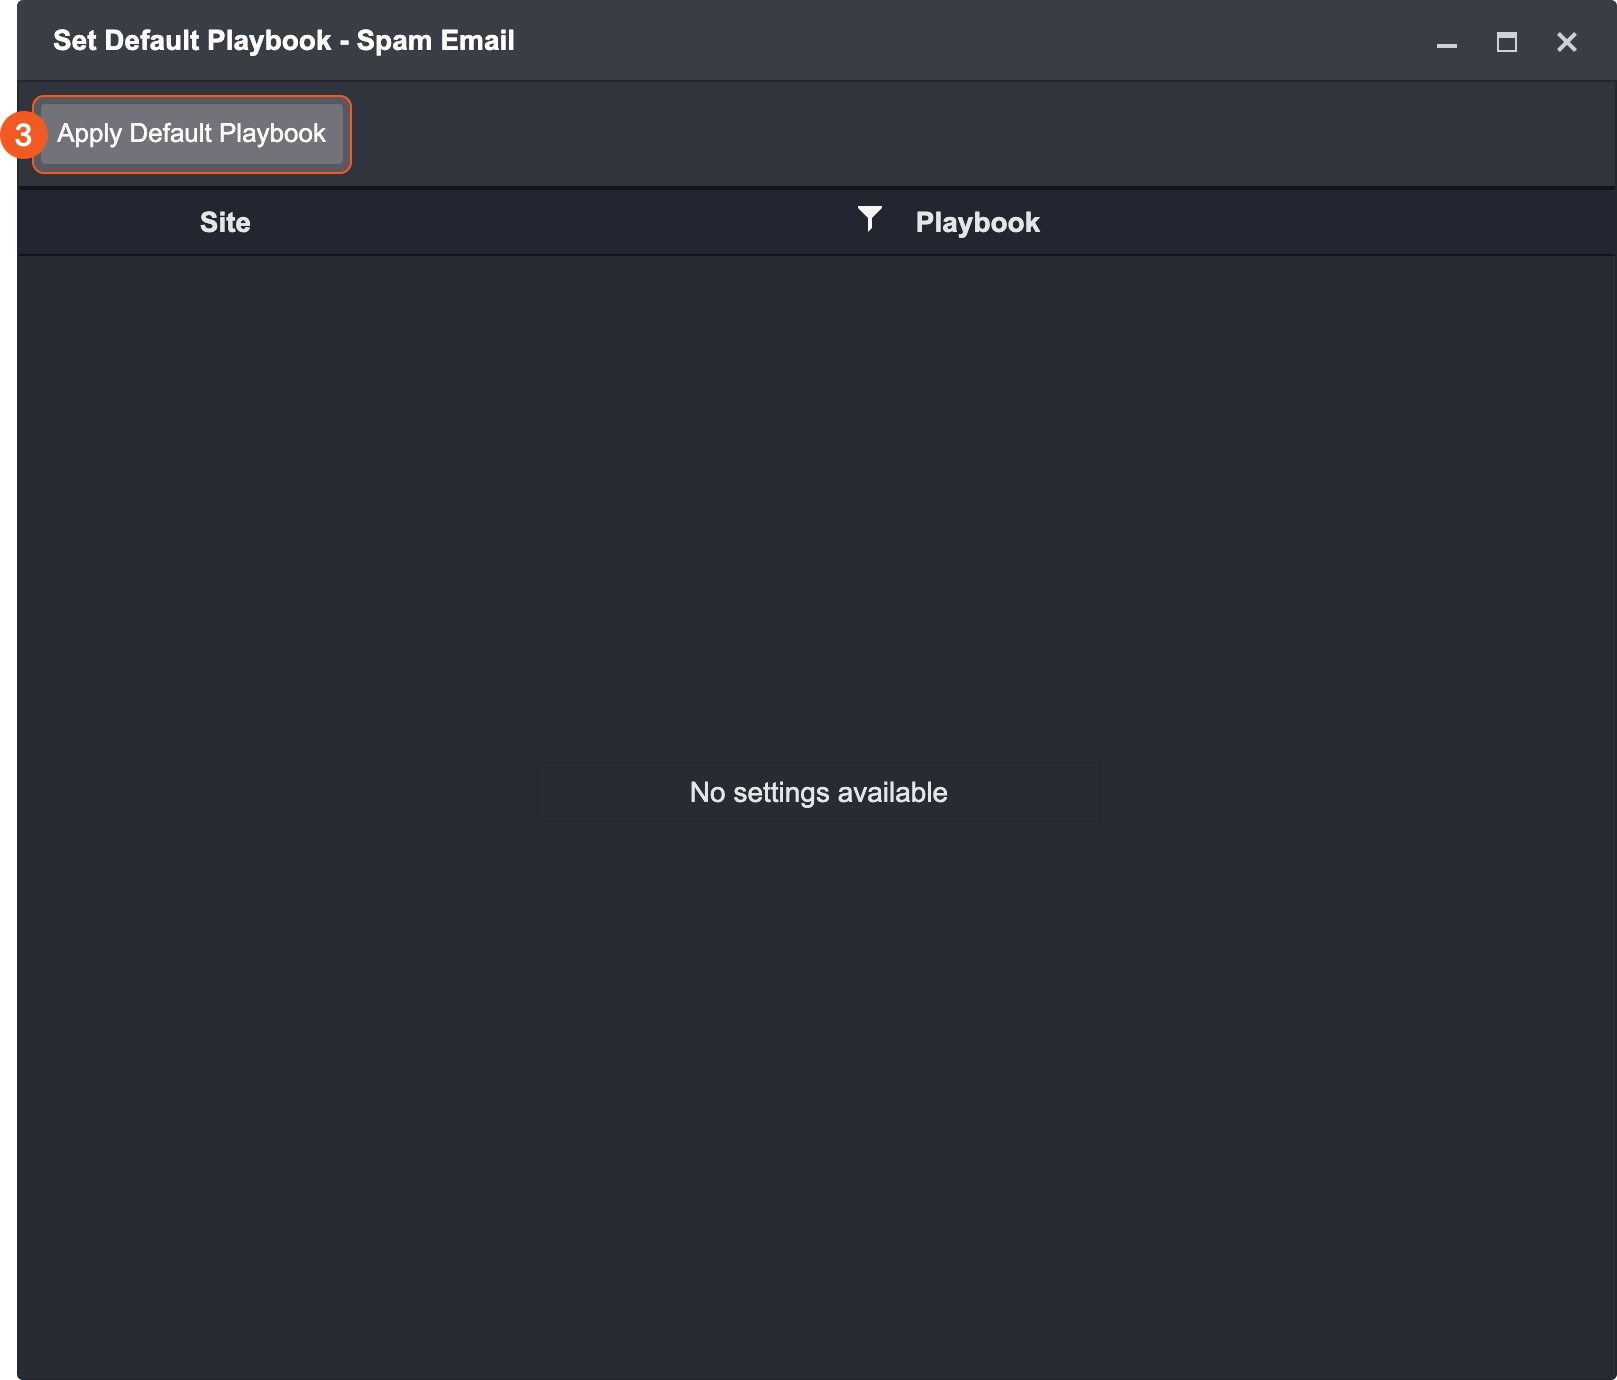
The Apply Default Playbook pop-up modal will appear.
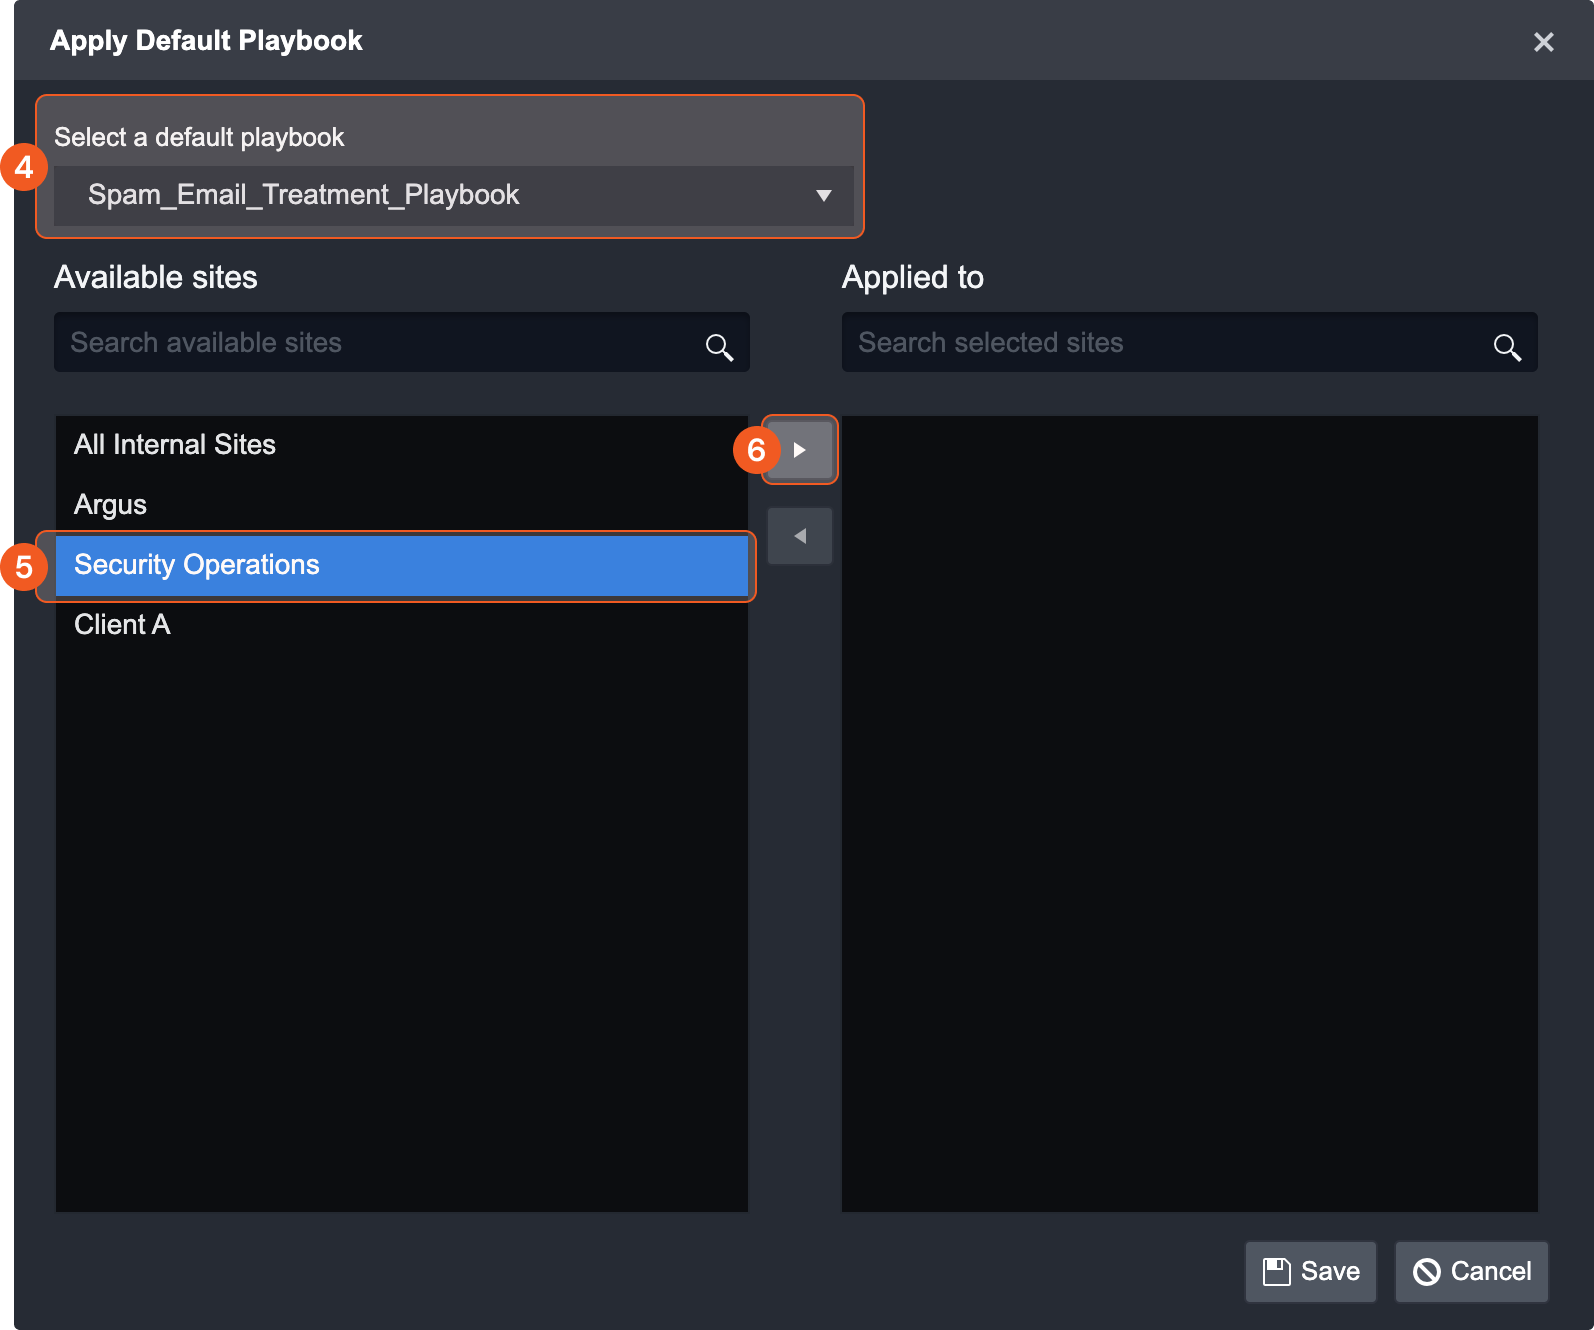
Select the default Playbook using the dropdown list.
Select the Site(s) which you want to use this Playbook as the default one.
After selecting the Site, click the > arrow to confirm the selection.
Click Save to confirm your setting.
Reader Note
Only Playbooks that are live can be used as a default playbook. The desired playbook must also be published to the site you wish to use it in.
After setting a default playbook, upon creating a new incident of that type in the specific site, the default playbook will be automatically selected.
Updating Incident Forms with the “Set Incident Dynamic Field” Values Utility Command in Incident Playbooks
You may automate the process of updating incident form fields by using the Set Incident Dynamic Field utility command in an Incident Playbook.
In an Incident Playbook, add a new command task running the Set Incident Dynamic Field utility command. In the example shown in the screenshot, a command task is created to update the Sender field for the Incident Form when a spam email incident is processed through the Incident Playbook.
Configure the input parameters for the utility command.
Section Name: The section name of the incident form to update.
Conditions: Defines conditions to filter dynamic form instances in the specified dynamic section in JSON format.
Field Values: The key-value pairs to update the incident form in JSON format. Note: The object key must be an exact match to the field configured in the form editor. The value set can be static or constant.
Reader Note
Click the View Sample Data button to reveal sample input data for the utility command. This may be useful when formatting your inputs.
Configure the other configuration settings for the command task, then click ✓ to confirm. After you finish building the playbook, publish it by clicking Submit near the top right corner.
Done! When an incident runs through the configured Incident Playbook, the corresponding Incident Form will be updated based on your configurations for the Set Incident Dynamic Field utility command.