.png)
Advanced Settings
Overview
You can access this module by clicking on the user profile icon at the top right corner of the platform and selecting the Advanced Settings option from the dropdown menu.
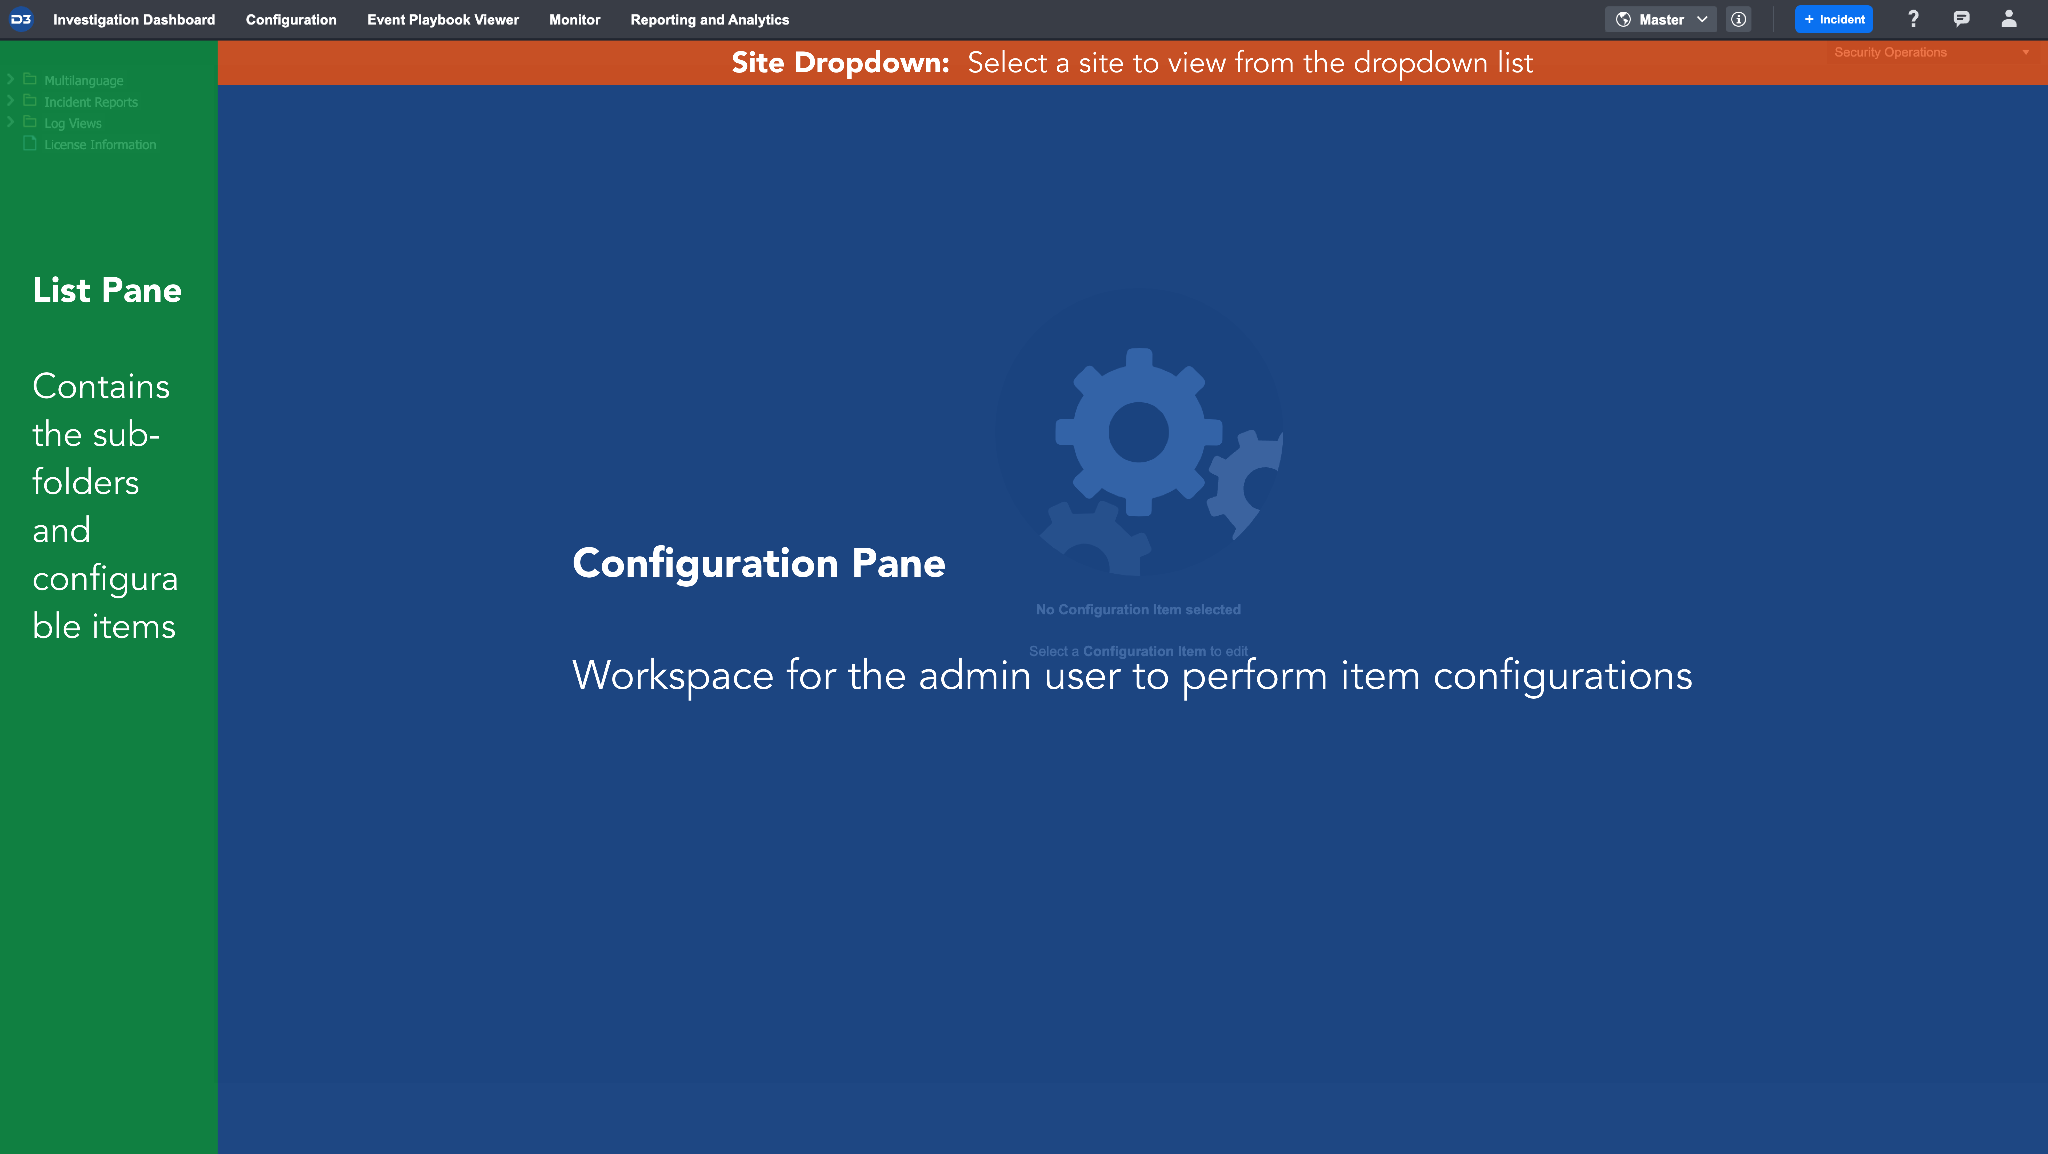
The tree structure on the left-hand panel is known as the List Pane. This contains all the broad sub-folders and underlying configurable items. The larger pane on the right-hand side is the Configuration Pane. The admin user performs all their application configurations within this pane.
You can configure three aspects of the system: Multilanguage, Incident Reports, and Log Views.
Multilanguage
The multi-language configuration page within the Advanced Settings module accommodates users from a wide variety of backgrounds and ethnicities. Here, the admin user can add multiple languages to be used within the SOAR platform, as well as translate specific text from different sections of individual modules (e.g. form type, sections, etc).
Adding a New Language
To enable text within the SOAR platform to be translated to another language, the admin user must firstly add a new language to the Languages list. Once added, the user can perform translations of selected text into this new language.
To Add a New Language:
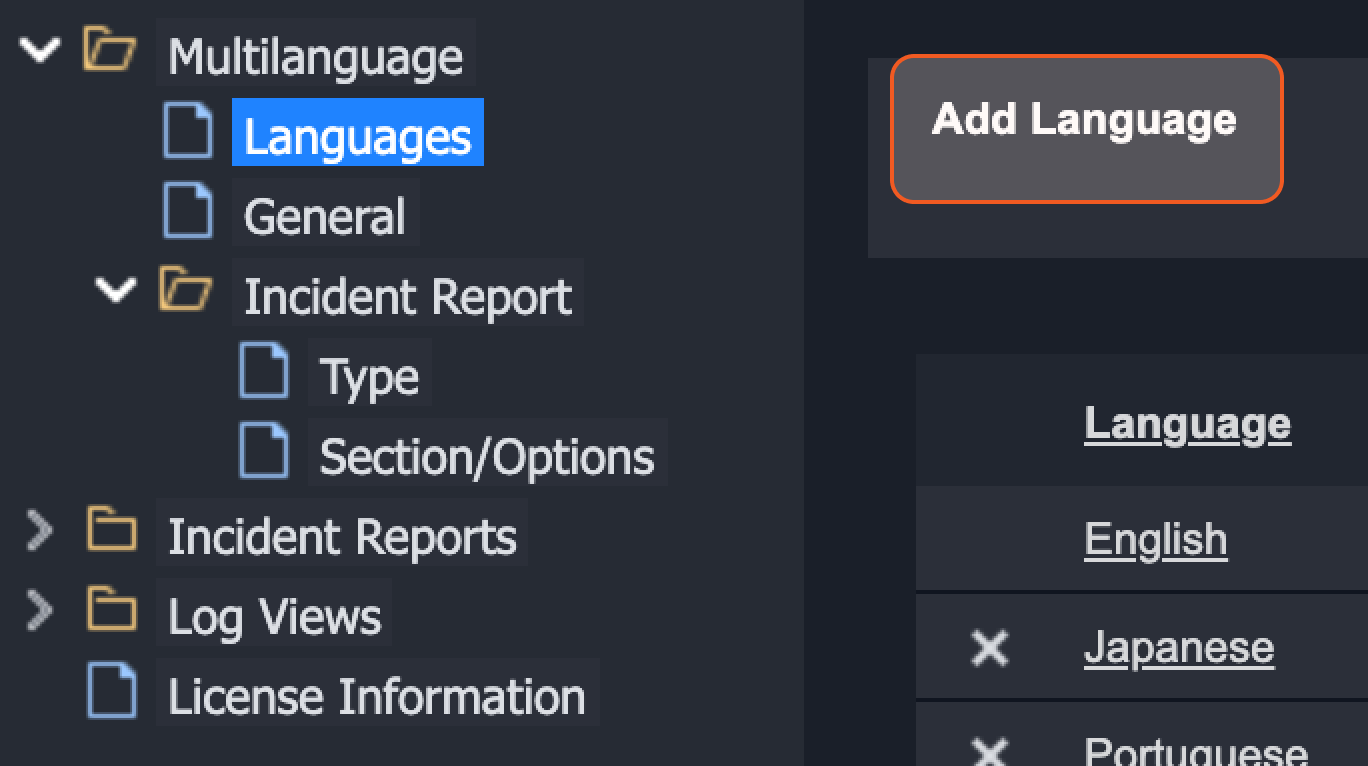
Click on the Languages item from the list pane of Application Settings.
Click Add Language at the top-left corner of the page.
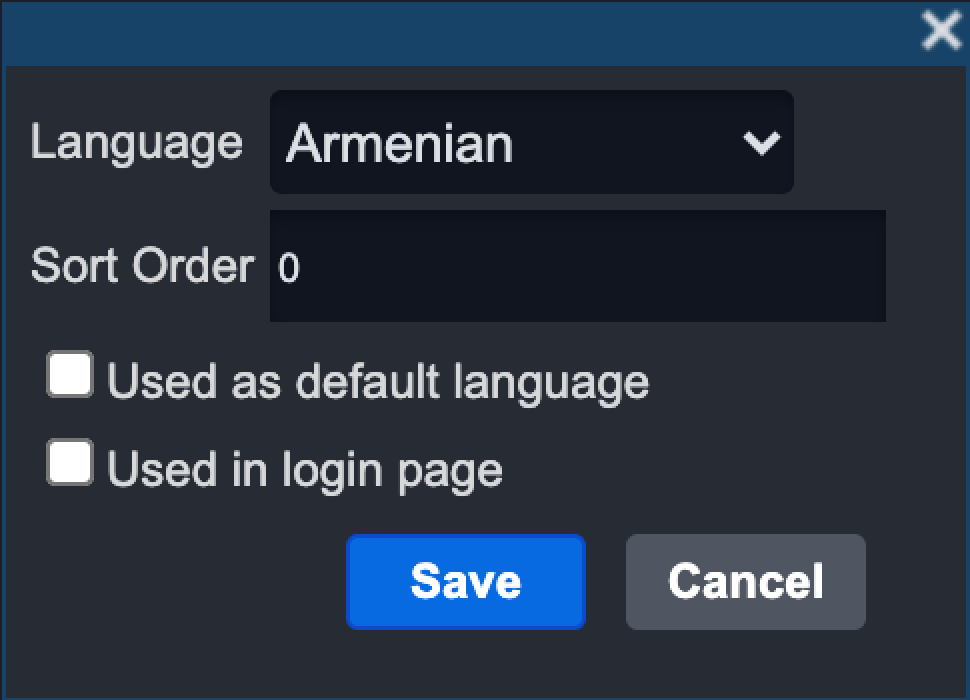
Select a Language from the drop-down menu.
Enter a Sort Order number (default will be 0).
Select the applicable checkboxes:
Used as default language: All language settings within the Application Settings which are set to the 'default' option will reflect the newly added language.
Used in login page: The text on the SOAR login page will reflect the newly added language. The Admin user can only select one language for each of the two options described above.
Click on the Save button. The added language will appear on the list on the configuration panel.
Translating Standard & Dynamic Text
Once a new language has been added to the languages list, the admin user can translate the base English text into the newly selected language. By default, any untranslated text will be displayed in English within the SOAR platform.
The General configurable item within the Multi-language folder on the list pane allows the user to add, search and translate default text within the SOAR application. The text listed on this screen is standard in nature and therefore separated from the custom text found in dynamic module folders, such as individual forms types names, element and option names, etc.
Reader Note
The guide below illustrates how to translate default text from the General configuration screen, however
all other items in the multi-language section follow the same logic. The admin user can select their desired language from the drop-down list and individual items to translate by clicking on the item name, ID number or the Edit button on the top right corner of the respective screen (if applicable). For Sections/Options translation, the user can selectively determine which Type to perform the translations for.
To Add Default Text
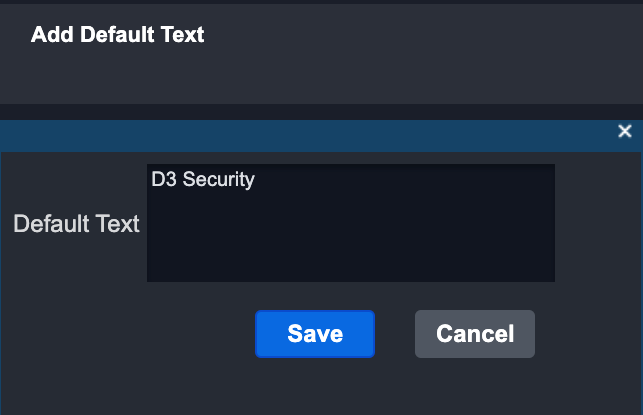
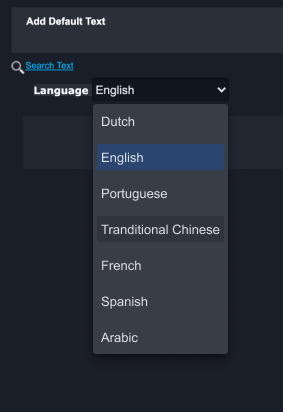
From the General configurable item on the list pane, click Add Default Text at the top left corner.

Enter Default text in the free text box.
Click on the Save button. The entered text will be added to the Default Text list.
To Translate Default Text
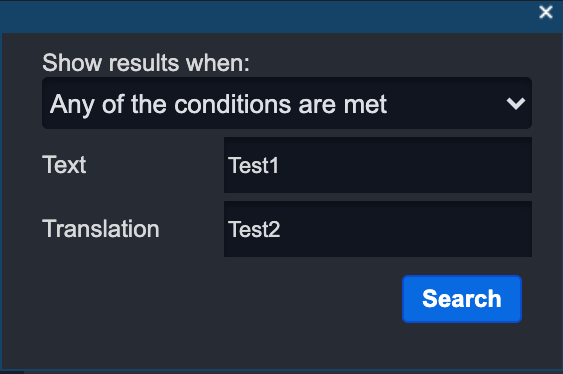
Click on Search Text from the top left corner of the configuration panel.

Type the name of the text in the box provided. Alternatively, search for the translation text (if applicable).
Result: The configuration panel will show all text or translation entered in the pop up window.
Select a language to translate to from the drop-down list
Click on the Edit button on the top right corner of the configuration panel.

Enter the selected language's translation in the box provided in the configuration panel.

Click on the Save button on the top right corner of the configuration panel.
Result
The translation is now set for the selected language. Follow the same steps to edit the translation if required.
Incident Reports
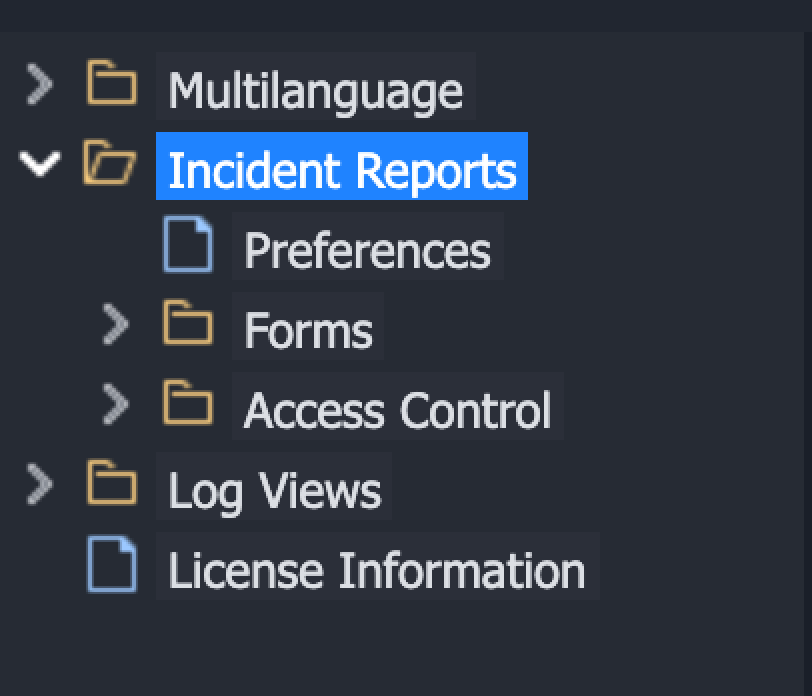
When the admin user selects the Incident Reports folder from the list pane they are presented with a selection of configurable folders and items. The three broad categories include:
Preferences
Forms
Type
Sections
Elements
Options
Access Control
By Type
By Section/Options
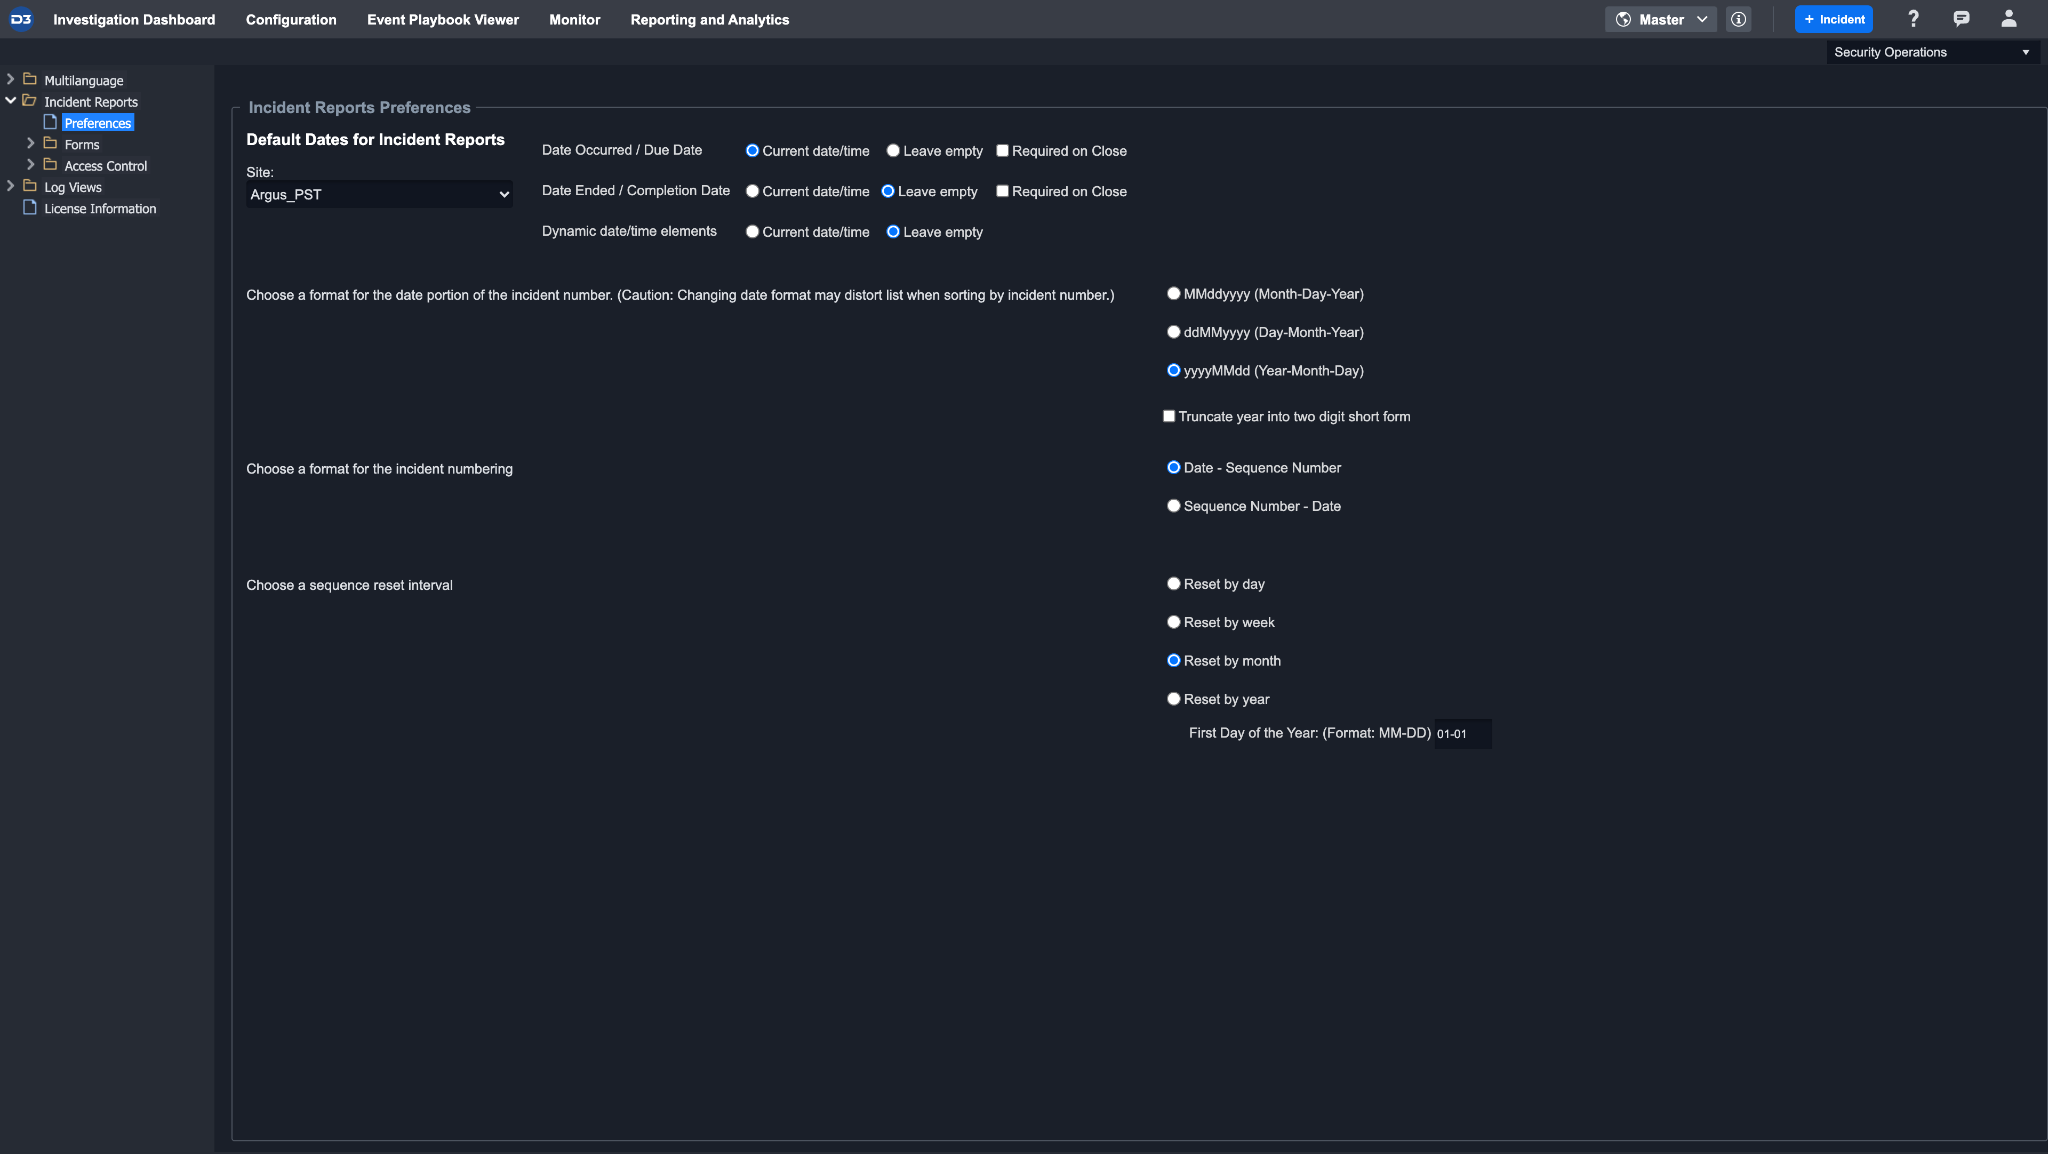
Preferences
This configuration screen allows the admin user to select how the time and date fields are displayed on the IR form for a specific site. The user can choose to leave the fields empty or display the current date/time when a new incident is created. The 'Required on Close' check-box can also be selected to mandate the completion of the selected field whenever a form is closed. Additional date and incident number formatting can be customized on this page.
Forms
Dynamic forms within the SOAR application are highly customizable and can be tailored towards the reporting requirements of each SOC team. The example below will outline the hierarchical components that make up the dynamic form (Type, Sections, Elements, Options) and walkthrough the necessary steps to create a new form.
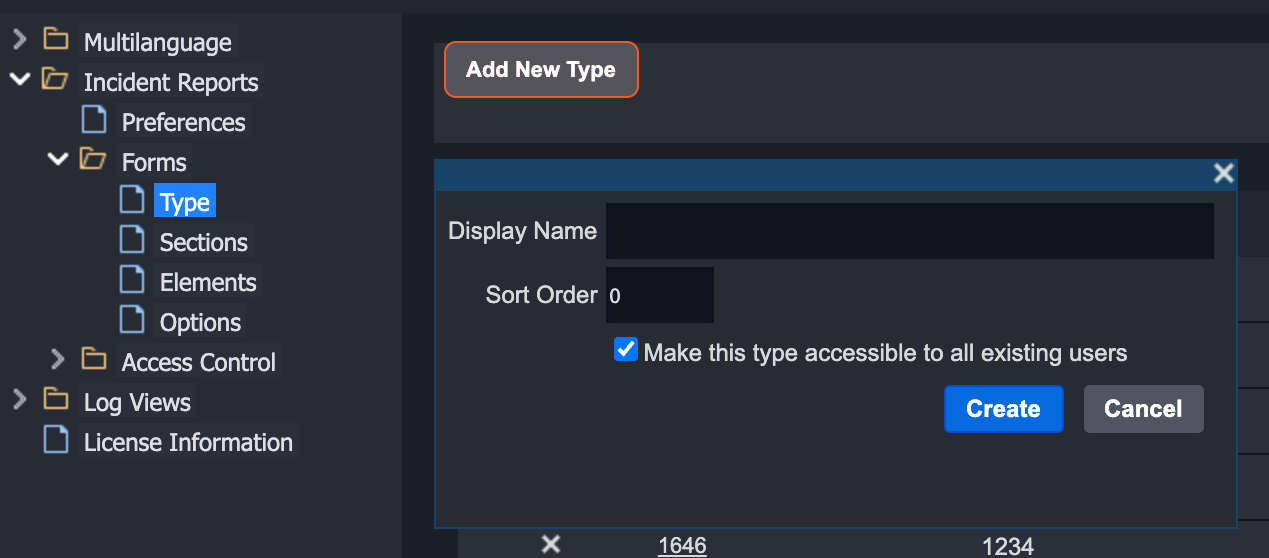
Step 1: Create Form Type
Each type of form will have a specific set of sections and elements designed for a specific documentation purpose. This is the broadest and highest level in the data hierarchy for application forms. After selecting the Add New Type from the configuration panel, specify a name and sort order.
Example Type Name: Workplace Incident (WIM)
Sort Order determines where the created case type will appear in the front-end Case Type dropdown list.
Ensure the “Make this type accessible to all existing users” is checked.
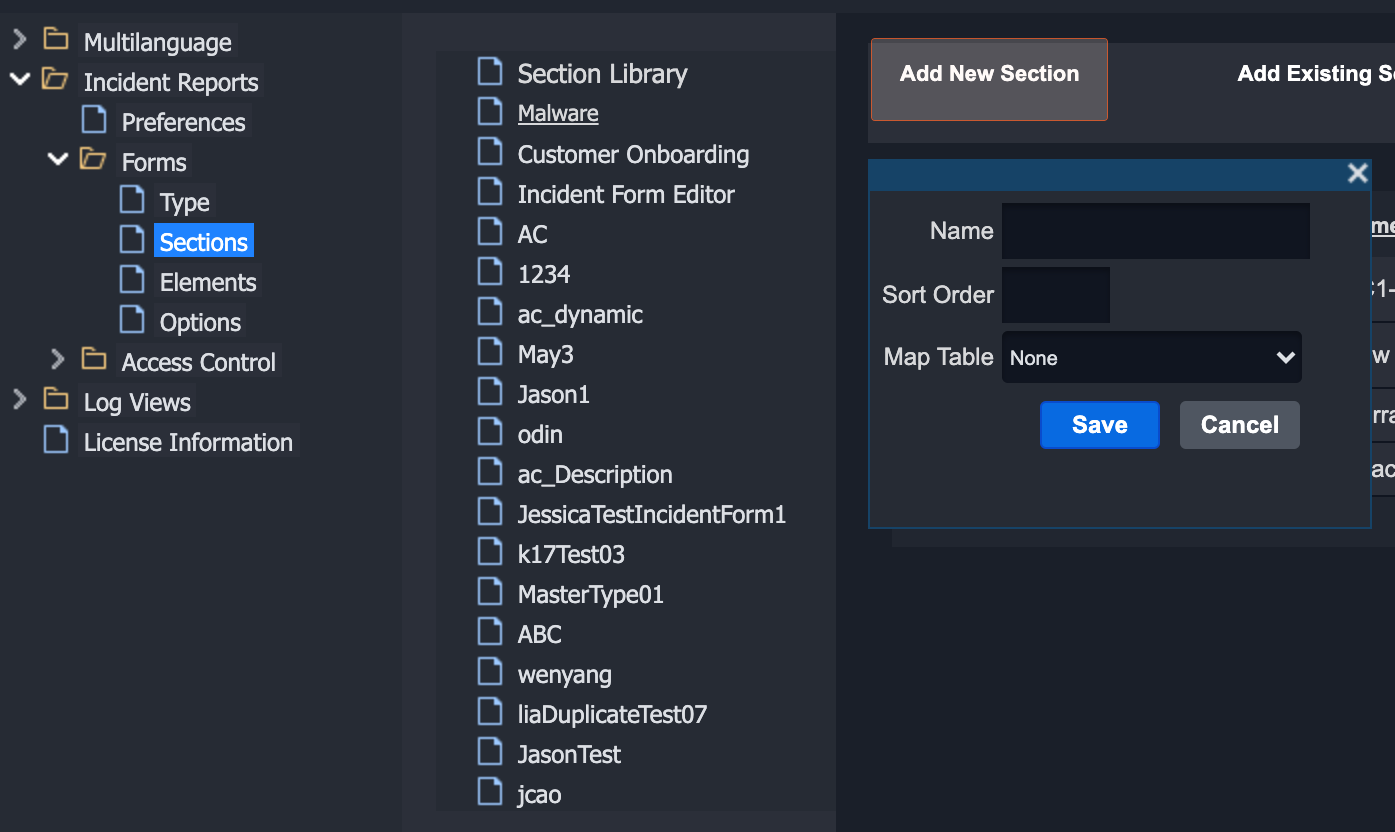
Step 2: Create Sections
Once a type has been created, sections can be added to the form type by clicking on the Sections item on the list pane. Alternatively, the admin user can click on the down-pointing arrow icon in the IR type row to arrive at the same configuration screen. The admin may choose to create a section from scratch, or reuse existing sections from another Type.
When adding a new section, a display name (e.g. Workplace Violence Details) and sort order must be specified.
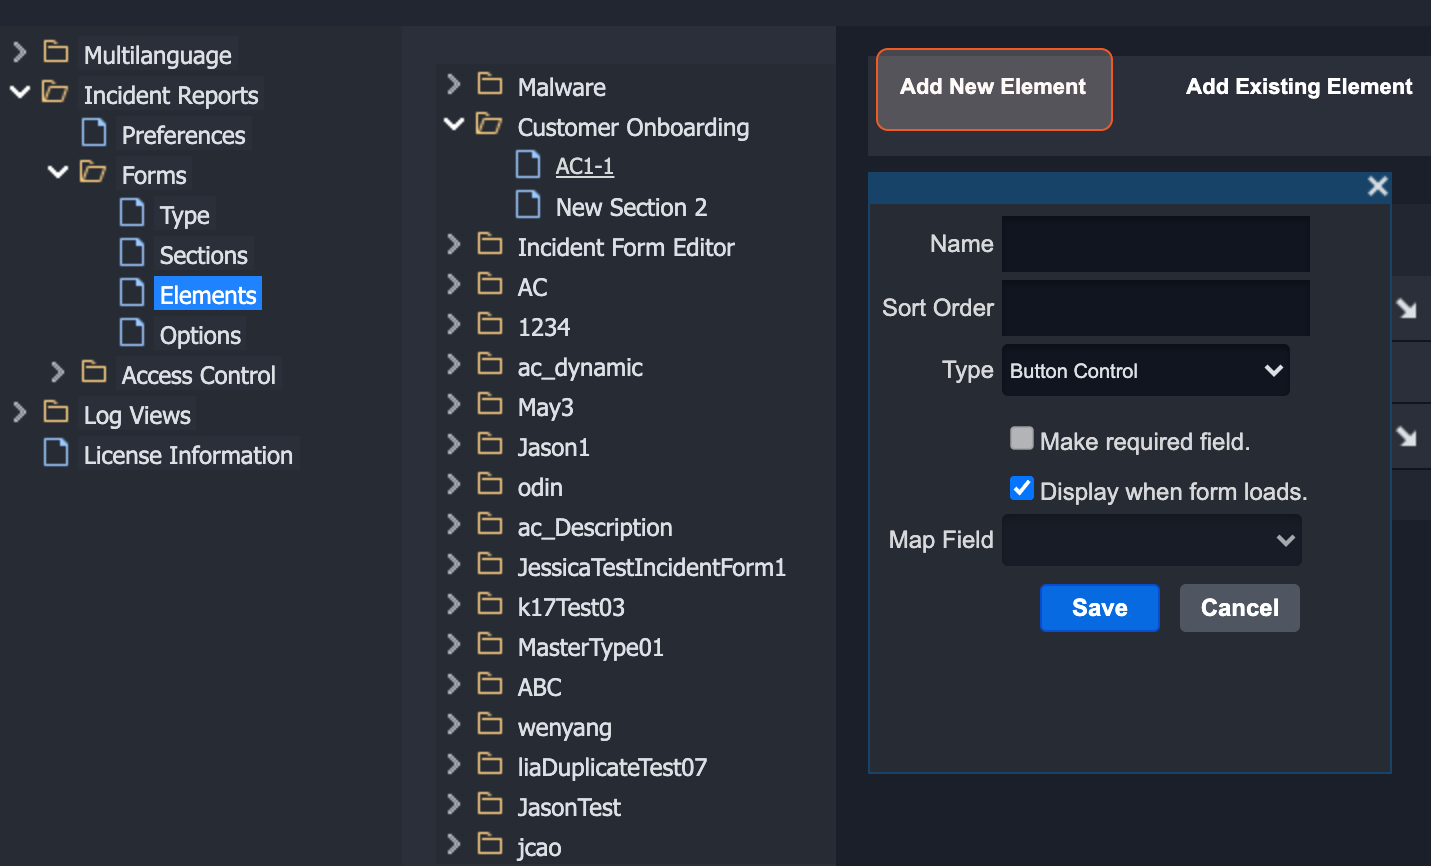
Step 3: Create Elements
Once sections have been added to the form, the admin user can add elements within those sections. Just like sections, elements may be created from scratch, or they can be copied from existing elements. When adding an element, the user must specify a name, sort order and input control type. The user may designate the element as a 'Required' or 'Required on Close' field, preventing users from continuing to other sections before filling out the required field.
Click on Add New Element.
Enter an Element Name and Sort Order (eg. Sub Type).
Select a Field Type from the dropdown list (eg. Radio Box).
Step 4: Create Options
Certain elements require the configuration of child options, such as the choices found in a drop-down list. Unlike the other form components, options must always be created from scratch (i.e. re-using existing options is not permitted). Each new option is assigned a unique ID number.
Click Add New Option.
Enter an Option Name and Sort Order (eg. Assault).
Repeat previous step to create multiple choice options (eg. Robbery, Harassment, etc).

Front-end Application Interface
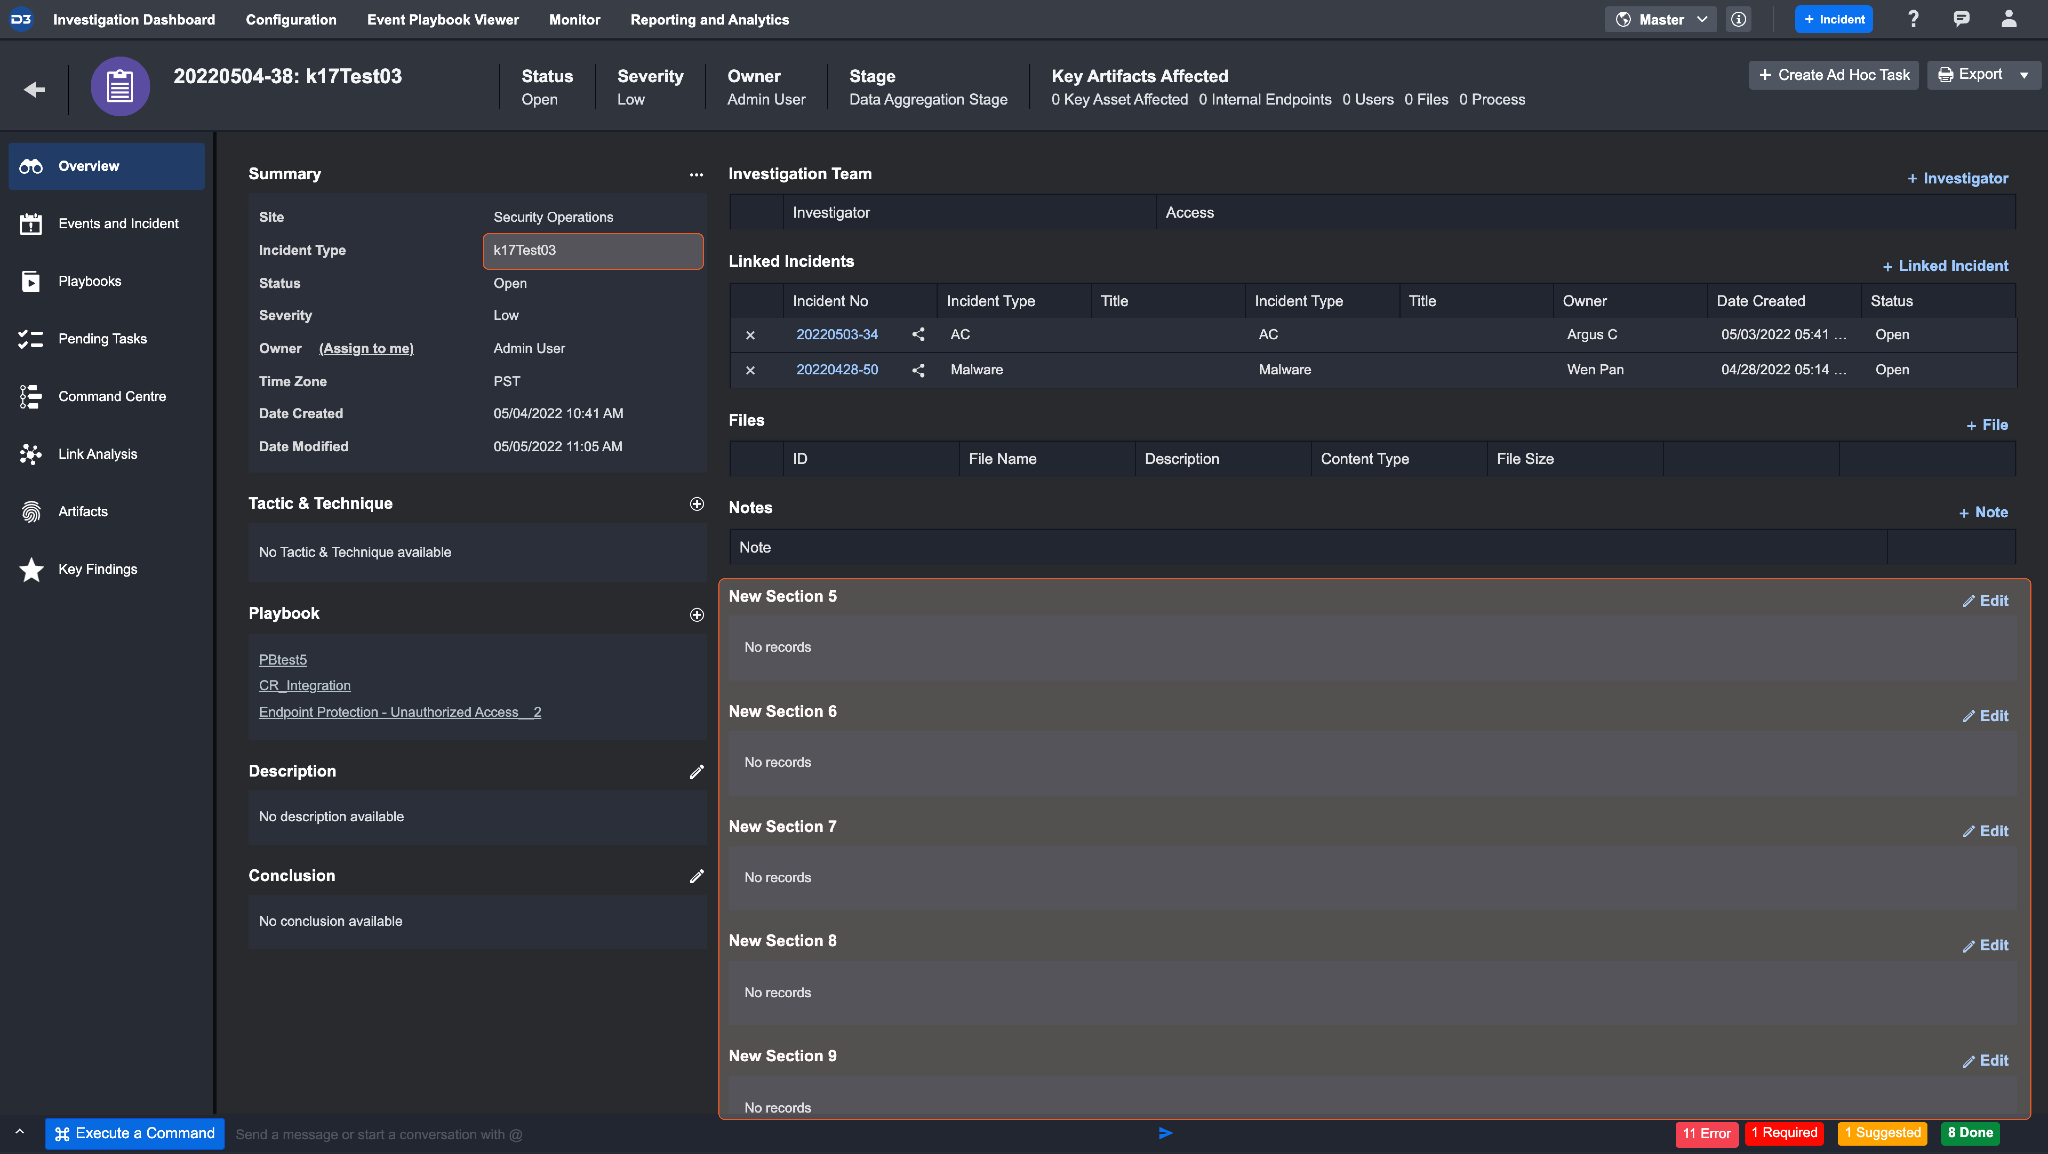
The incident form type is displayed as incident type in the incident workspace. The custom sections are located on the right side under the notes section. You can edit each section in the custom form by clicking on the edit button.
A section popup will open when the edit button is clicked.
This represents the section
This is the element
These are the options under an element

Access Control
D3's SOAR platform incorporates a combination of a role-based and predefined access controls that can be executed at the Incident Type and Incident Section/Option level. This is an overarching control whereby SOC Engineers can either grant full control, read-only access or deny groups, users and sites to a selected Incident type (e.g. Brute Force Attack) and underlying dynamic form sections (sections, options and elements).
The privileges set for each user class will determine what custom forms can be accessed in the overview tab of the Incident Workspace.
The list below summarizes different access privilege types the SOC Engineer will be able to assign to an incident type form and its components. Their applicability will depend on the selected incident form component and for whom the rule is for (e.g. user, group, role, site etc.).
Full Control: The site, group or user is granted full read/write access to the information in question.
Read Only: The site, group or user may view the information in question, but cannot create or edit information of this type.
Deny: The site, group or user does NOT have access to the information in question.
Same as [Parent]: Applies to sections, elements, and options only. This means that the form component will inherit the access control rule that was defined for its parent component. For example, if a group was given full control of a parent section, the same group would be given full control of the child element if the rule 'Same as Section' was given to that element.
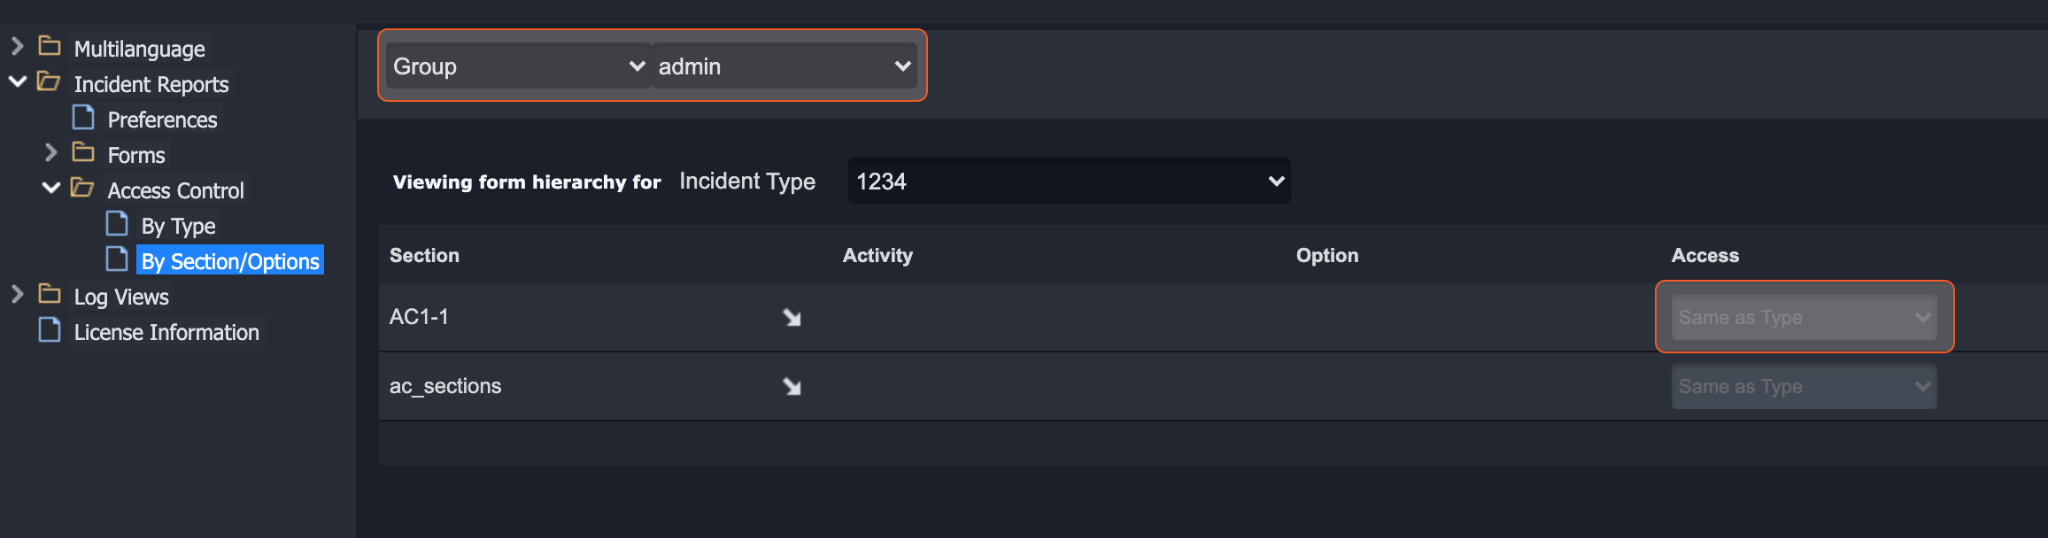
In this example above, the admin user is setting access control policies for sections of an IR Type for a group. Access controls can vary depending on whether the rules are set for sections, elements or options.
Log Views
The Log Views folder allows the admin user to view a historical log of the operational updates made by all users in the SOAR application. This is particularly important for audit trail purposes. Each of the historical logs filtered by users, roles, sites and/or groups can be selected from the list pane.
The Login Audit item displays the login status and details of each user within the SOAR platform. The admin user can search for specific user accounts or apply filters using the dropdown list at the top of the page. One of the most common use for this item is unlocking a suspended account (described below).

Unlocking a Suspended Account
After a number of unsuccessful login attempts, the SOAR user's account will be locked for the period of time. In certain situations, the user will require their account to be unlocked by the admin user before the time has lapsed in the temporary login lock.
To unlock a suspended account:
Navigate to Log Views → Login Audit on the Application Settings list pane.
From the drop-down list on the top of the configuration pane, select Filter By Suspended Users.
Result
A list of suspended users will appear on the screen.
Click on the unlock icon of the user account to unlock it.
Result
The user's account is now unlocked and they can proceed to log in normally through the application login page.